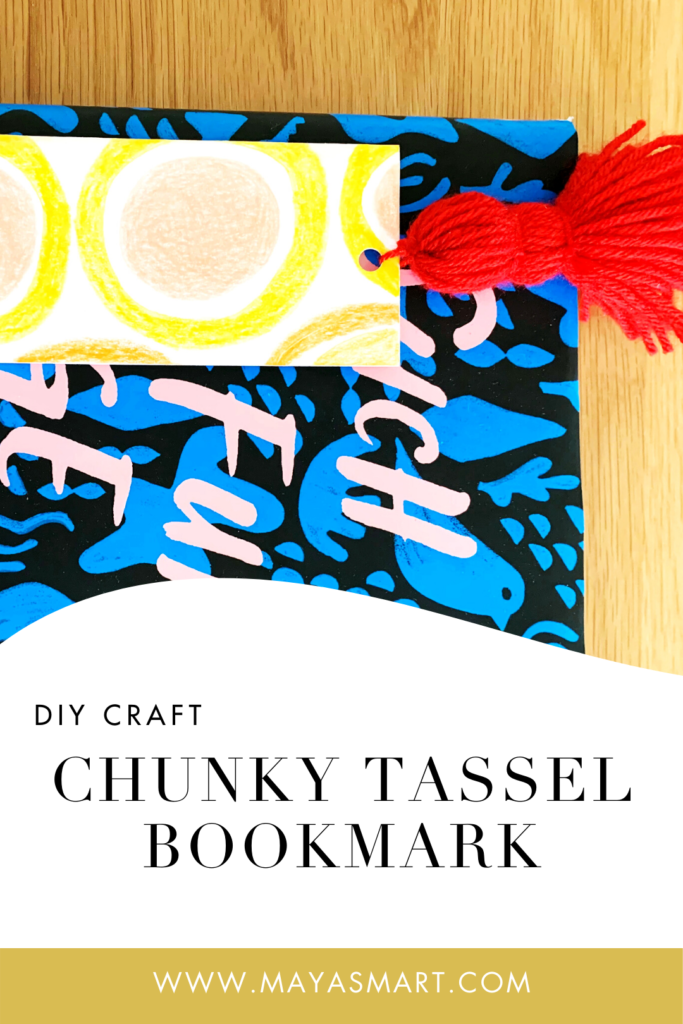
These might be my new favorite DIY craft bookmarks! The chunky tassels are so fun and make it super easy to find your spot in a book, even for little hands. They’re also eye-catching and hard to misplace … hopefully encouraging young readers to use them instead of folding down the page corner! (We can always dream.)
This is an excellent book craft to do with kids. Let them draw or paint their own design to personalize their bookmark, or help them copy out a quote from a favorite book to add some extra literacy to the project. And don’t forget to have them to sign their creation! Whether you’re doing it to create a cute keepsake or as the perfect made-by-me gift, this simple craft is satisfying for all ages.
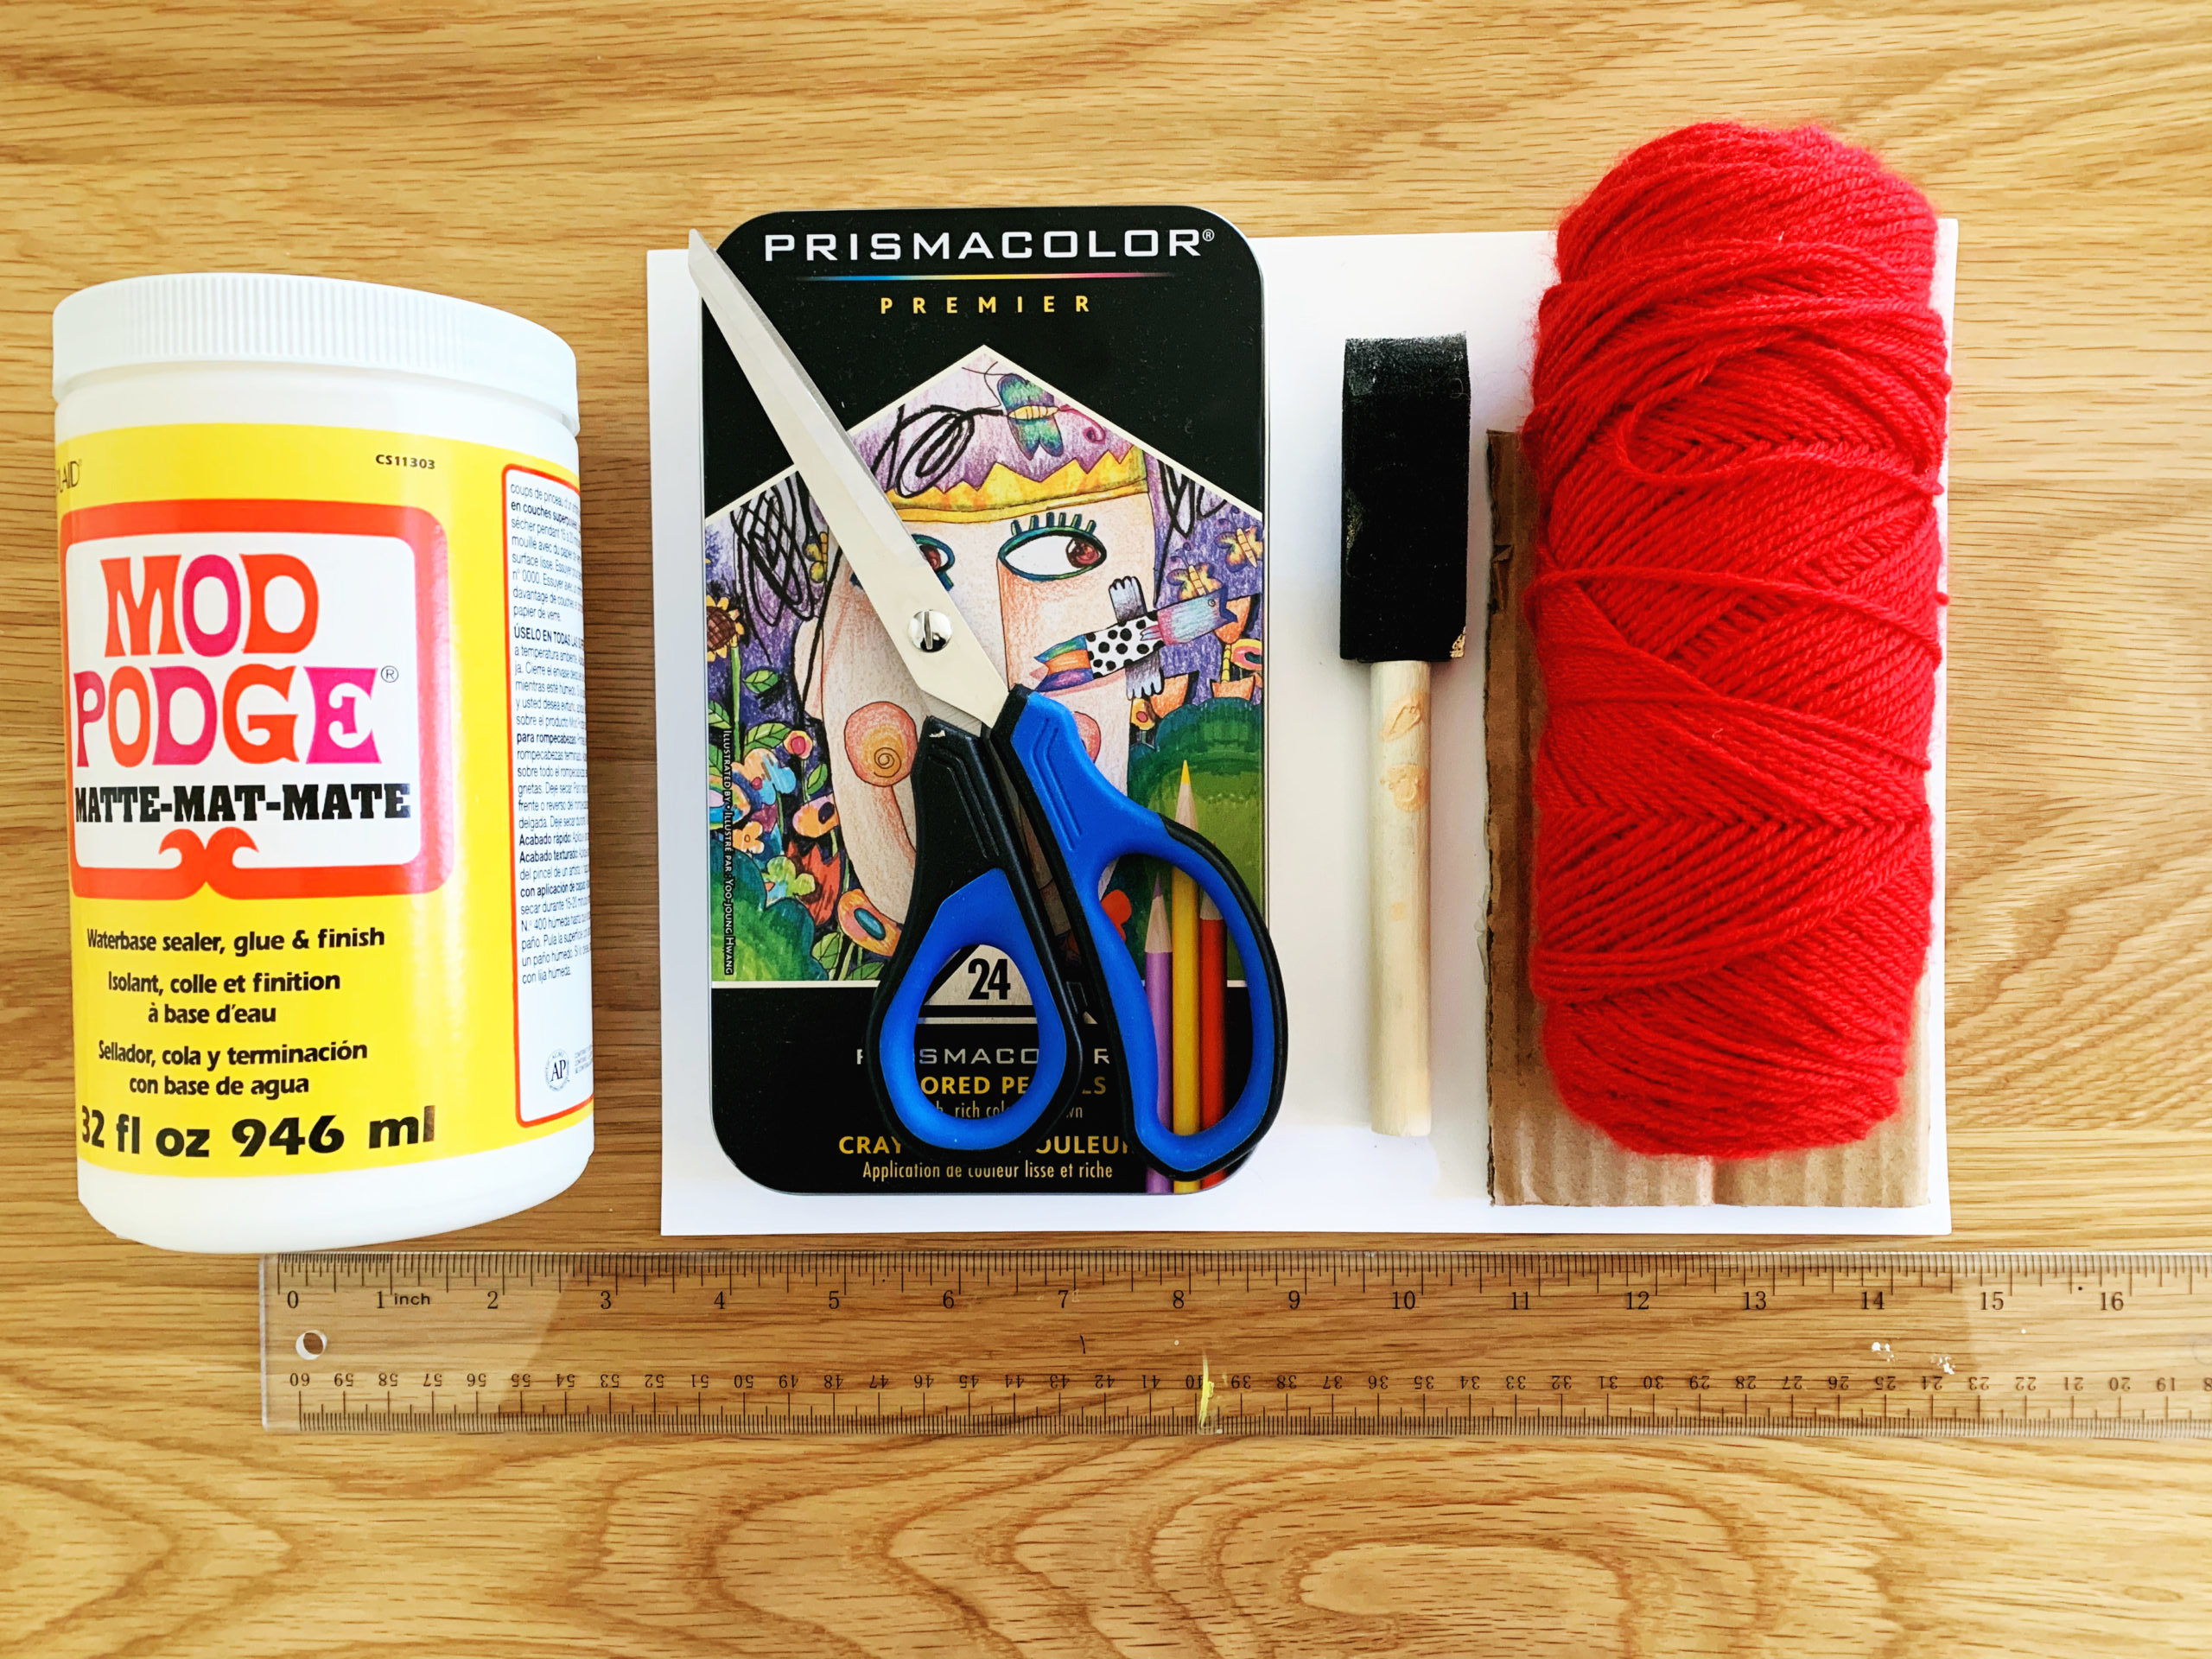
Materials:
- Yarn
- Scissors
- Cardboard
- Ruler
- Pencil
- Cardstock (patterned, or plain to decorate your own!)
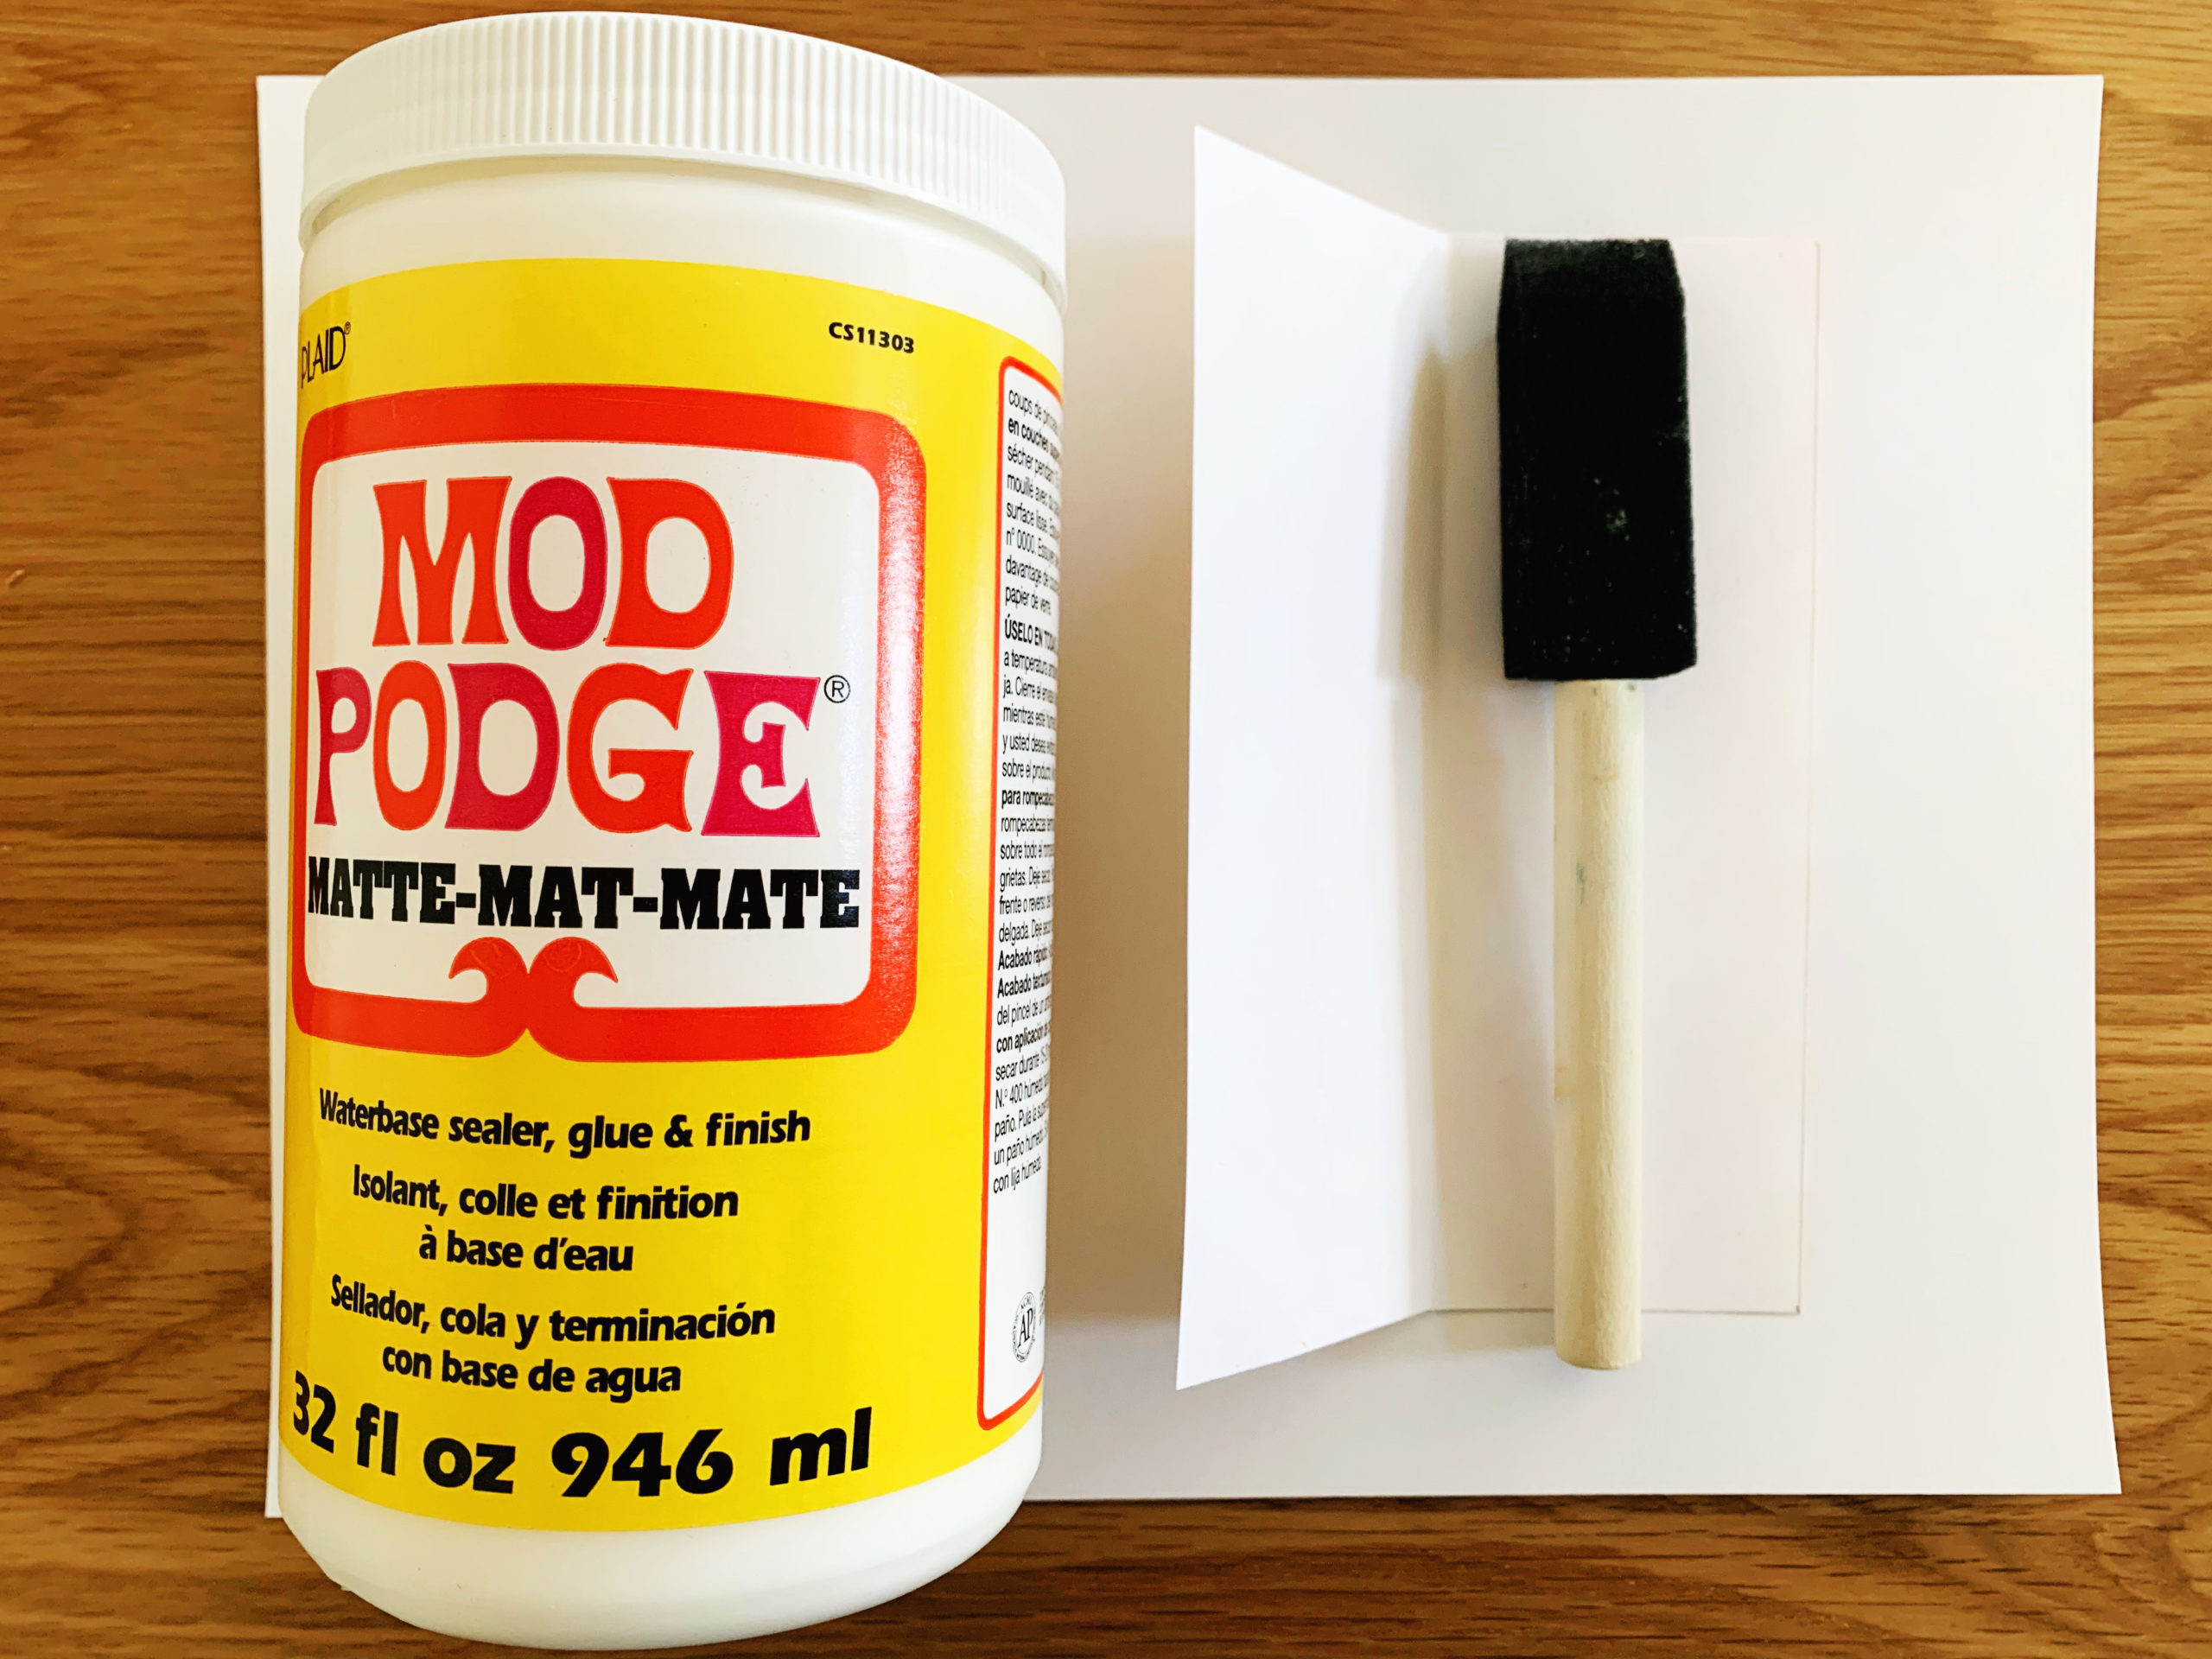
- Mod Podge (or other glue)
- Foam brush
- Hole punch
Cost: You probably have most of these materials around your home! If not, the cost will be very minimal to get a few of these craft supplies, which you can reuse for another project.
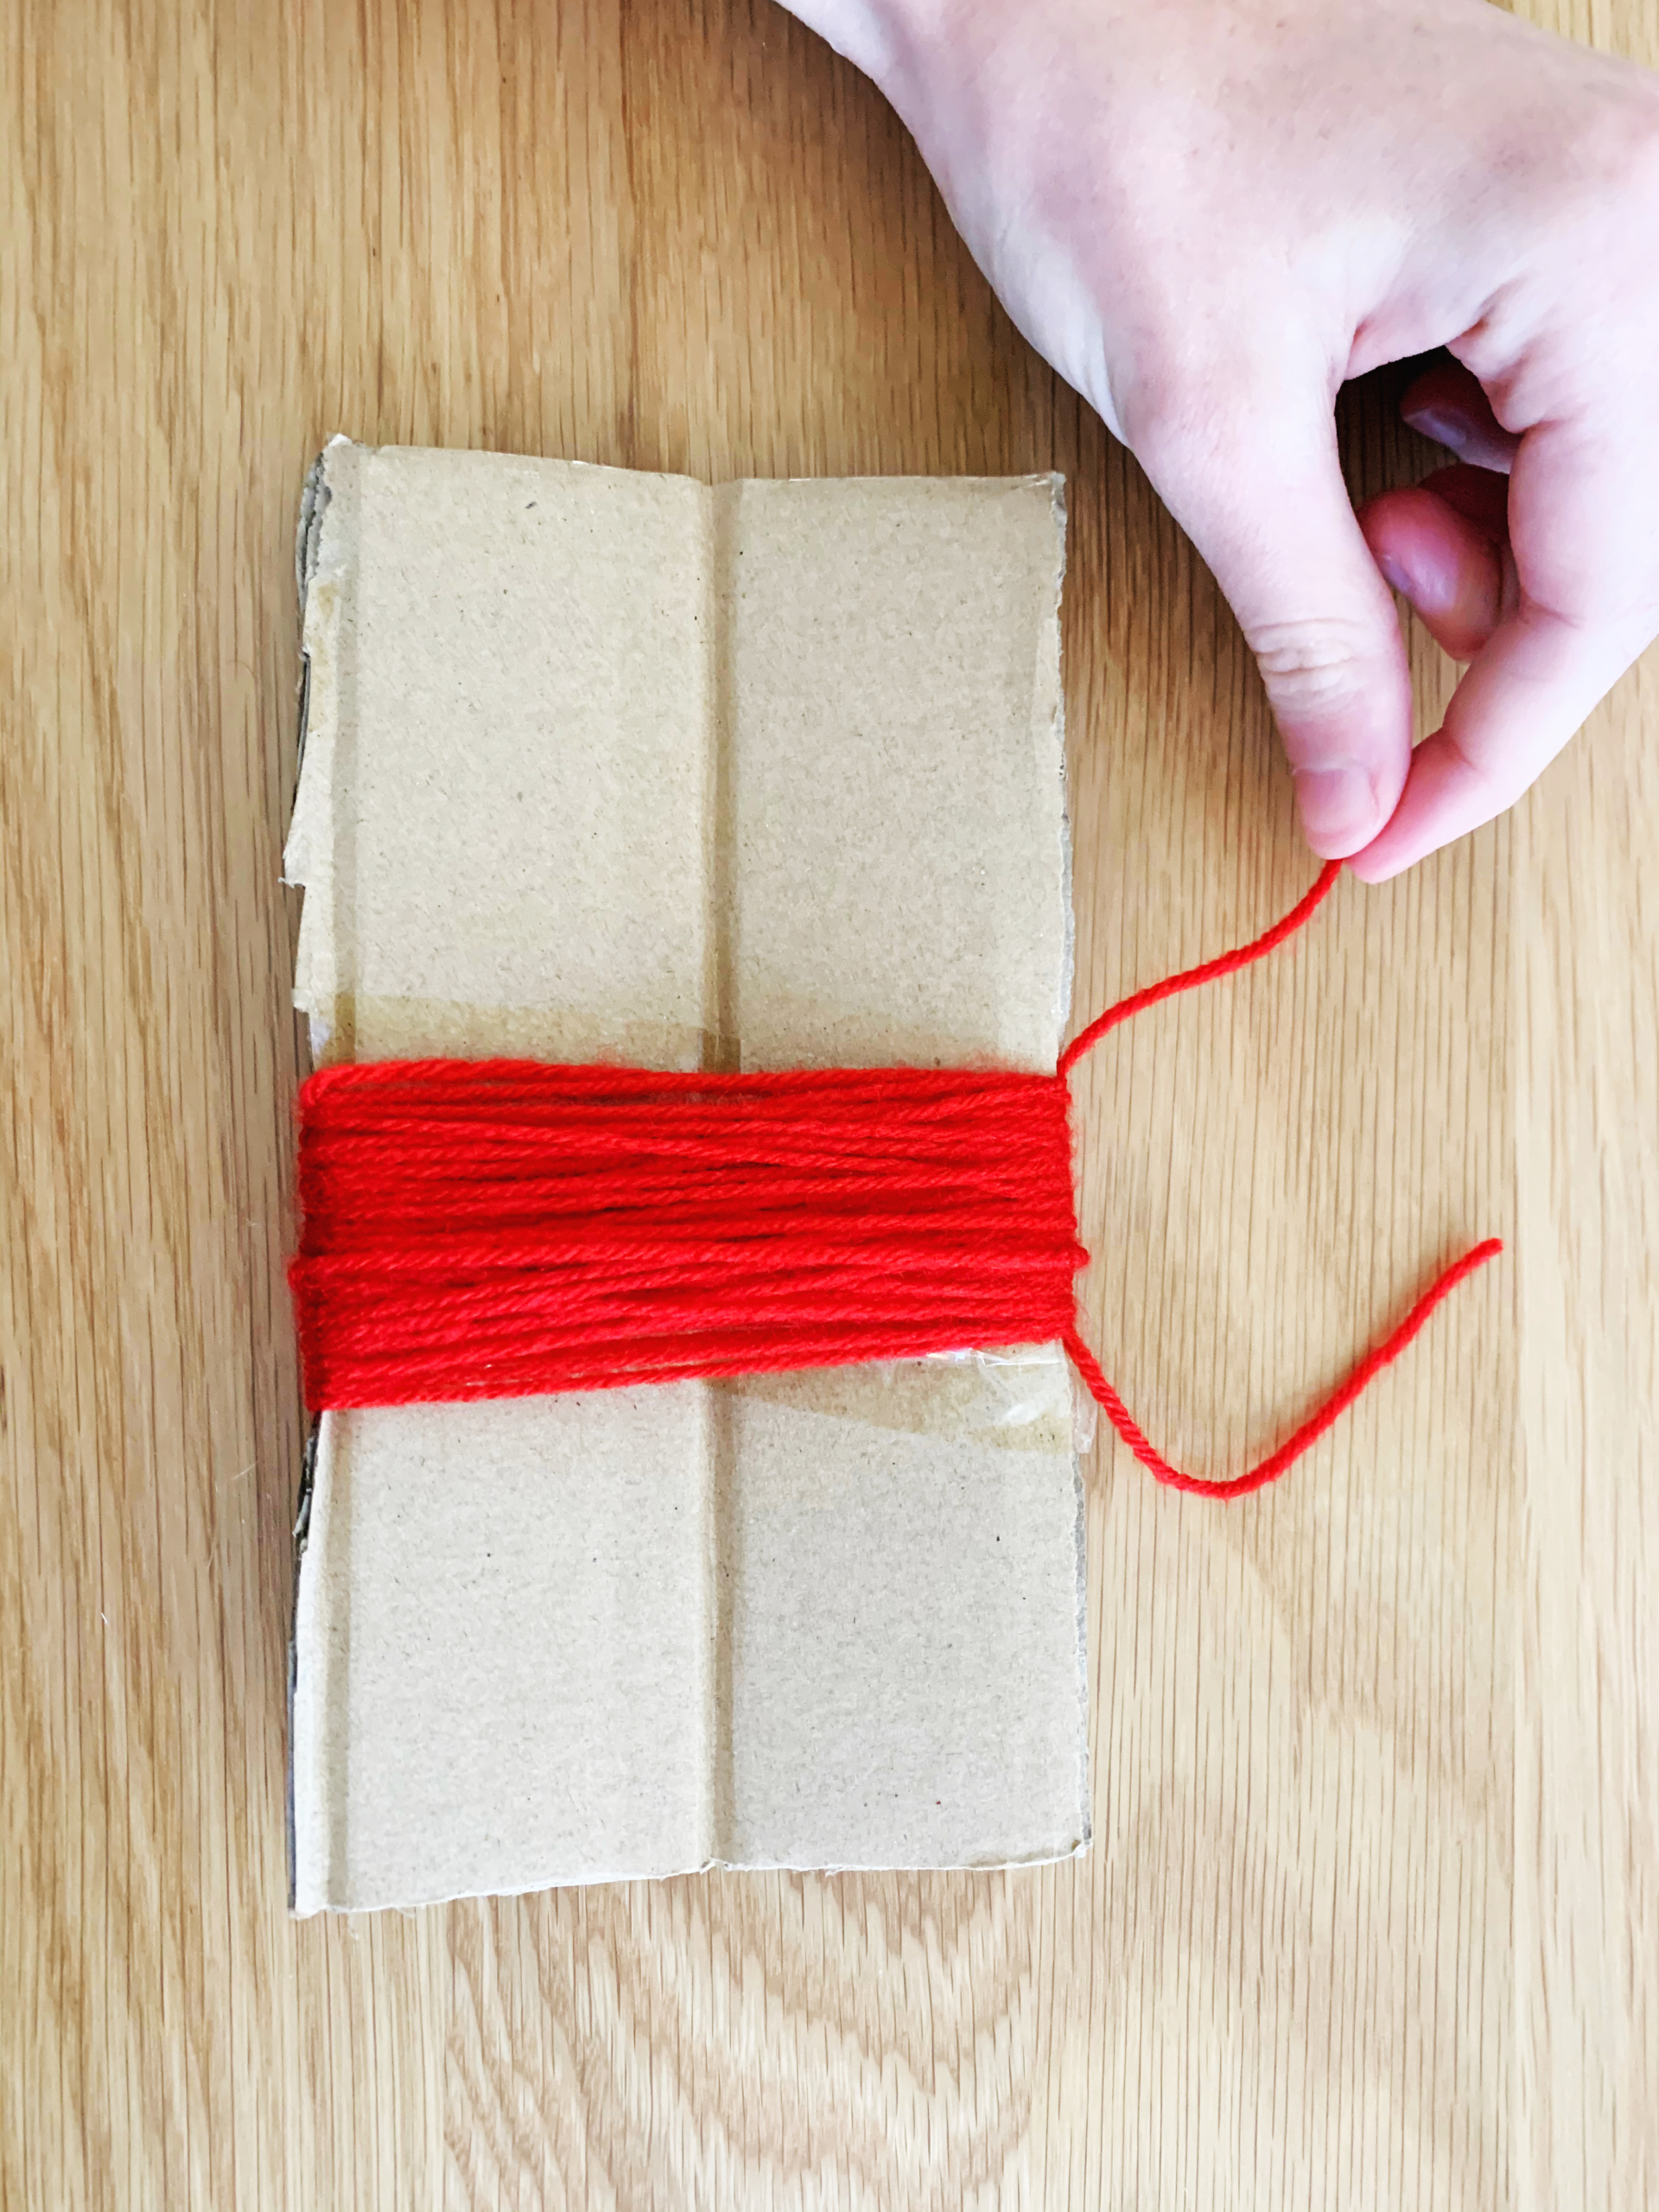
Step One: Cut a piece of cardboard to about 3.5 inches wide.Take your yarn and wrap it about 50 times around the cardboard. Then cut the yarn from the spool.
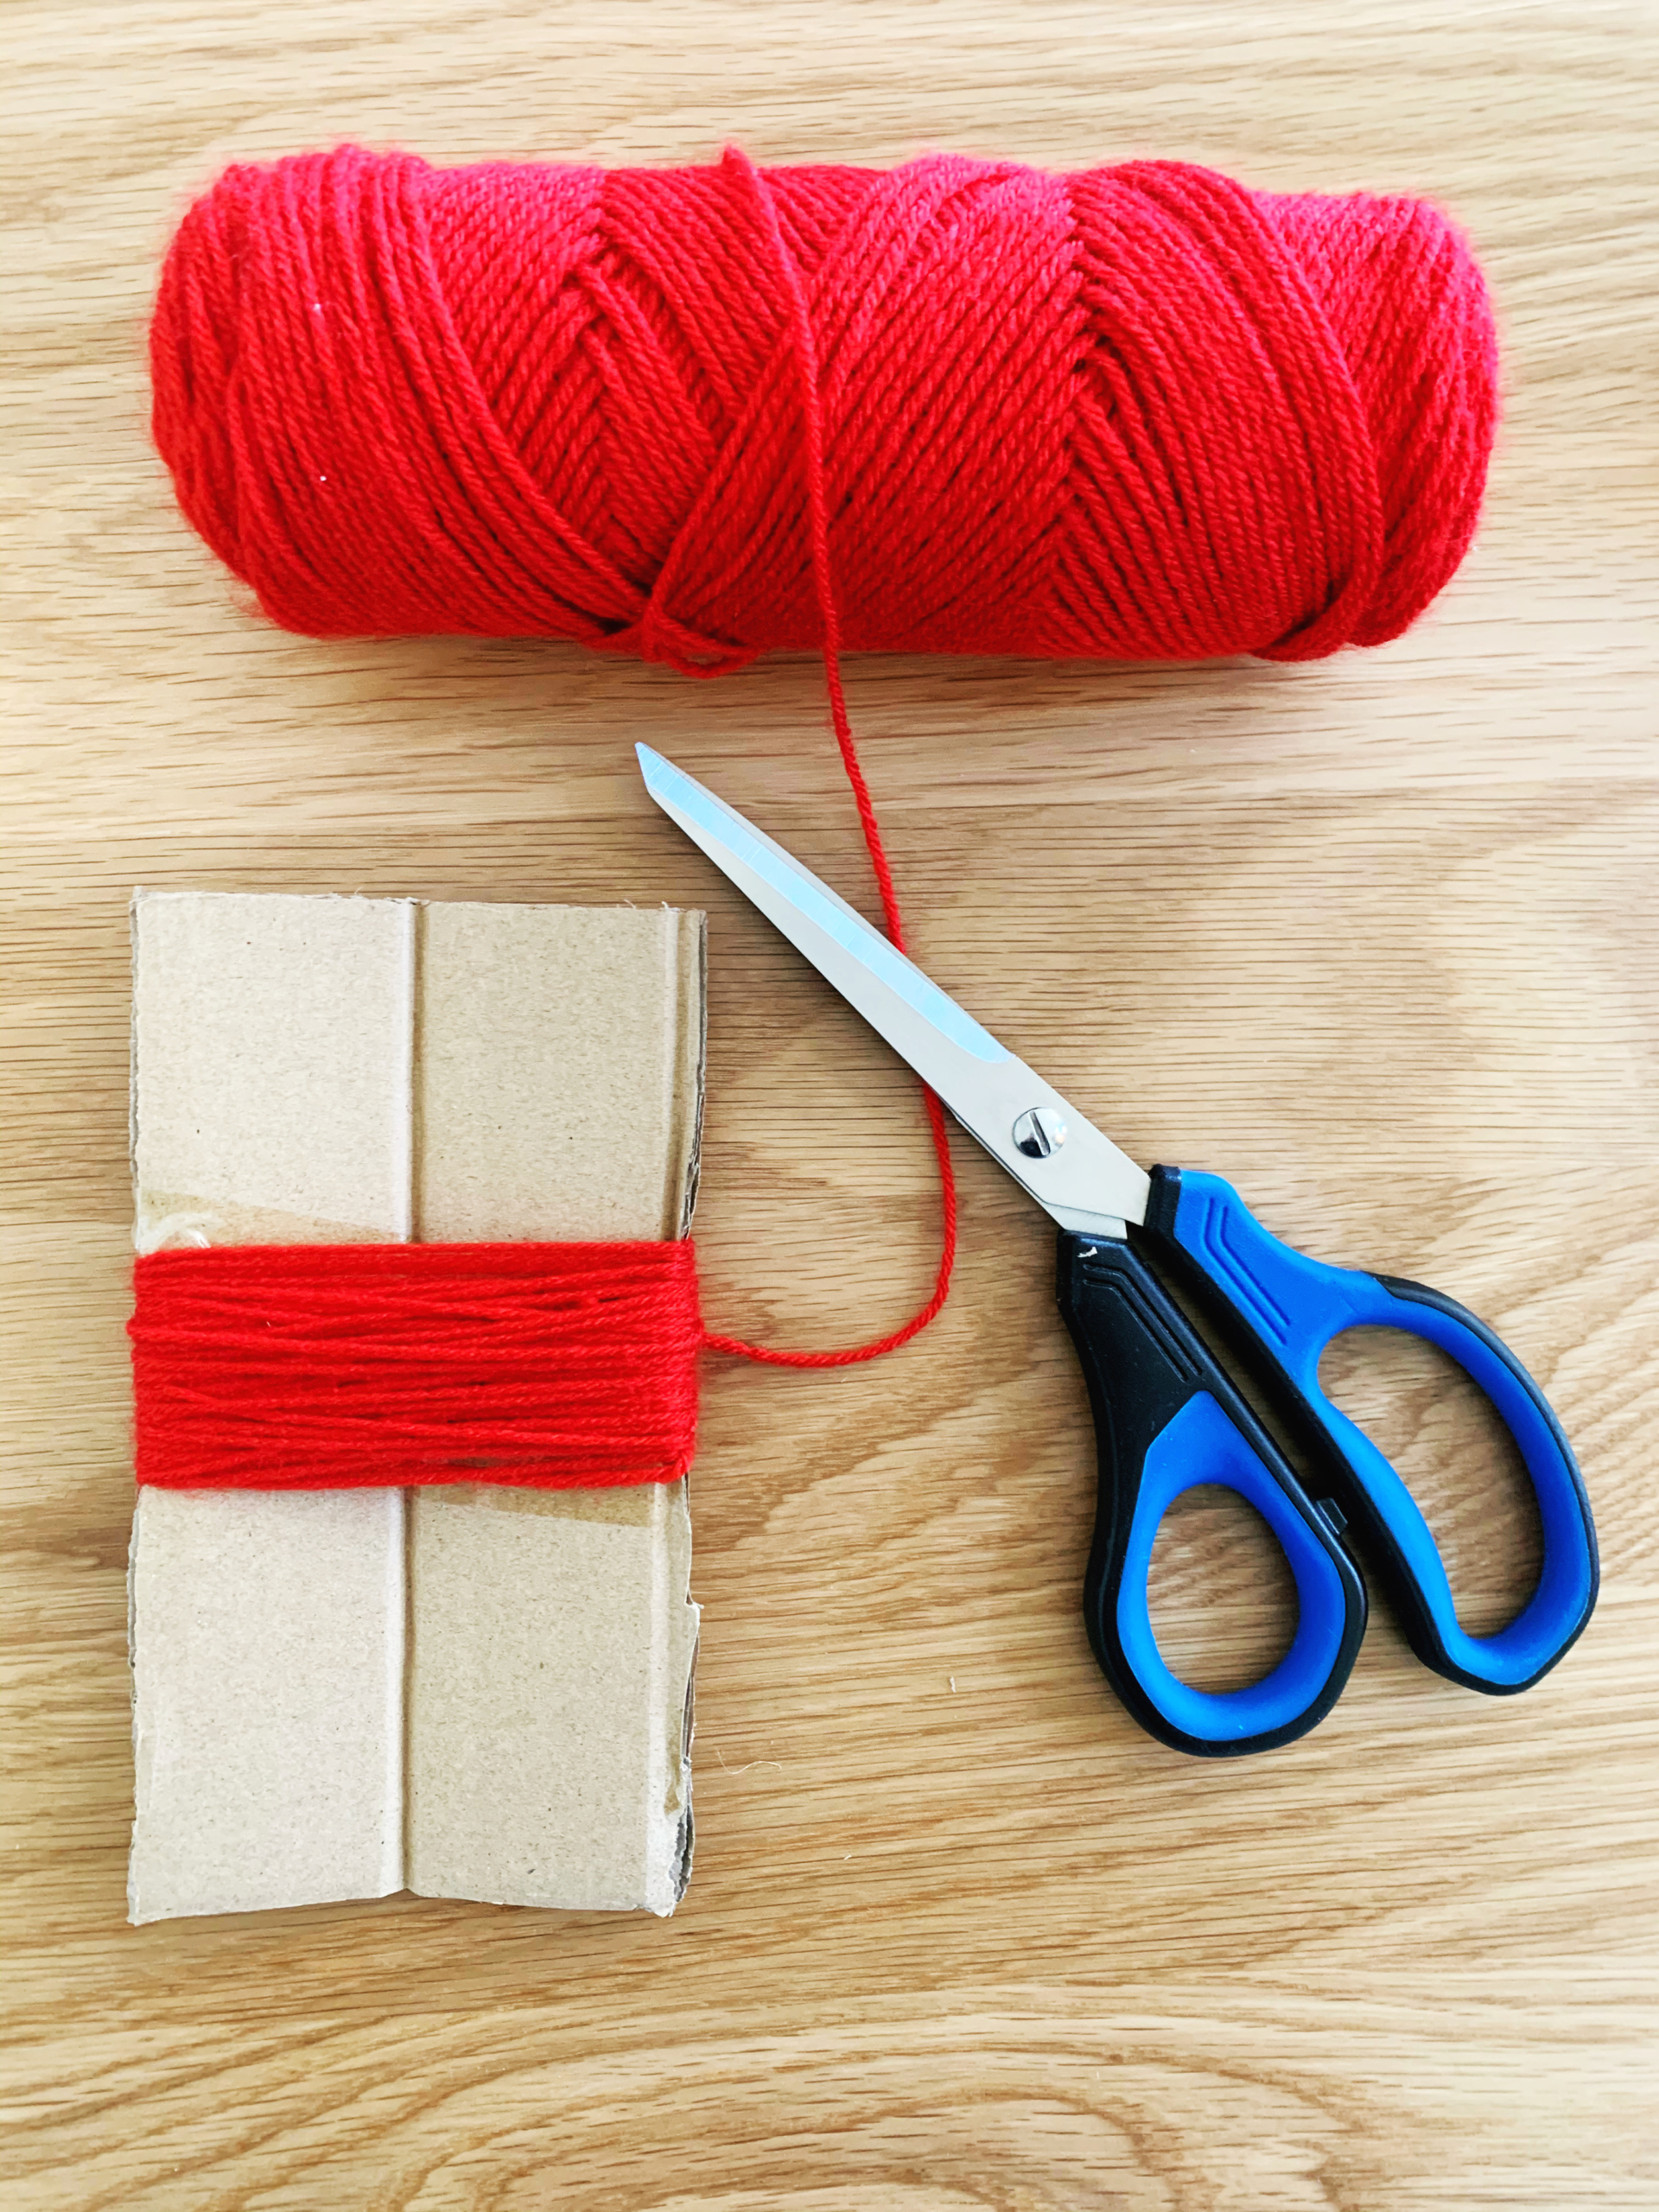
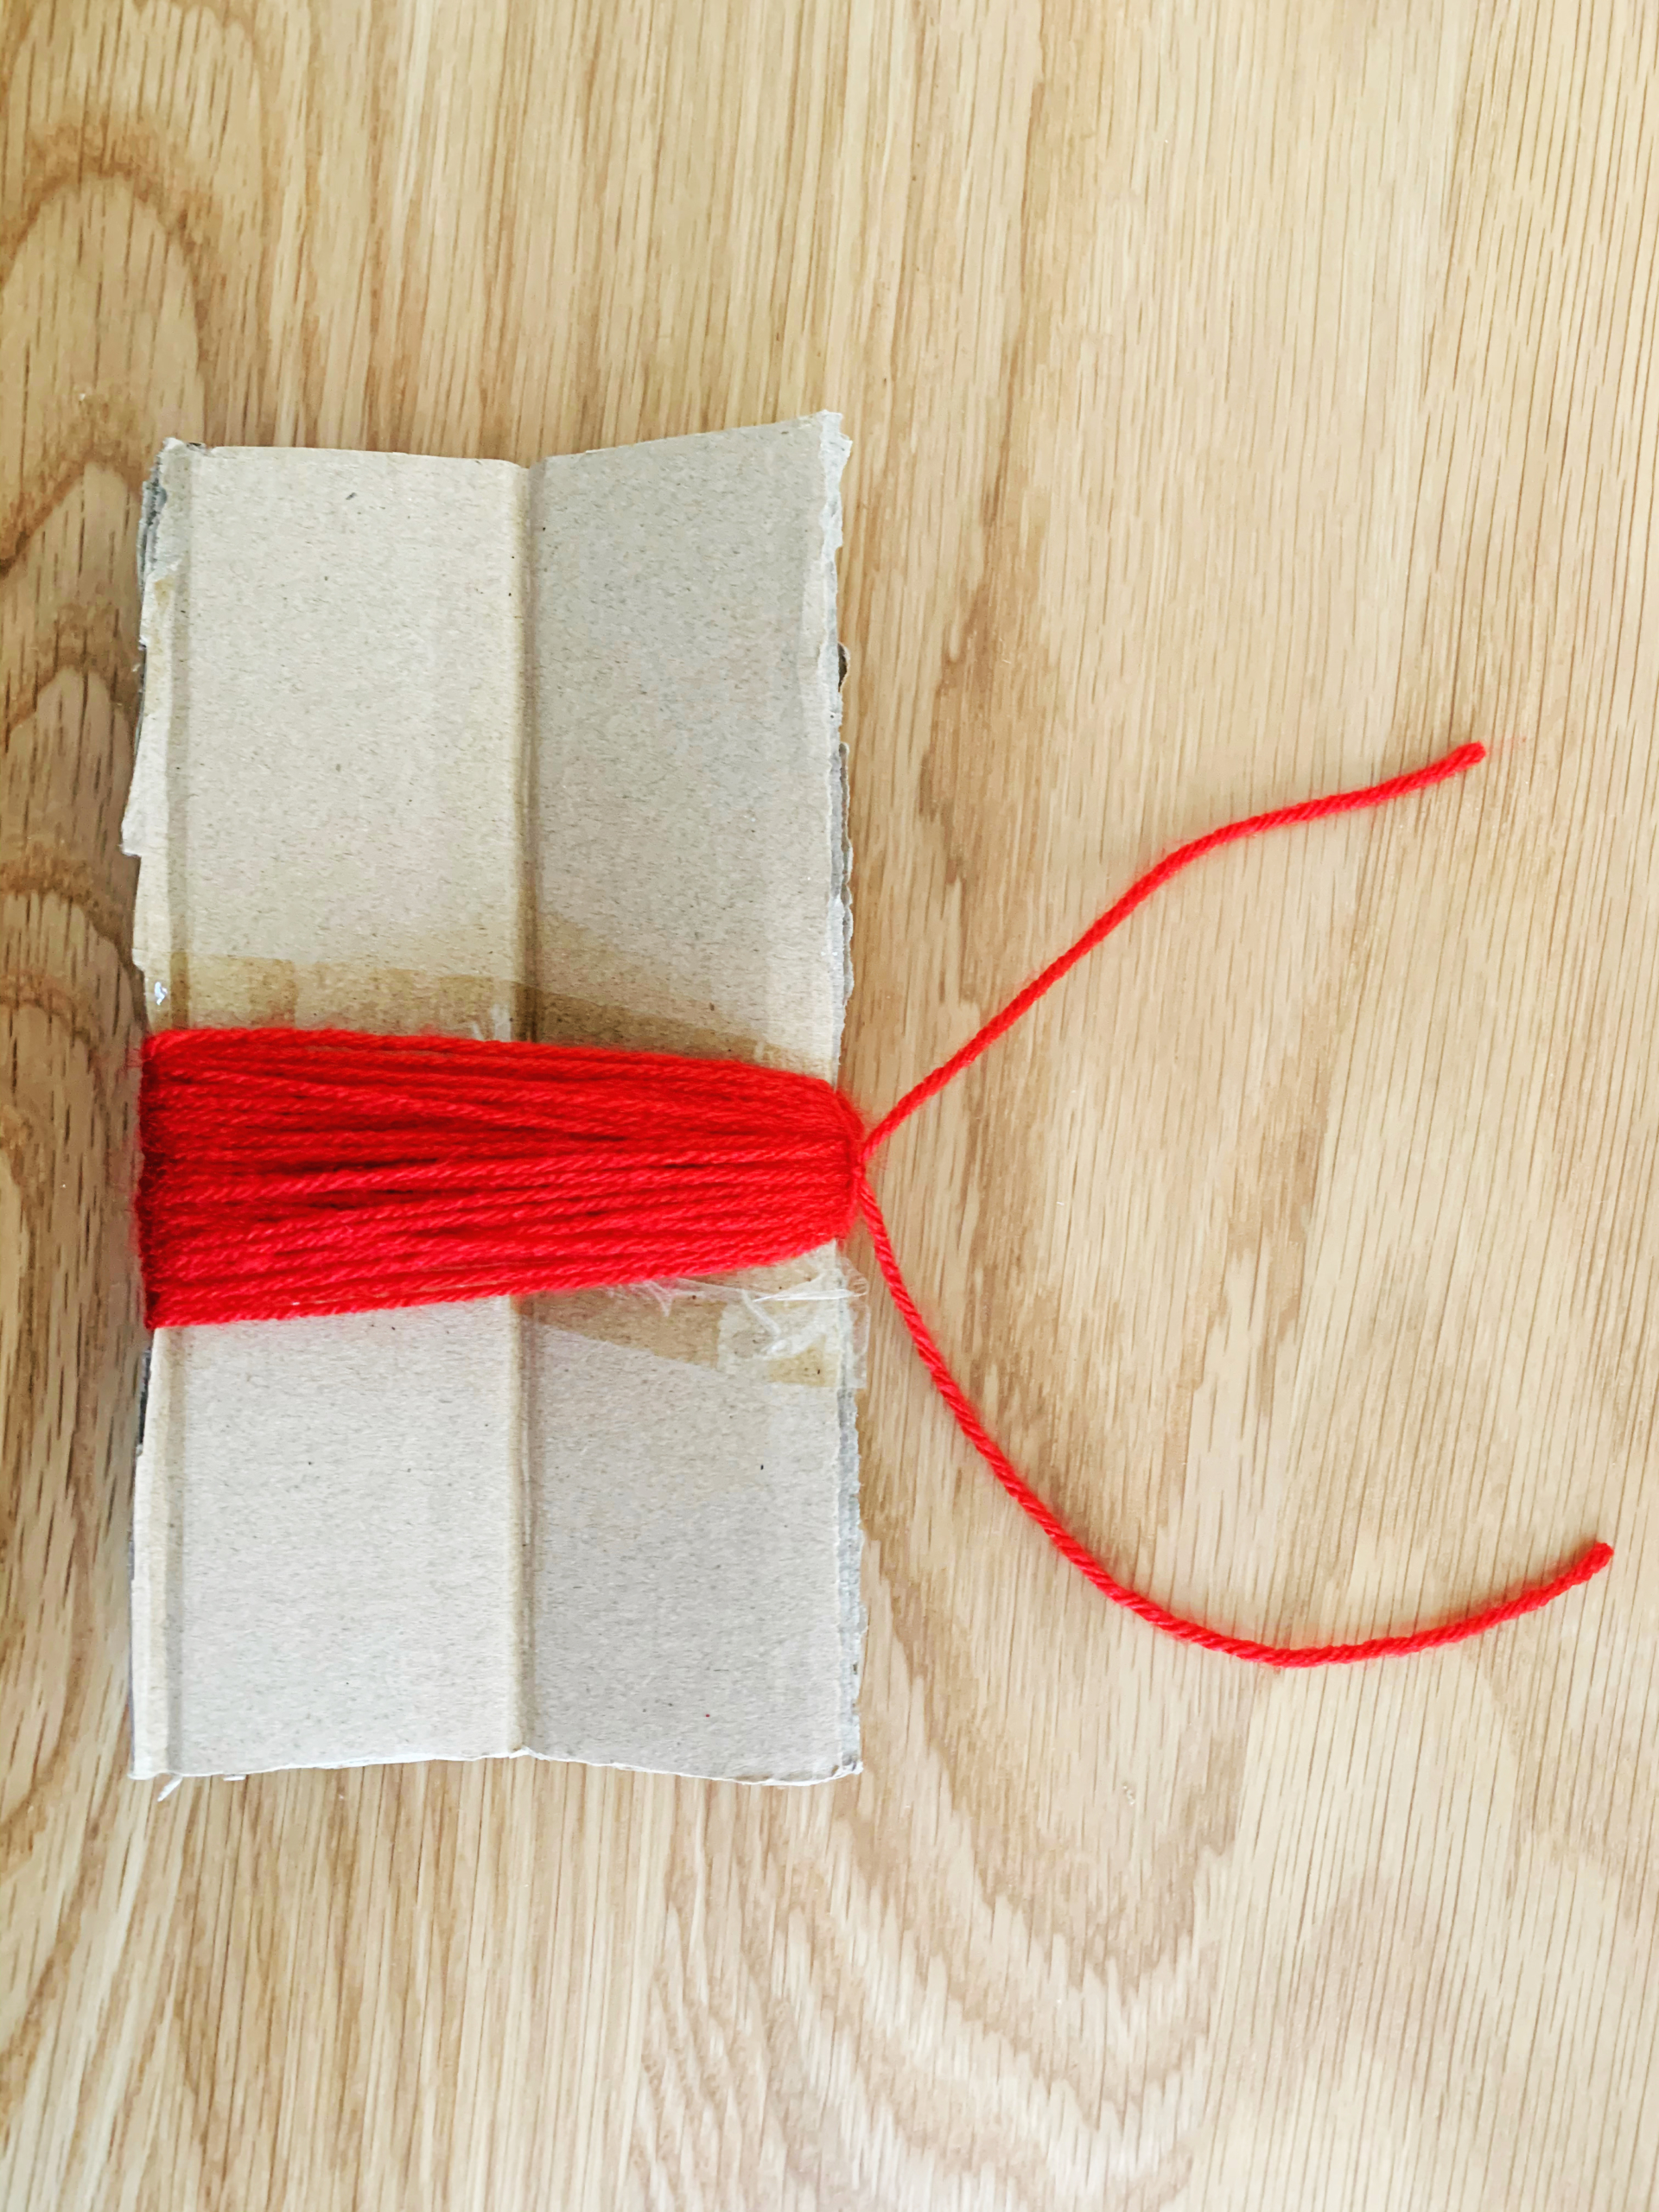
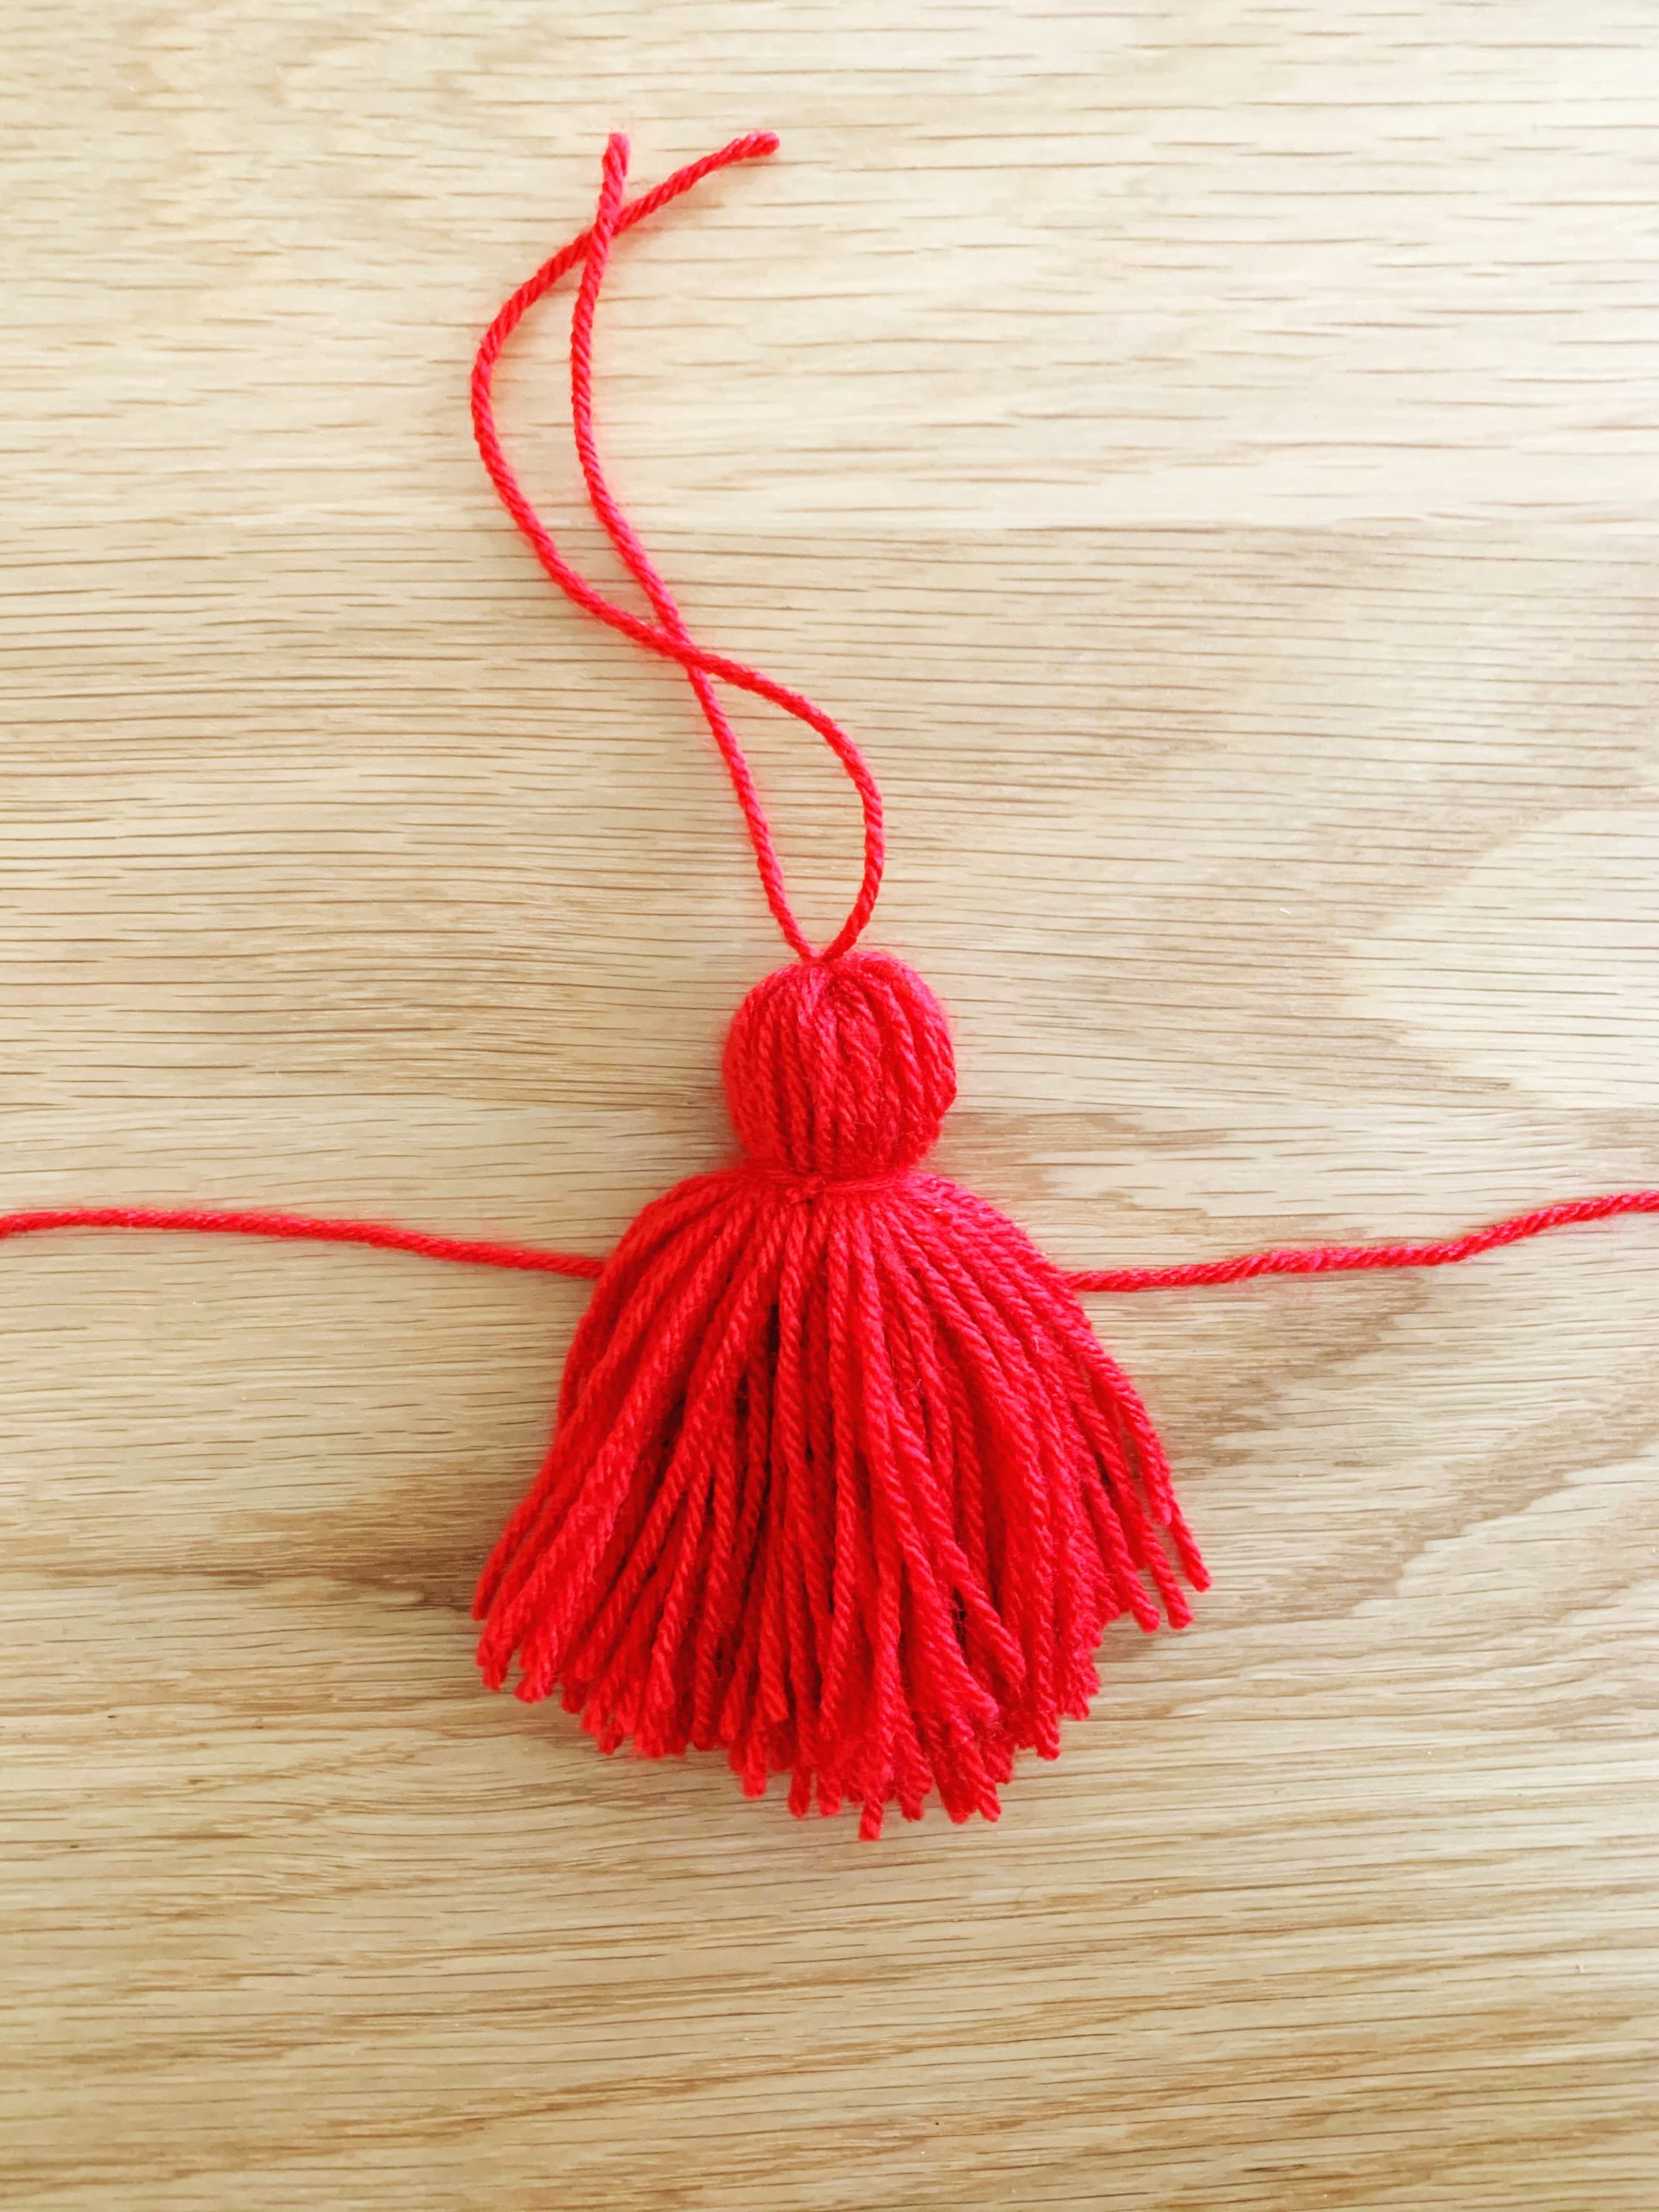
Step Two: Cut a small piece of yarn from the spool and slide it under all the yarn on one side of the cardboard, as shown below, then double knot it at the top.
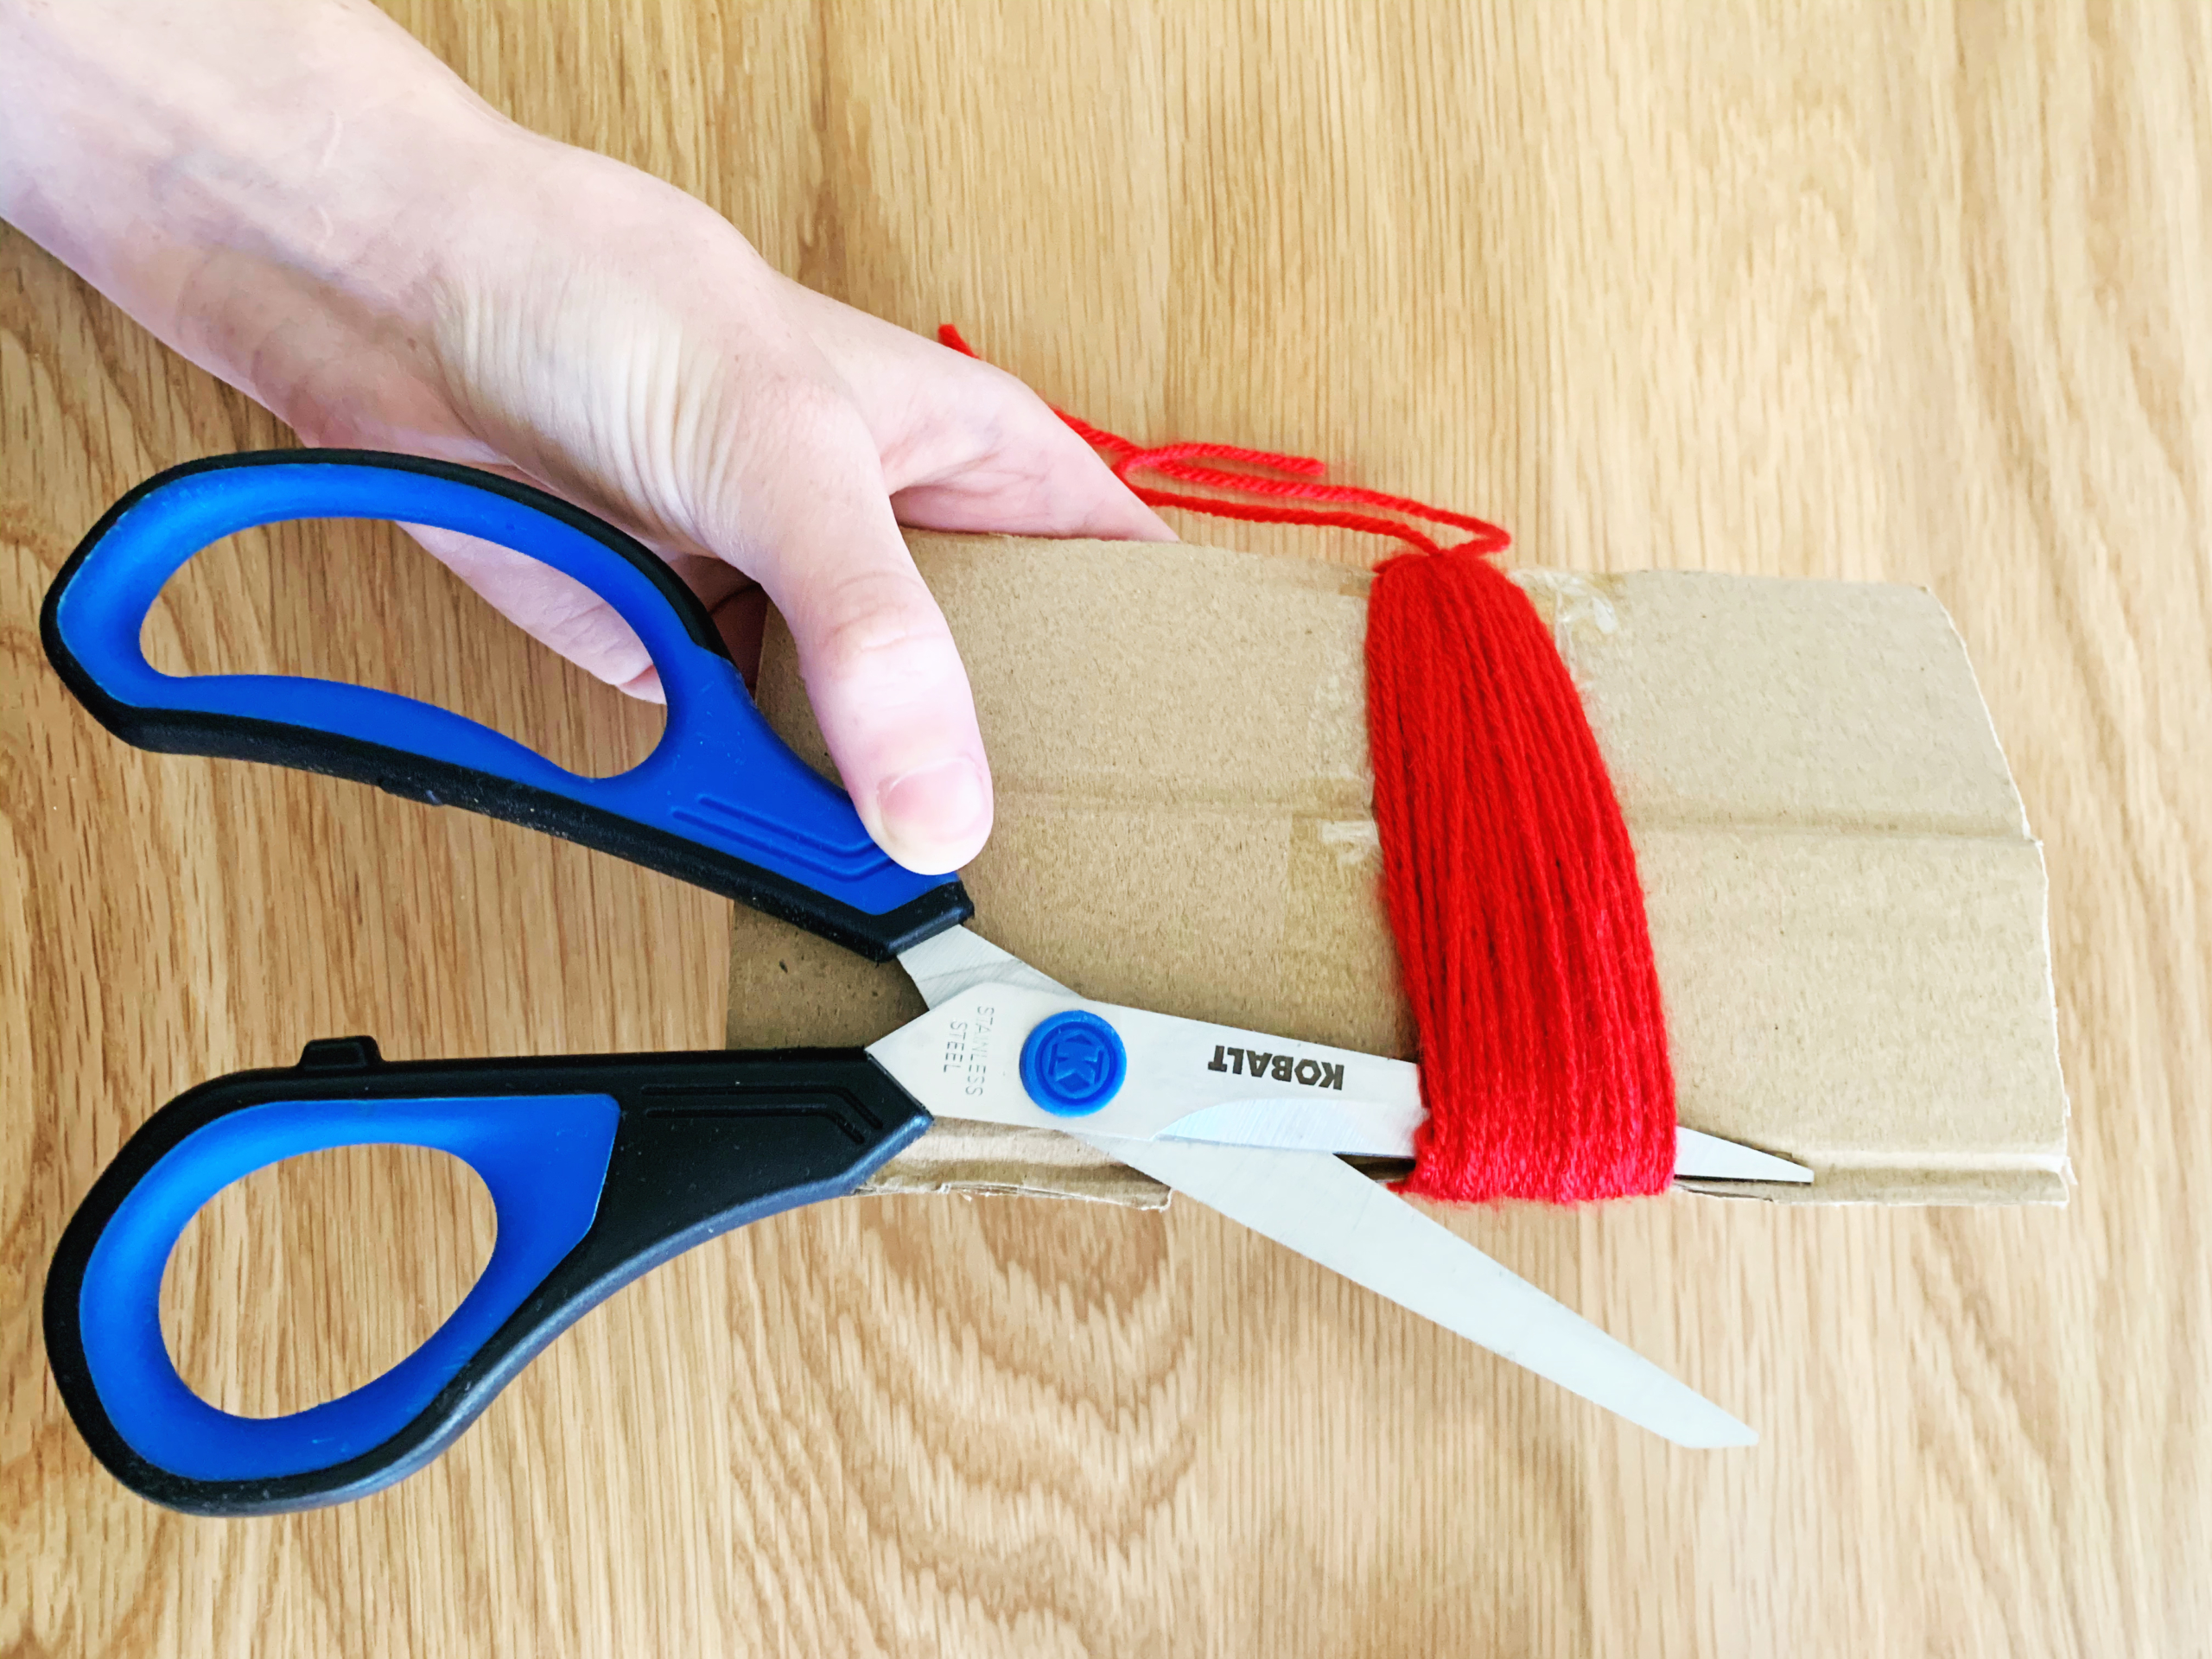
Step Three: After you tie the knot, cut through all the yarn on the opposite side.
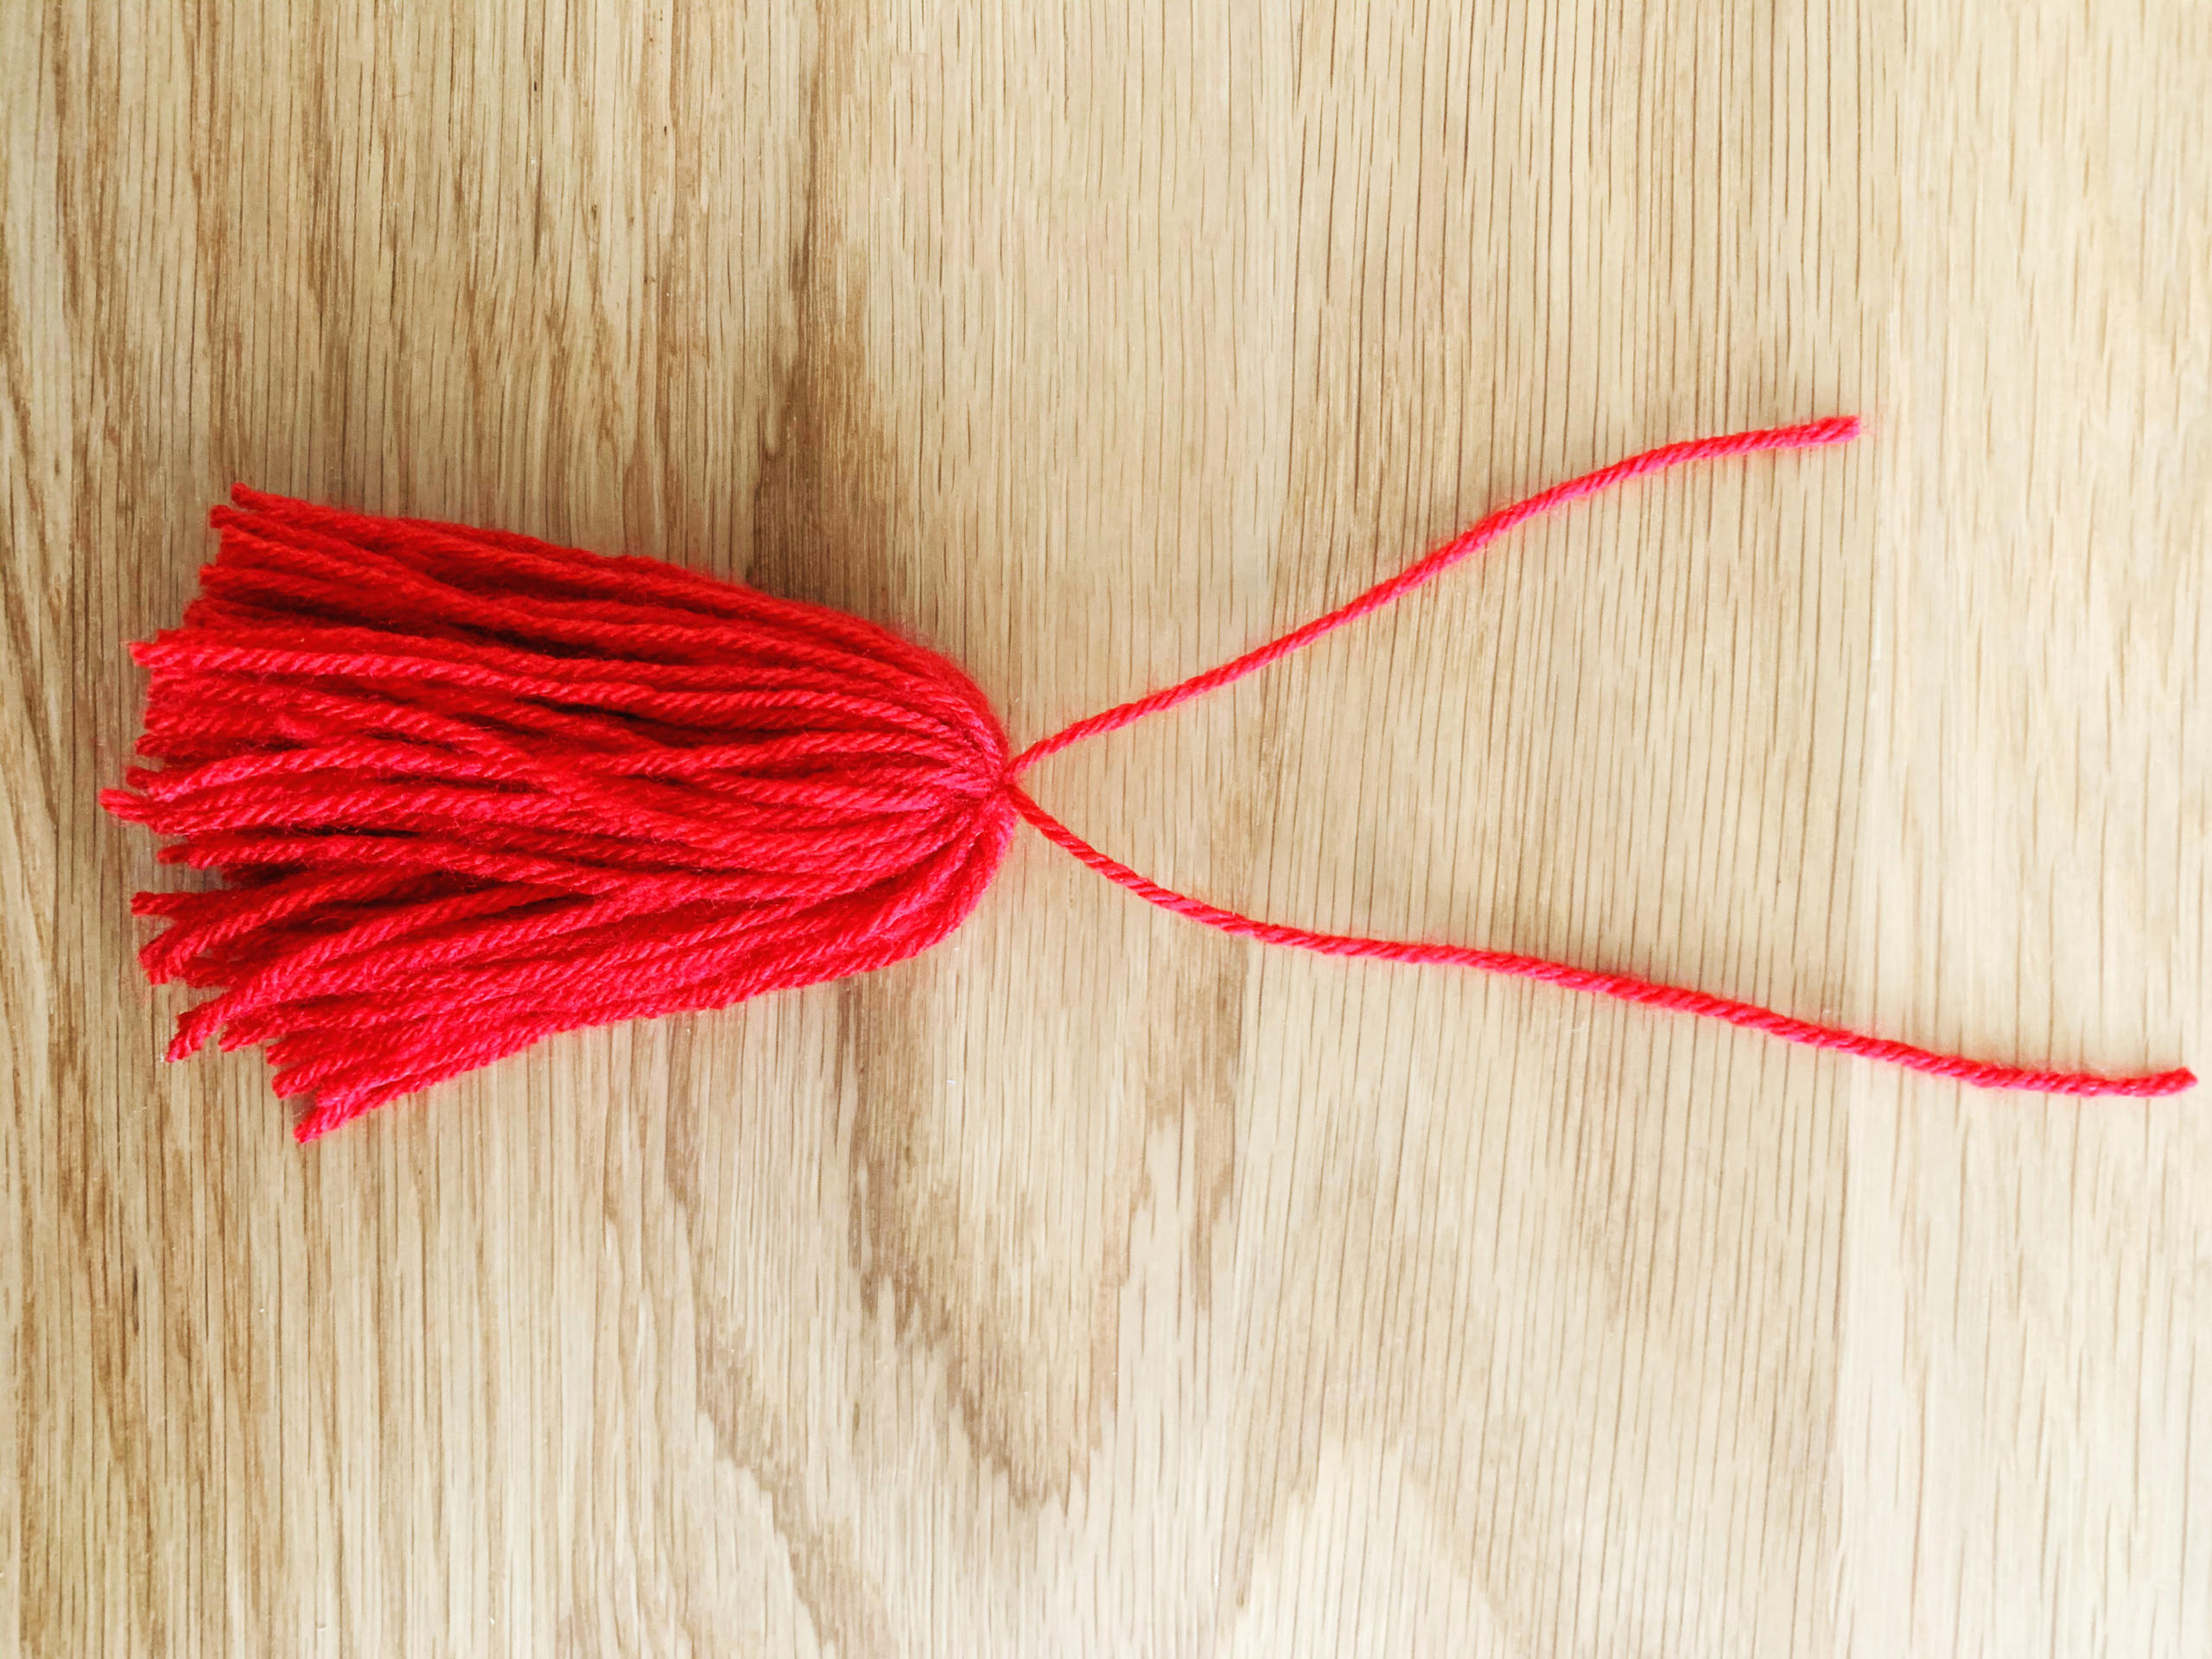
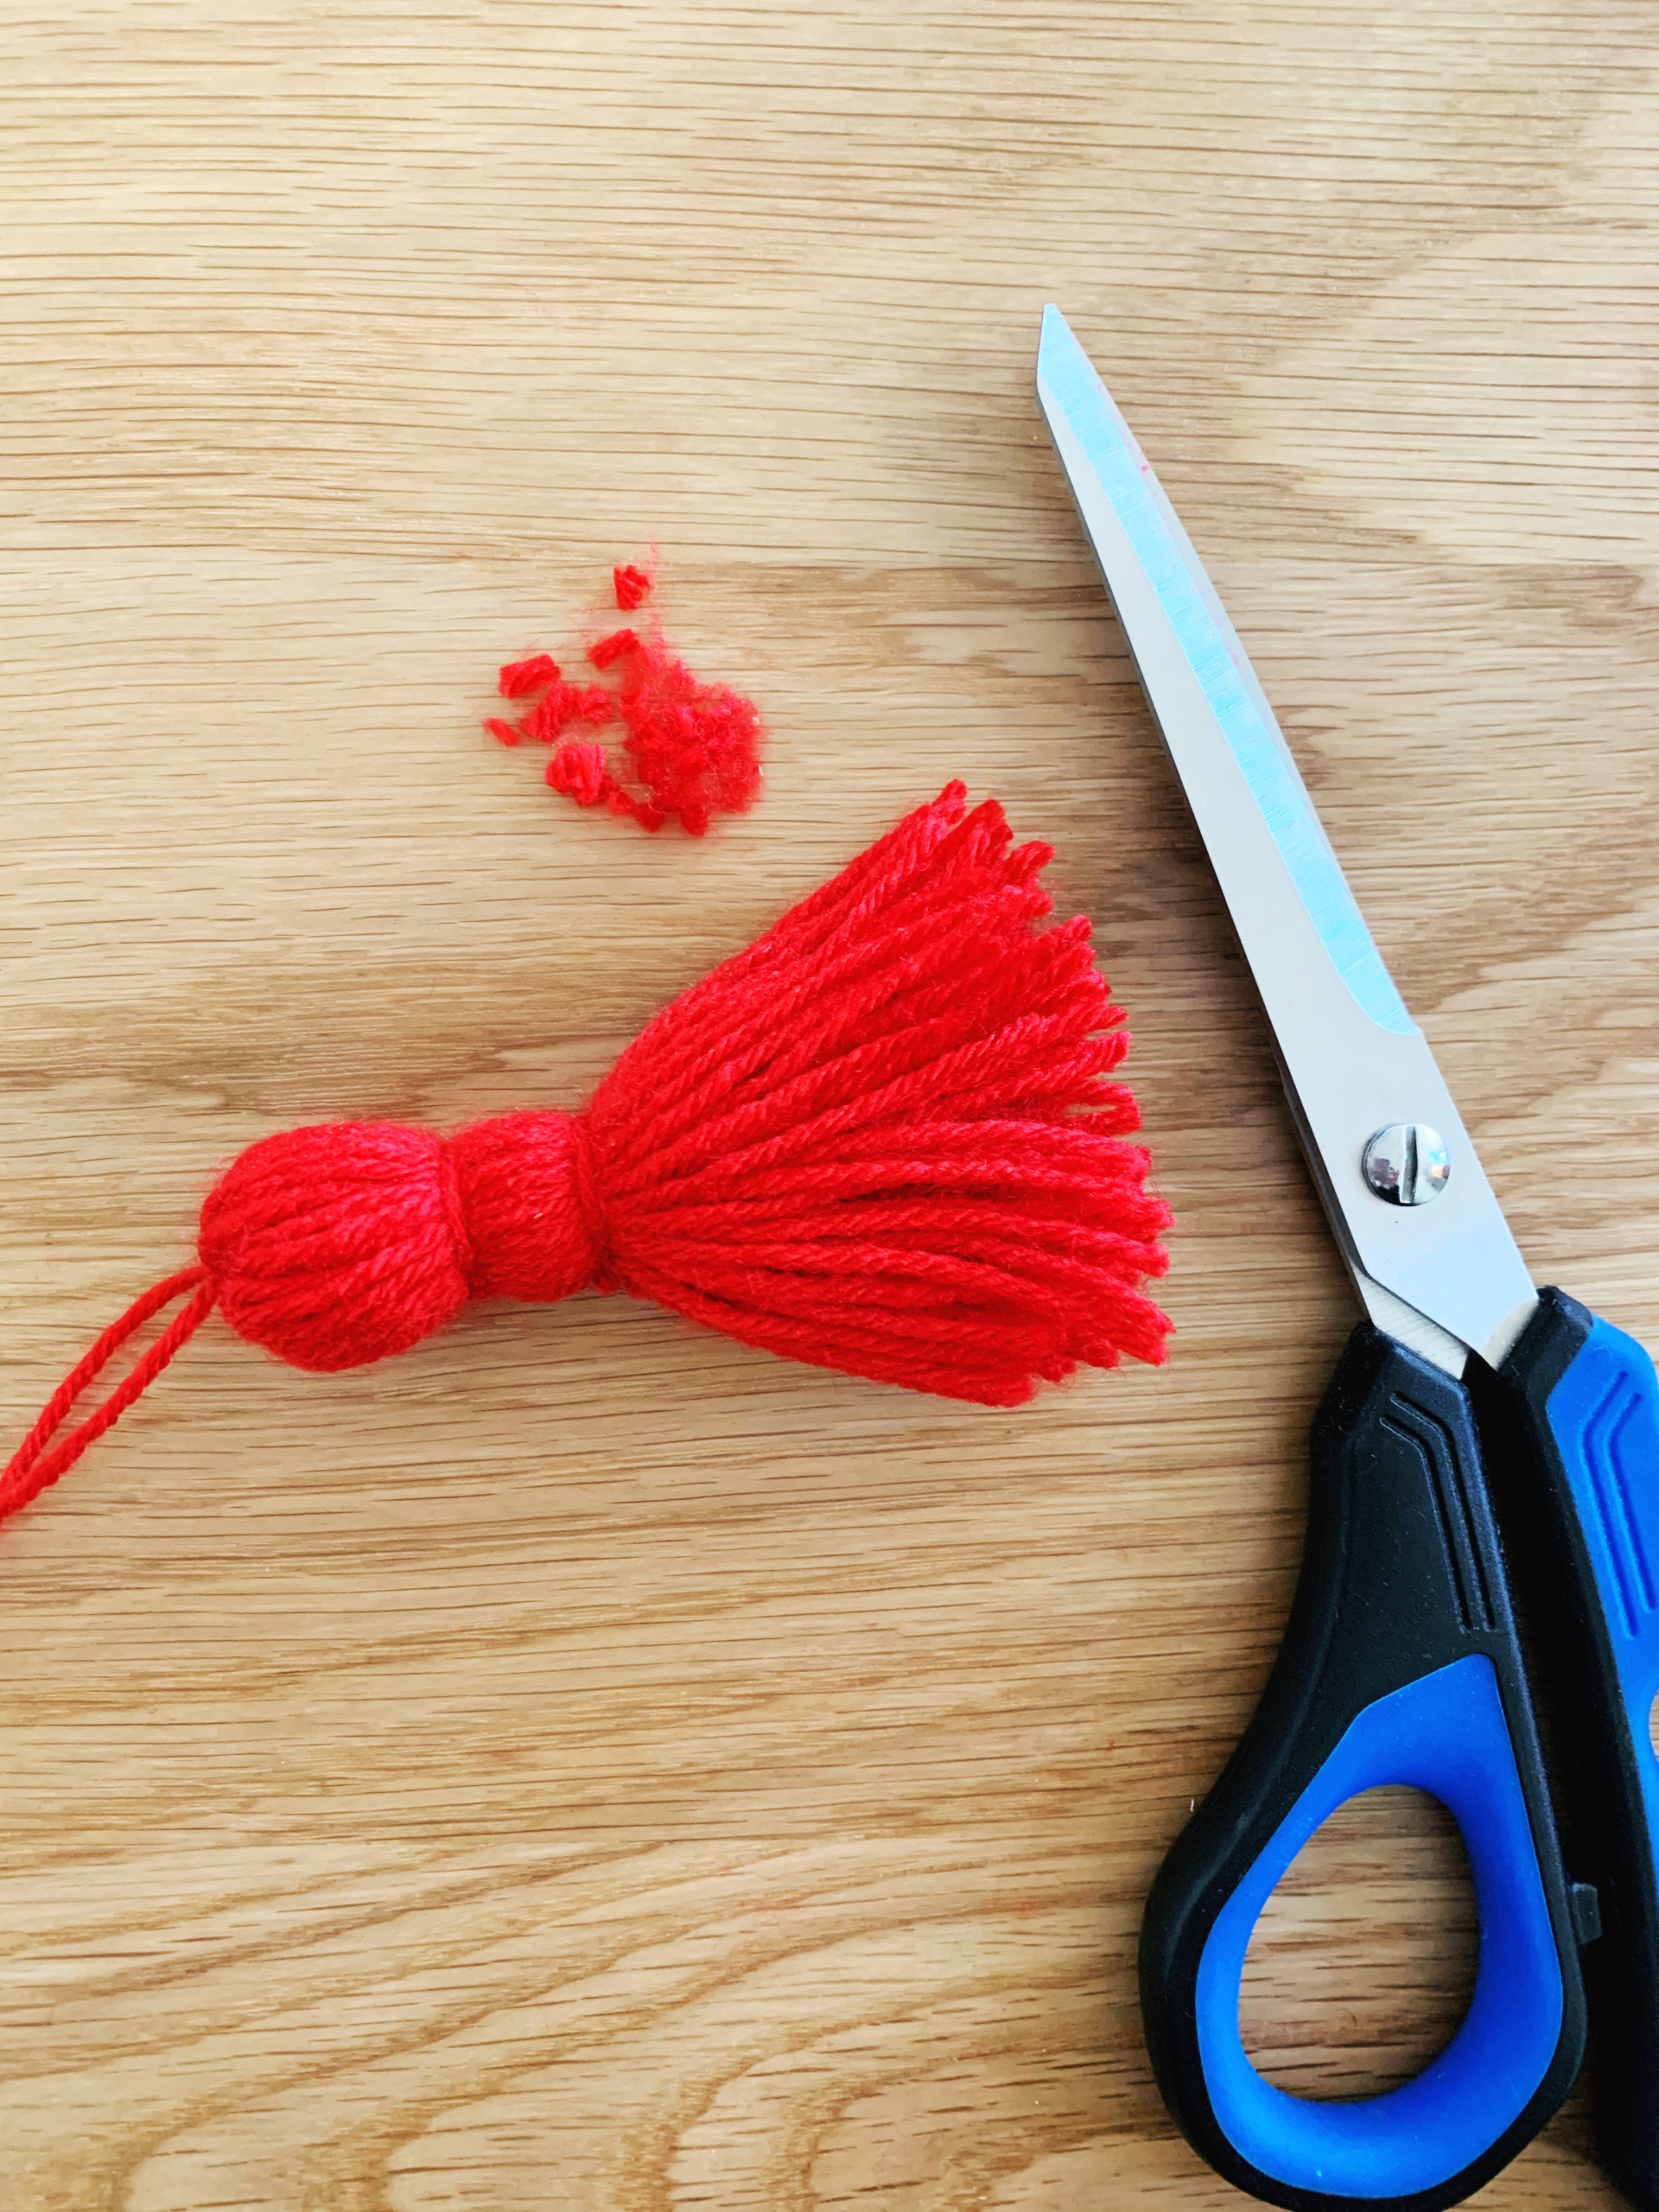
Step Four: Now, to finish off your tassel, cut off two small pieces of yarn from the spool. Wrap the first piece around the top and tightly double knot it to make the head of the tassel. Repeat this with your second piece of yarn, underneath the previous piece of yarn.

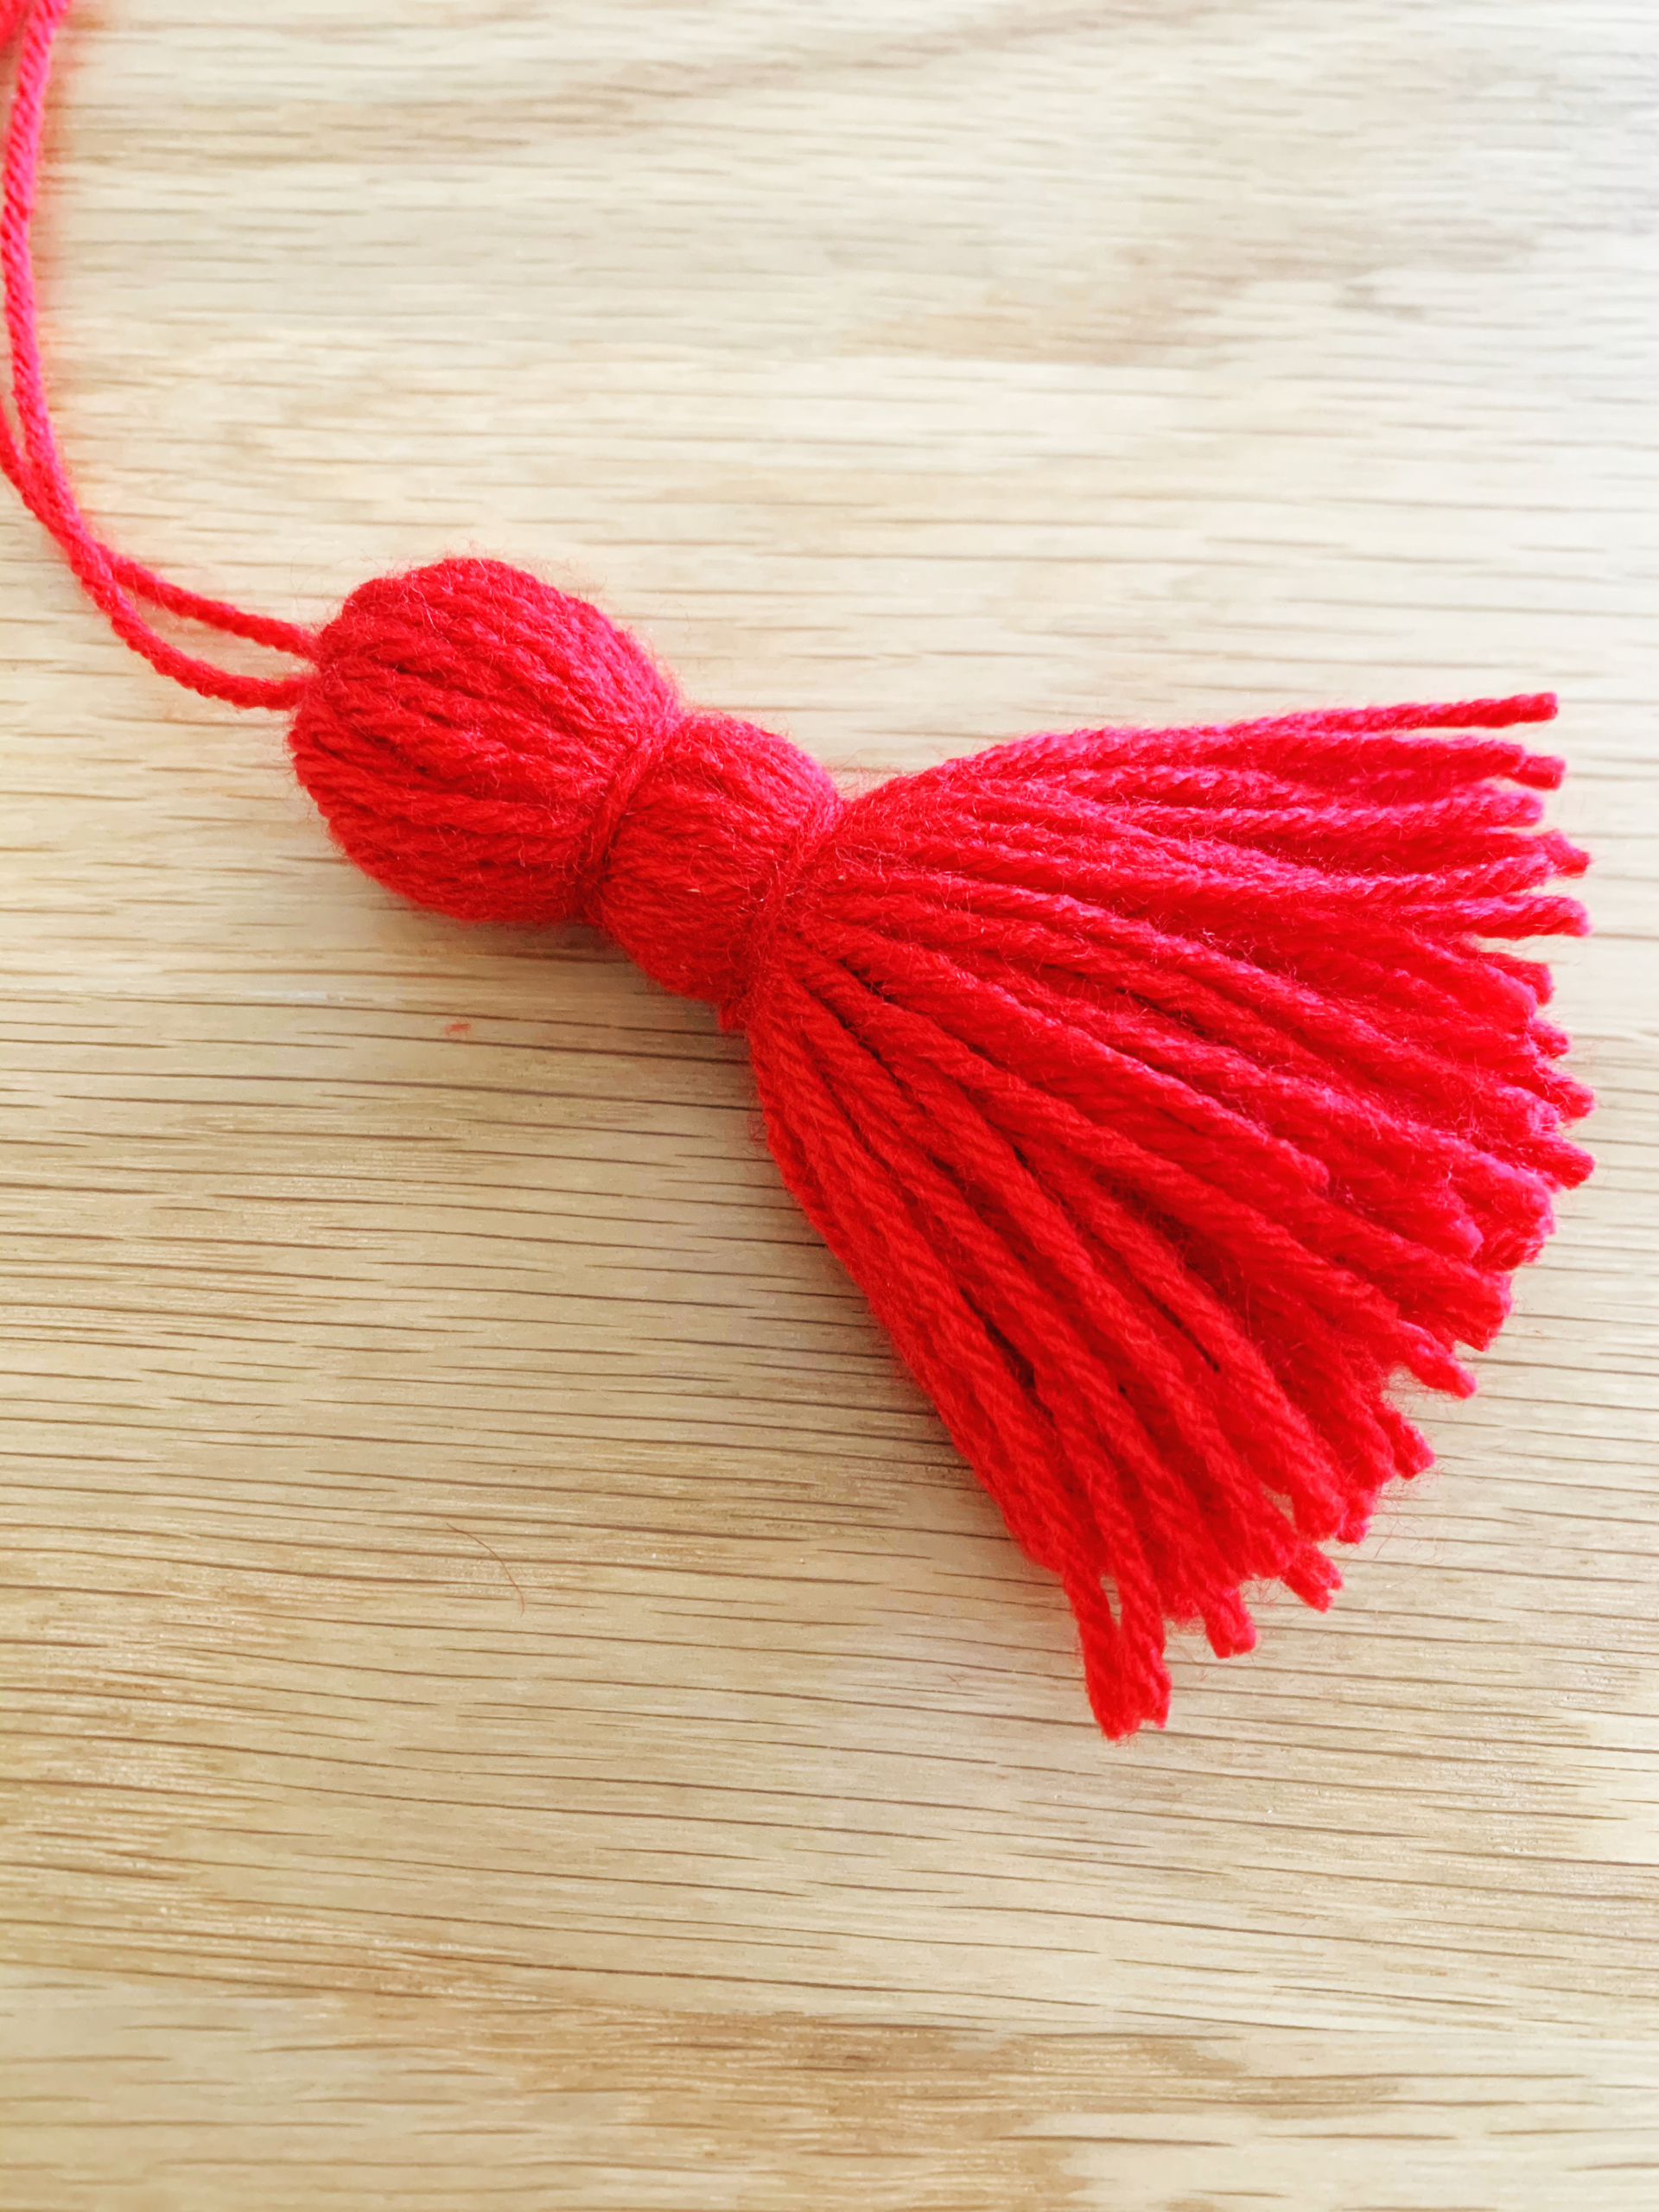
Step Five: Trim any straggly pieces of longer yarn from the bottom of your tassel, to clean it up and make it look even.
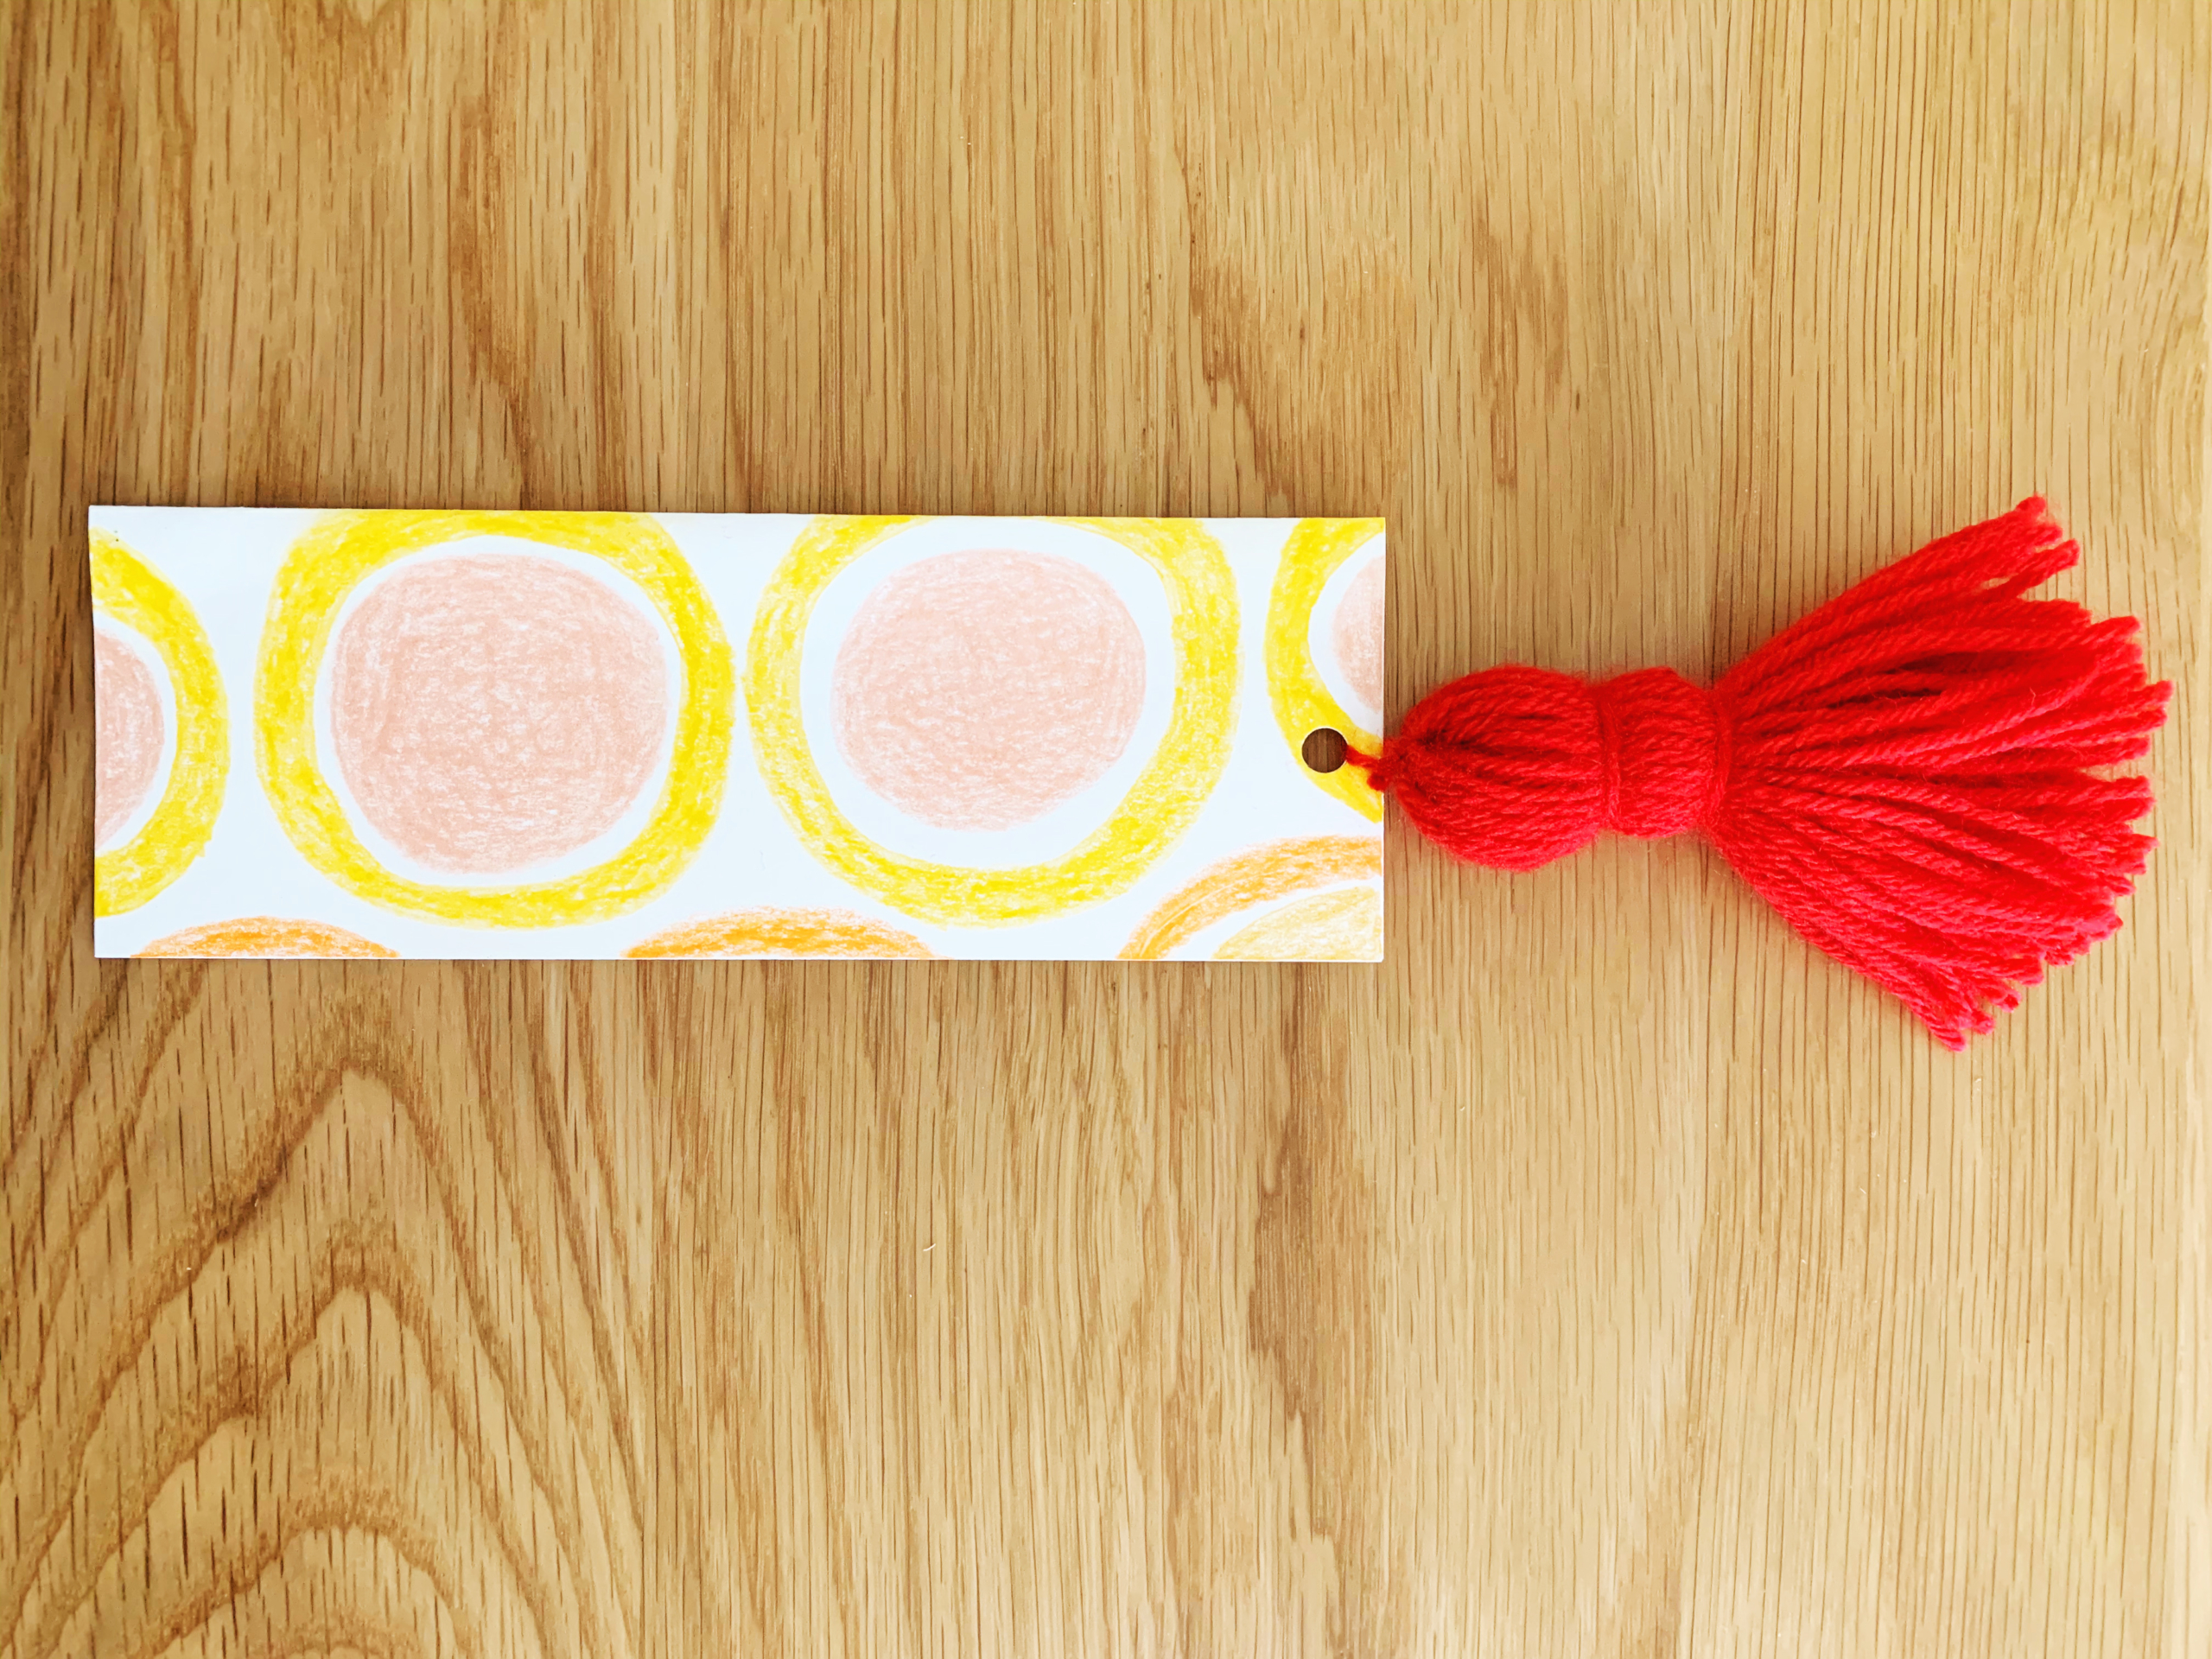
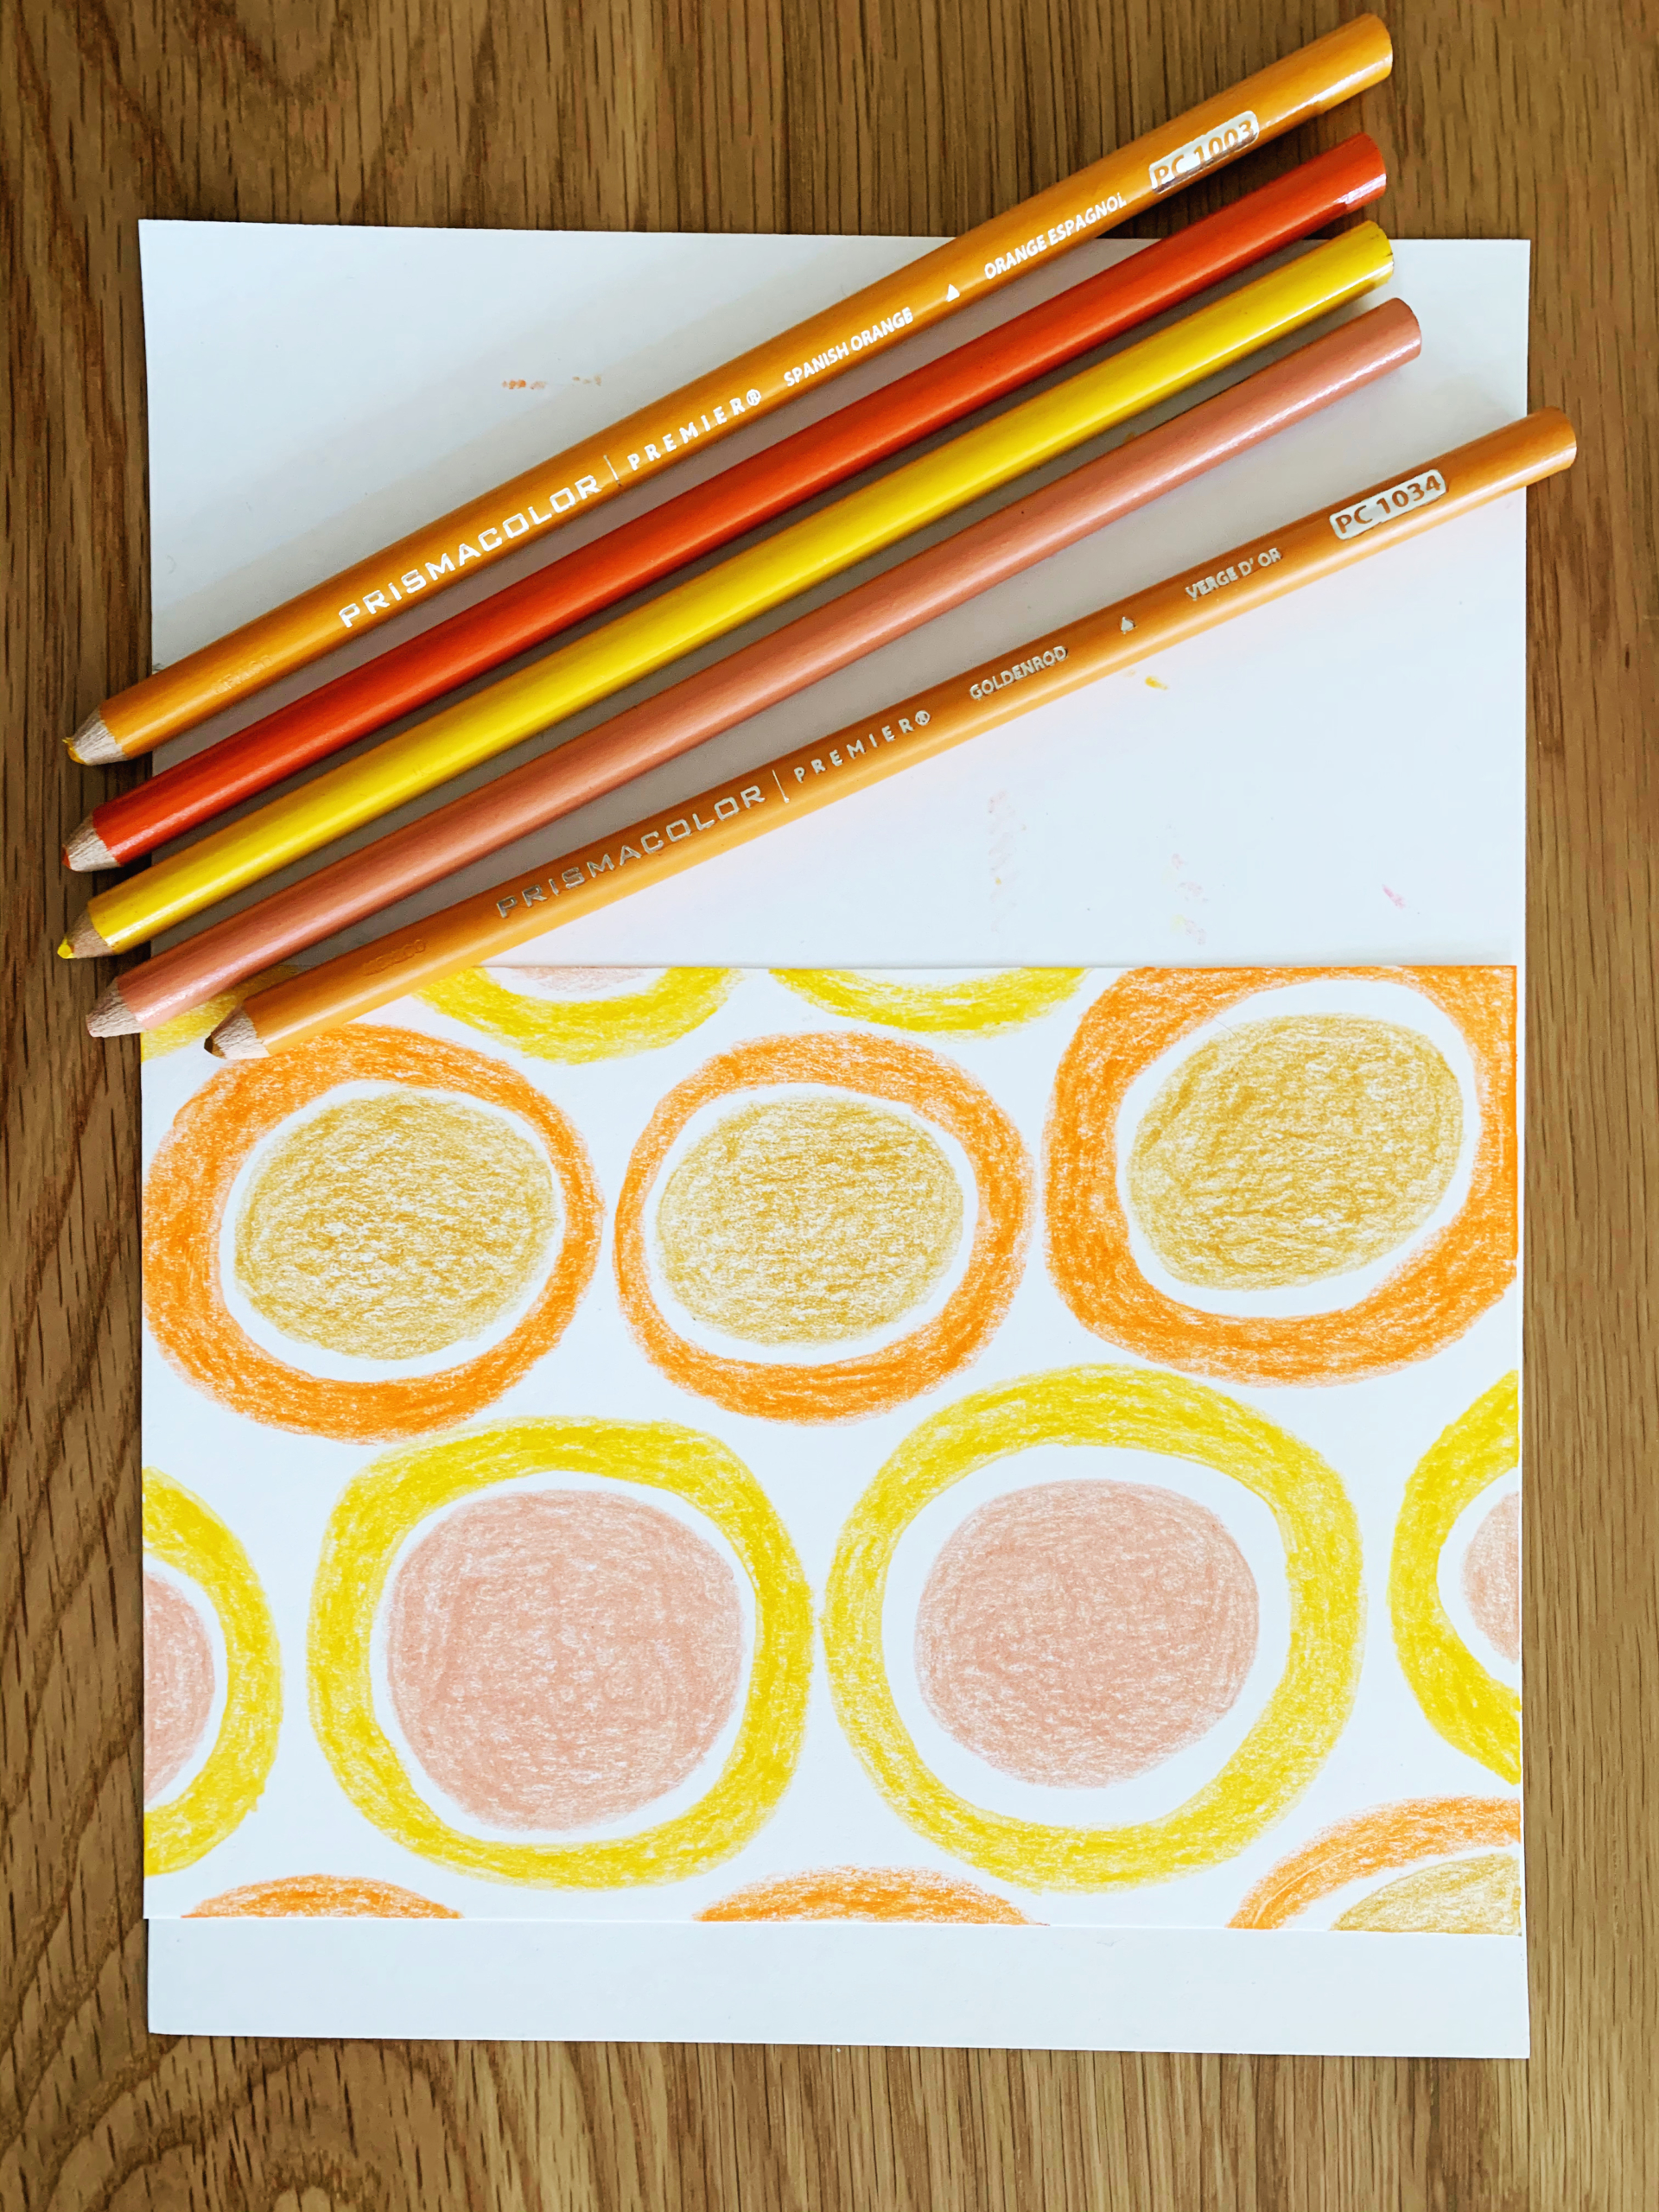
Step Six: Measure and cut out a 4.5”×6.5″ piece of cardstock. If you’re decorating your own bookmark, now’s the time to decorate it. (I chose to decorate my own rather than using a patterned cardstock, but you can definitely use patterned paper, especially if you want to make several bookmarks.) Once you have cut it out, fold the cardstock in half lengthwise.

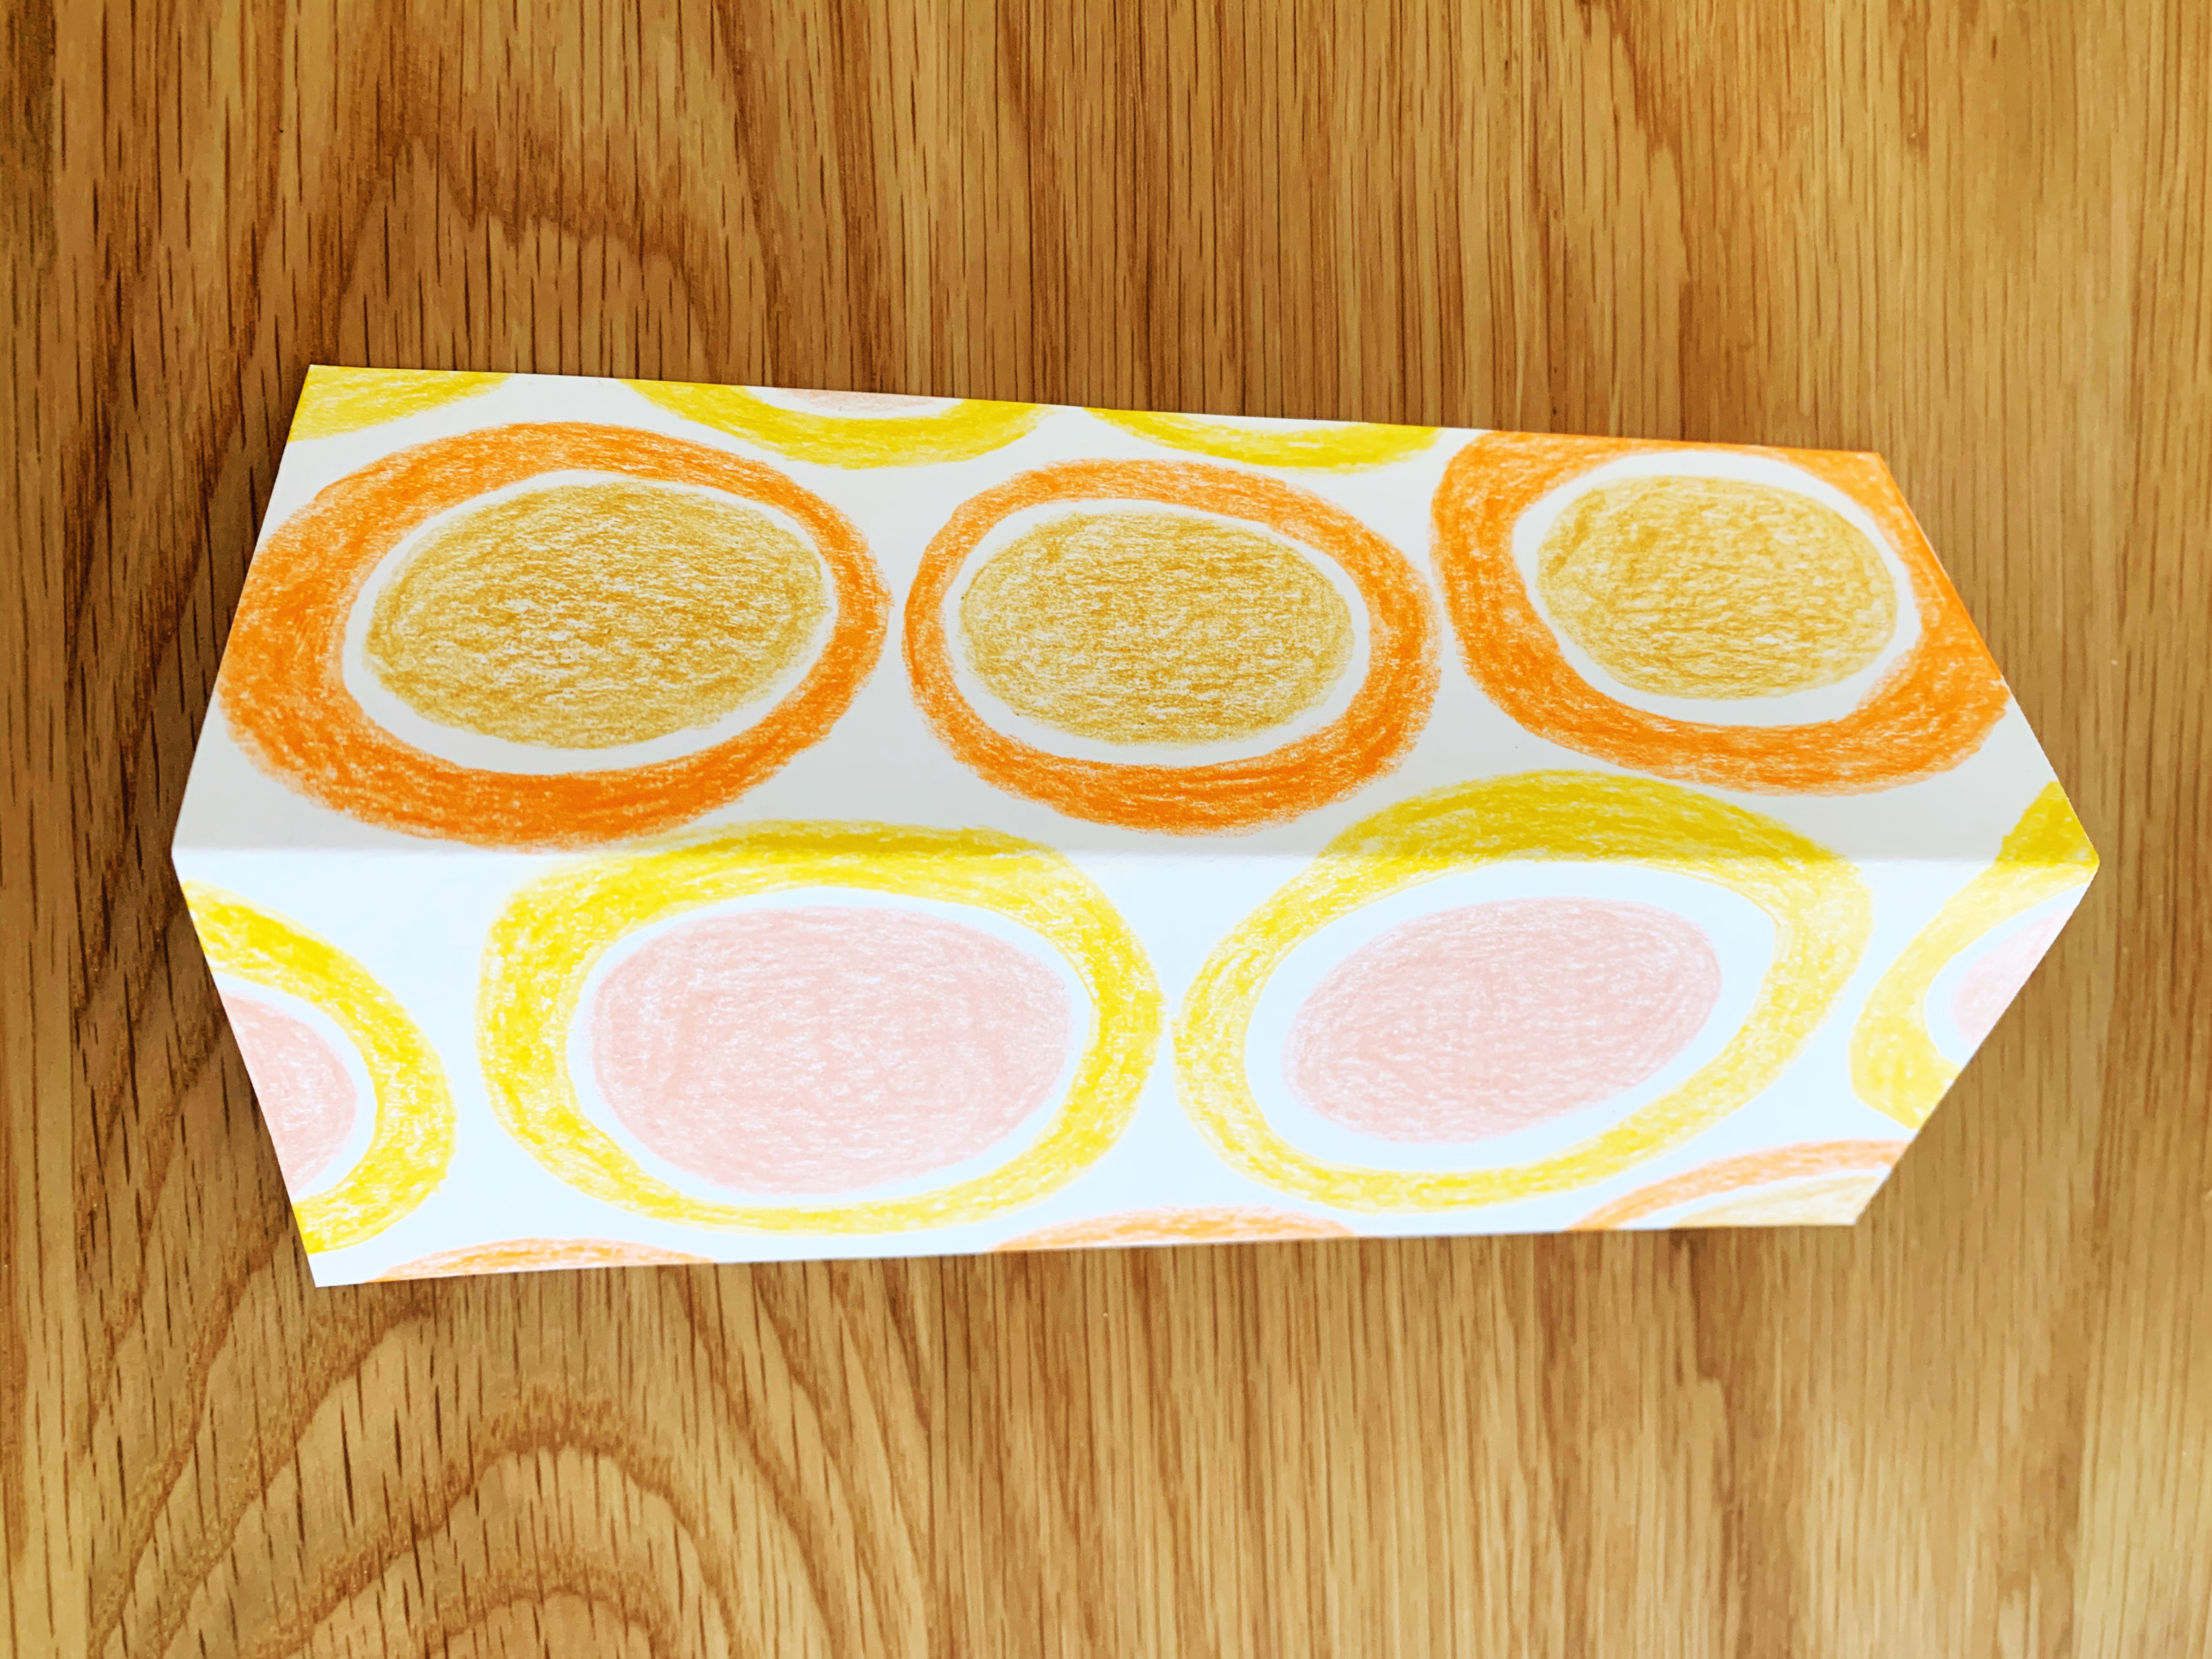
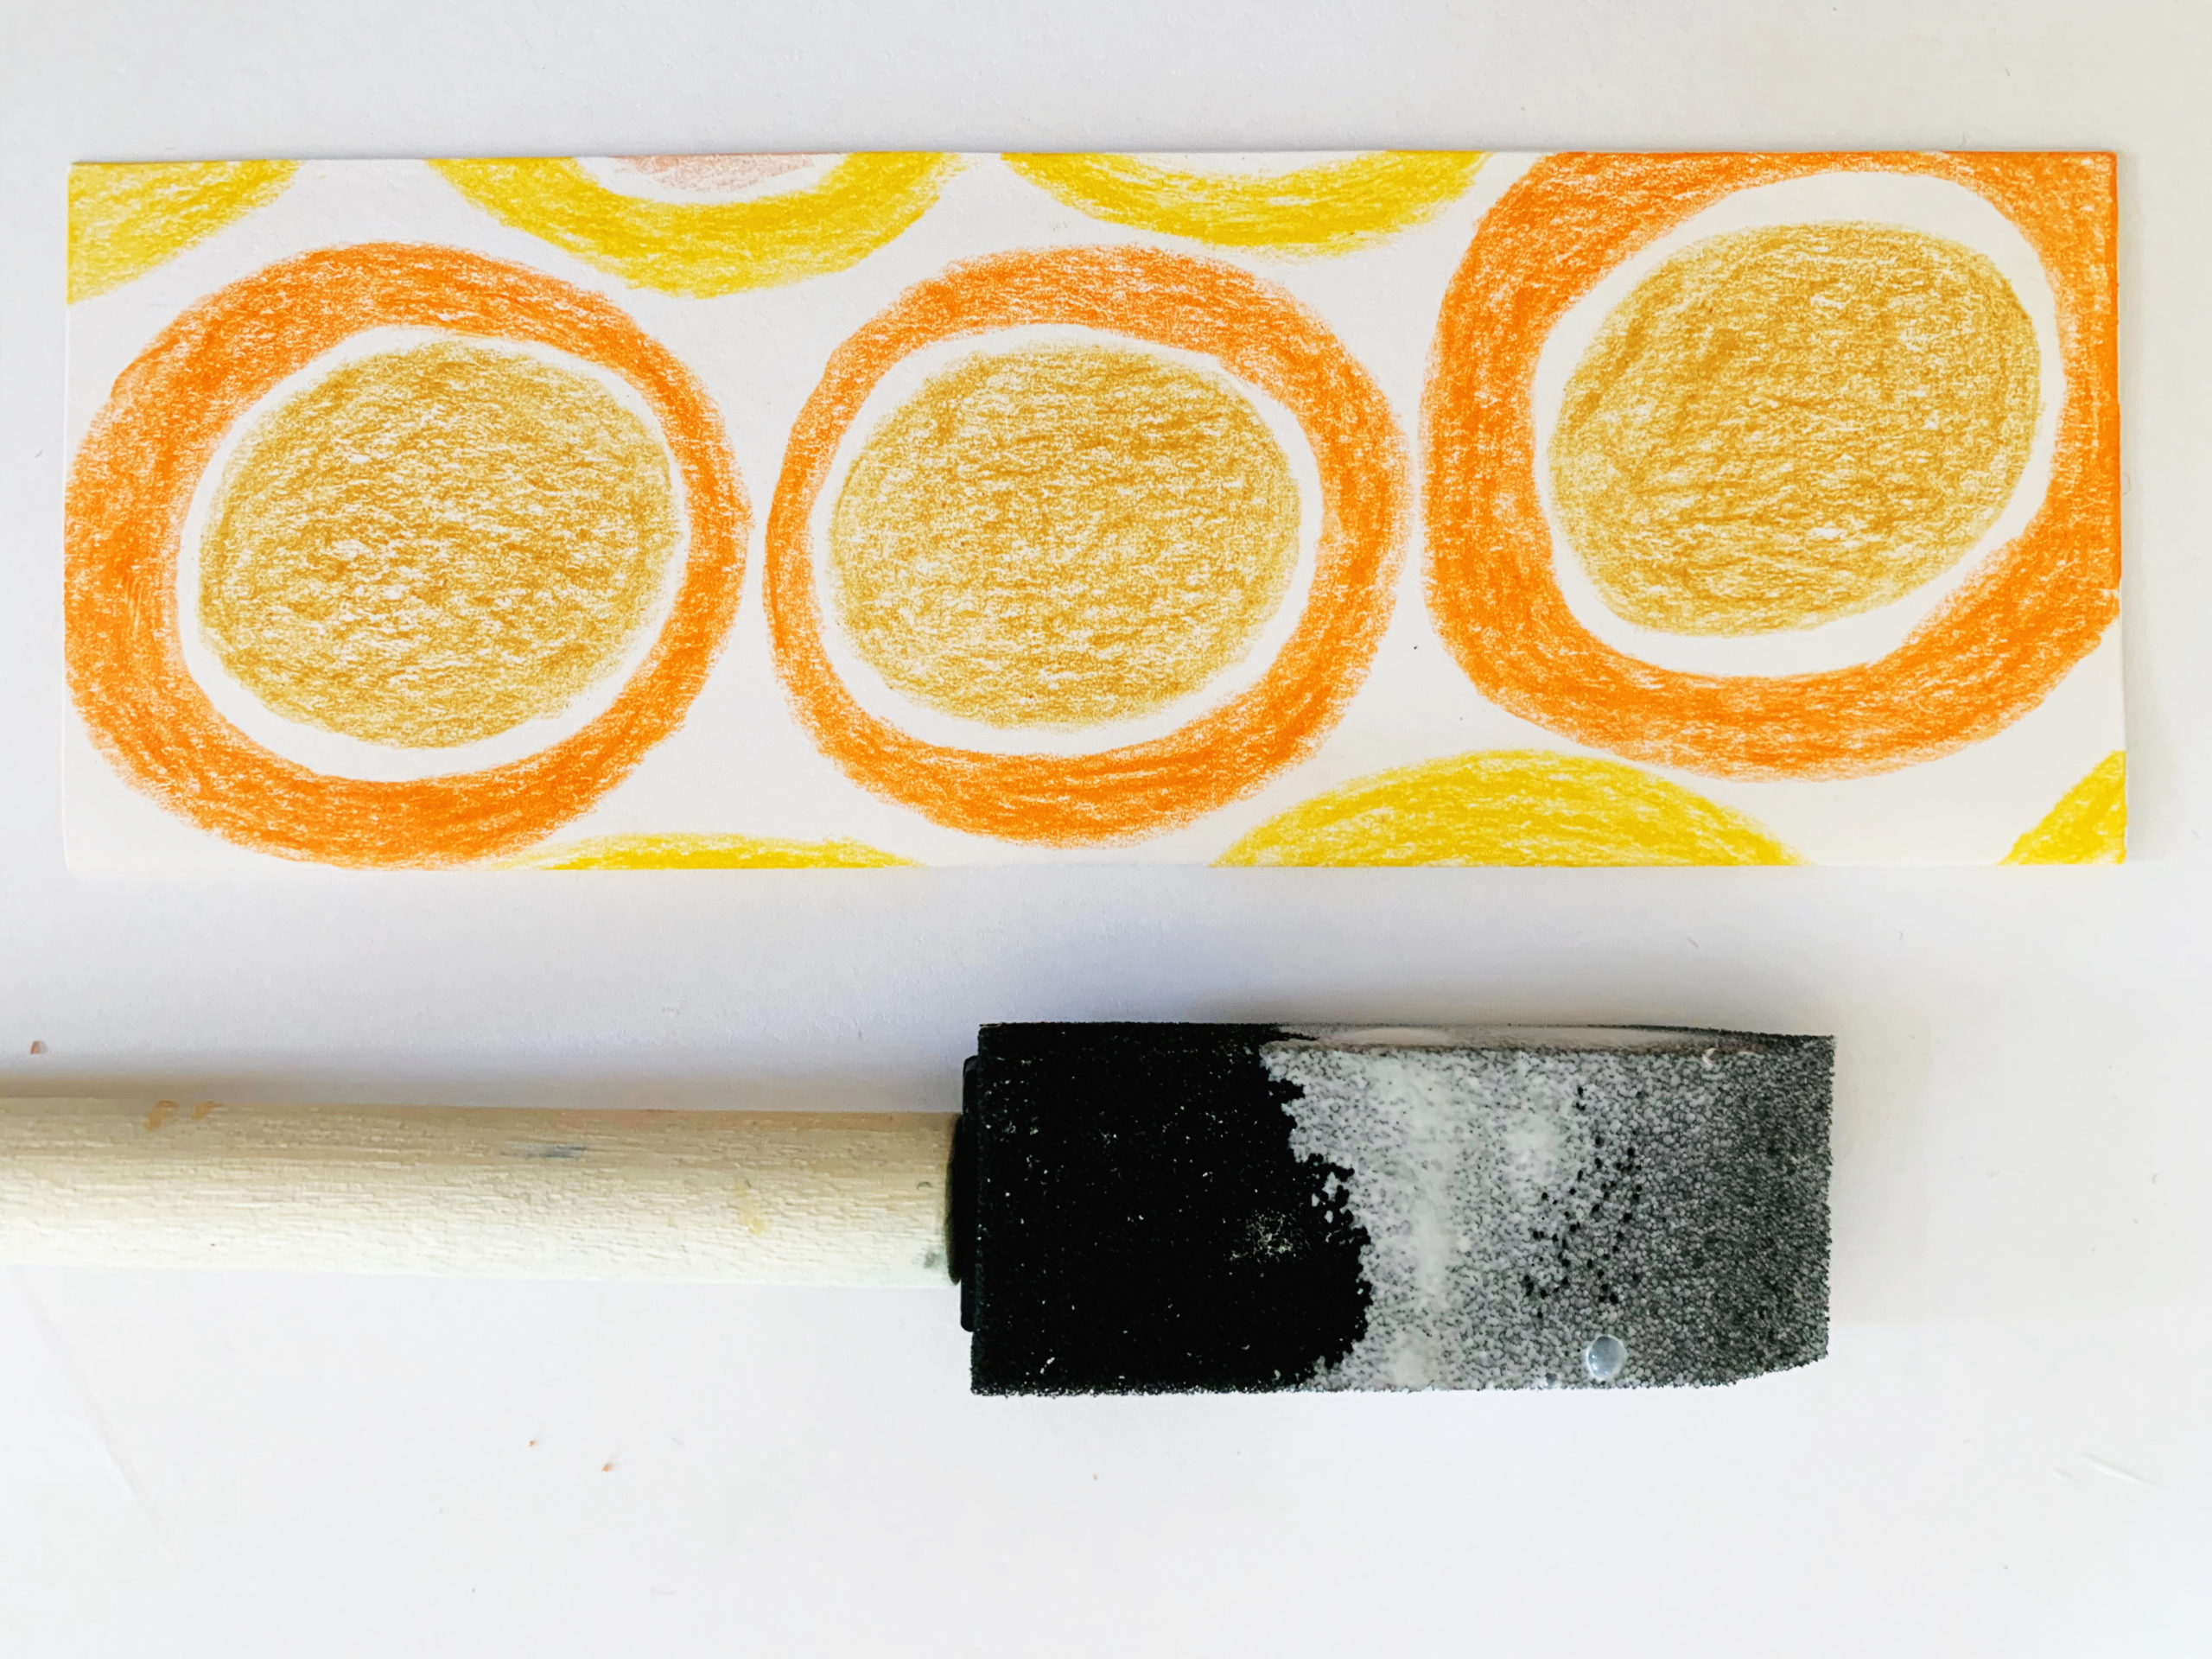
Step Seven: Apply a thin layer of Mod Podge (or glue) with a foam brush on the inside of the cardstock, then fold it together and let it dry.
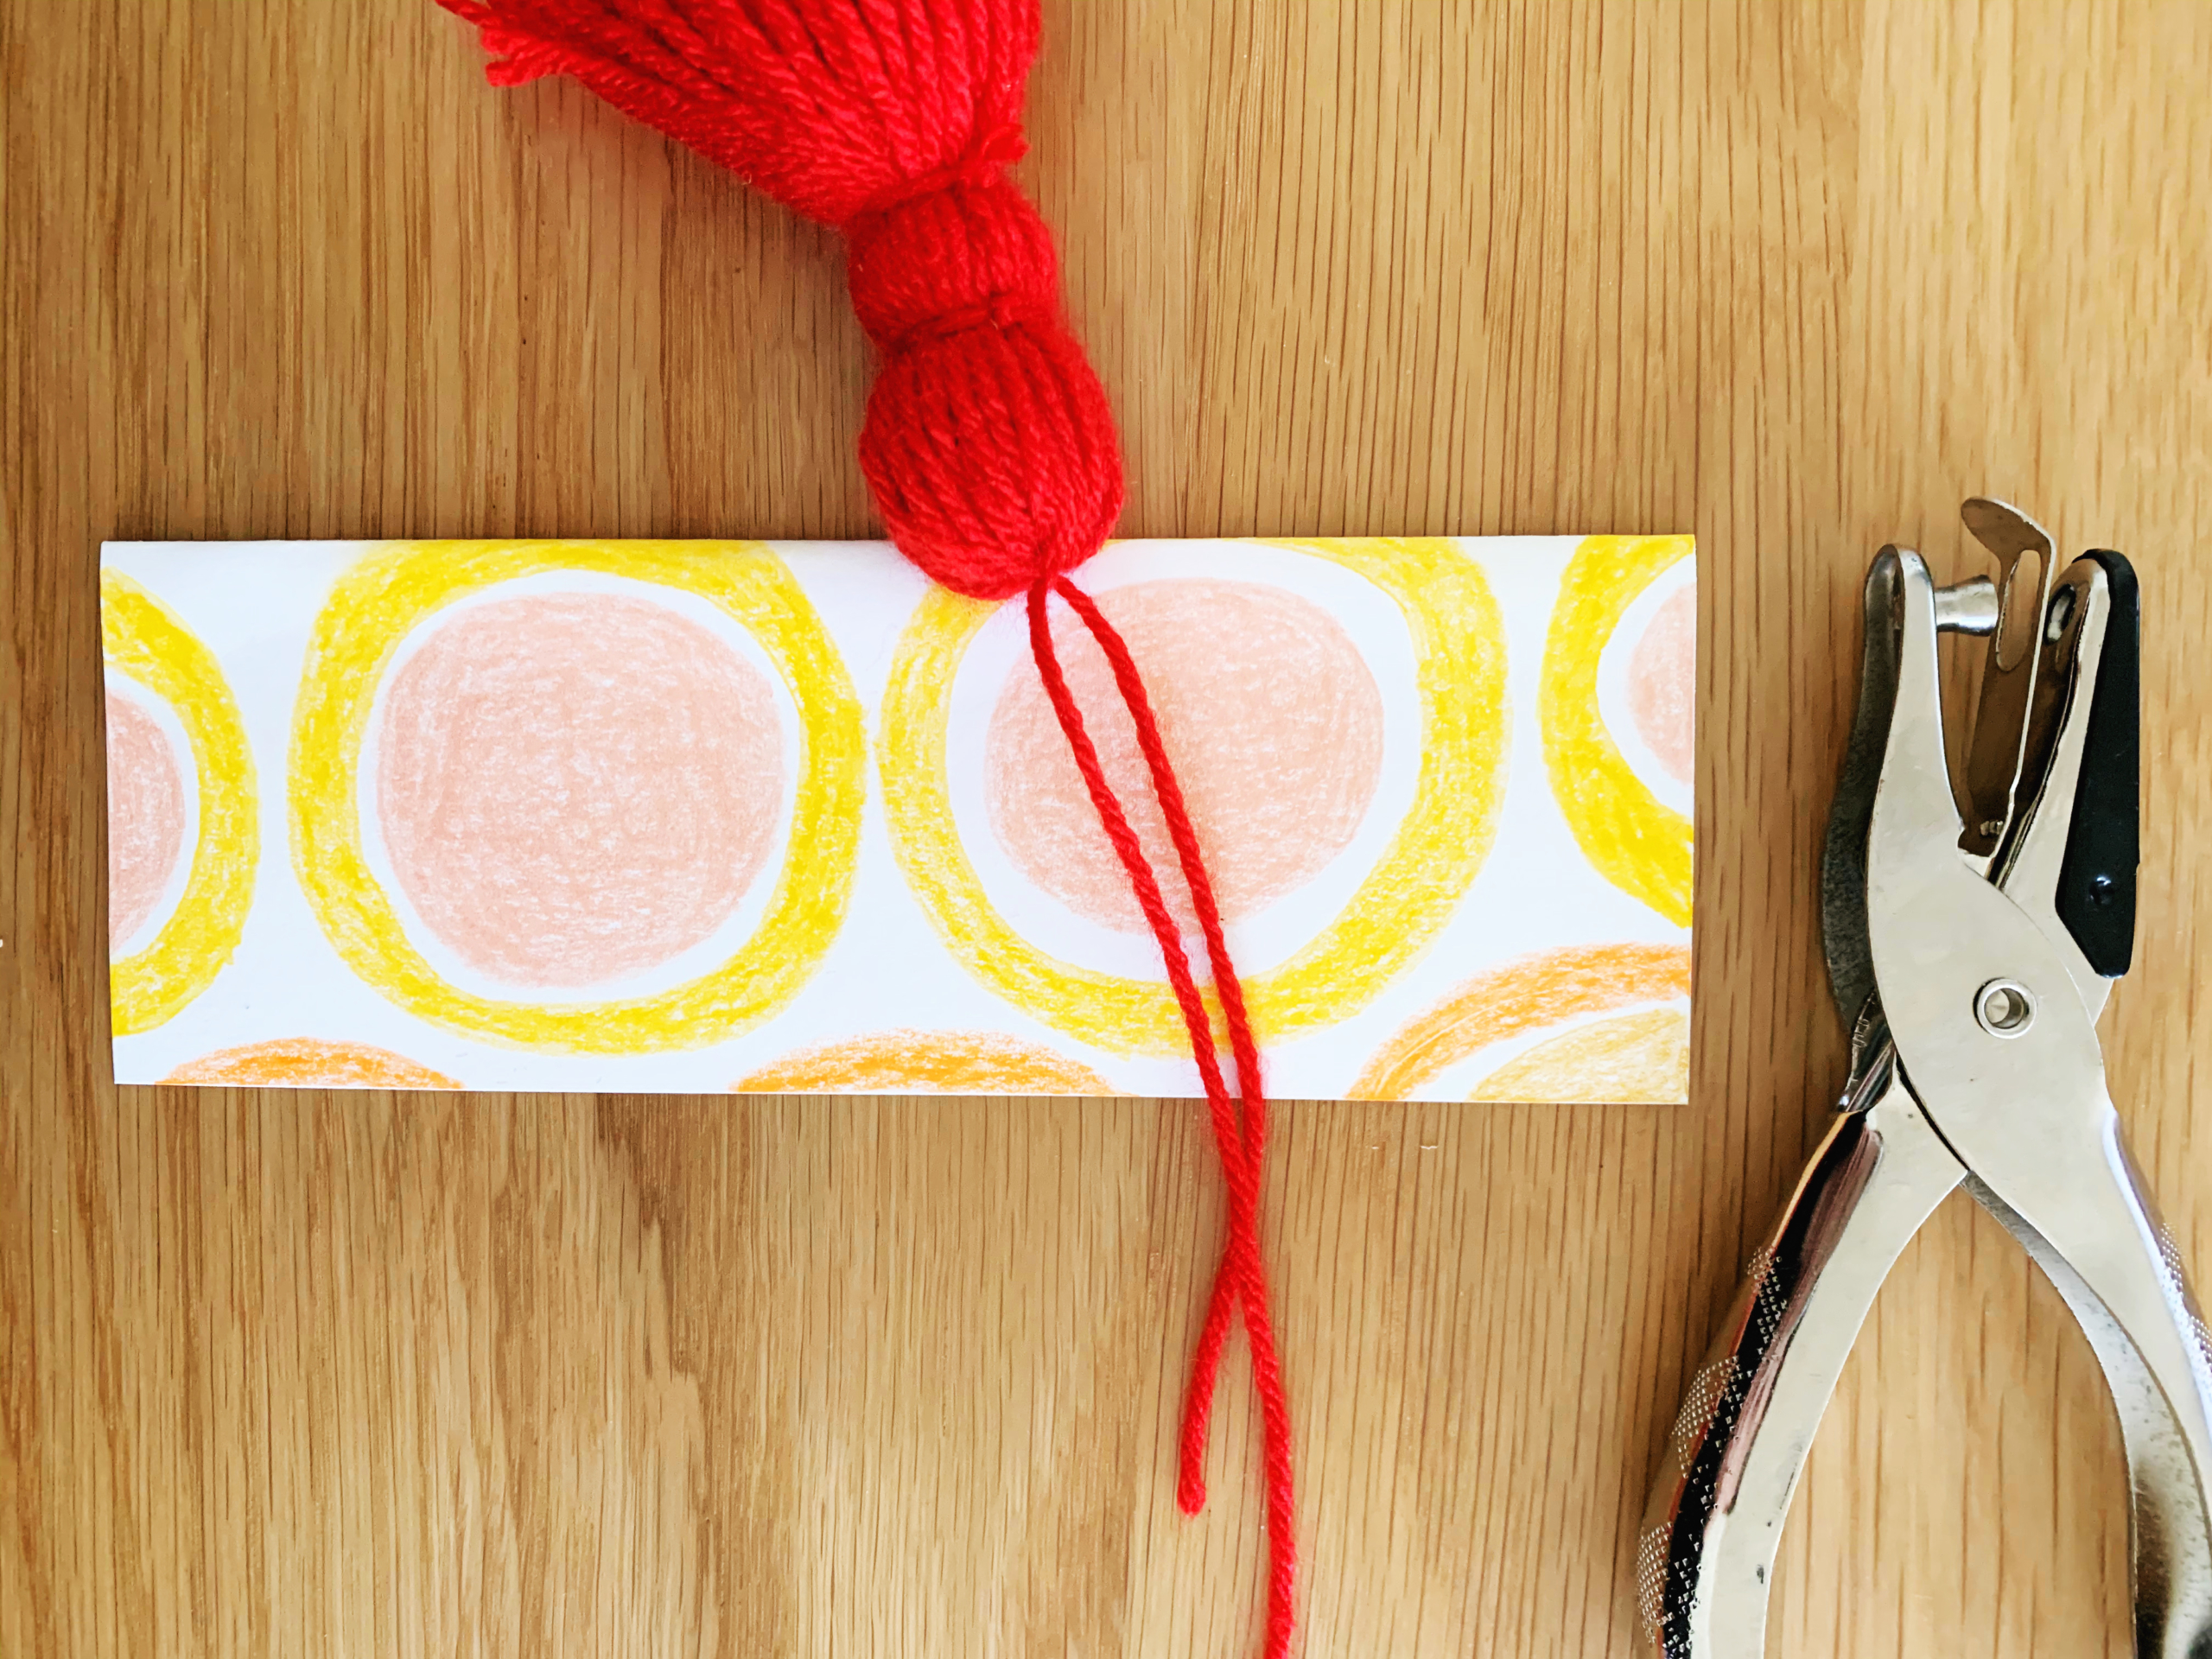
Step Seven: Once it is dry, punch a hole at the top of the bookmark. Double knot the tassel through the hole, cut off the excess yarn and you’re done!

I hope you enjoy making these tassel bookmarks as much as I did! Let us know what book you’ll be using your new bookmark with next. We’d love to know what’s on your reading list!