This accordion book craft is a great one to do with kids. Not only is it easy to make a pretty little book, it’s also a fun way to encourage children to write—they’ll be eager to fill these cute pages. Plus they can wrap the covers with an original drawing or painting, a great way to give kid creations a second life.
Younger kids will just need a little help with the assembly, but then they can let their imaginations take over as they illustrate the cover and put the pages to use. For a sweet home-literacy activity, invite children to write their own stories inside their DIY accordion book. Older kids can create a comic strip or illustrated story. For younger kids, consider helping them make an alphabet book with a couple of letters per page, plus drawings of items whose names start with those letters. Once their masterpieces are ready, they can stand them up and put them on display!
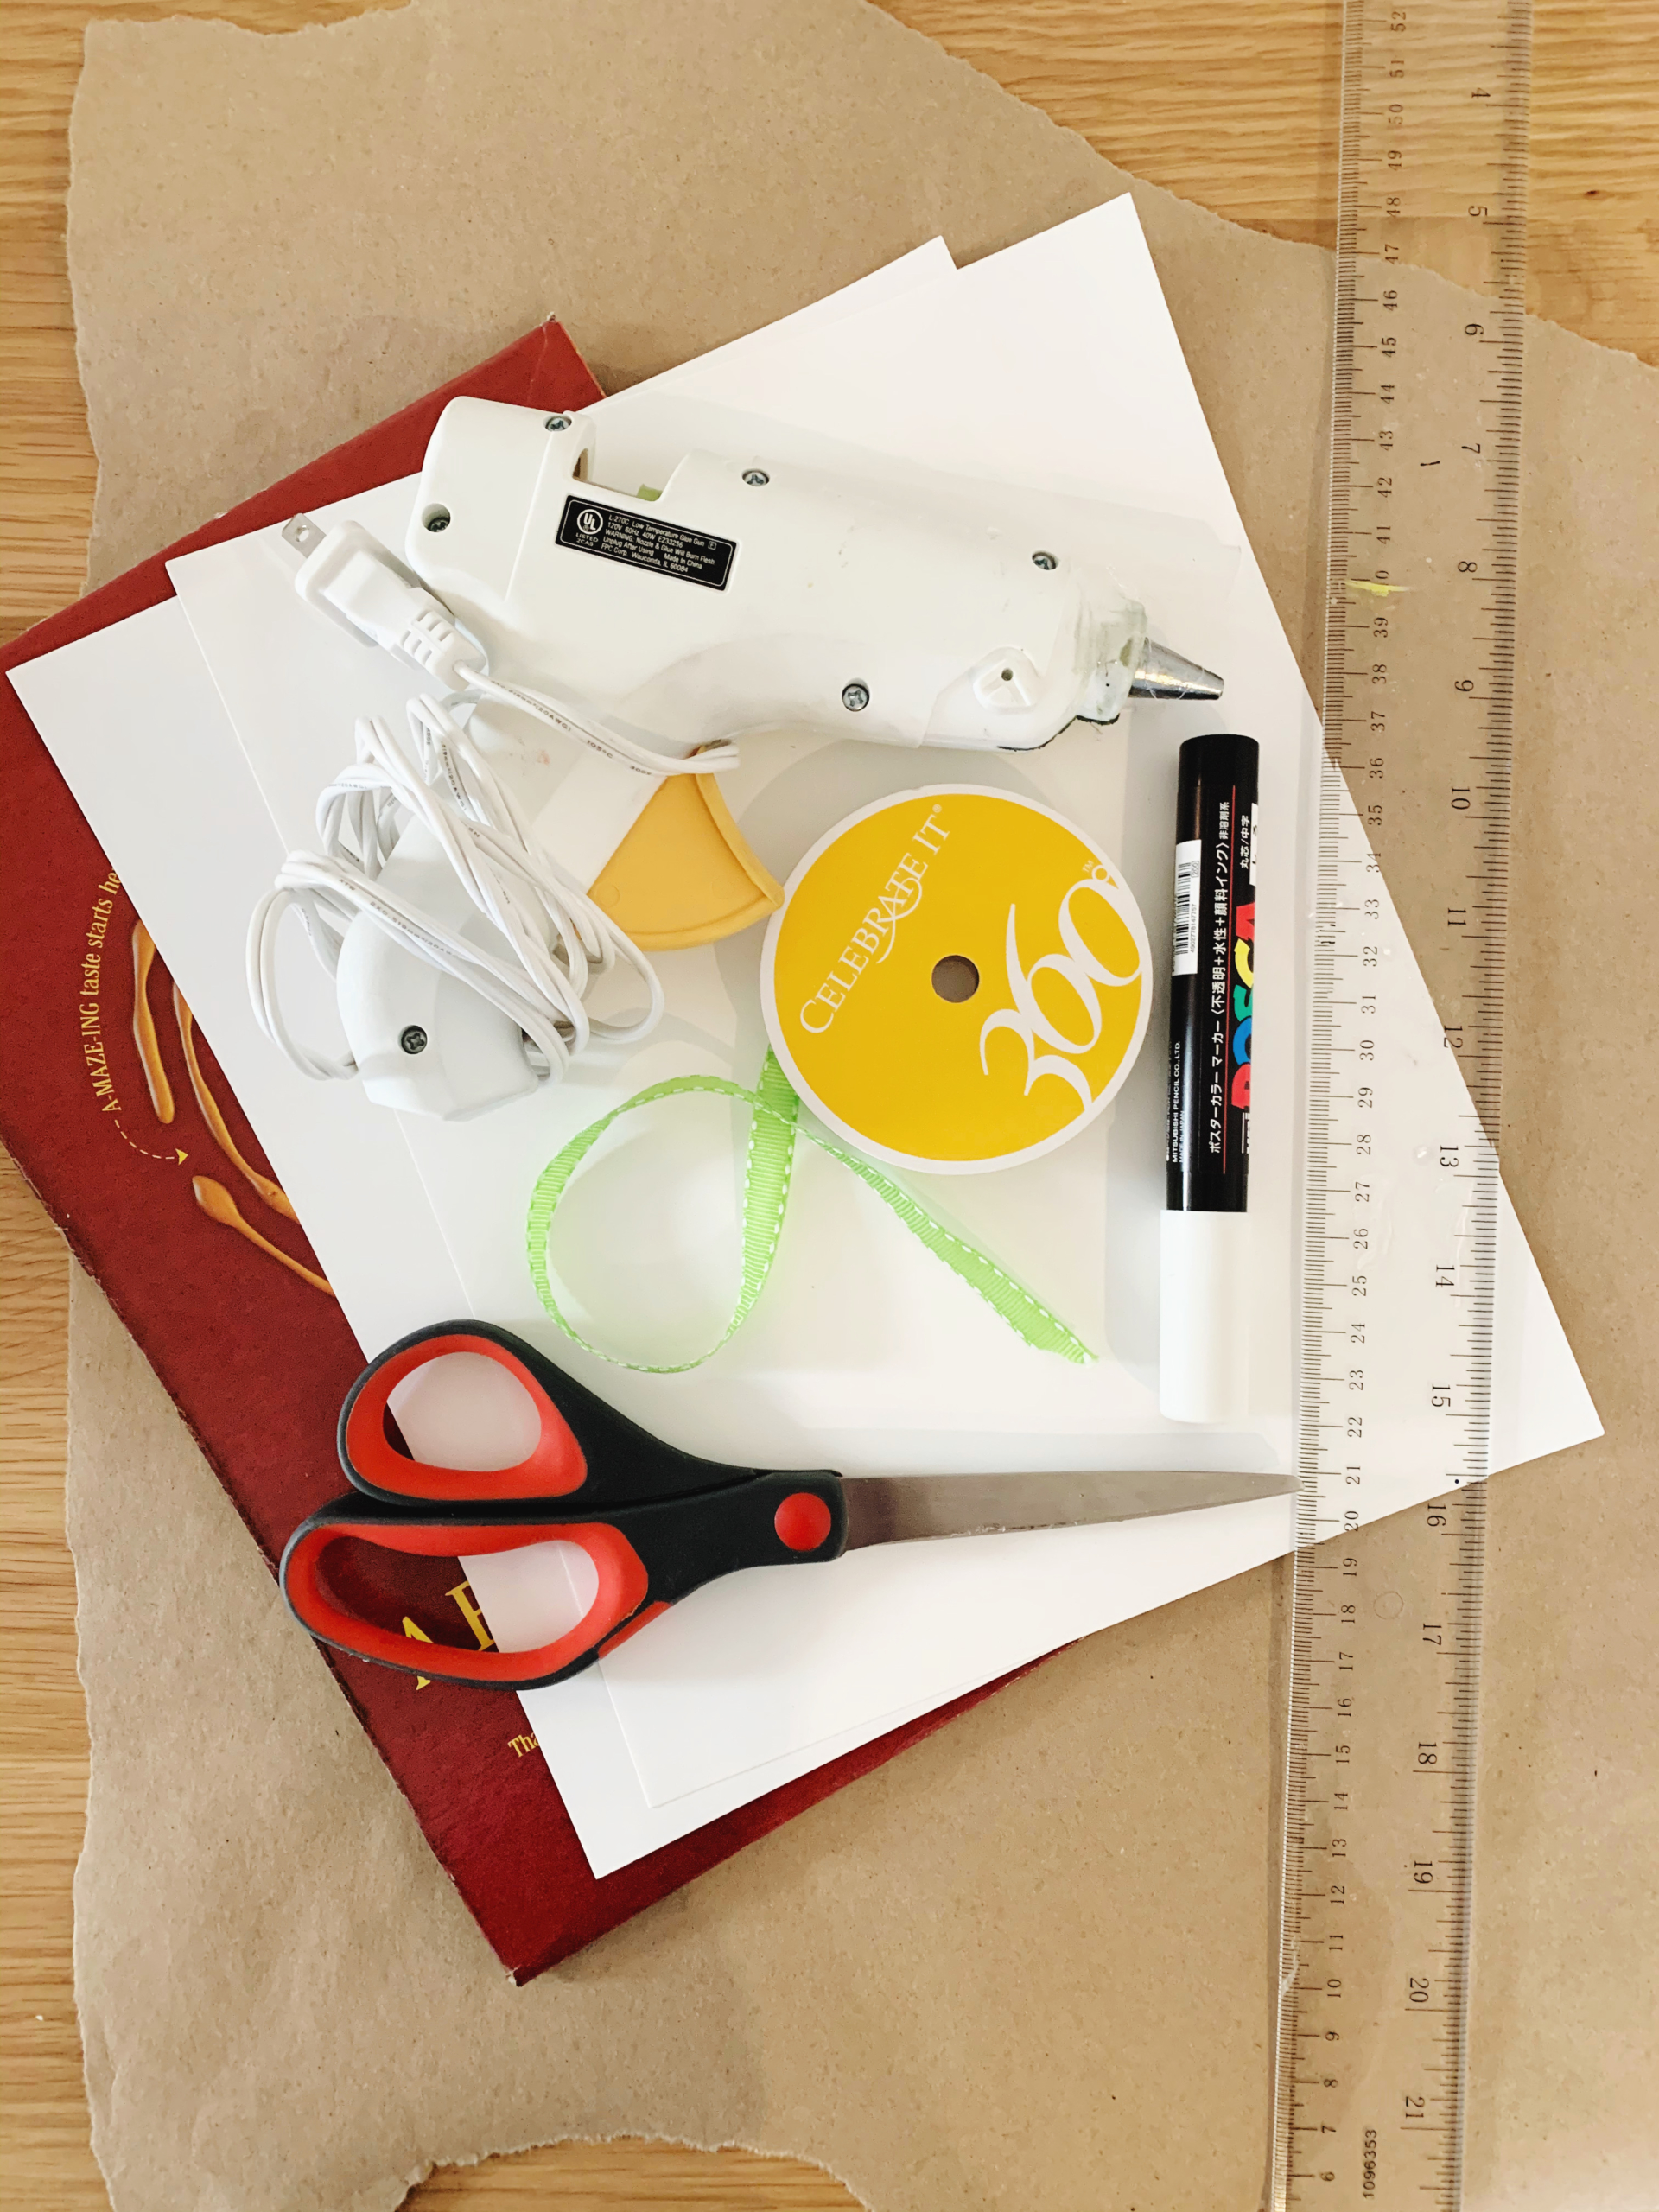
Materials:
- 2 pieces of 8.5” x 11” cardstock (or heavier-weight paper)
- Scissors
- Ruler
- Glue (hot glue gun, white glue, or glue dots could work)
- Cardboard big enough to cut out two squares, 3” x 4.5” each (cereal boxes work great!)
- Scrapbook paper, construction paper, or original artwork to cover the book
Cost: If you have a few craft staples around, this should not cost you anything!
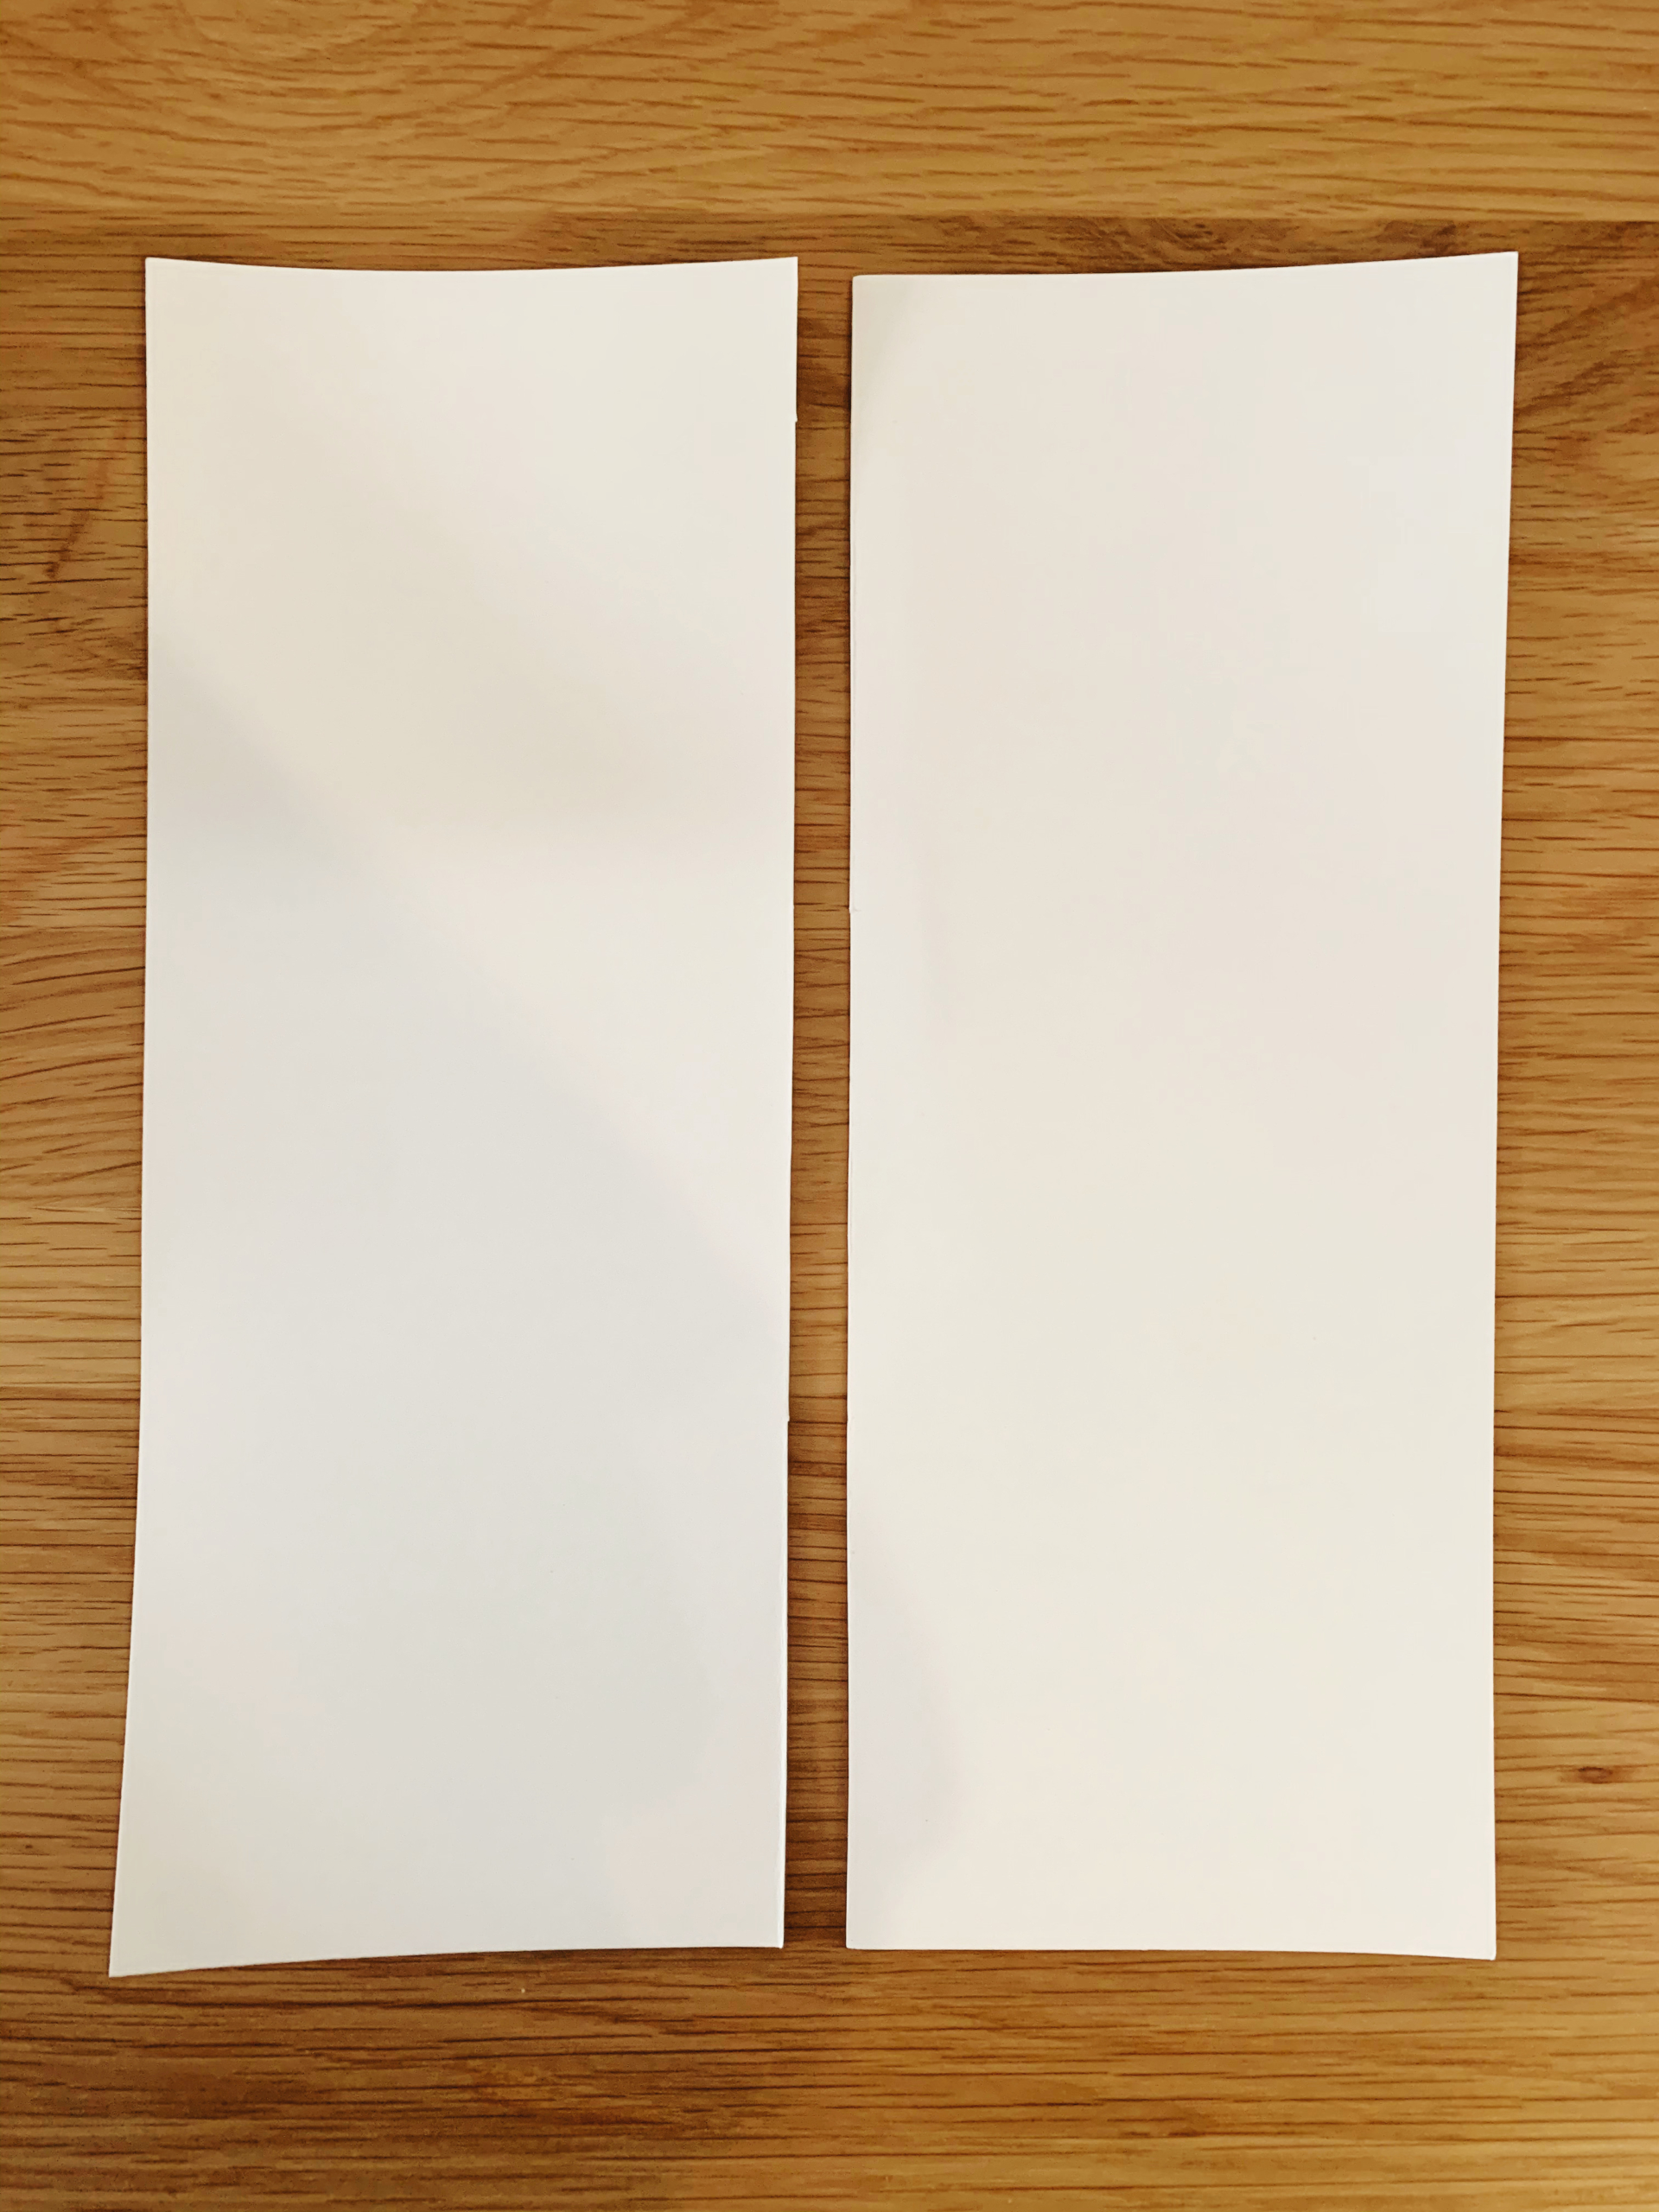
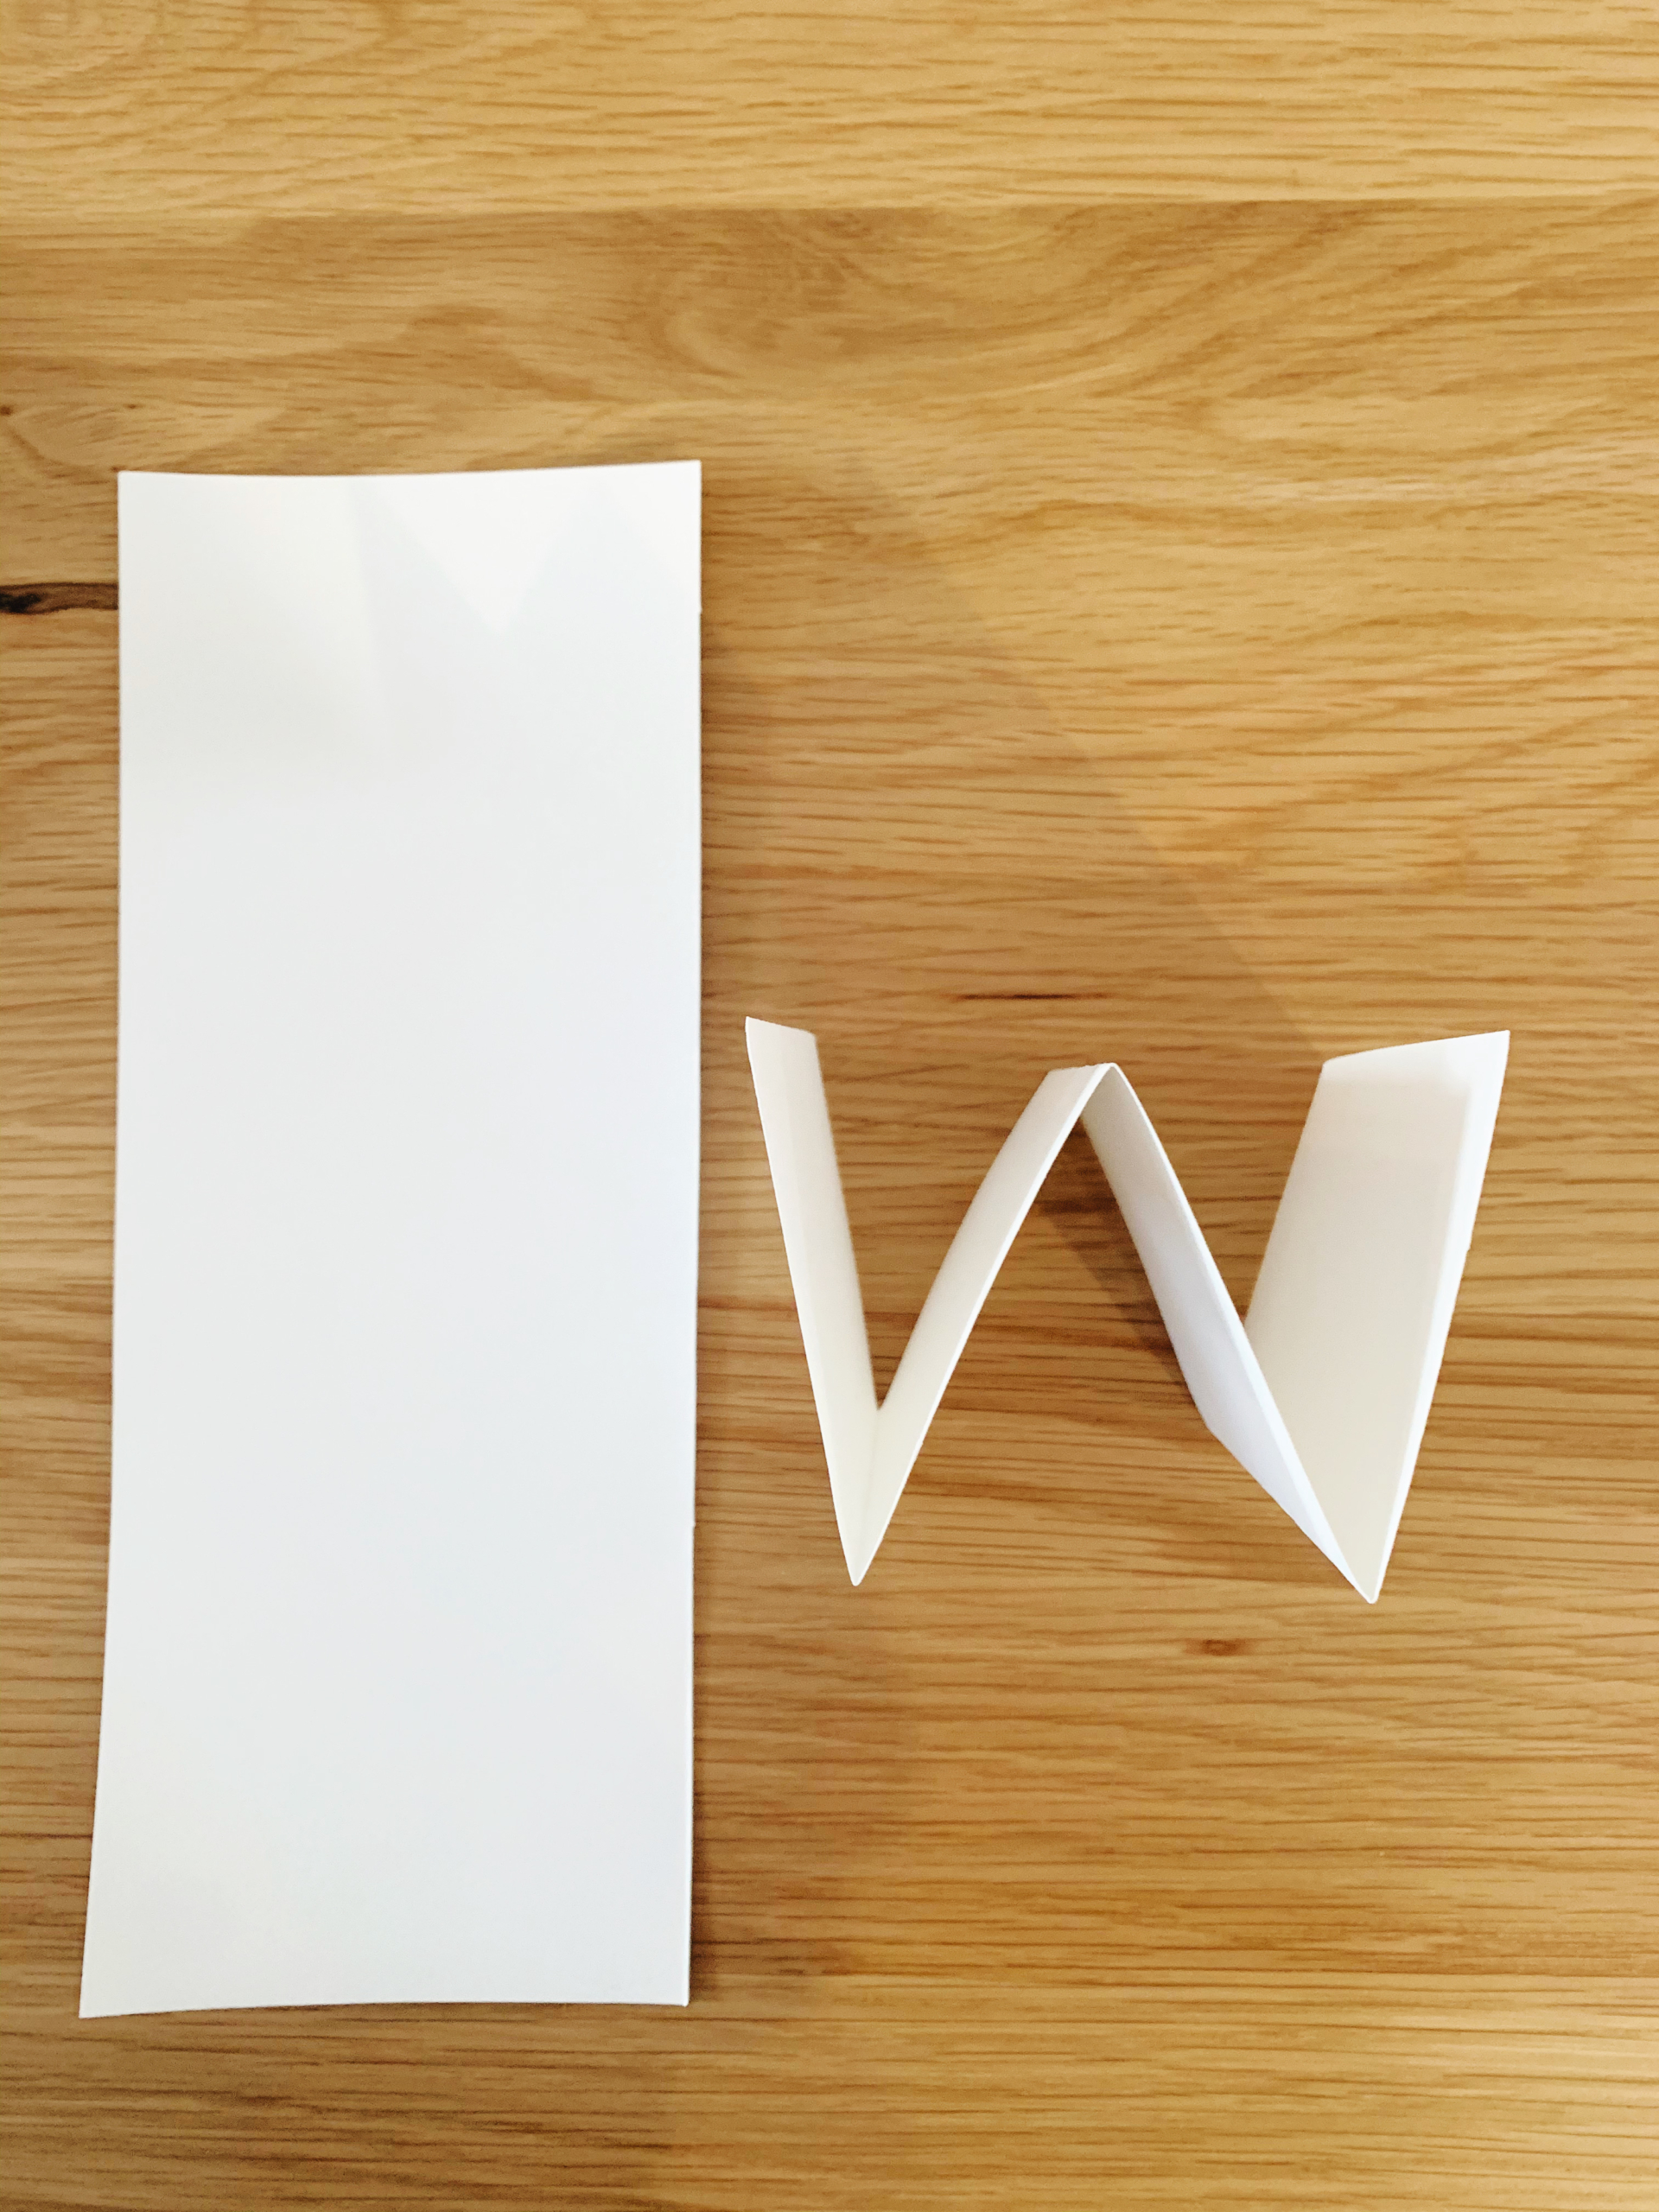
Step 1: To start, take one of your 8.5” x 11” pieces of cardstock and crease it in half lengthwise, then cut down the crease to make two long, skinny rectangles.
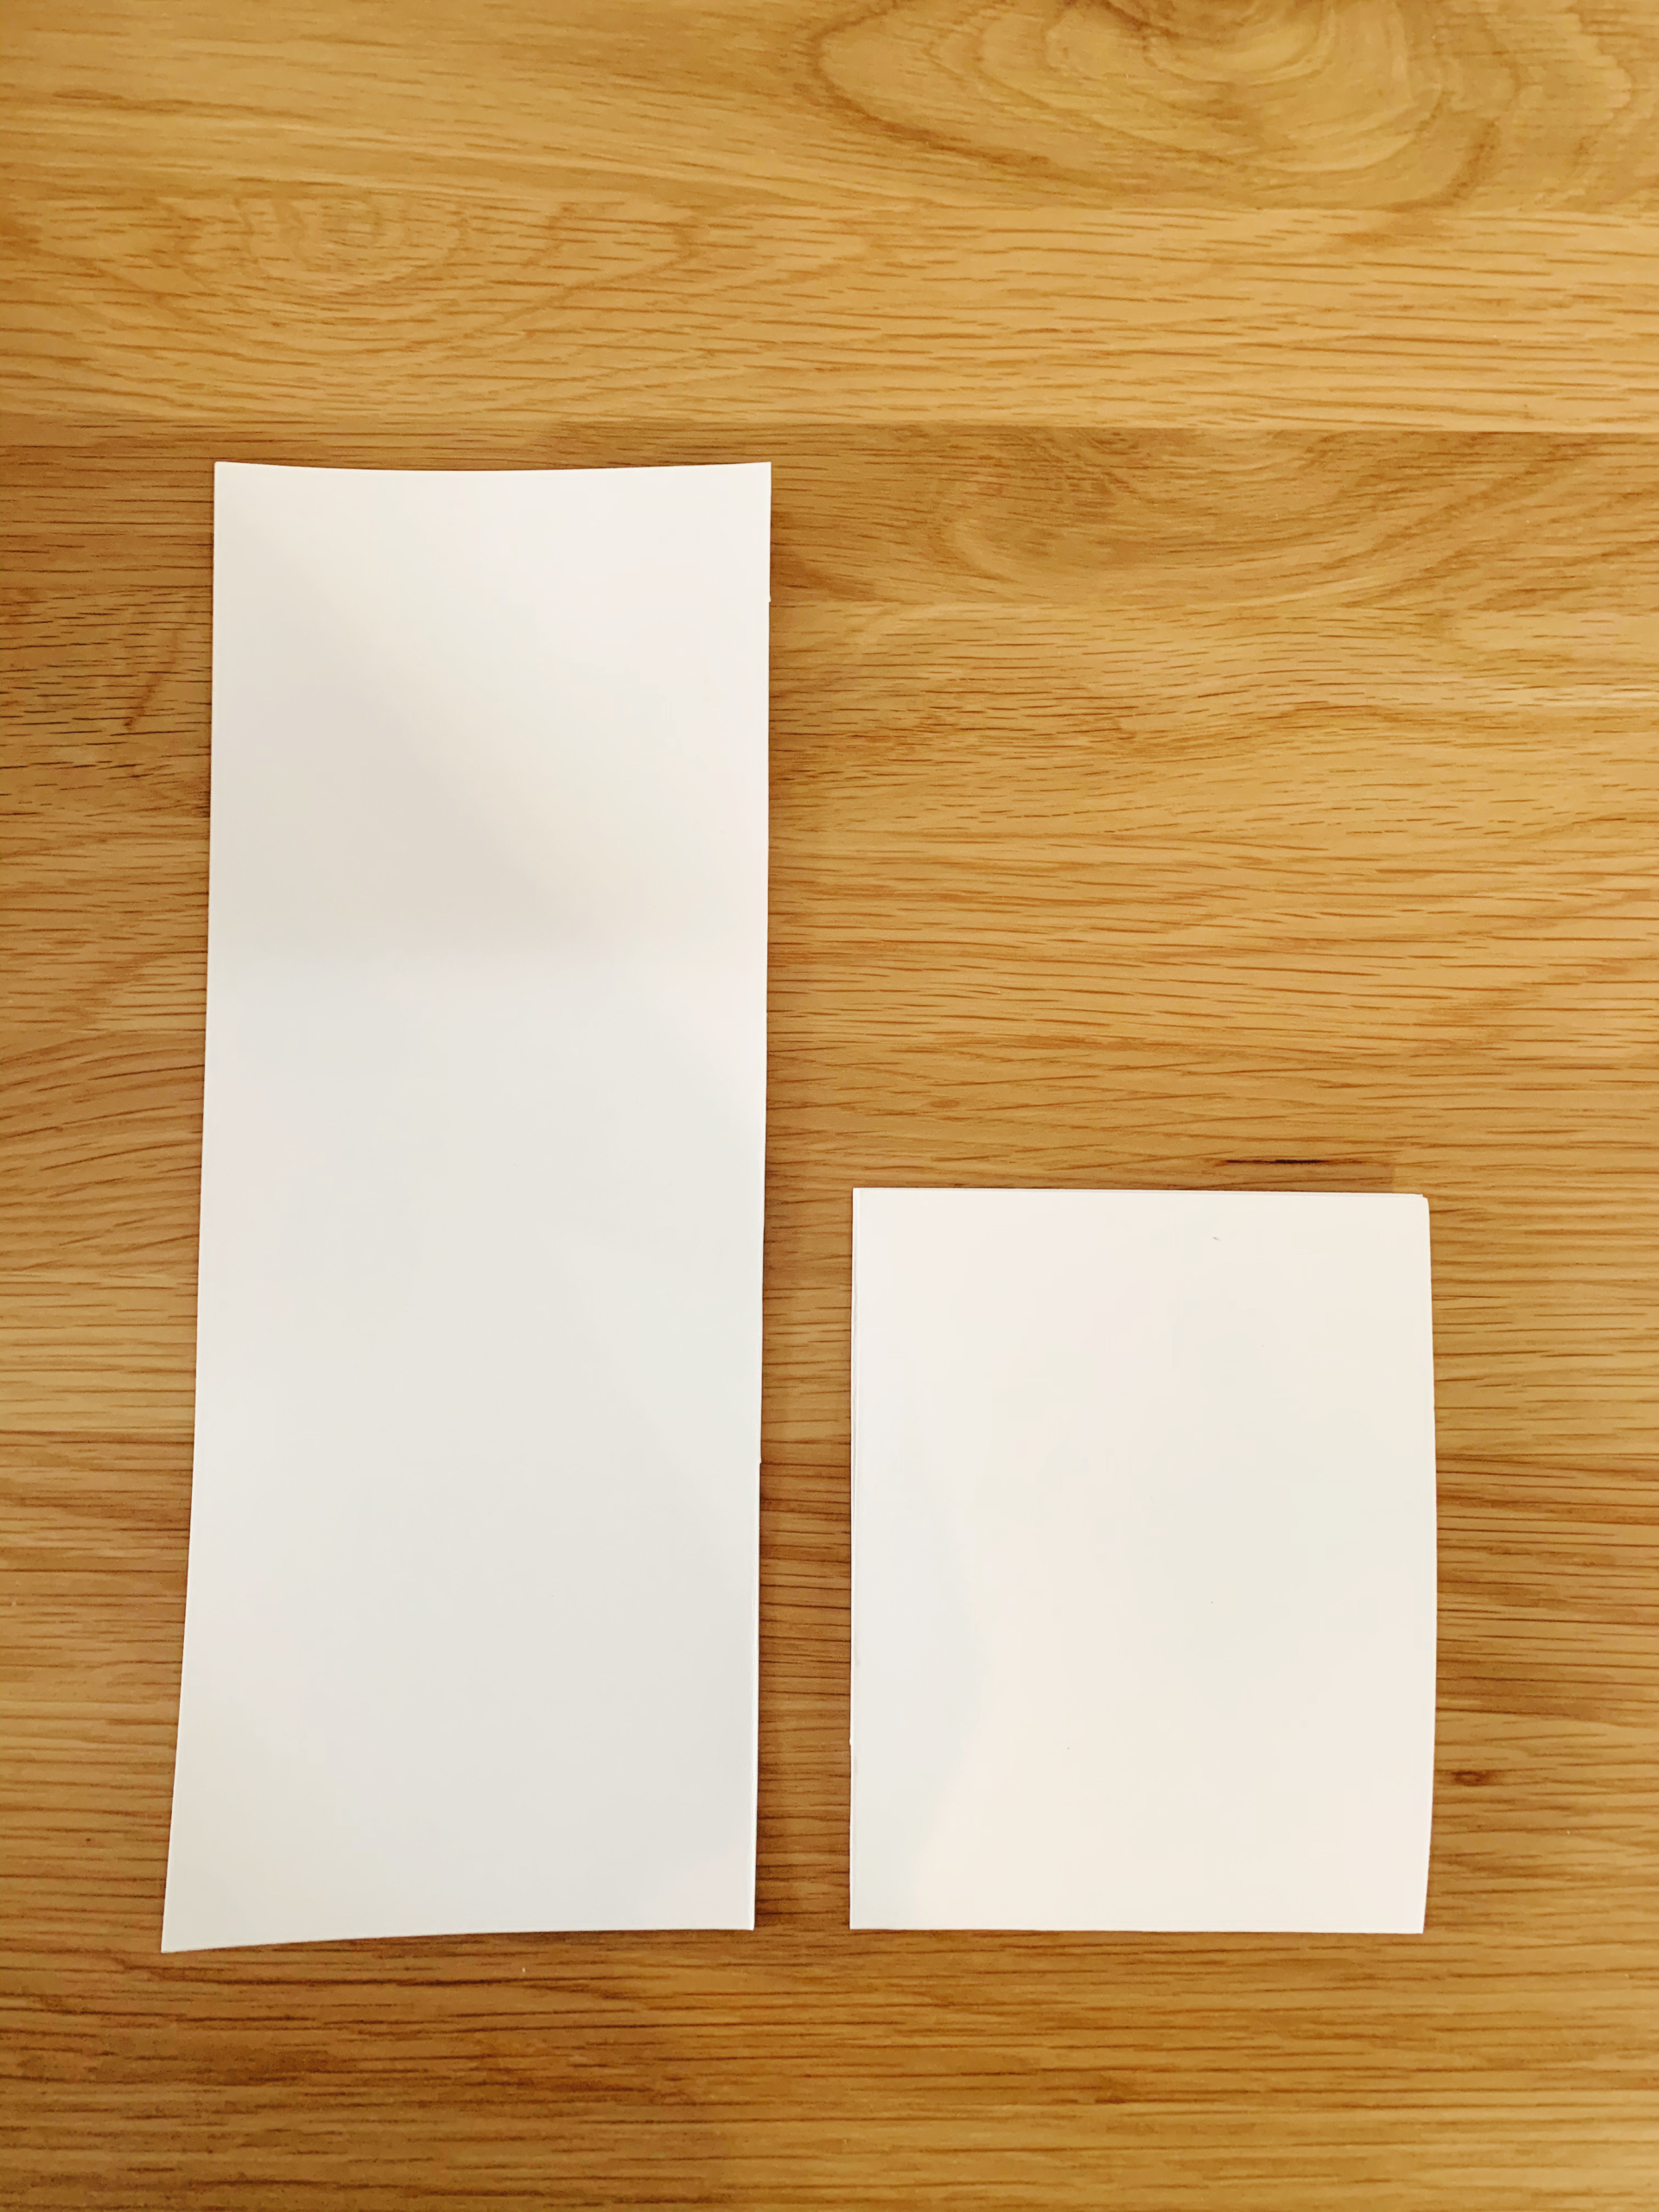
Step 2: Now fold each of your two pieces of cardstock in half widthwise.
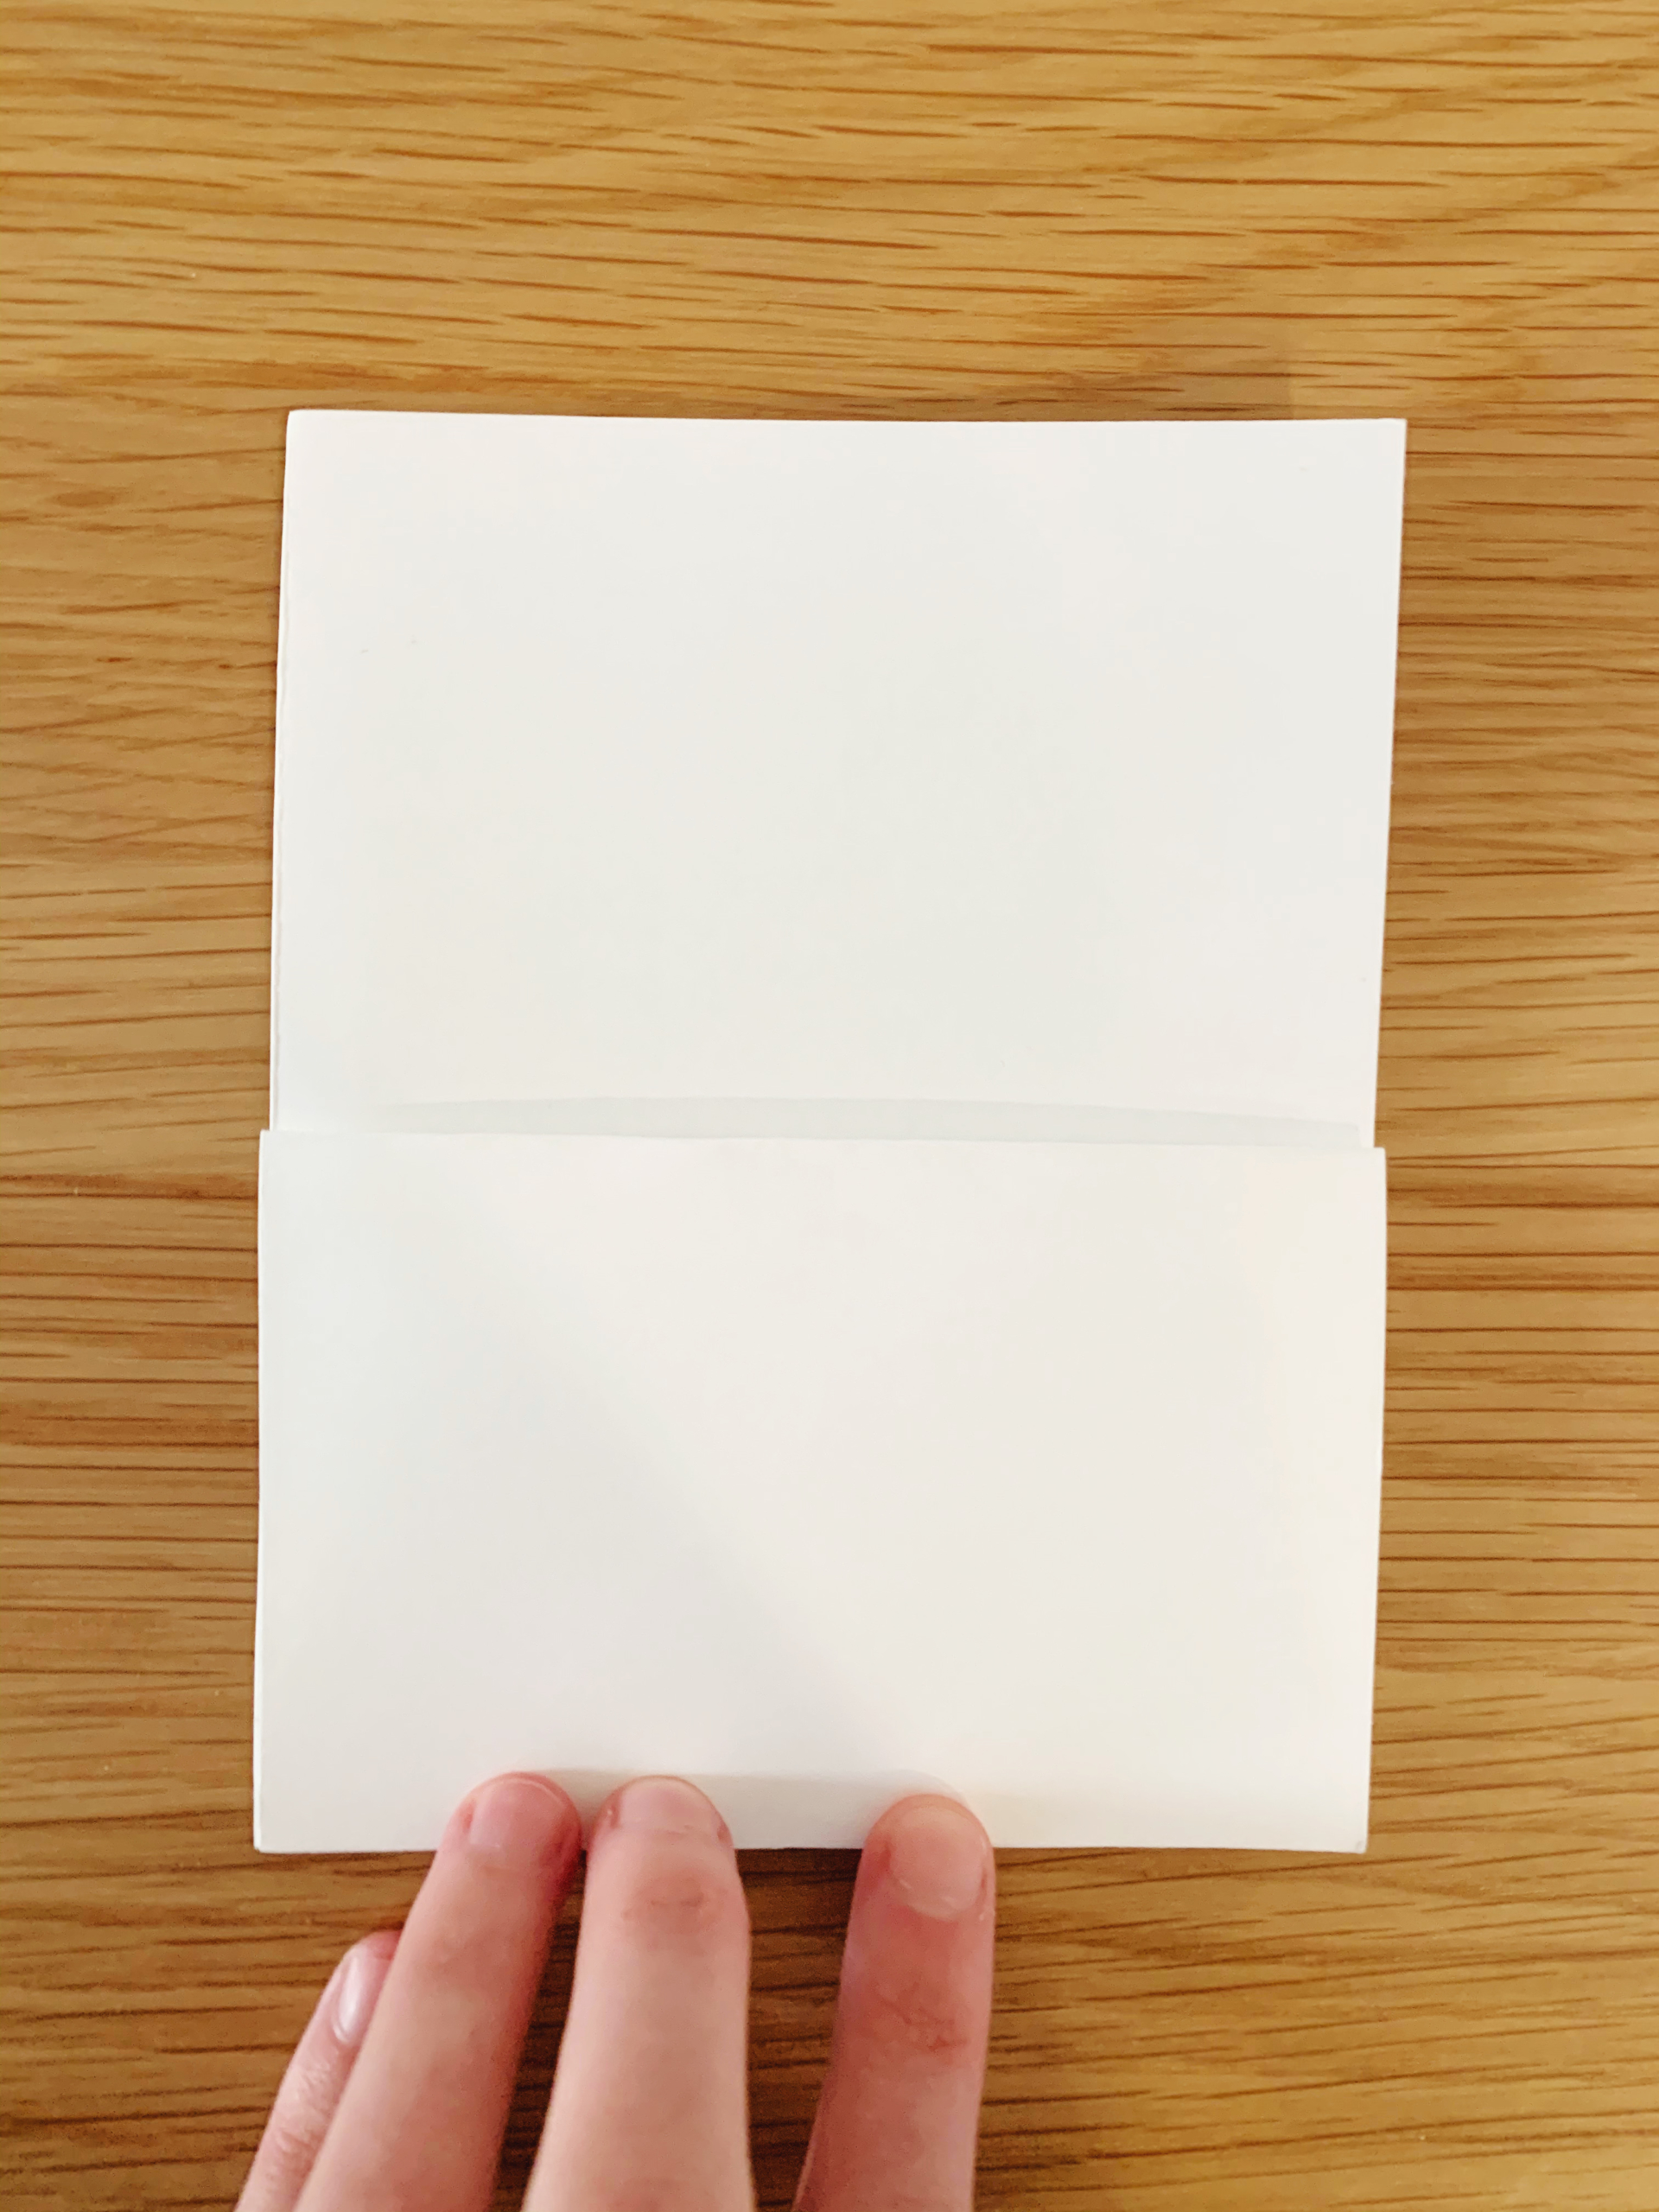
Step 3: Next, fold just the top flap in half again, aligning the bottom edge to the top, and crease it.
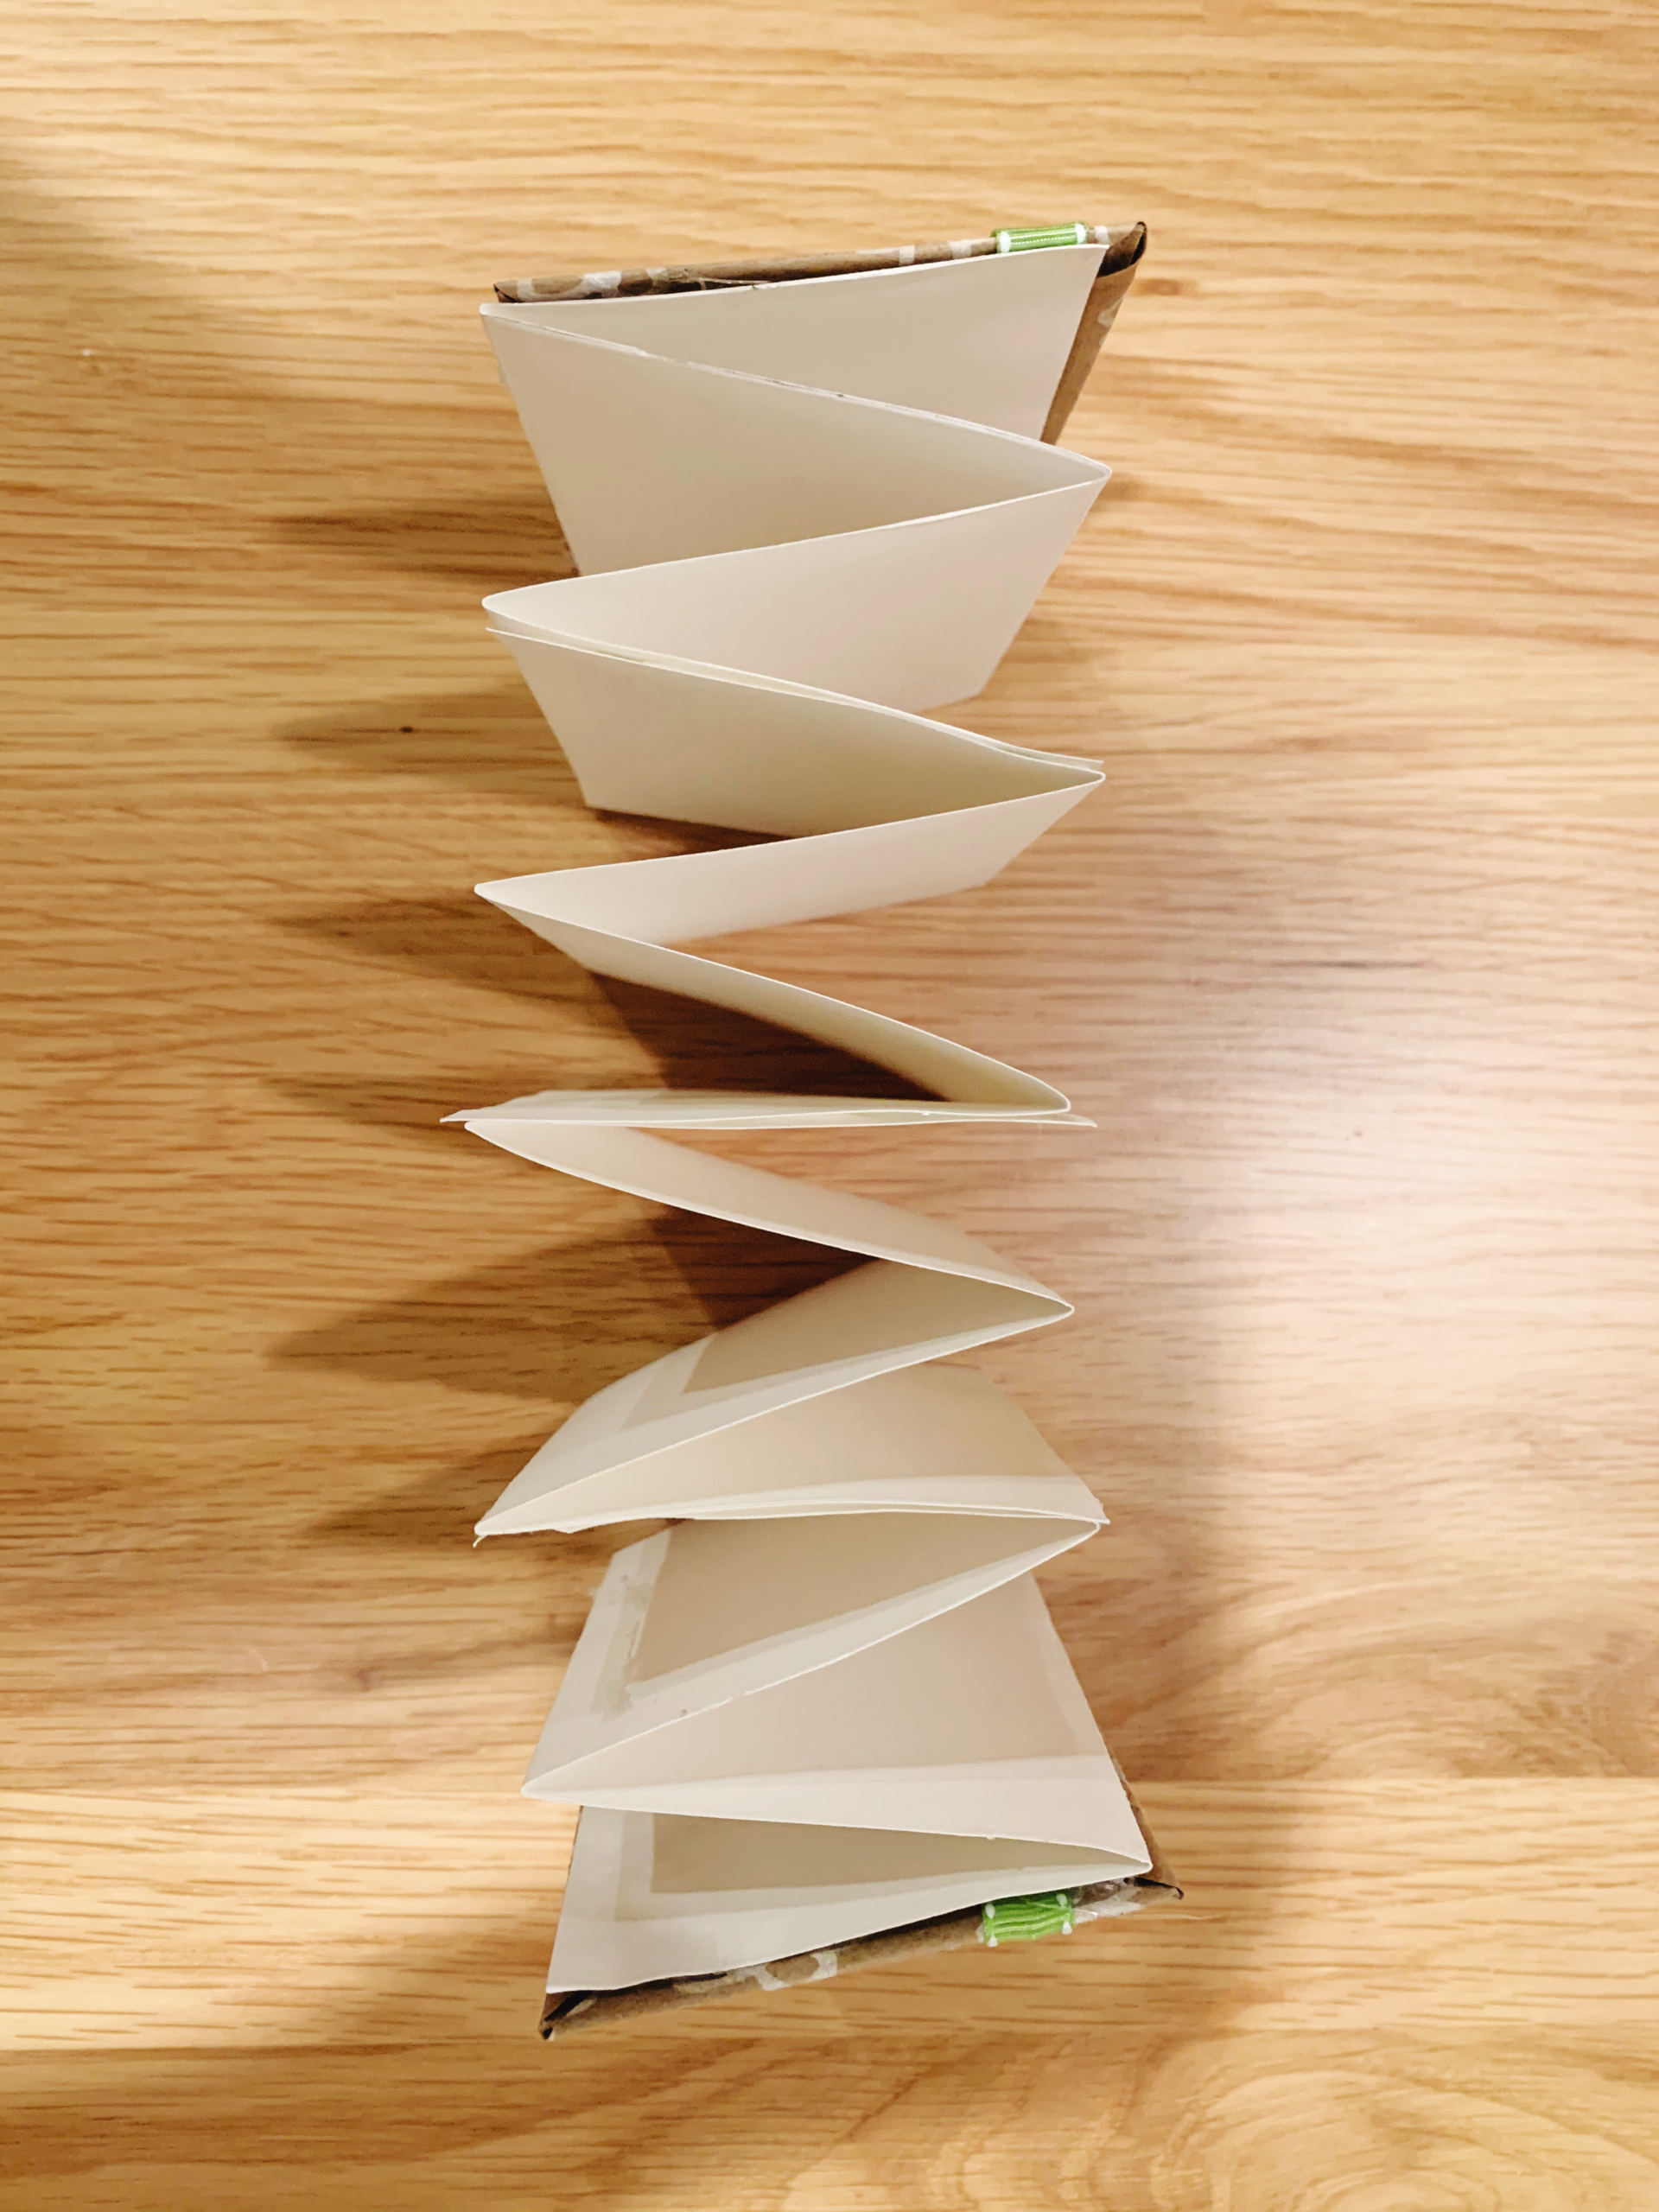
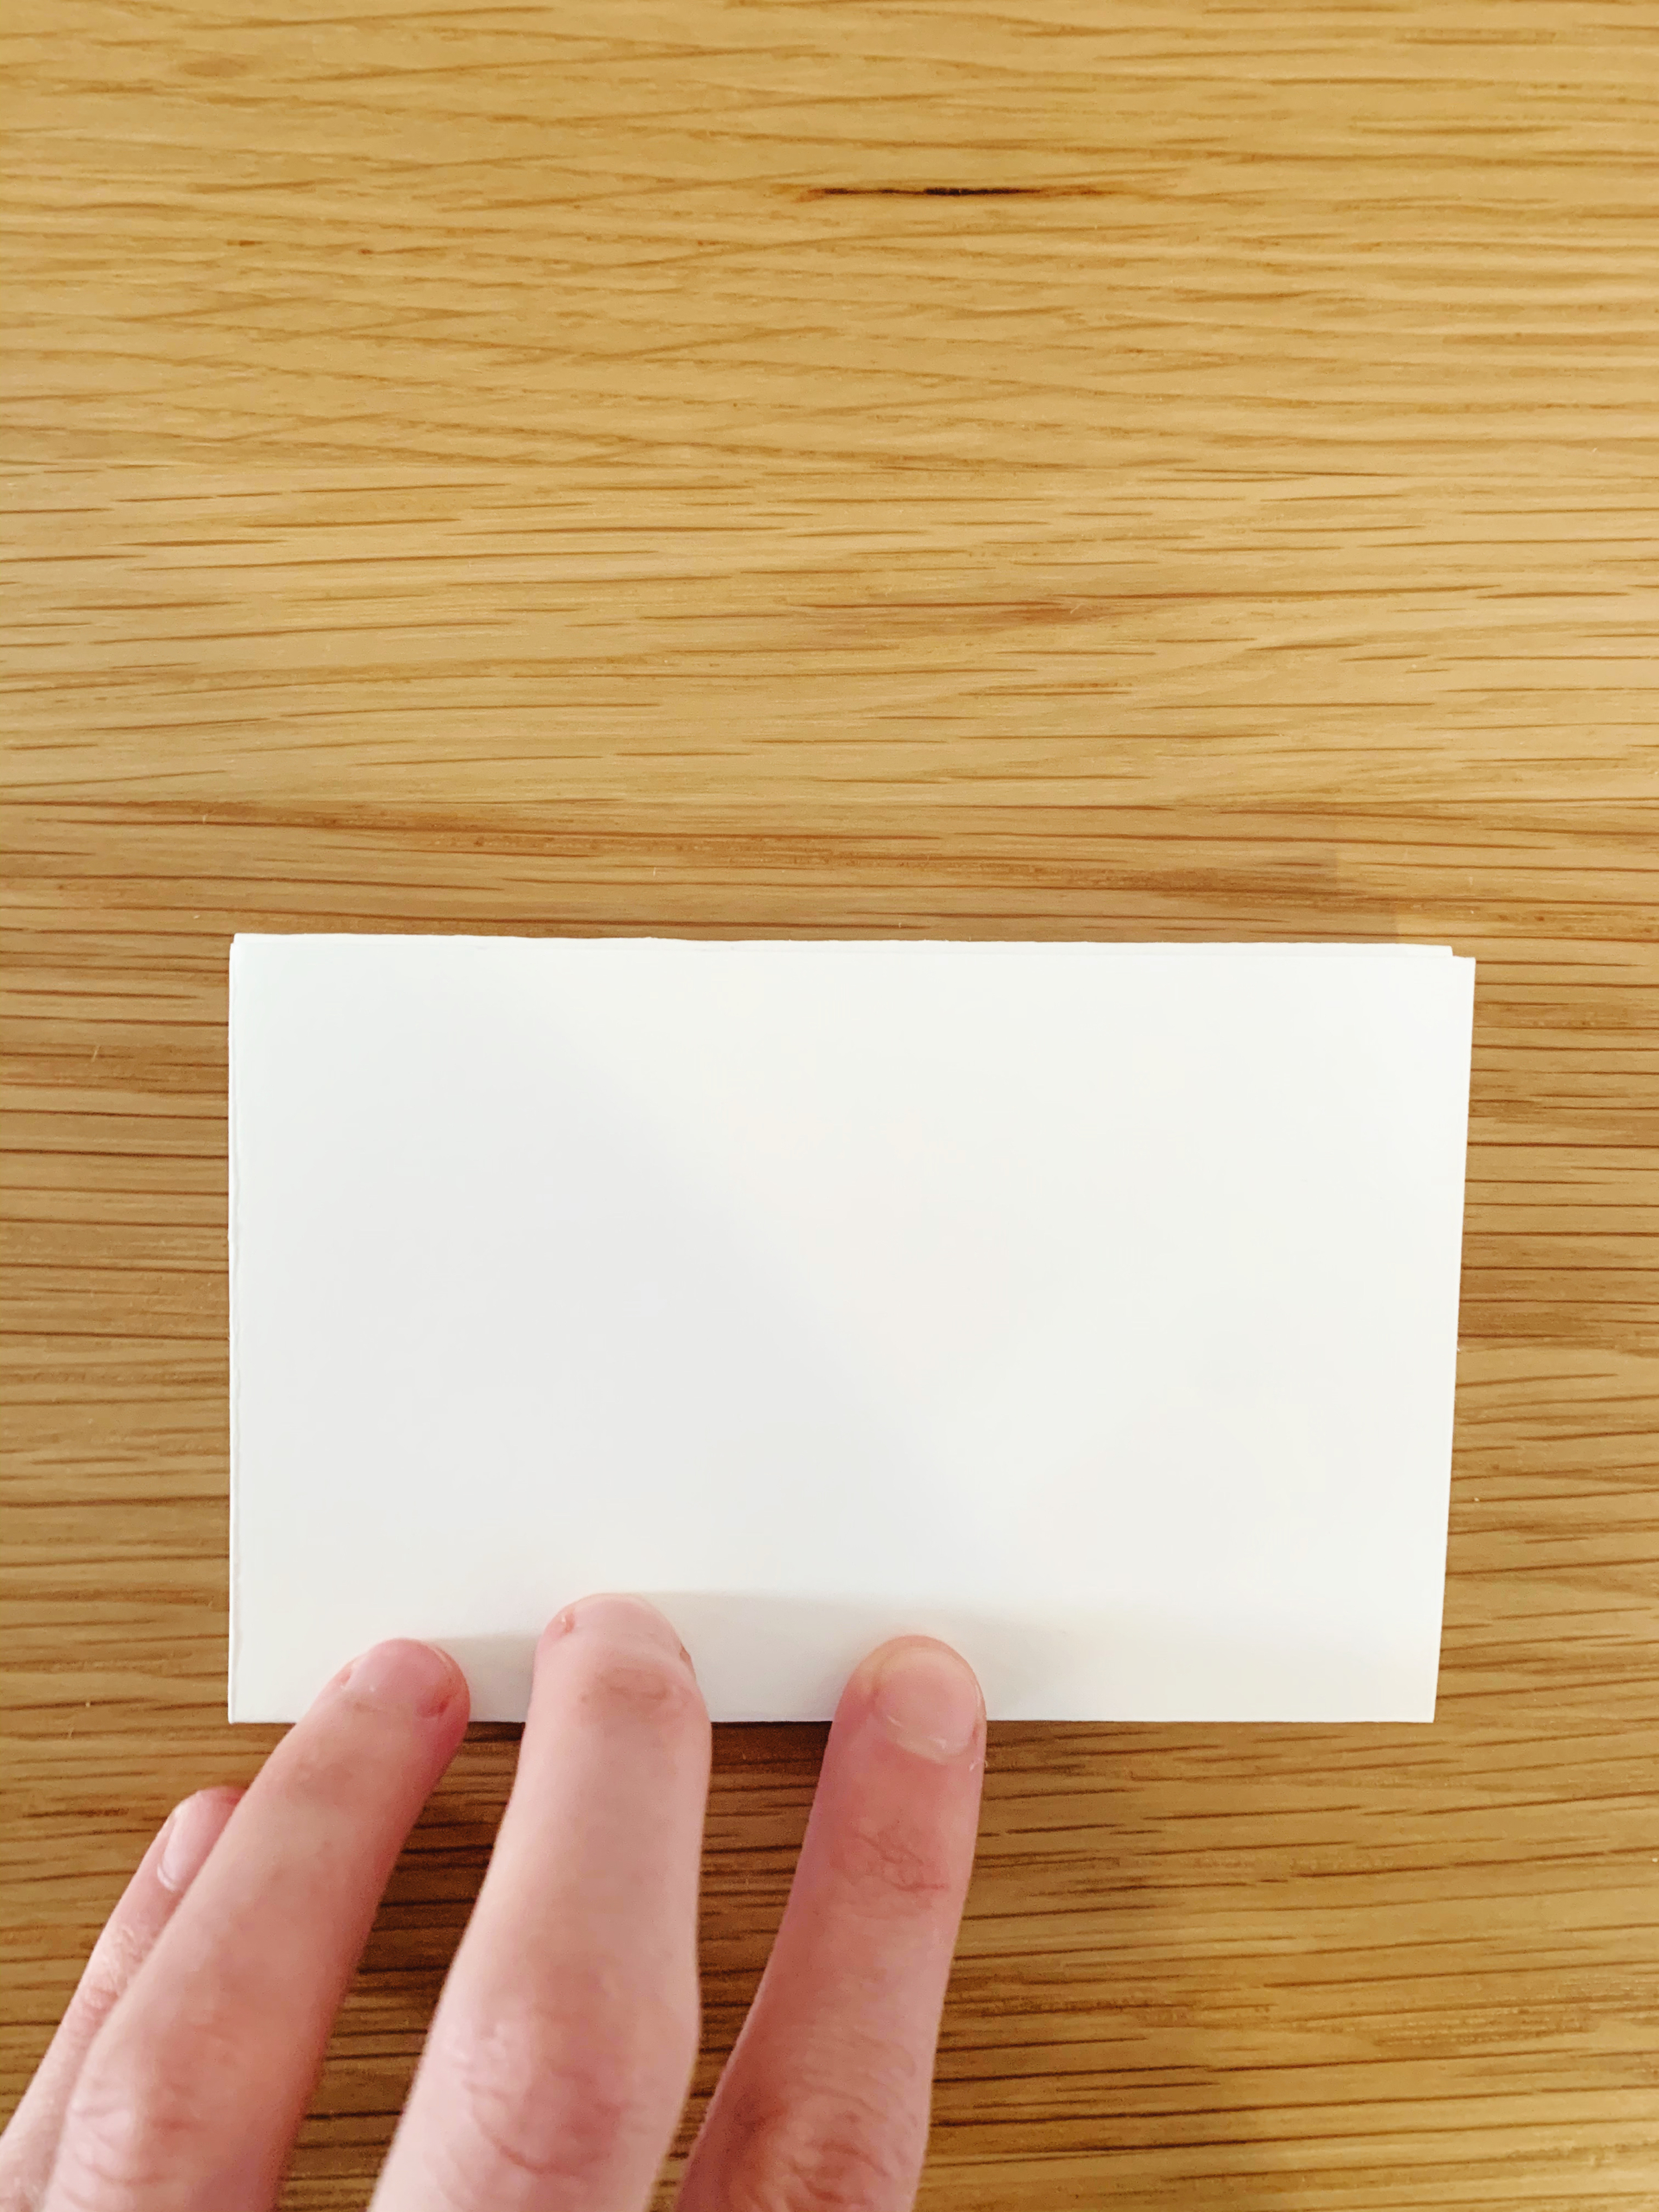
Step 4: Flip the cardstock over and do the exact same fold to the other side. Once you do this, each of the strips of cardstock should resemble a W.
Step 5: Repeat steps 1 through 4 with another sheet of cardstock, so you now have four W’s total.
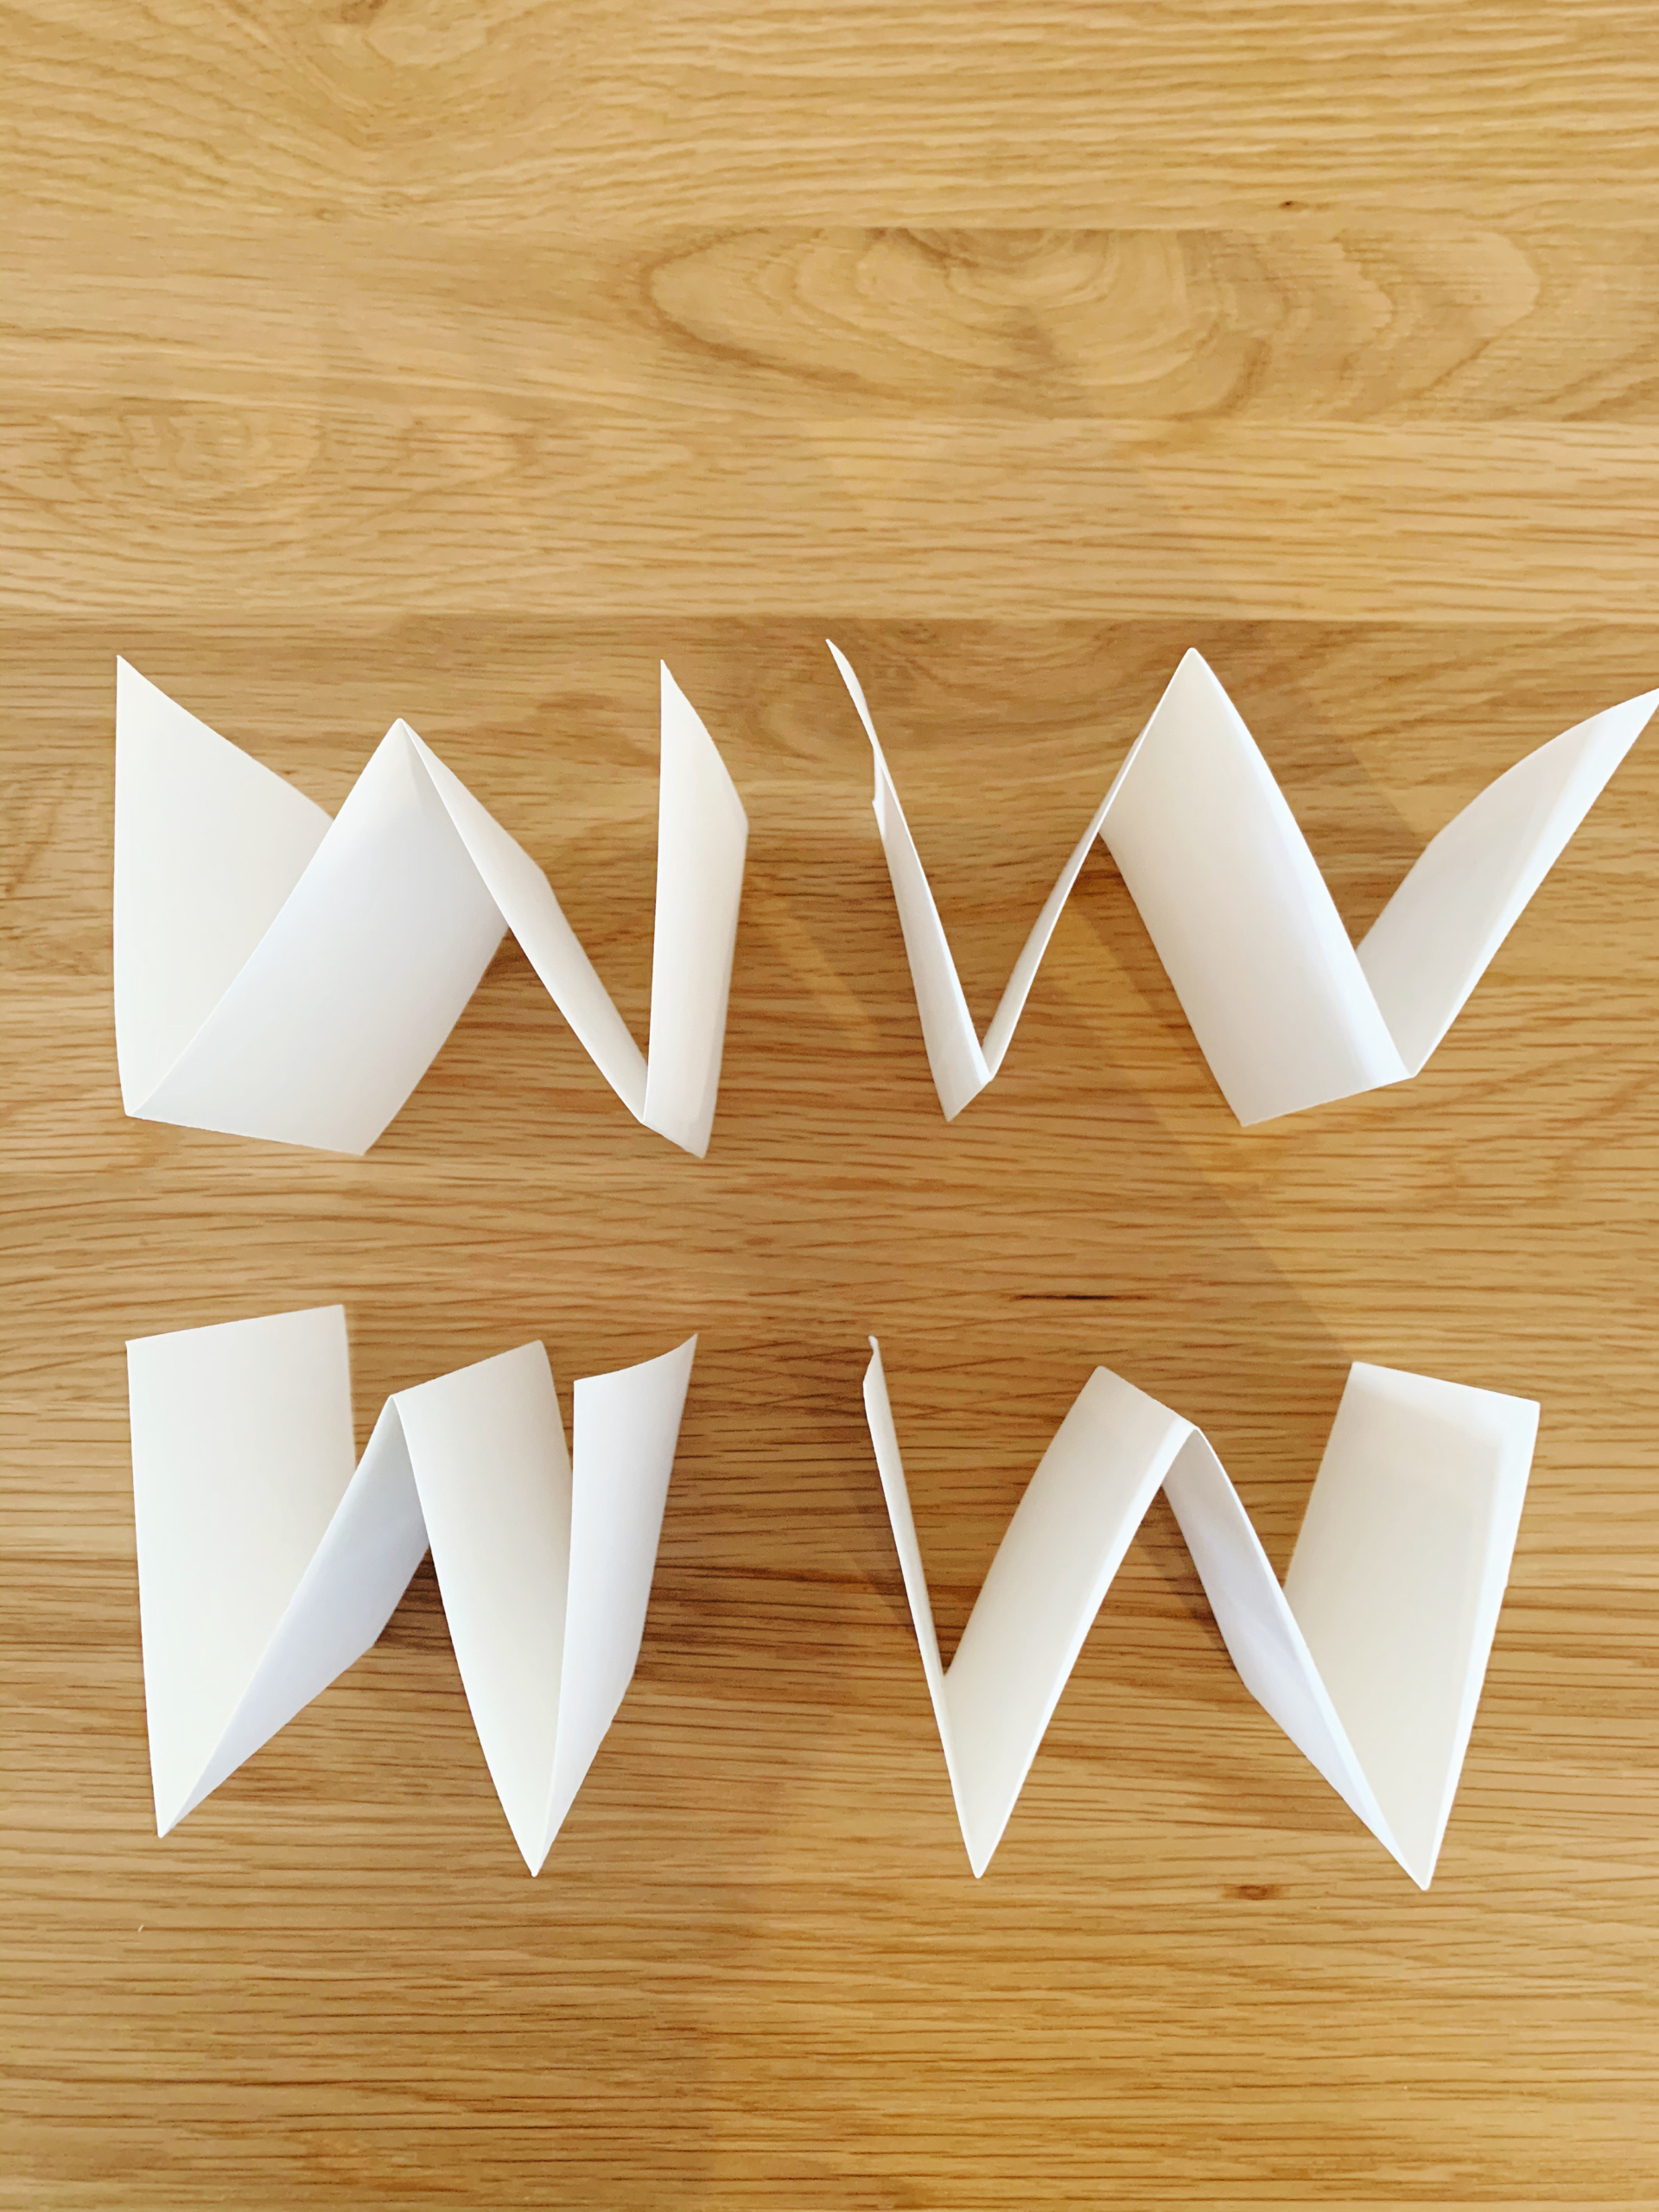
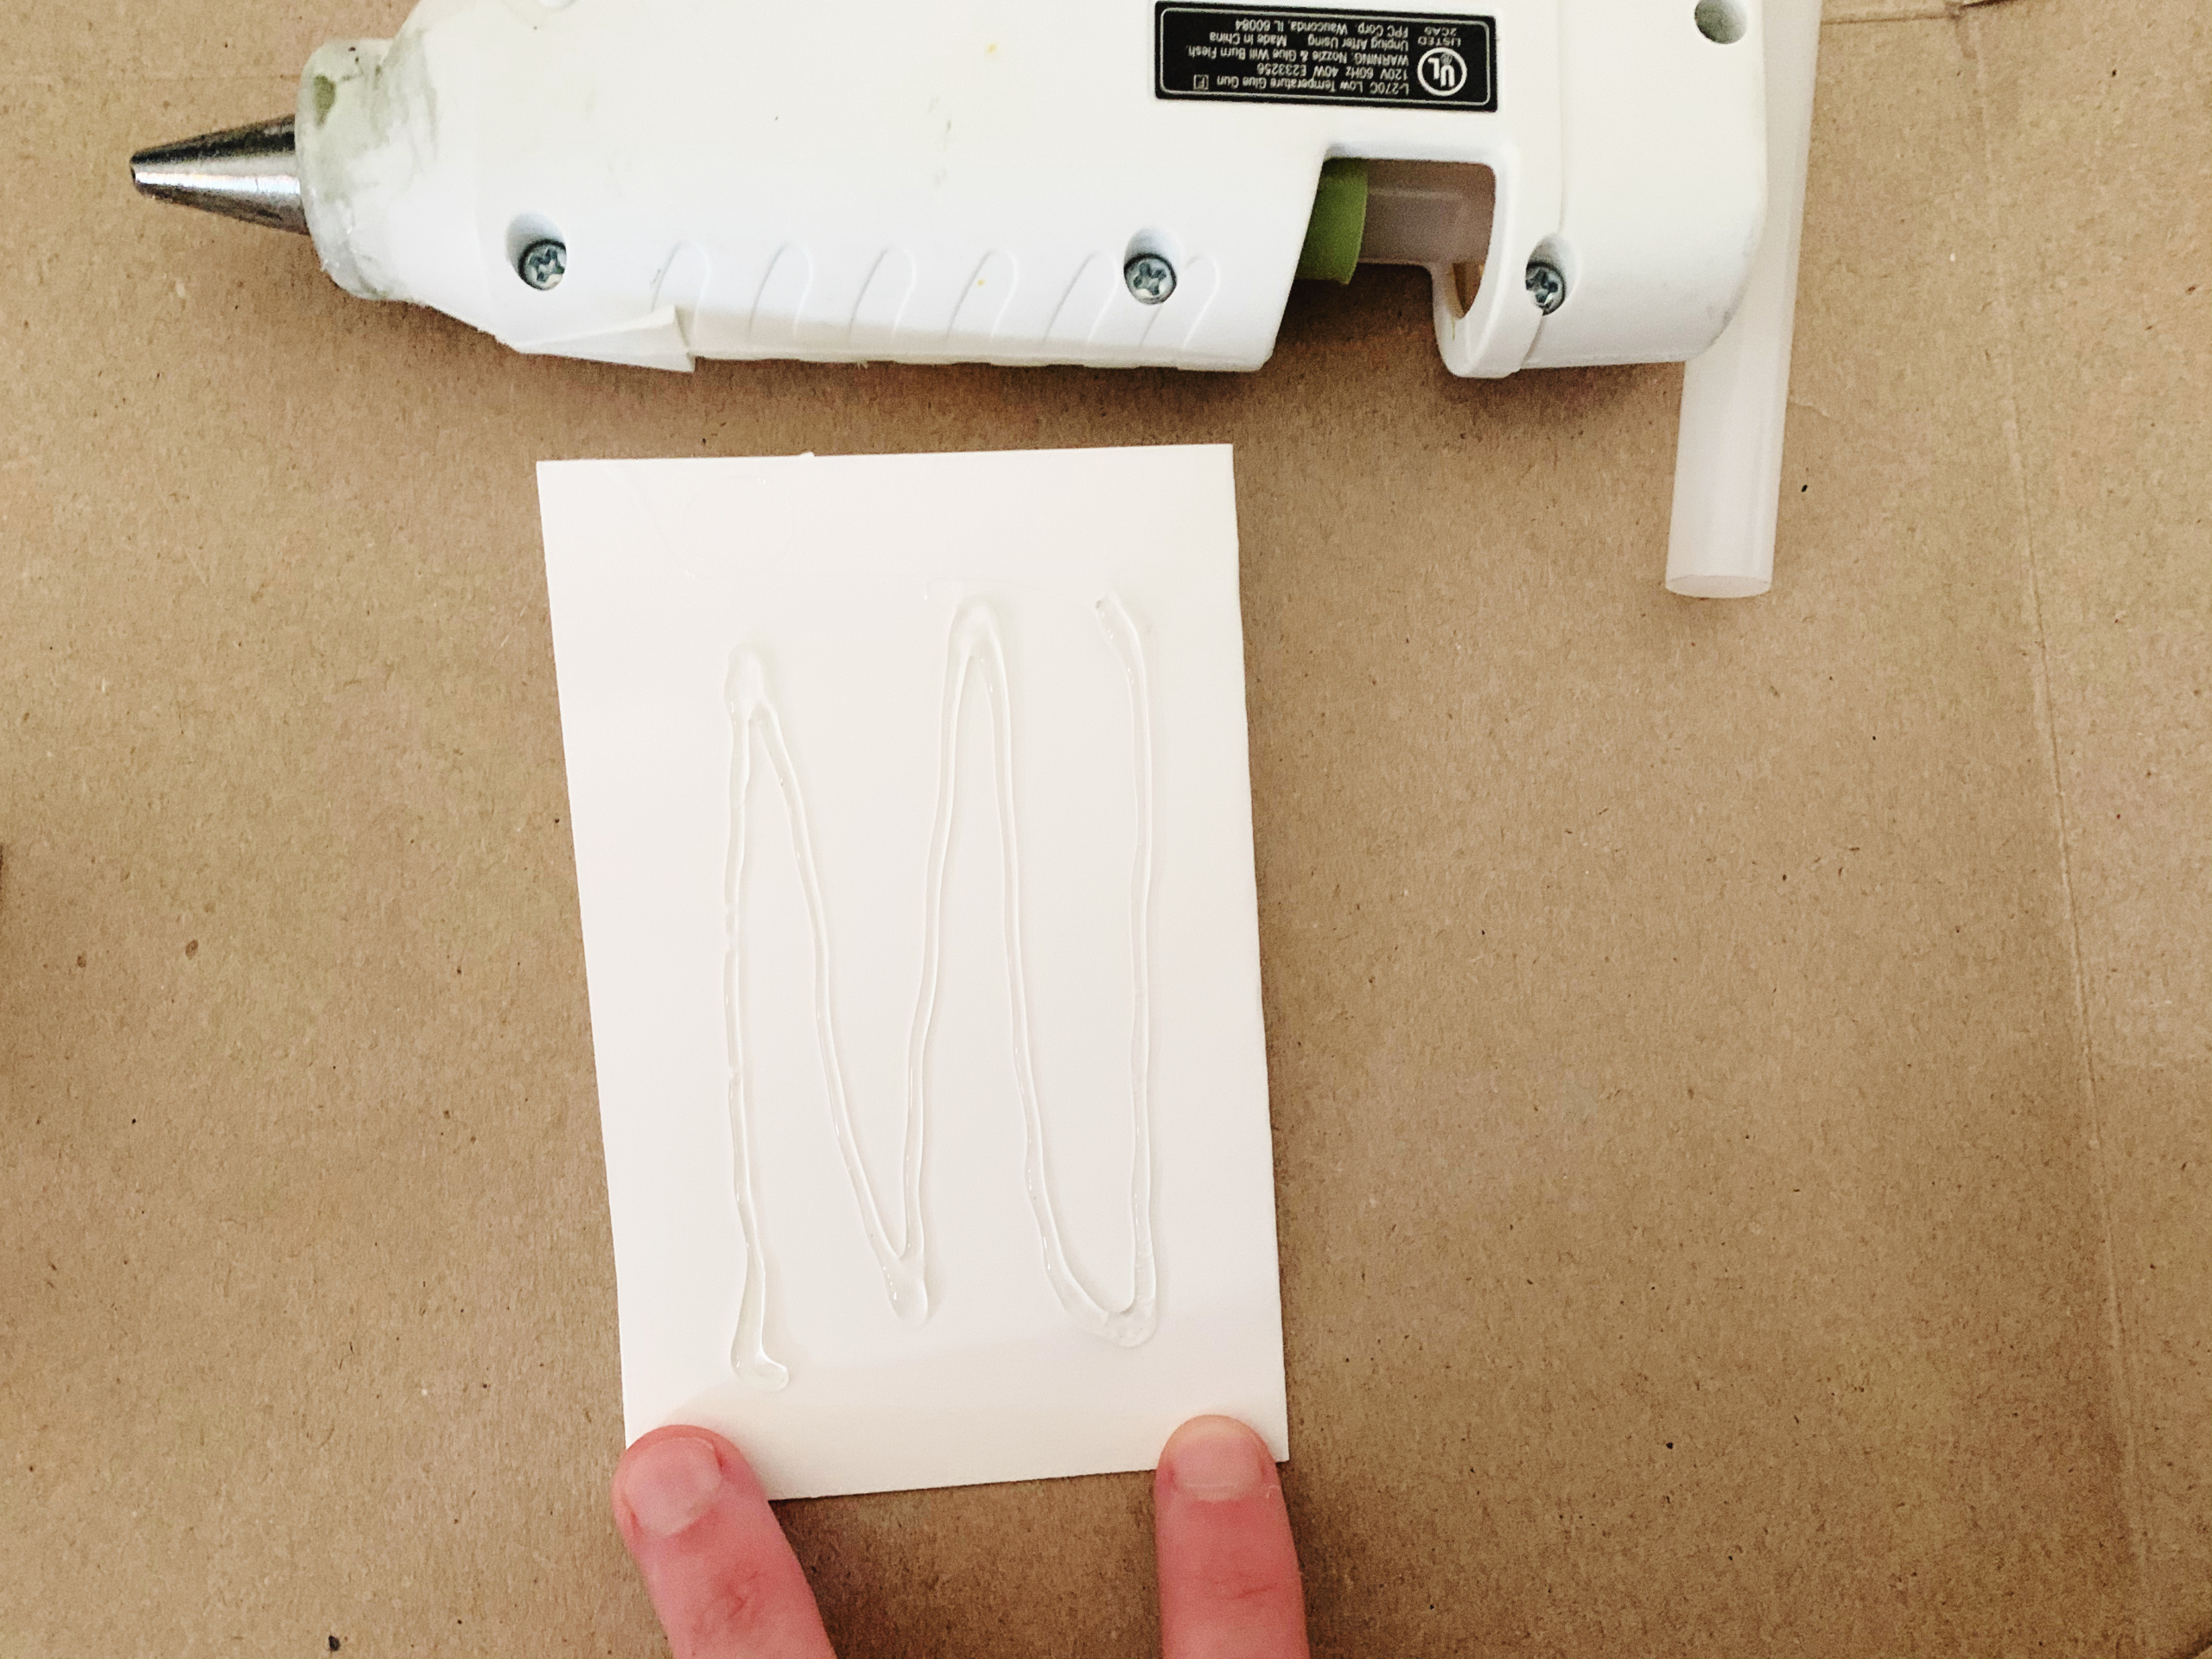
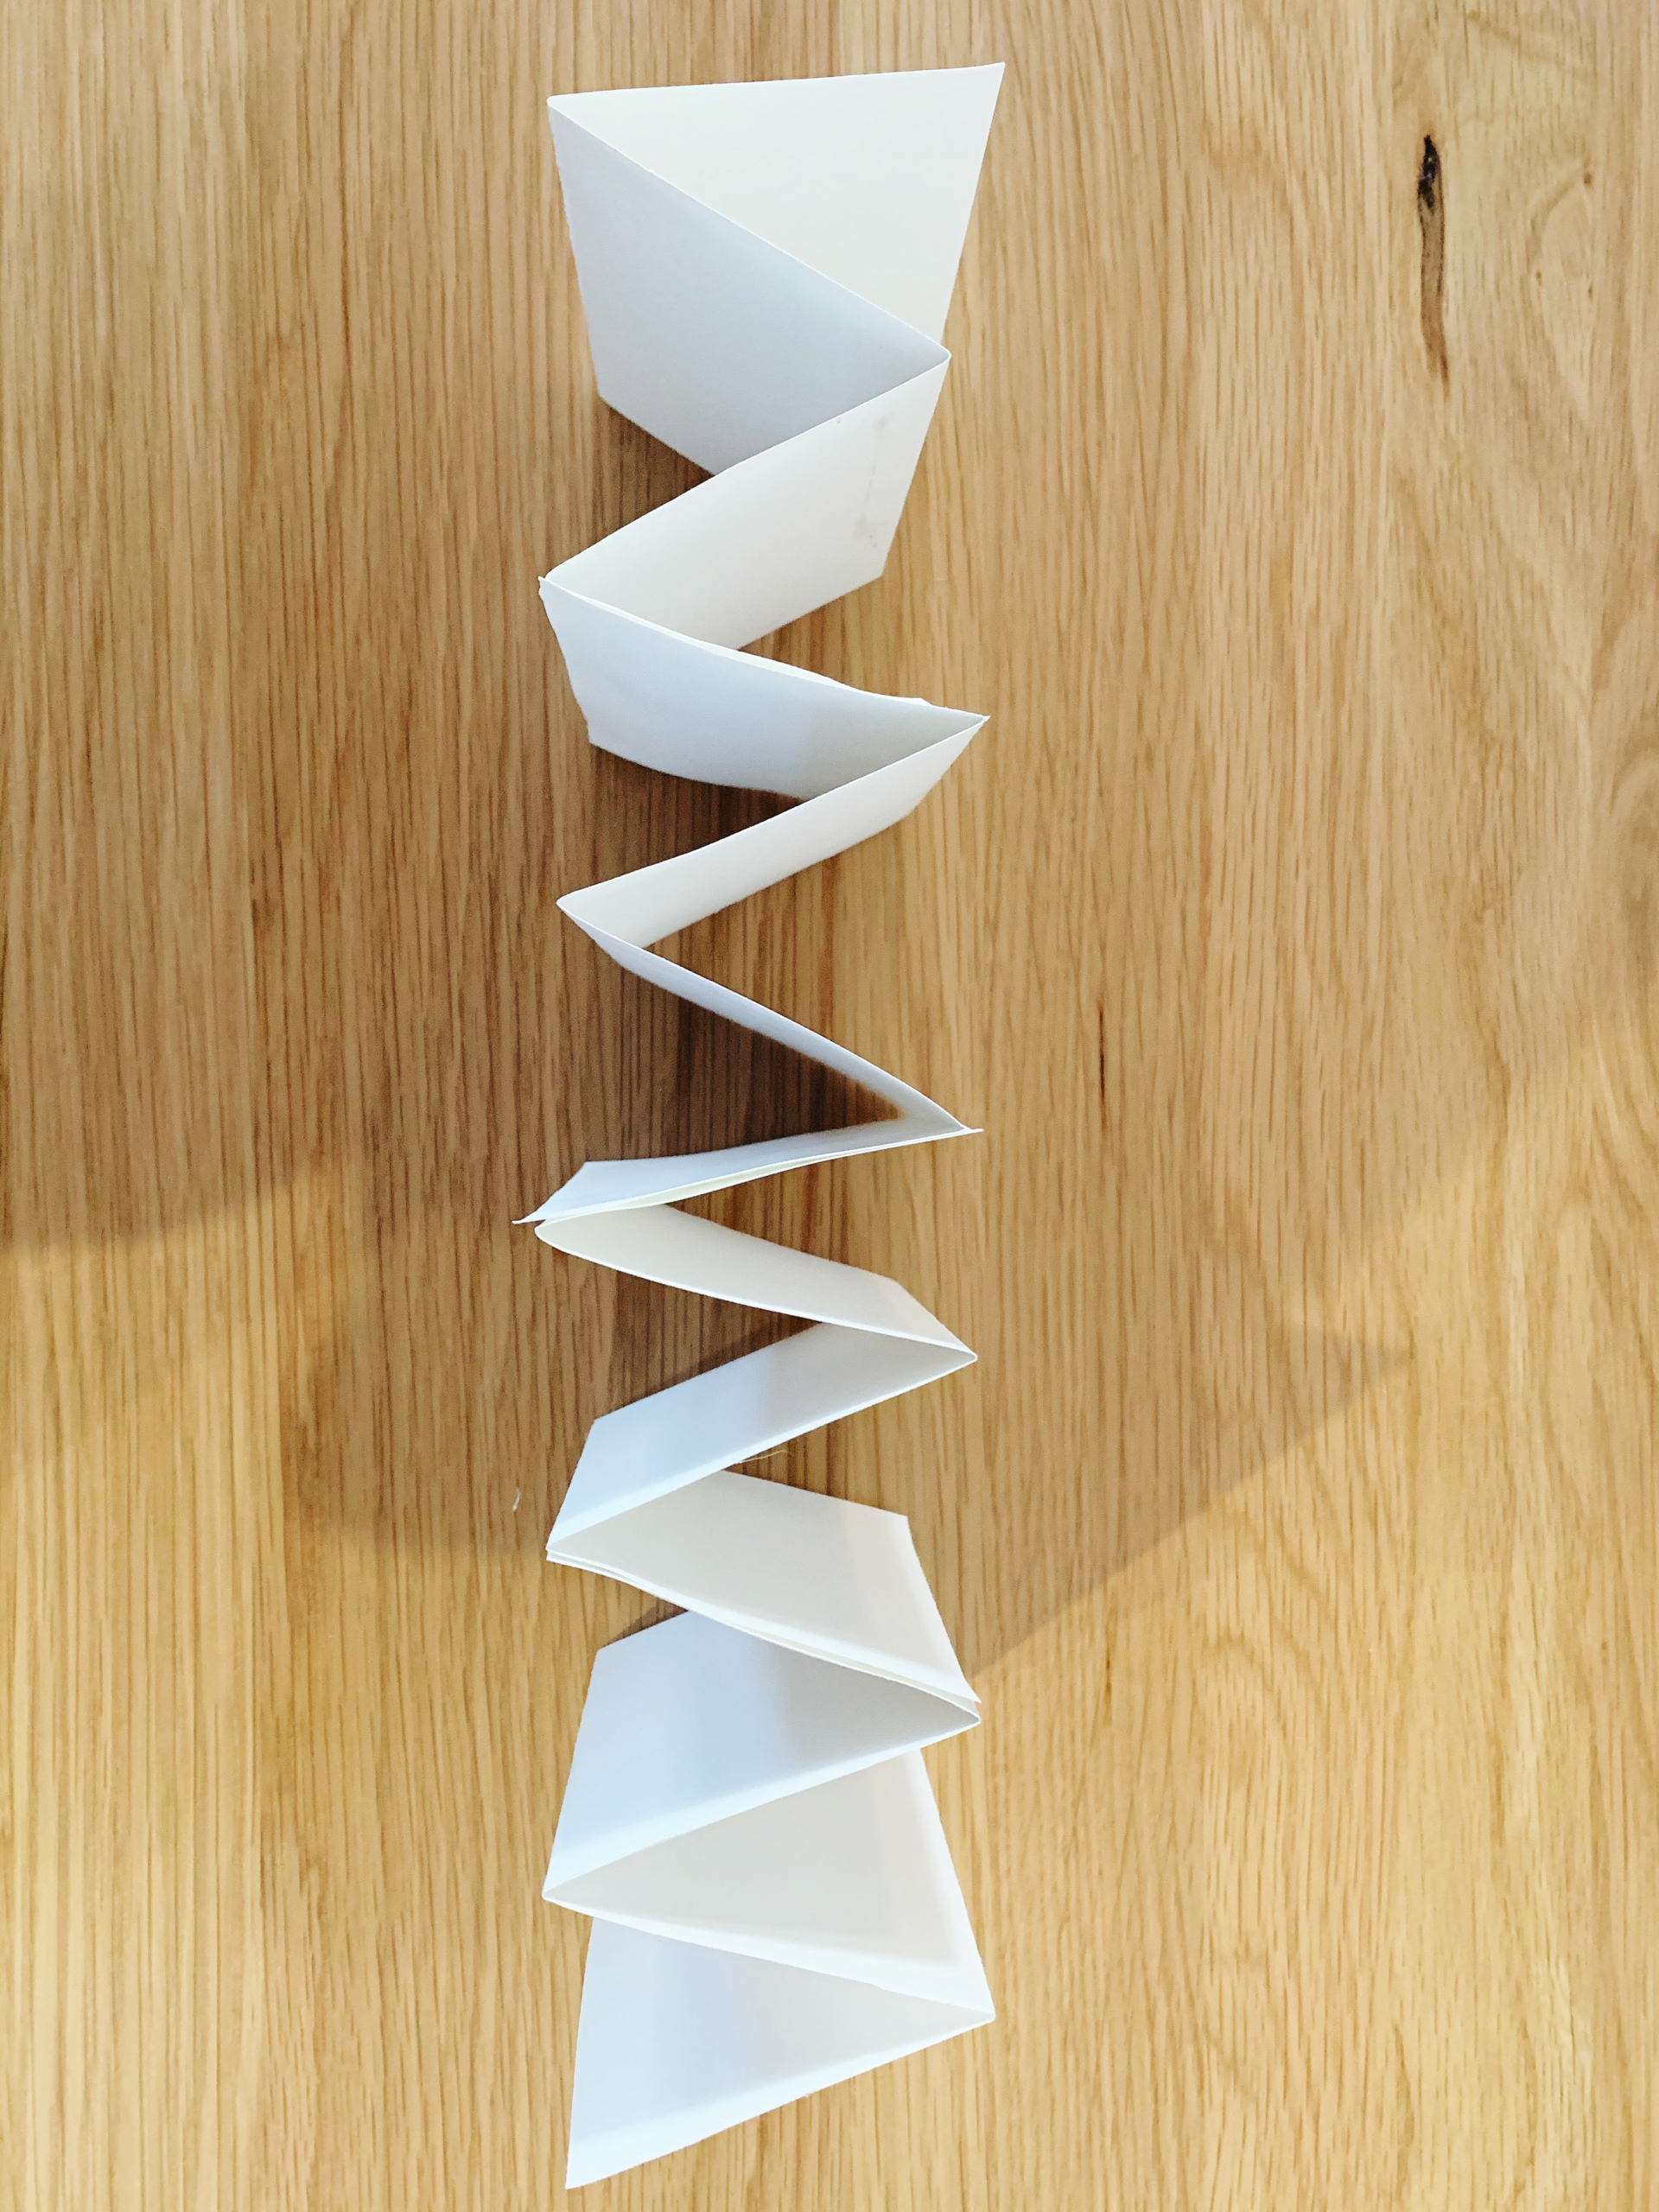
Step 6: Now you are going to glue your W’s together to make an accordion. Put glue on the ends of the W’s to stick all four together in a row. You’ll need to put glue on both ends of two W’s and on one end only of the other two W’s. Tip: If you are using white glue, you will probably want to press the accordion under something heavy (like another book) for a bit so it can dry. I decided to use a hot glue gun so I wouldn’t need to wait for the glue to set. Glue dots would work the same.
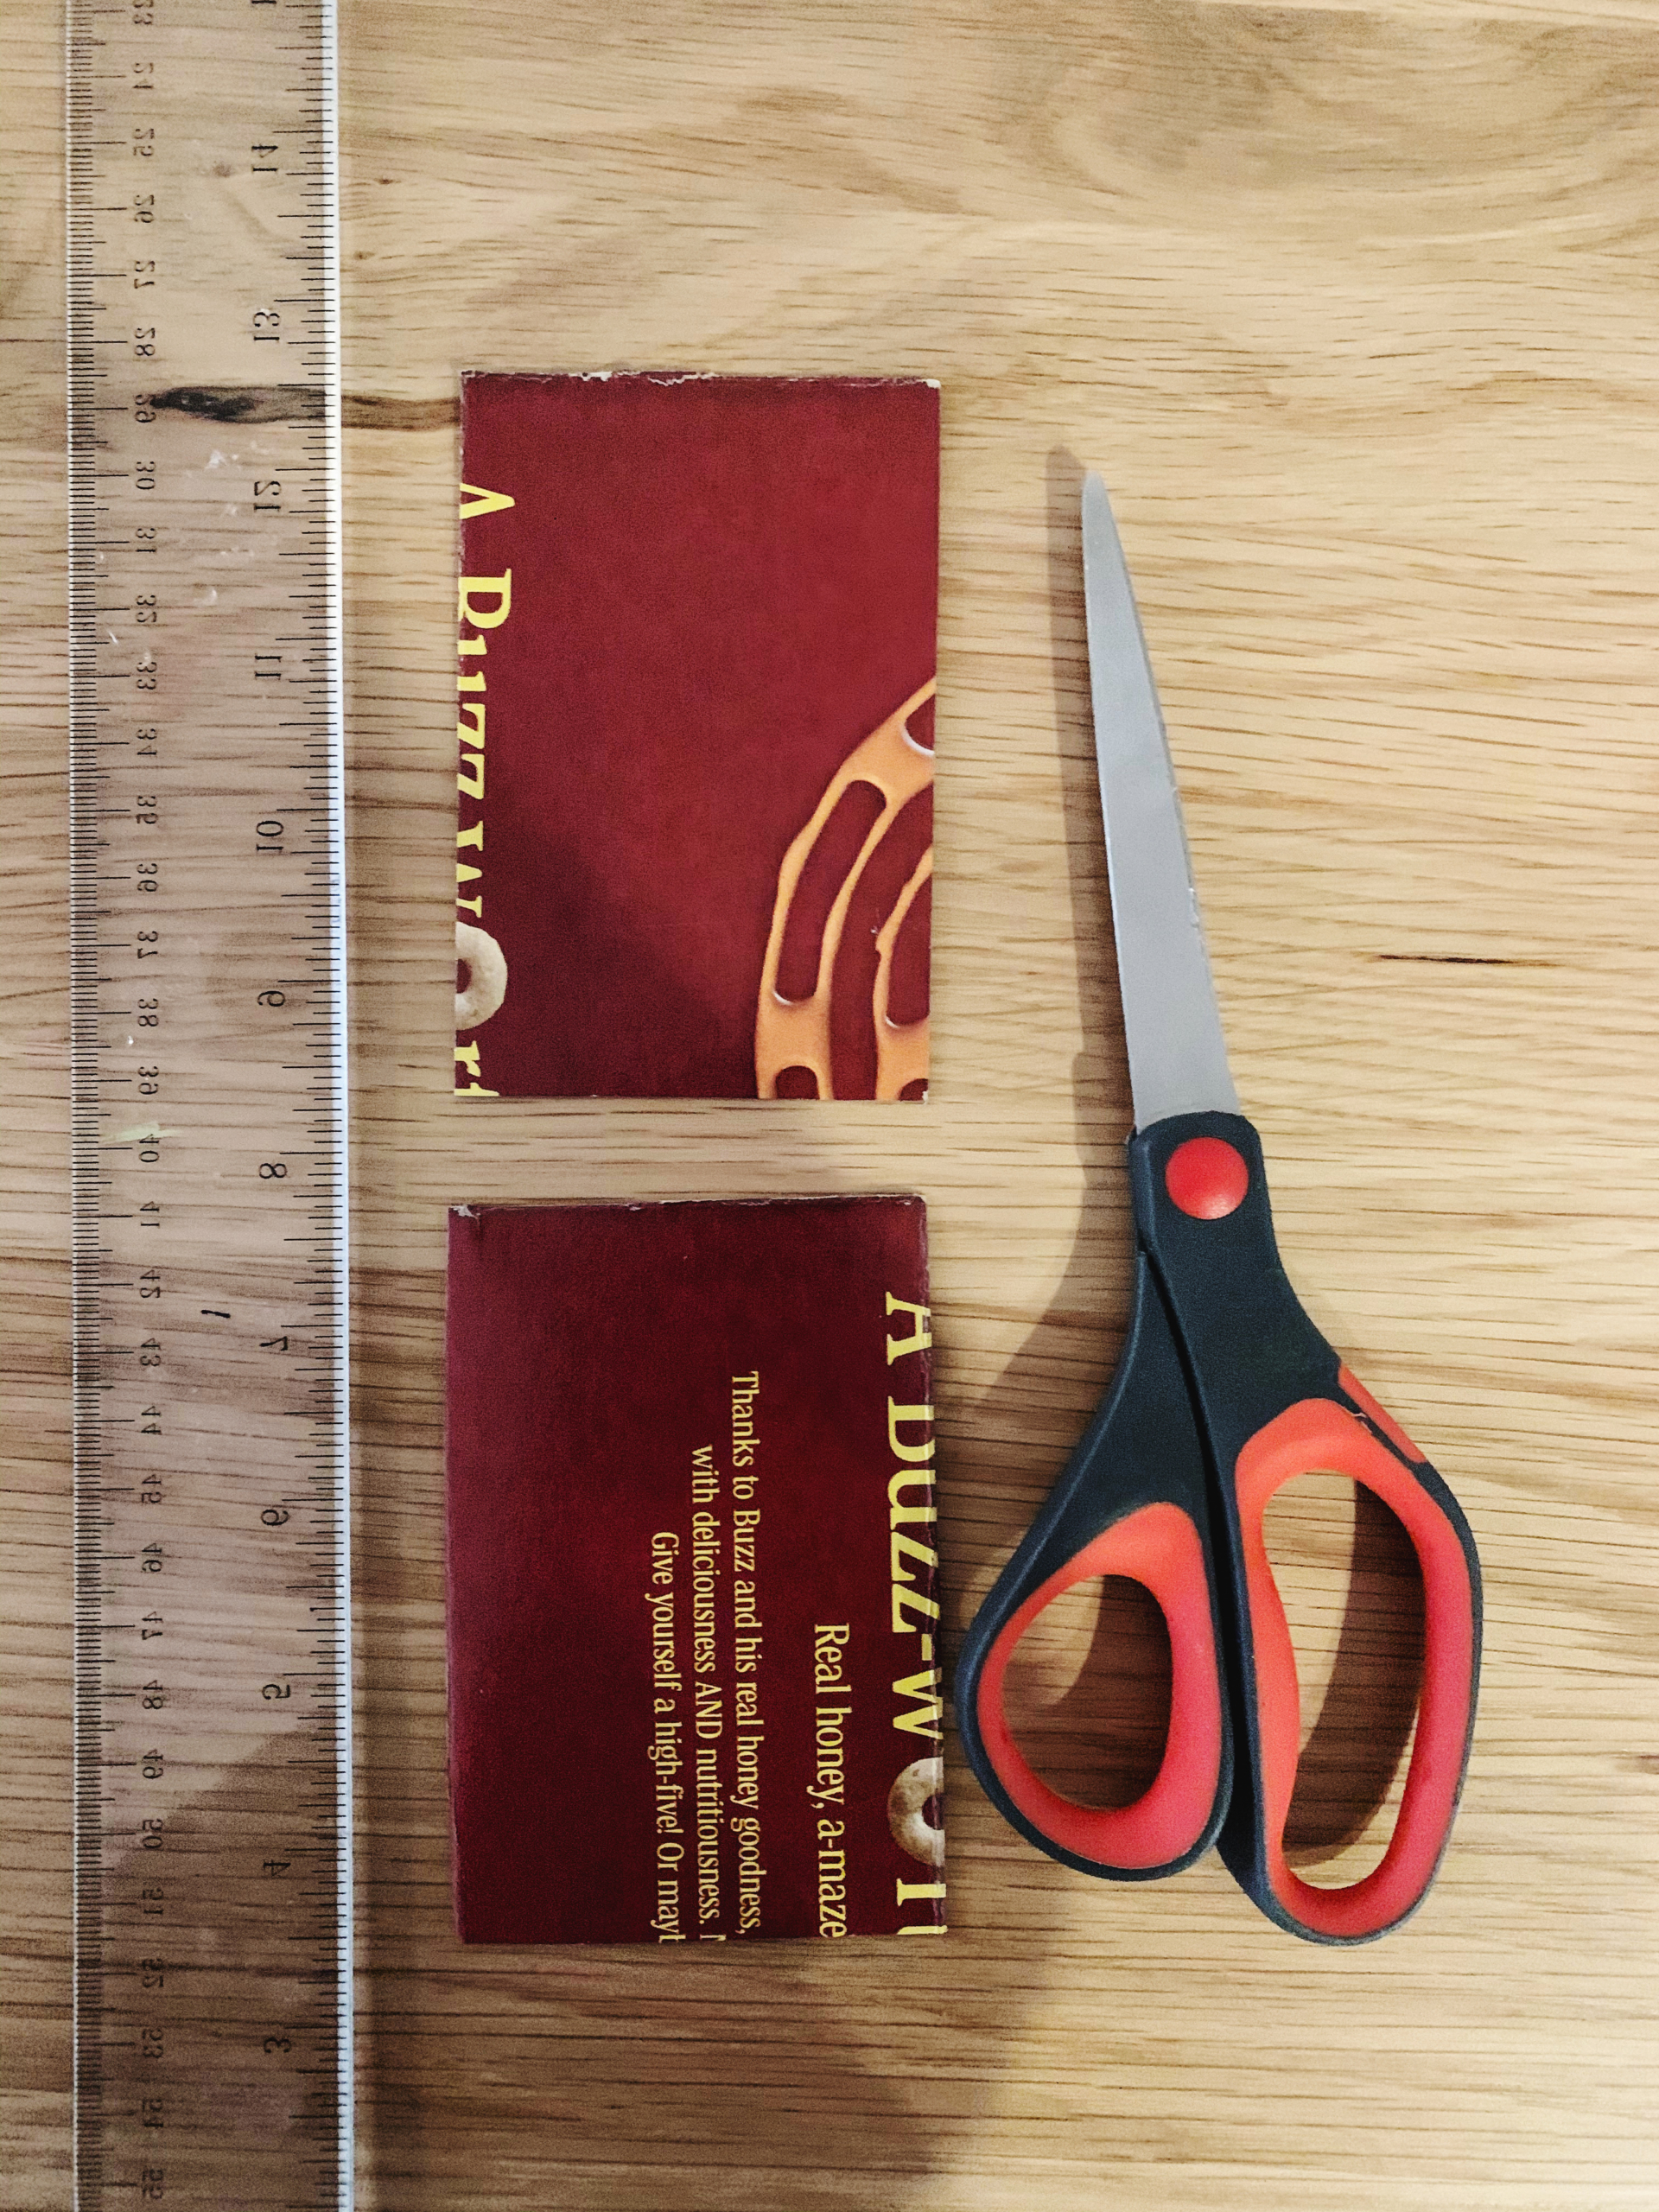
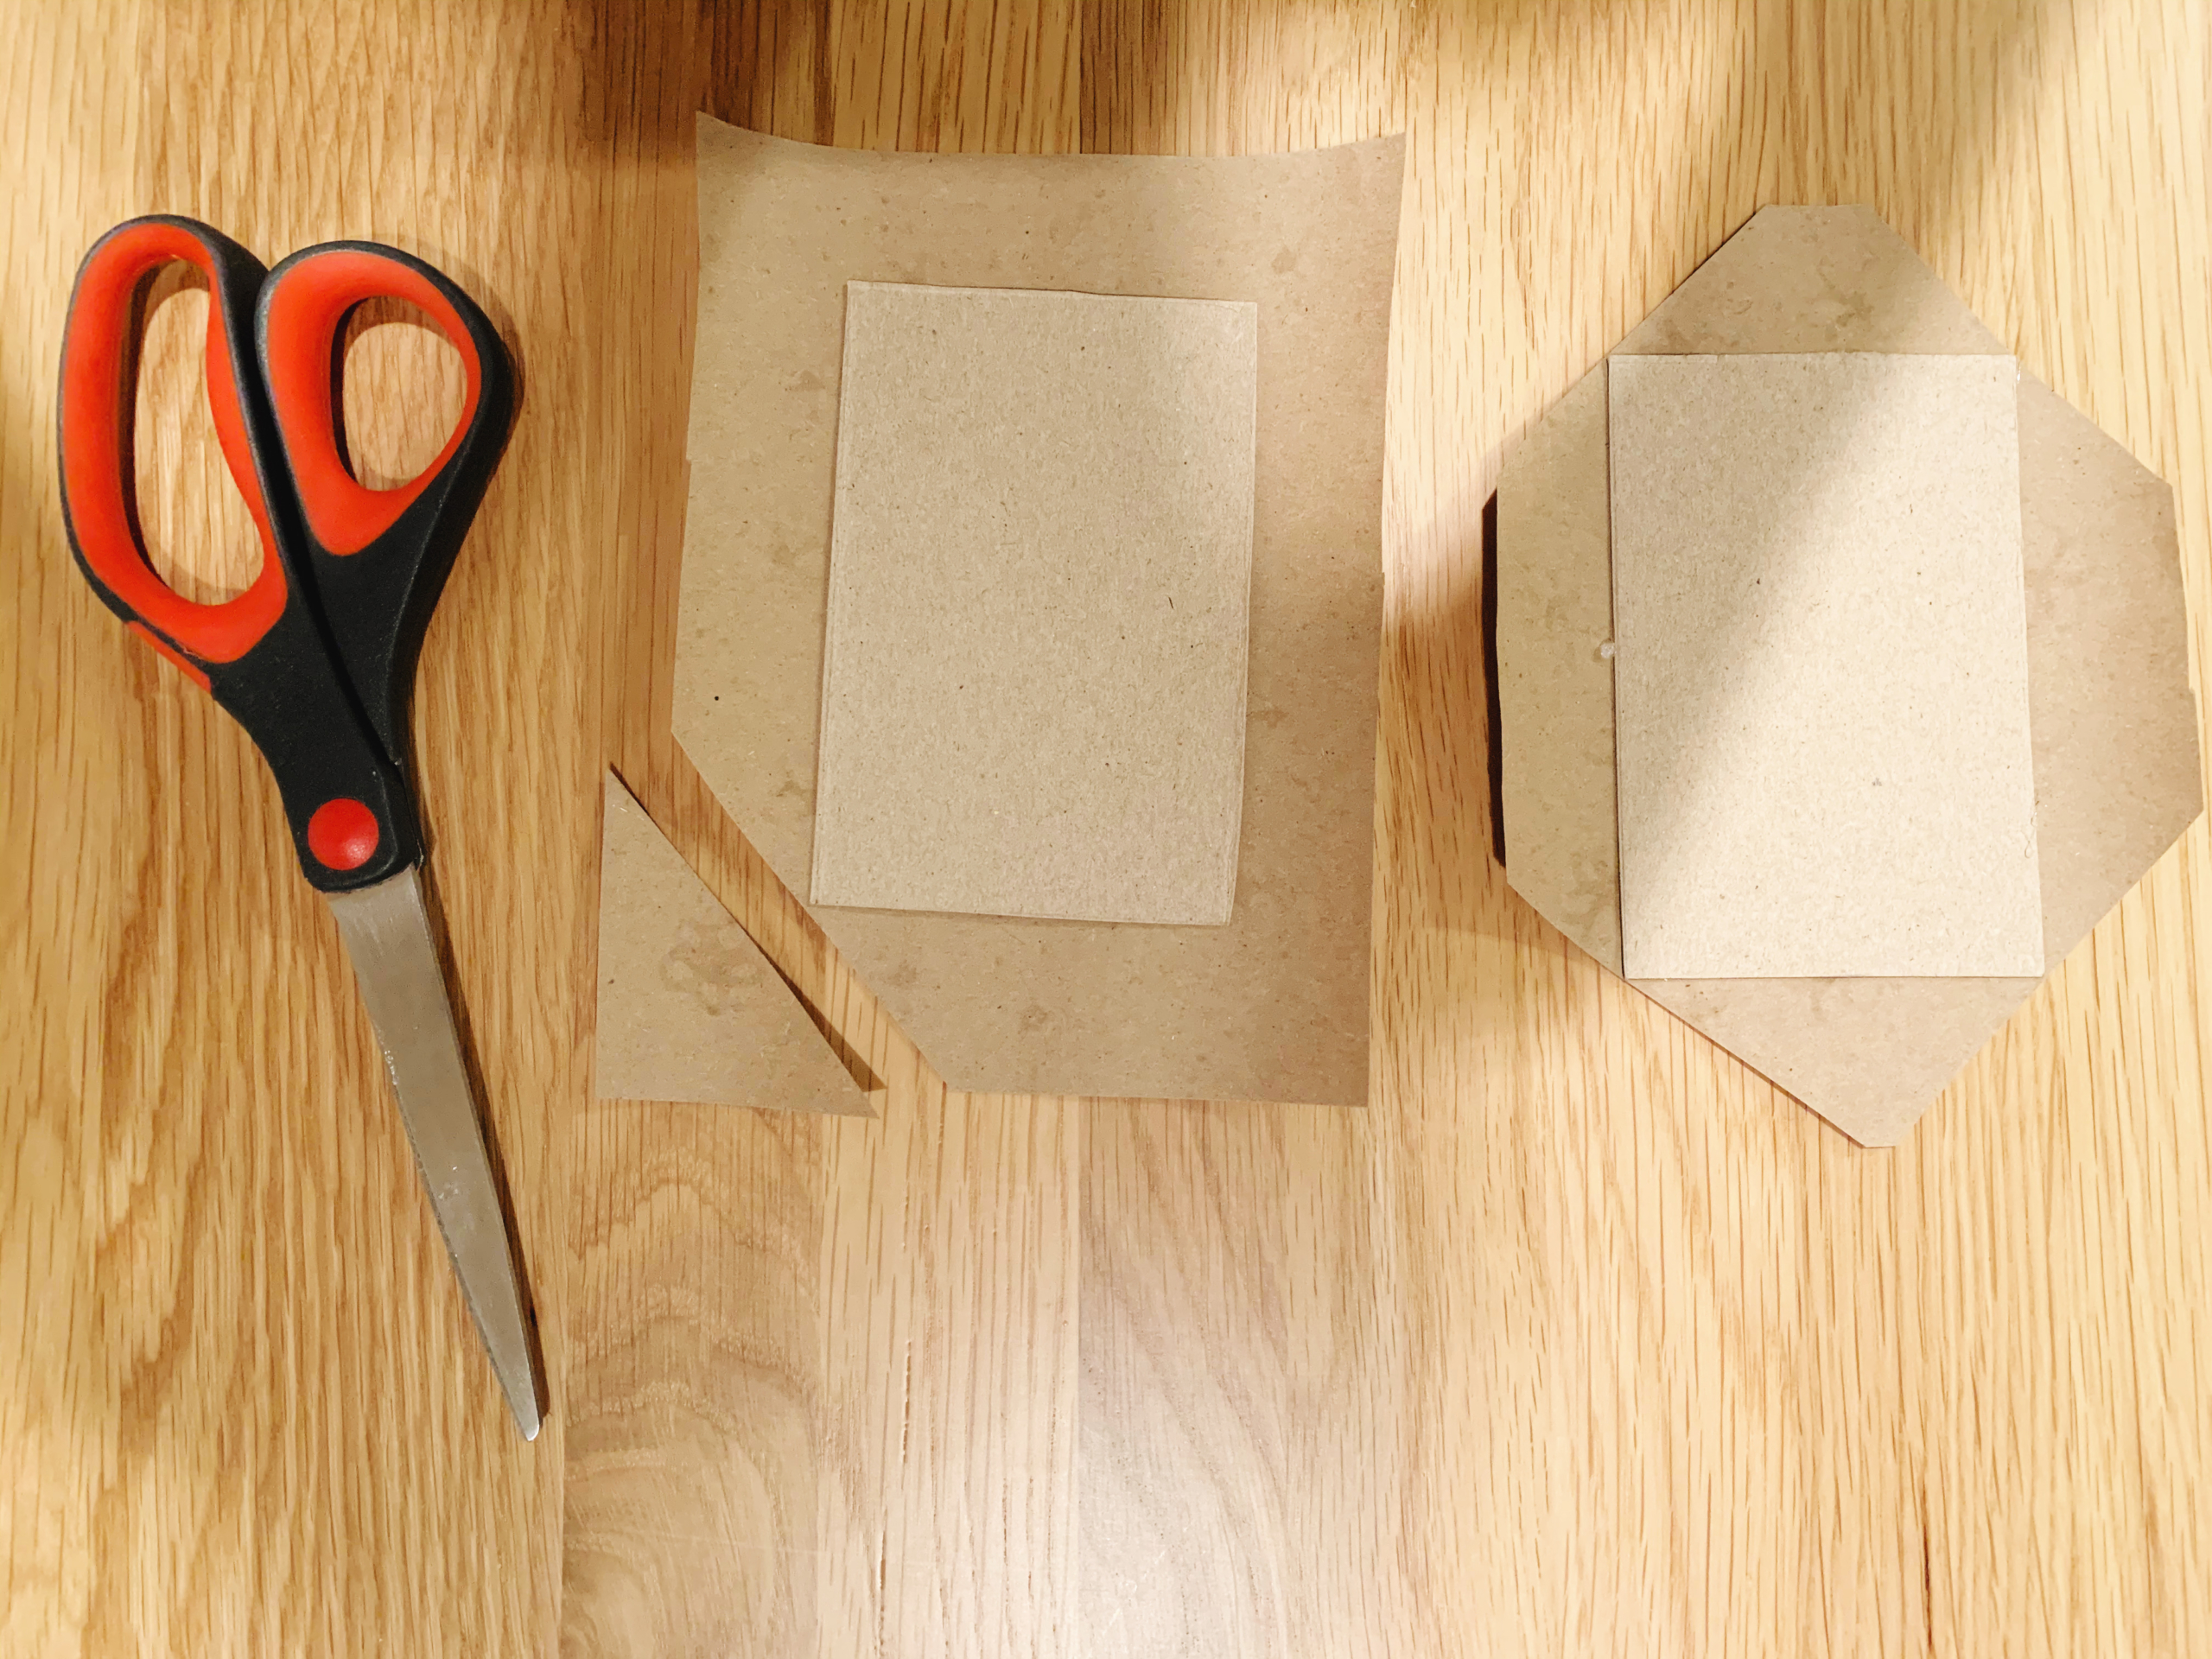
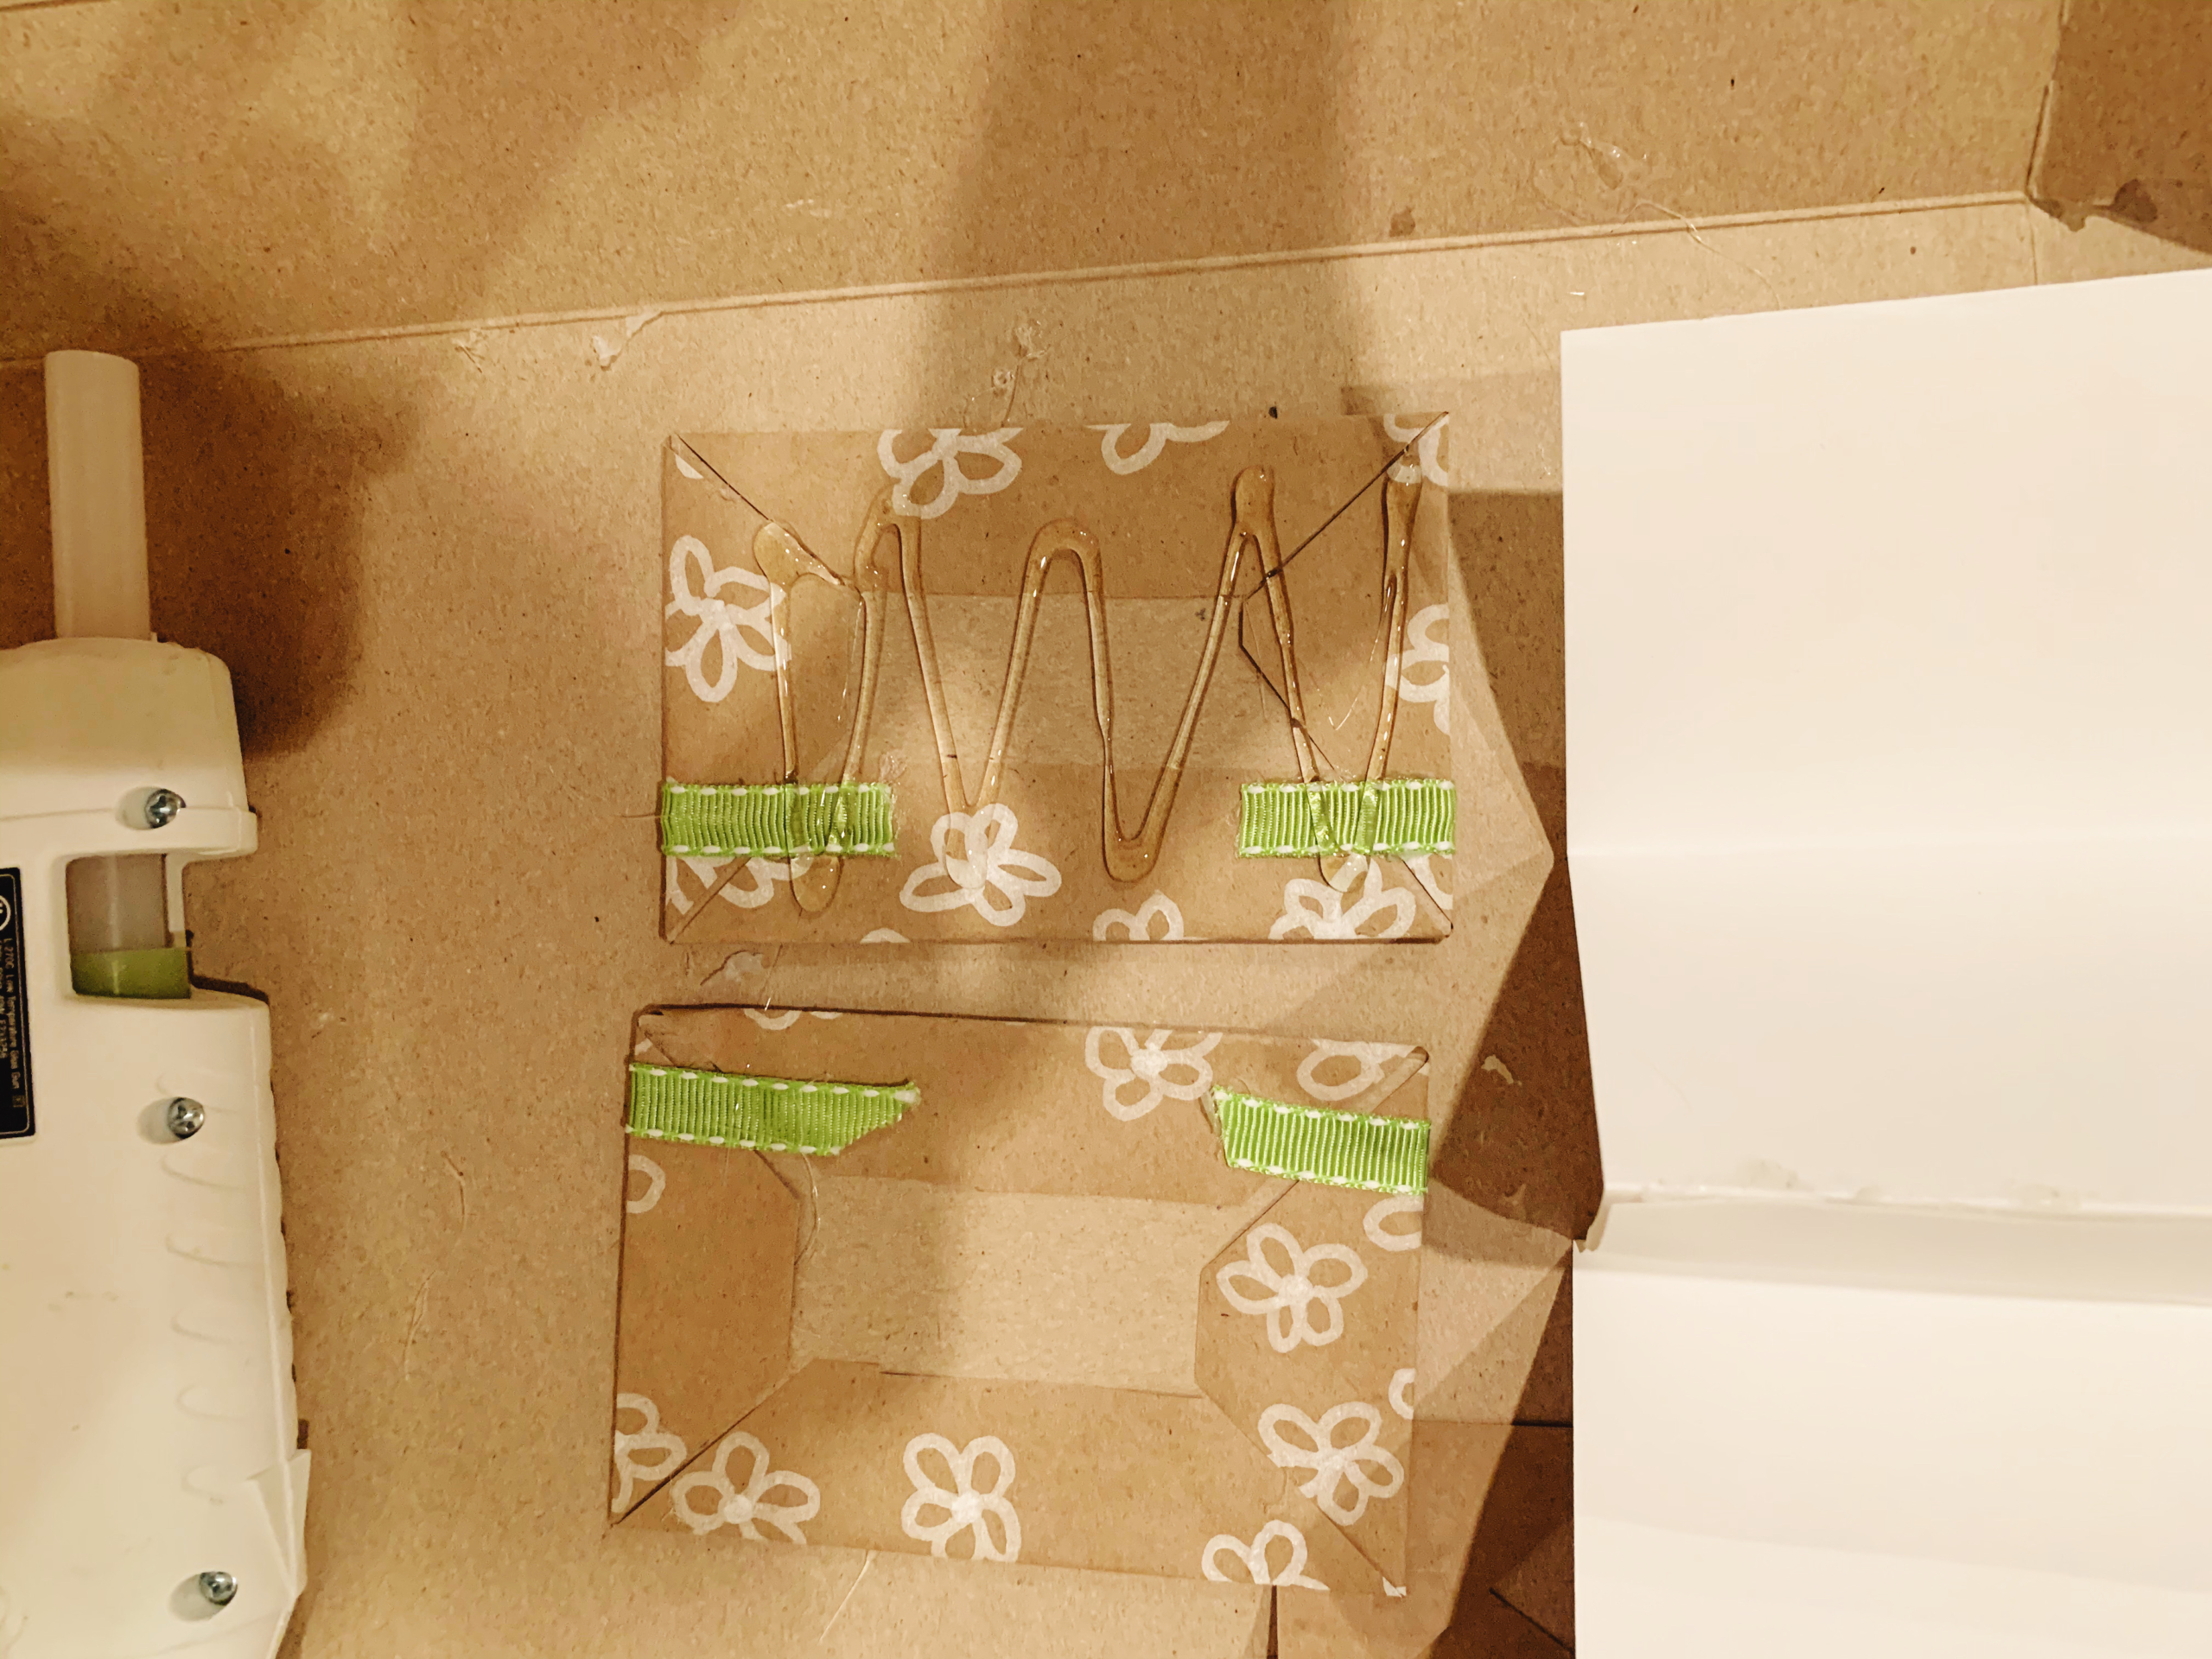
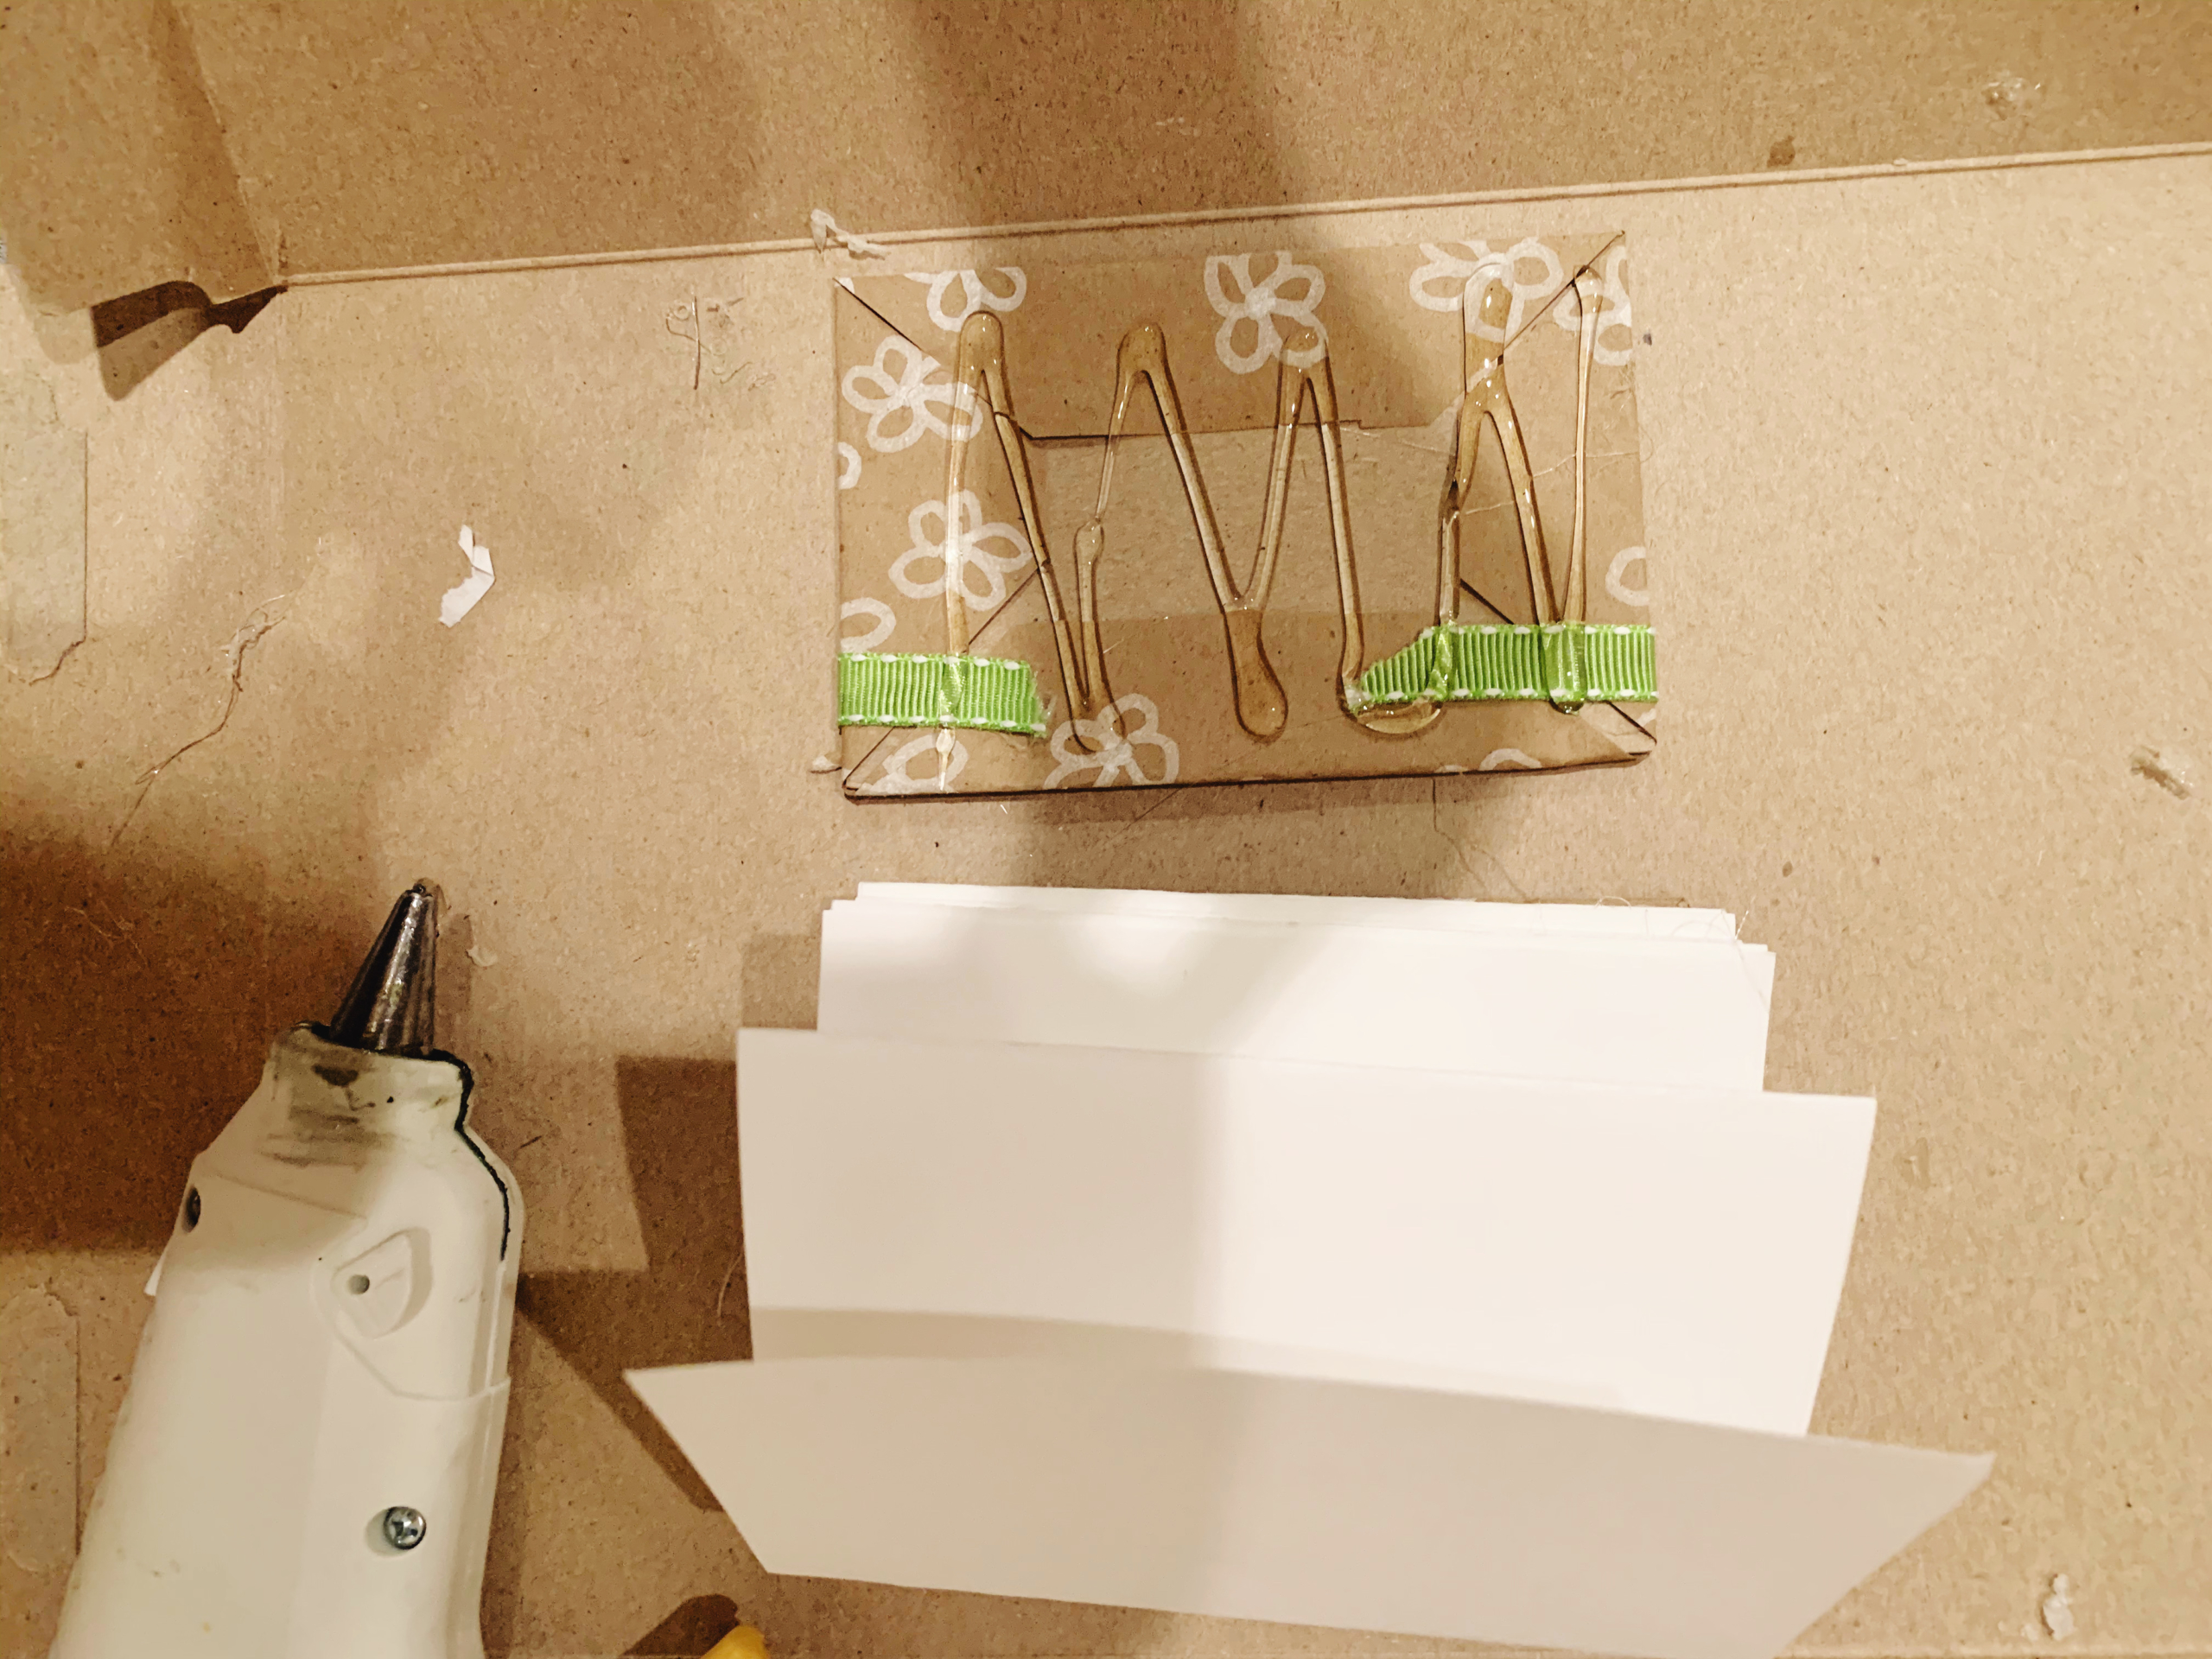
Step 7: Now that your pages are ready, you are going to make the cover of your book. Take your cardboard pieces and cut out two 3” x 4.5” squares.
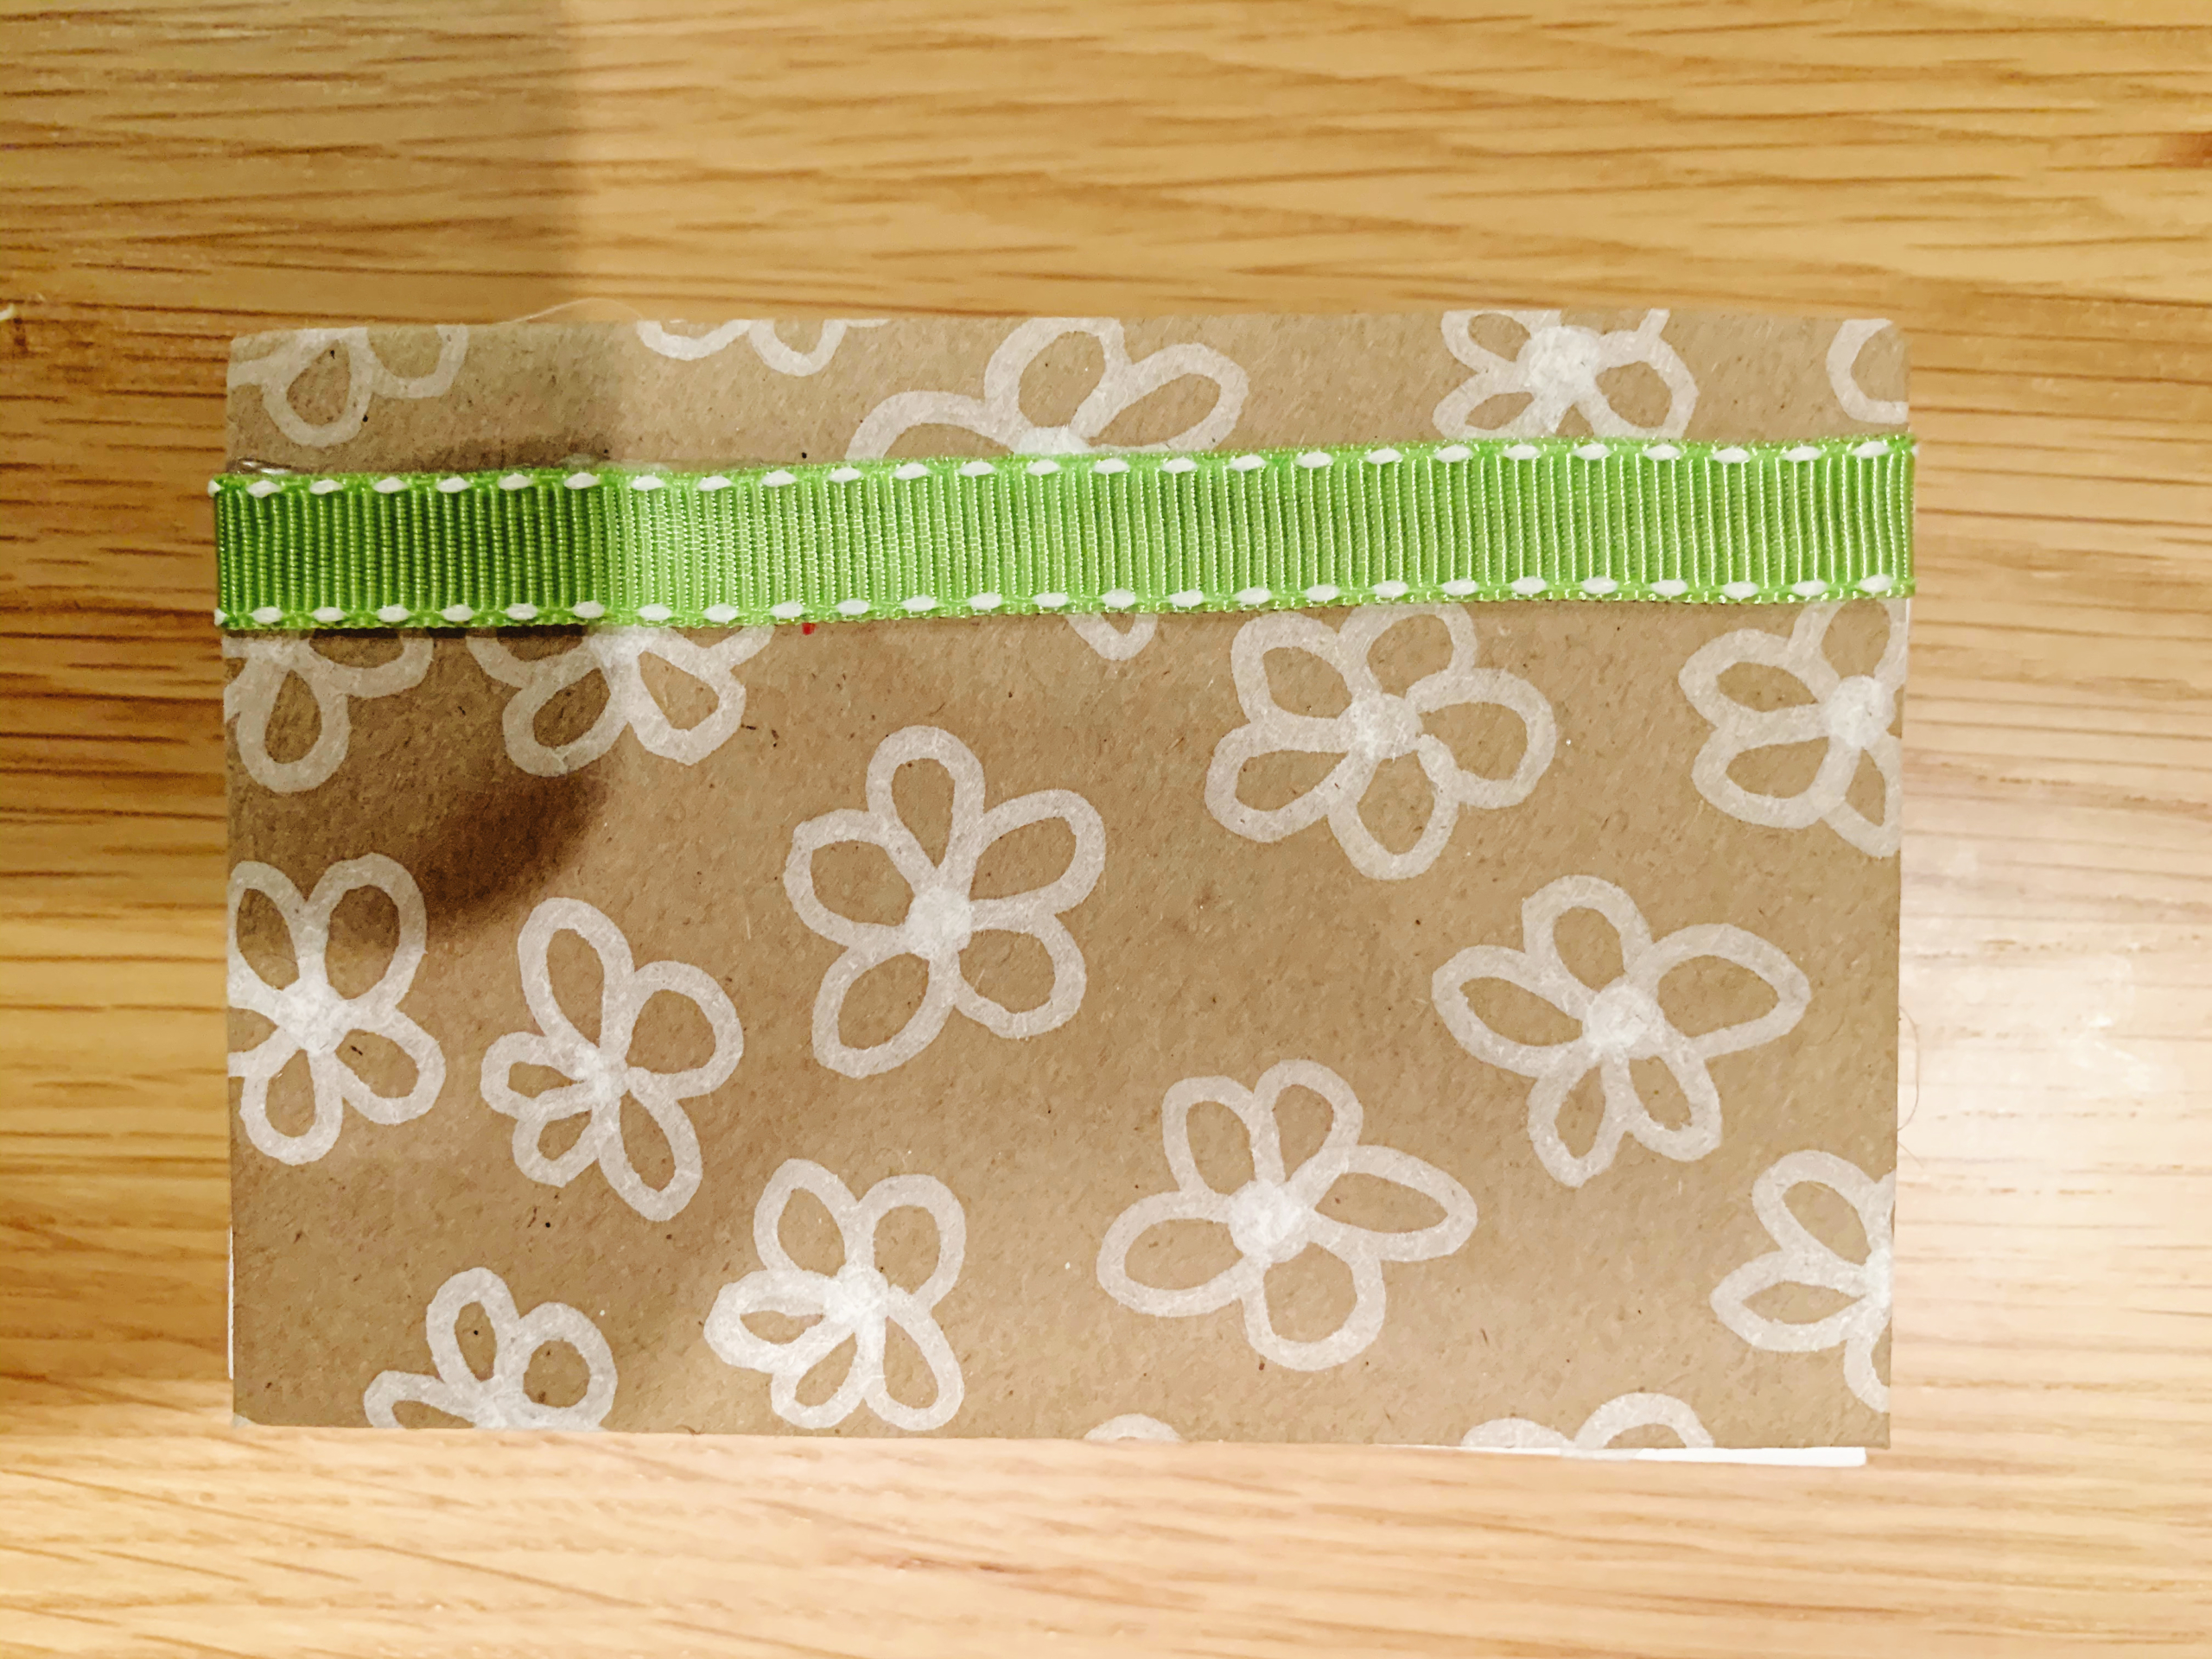
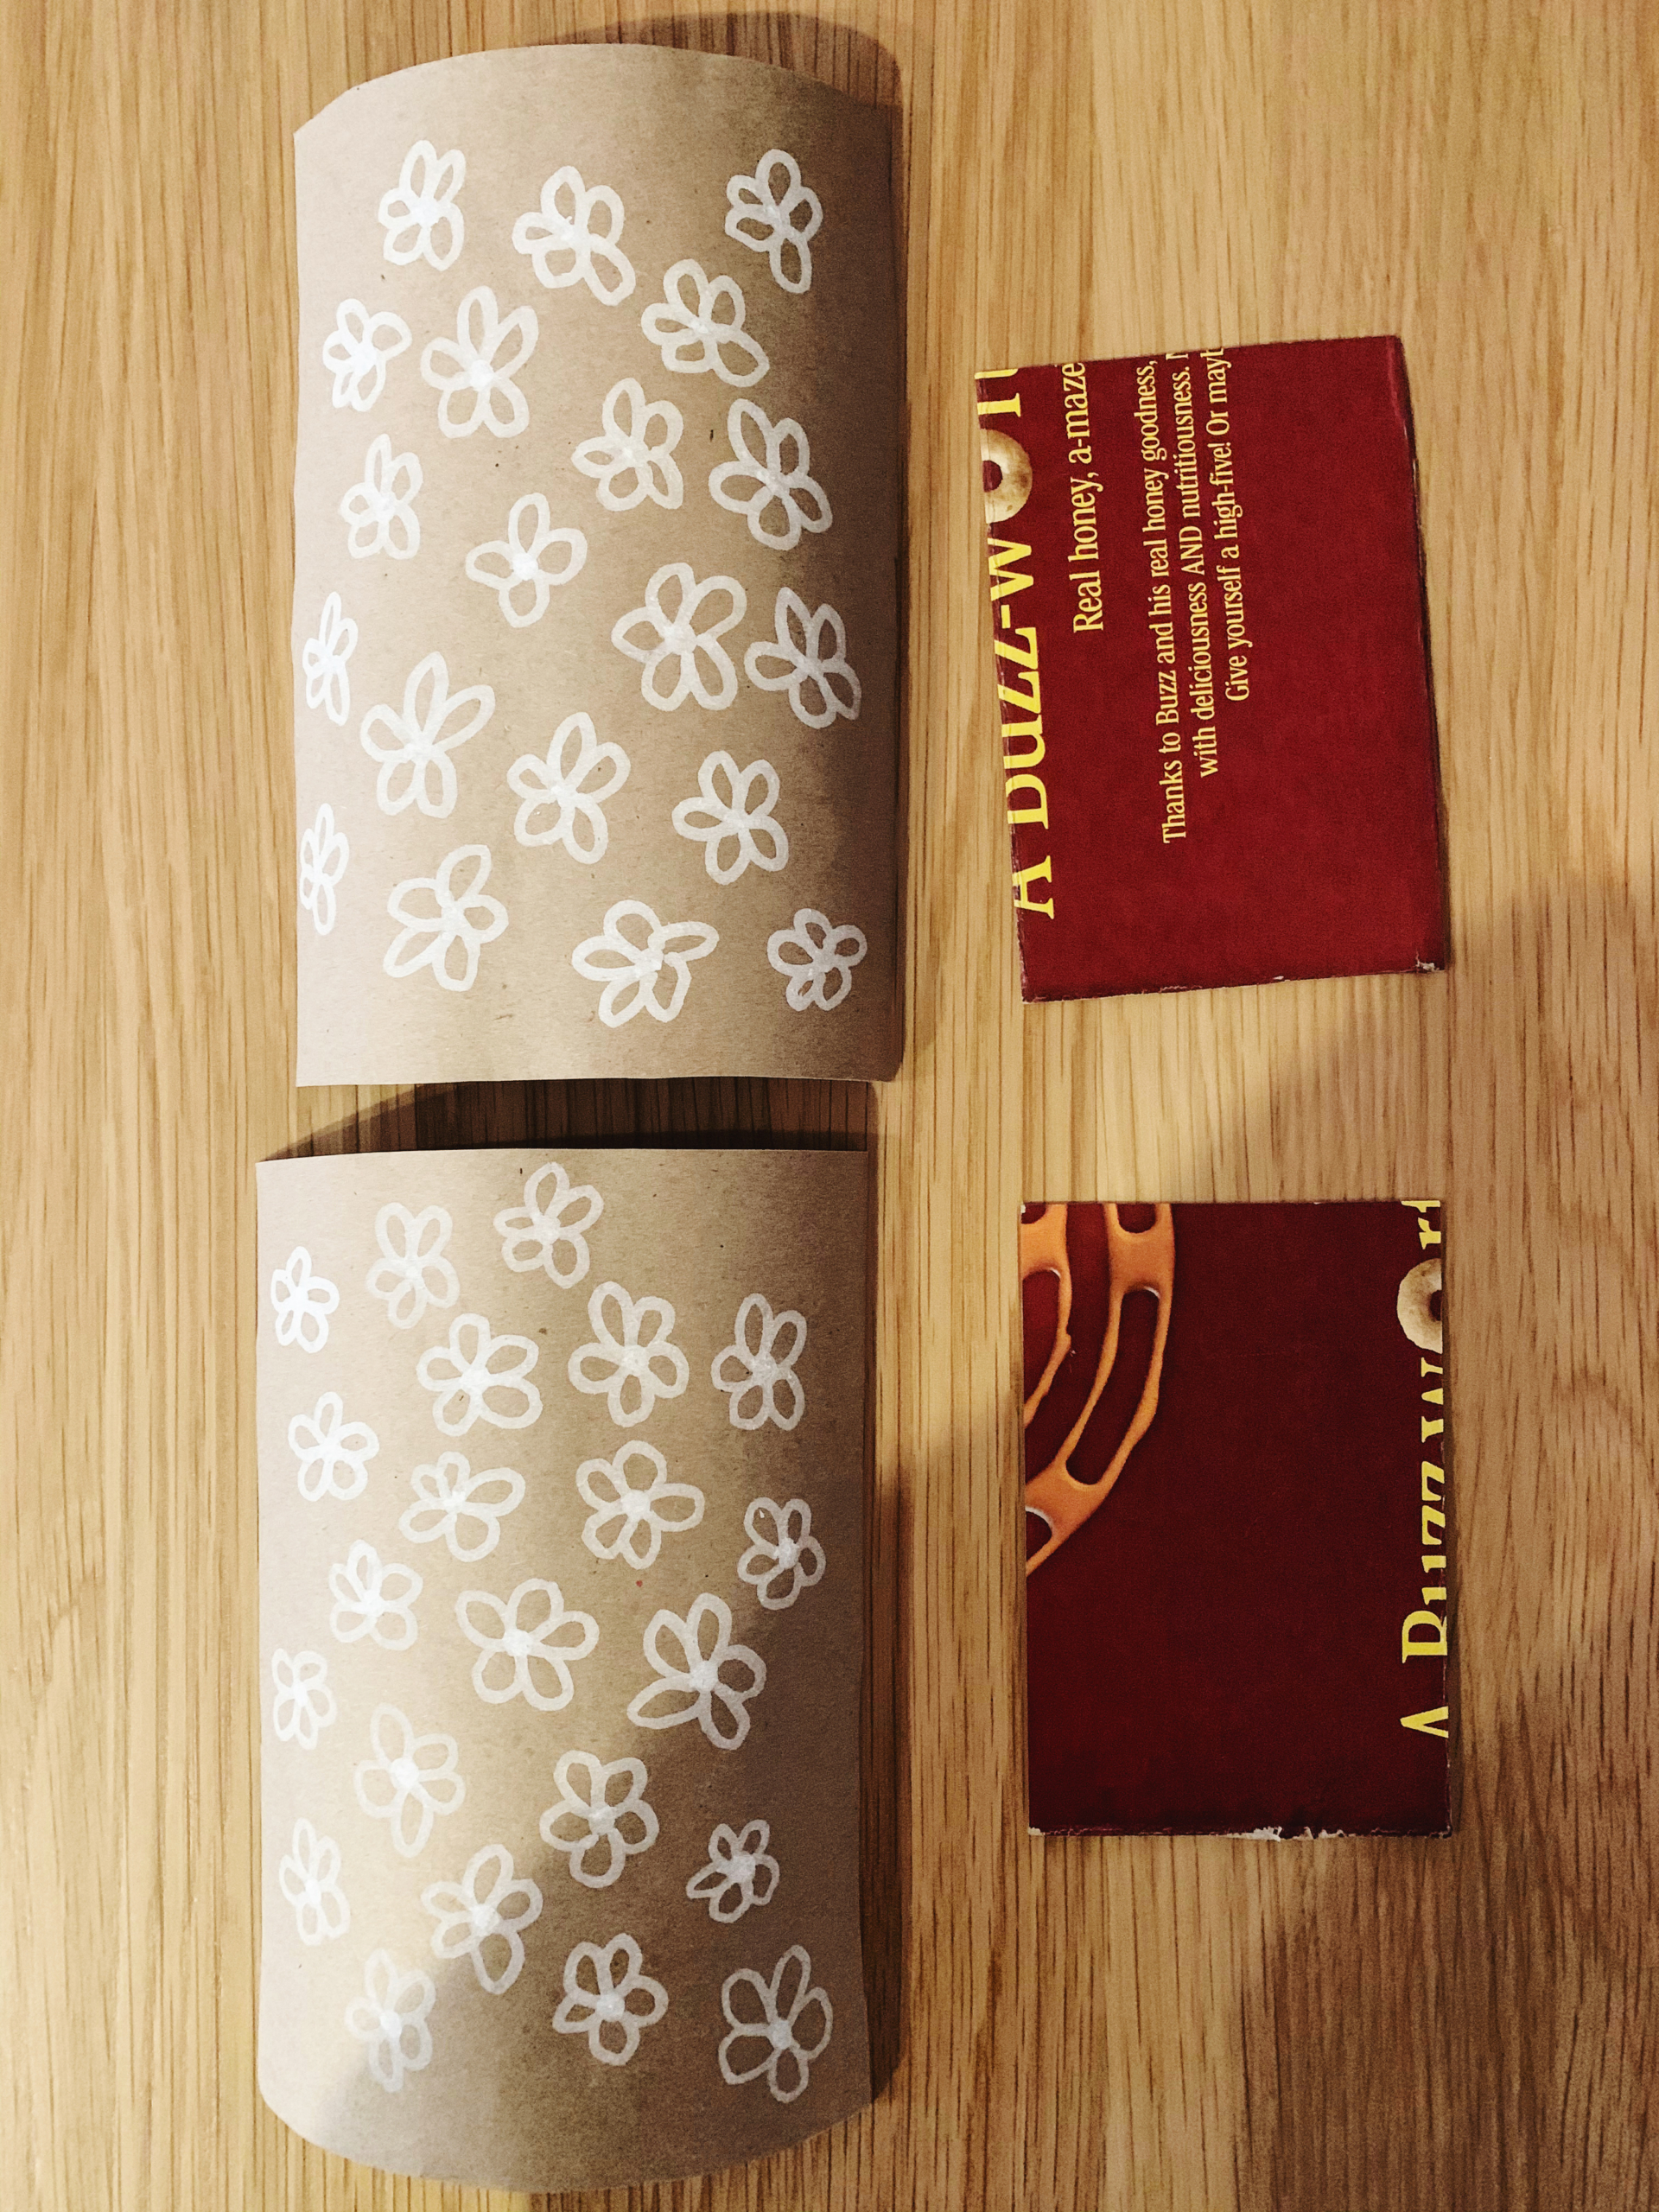
Step 8: Lay the cardboard onto the scrapbook paper, construction paper, or artwork you’re using to cover the book, and cut out two pieces a little larger than the cardboard. I used brown wrapping paper and drew flowers with a white paint pen. There are so many fun ways to decorate your cover! If your kids have old art projects around that you just can’t bring yourself to toss, this is the perfect way to upcycle them!

Step 9: Next, glue the cardboard cutouts into the center of the pieces that you just cut out.
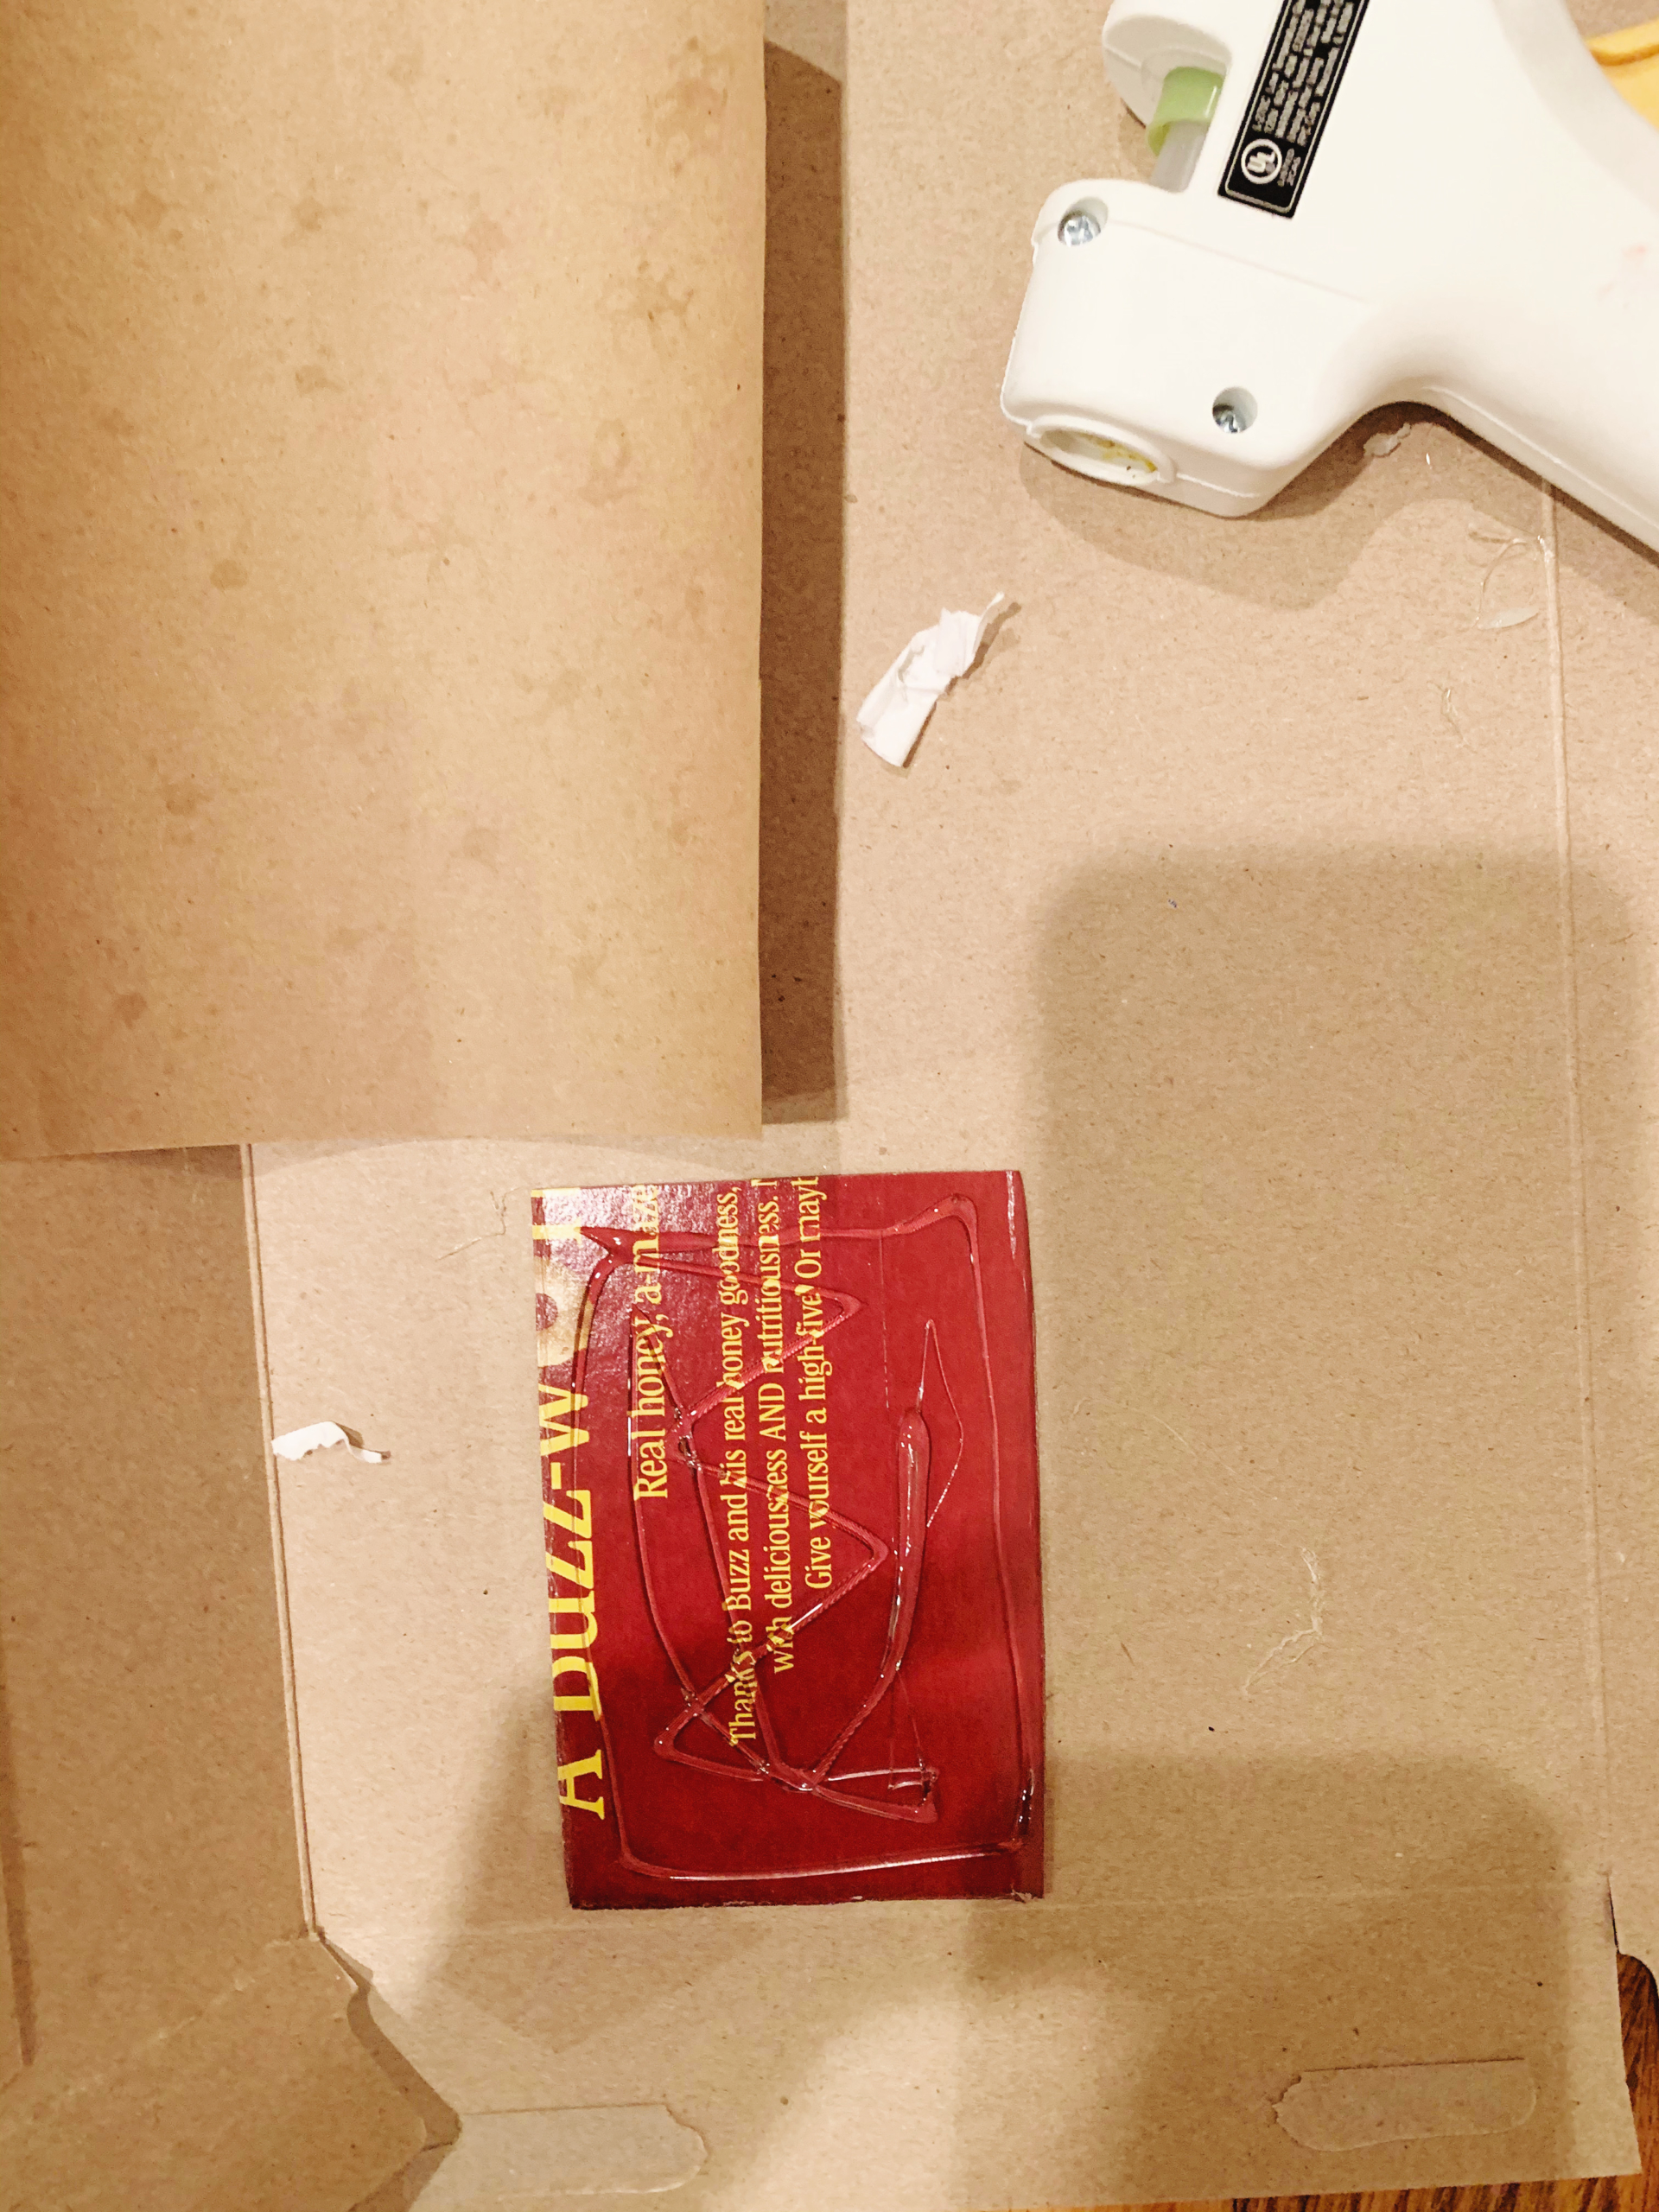
Step 10: Carefully snip off the corners of your scrapbook paper. Cut all the way to the corner of cardboard (this makes it look neat when you fold over the edges!).
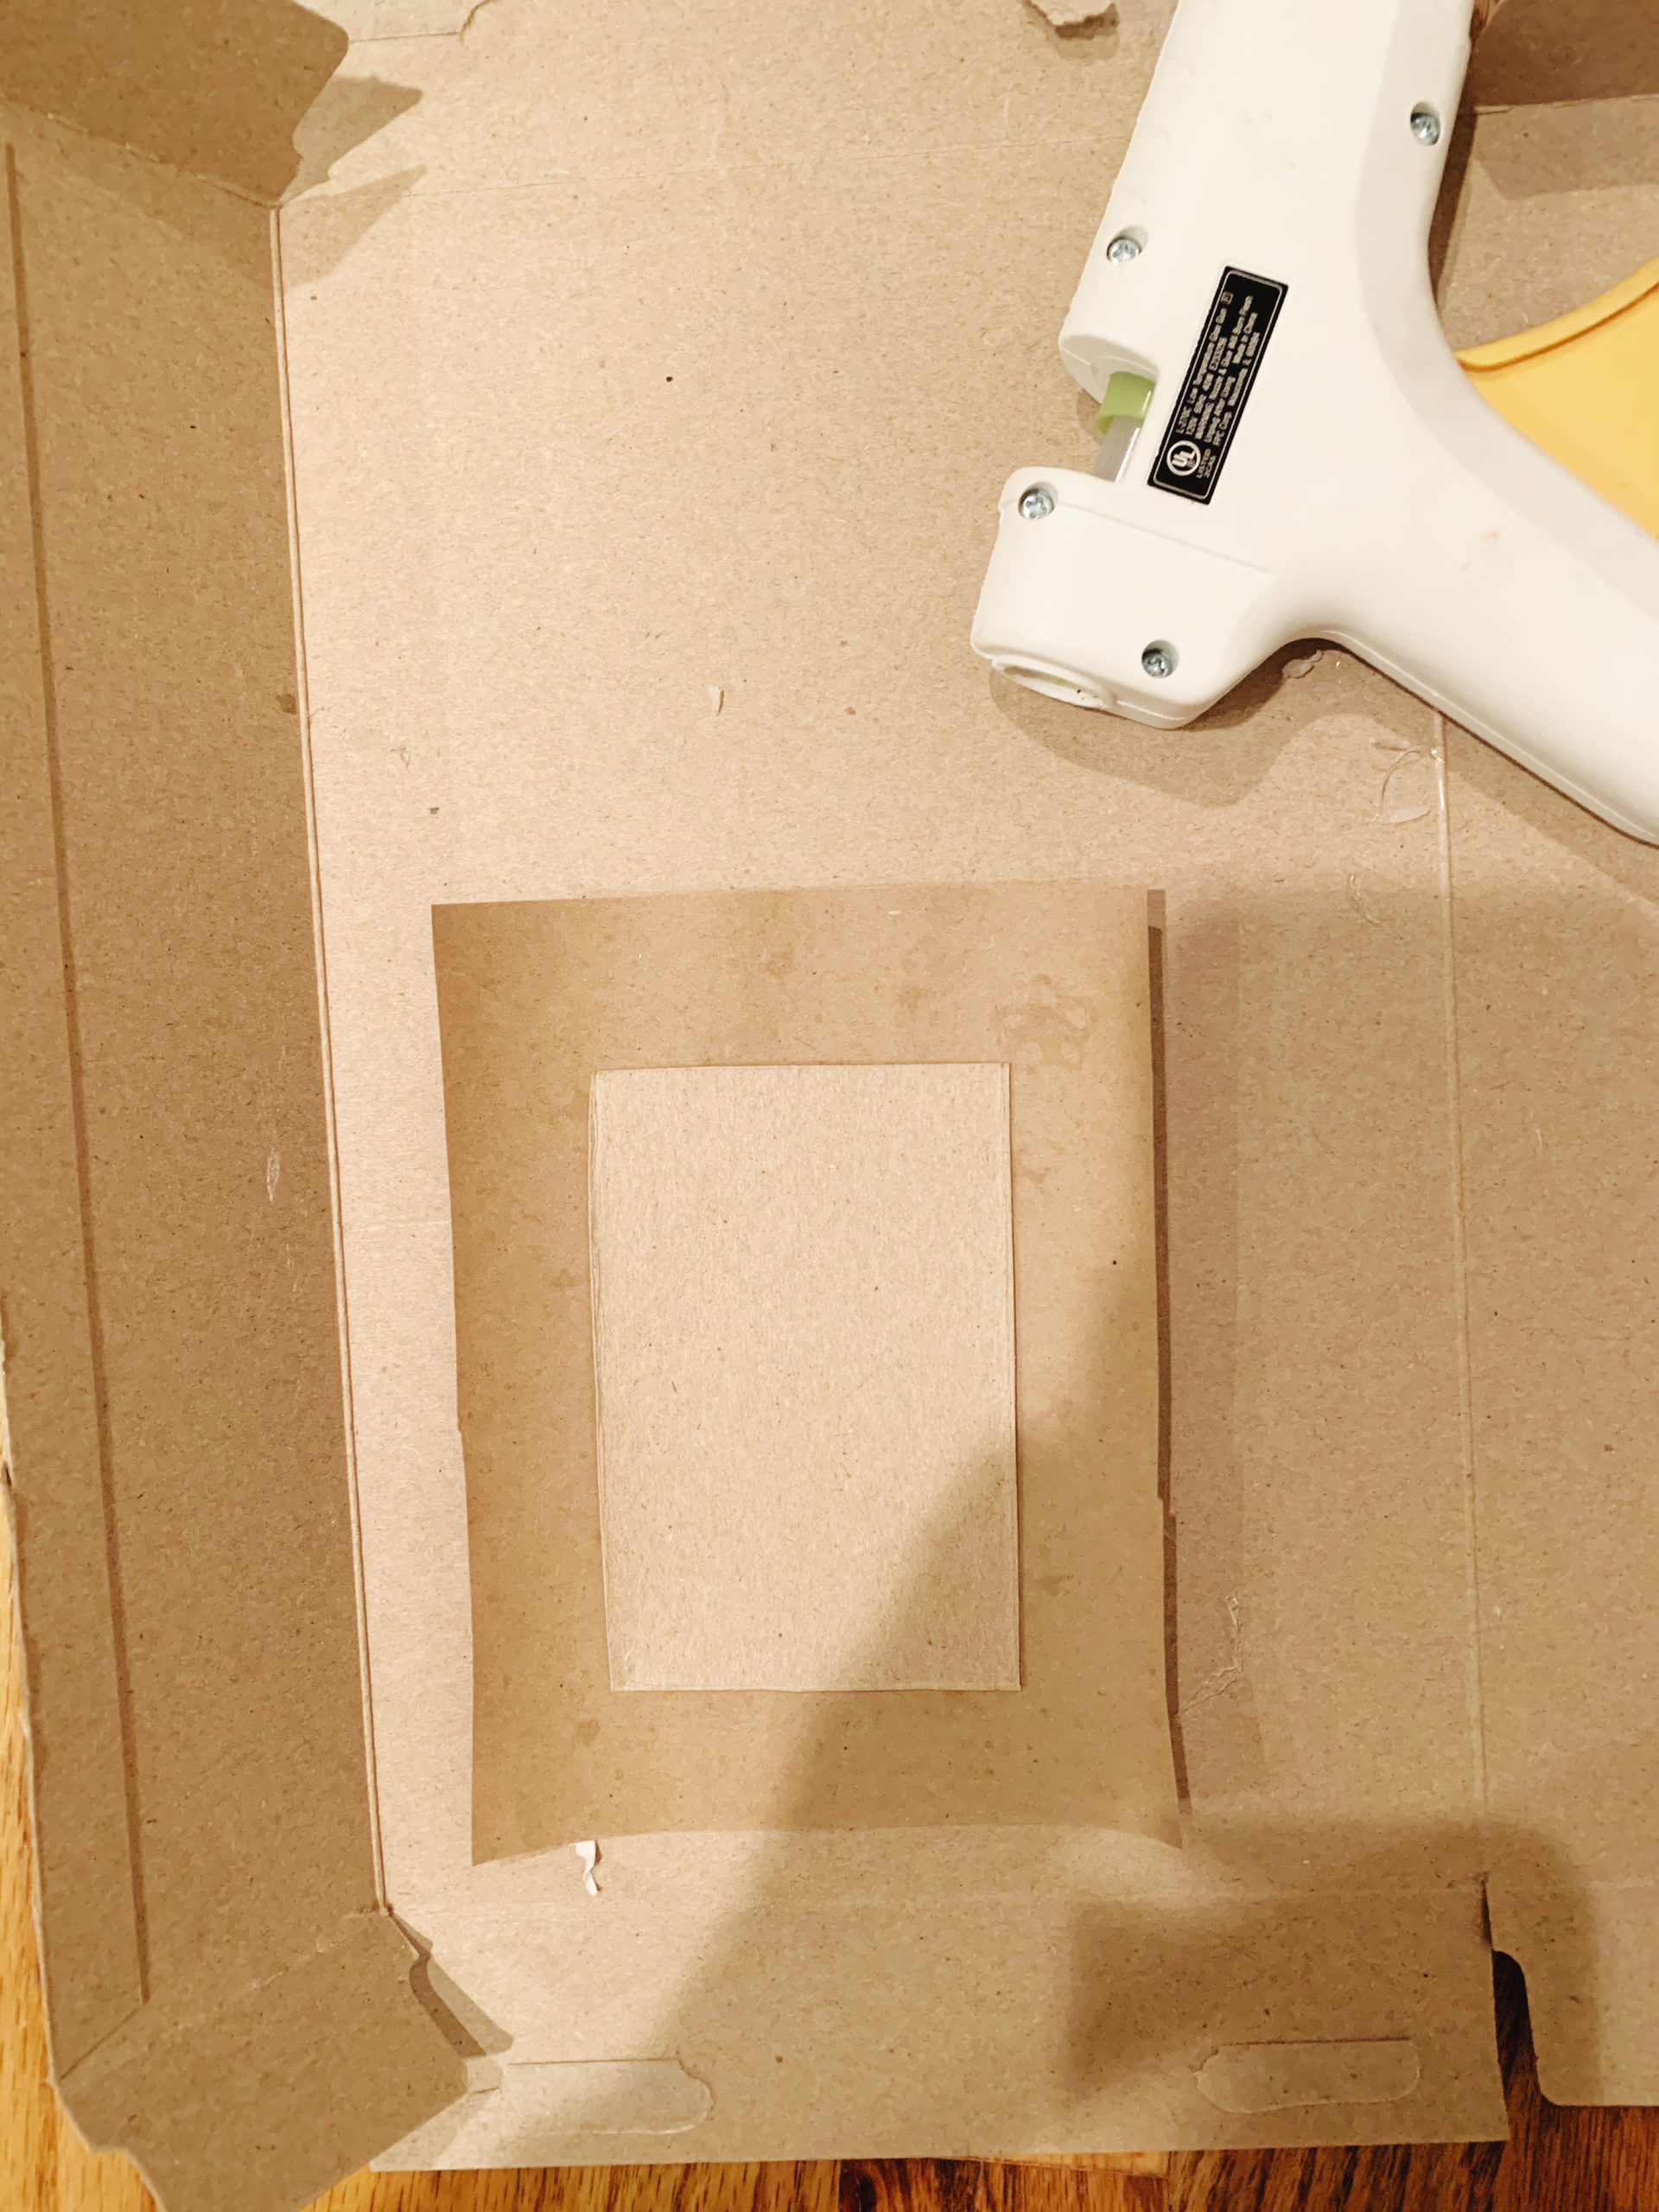
Step 11: Once you’ve cut the corners, fold over the flaps of excess paper and glue them into place on the back of the cardboard.
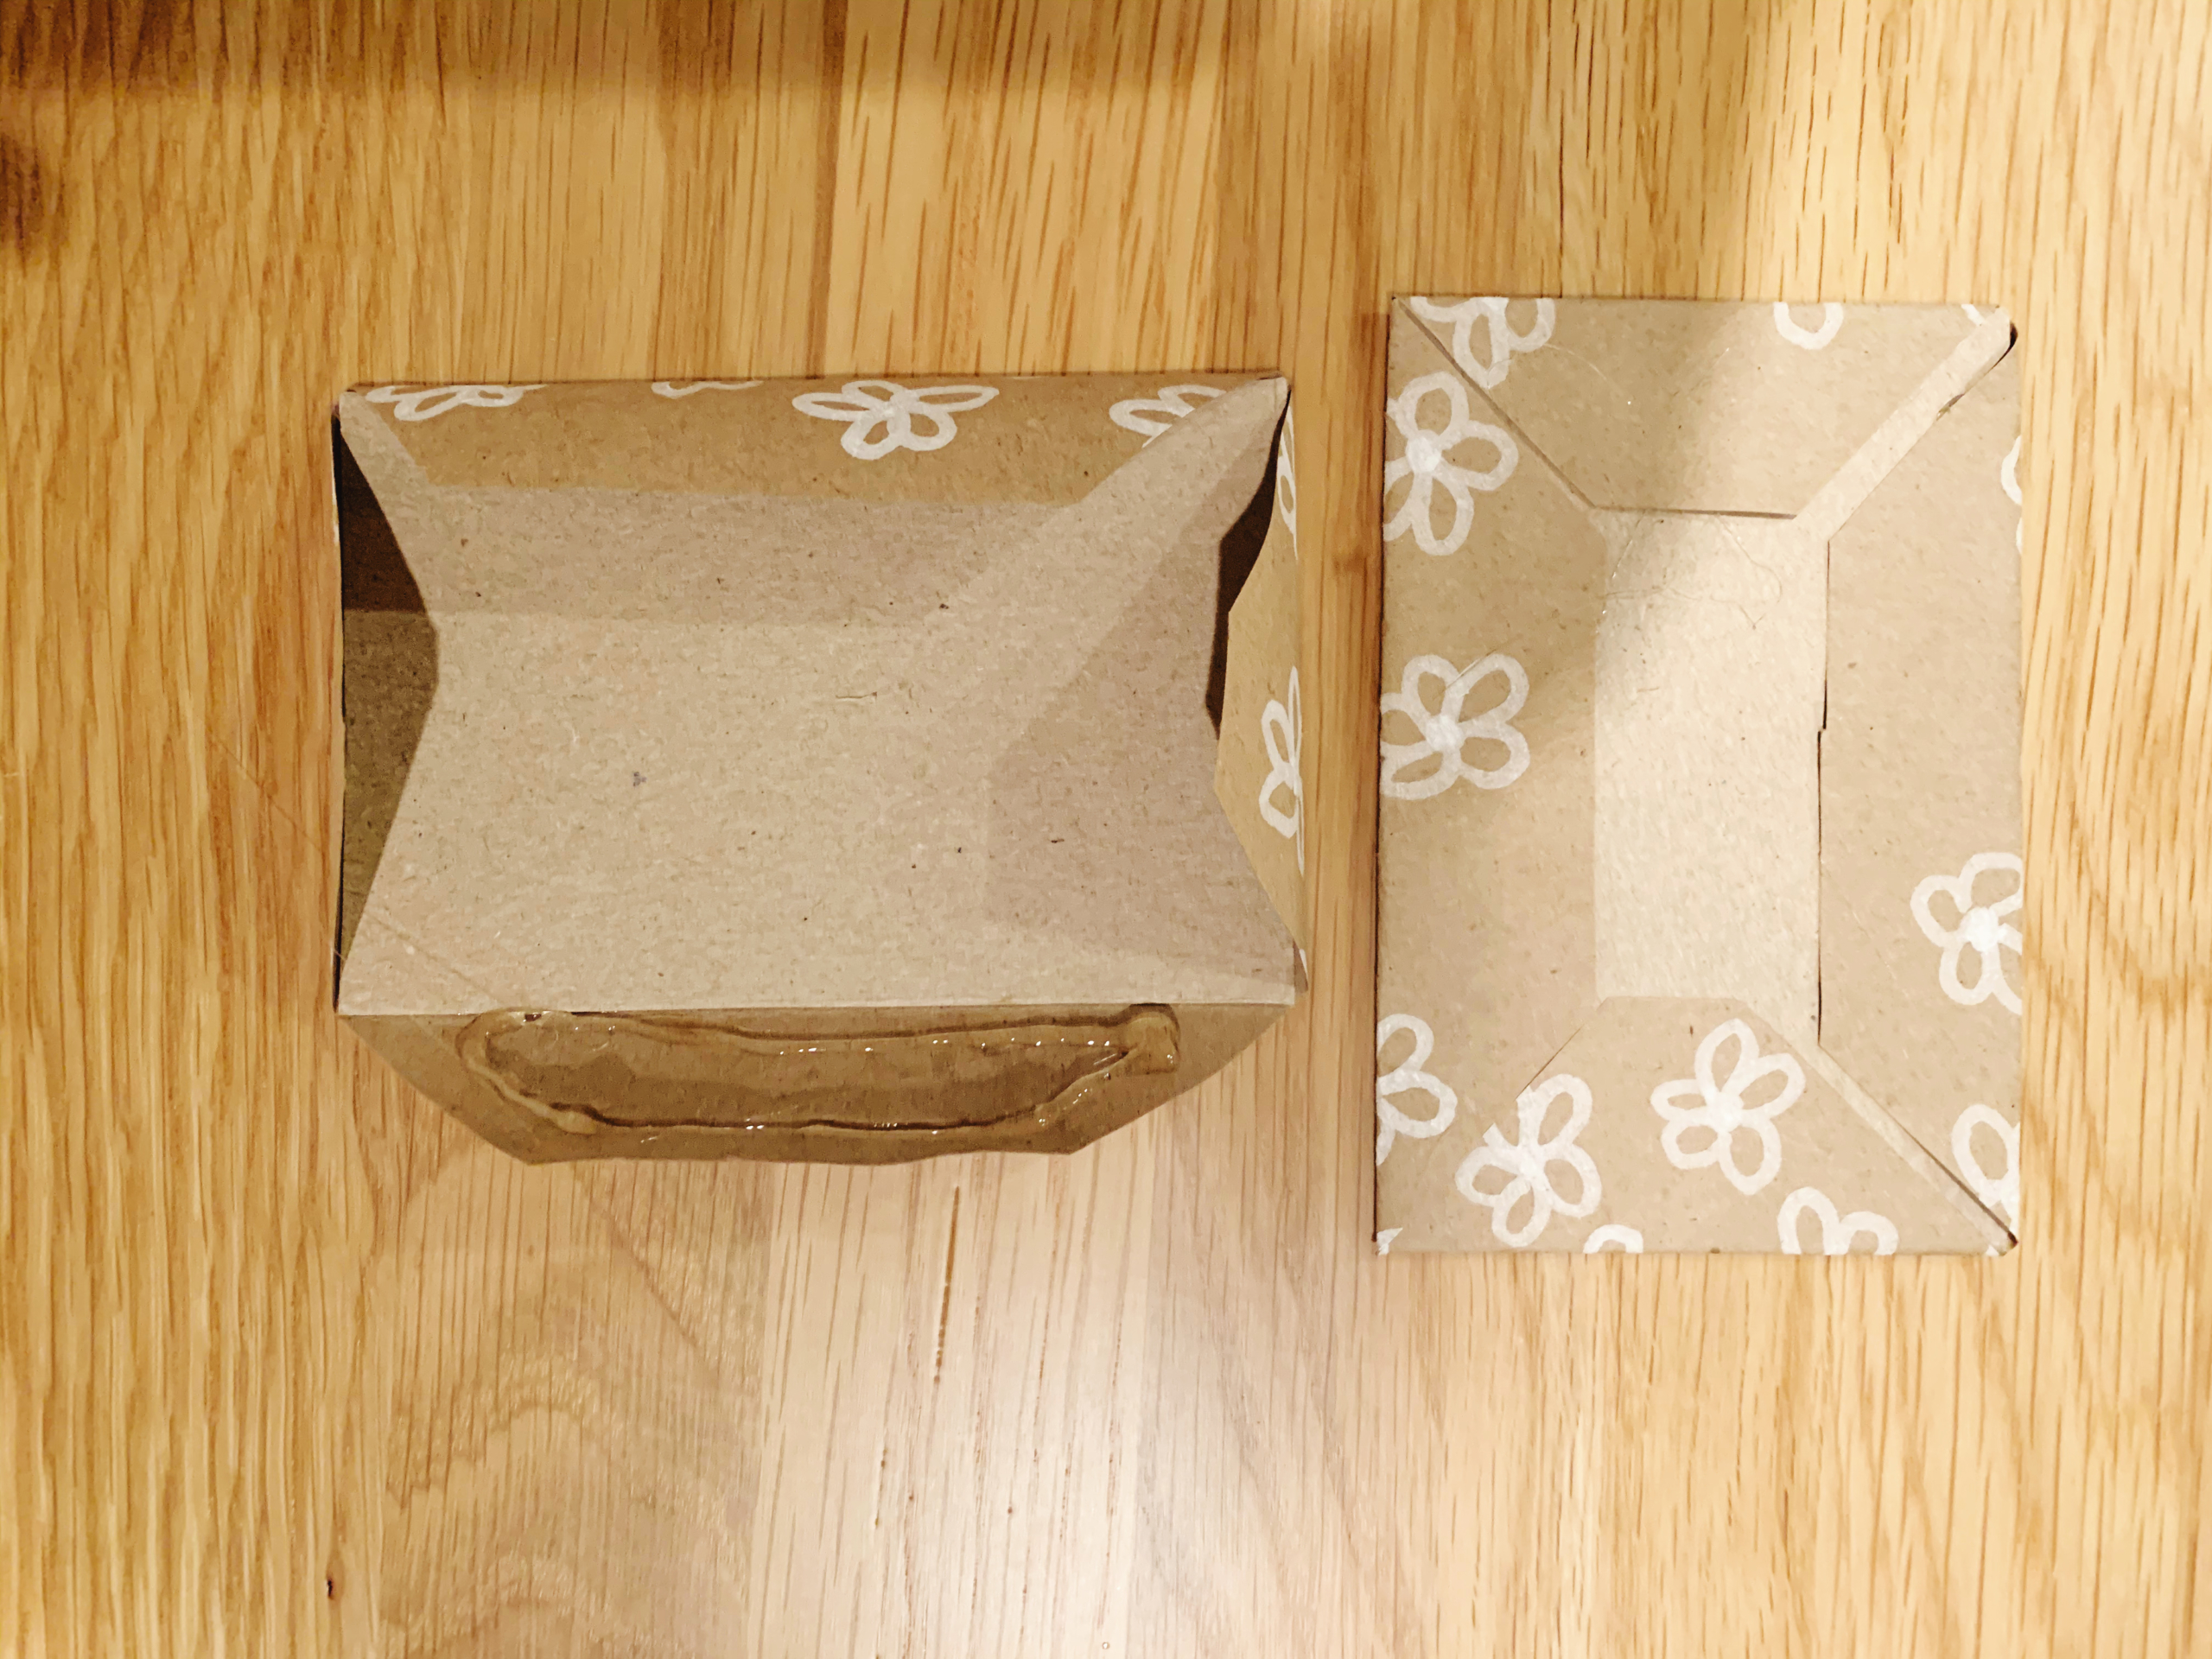

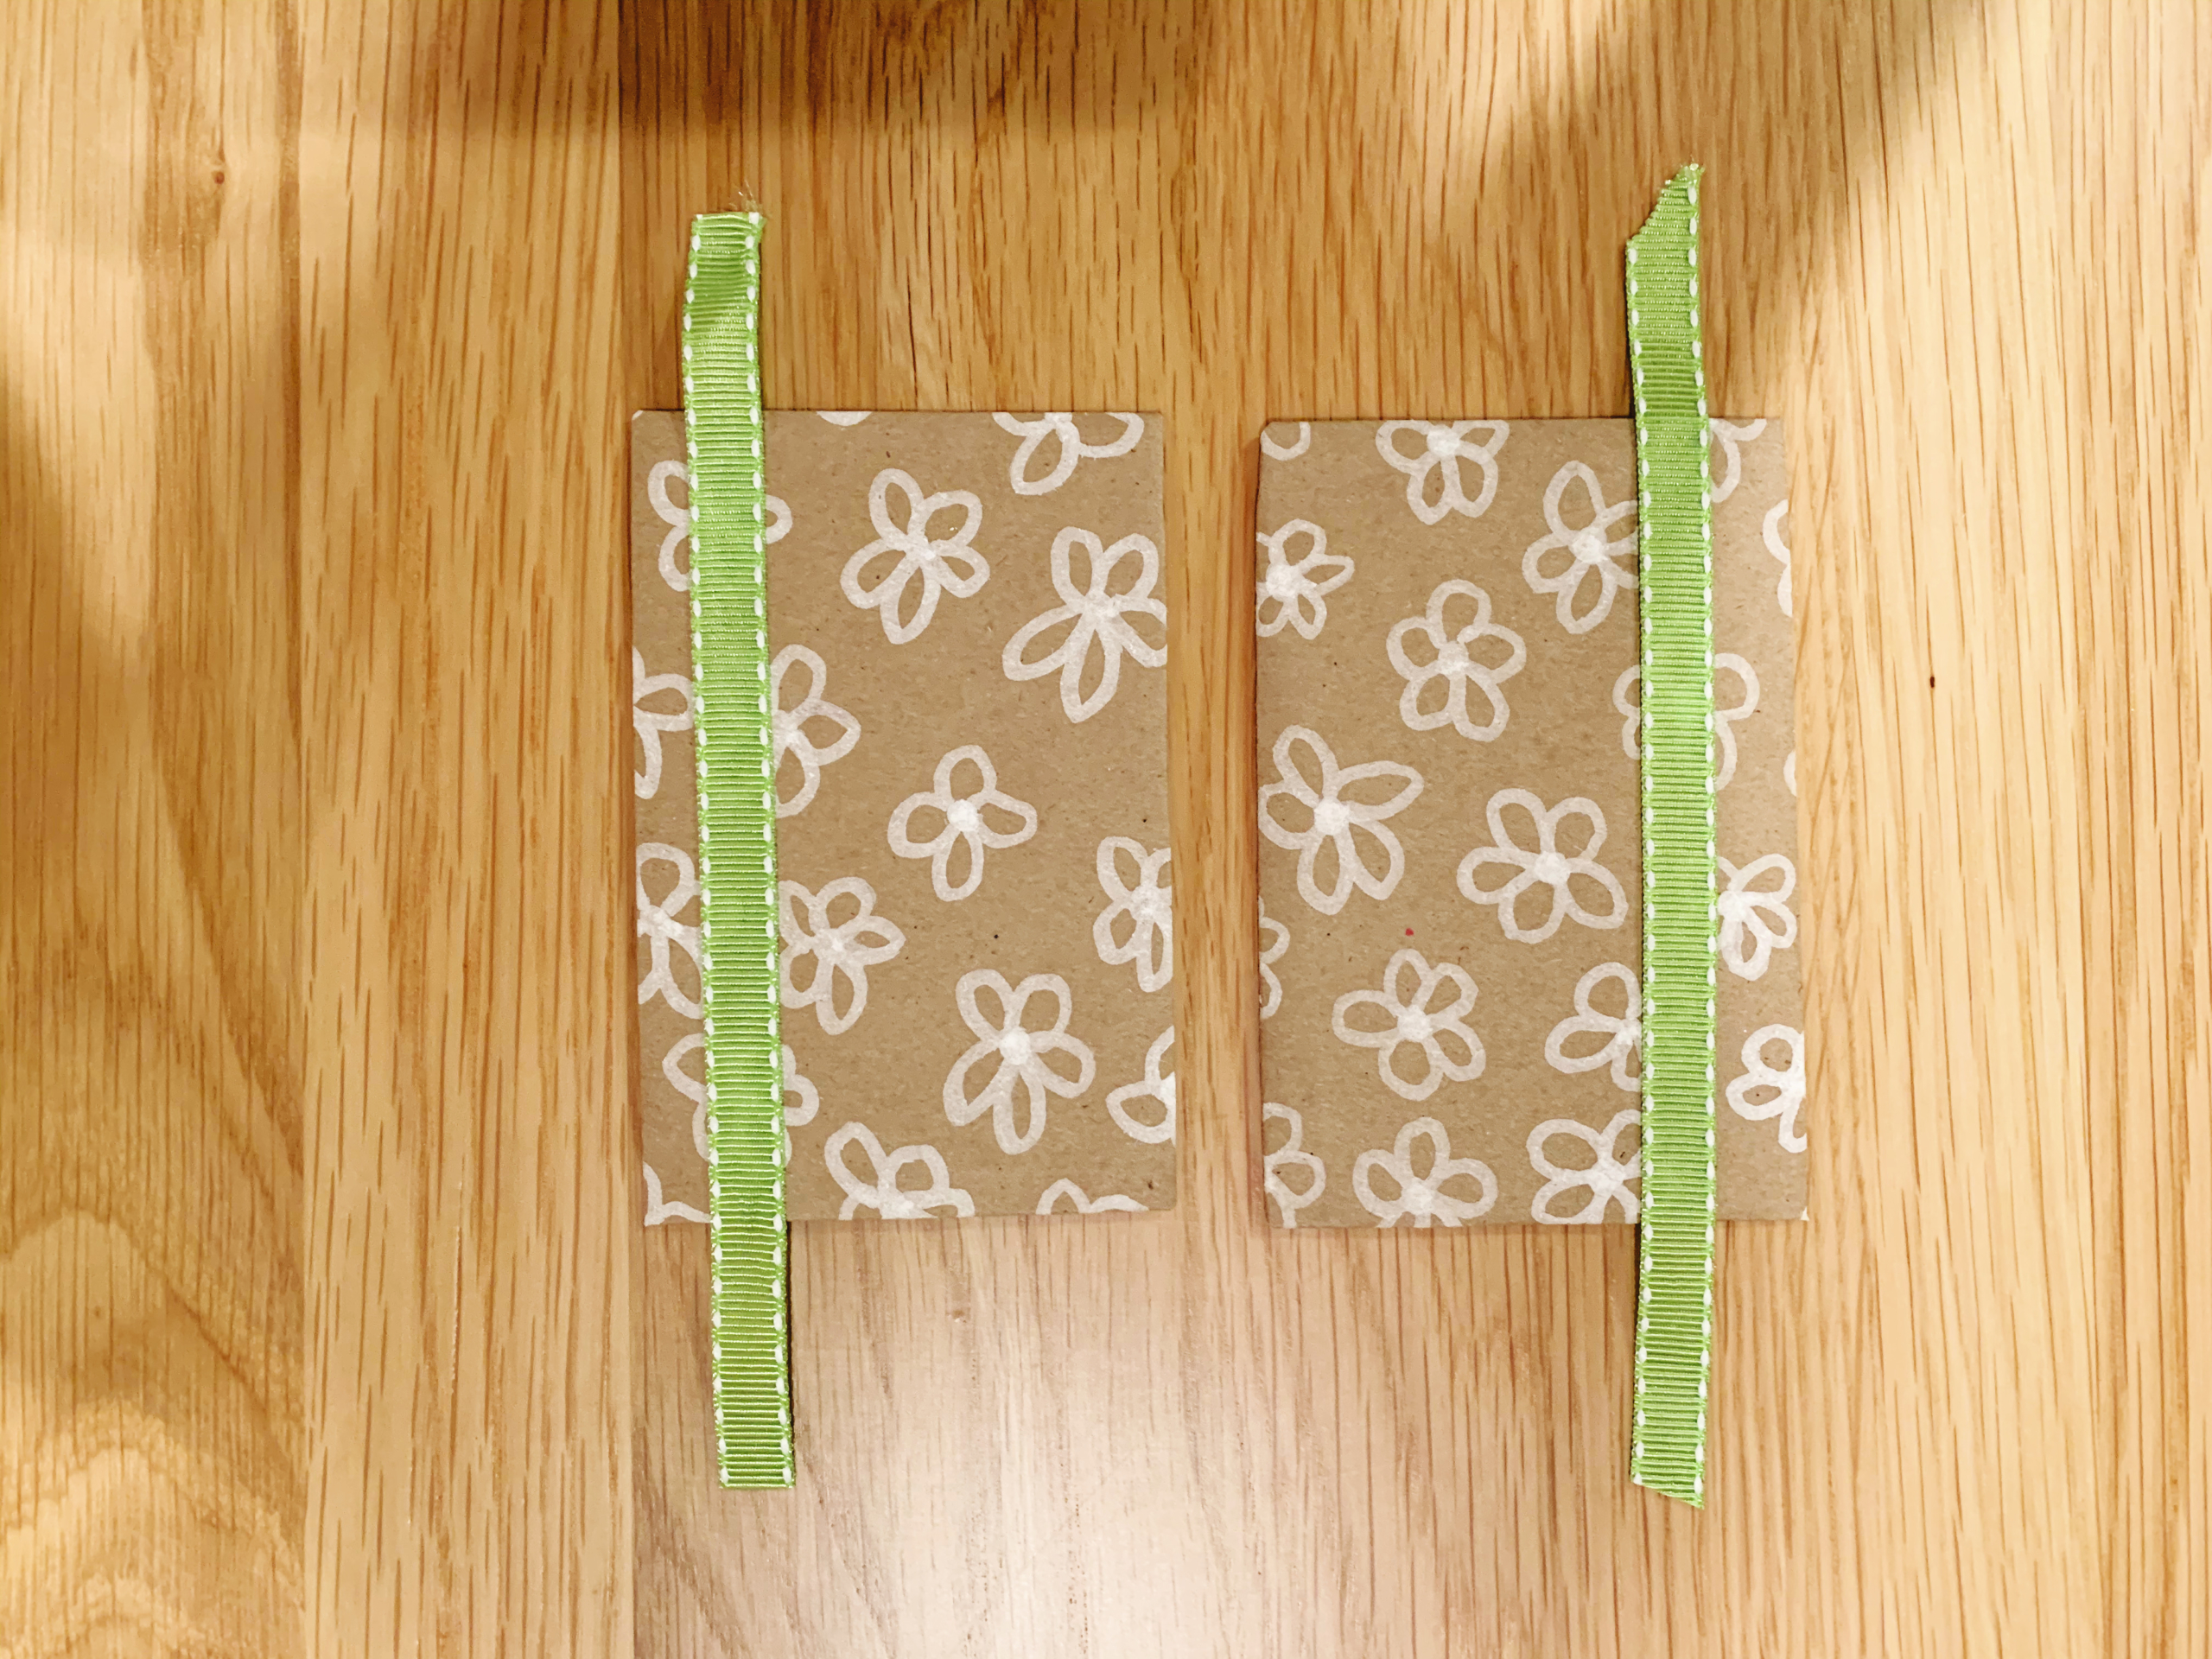
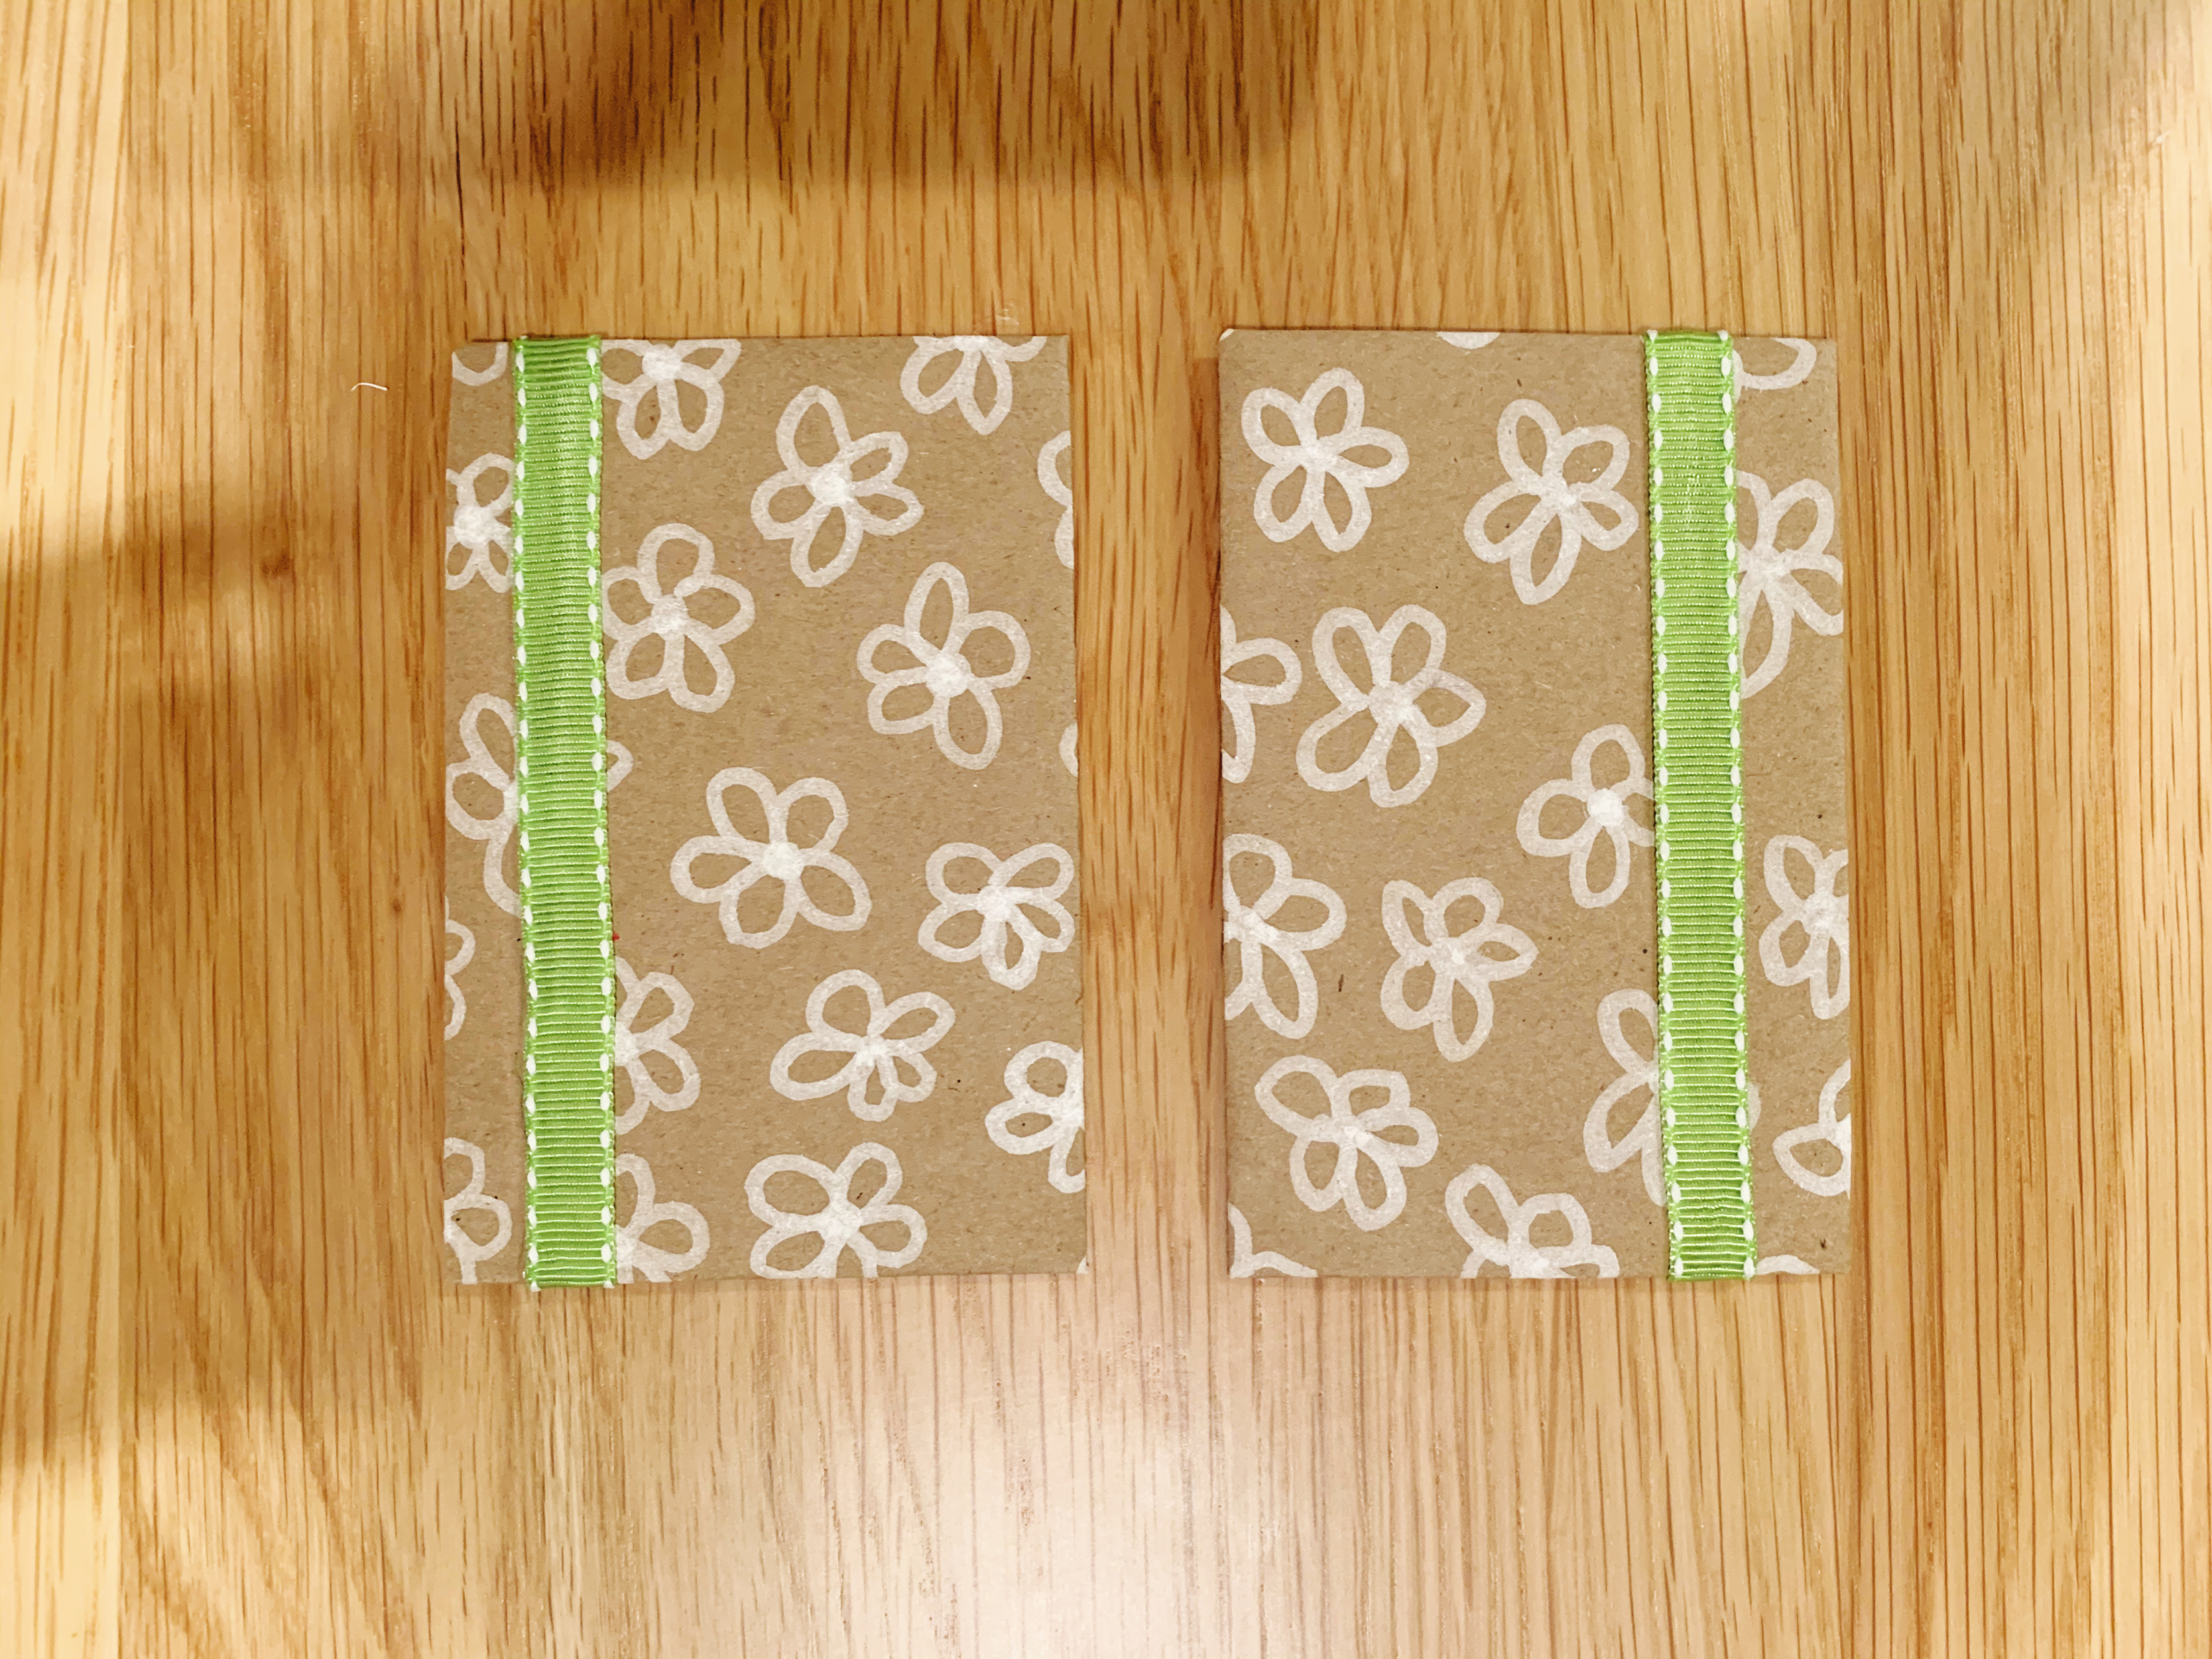
Step 12: You can also add other embellishments that wrap around the cover at this point. I added a ribbon to mine for a pop of color. You can add more decorations at the end, but before gluing your covers down, you will want to add any decorations that will wrap over the edge, so it has a nice clean finish!
Step 13: The last step is to fully assemble your book. To do so, glue the covers to each end of the paper accordion. Again, if using white glue, I recommend placing your book under a heavy book while the glue sets and dries.
Voila! Now you have a beautiful book that you can decorate with anything or everything from your craft drawer—rhinestones, glitter, markers, ribbon, or anything else you can think of. It’s your book, so have fun adding your own personal flair! You can use these adorable books as notebooks, help kids create their own storybooks inside them as described above, or give them as gifts or party favors.