
One of my strongest memories growing up as a child was playing board games with my family. My dad’s favorite game was Sorry! Each time he bumped my piece off the board he shouted, “Sorry! I’m not sorry!” Was my dad creating trending phrases 20 years ahead of time or secretly a songwriter for Demi Lovato? Uncertain. But one thing’s sure—30 years later, I carry the warm memory of those evenings with me.
Family game nights can be a really wonderful way to spend quality time together as a family. Board games also teach children fine motor skills, taking turns, patience, and problem solving, and they can even help improve academic skills. But, most importantly, they’re fun! I created this tutorial to help you and your children make a DIY board game that reinforces alphabetic knowledge and gives you a unique opportunity to bond.
This simple alphabet game is tailored for children from about 3 to 5 years old, so it’s easy to make, quick to play, and supports practicing basic letter sounds. Together, you’ll make and customize your ABCs board game, and then you can play it over and over, building literacy and memories along the way.
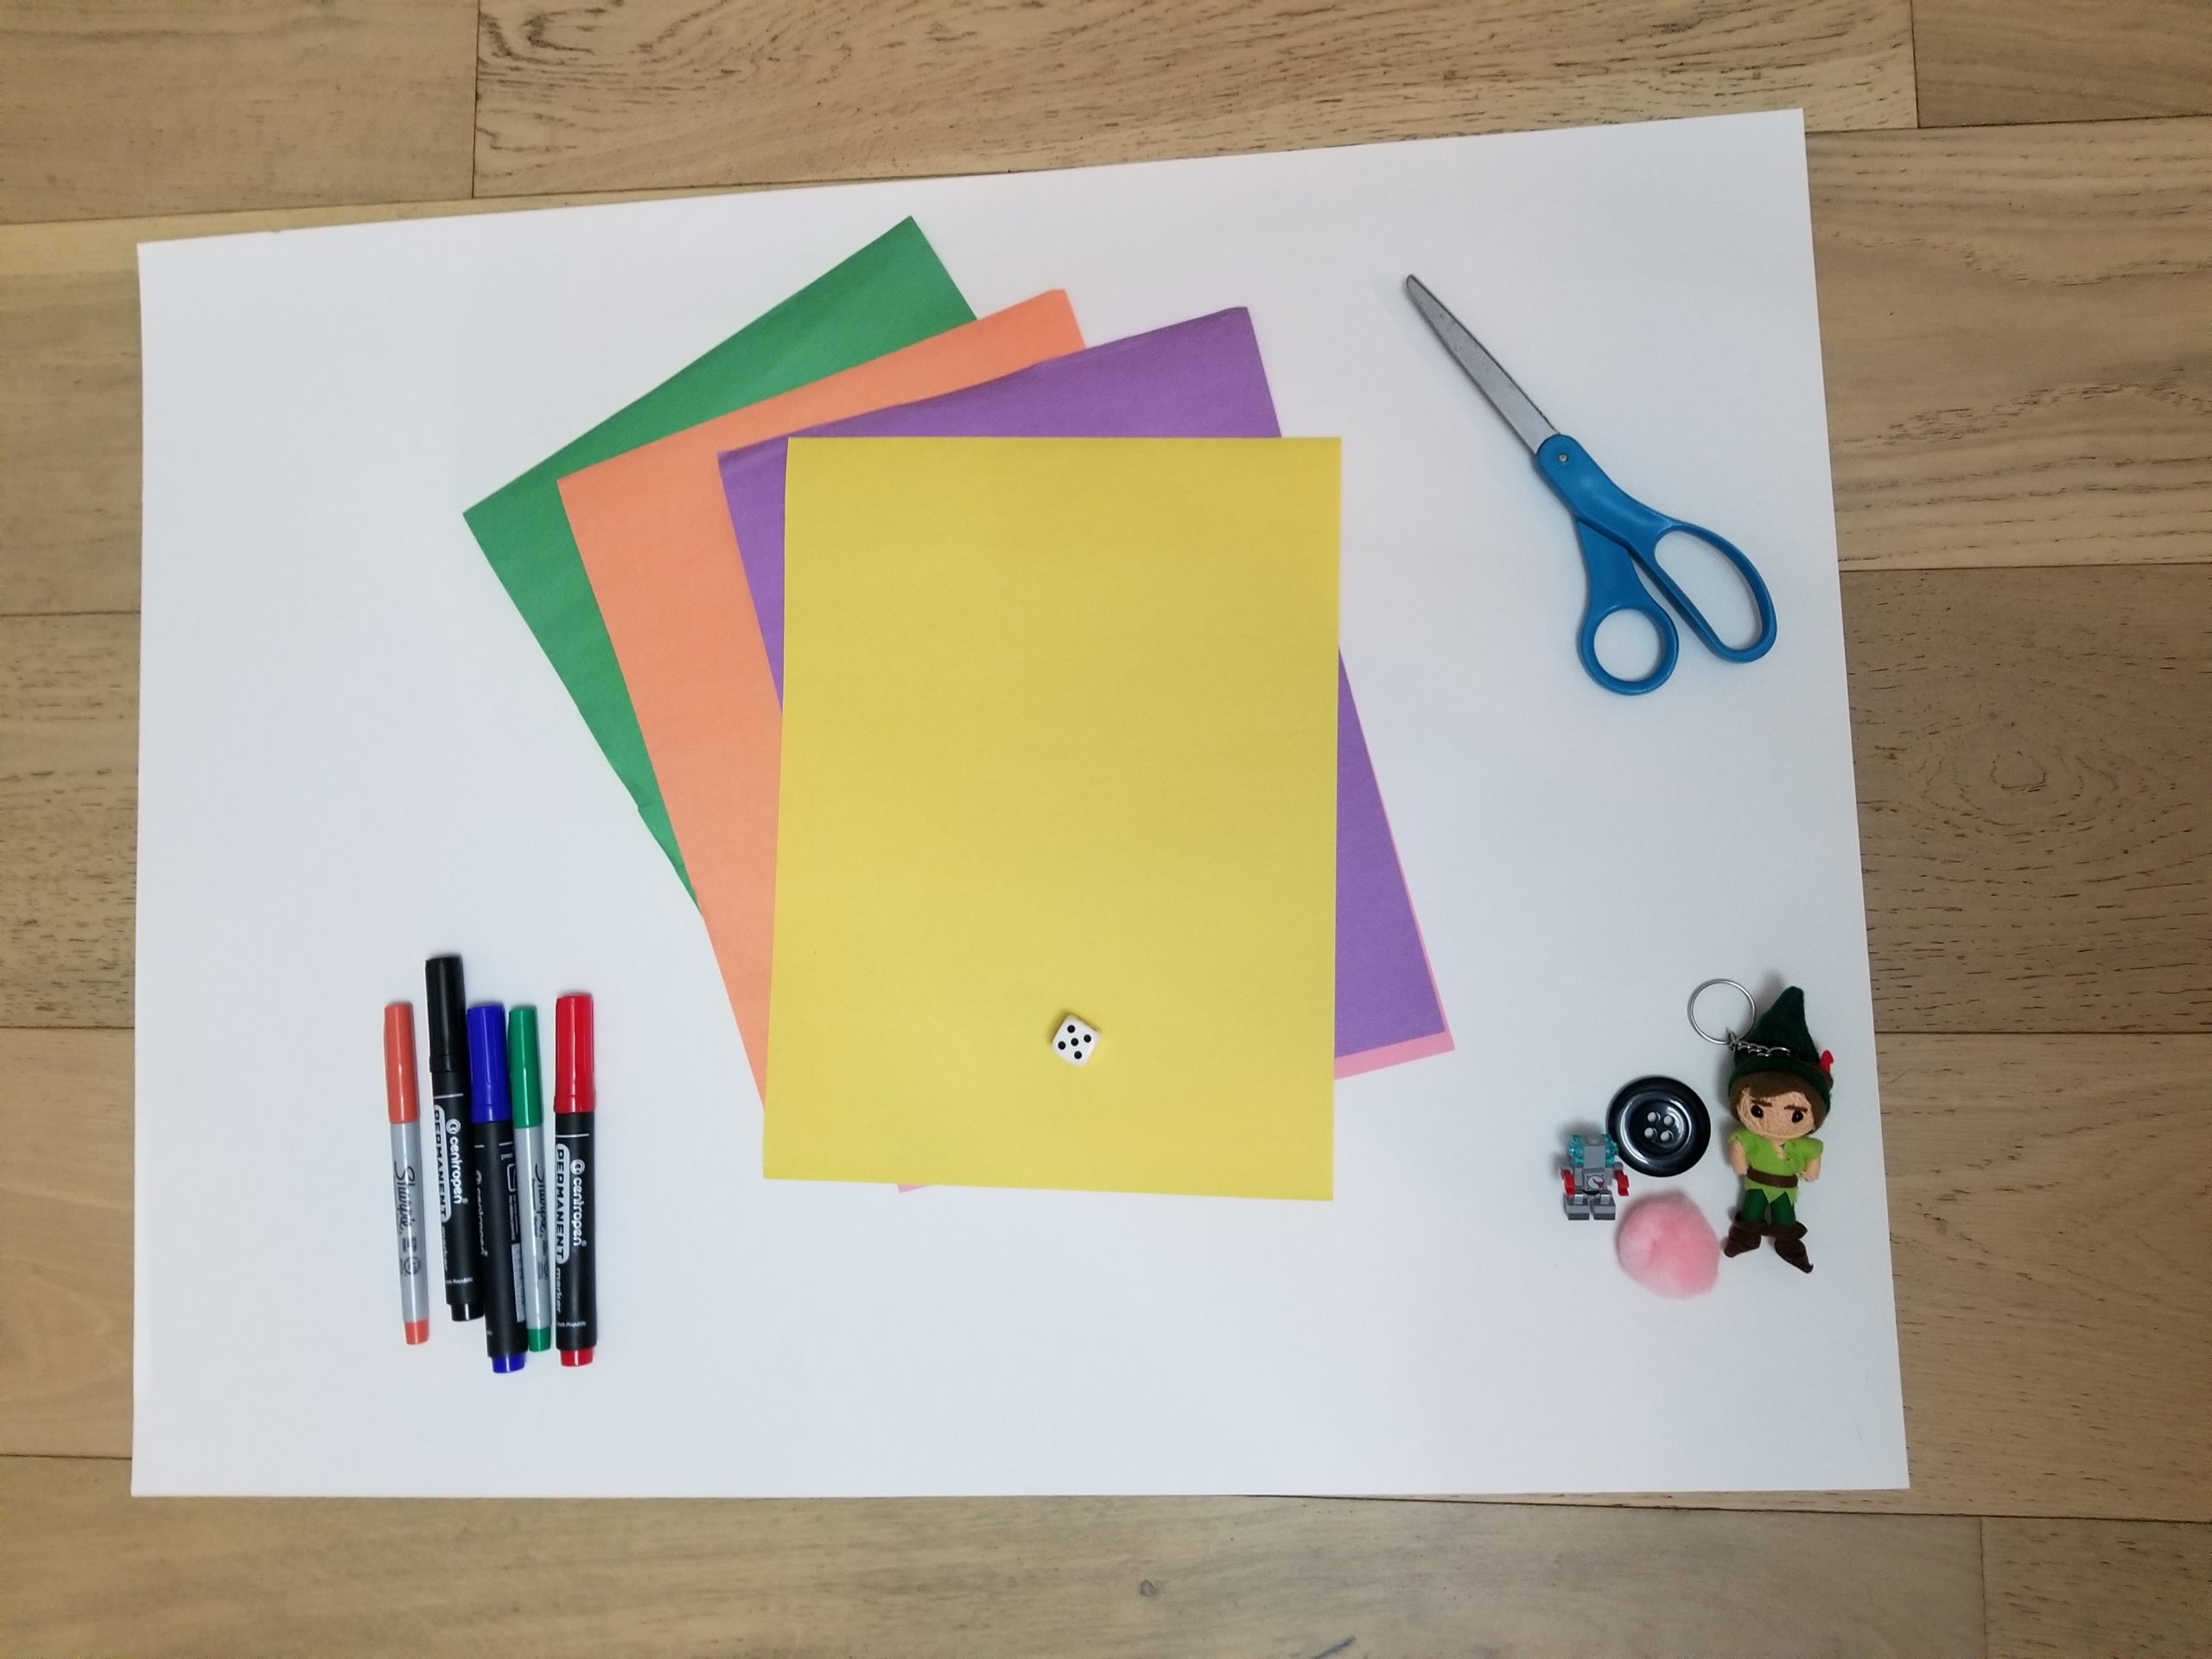
Materials:
- Poster board
- Scissors
- Markers
- 1 Die
- Small items to use as playing pieces
- Glue (optional)
- Construction paper (optional)
Cost: Around $3 for the poster board.
Remember: Let your child help you with each of these steps. Their input is very valuable and will help make sure they’re engaged!
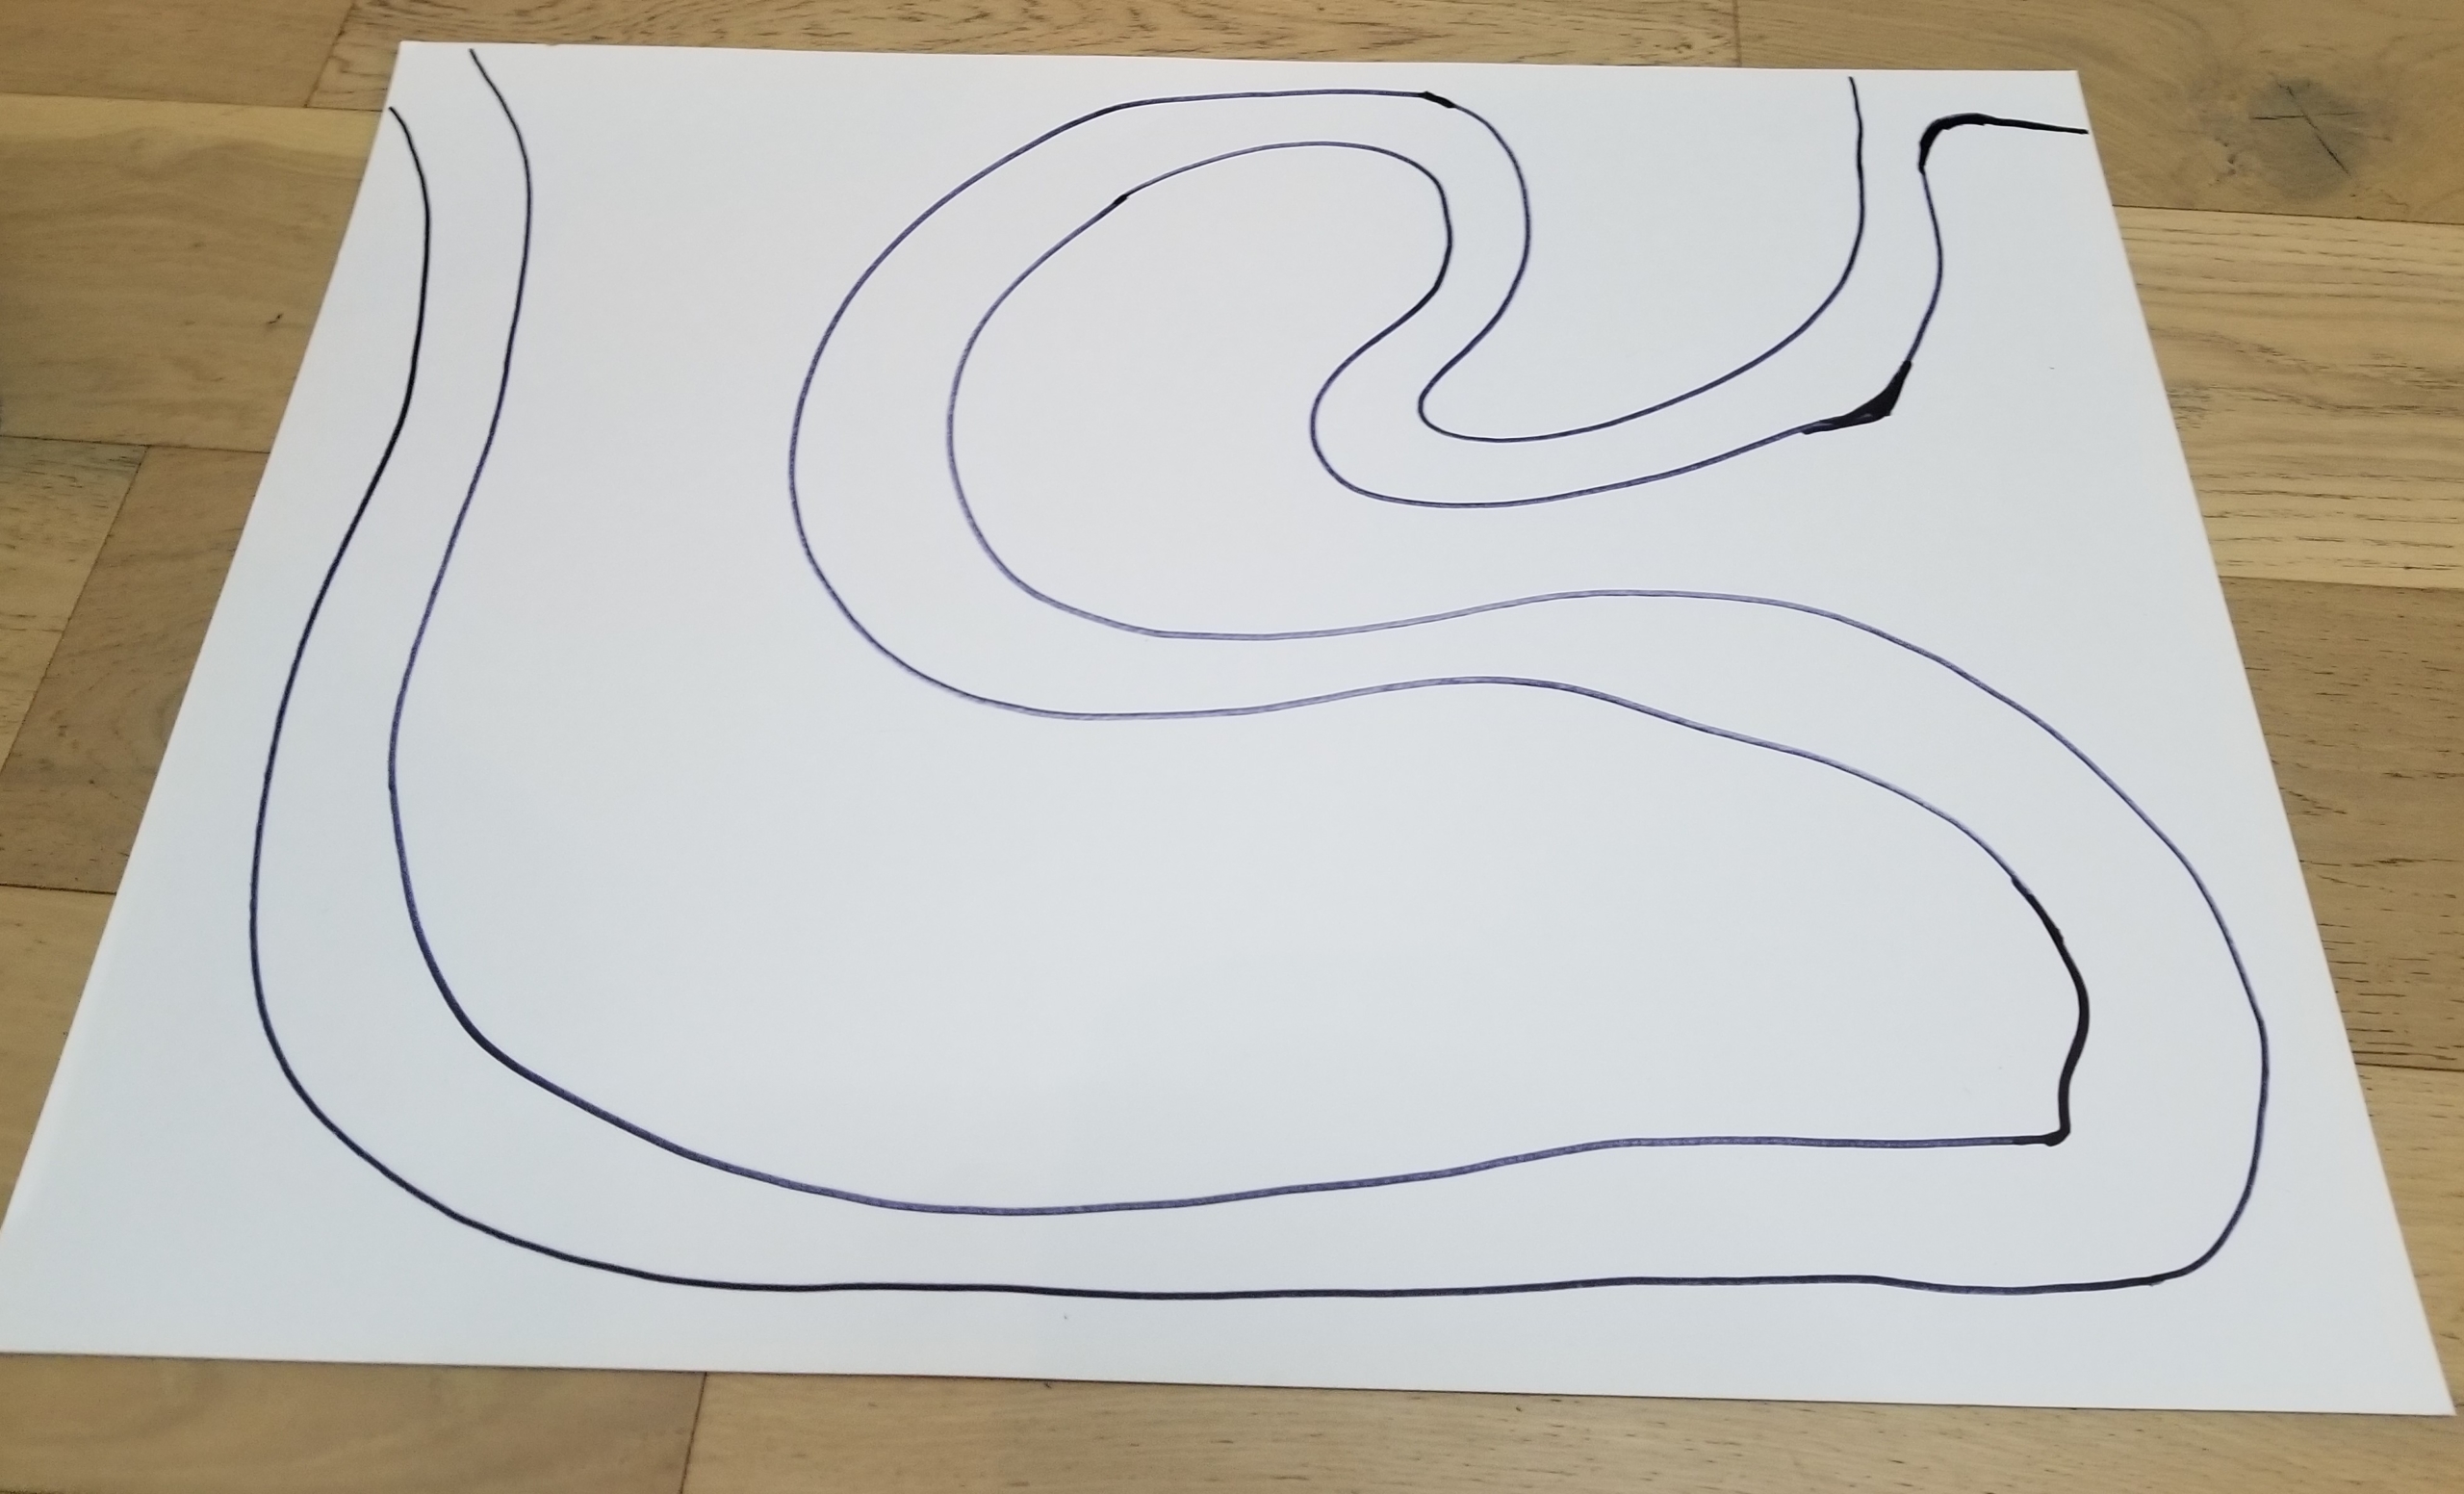
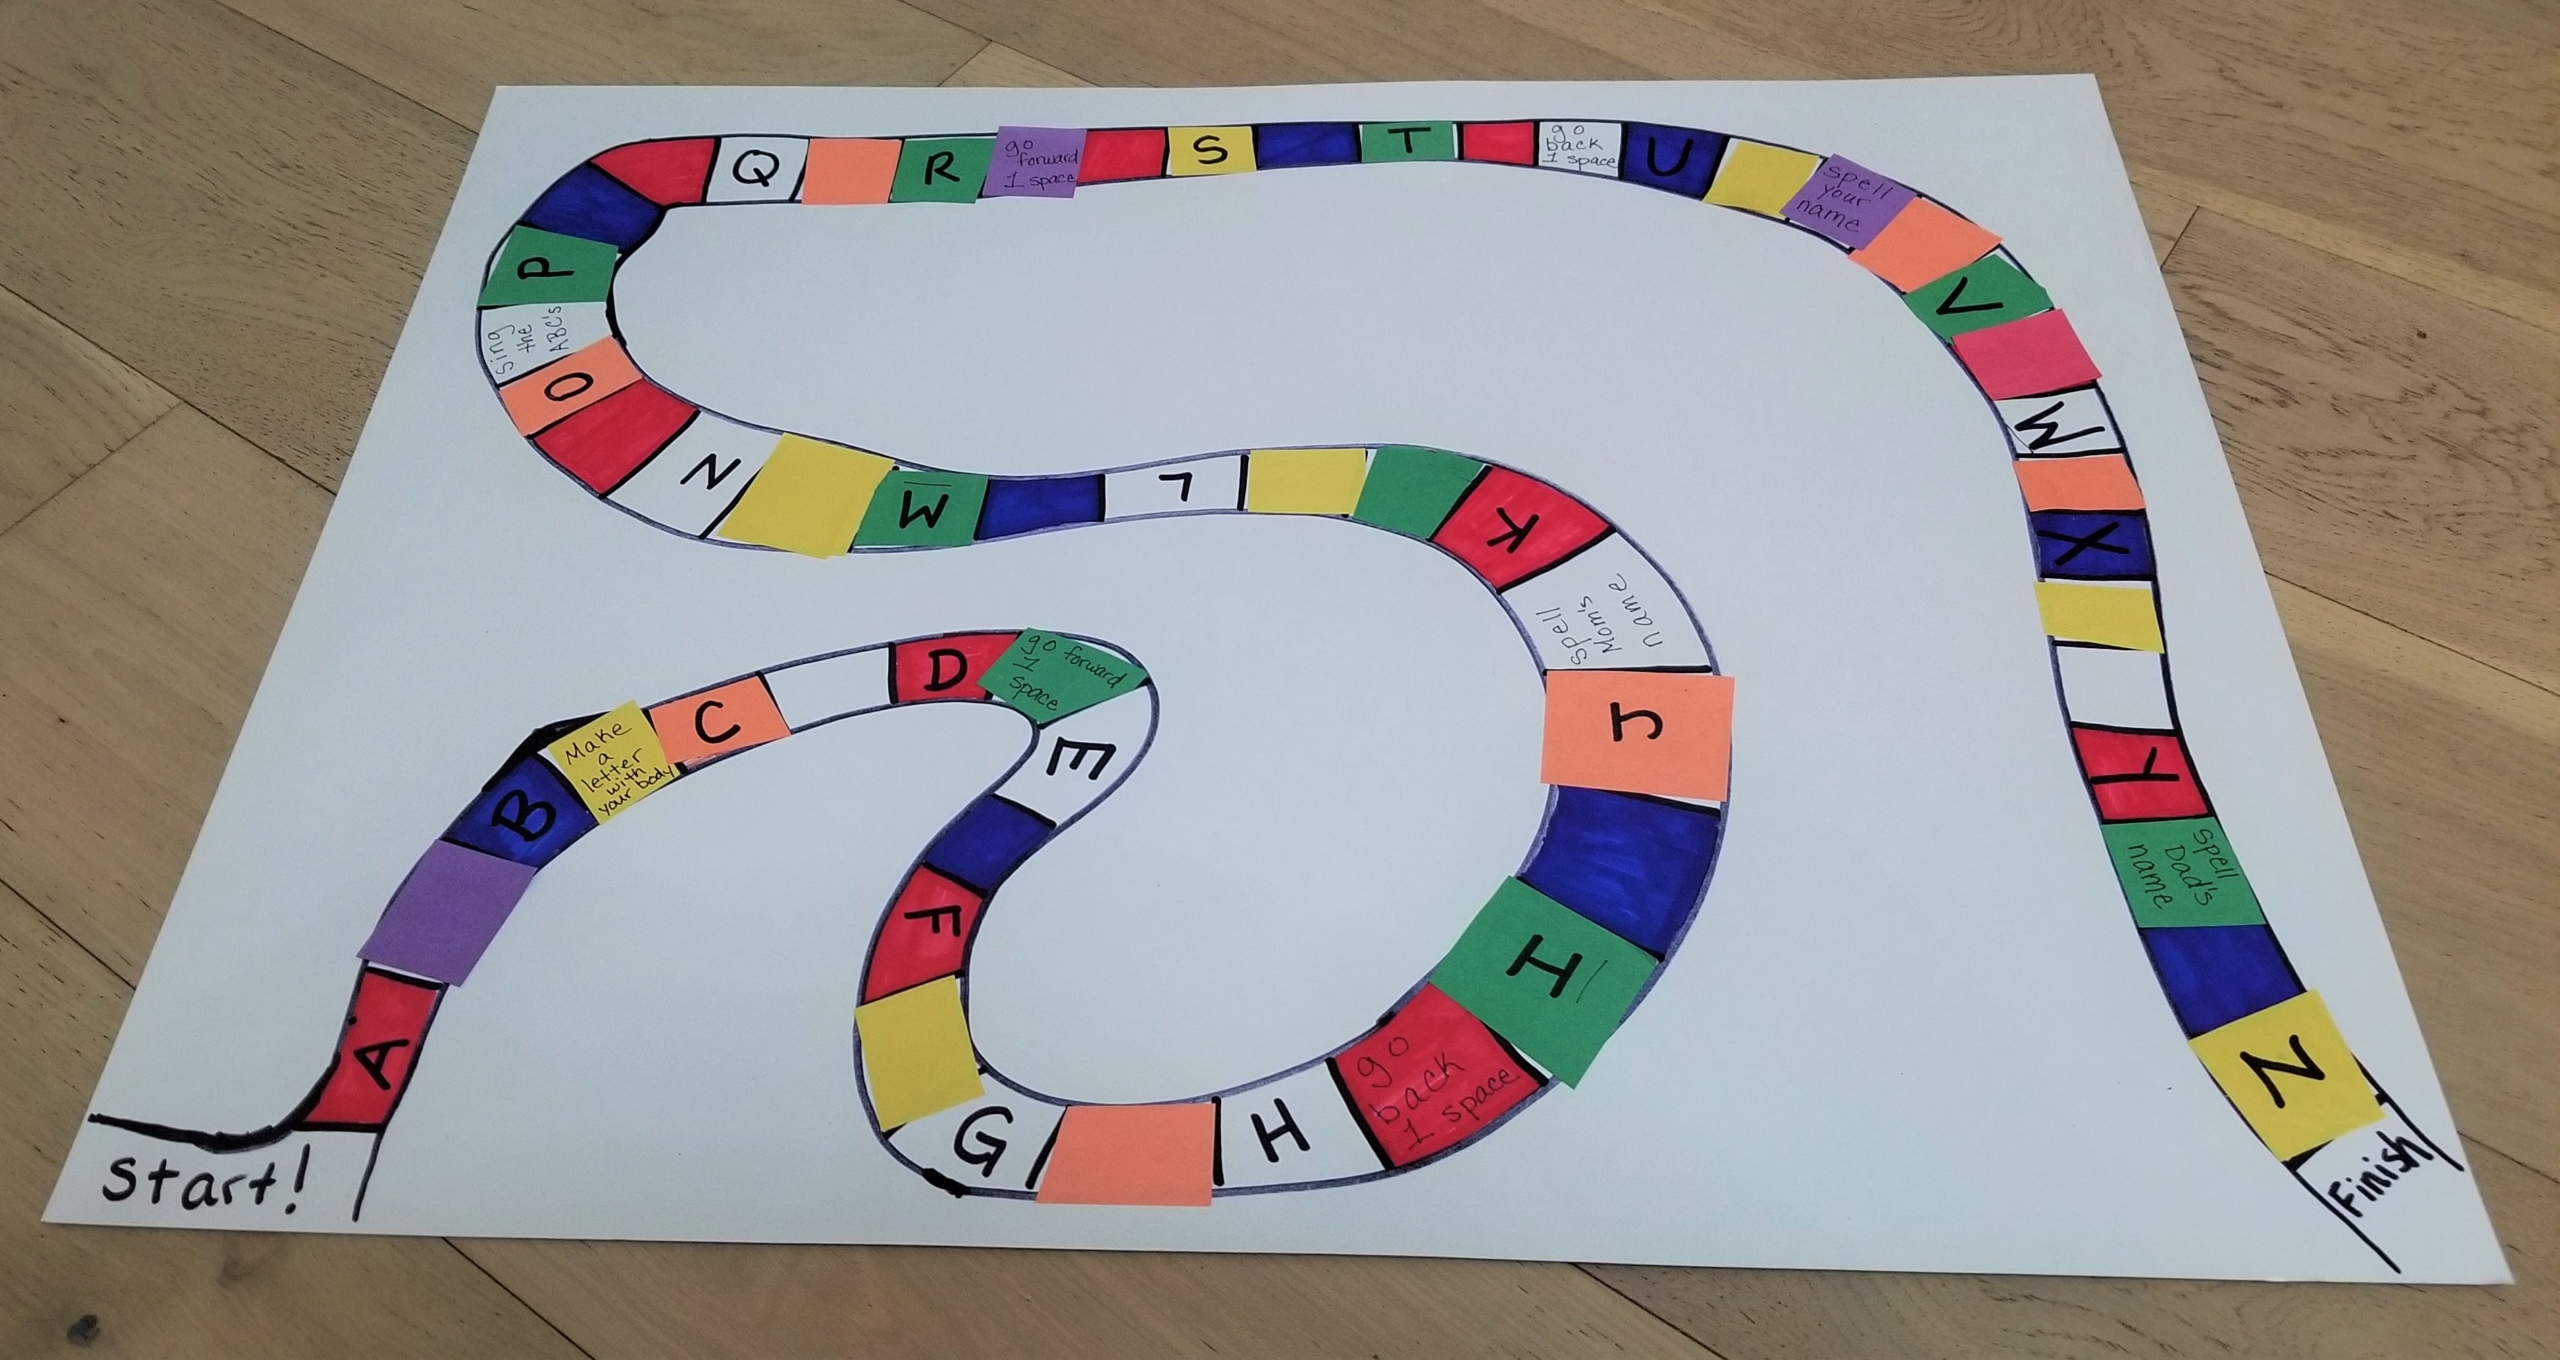
Step 1: Draw a winding path from one corner of the poster board to the other. The way is entirely up to you. Make sure it is wide enough for you to write a couple of words inside.
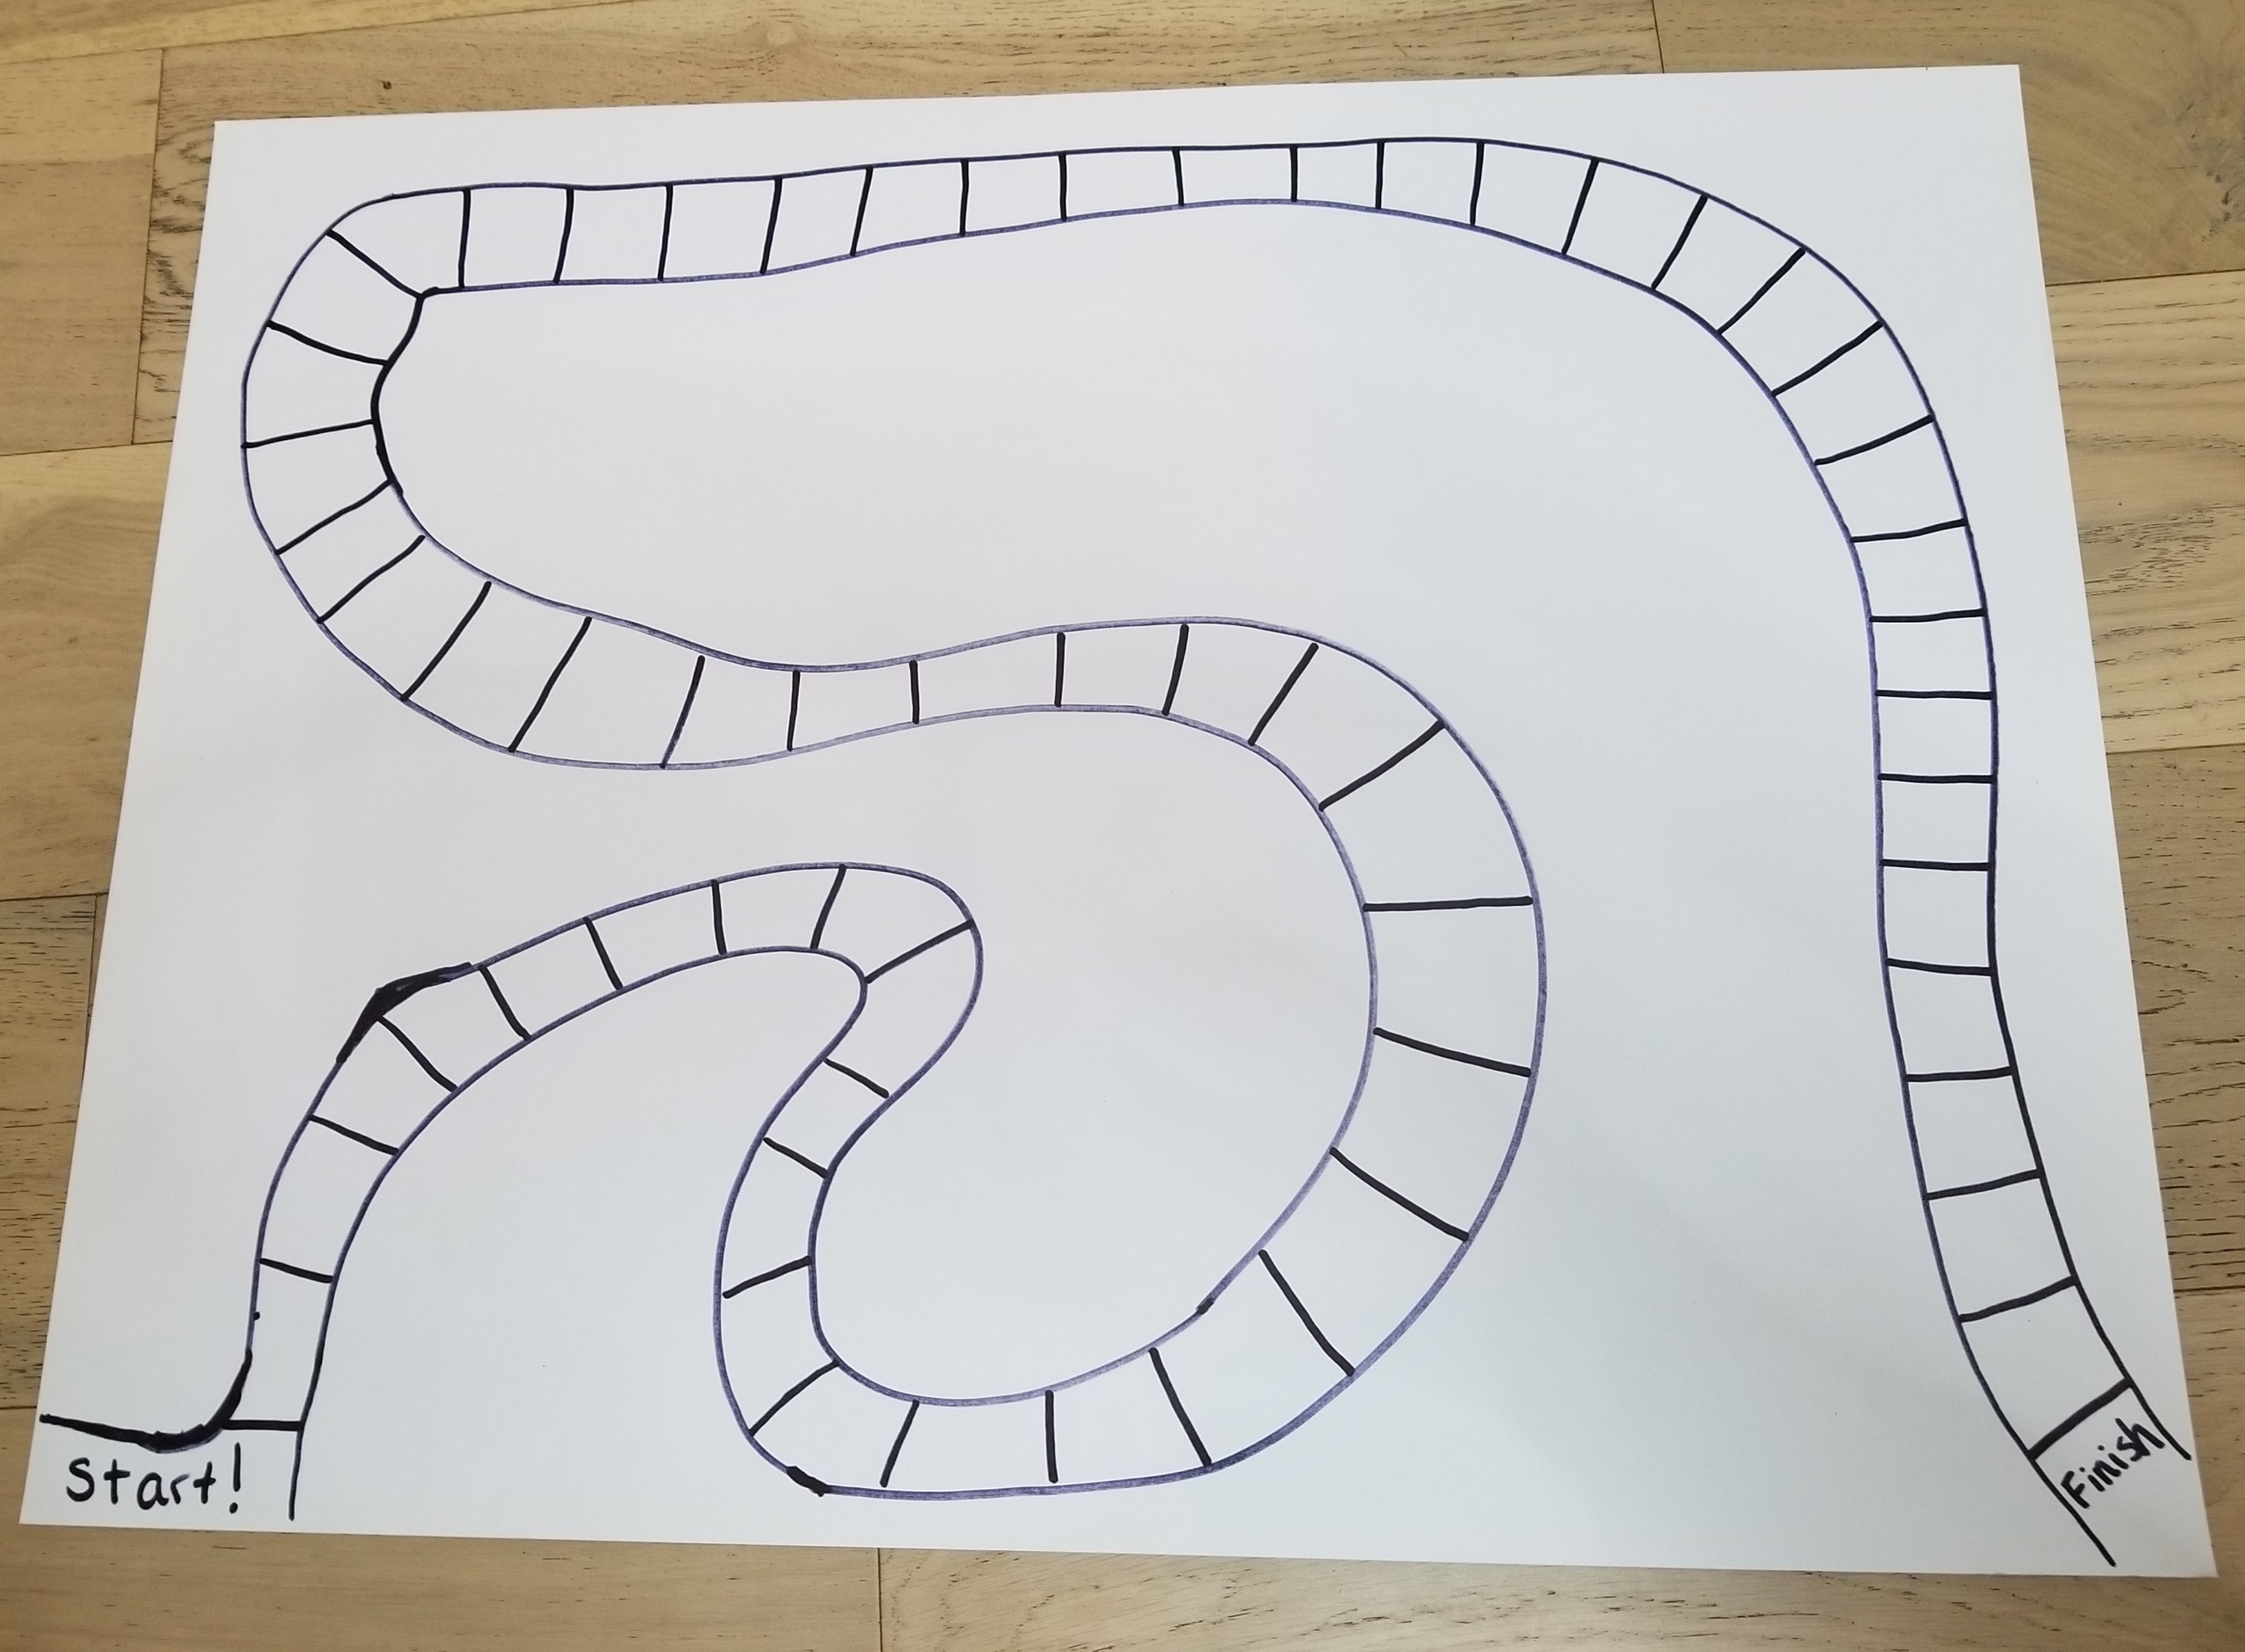
Step 2: Draw lines across the path, segmenting it into at least 53 spaces. Write “start” in the first space and “end” or “finish” in the last one.
Step 3: Color the spaces a variety of different colors. Or you can glue on pieces of construction paper. Make it as colorful and inviting as you like!

Step 4: In the second spot, write the letter A. Continue writing the rest of the alphabet, leaving at least one blank space between the letters.
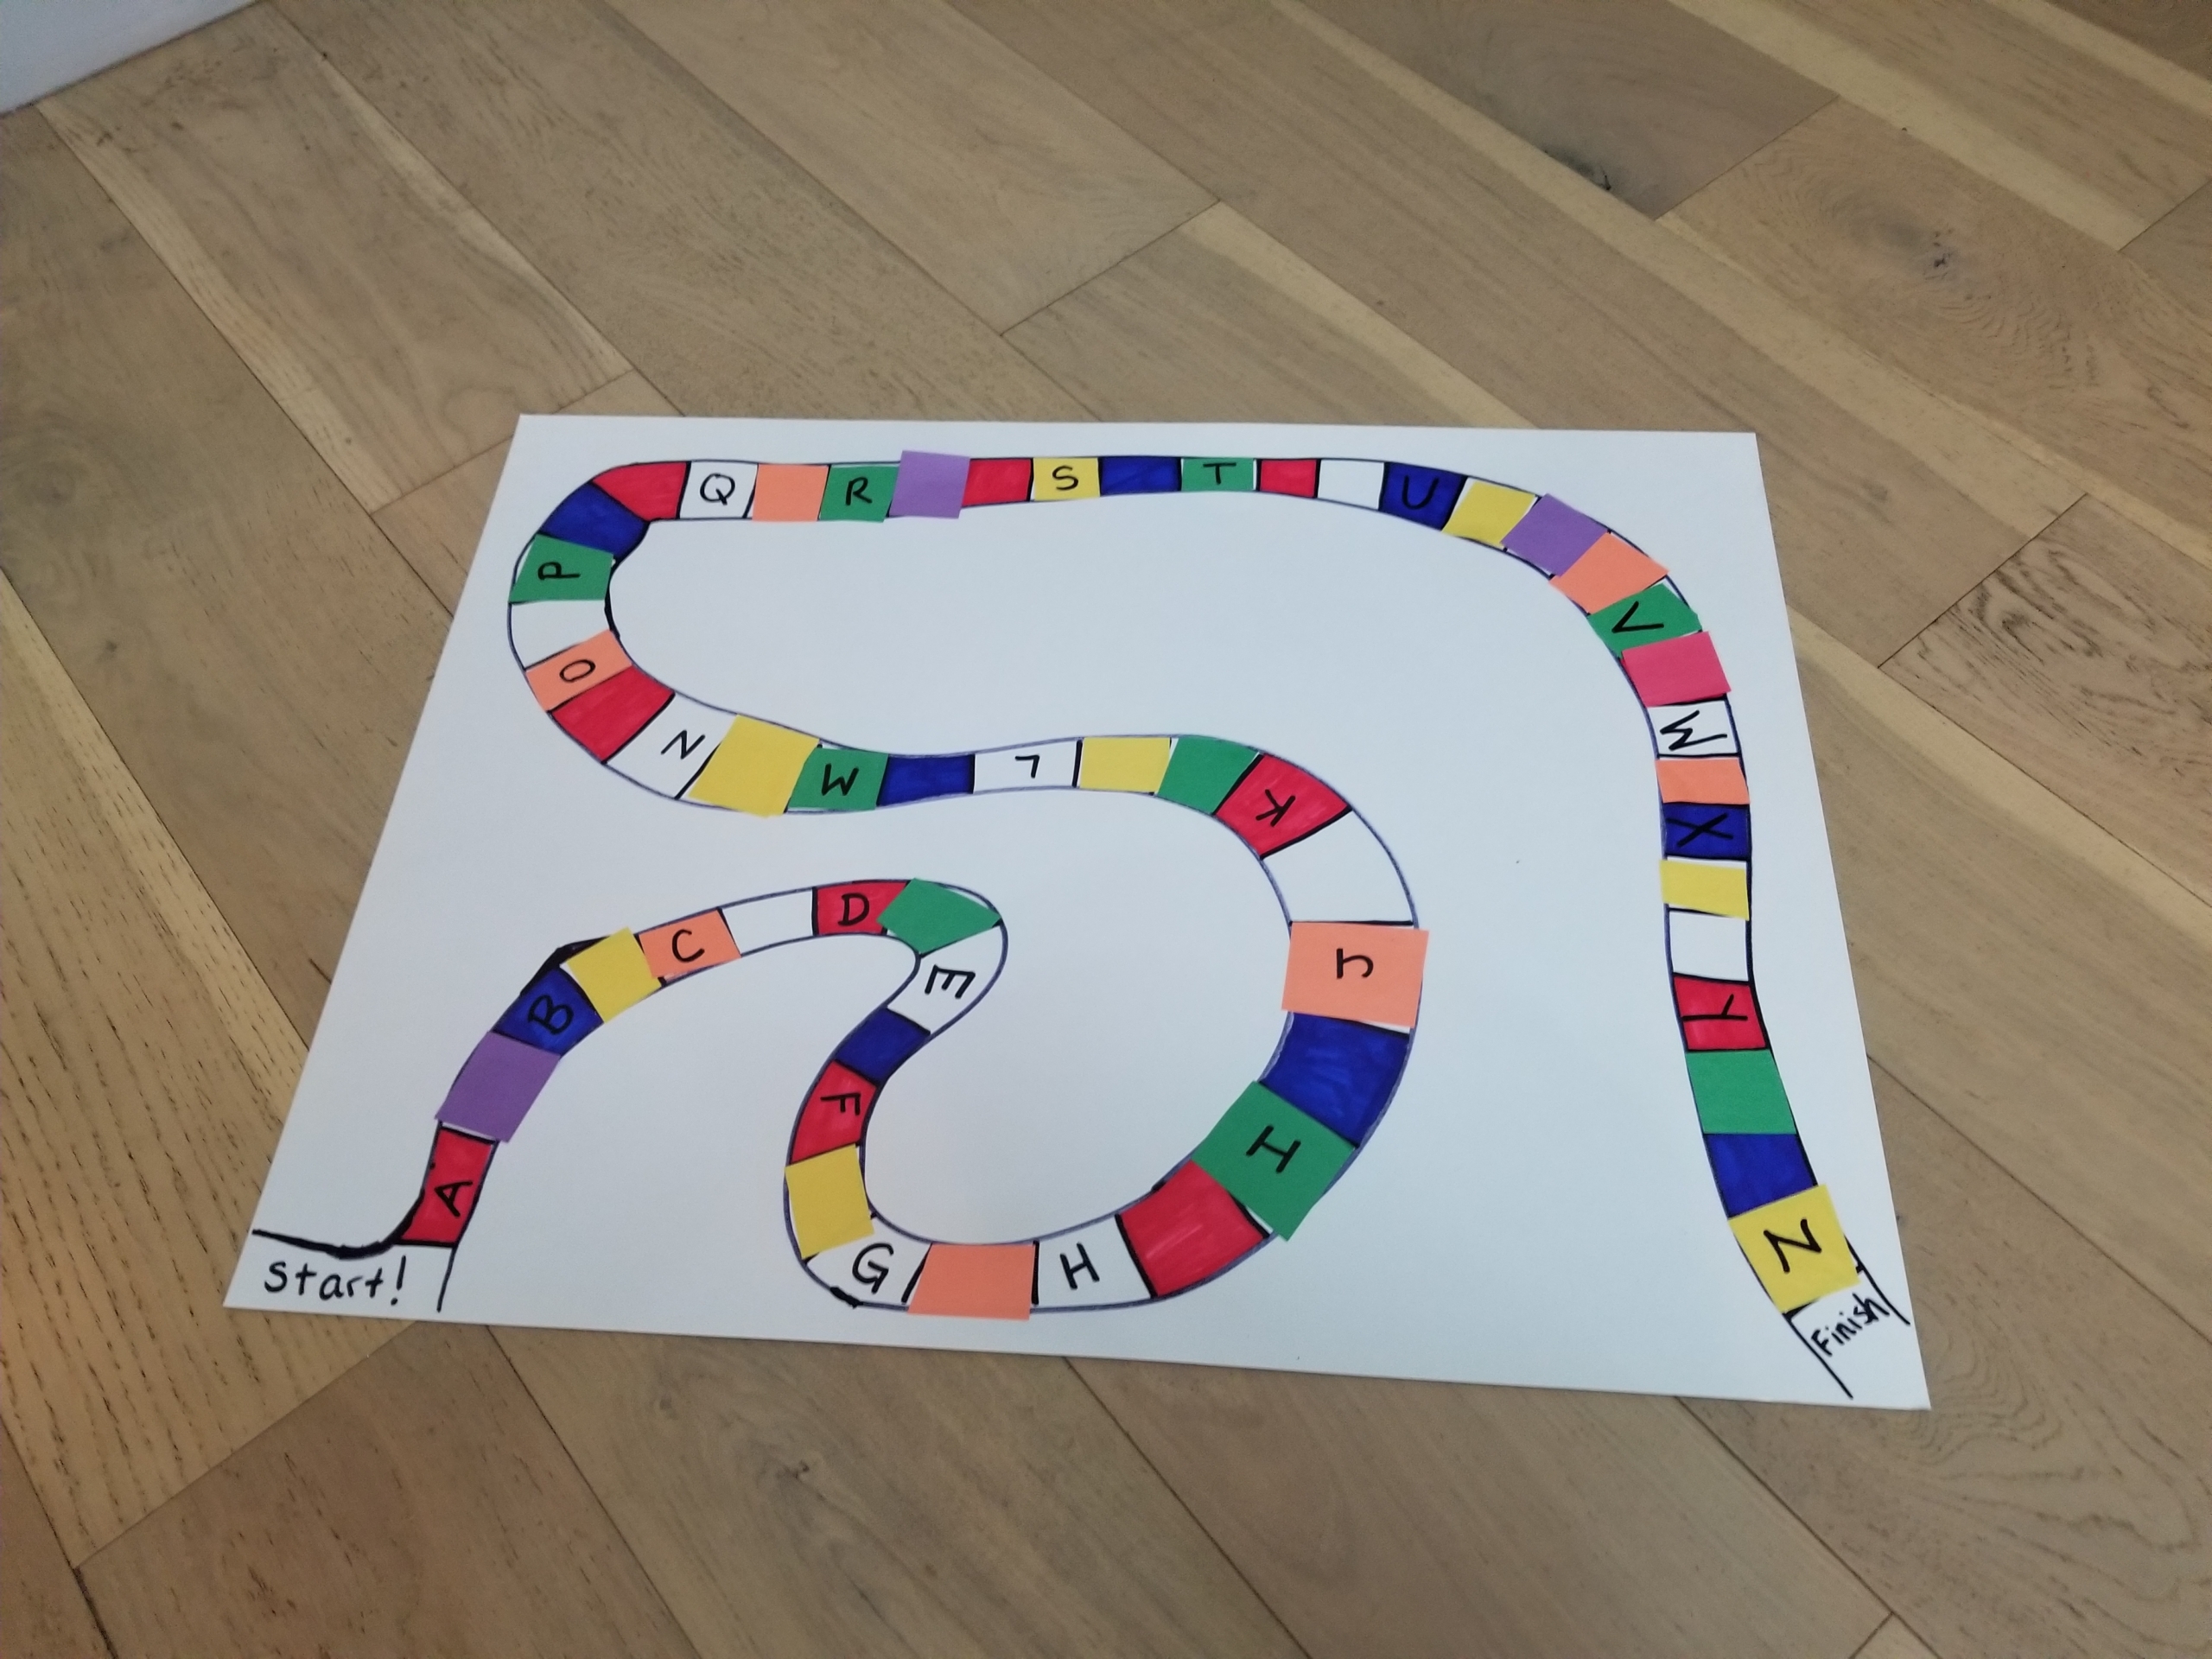
Step 5: Now it’s time to add some fun! Write instructions on some of the blank spaces. Here are some suggestions, below, but you can also come up with your own. Personalize this game for (and with) your child.
Suggestions: “Go back 1 space,” “Sing the ABCs,” “Spell your name,” “Spell a pet’s/relative’s/friend’s name,” “Go ahead 1 space,” and “Make a letter with your body.”
Step 6: Decorate the board more! Let your child lead the way on how this should look. When I do this activity with students, our boards always end up with glitter and sequins on them!
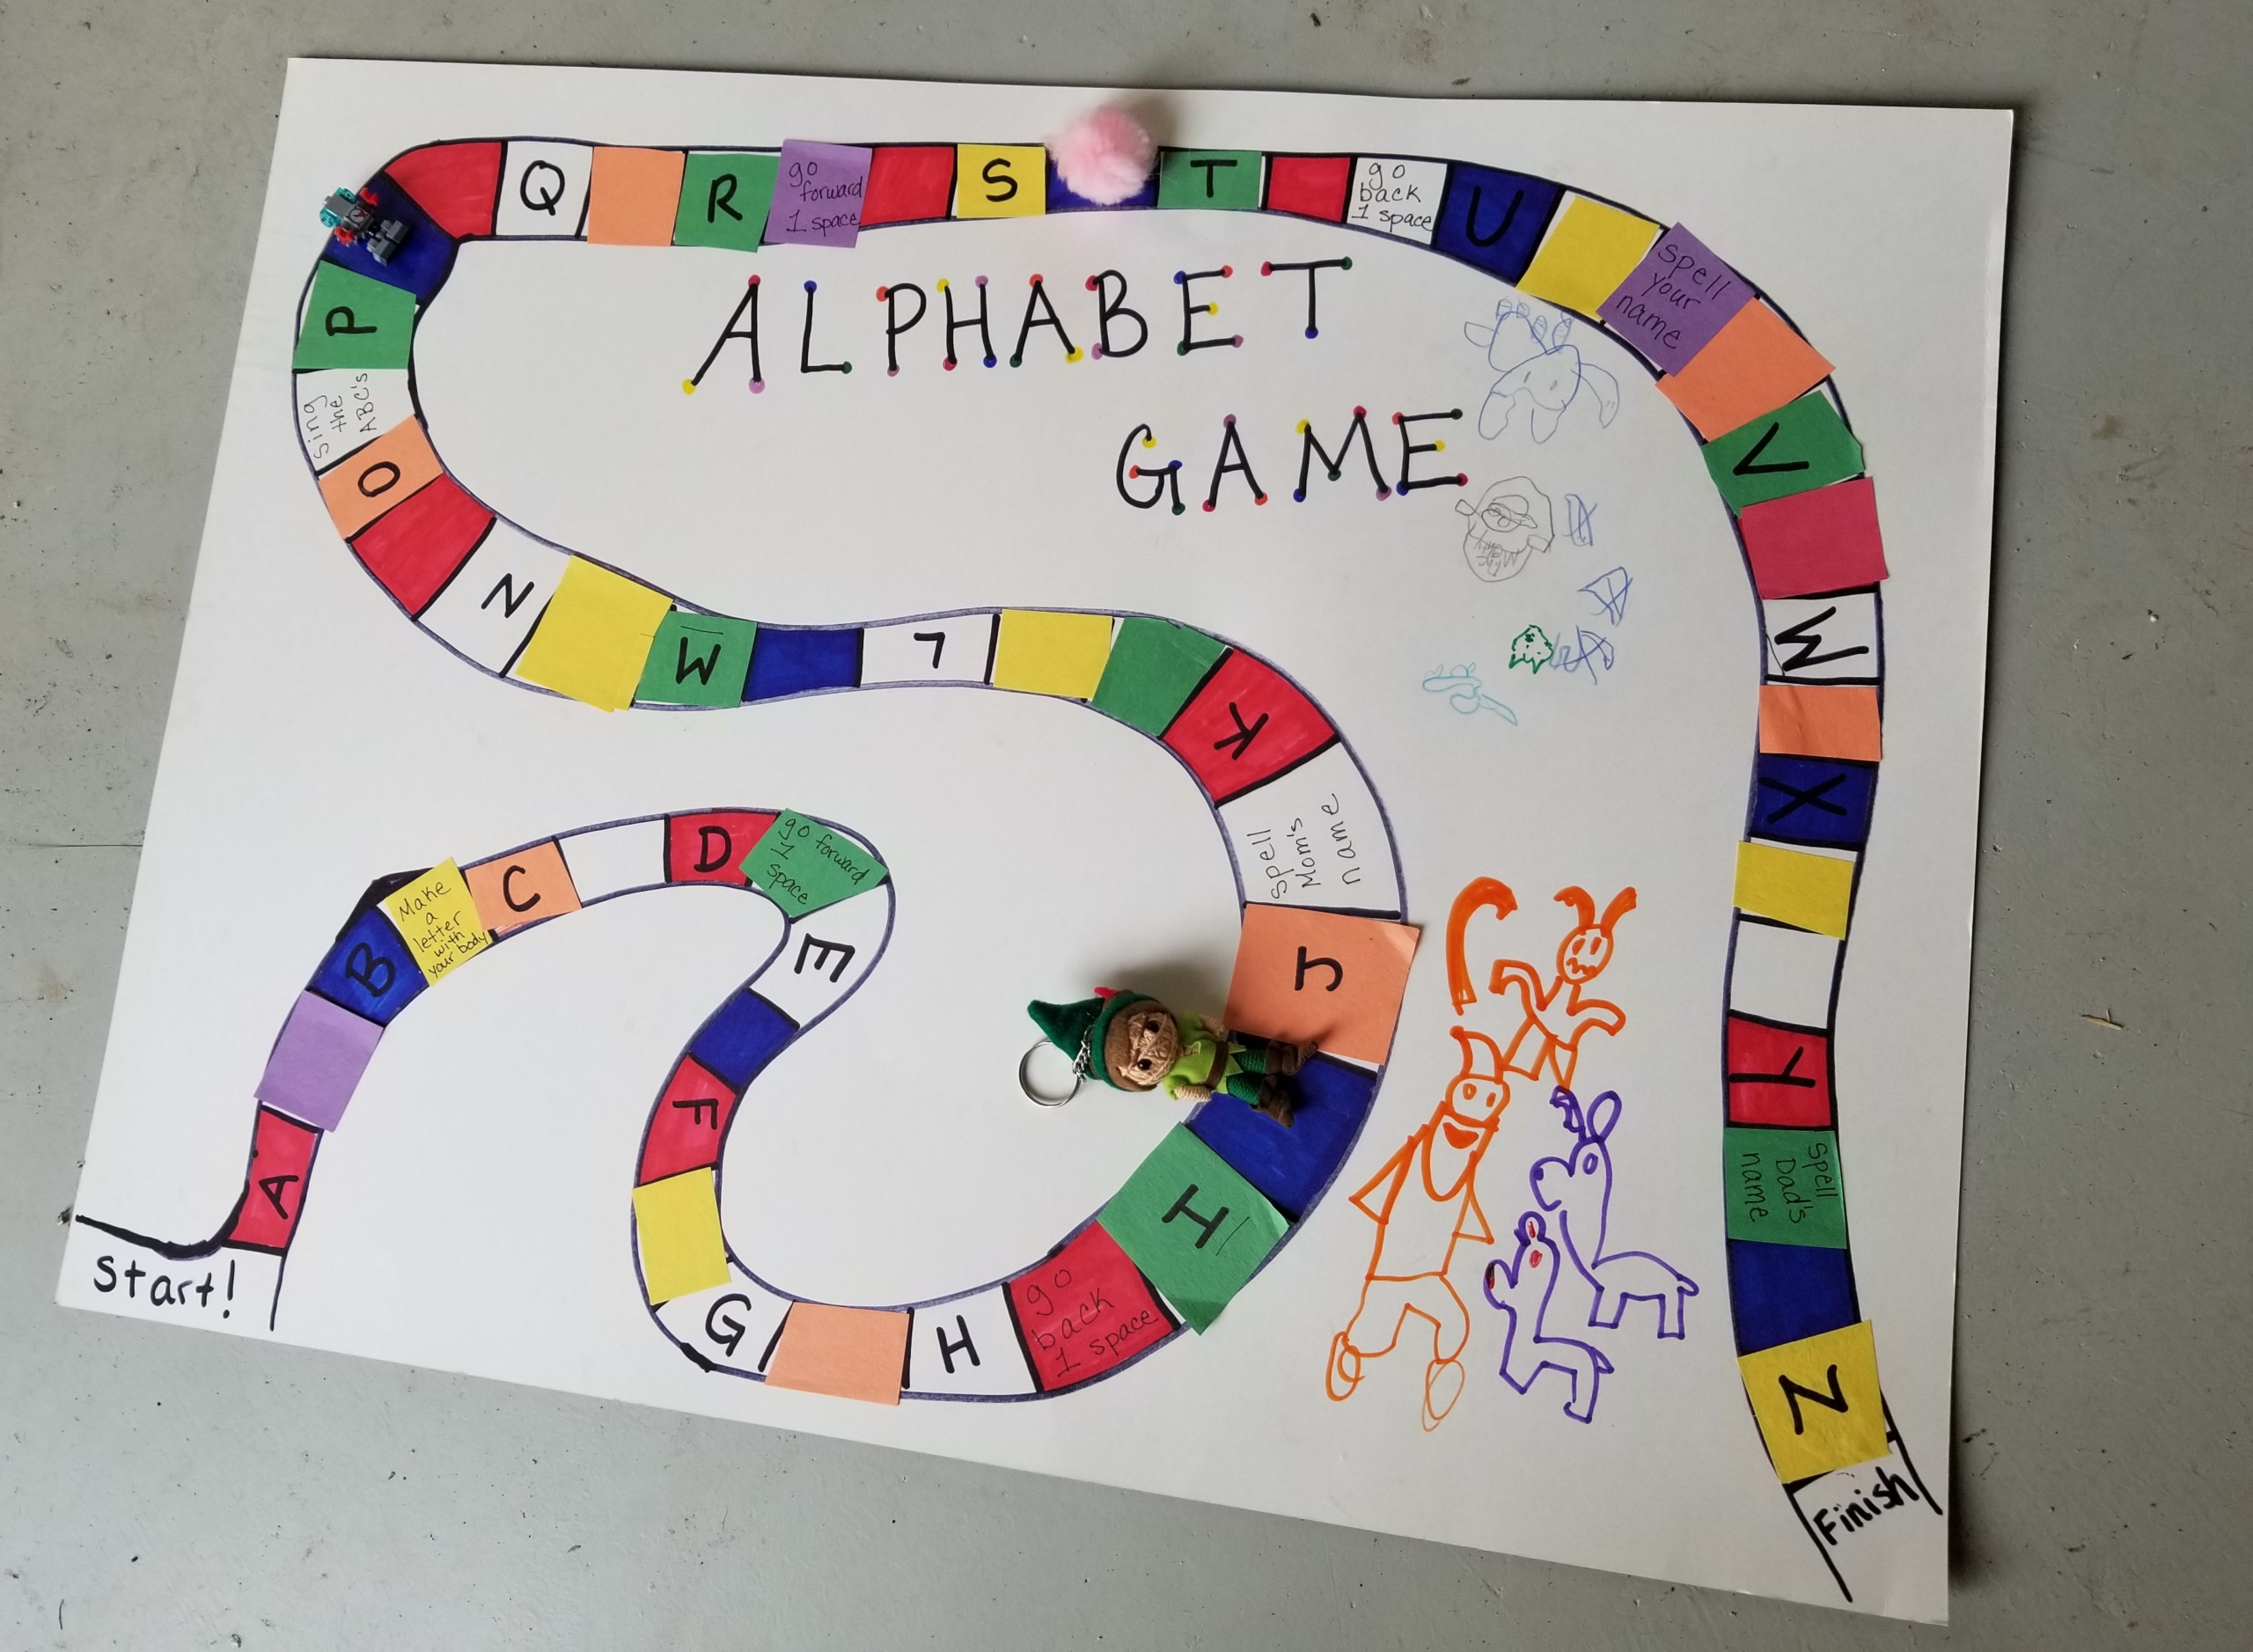
Step 7: Play the game! See my rules below, but you should feel free to edit or create rules that work best for your game and your family. That’s the best part of creating your own board game!
Rules:
- Players go in alphabetical order.
- Players take turns rolling the die and moving that number of spaces.
- If a player lands on a letter, they say the name of the letter and something that starts with that letter. If they’re unable to do so, they go back to their previous space.
- If a player lands on a space with an action, the player must complete that action or go back to their previous space.
- If a player lands on a blank space, they can chill out that round.
- The first player to reach the finish line wins!
This game can be played quickly, perfect for the attention spans of little players (and convenient for busy parents, too!). But while it may be over quickly, the memories your family will create as you play your own customized board game will last long after the final die is rolled.
How was your family game night? Let us know!
