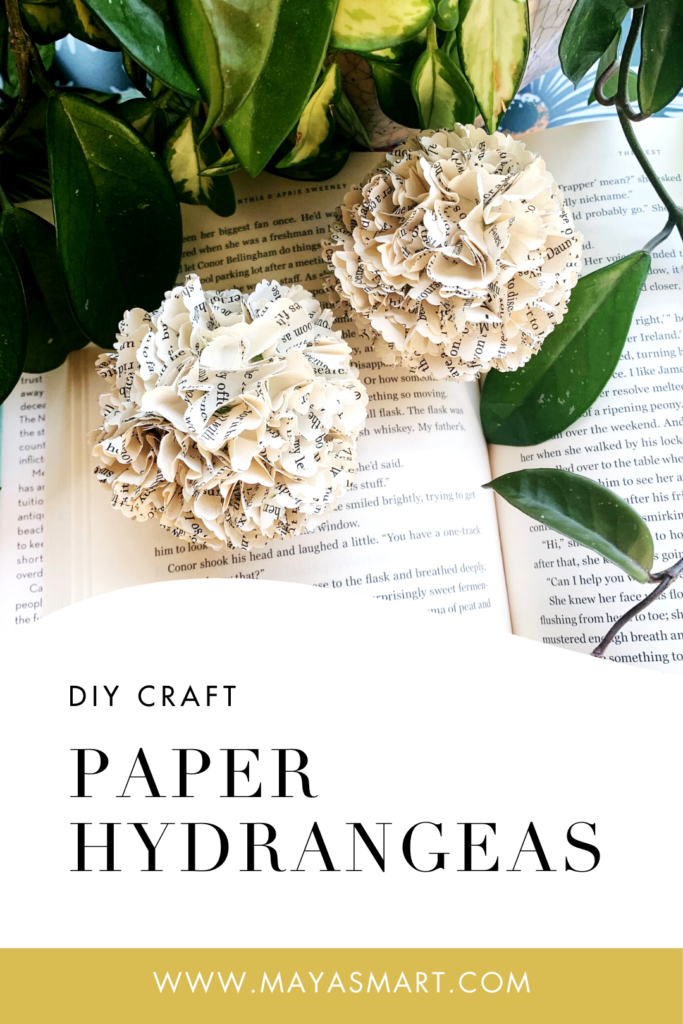
Why not bring a touch of spring into your home, with some reading-themed floral decor? These DIY book-page hydrangeas offer a literary twist on classic paper flowers. Display them around the house or feature them as centerpieces at a festive meal. You can even mix them with real flowers to create a distinctive bouquet.
Tip: These delicate blooms can make unique decorations for a child’s birthday, spotlighting literacy and nature in one pretty package. (Complete the theme with our DIY bookmarks or honey-bear bookends as favors.)
This book craft may be challenging for some younger children, so it’s a good project for one-on-one time with an older kid or for a little me-time. With just three steps, it’s pretty simple for bigger hands once you get the hang of it!
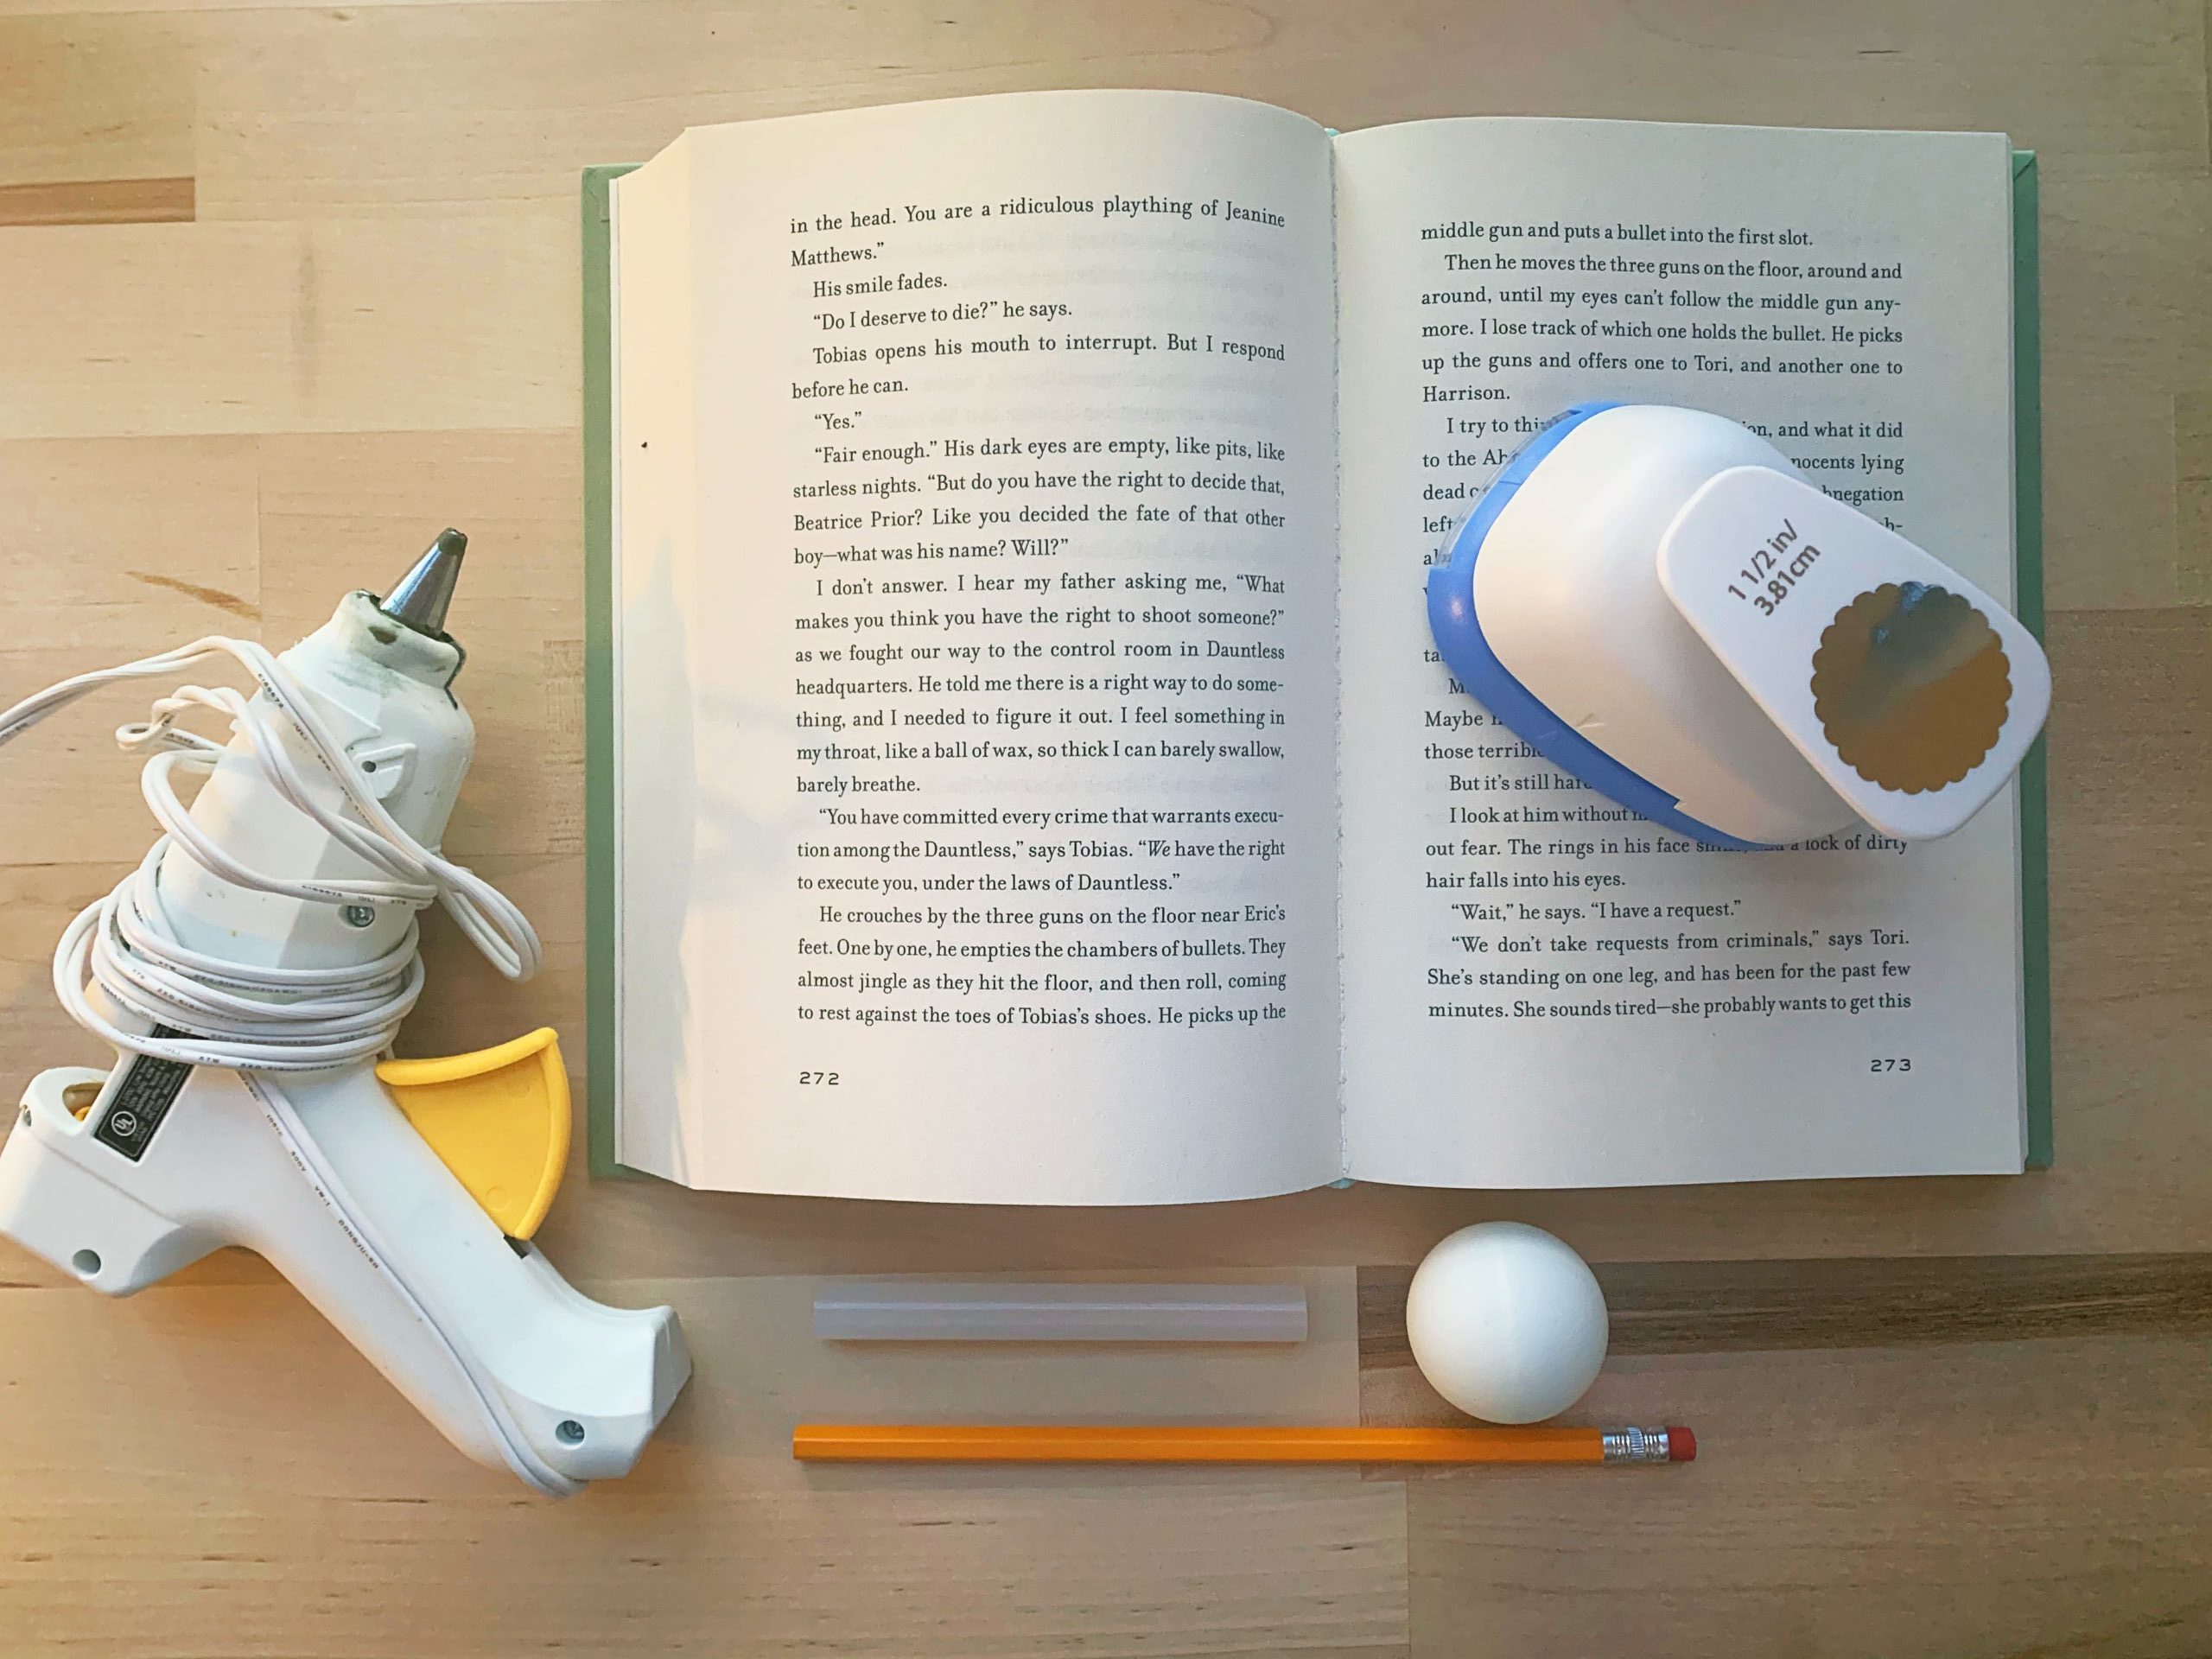
Materials:
- Styrofoam balls or other small balls (I used ping-pong balls, because I had them on hand)
- Scalloped circle paper punch (you can buy various sizes at any craft store; mine was $10 and is 1½” in diameter)
- Pages from obsolete books (or magazines)
- Glue gun and glue sticks
- Unsharpened pencil
Cost: This craft should cost you under $15, depending on what materials you need to purchase.
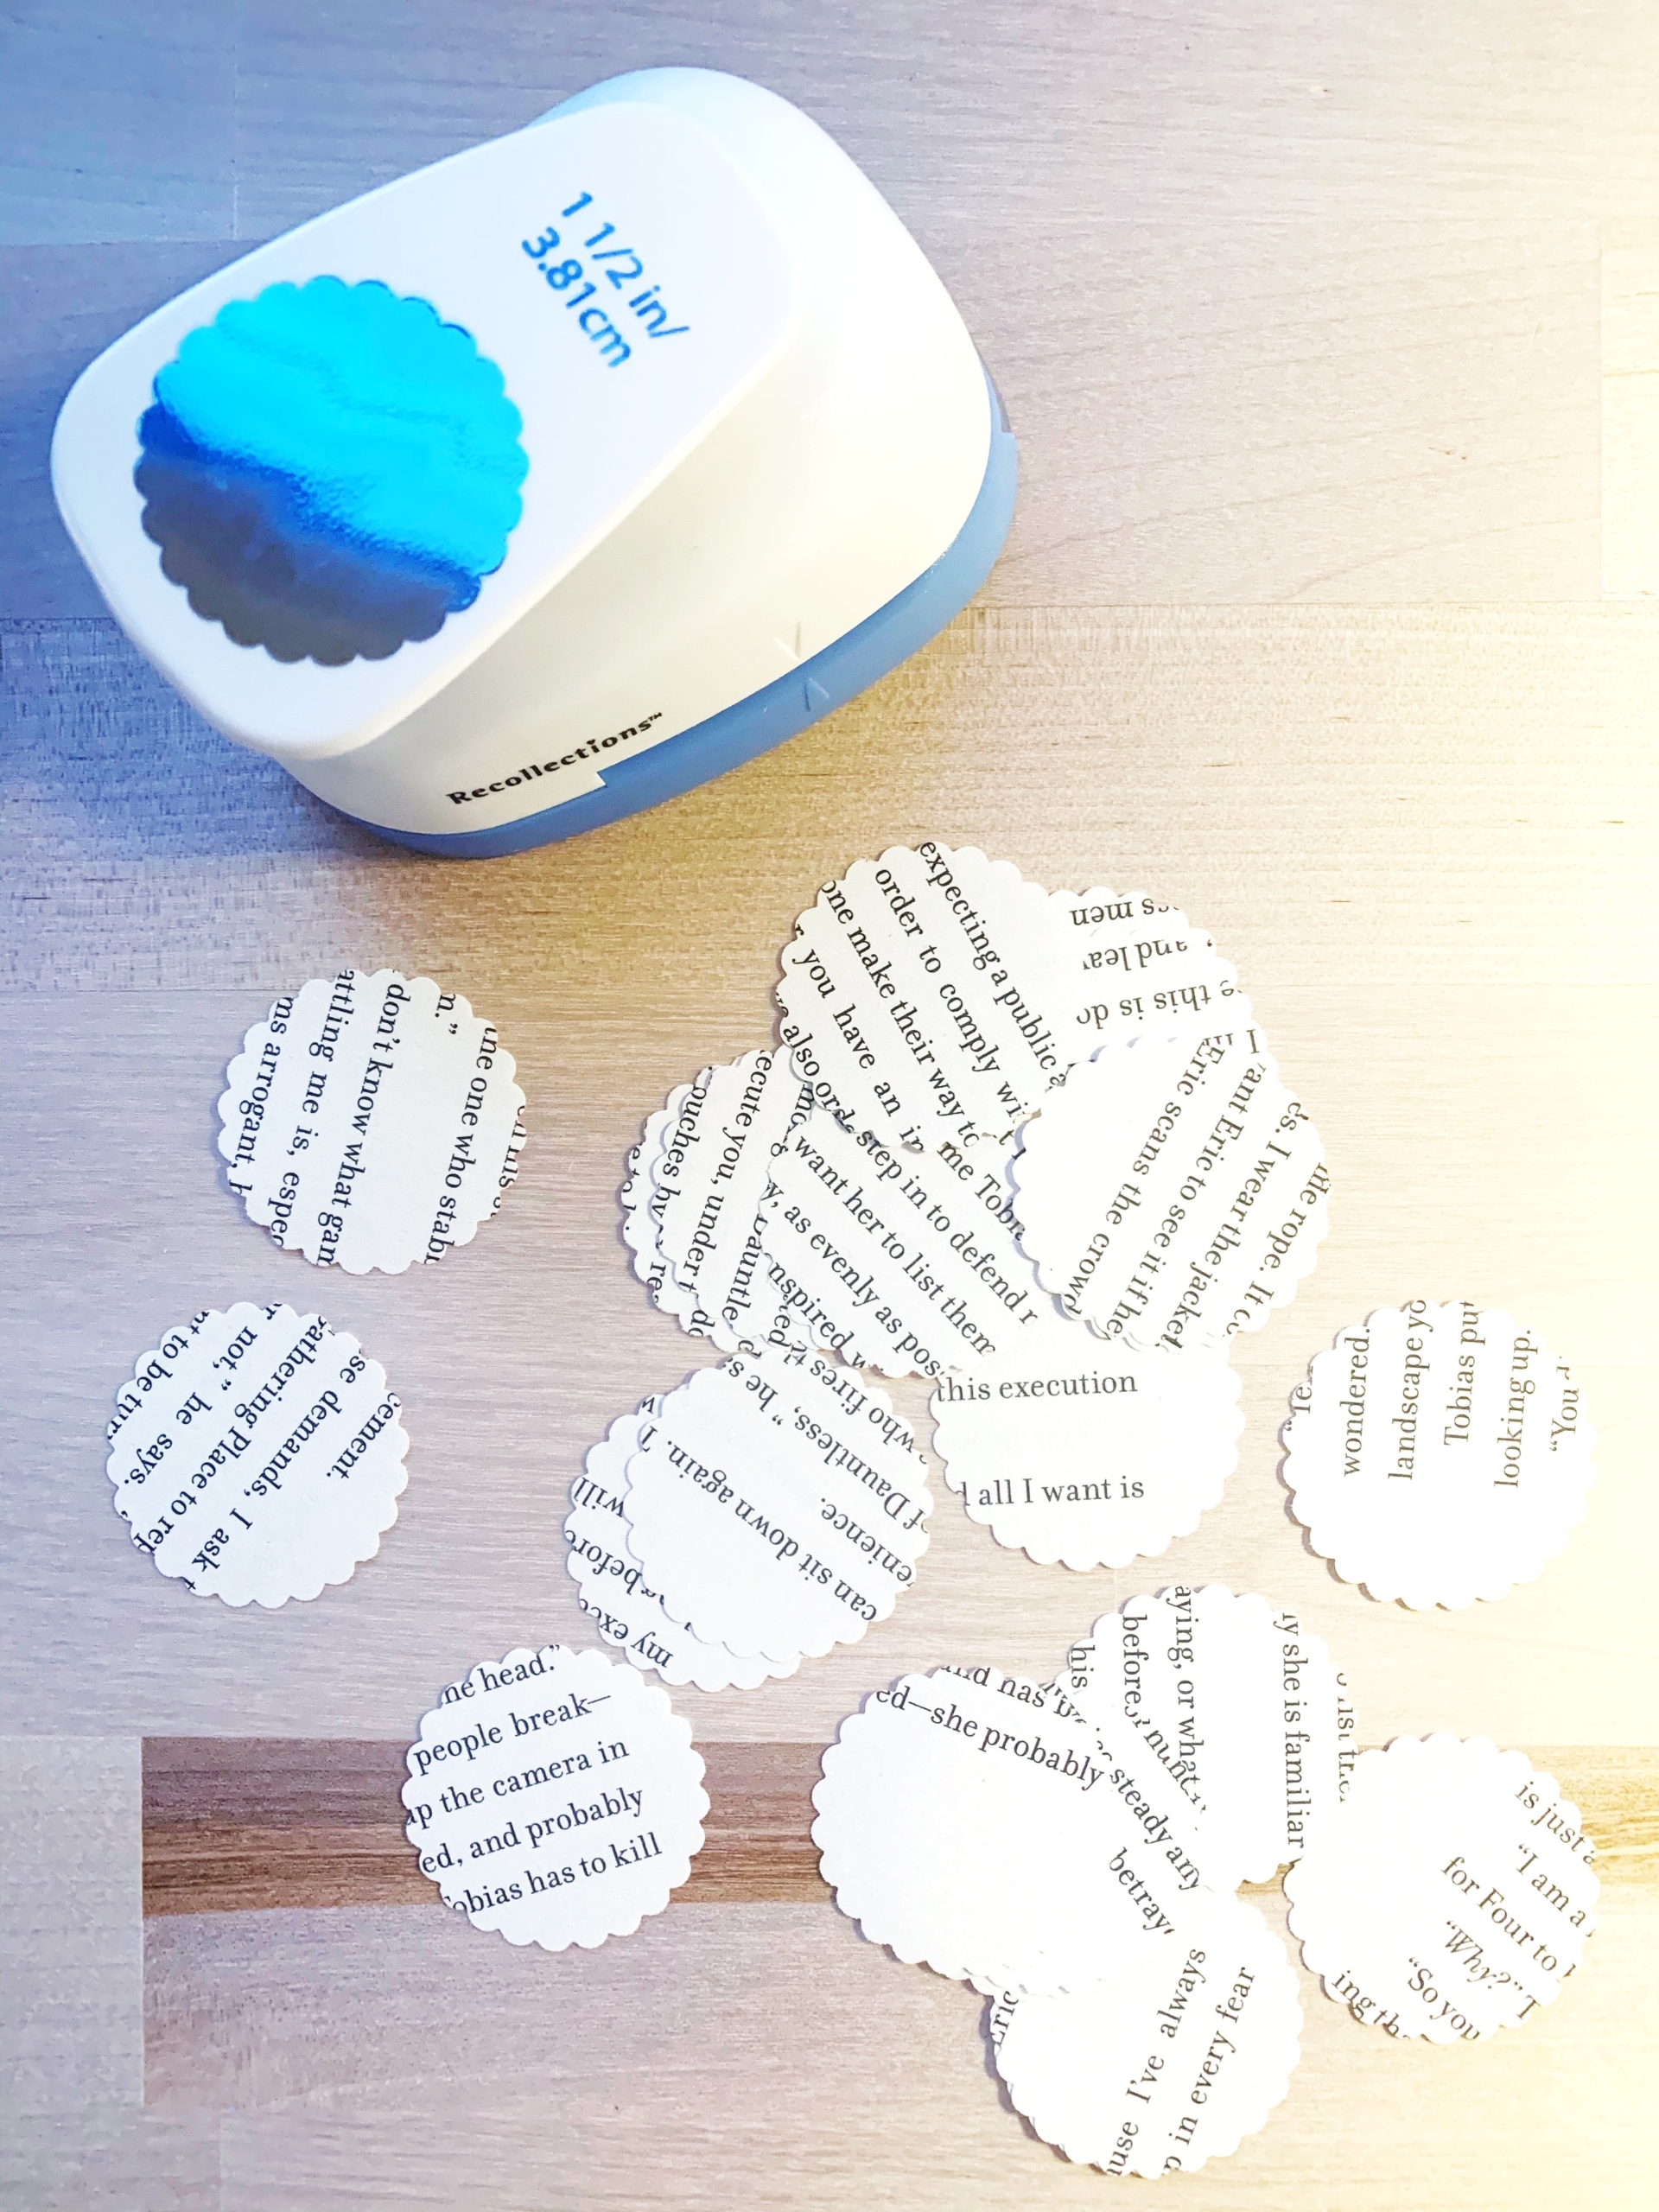
Step One:
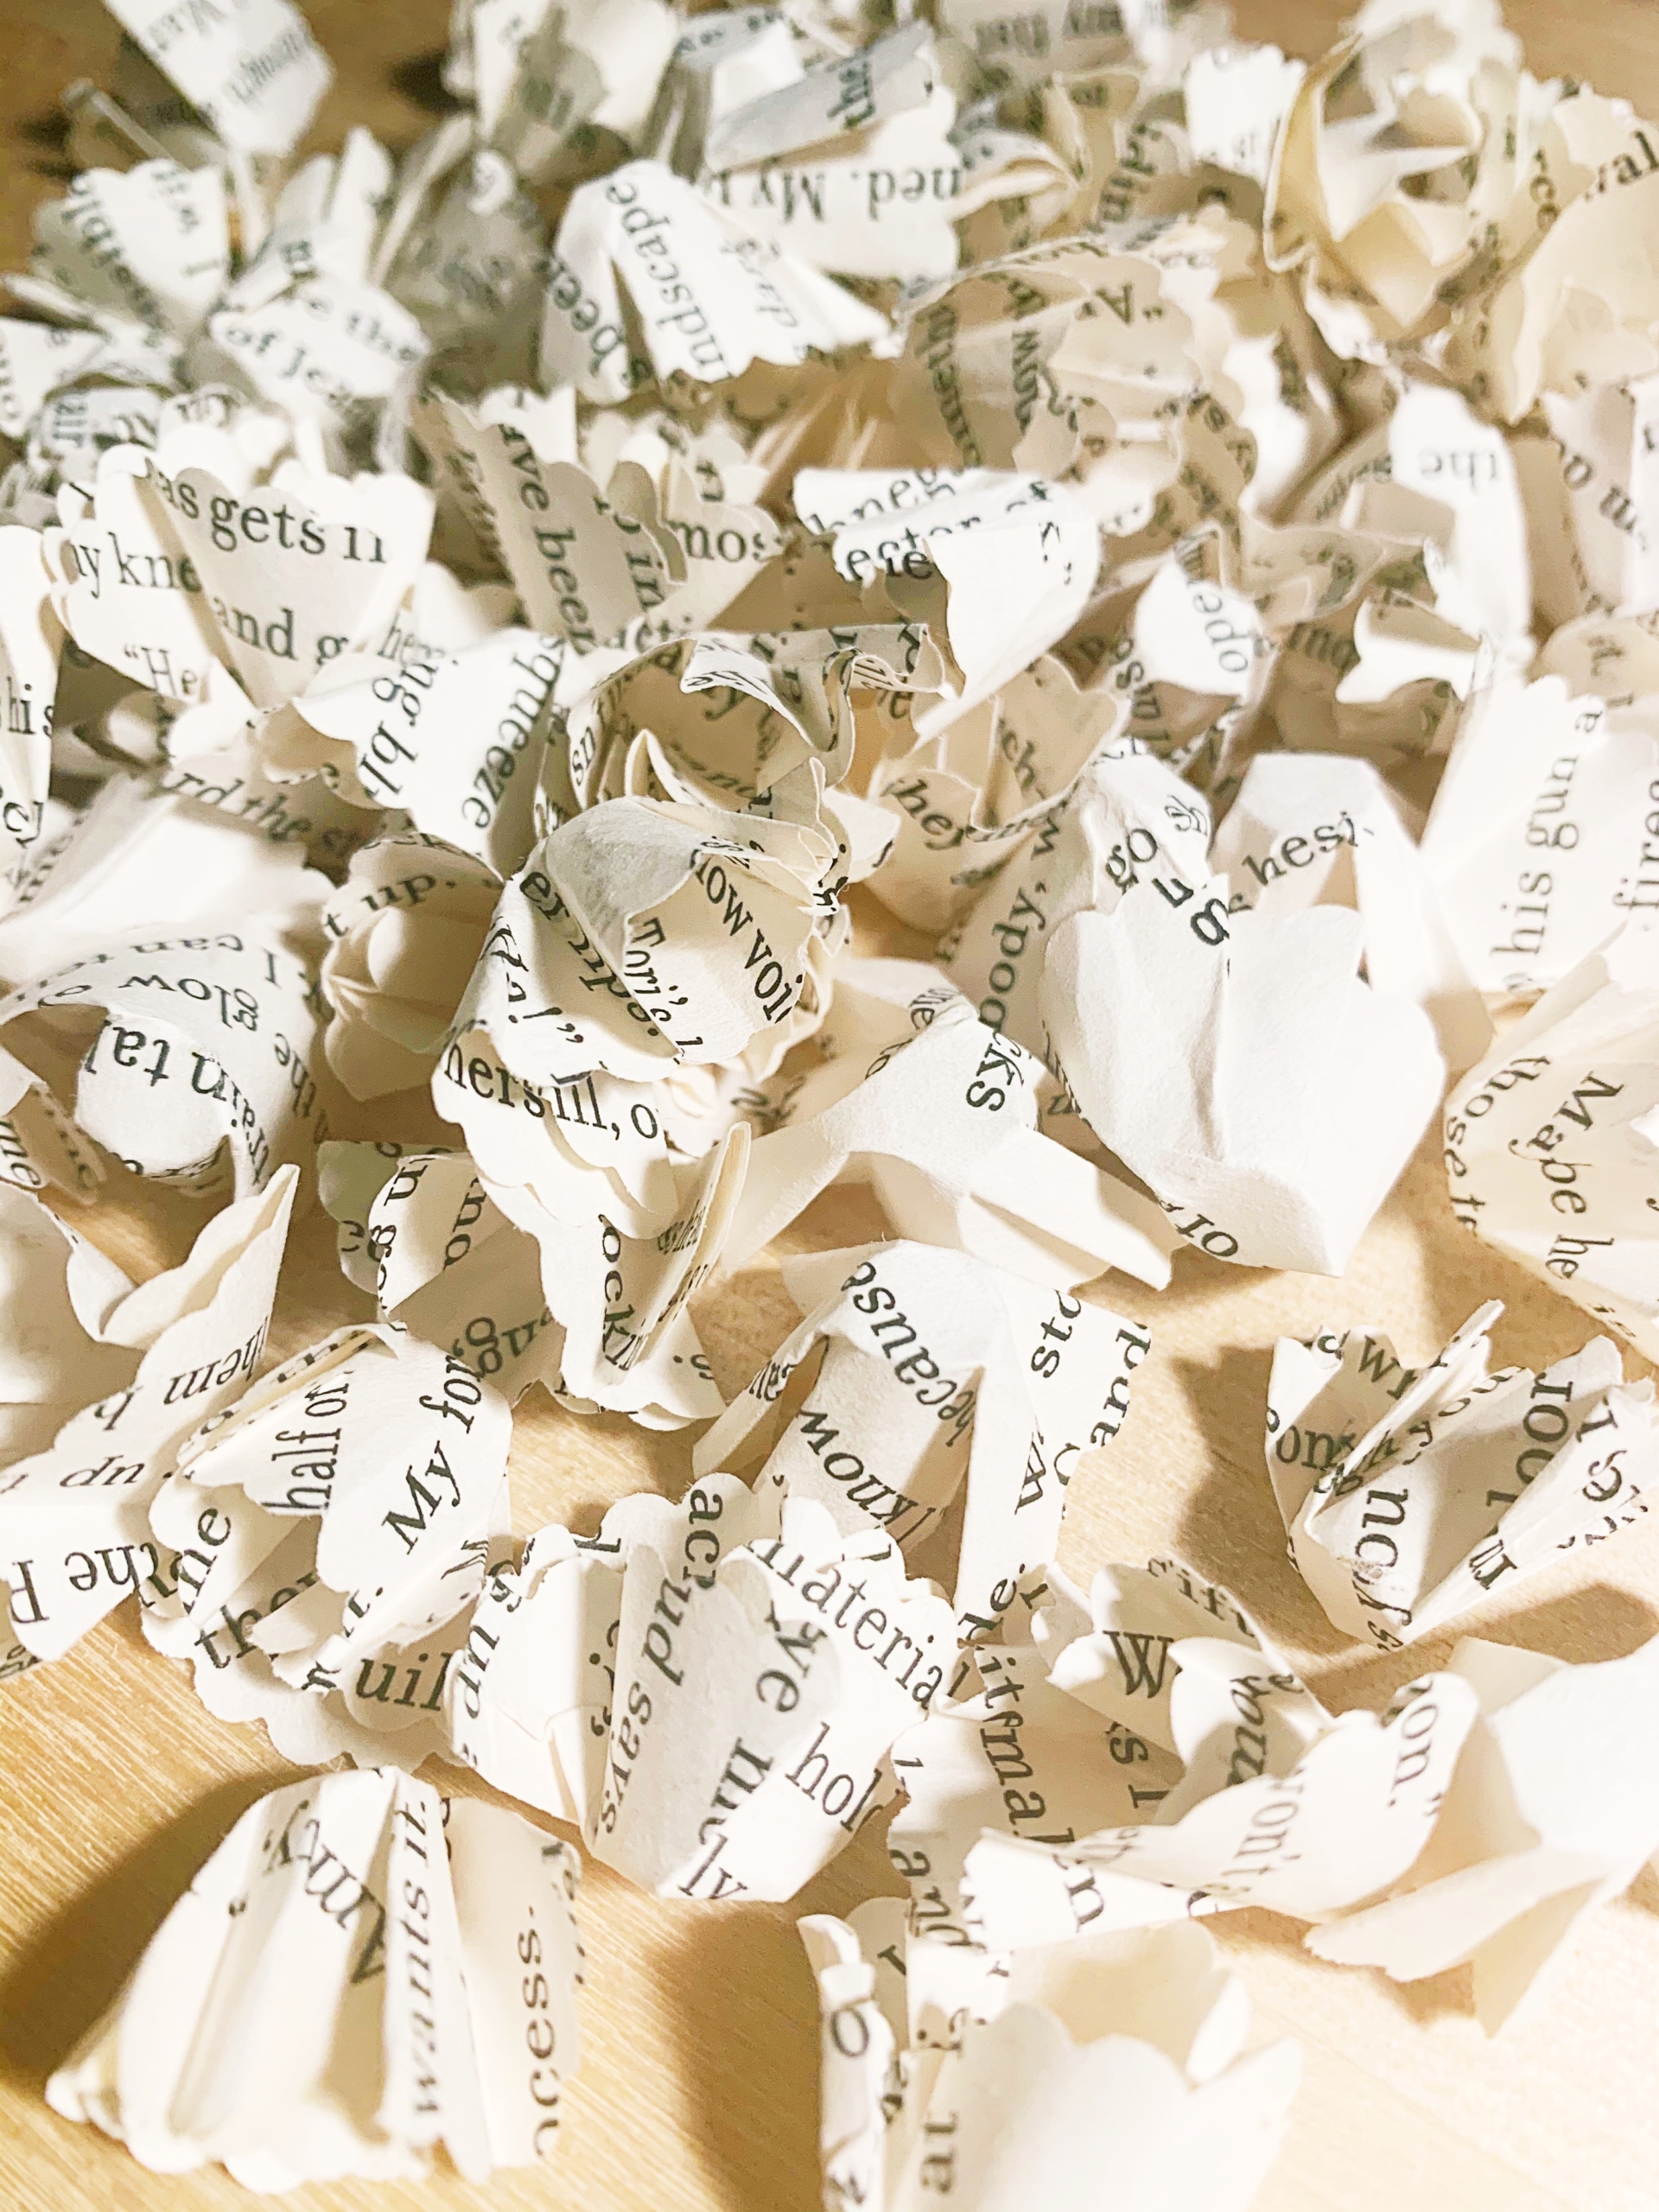
Using your scalloped paper punch, punch out circles from the book pages. These will be the petals of your flowers. You will need quite a few! I must have made about 100 or so. Part-way through, I realized it was most efficient to fold the book pages in half before punching, so I could punch two circles at a time.

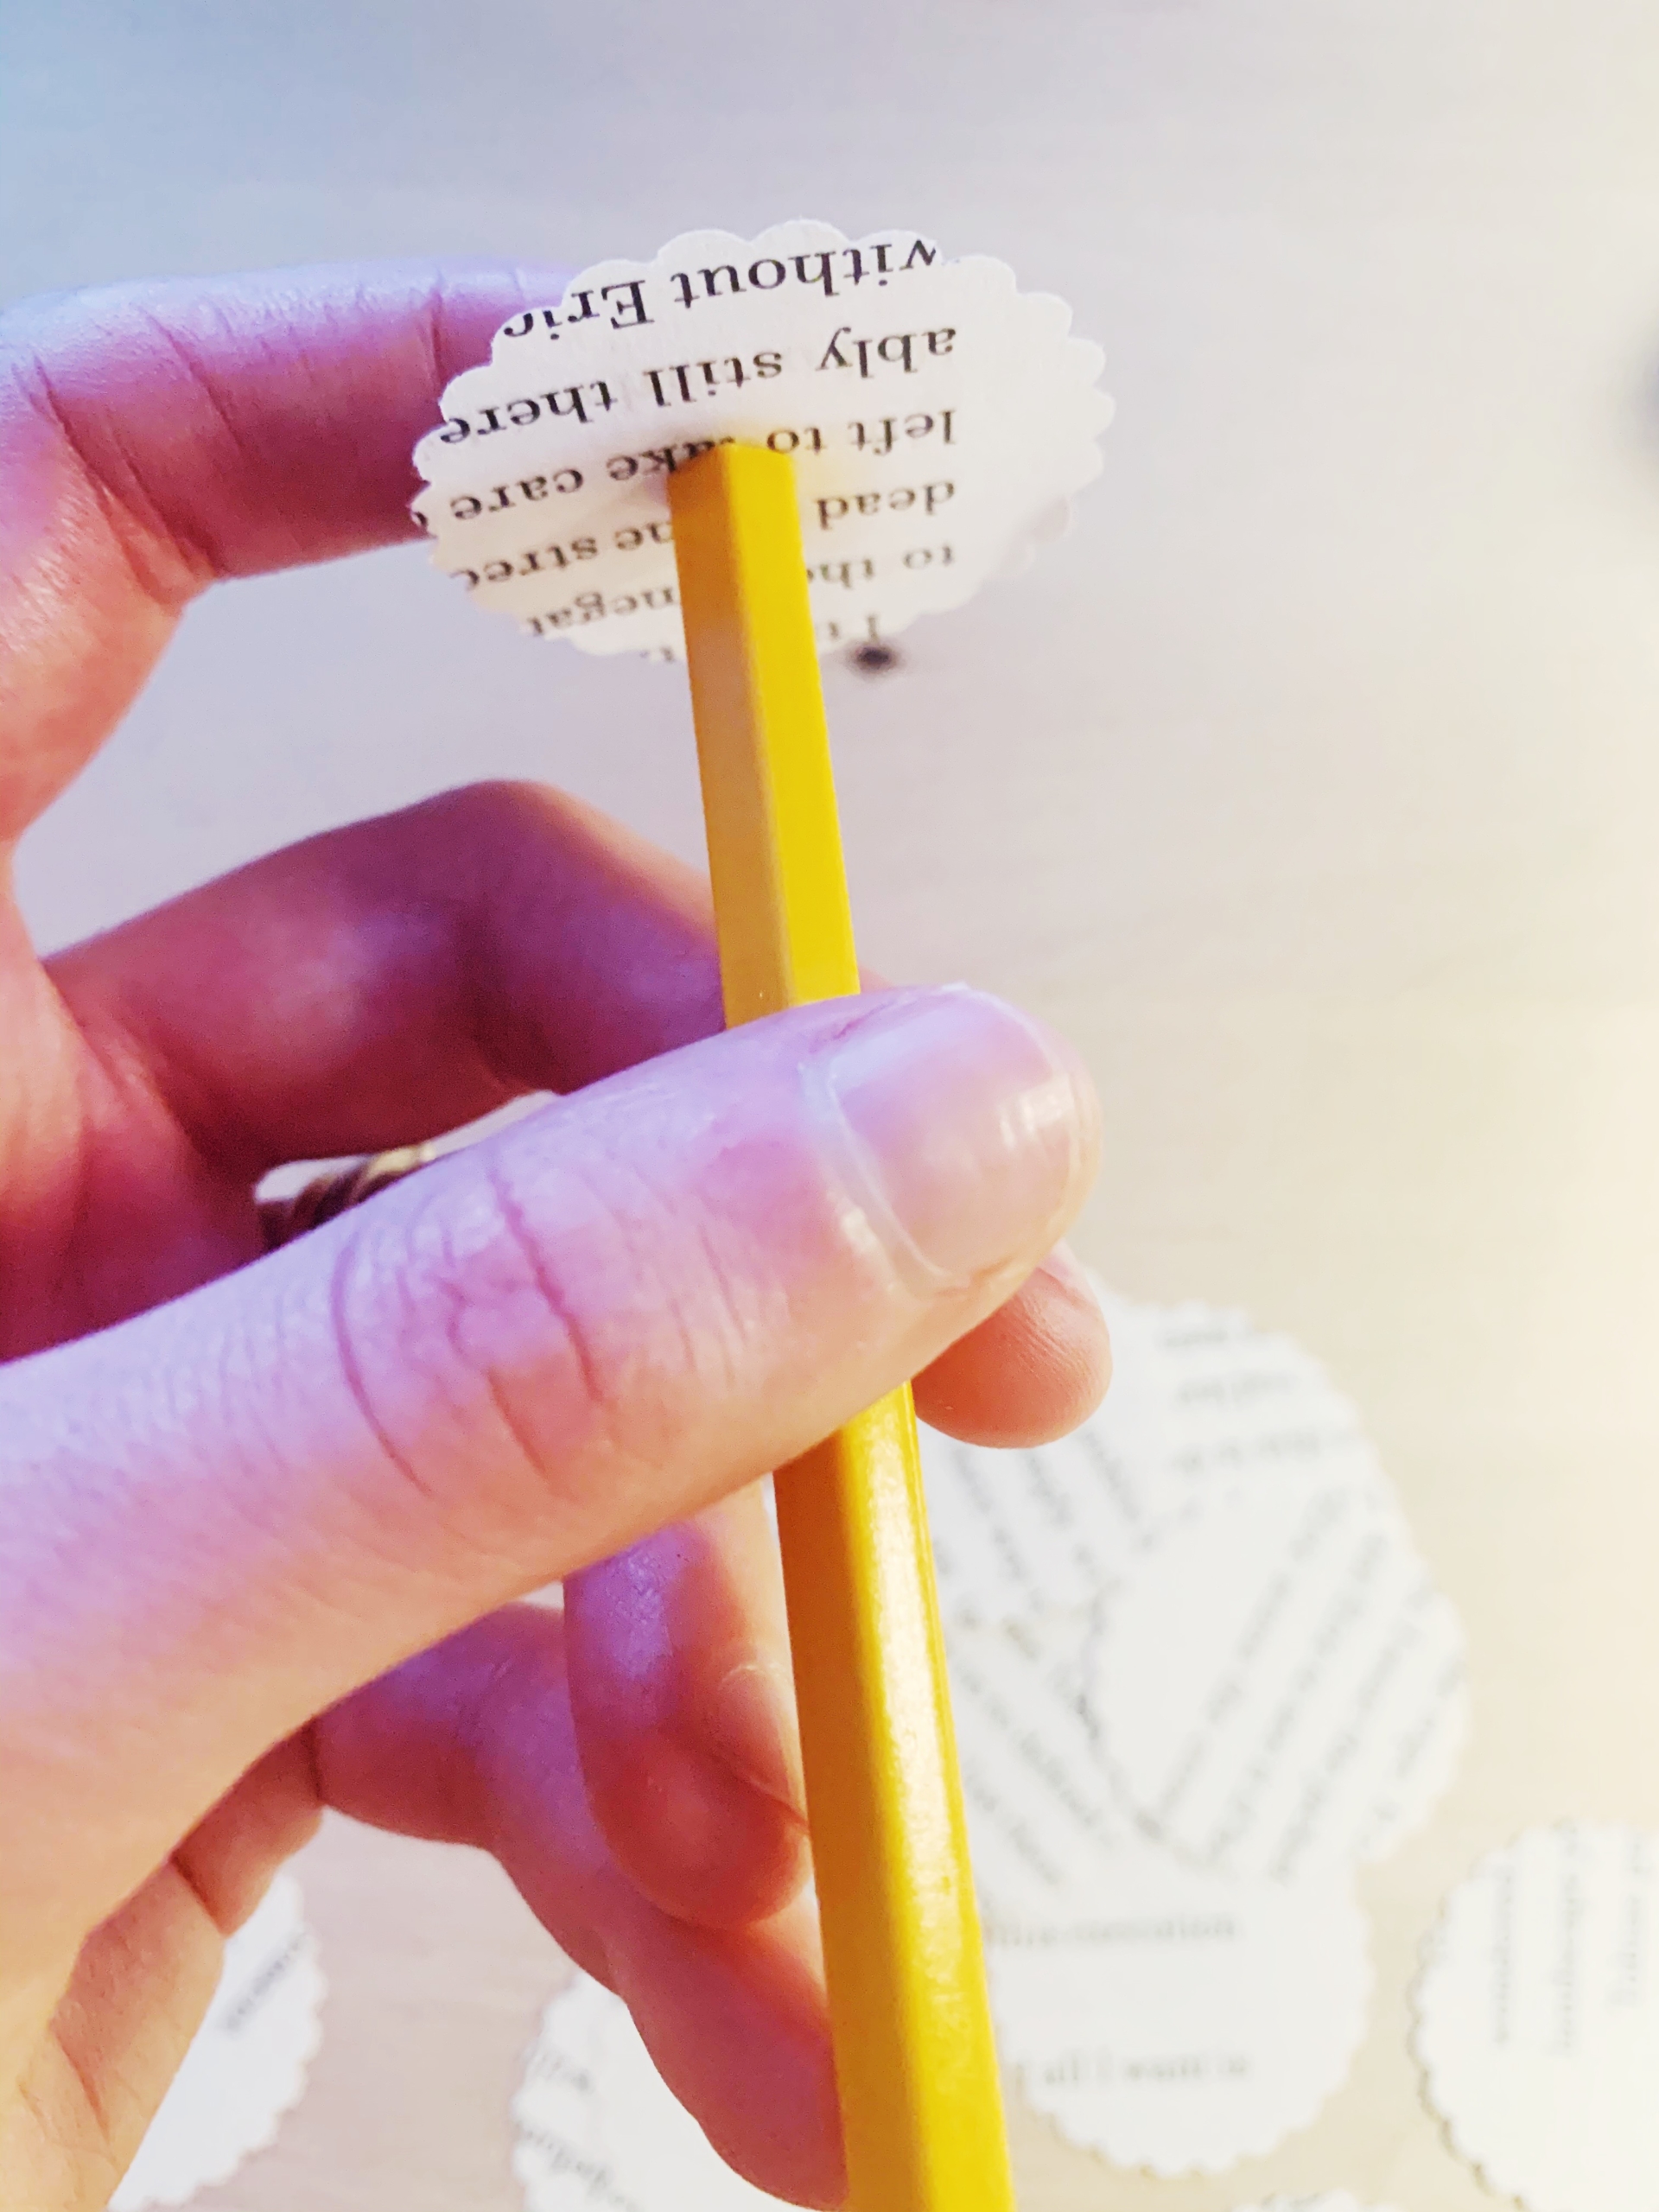
Step Two:
Using the unsharpened pencil, place the center of the paper circle on the end of the pencil, and form the sides of the circle up around it. The paper will look scrunched up, with one small circular flat area. I found it easiest to make a whole bunch of petals before going to the next step of gluing them on.
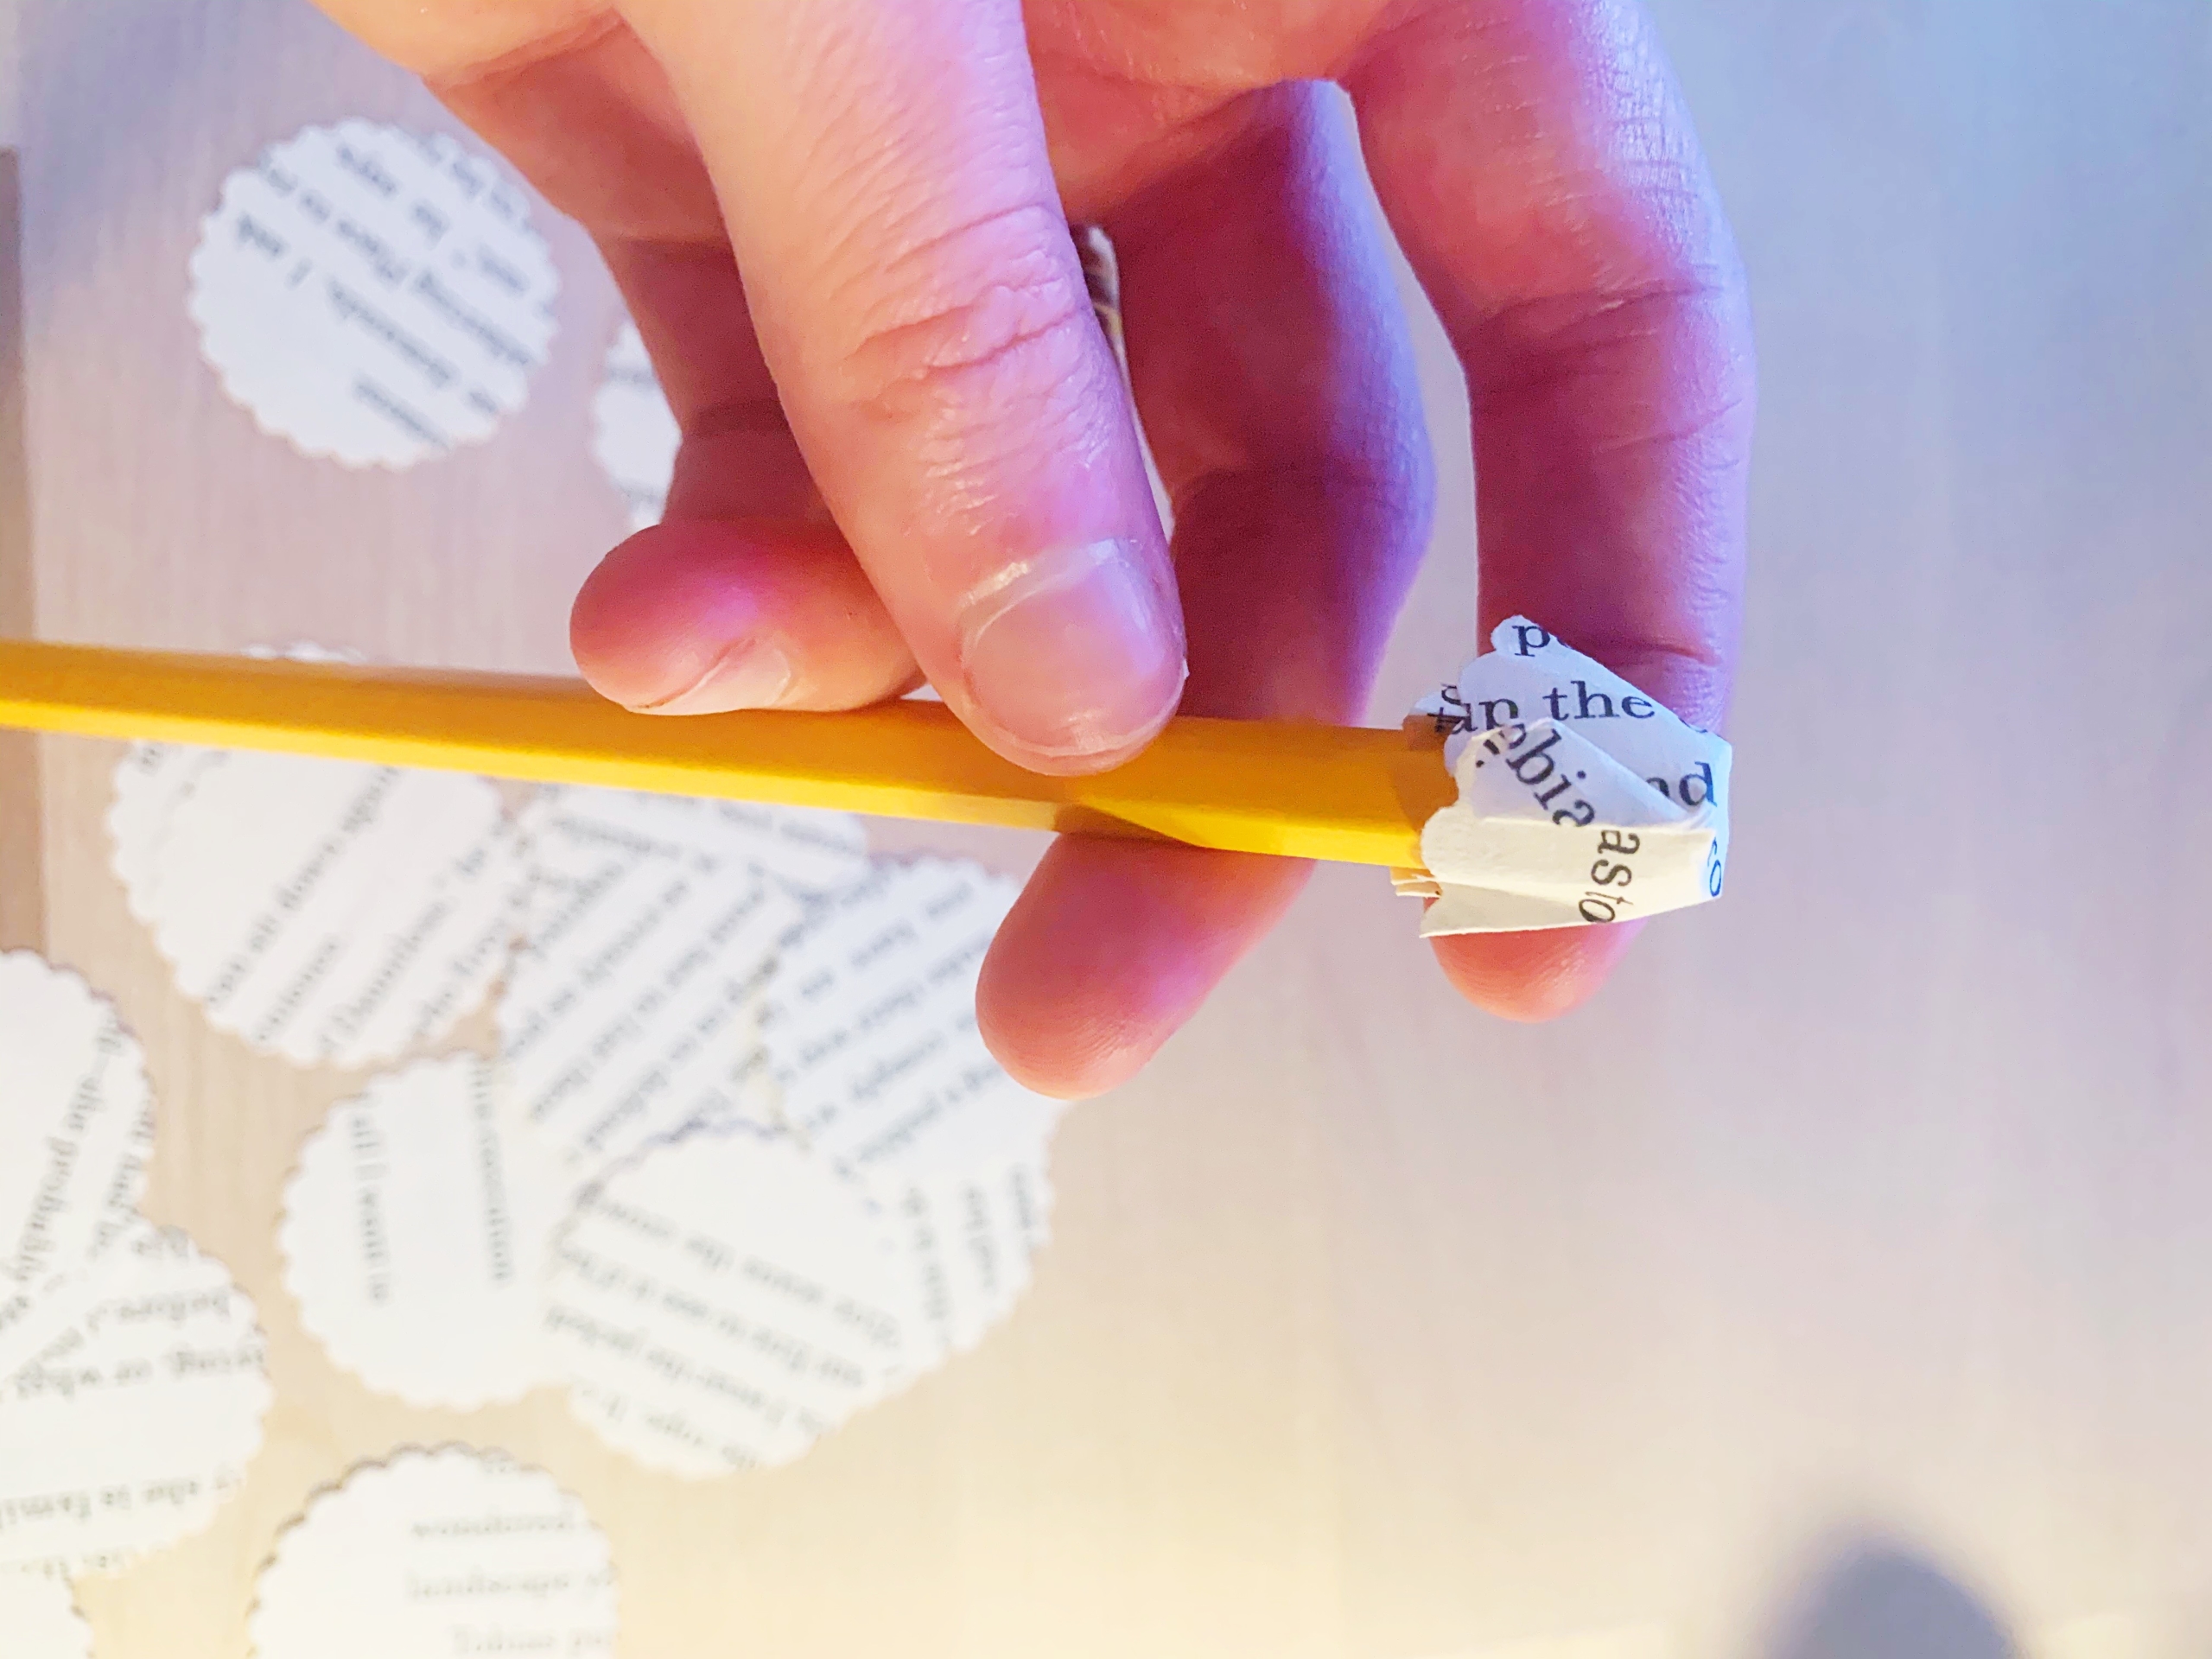
Step Three:
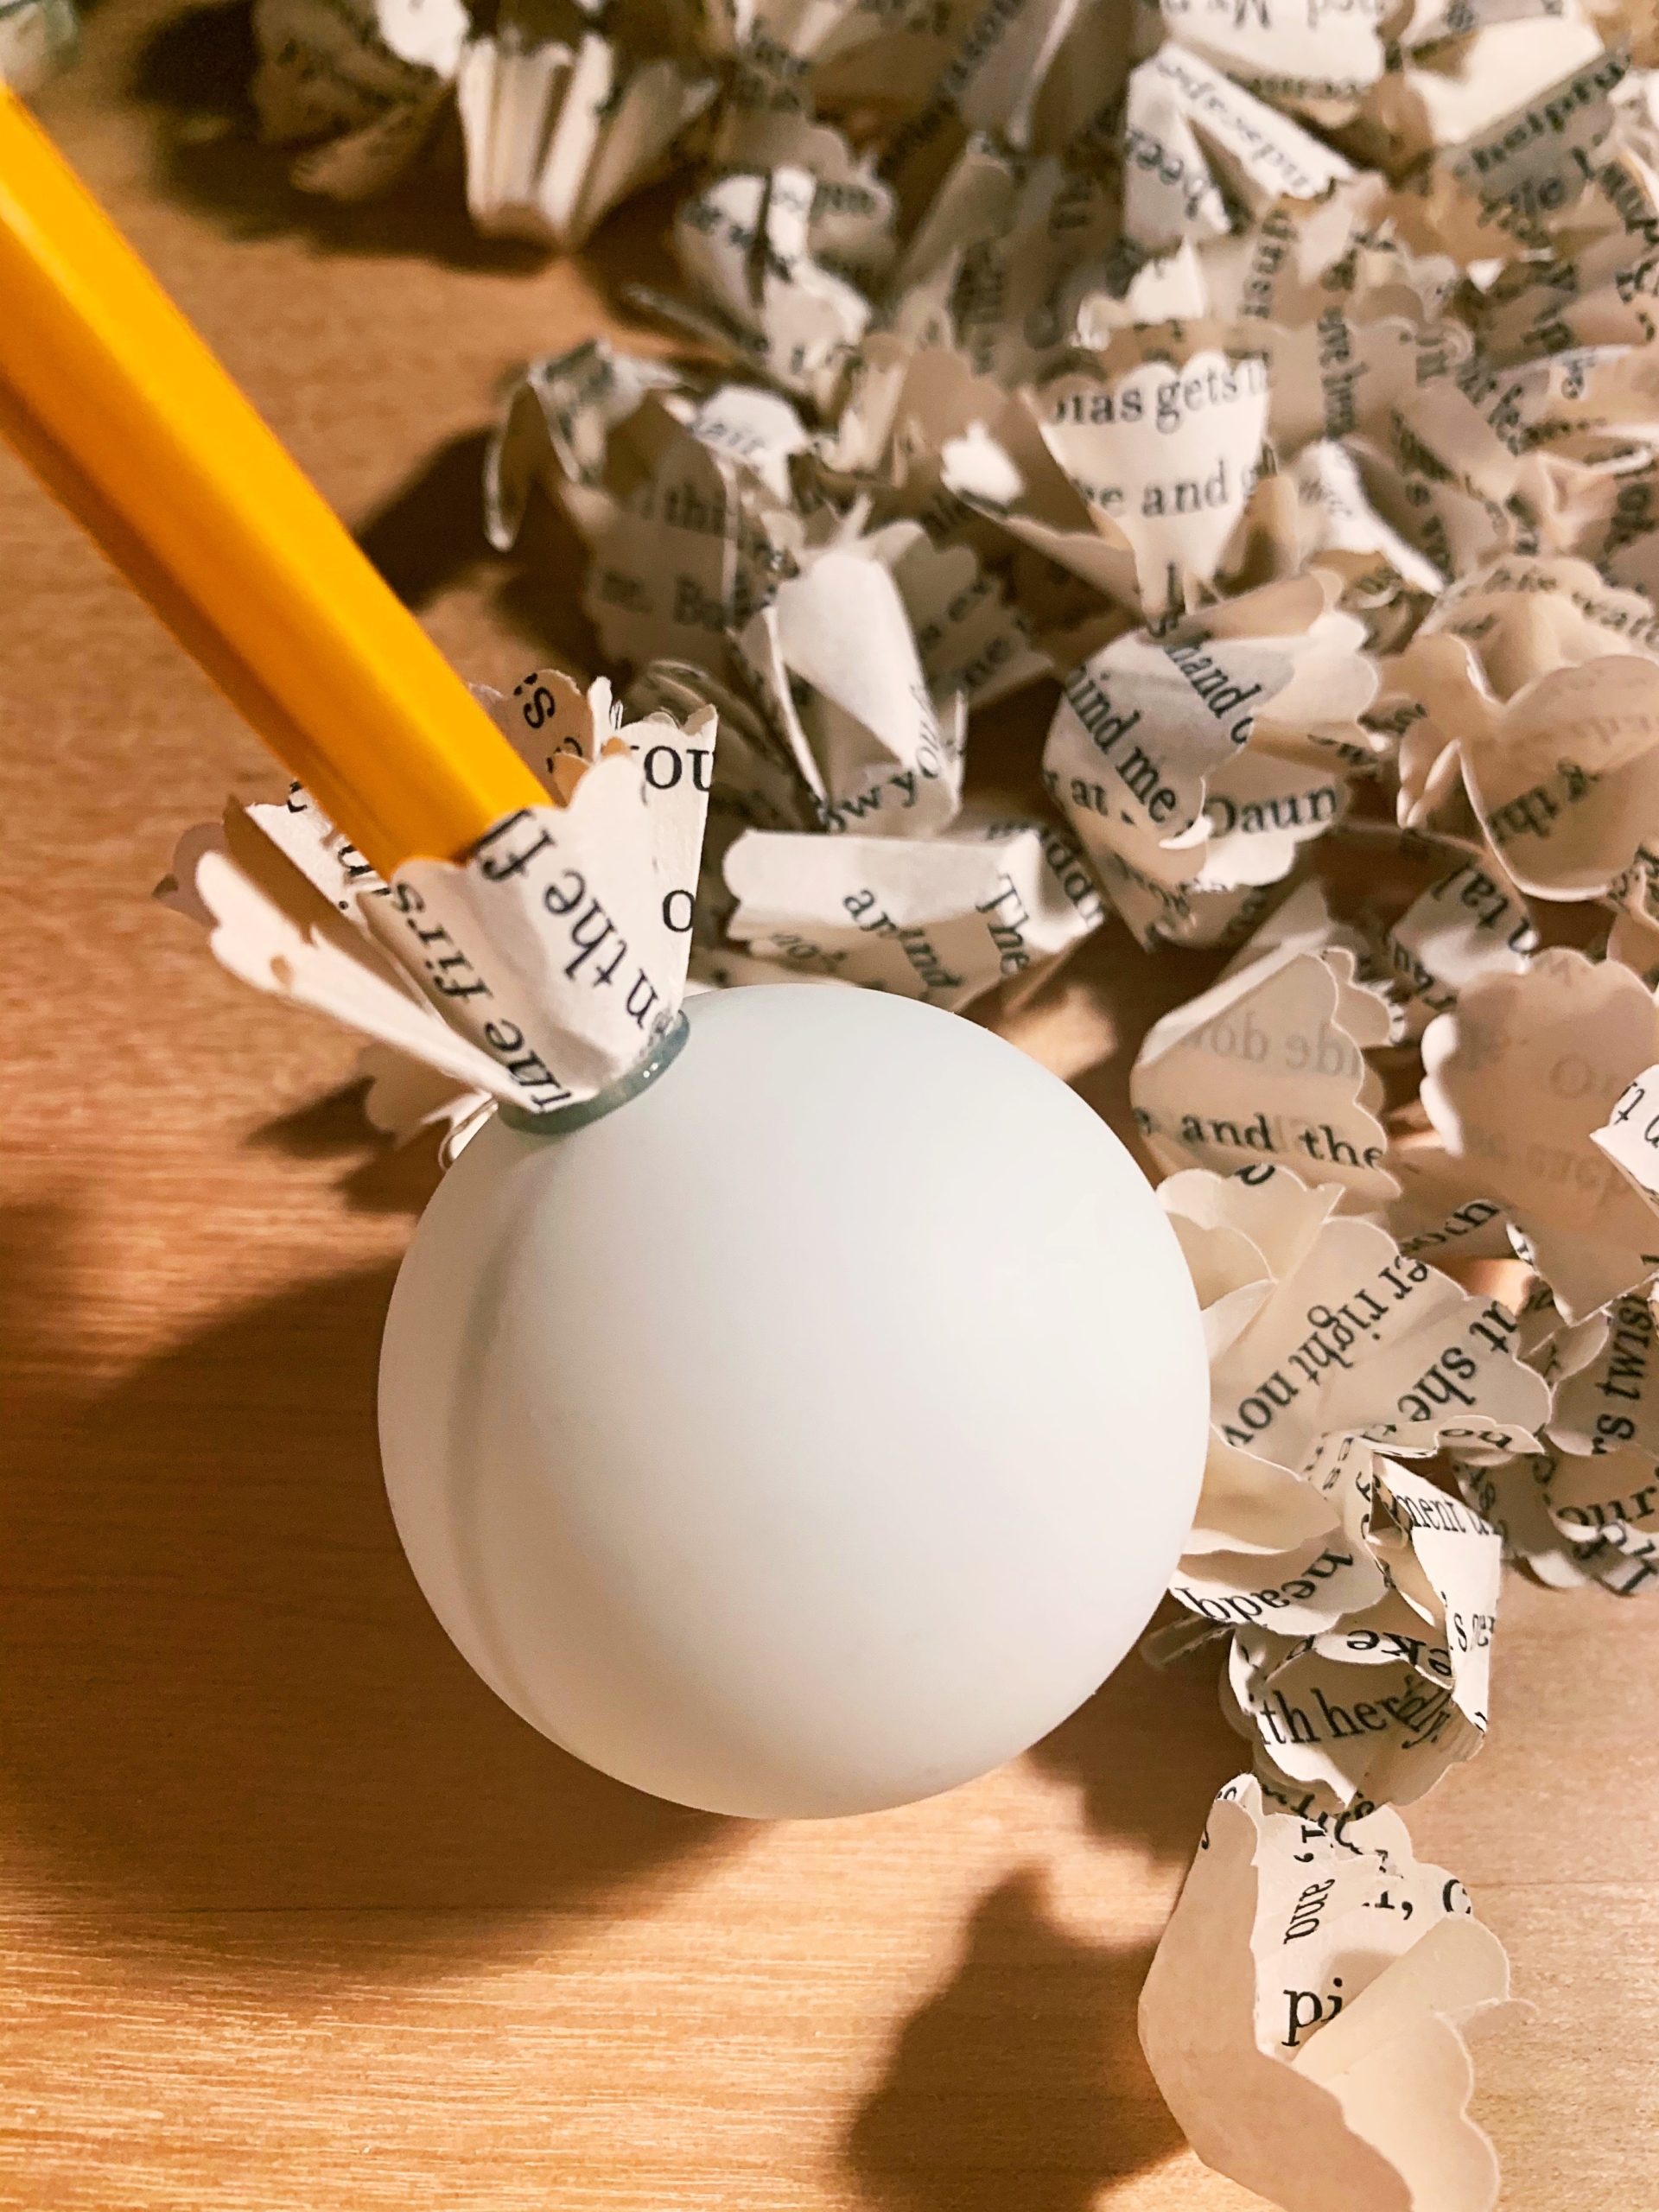
With the pencil inside one of the petals, take your hot-glue gun and place a small drop of glue on the flat area, then use the pencil to press the petal directly onto the ball. Repeat this process until you have covered the entire ball with your paper petals. You want to make sure to glue the petals as close together as possible, to give your hydrangea the full look you’re going for.
And voila!
Since I used ping-pong balls, my flowers are all the same size. Next time I do this craft, I think it will be fun to use different-sized balls to create varying sizes. You could also try mixing up the petal sizes, by using different-sized hole punches.
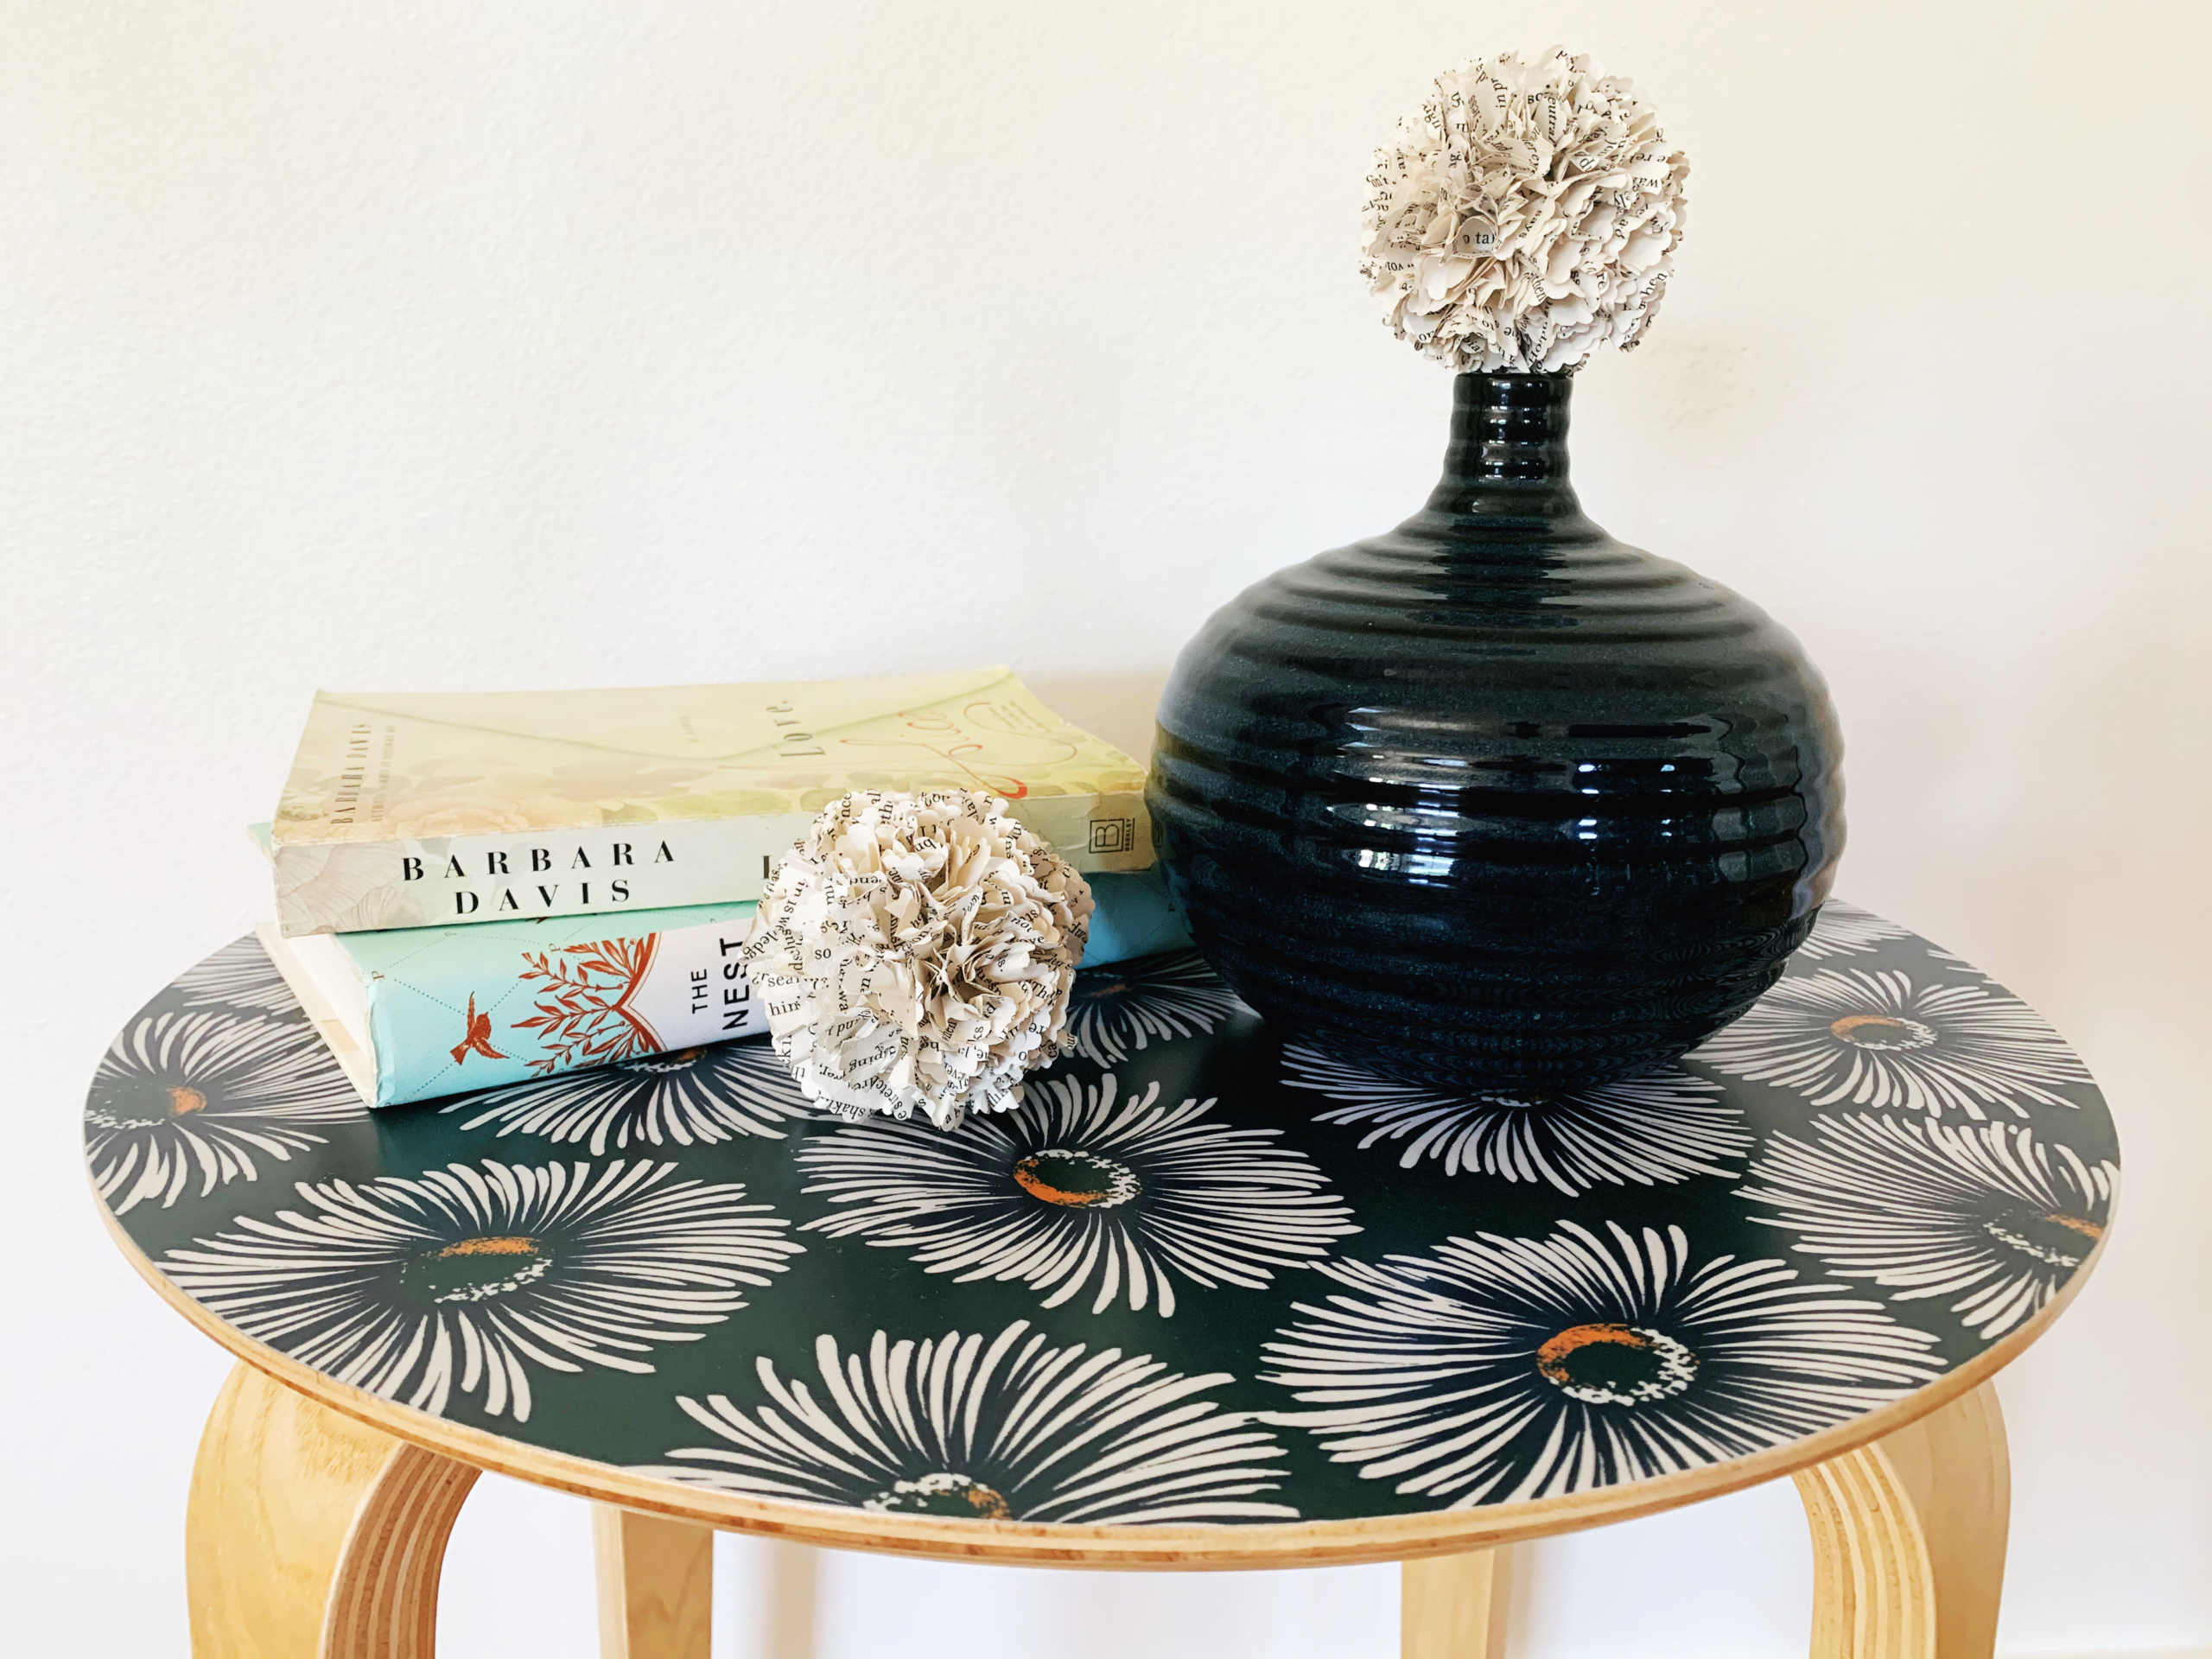
You can arrange your paper hydrangeas in a bowl or vase, place them along a bookshelf or mantelpiece, or even scatter them over a tablecloth for a charming effect. You might try pairing them with a bold color or bright flower petals, to offset the subtle tones of your paper flowers.
Let us know in the comment section how you arrange your brainy blossoms.