Bookends are among our favorite DIY book crafts. Not only are they a must-have for any book-loving household—they’re also an awesome secret weapon for getting kids to read. Just bookend a selection of tempting titles on a table or anywhere kids will come across them, then let their curiosity do the rest.
We also love bookends for breaking up a book collection into reading levels and subject areas, like fiction genres or nonfiction topics. And when your library overflows, you can extend your shelf space by using them to create rows of books atop a bookcase or counter.
There are so many directions you can take this fun DIY painted brick book craft. Get as detailed as you like, or create an “antiqued” look with a sponge. Bring kids in on the fun and let them decorate their own bookends with handprints or designs from their imaginations. You may even want to create a whole series of bookends to display throughout your home.
To inspire you, here are some photos I found from the Human Behavior blog.


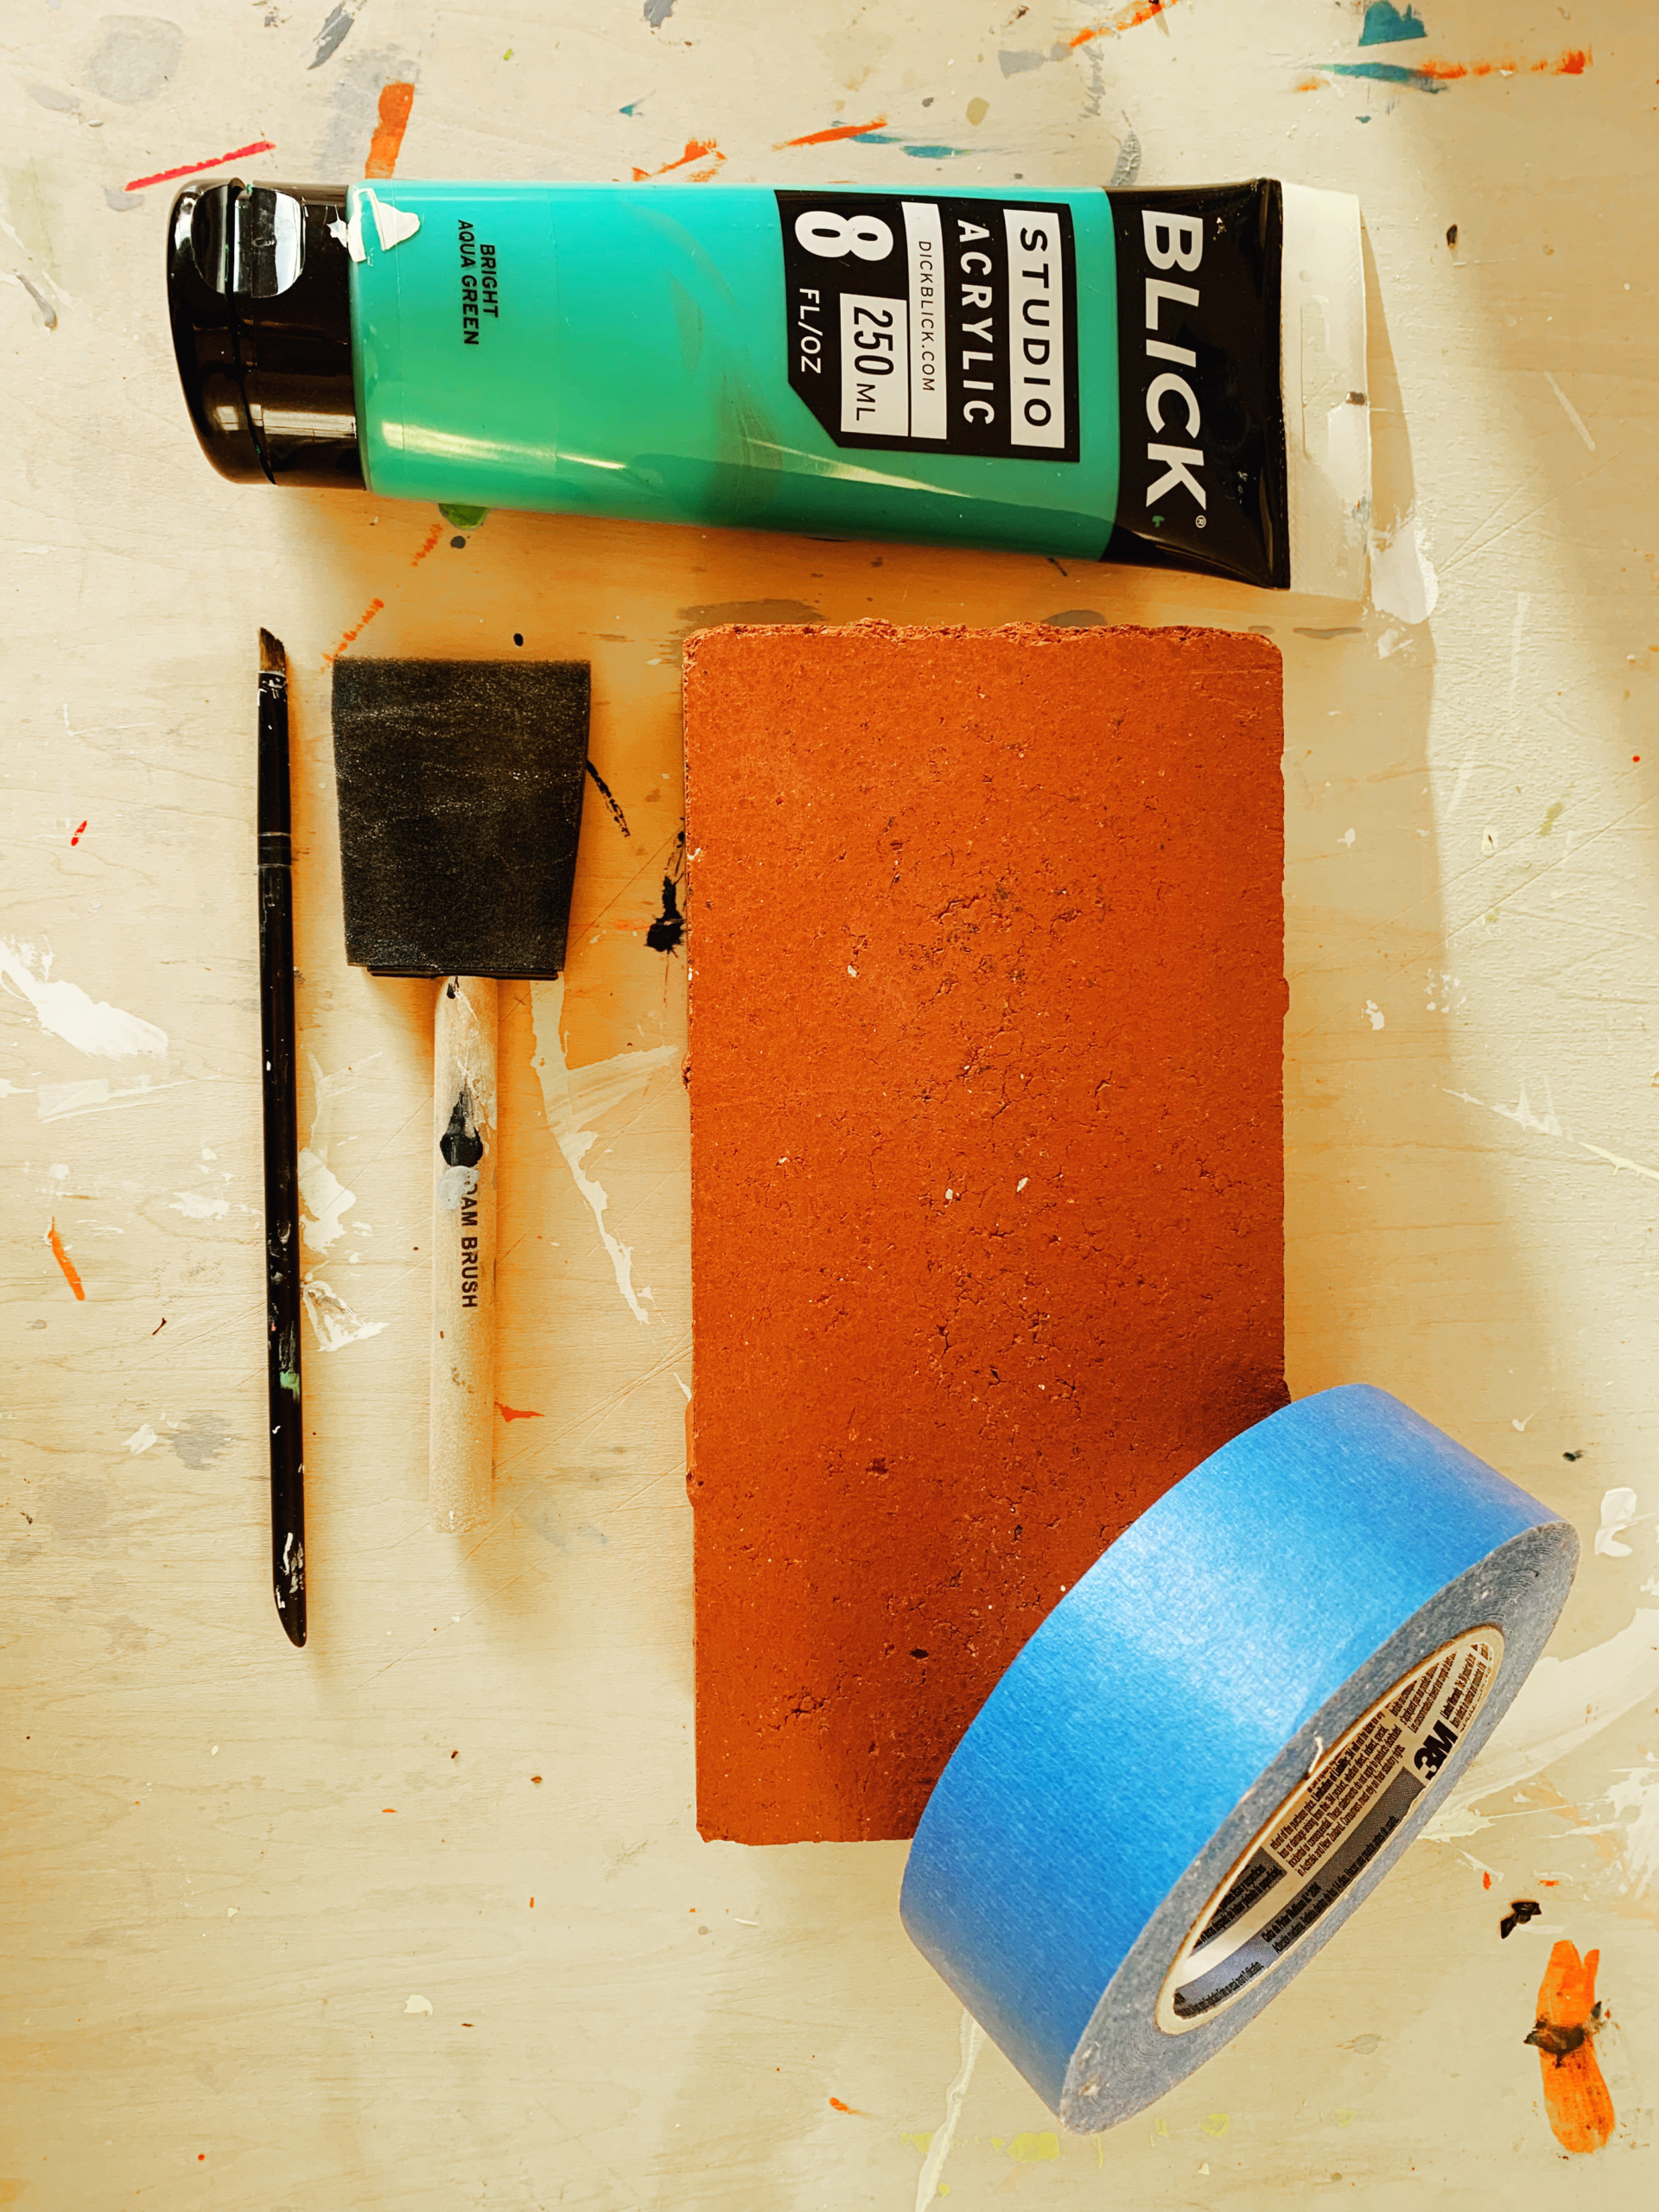
Materials:
- Brick(s) (They don’t have to be perfect! Chips or marks on the bricks give your bookends character.)
- Acrylic paint
- Painters tape
- Paint brushes/rollers
Optional: (But you can always free-hand your design if you’re feeling extra crafty!)
- Letter stencils
- Design stencils
Cost: Hopefully you have some painting materials on hand, but this DIY book craft should cost around $15 if you have to purchase some. Remember, you don’t need to use a brand-new brick. It’s usually easy to find people with leftover bricks to give away. I think old bricks add character to a craft like this!
Step One:
The first thing I did was decide on my design. I spent some time poking around for inspiration. There are many variations to this craft, so it was fun to search for ideas. If you have a favorite book, that’s a great place to start! Knowing where you’ll use your bookend could also help you decide on designs or colors.
Pro Tip: If you want to create a pair of bookends, just remember which side of each brick will be facing out!
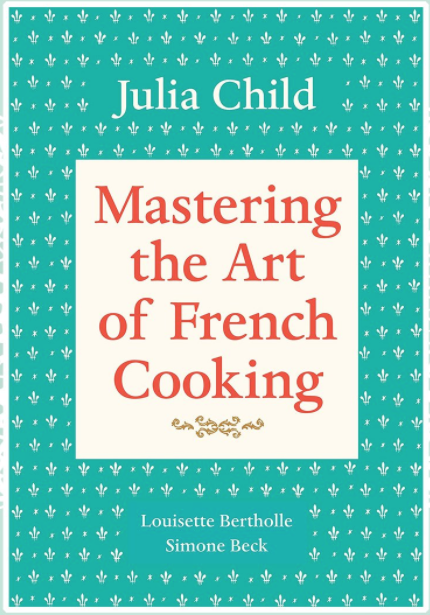
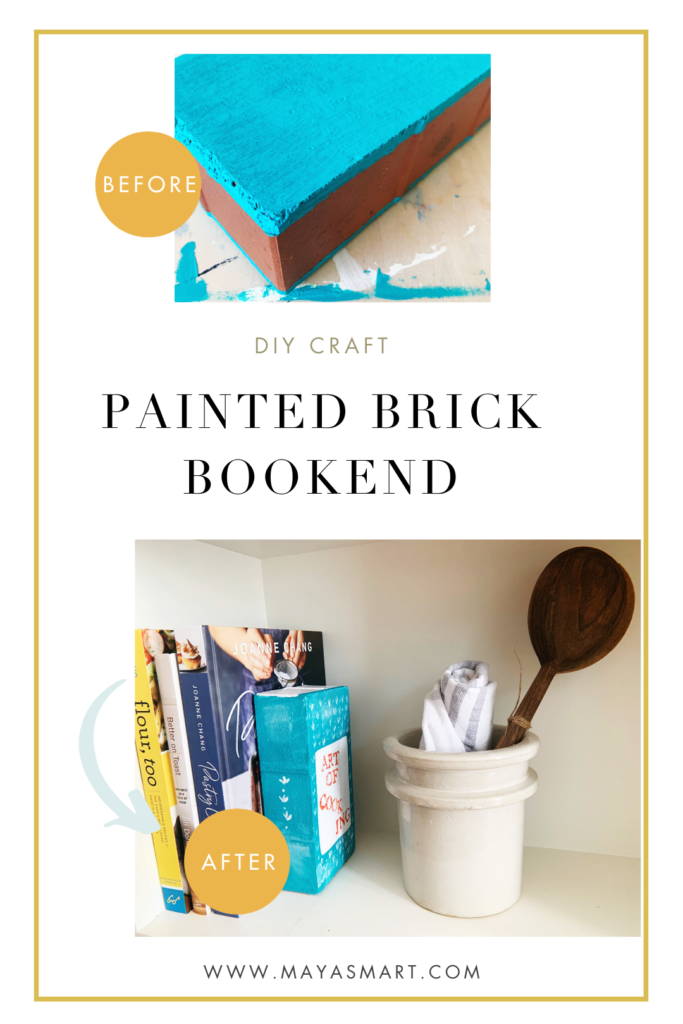
I decided to use my bookend for some new cookbooks I have, so I wanted to find a fun design of a colorful cookbook. Here was my inspiration: Julia Child’s Mastering the Art of French Cooking.
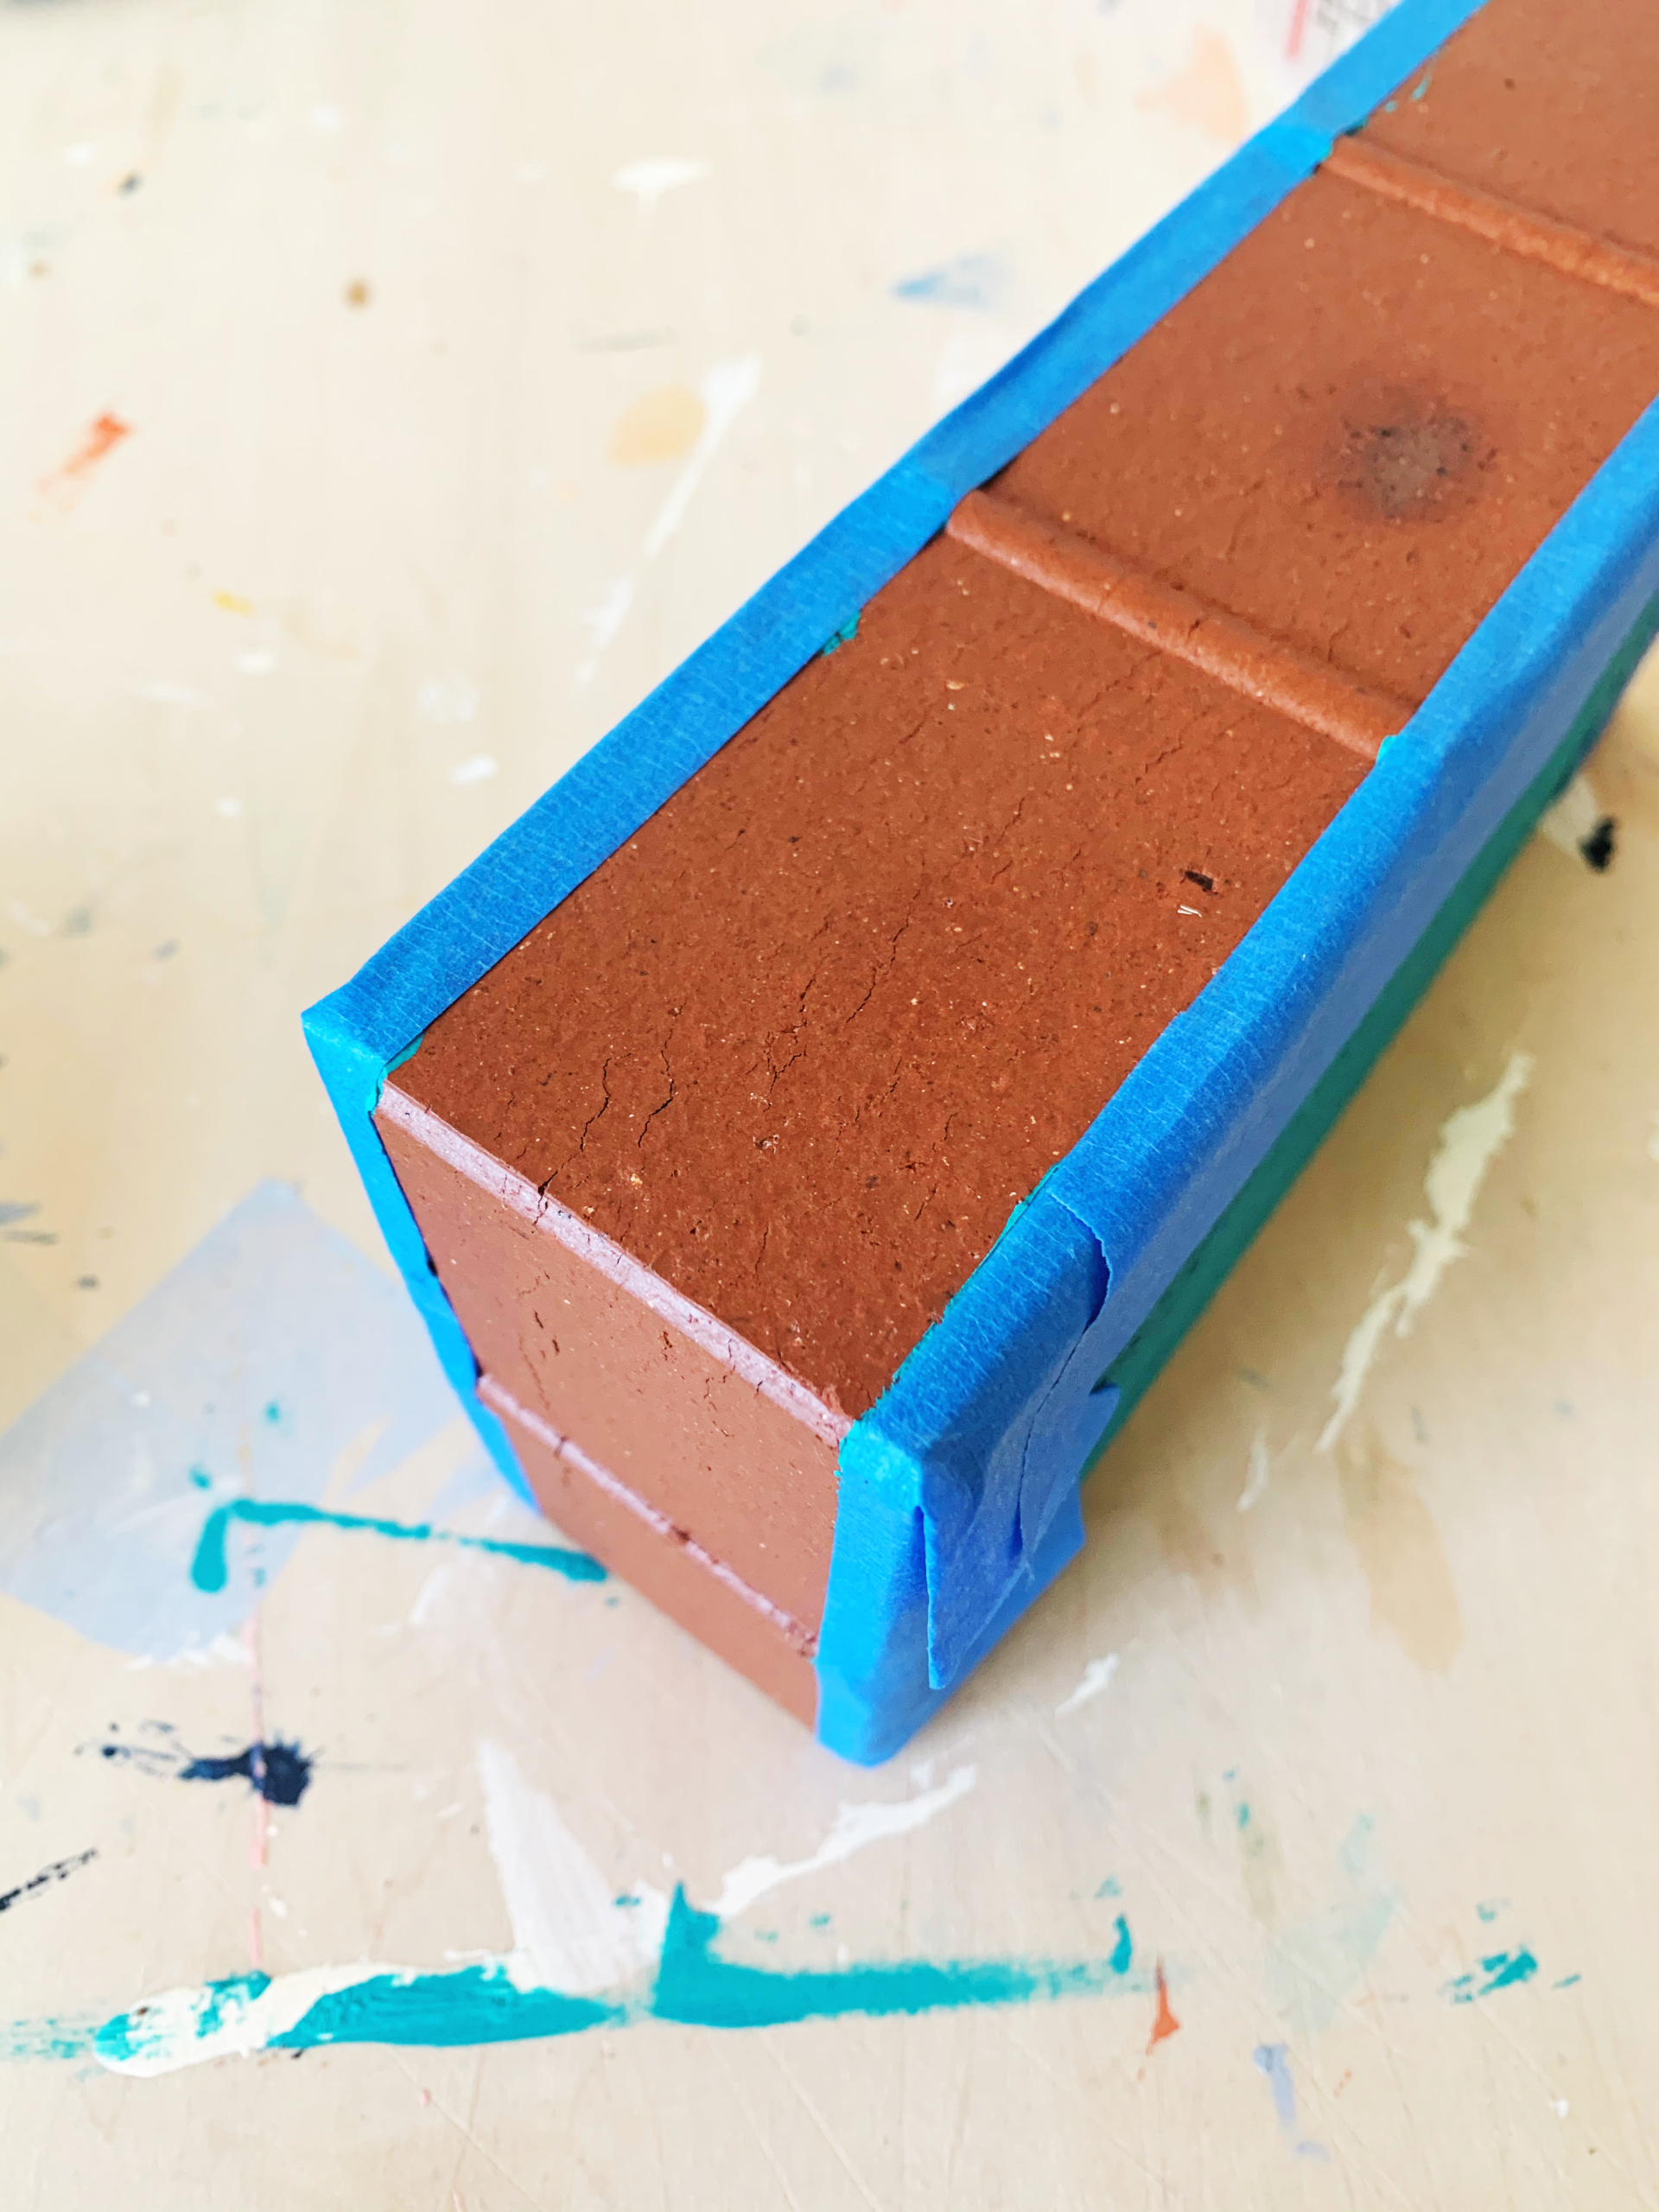
Step Two:
To start, you will put painter’s tape along both short sides of the brick and one of the long sides—these will be the book’s “pages.”
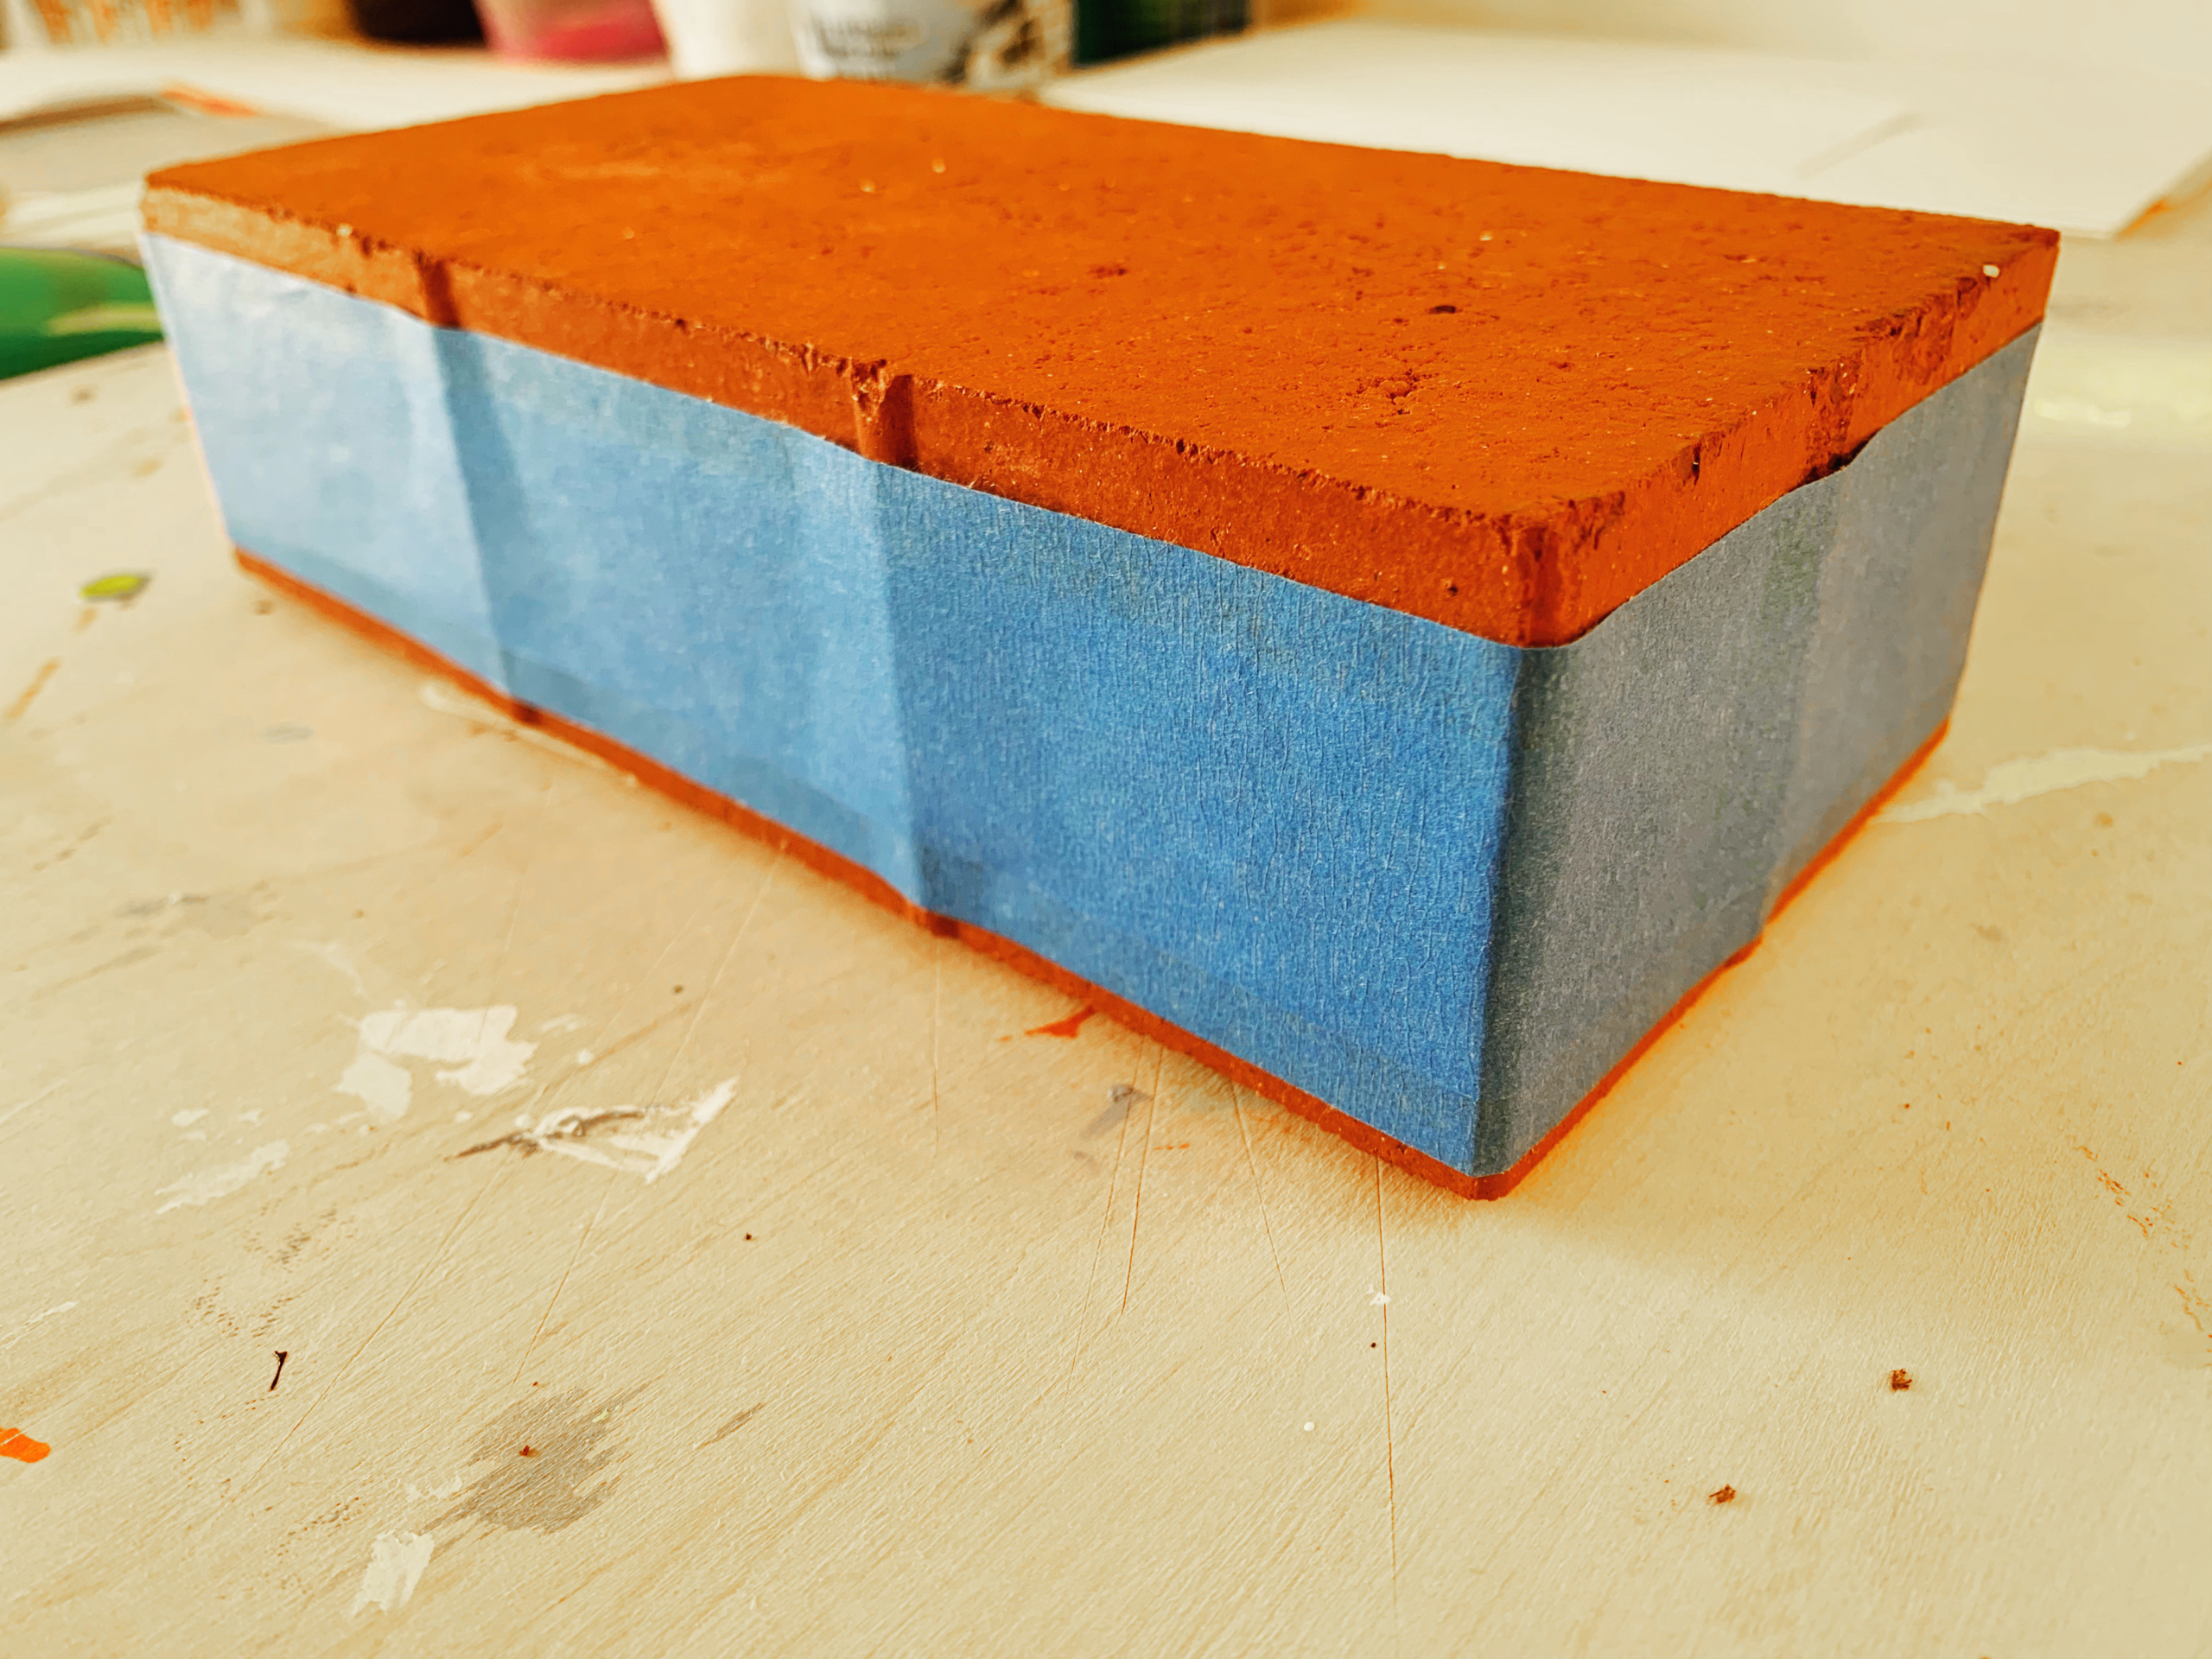
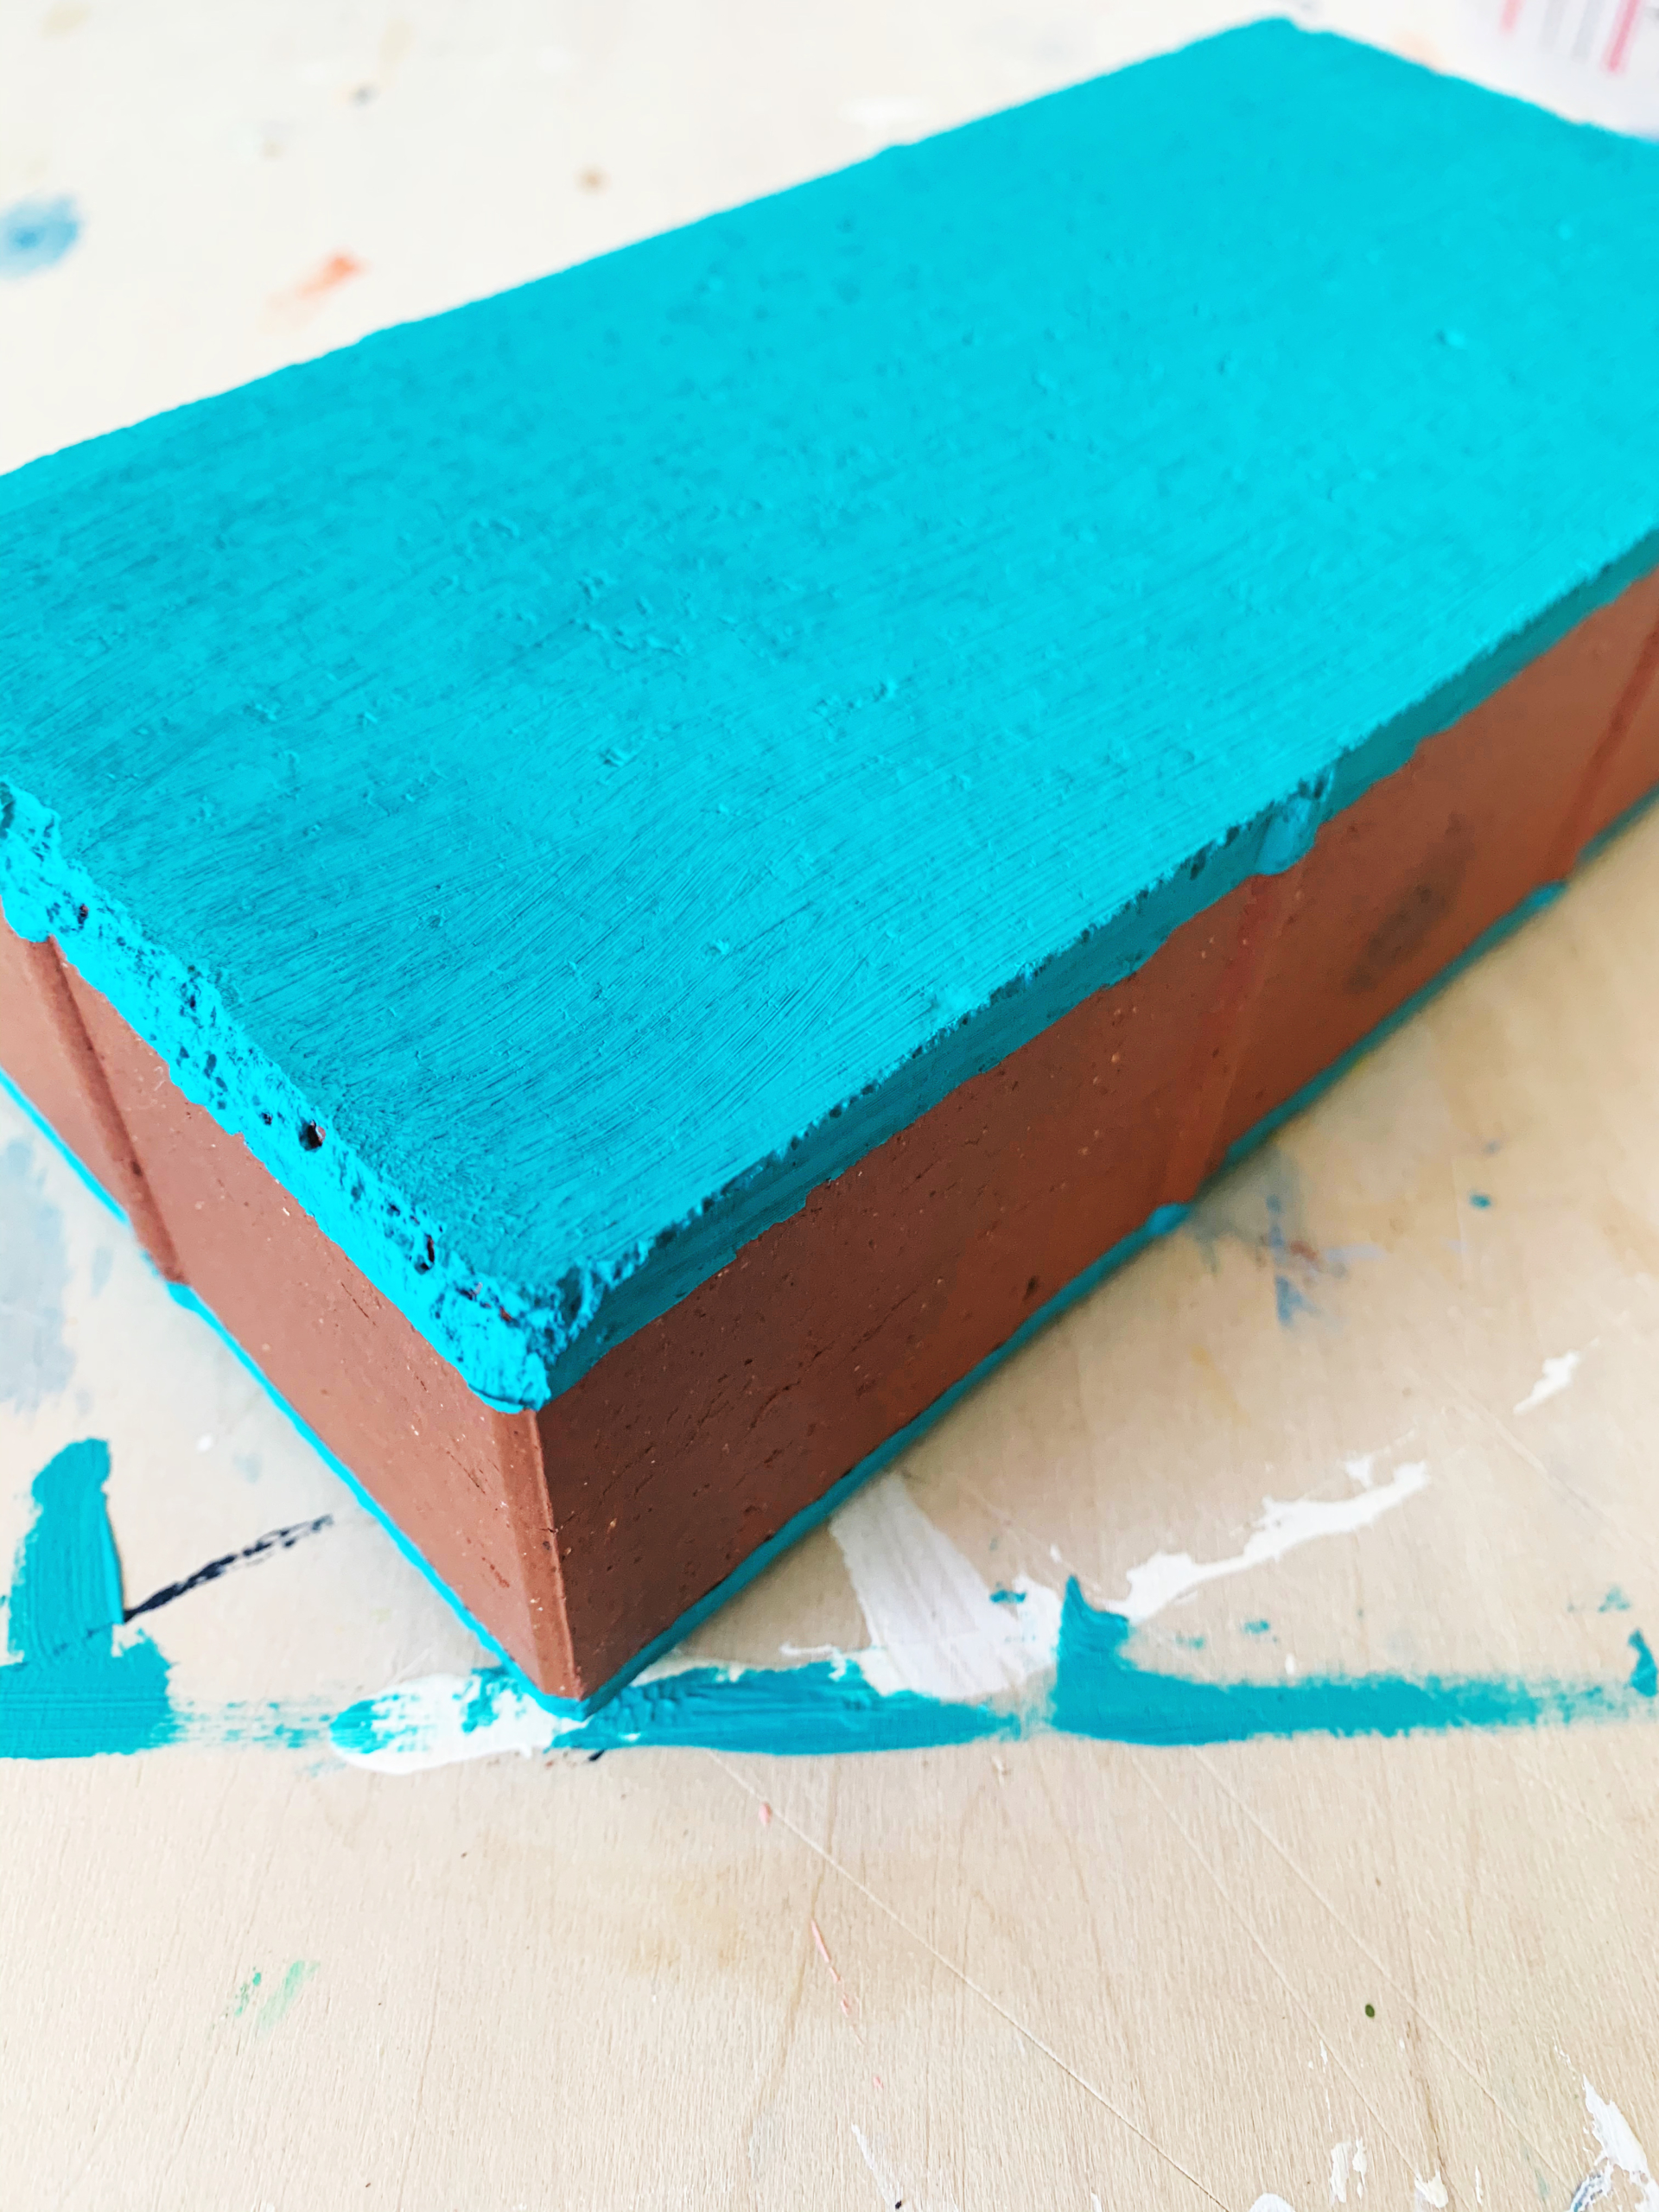
Step Three:
Next, paint the exposed part of the brick. This will be the front and back covers and the spine of your book. You will need to let this paint dry completely before moving on to the next step!
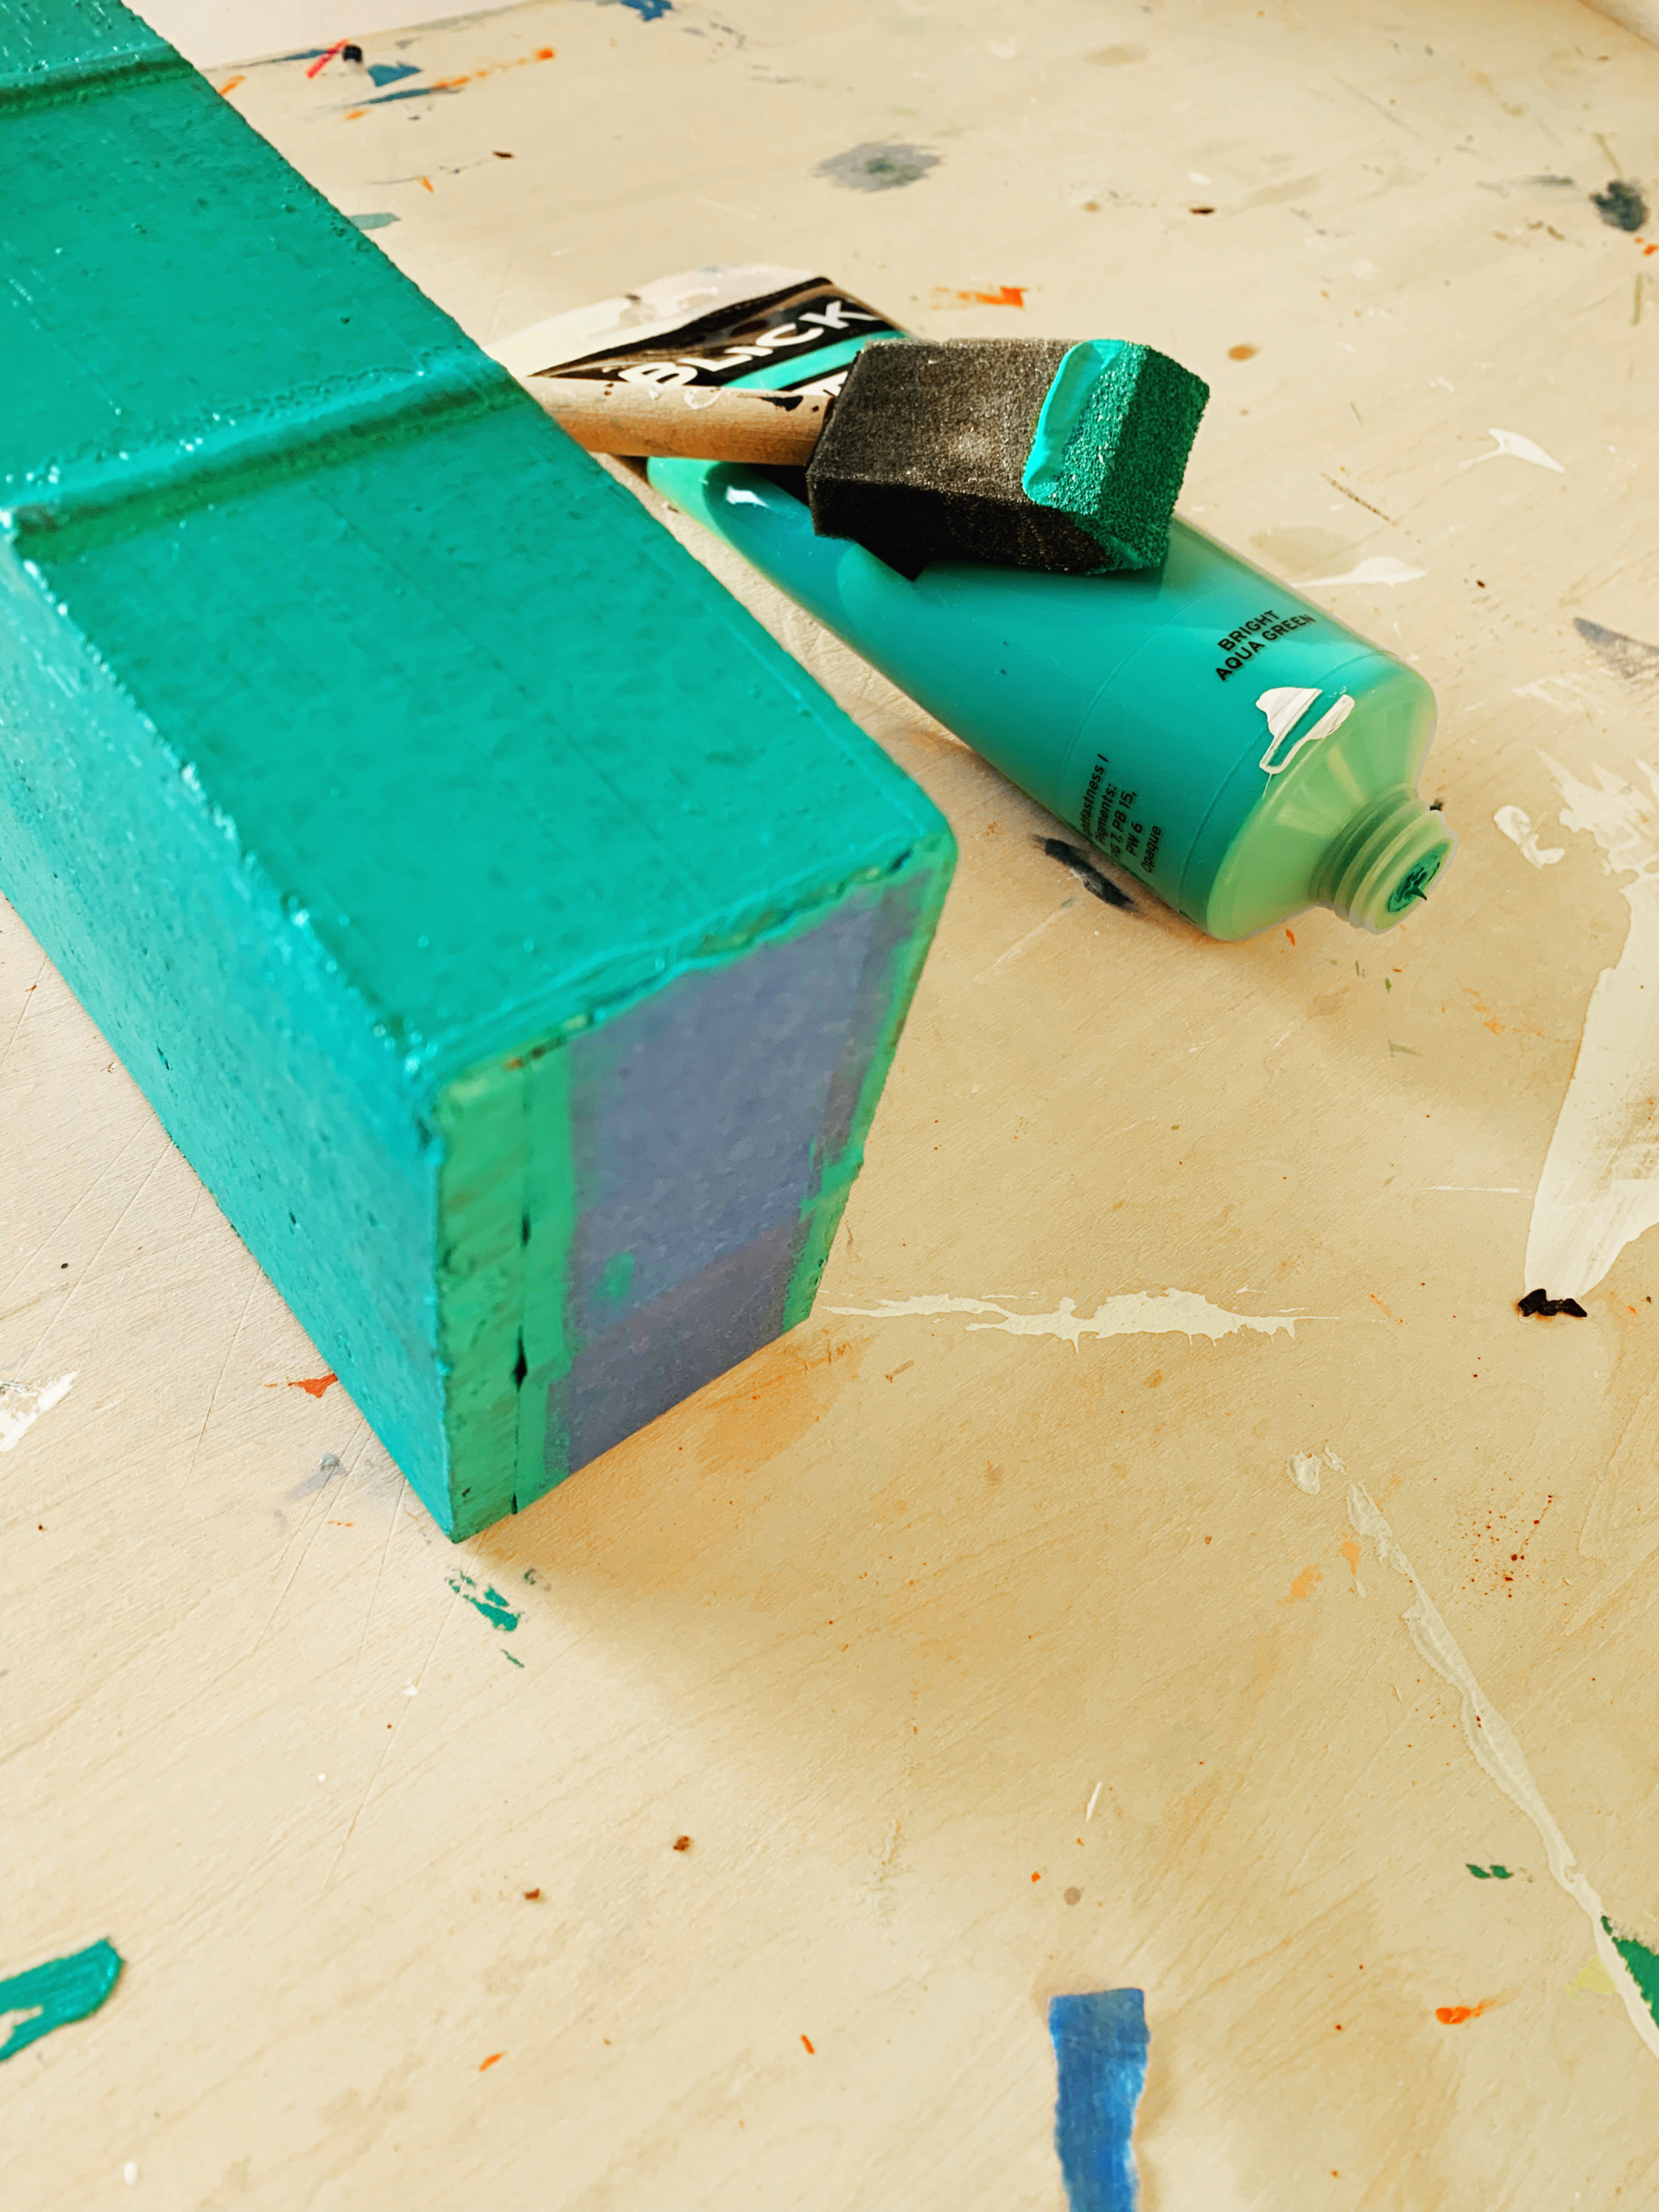
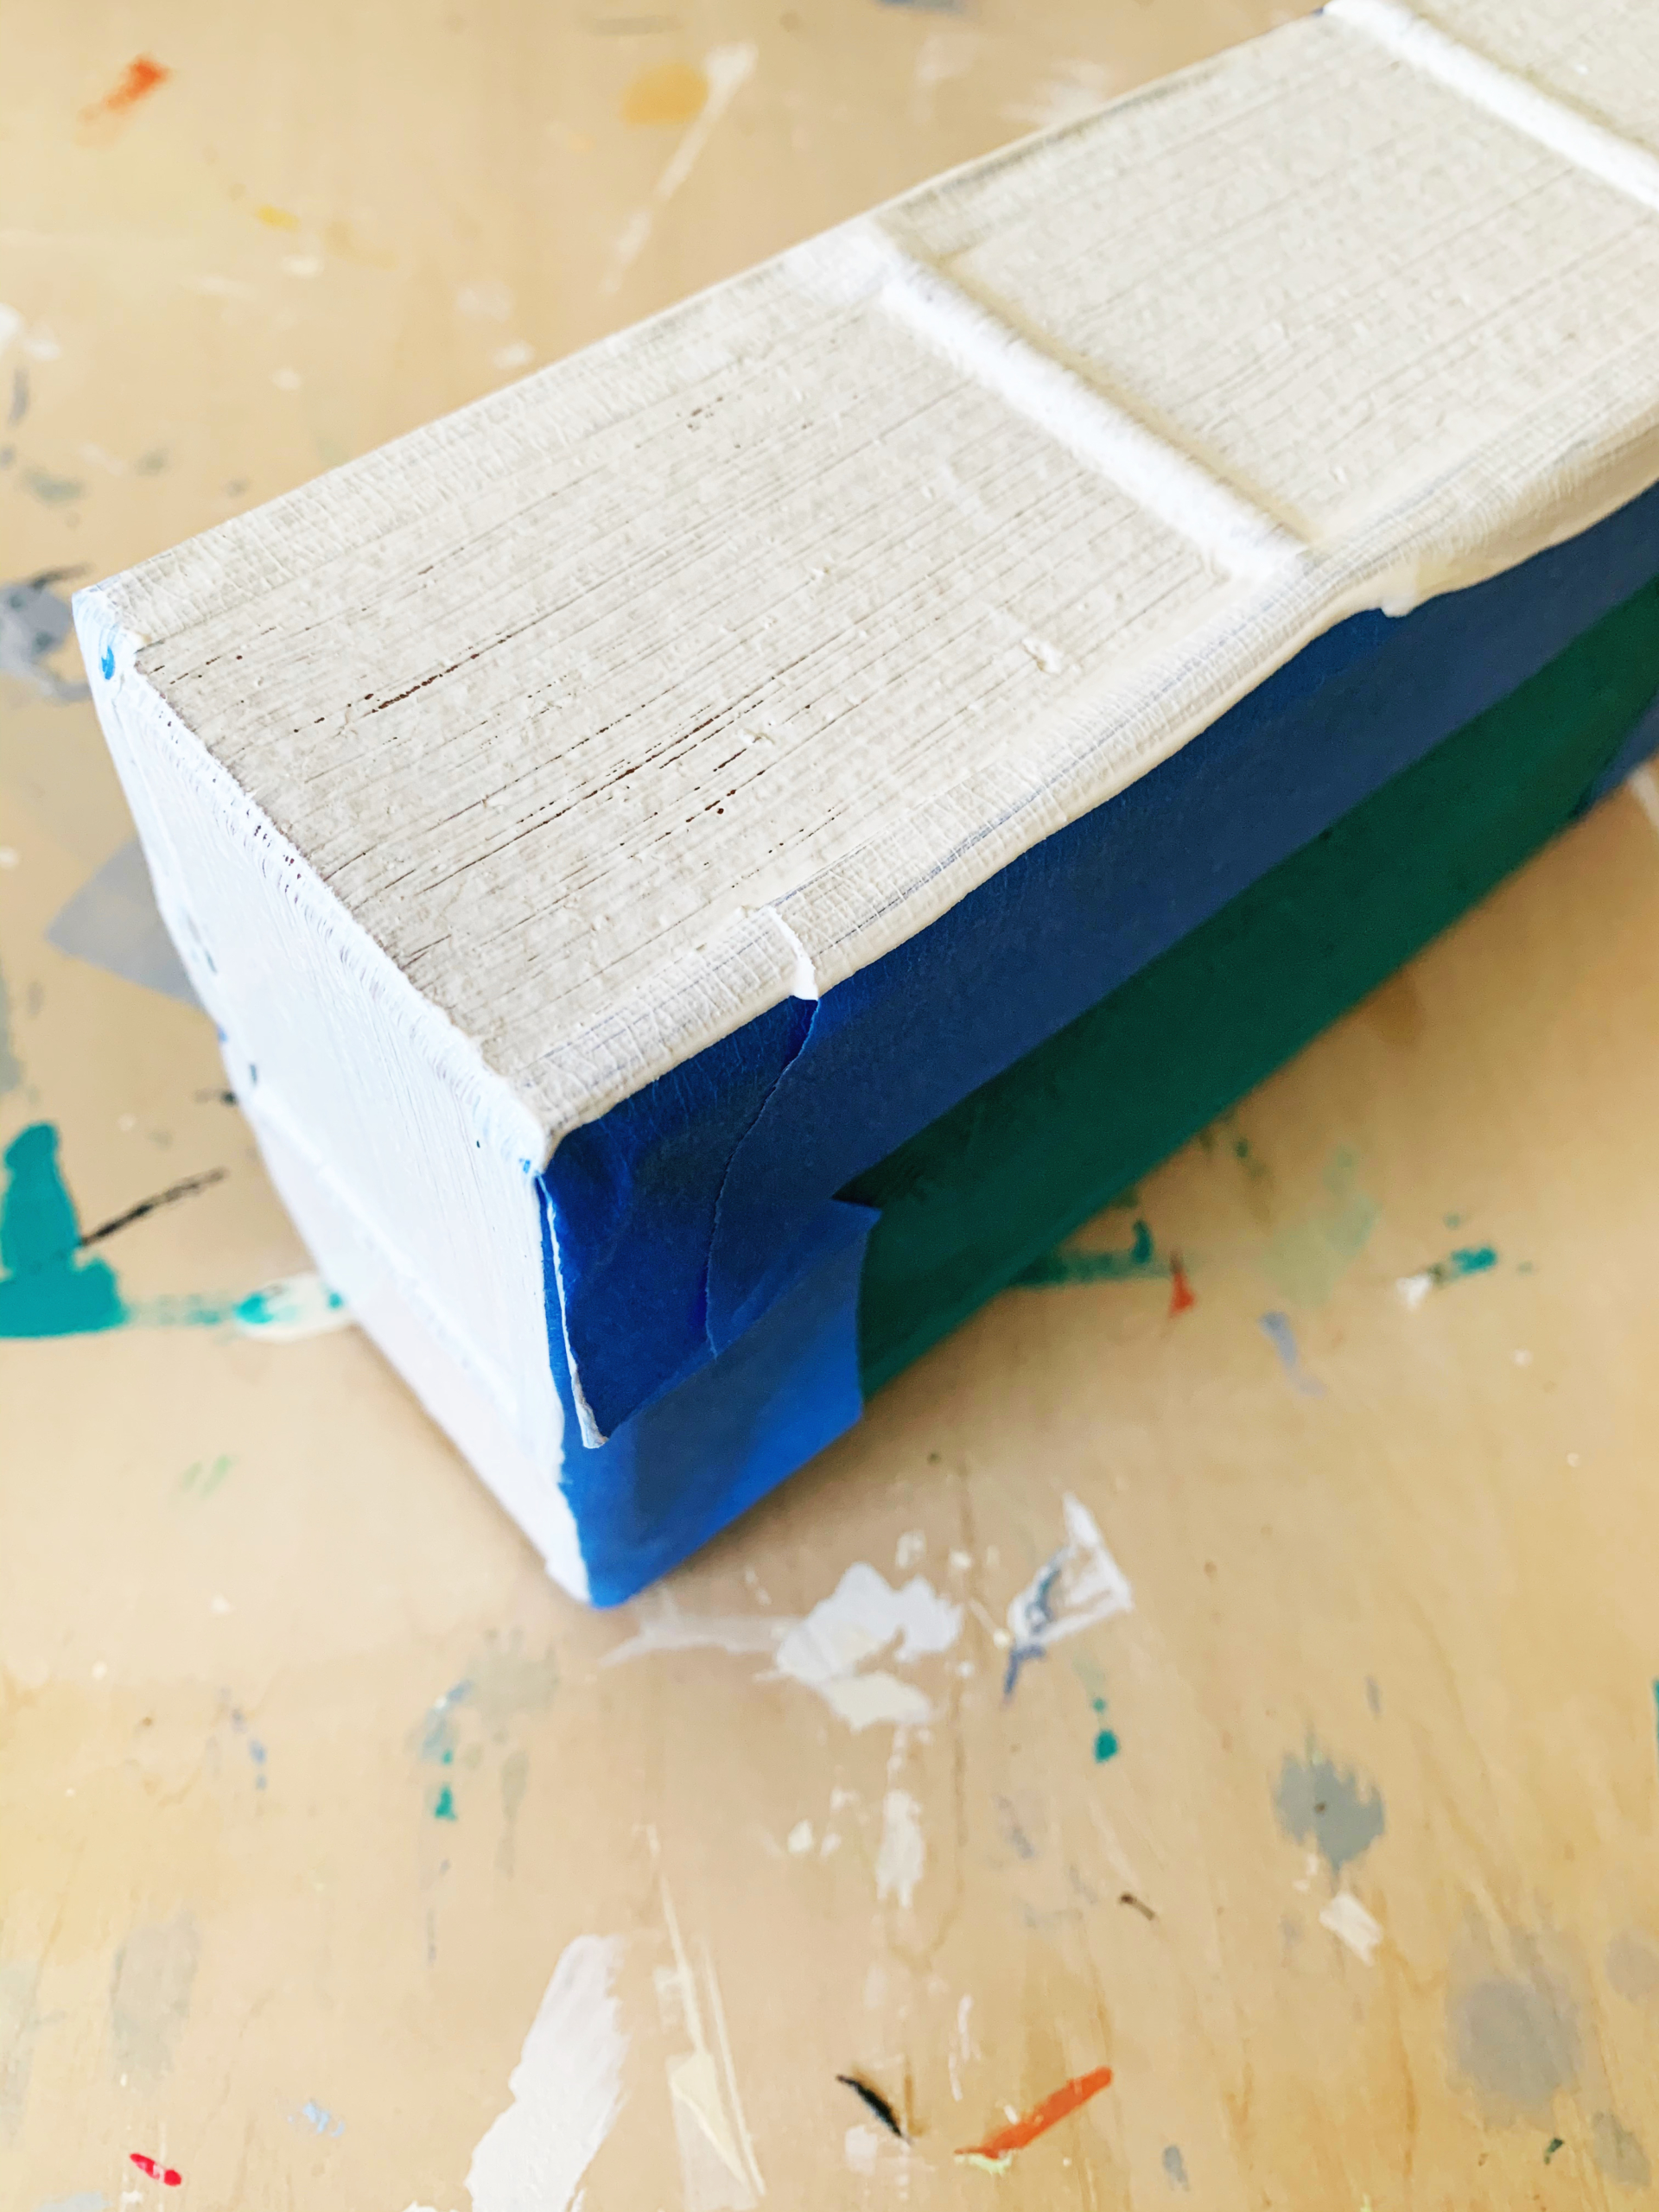
Step Four:
Now you’ll paint the pages of your book. This time, cover the edges that you just painted with painter’s tape, so only the brick you have yet to paint is exposed. Then paint the “pages” white (or gold for an antique gilt-edged look!). Again, wait for the paint to dry before moving on.
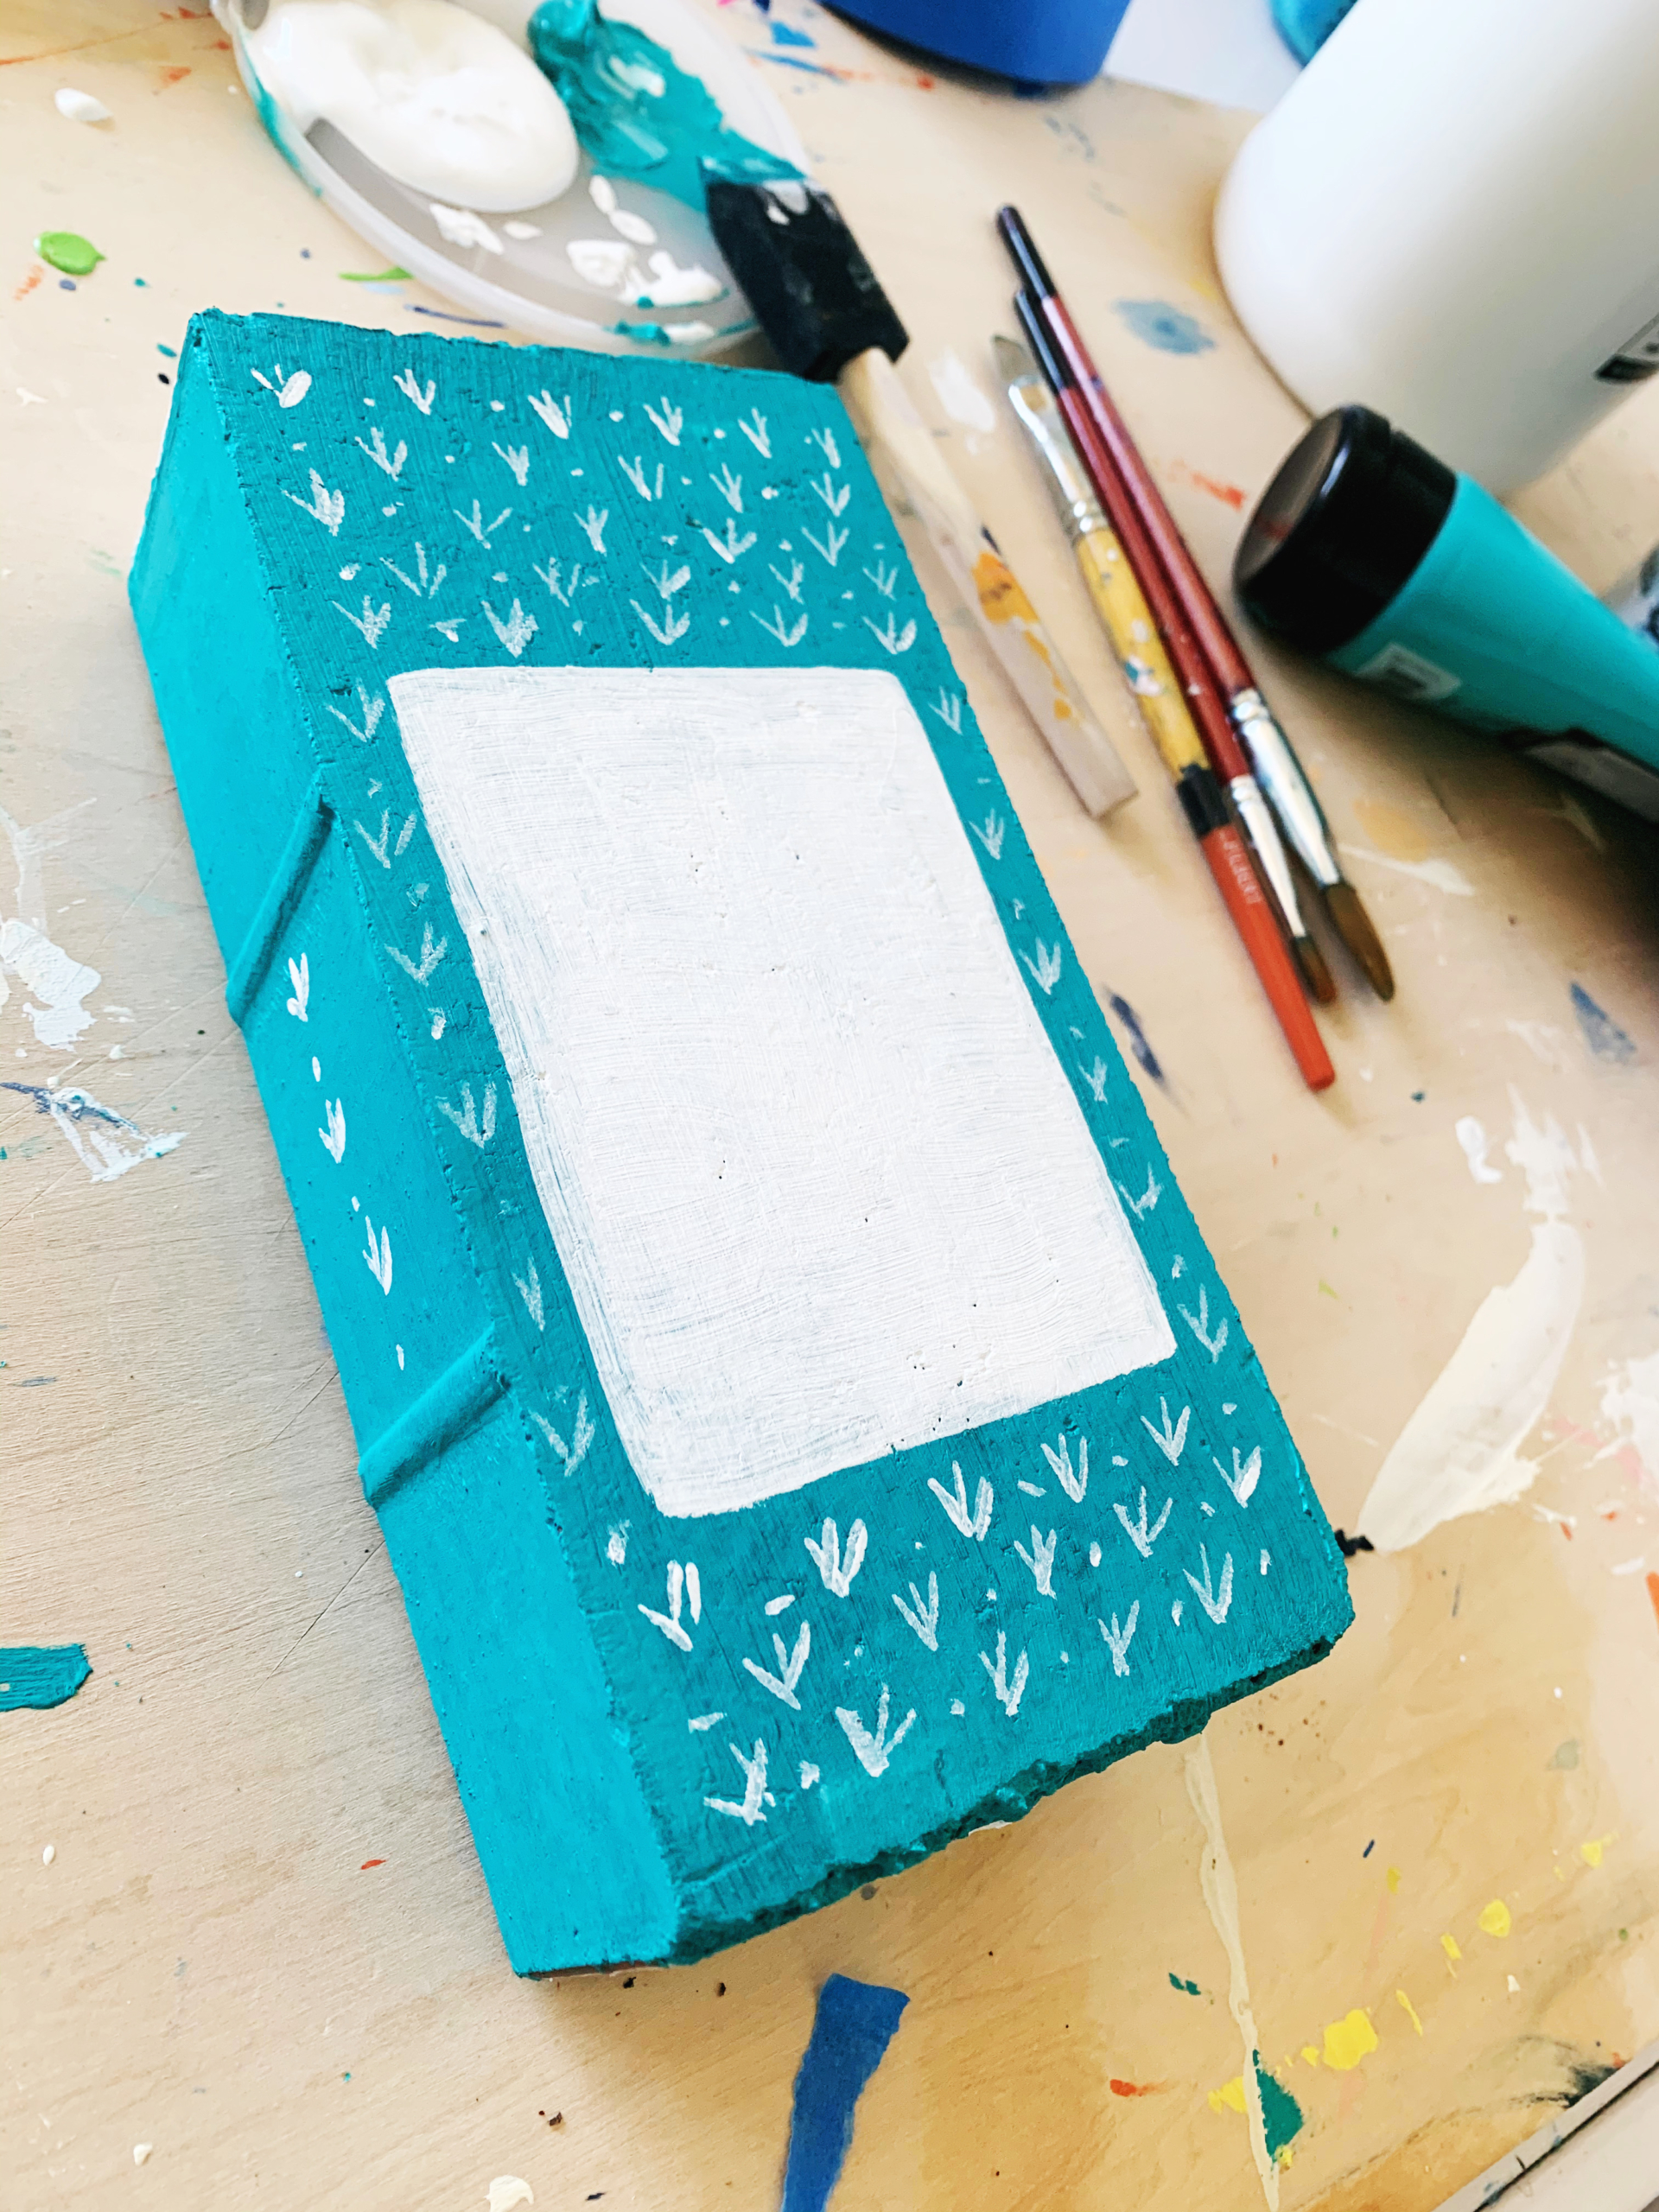
Steph Five:
Here’s the fun part! It’s now time to add the details that bring your book to life. In this step, you’ll decorate the spine and front cover of your brick. You can use painter’s tape, stencils, different-sized paint brushes, or even a sponge for the antique look.
You can spend as much or little time as you would like here. You can see from mine that I used the same color scheme and a similar pattern as Julia Child’s cookbook! For the title, I used rubber stamps that I had on hand, but you can also use a stencil or just hand-write your text.
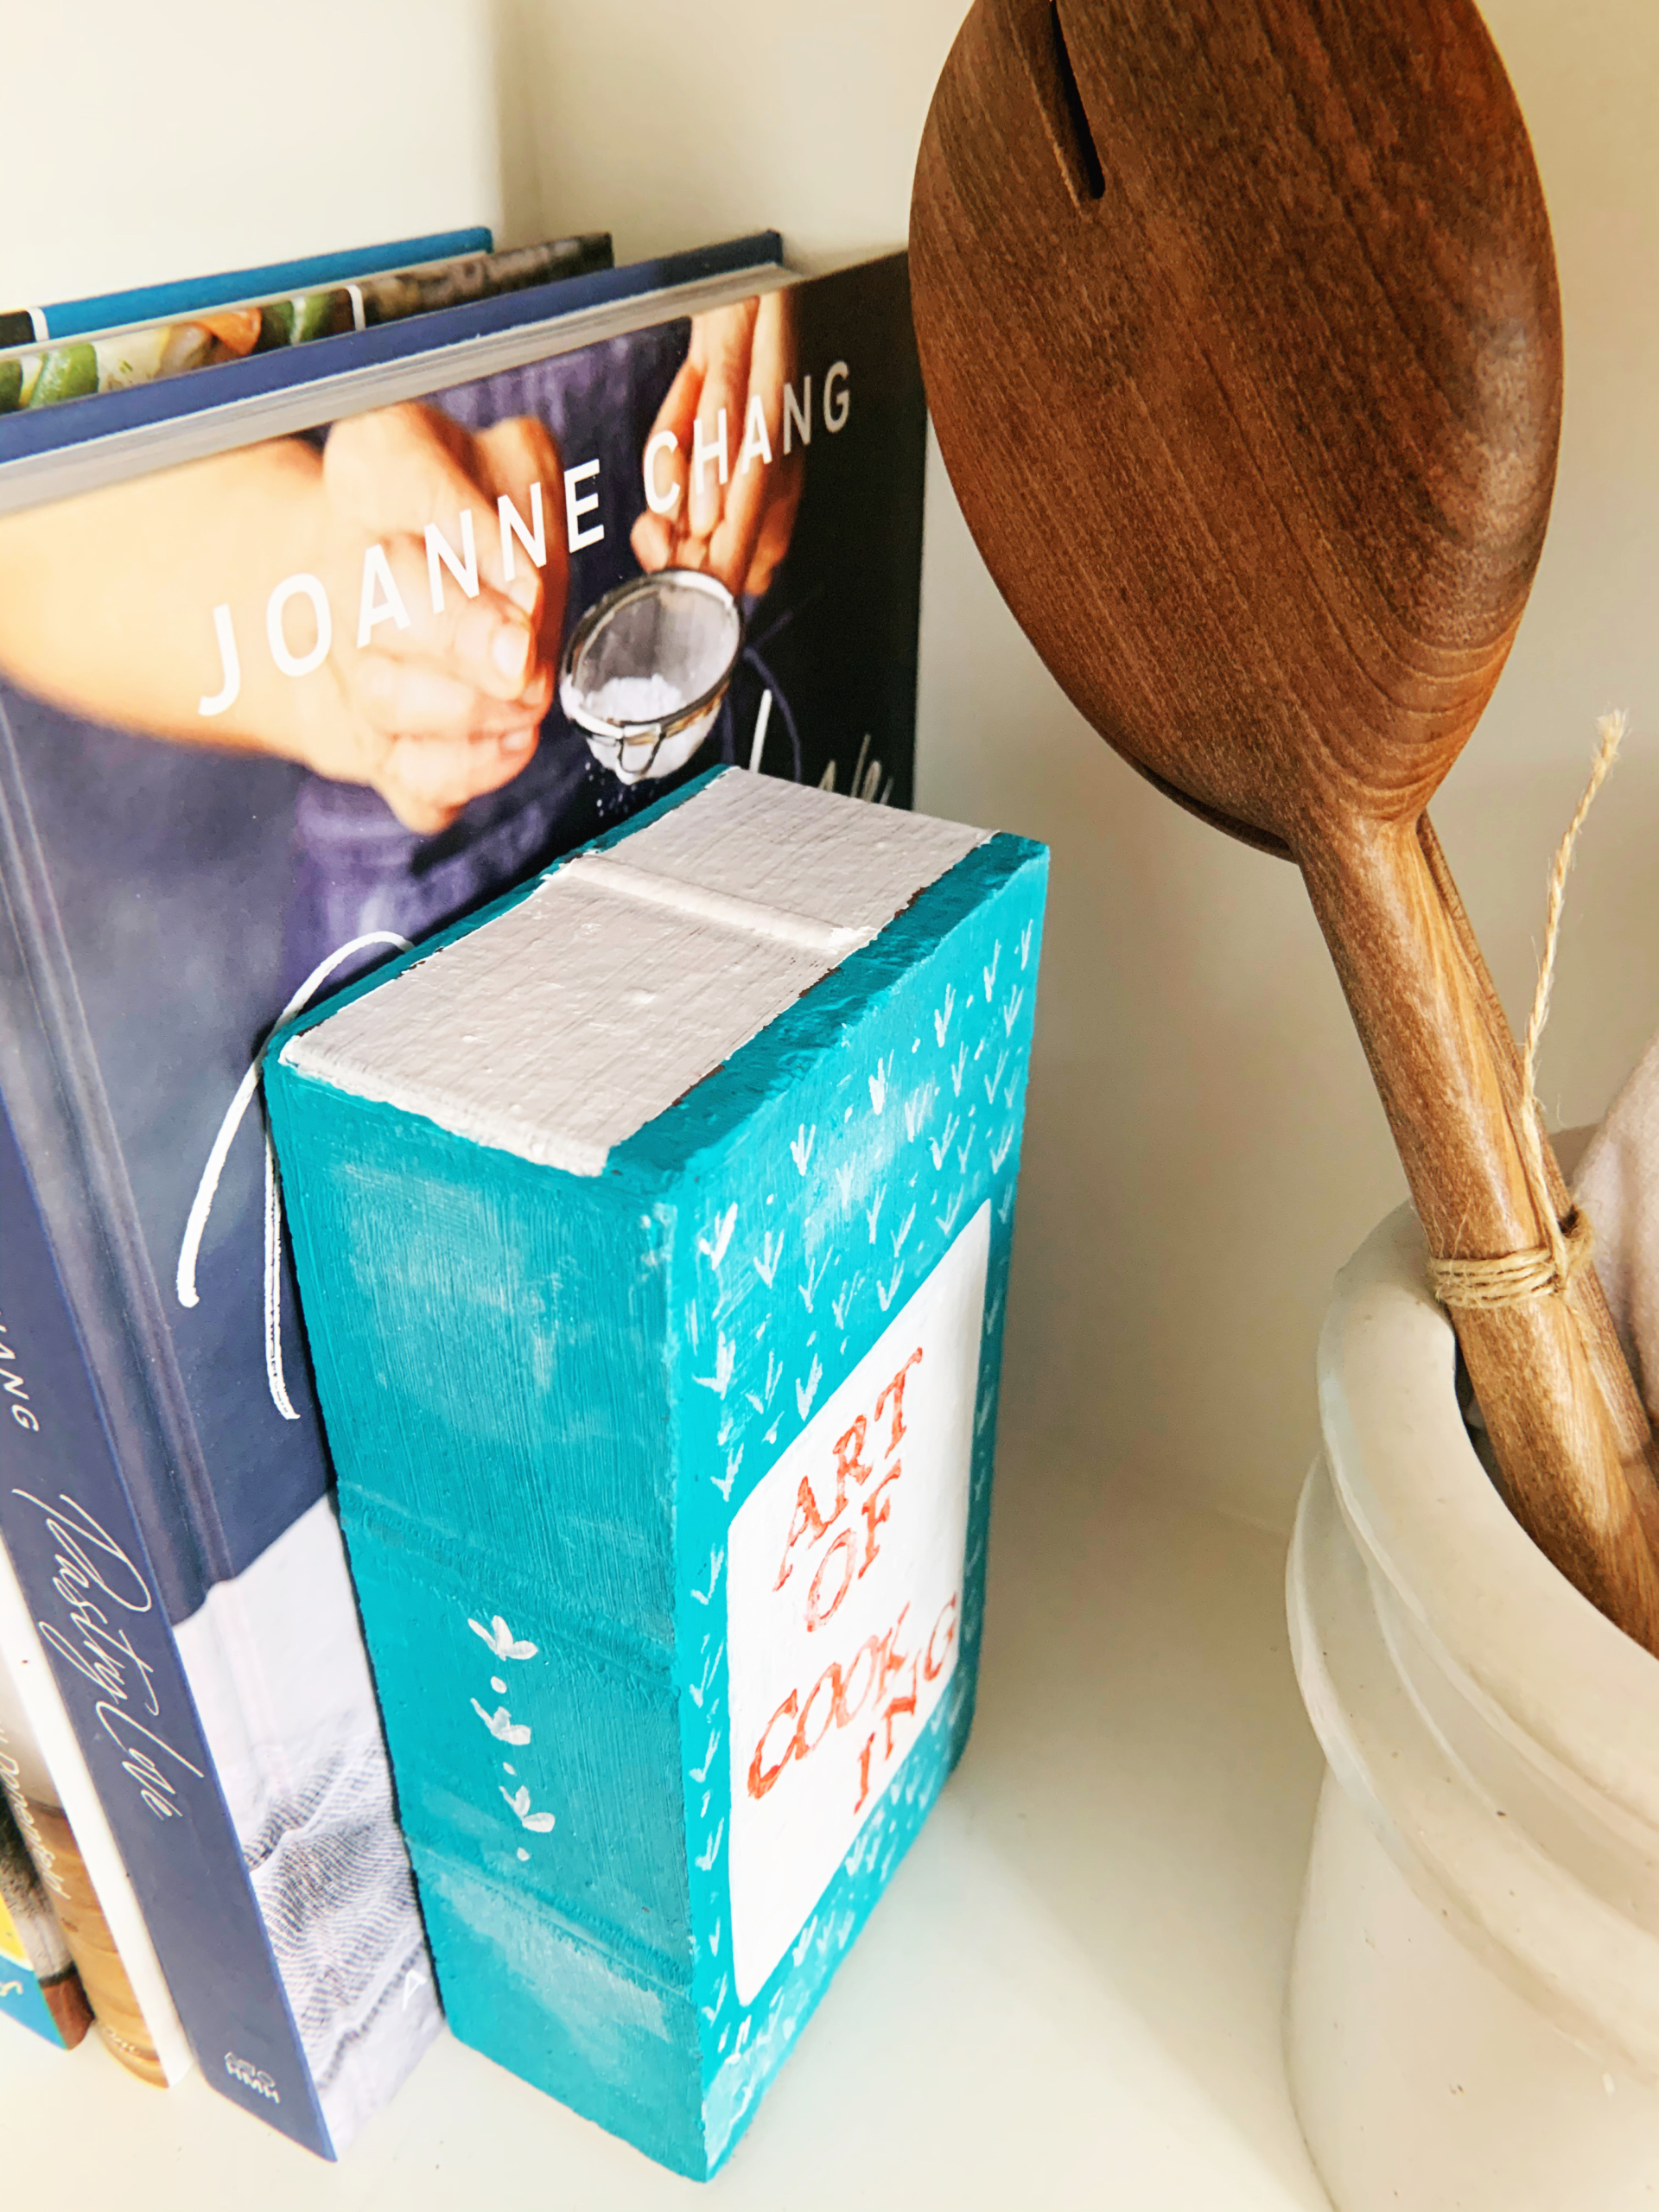
Be sure to let your bookend dry completely, and enjoy! Let us know in the comments how you use your DIY bookend.
Kelsey Nickerson creates abstract paintings with rich color, texture, and movement, and enjoys a good book craft. She oversees web production and photography for MayaSmart.com.
