
By Chrysta Naron
Anyone who’s watched educational videos with kids has probably seen one (or many) with the words printed at the bottom of the screen and a cheerful ball bouncing from word to word, guiding viewers along the text of a song or story. Other times, instead of a bouncing ball, the words might be highlighted, one by one, by a yellow box. The ball or box helps us follow along to the lyrics of “Hakunah Matata,” for example, or read along to Goldilocks and the Three Bears.
When children are initially learning to read, it can be difficult for them to keep track of where they are in a text. This kind of emphasis on each word in turn really helps them keep their spot and their focus. Let’s face it, though: Bouncing a ball on your copy of Goodnight Moon is really tricky to do. Pointing to each word with a finger is the classic alternative, but it can be hard for little ones who fidget, and many kids let their finger slip and so still lose track of where they are.
So we’re going to share with you an easy trick for teaching kids to read by making a simple DIY read-along tool. It’s a fast and truly helpful way for children to keep track of where they are on a page. Rather than pointing under a word, this method highlights the word itself. It also directs their focus to one word at a time, allowing them the space to sound it out, observe its spelling, and ask questions around it.
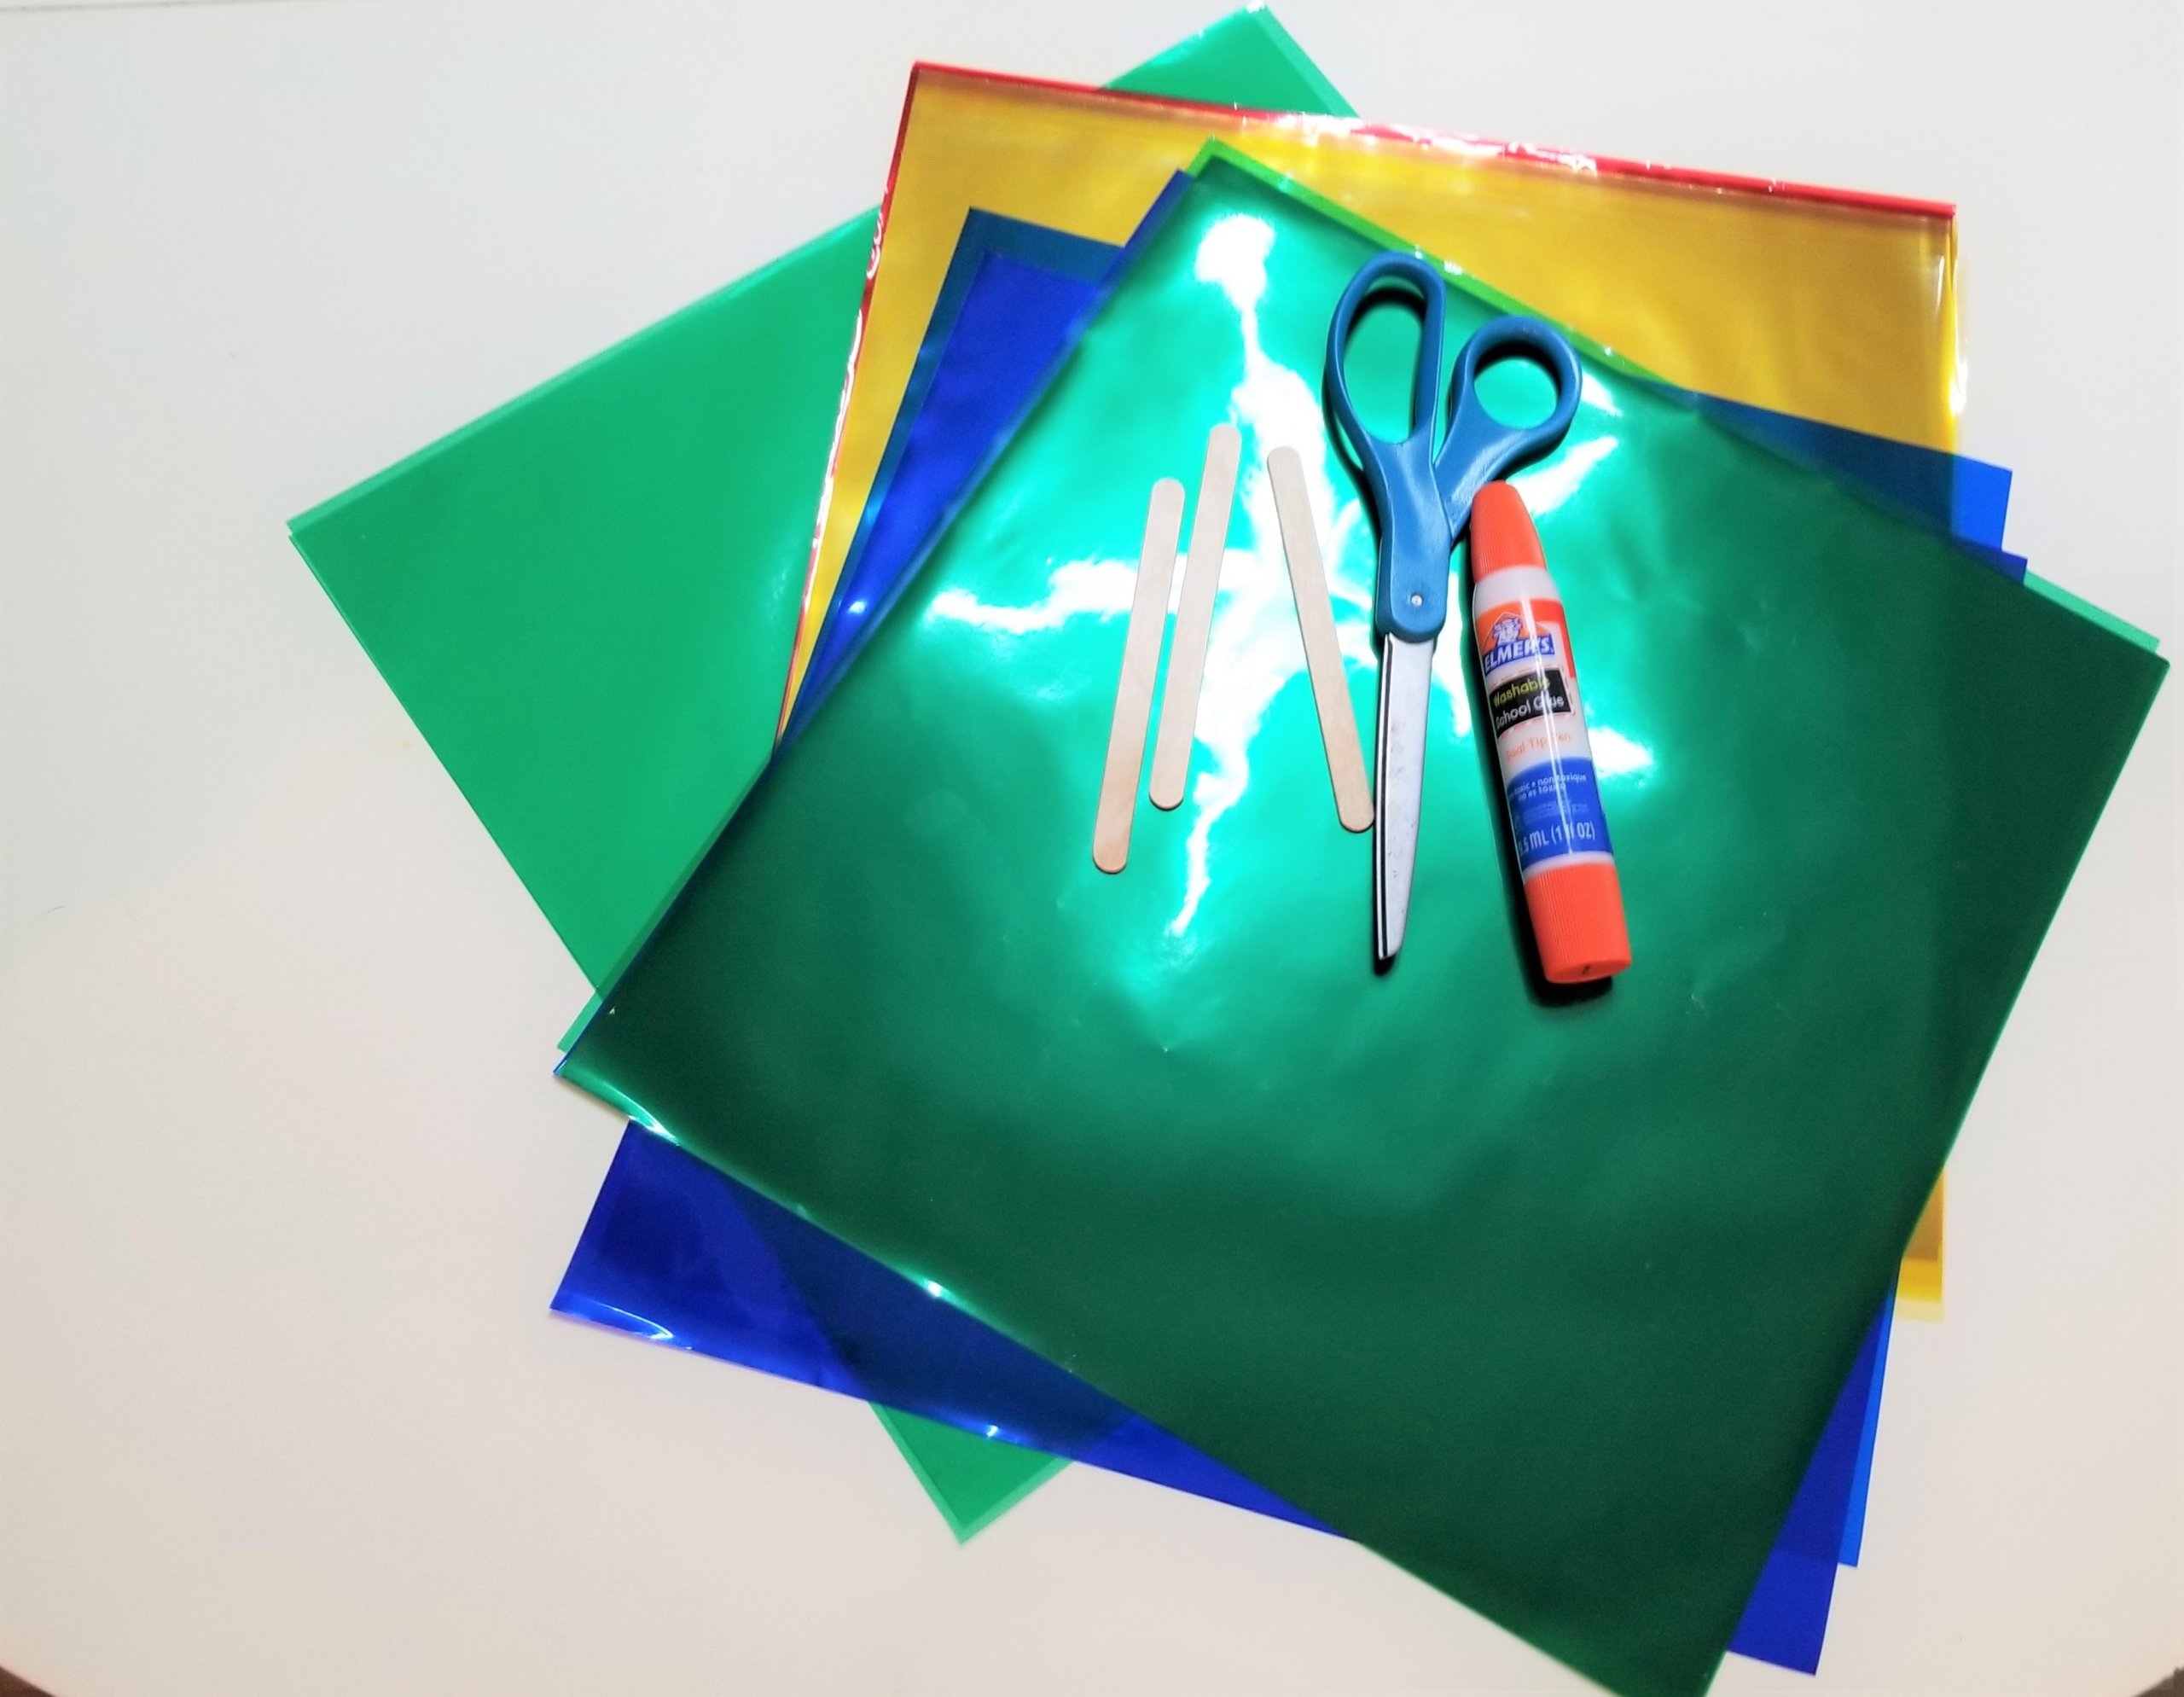
Materials:
- Plastic transparent folders or colored cellophane sheets
- Craft sticks
- Scissors
- Glue
- 1 quarter (optional)
Cost: $3
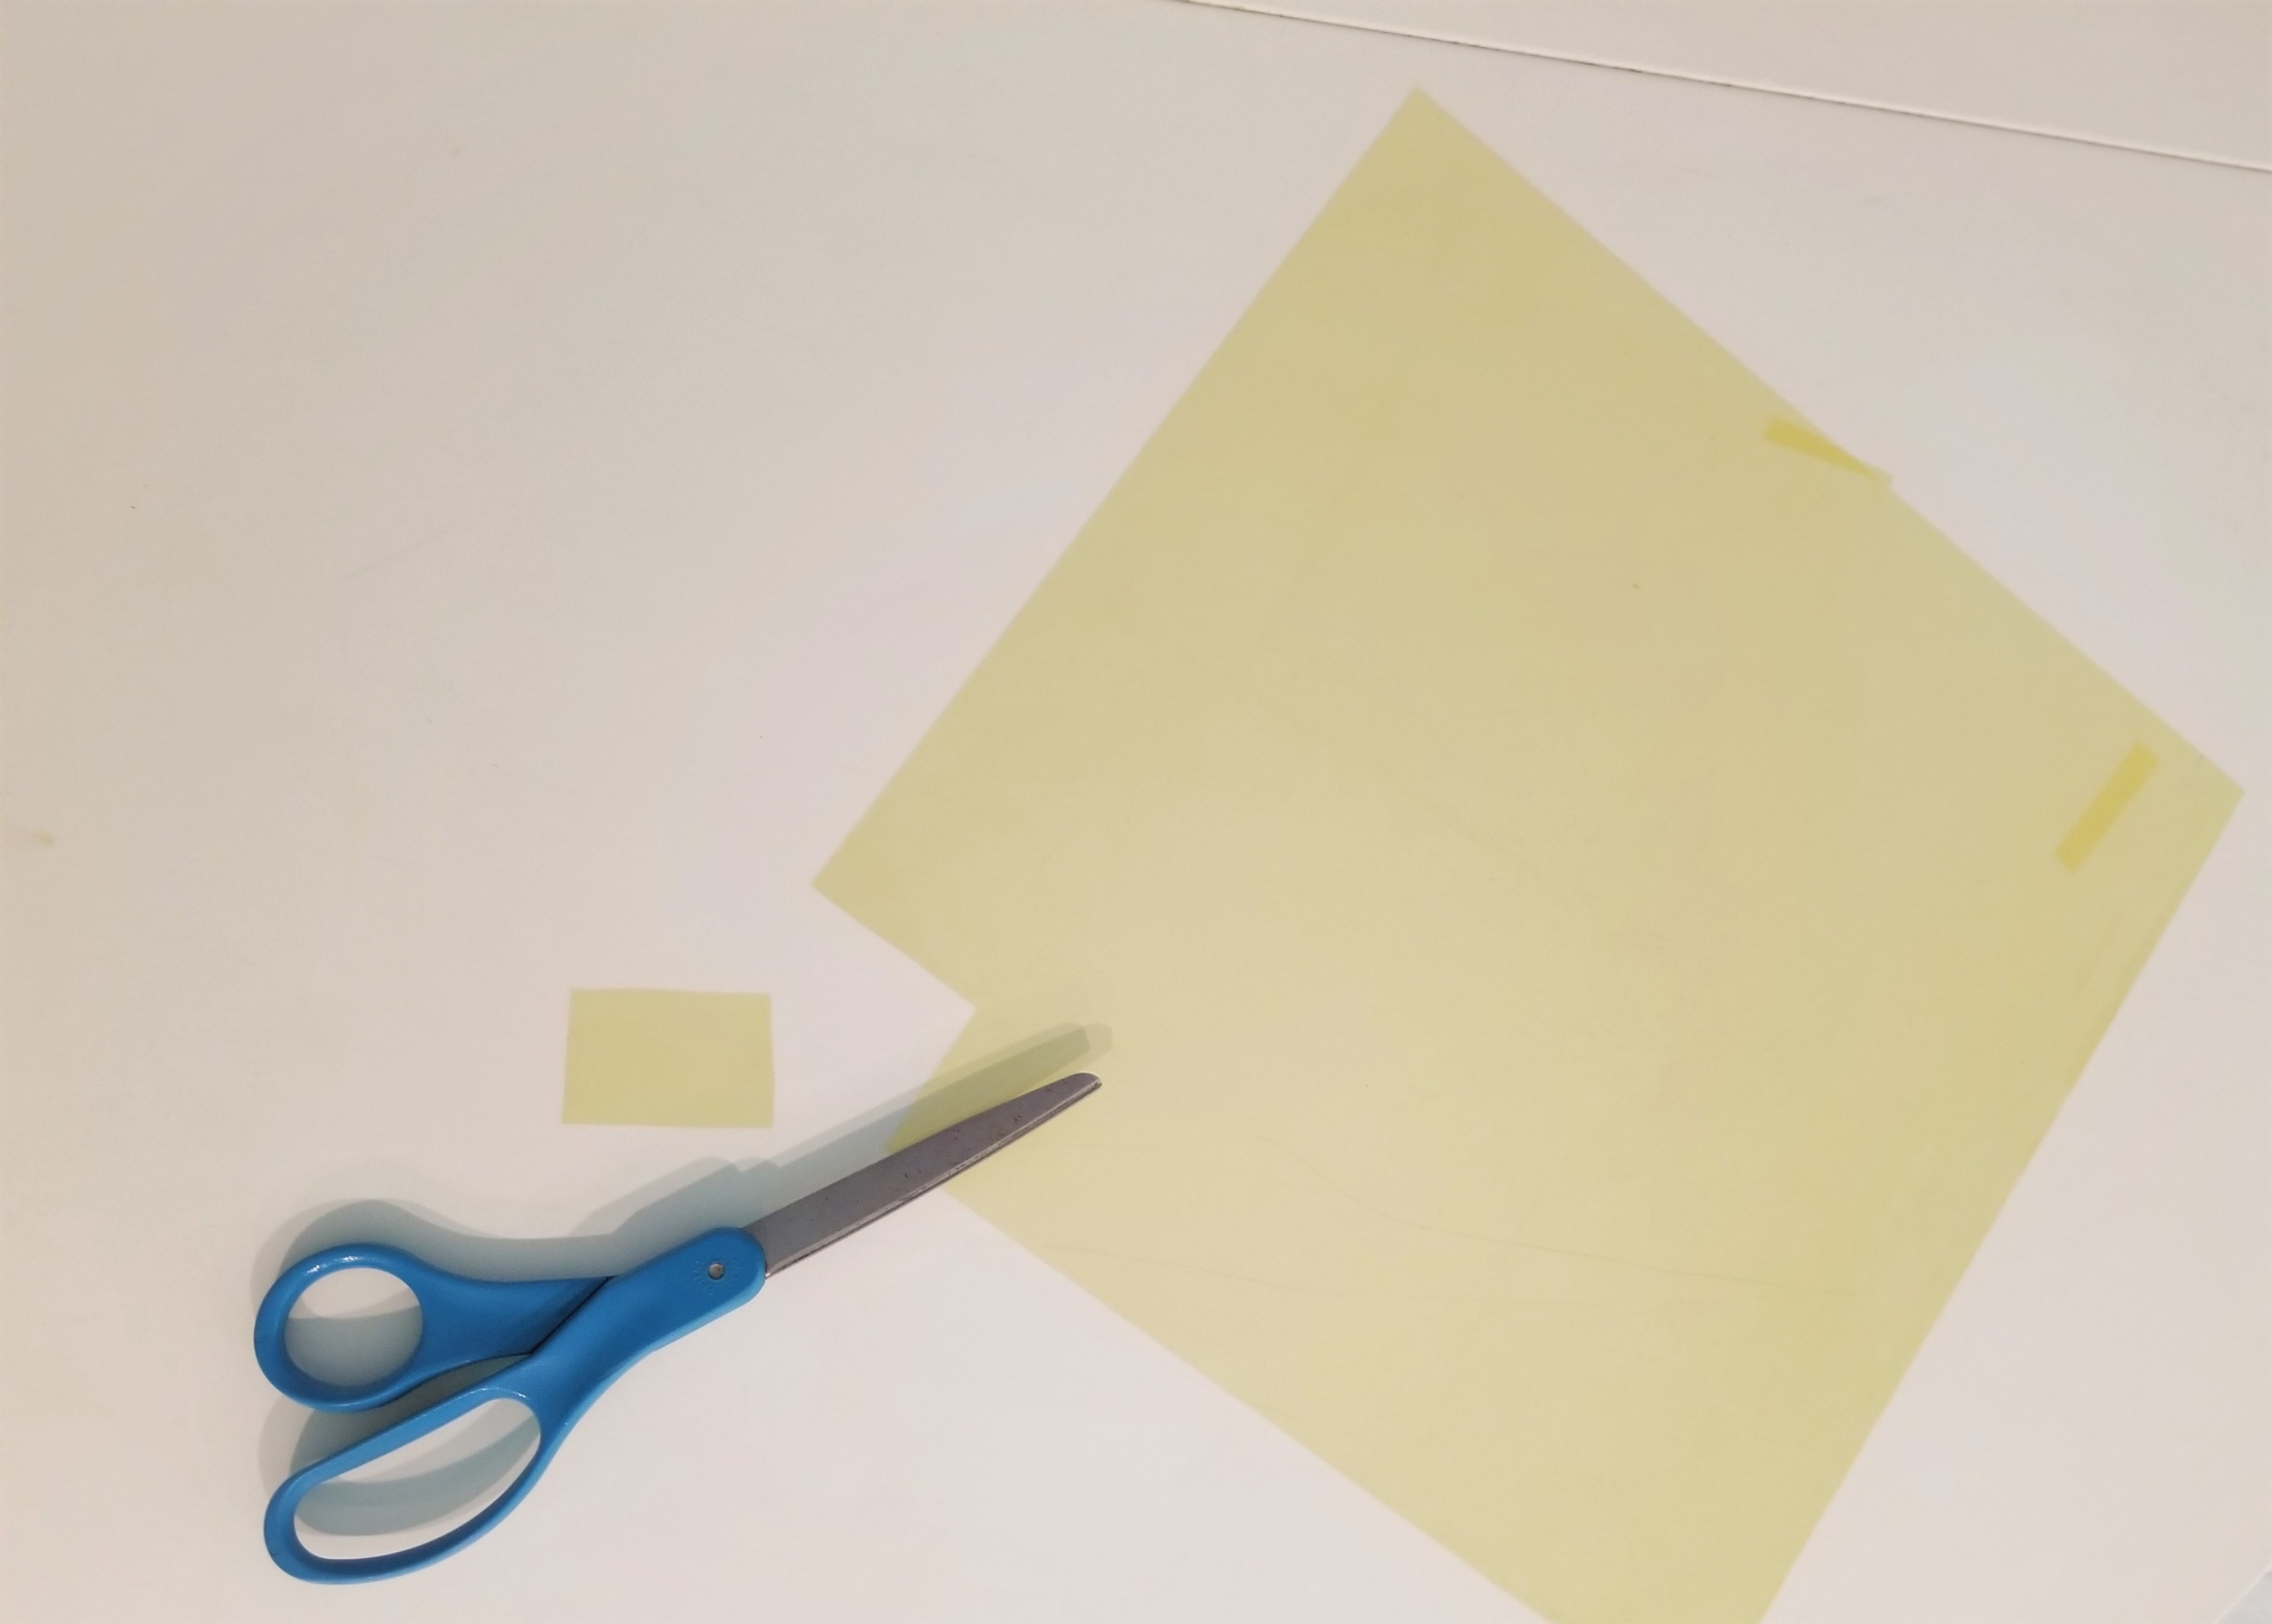
Step 1: Use your scissors to cut a small rectangle (about an inch wide) out of the folder or cellophane sheet.
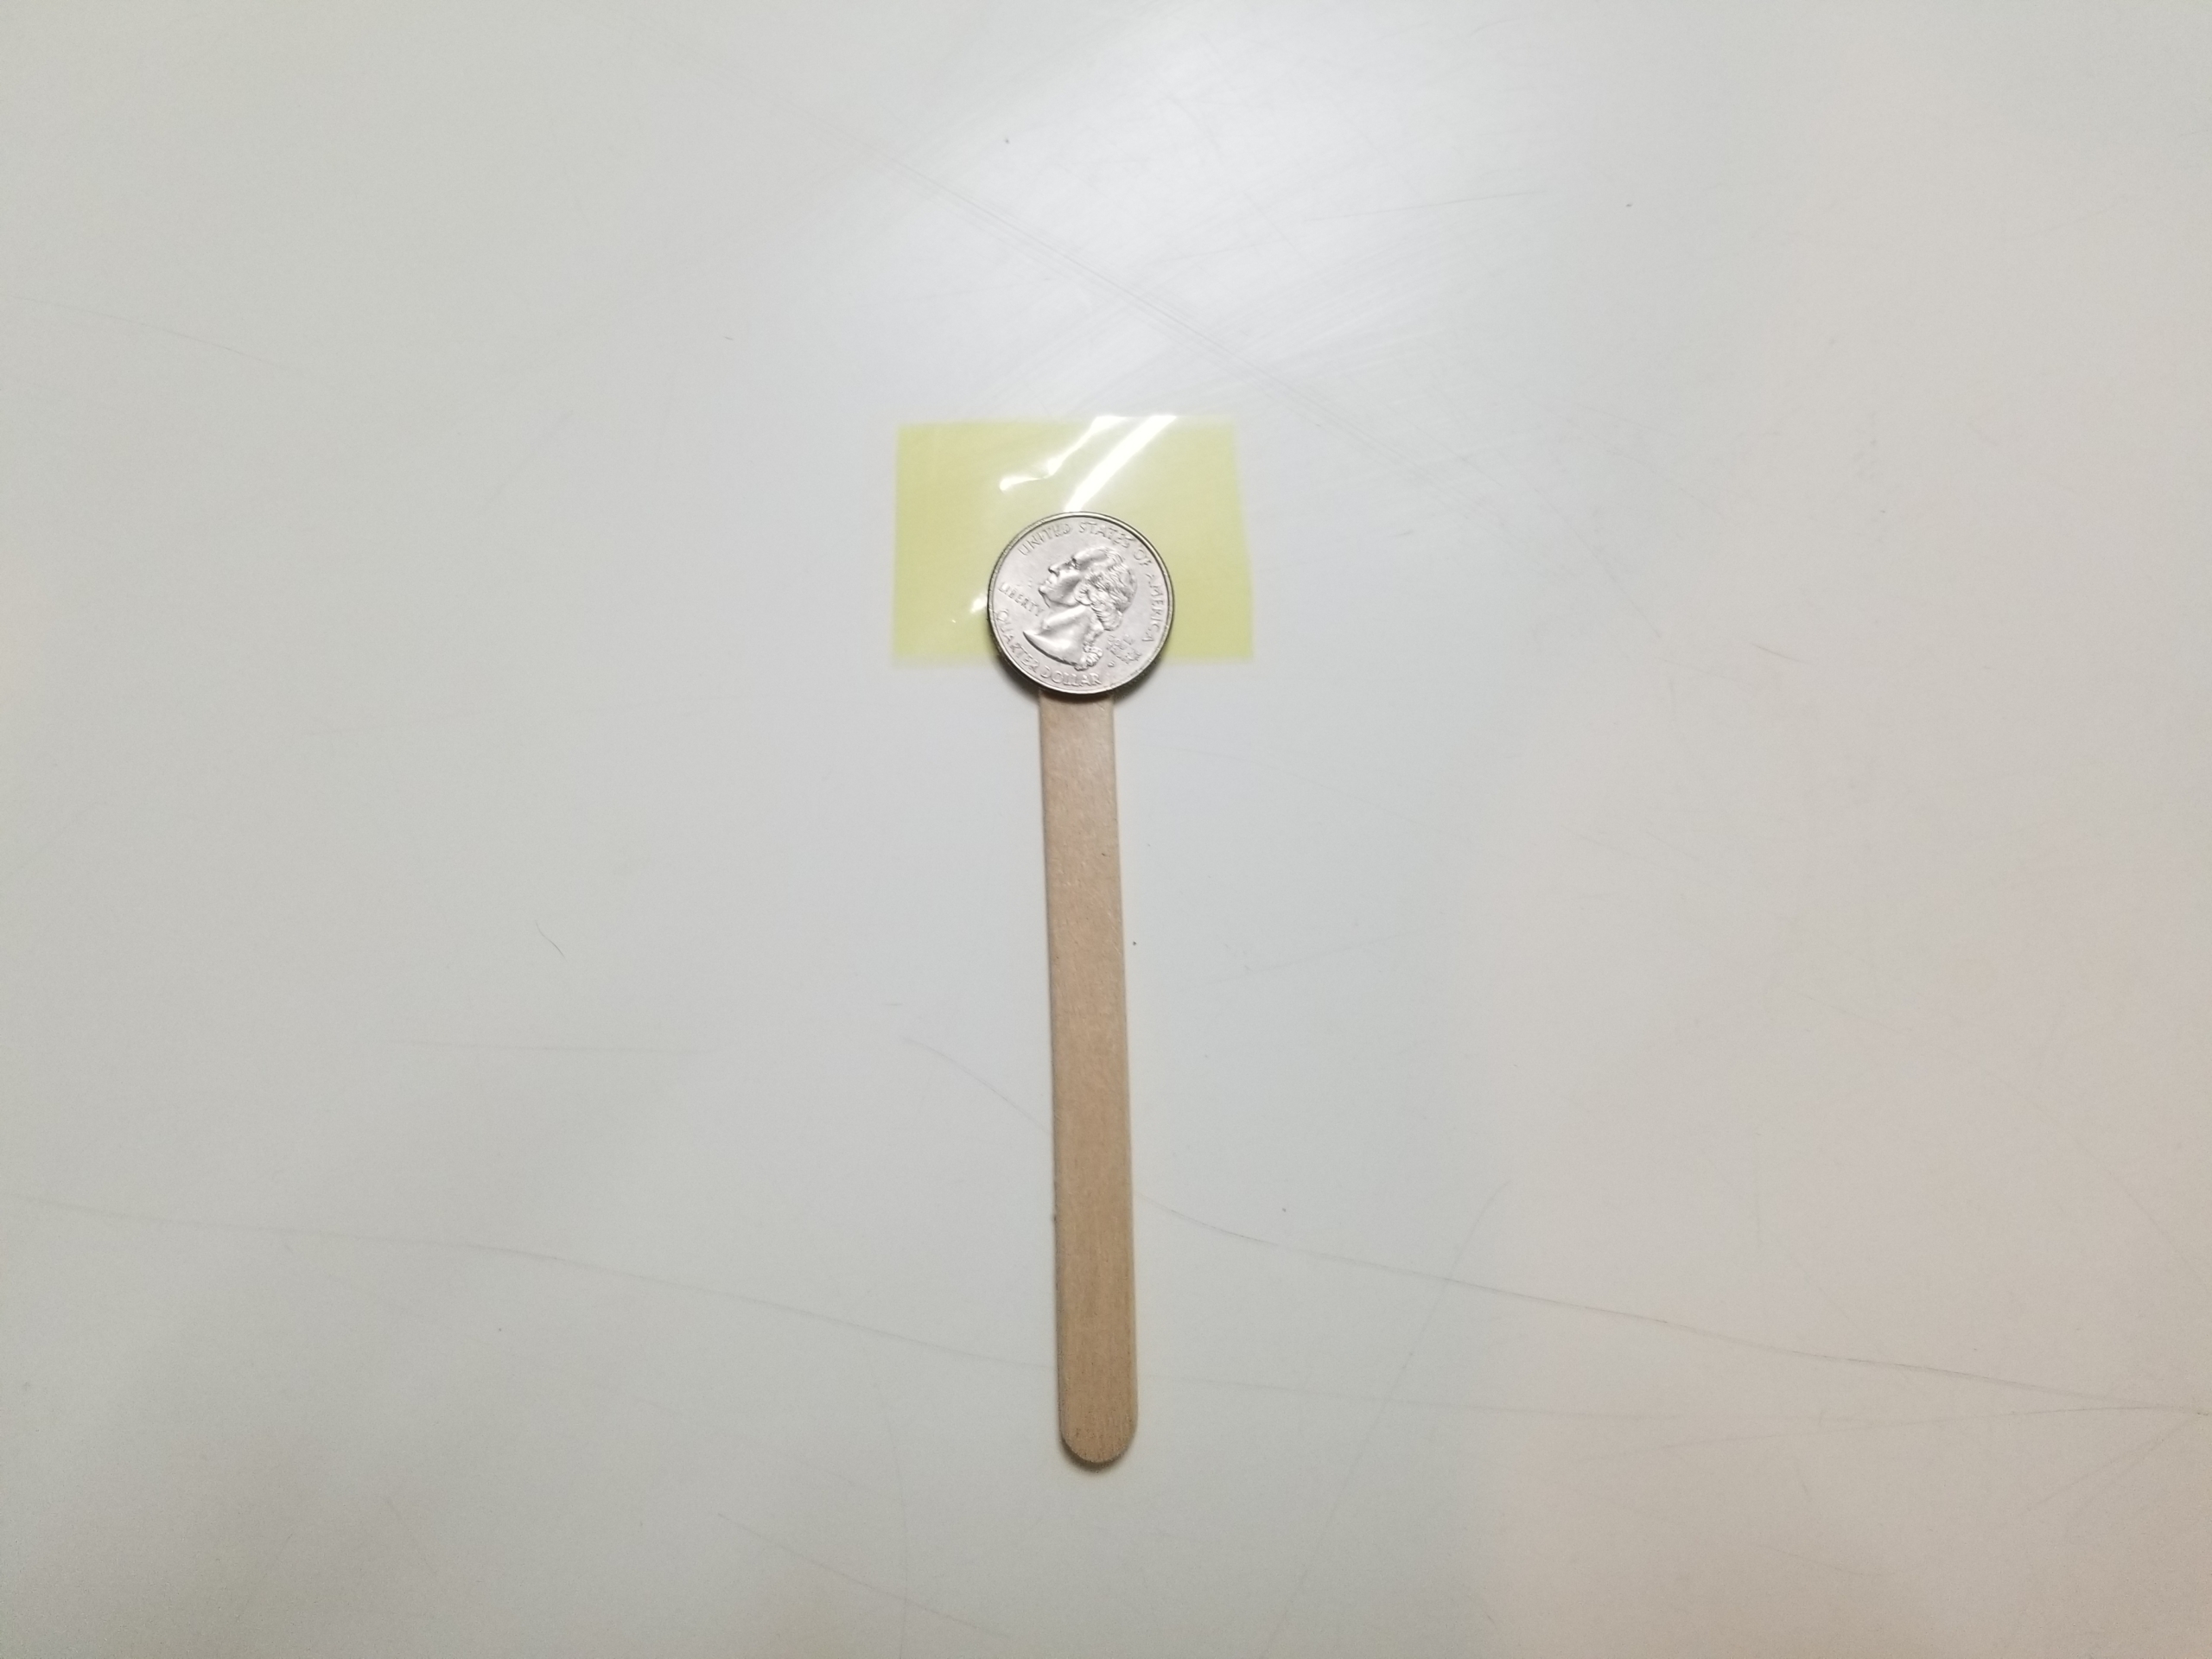
Step 2: Glue the rectangle to your craft stick. I recommend using liquid glue or even a craft glue like Modge Podge if you have some handy. Liquid glue bonds the plastic to the wood much better than a glue stick.

Step 3: Use your finger to press down firmly on the plastic to adhere it to the craft stick. You can also place a quarter on top instead of your finger if you like. It will also add the pressure you need to make sure the glue sticks.
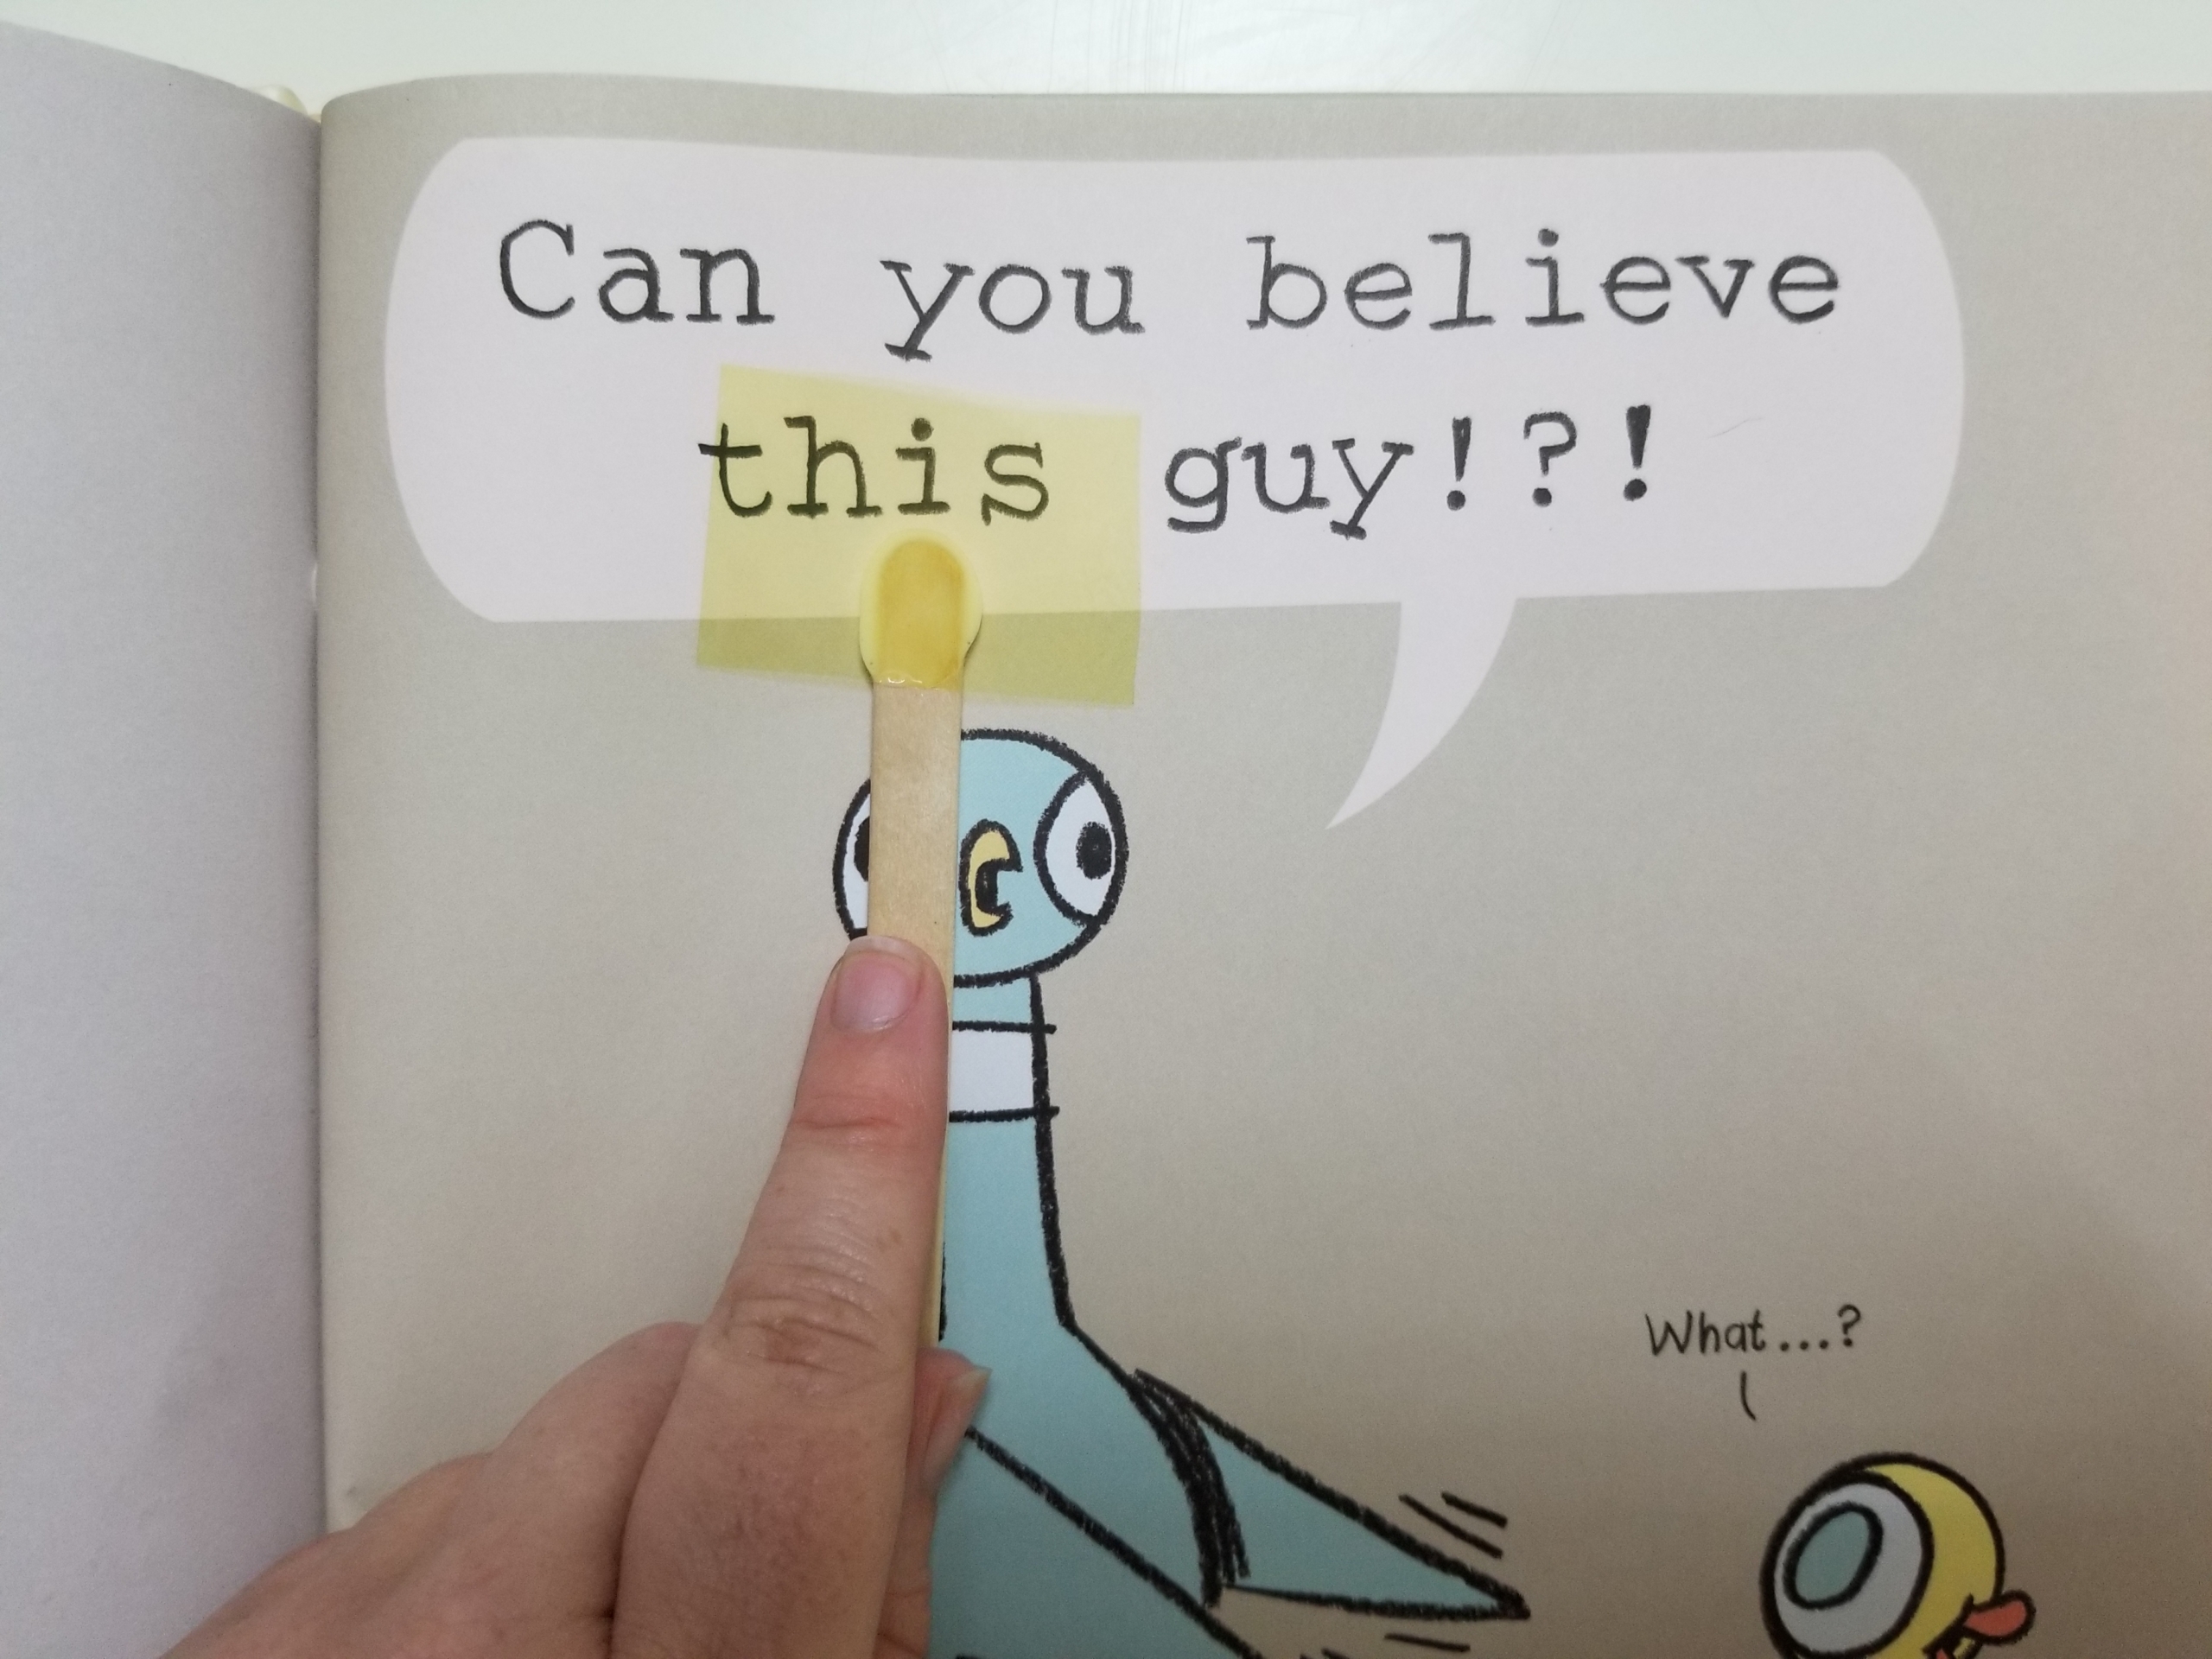
Step 4: Once the glue is dry, it’s time to read. Demonstrate to your child how to use your new reading tool by placing the colored rectangle over a word. As you read, move the rectangle along, one word at a time.
Ta-da! You’ve done it! What’s more, the tool has value beyond storytime whenever a child needs to lock in a single word. In kindergarten and first grade, for example, teachers sometimes ask children to find specific sentence components, such as nouns. This tool helps children examine each word one by one as they read, supporting them in giving greater attention to the task at hand.
How are you using your DIY read-along tool? We’d love to know what books you and your child are reading, and what methods you use to help your reader develop.
