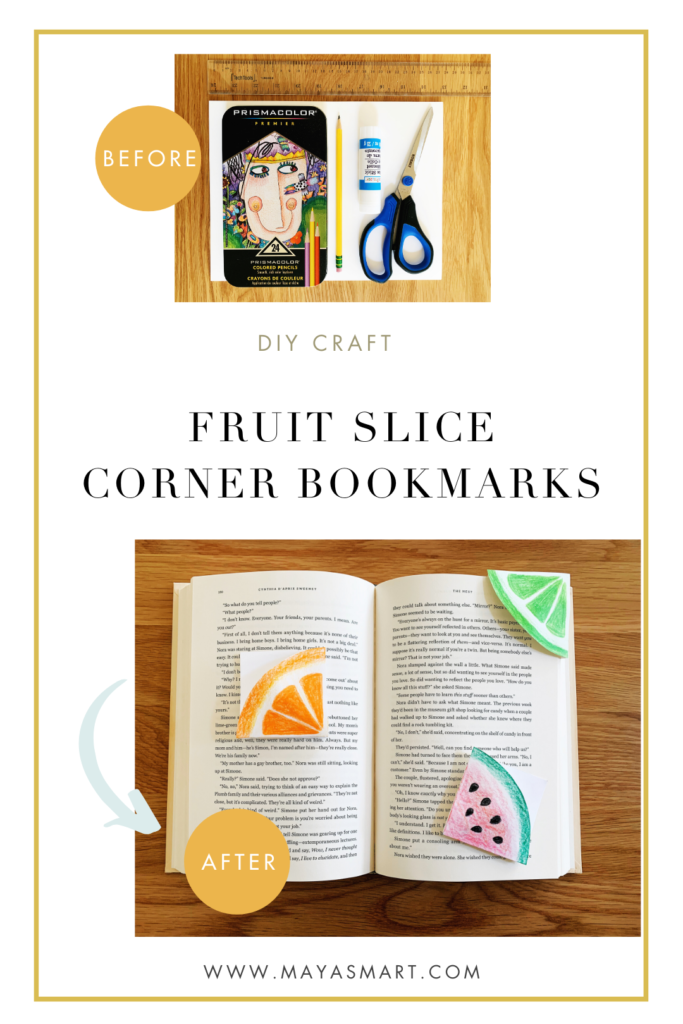
Whether you’re hitting the beach with a vacation paperback or encouraging your kids through their summer reading lists, a bookmark is a must. Having a page-marker handy helps keep kids (or you!) from folding over the corners of those library and school books—or creasing up your home-library favorites. And these slide-on DIY corner bookmarks don’t get knocked out when you toss your book into a tote, the way traditional bookmarks can.
Make these cute pocket bookmarks with just some squares of paper and a little origami. Then decorate them however you like. This book craft is great for kids and all ages. Follow along the simple steps below and you’ll have a bookmark that fits right over the corner of your page in no time! Once you or your crafters get the folding down, you can churn out as many designs as you like. Fruit salad, anyone?
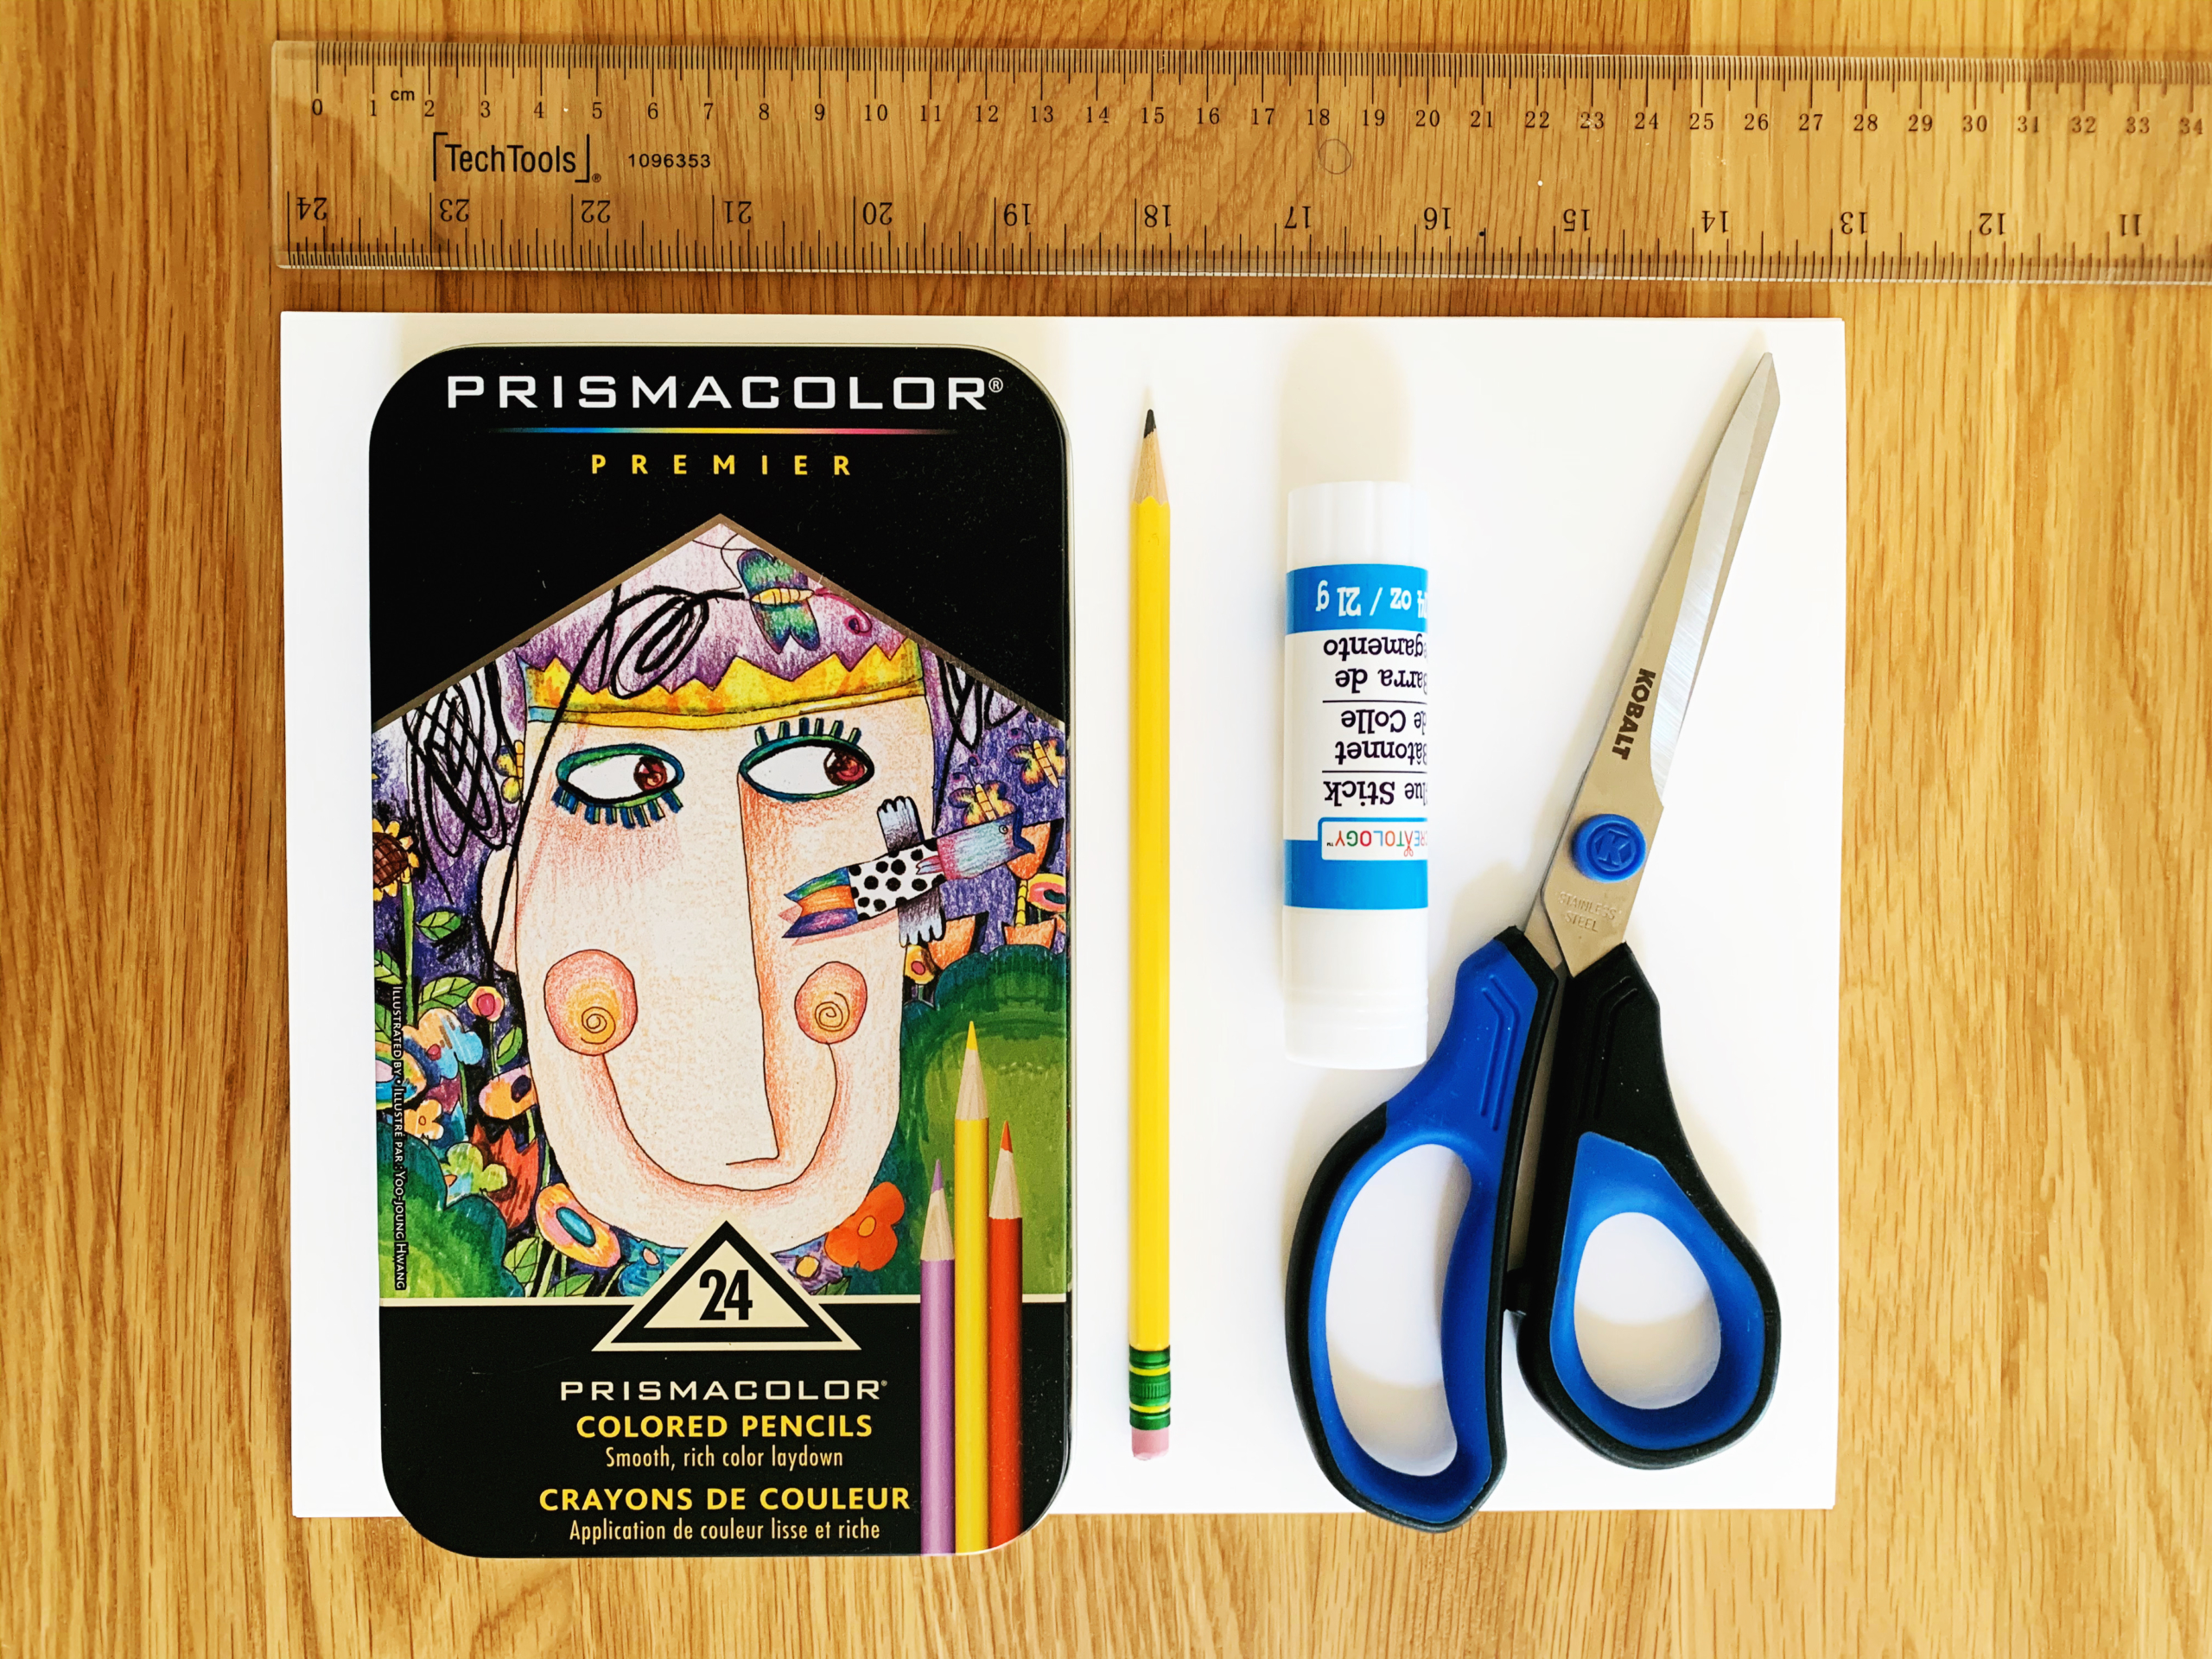
Materials:
- Craft paper
- Scissors
- Craft glue
- Pencil
- Colored pencils or markers
Cost: This craft should not cost you anything, provided you’ve got a few basic supplies on hand.
Step One: First you need to cut out squares to make your bookmarks. You will need one square for each bookmark. I made mine 5” x 5”. You could go bigger than this, but I wouldn’t go any smaller!

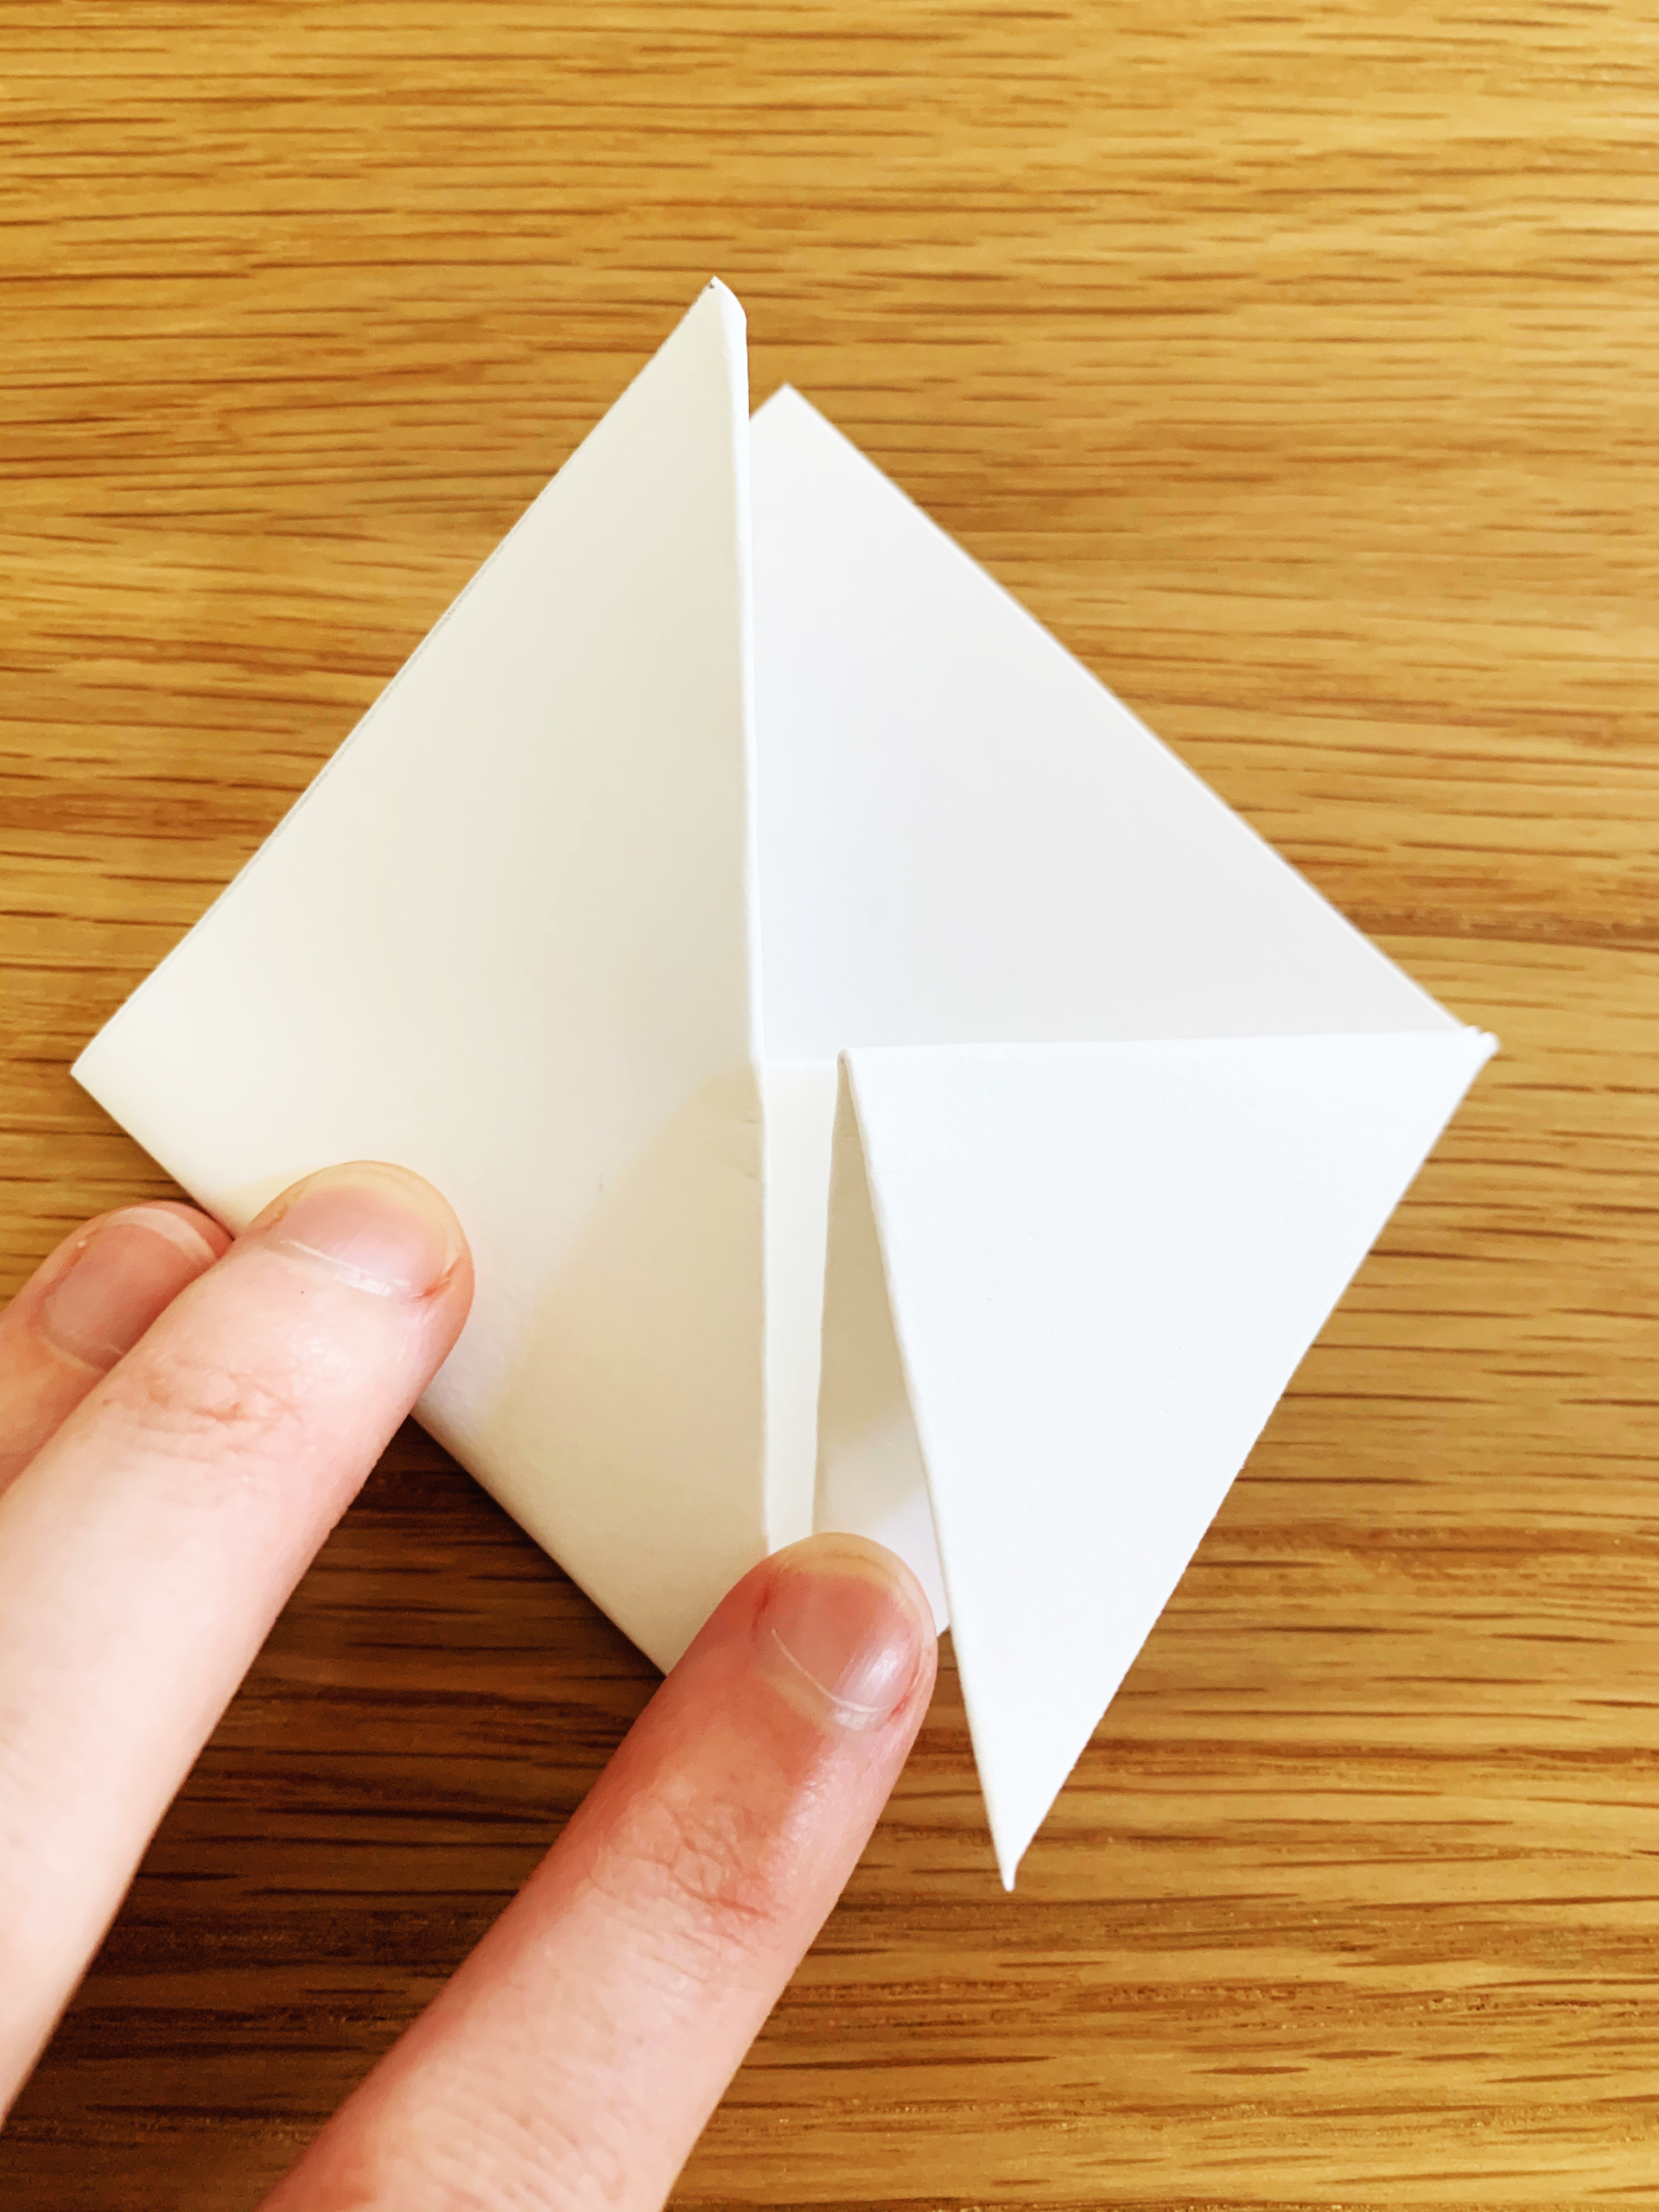
Step Two: Now we will start folding to make your first bookmark! These folds are pretty simple, so just follow along. First, fold in half, making a triangle.

Step Three: Take the top point of the triangle (just the top layer!) and fold it down towards the bottom.

Step Four: Fold the bottom left corner up to the top point of the triangle.

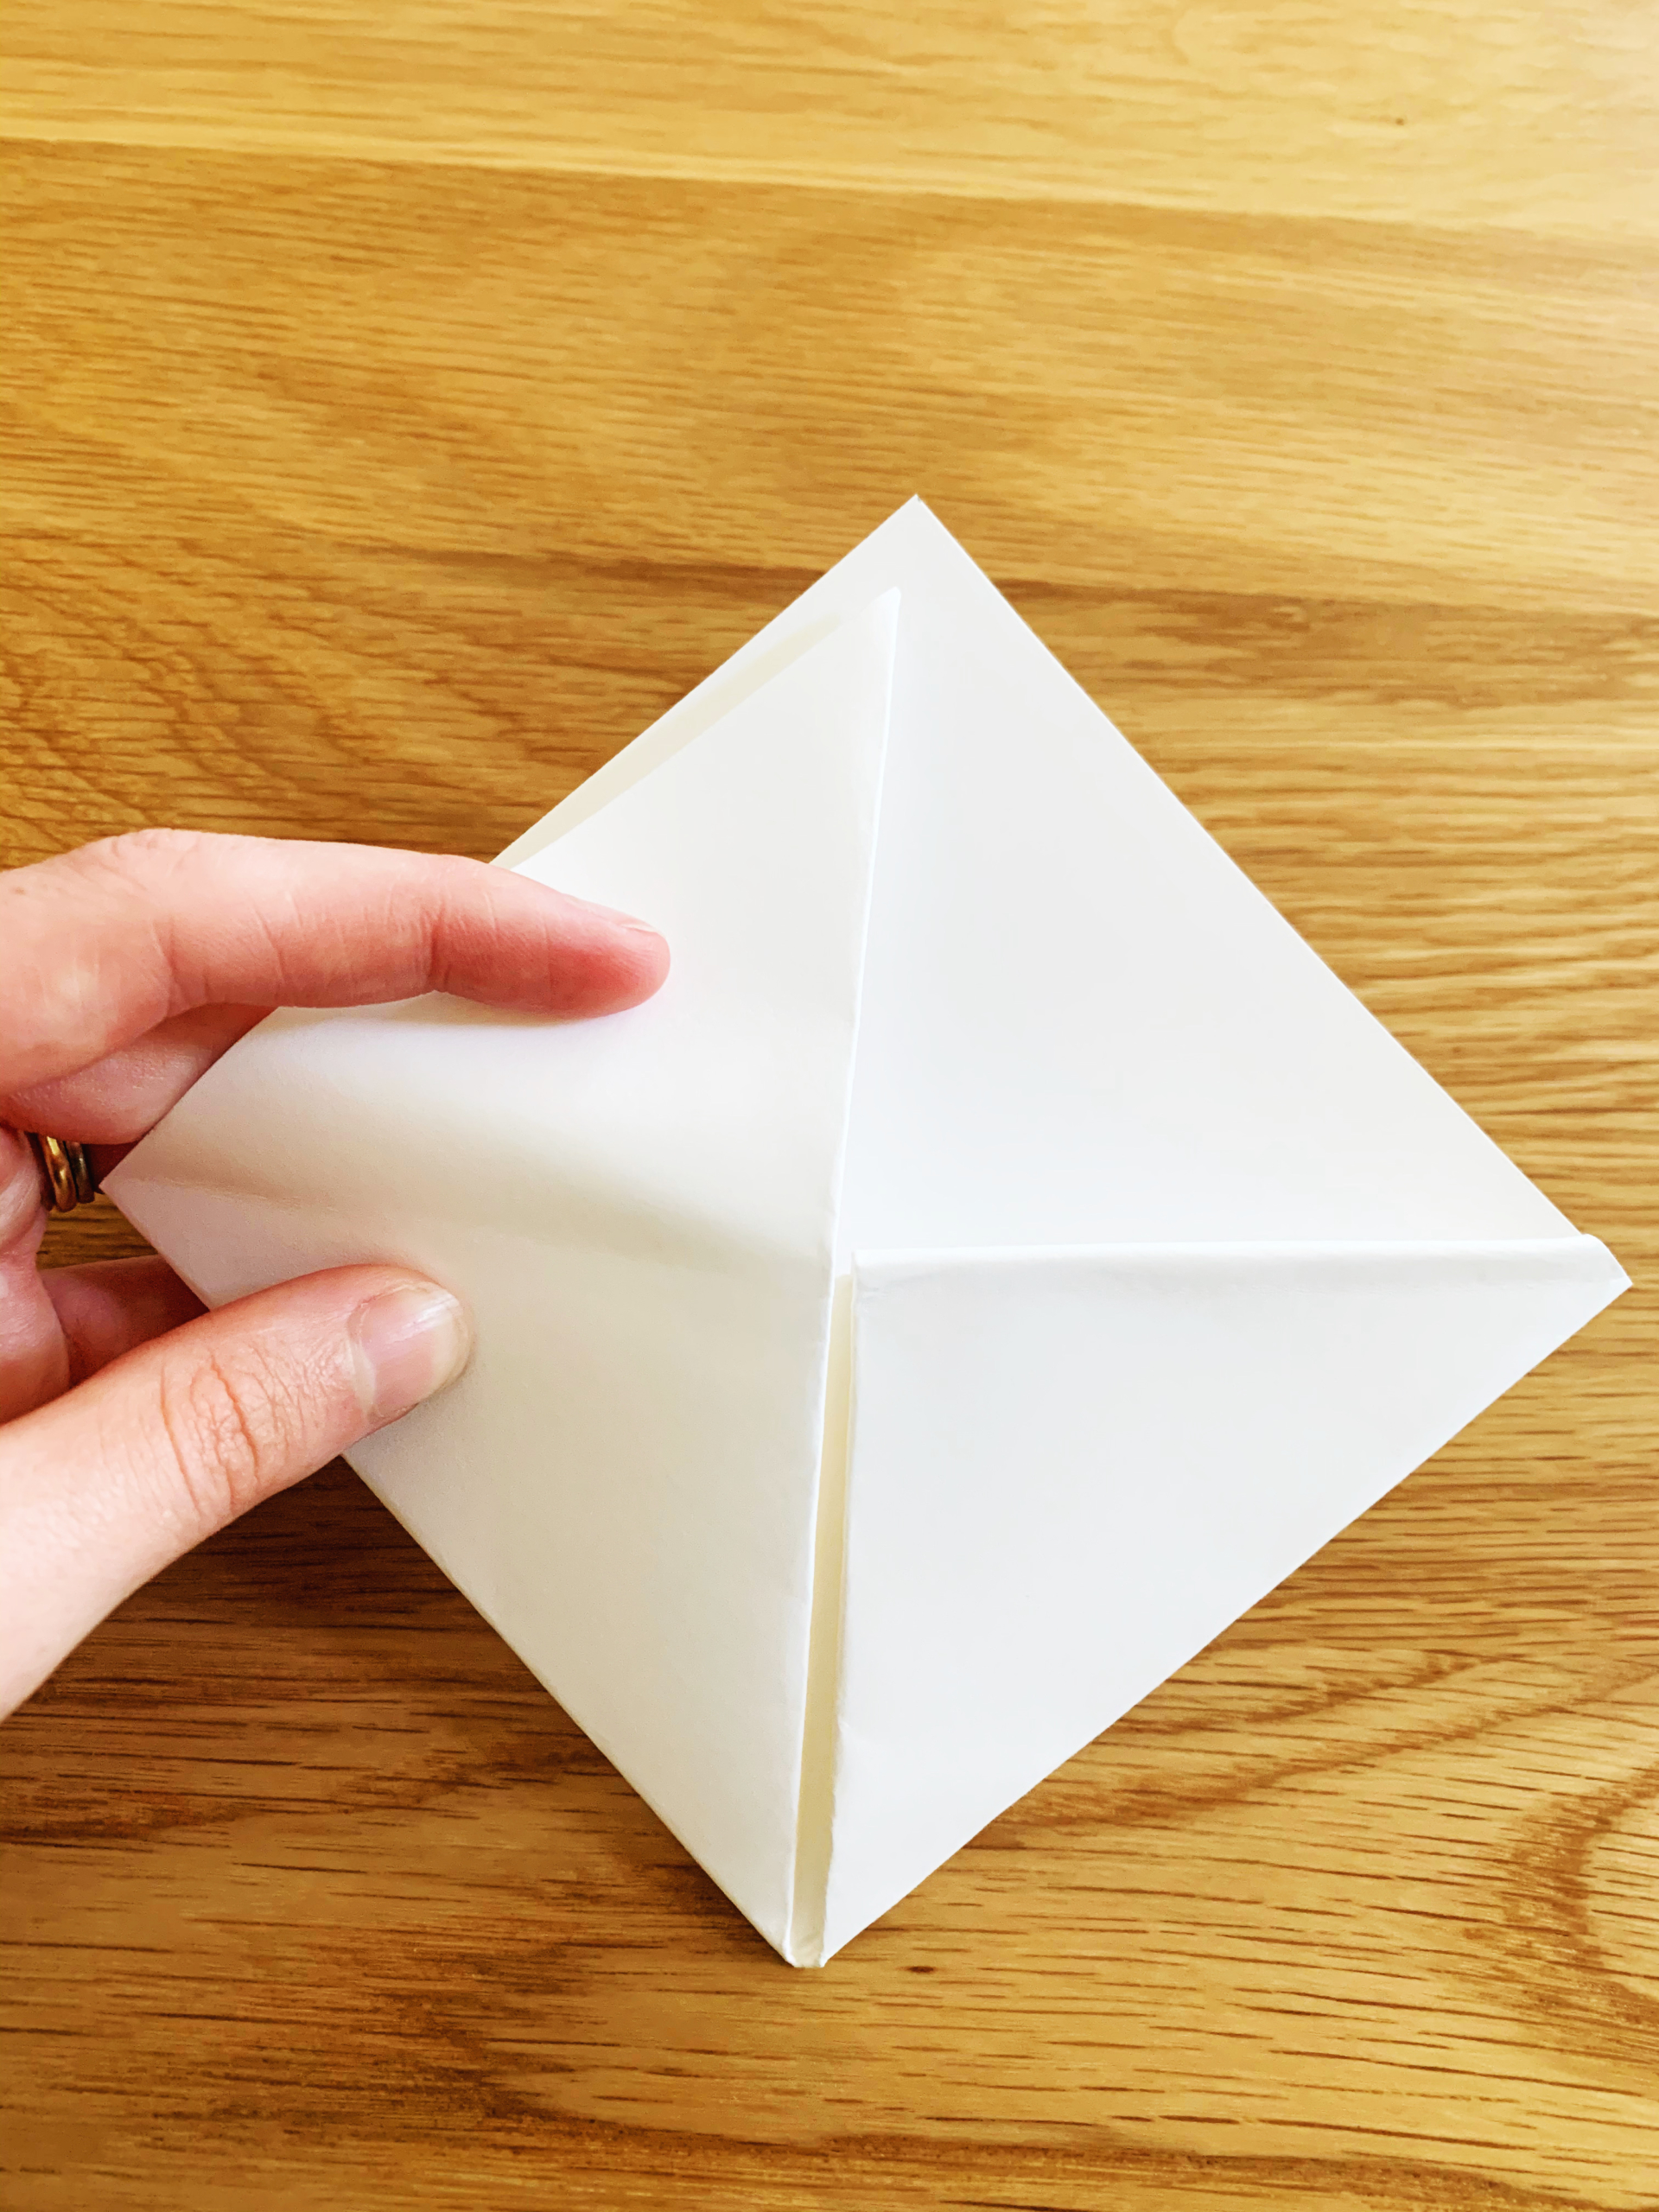
Step Five: Now do the same with the right corner of the triangle, once again matching it with the top of the triangle.

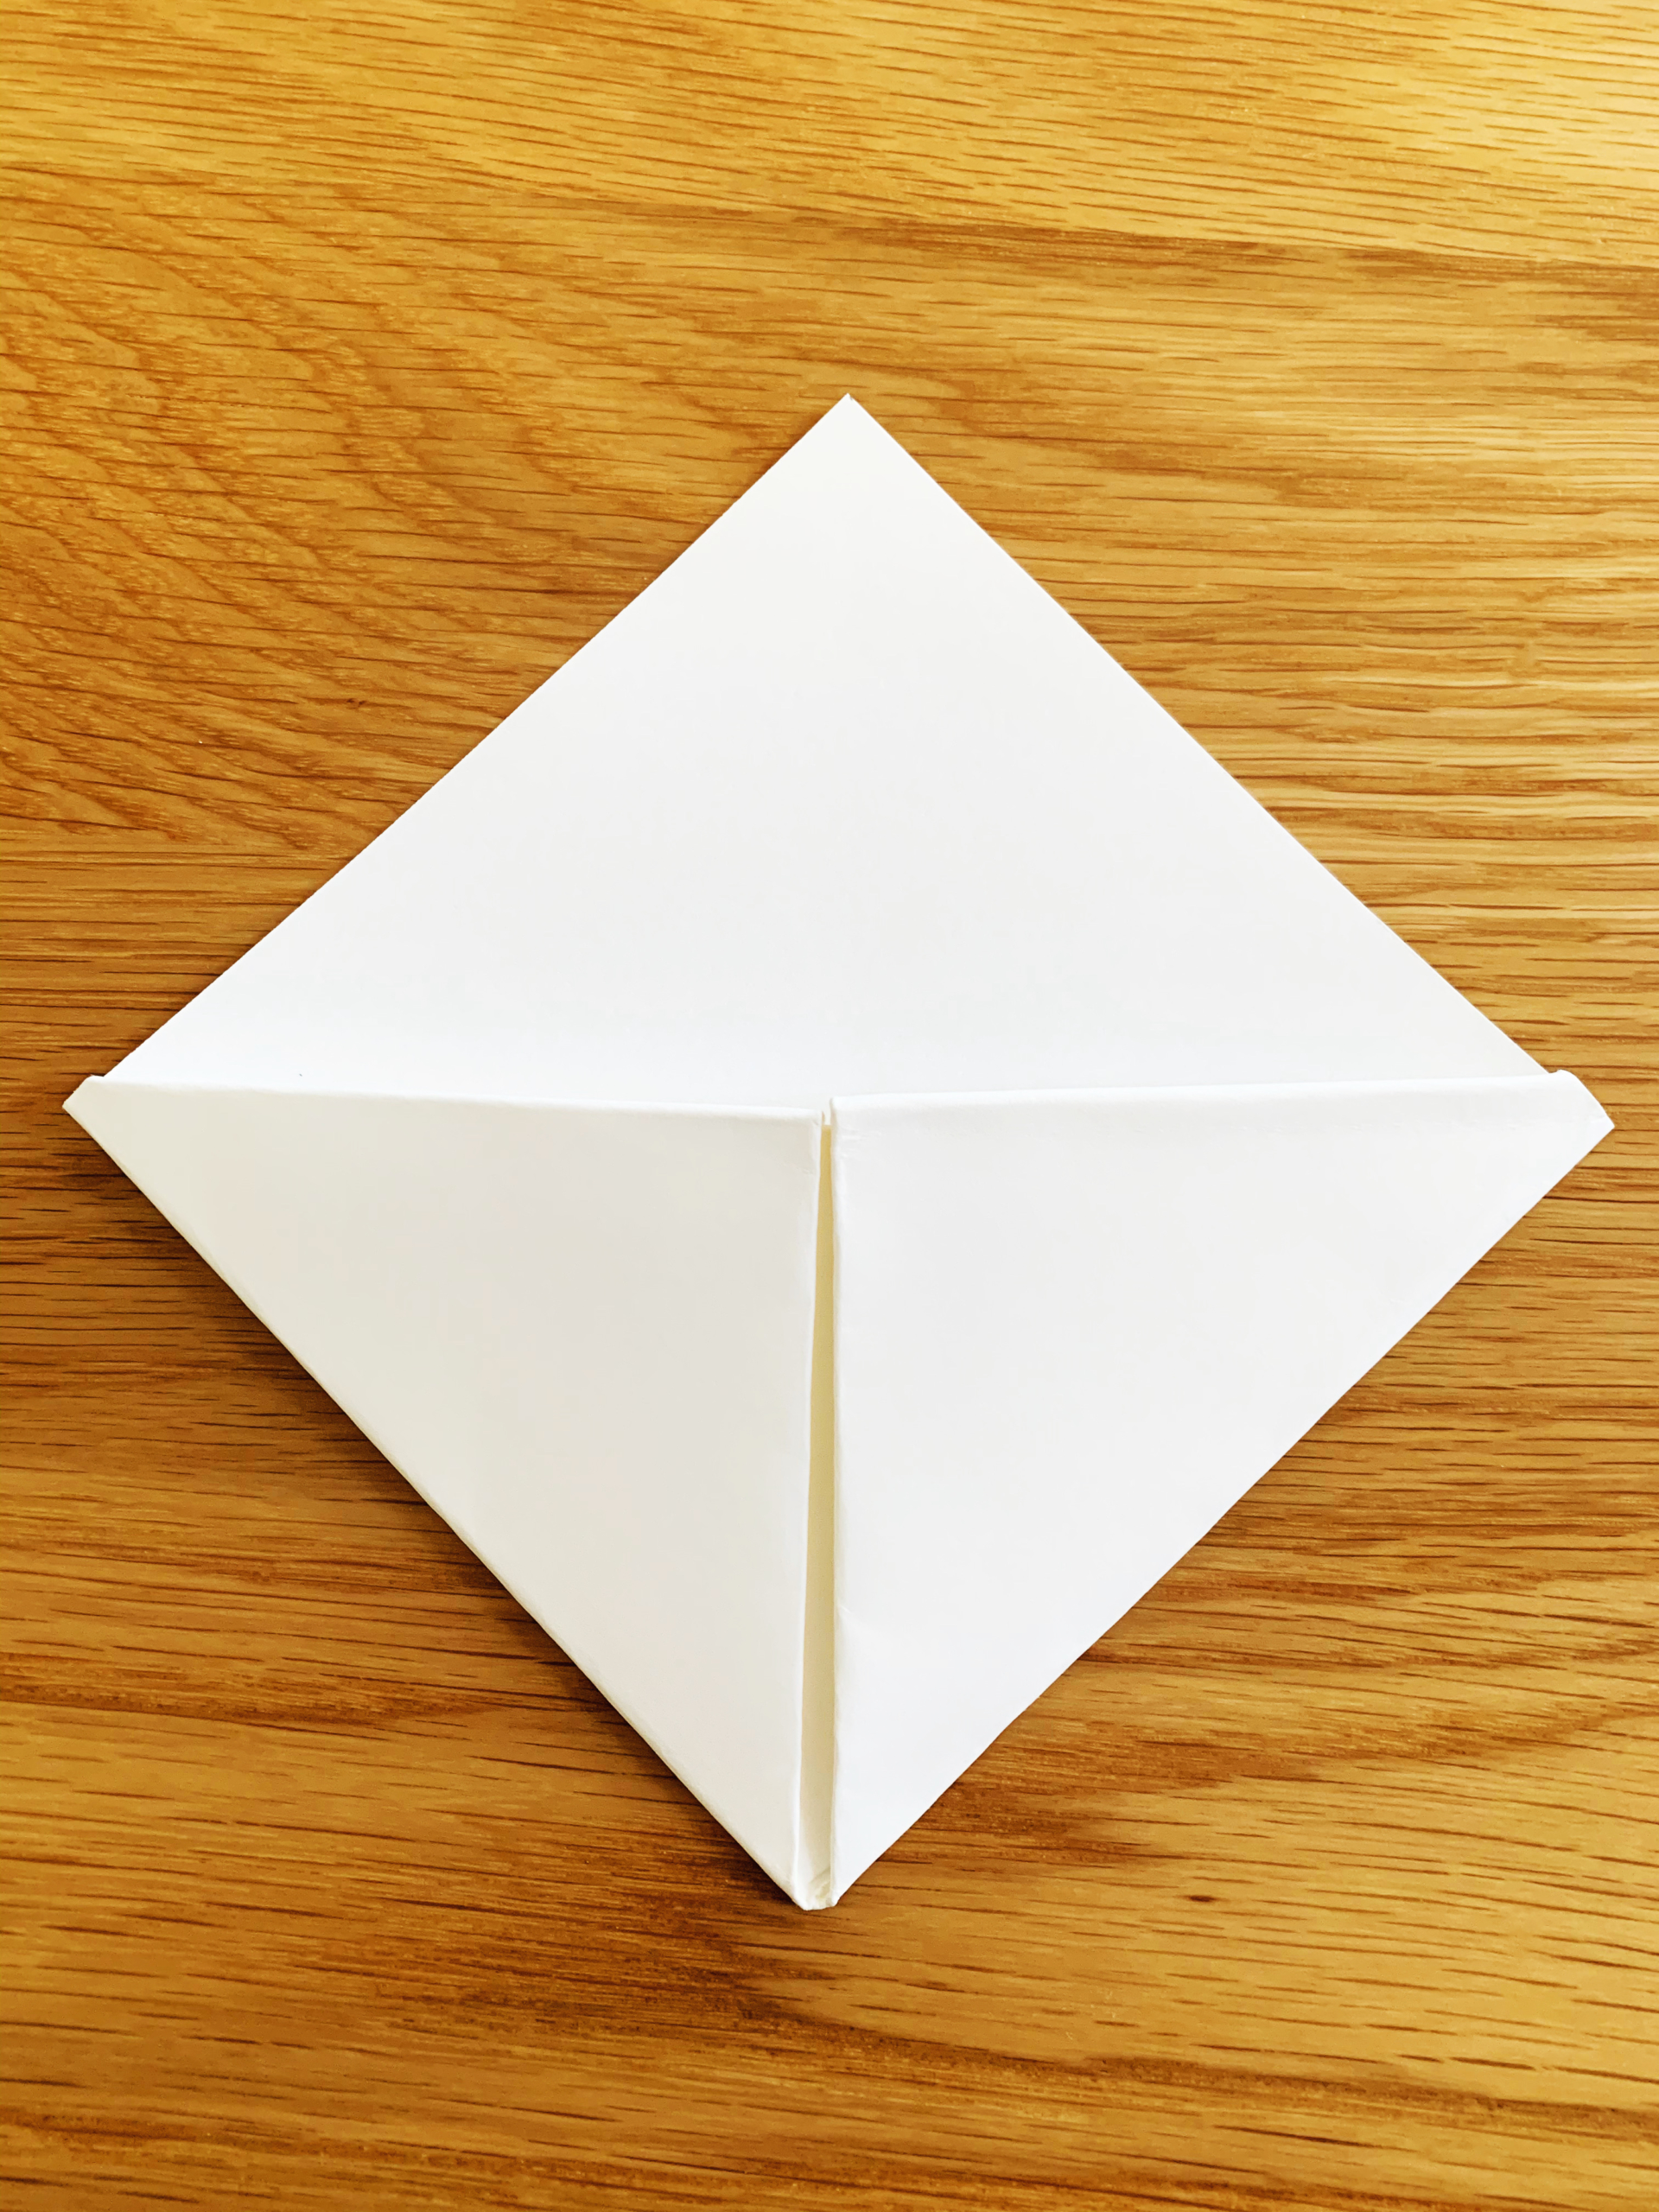
Step Six: You will now just take those points and fold them back down to the bottom, making a crease in the middle. Once you have the crease made, fold the paper back in the other direction, slipping it into the pocket created by the fold in Step Three.

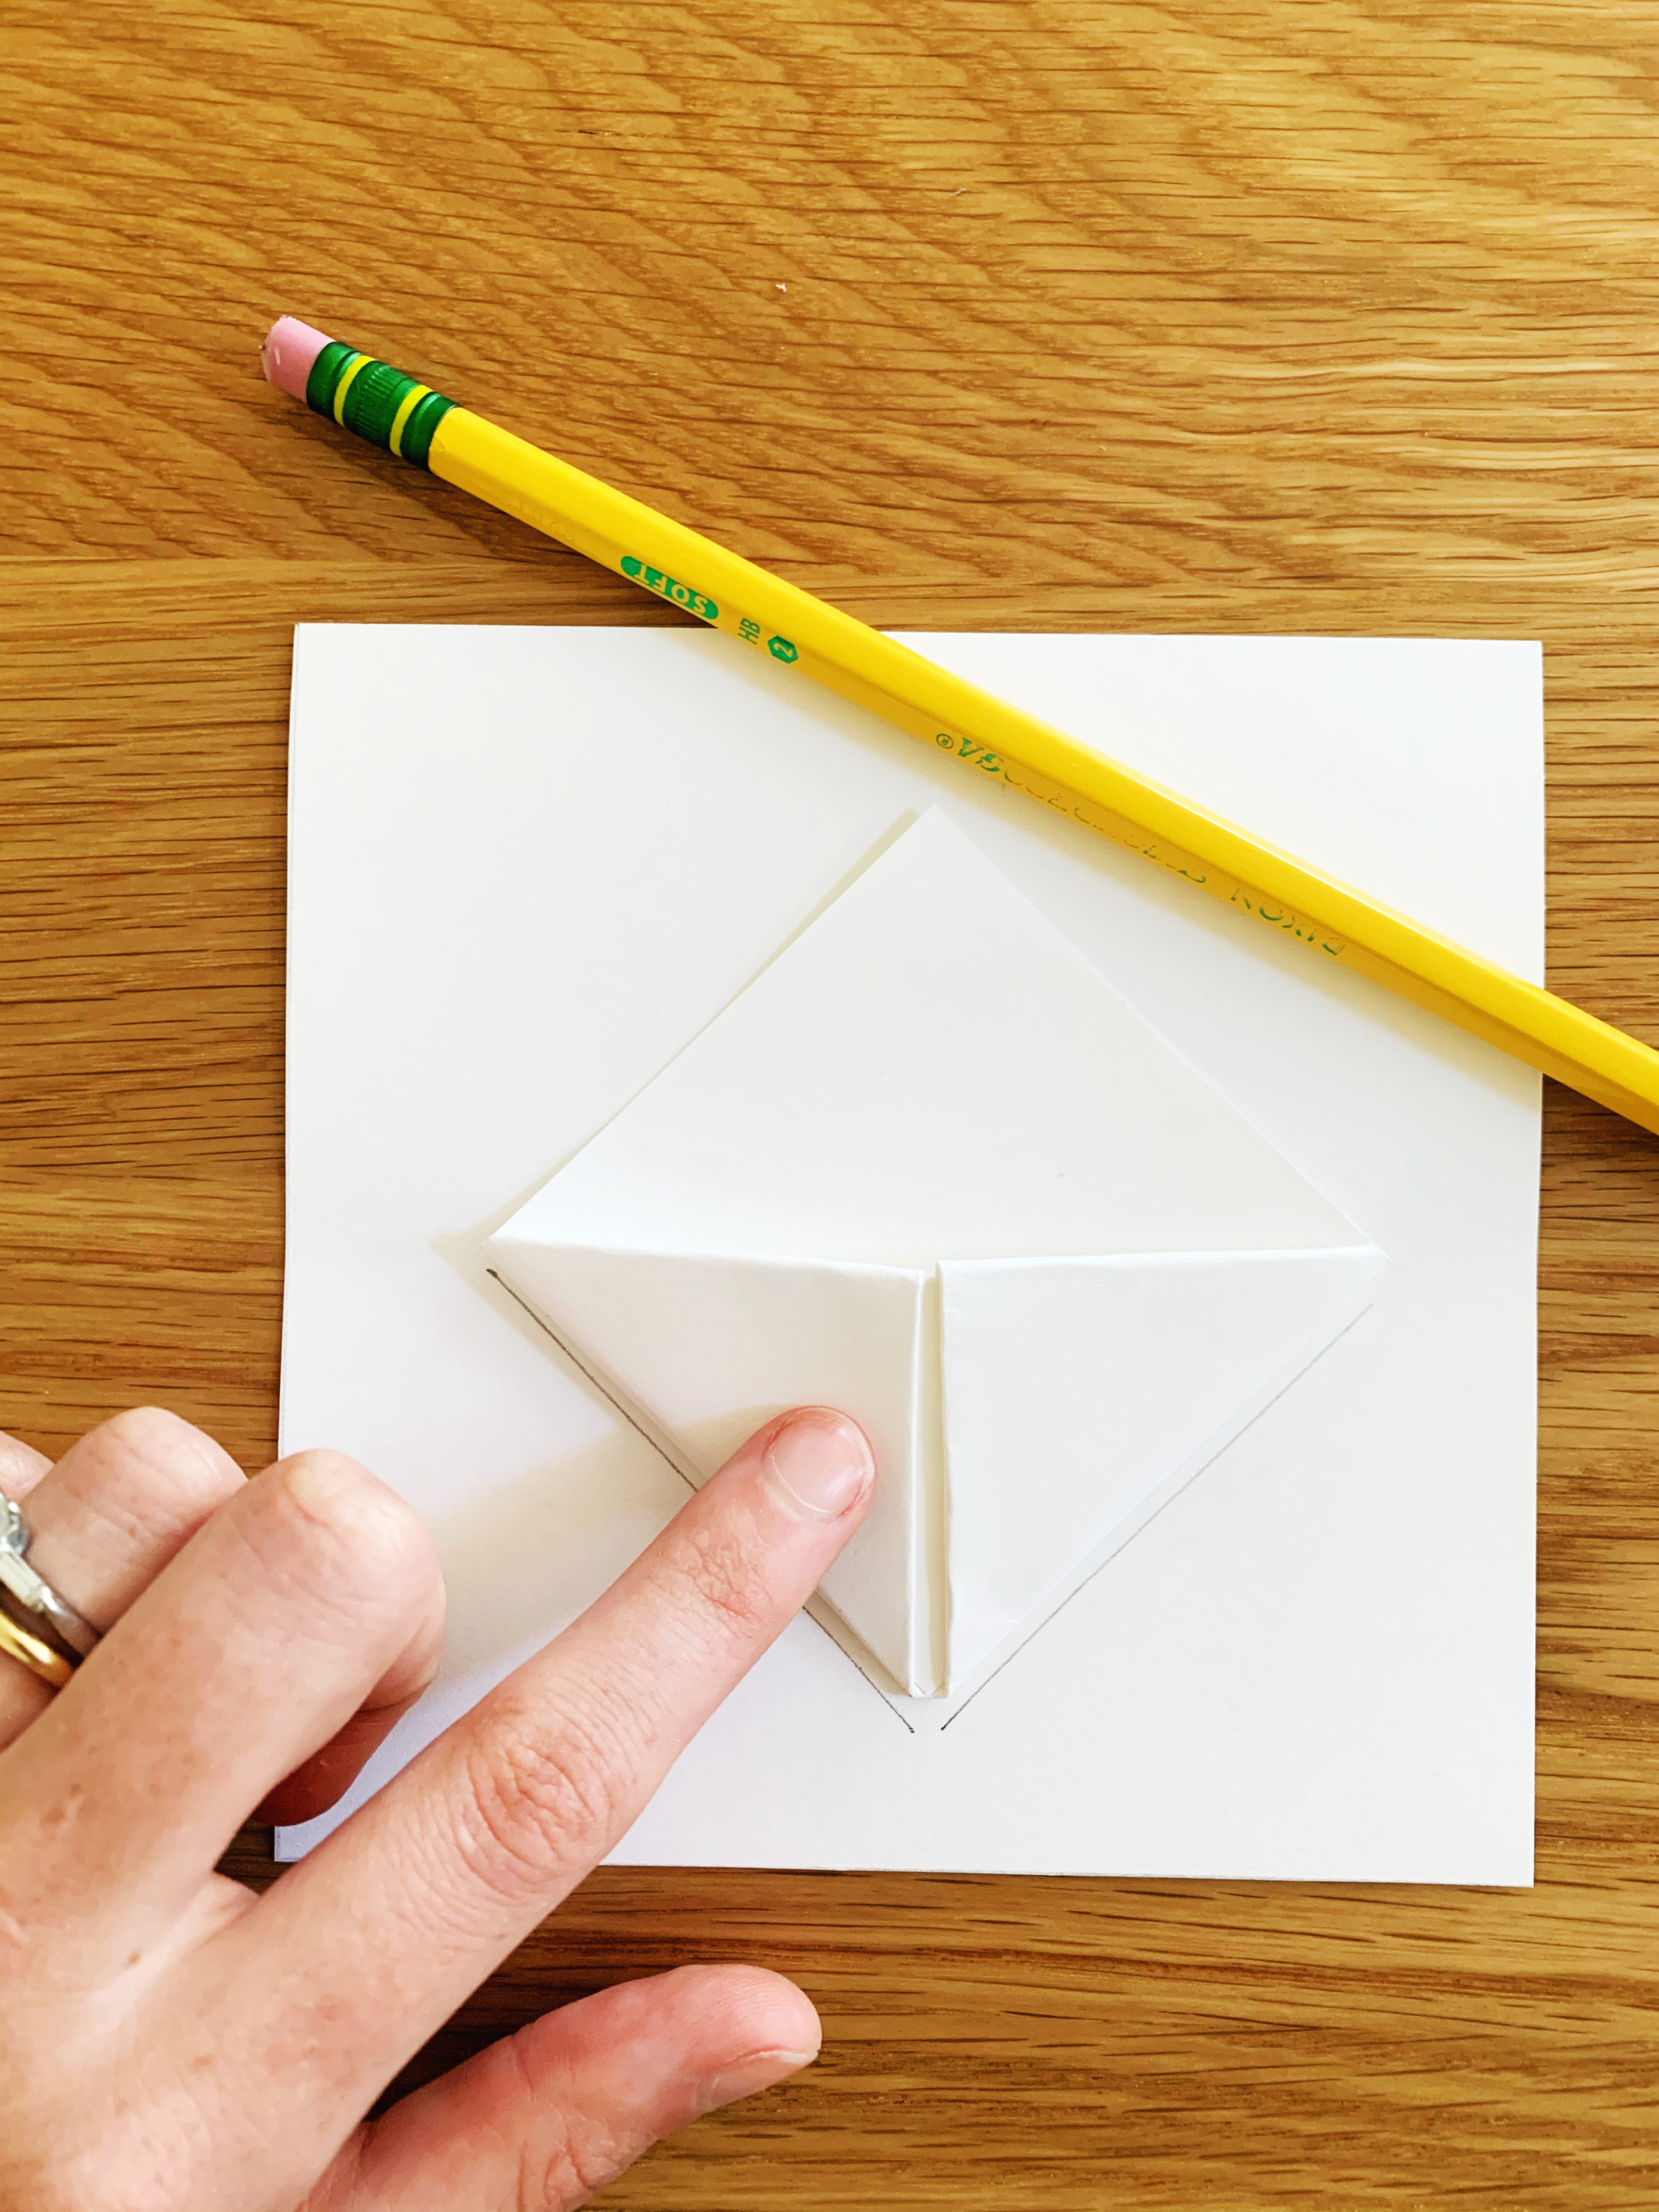
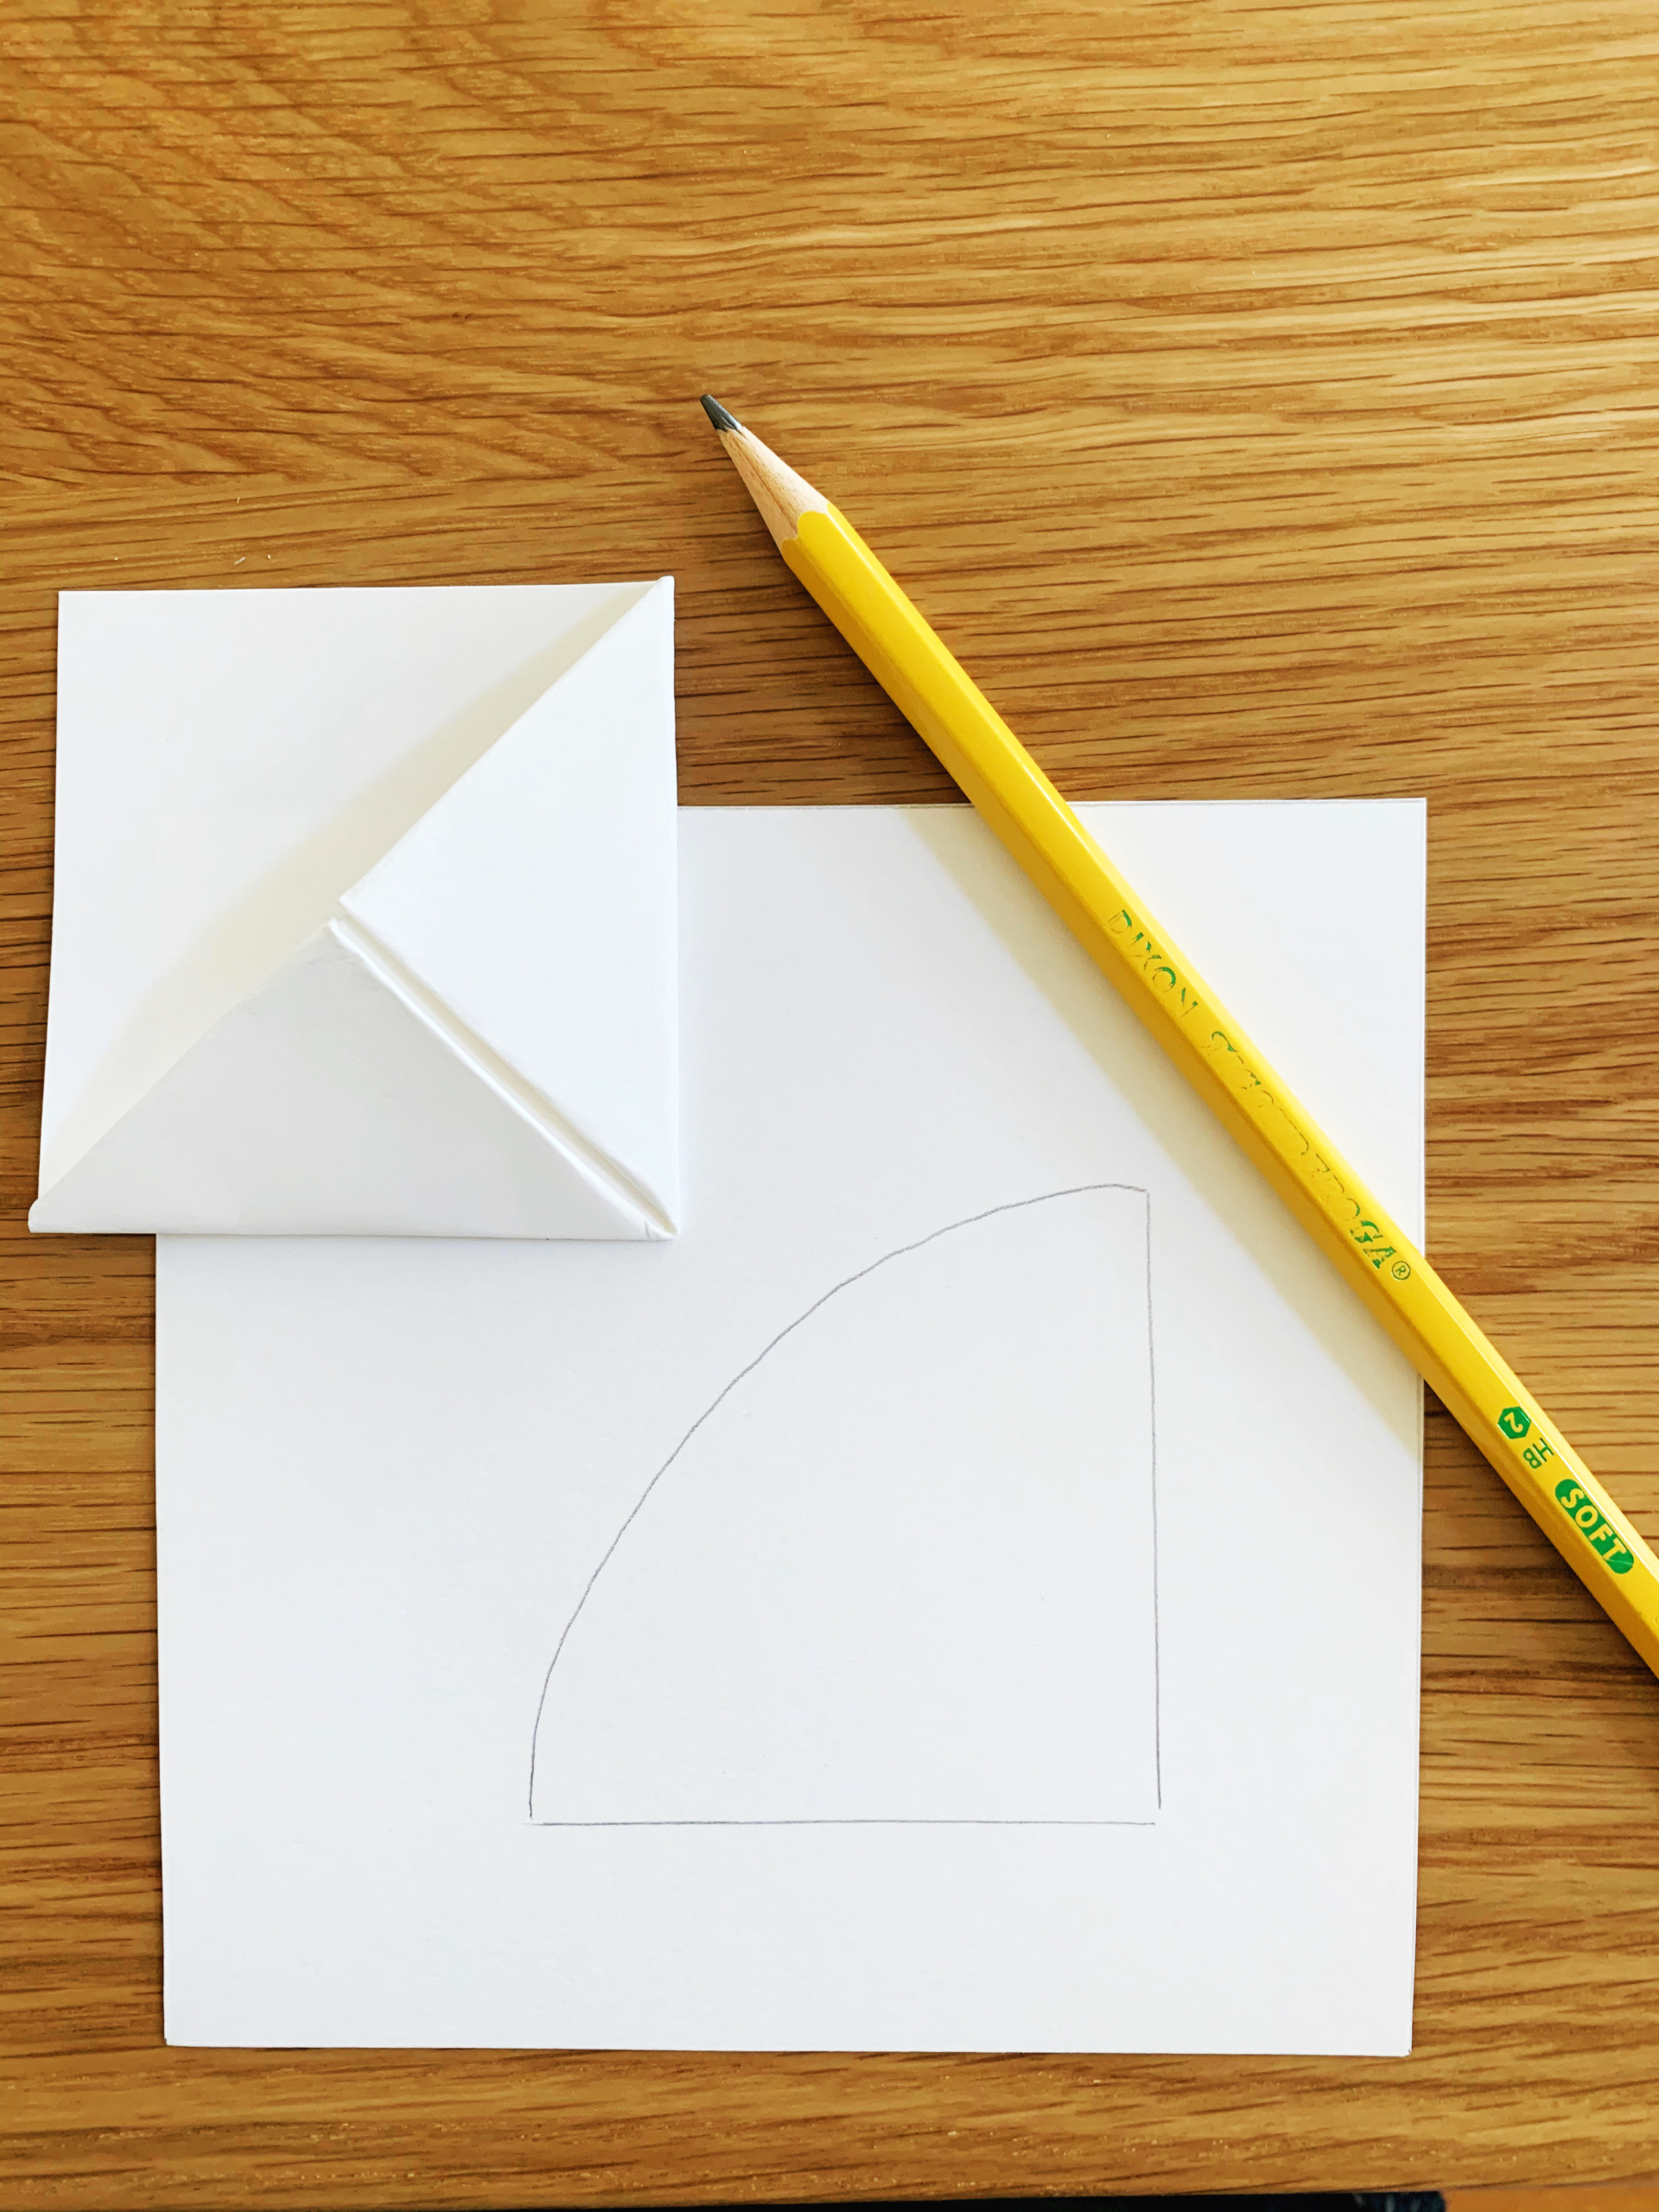
Step Seven: Now for the fruit shapes: Take a spare piece of paper and trace the corner of the pocket you just created. You will just need to trace the bottom part. Once you have that drawn, just connect the two points with an arch to create your fruit slice!
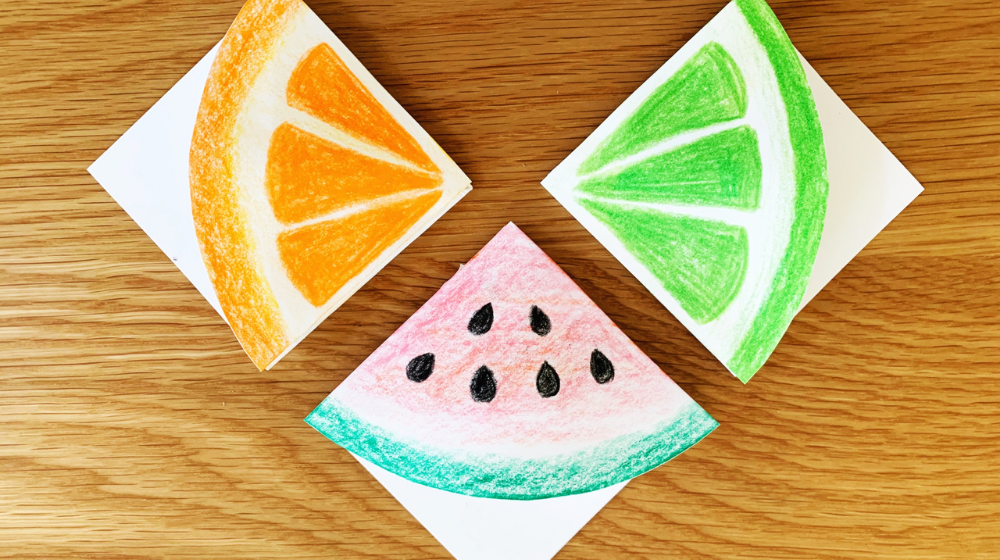
Step Eight: And now it’s time for the fun part! Take your colored pencils or markers and color the shape you just cut out. You can follow along with my color patterns or create your own. I made a lime, a watermelon, and an orange.
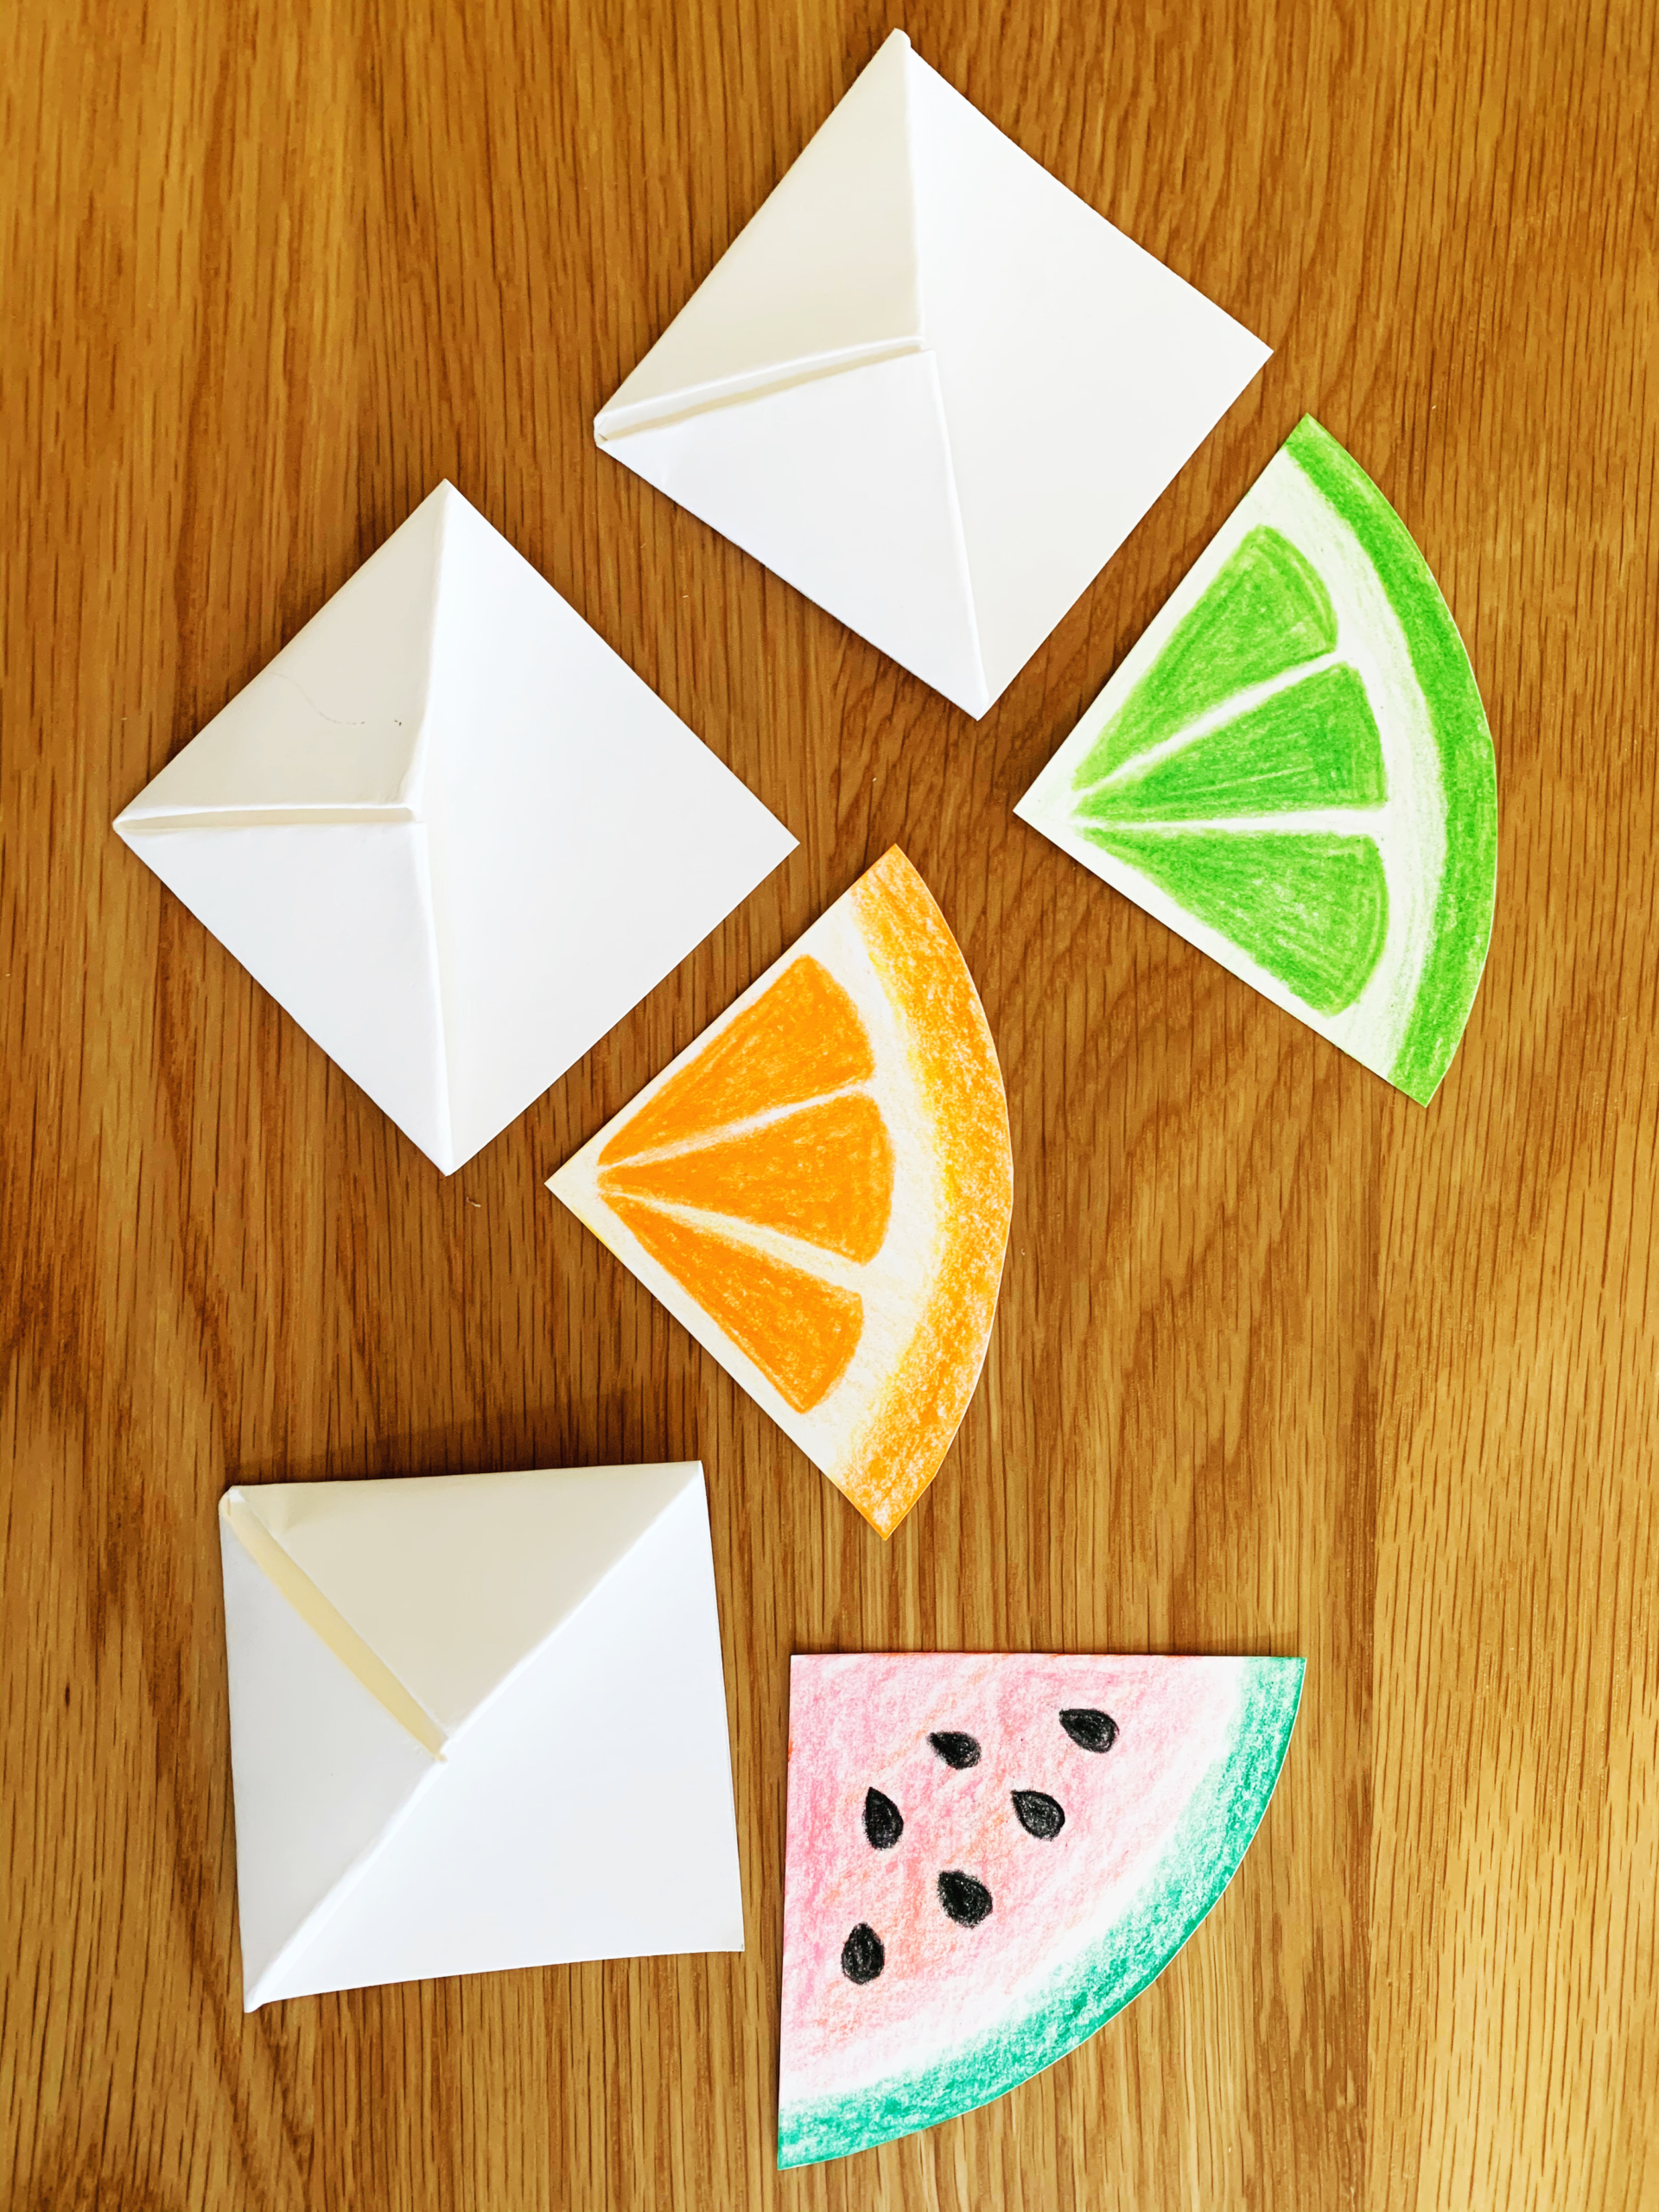
Step Nine: Once you are done coloring, it’s time to attach your fruit shapes to the folded square. Take your glue stick and apply glue to the outside of the pocket. Then line up the pointed corner of your fruit and attach it to the outside part of the pocket.

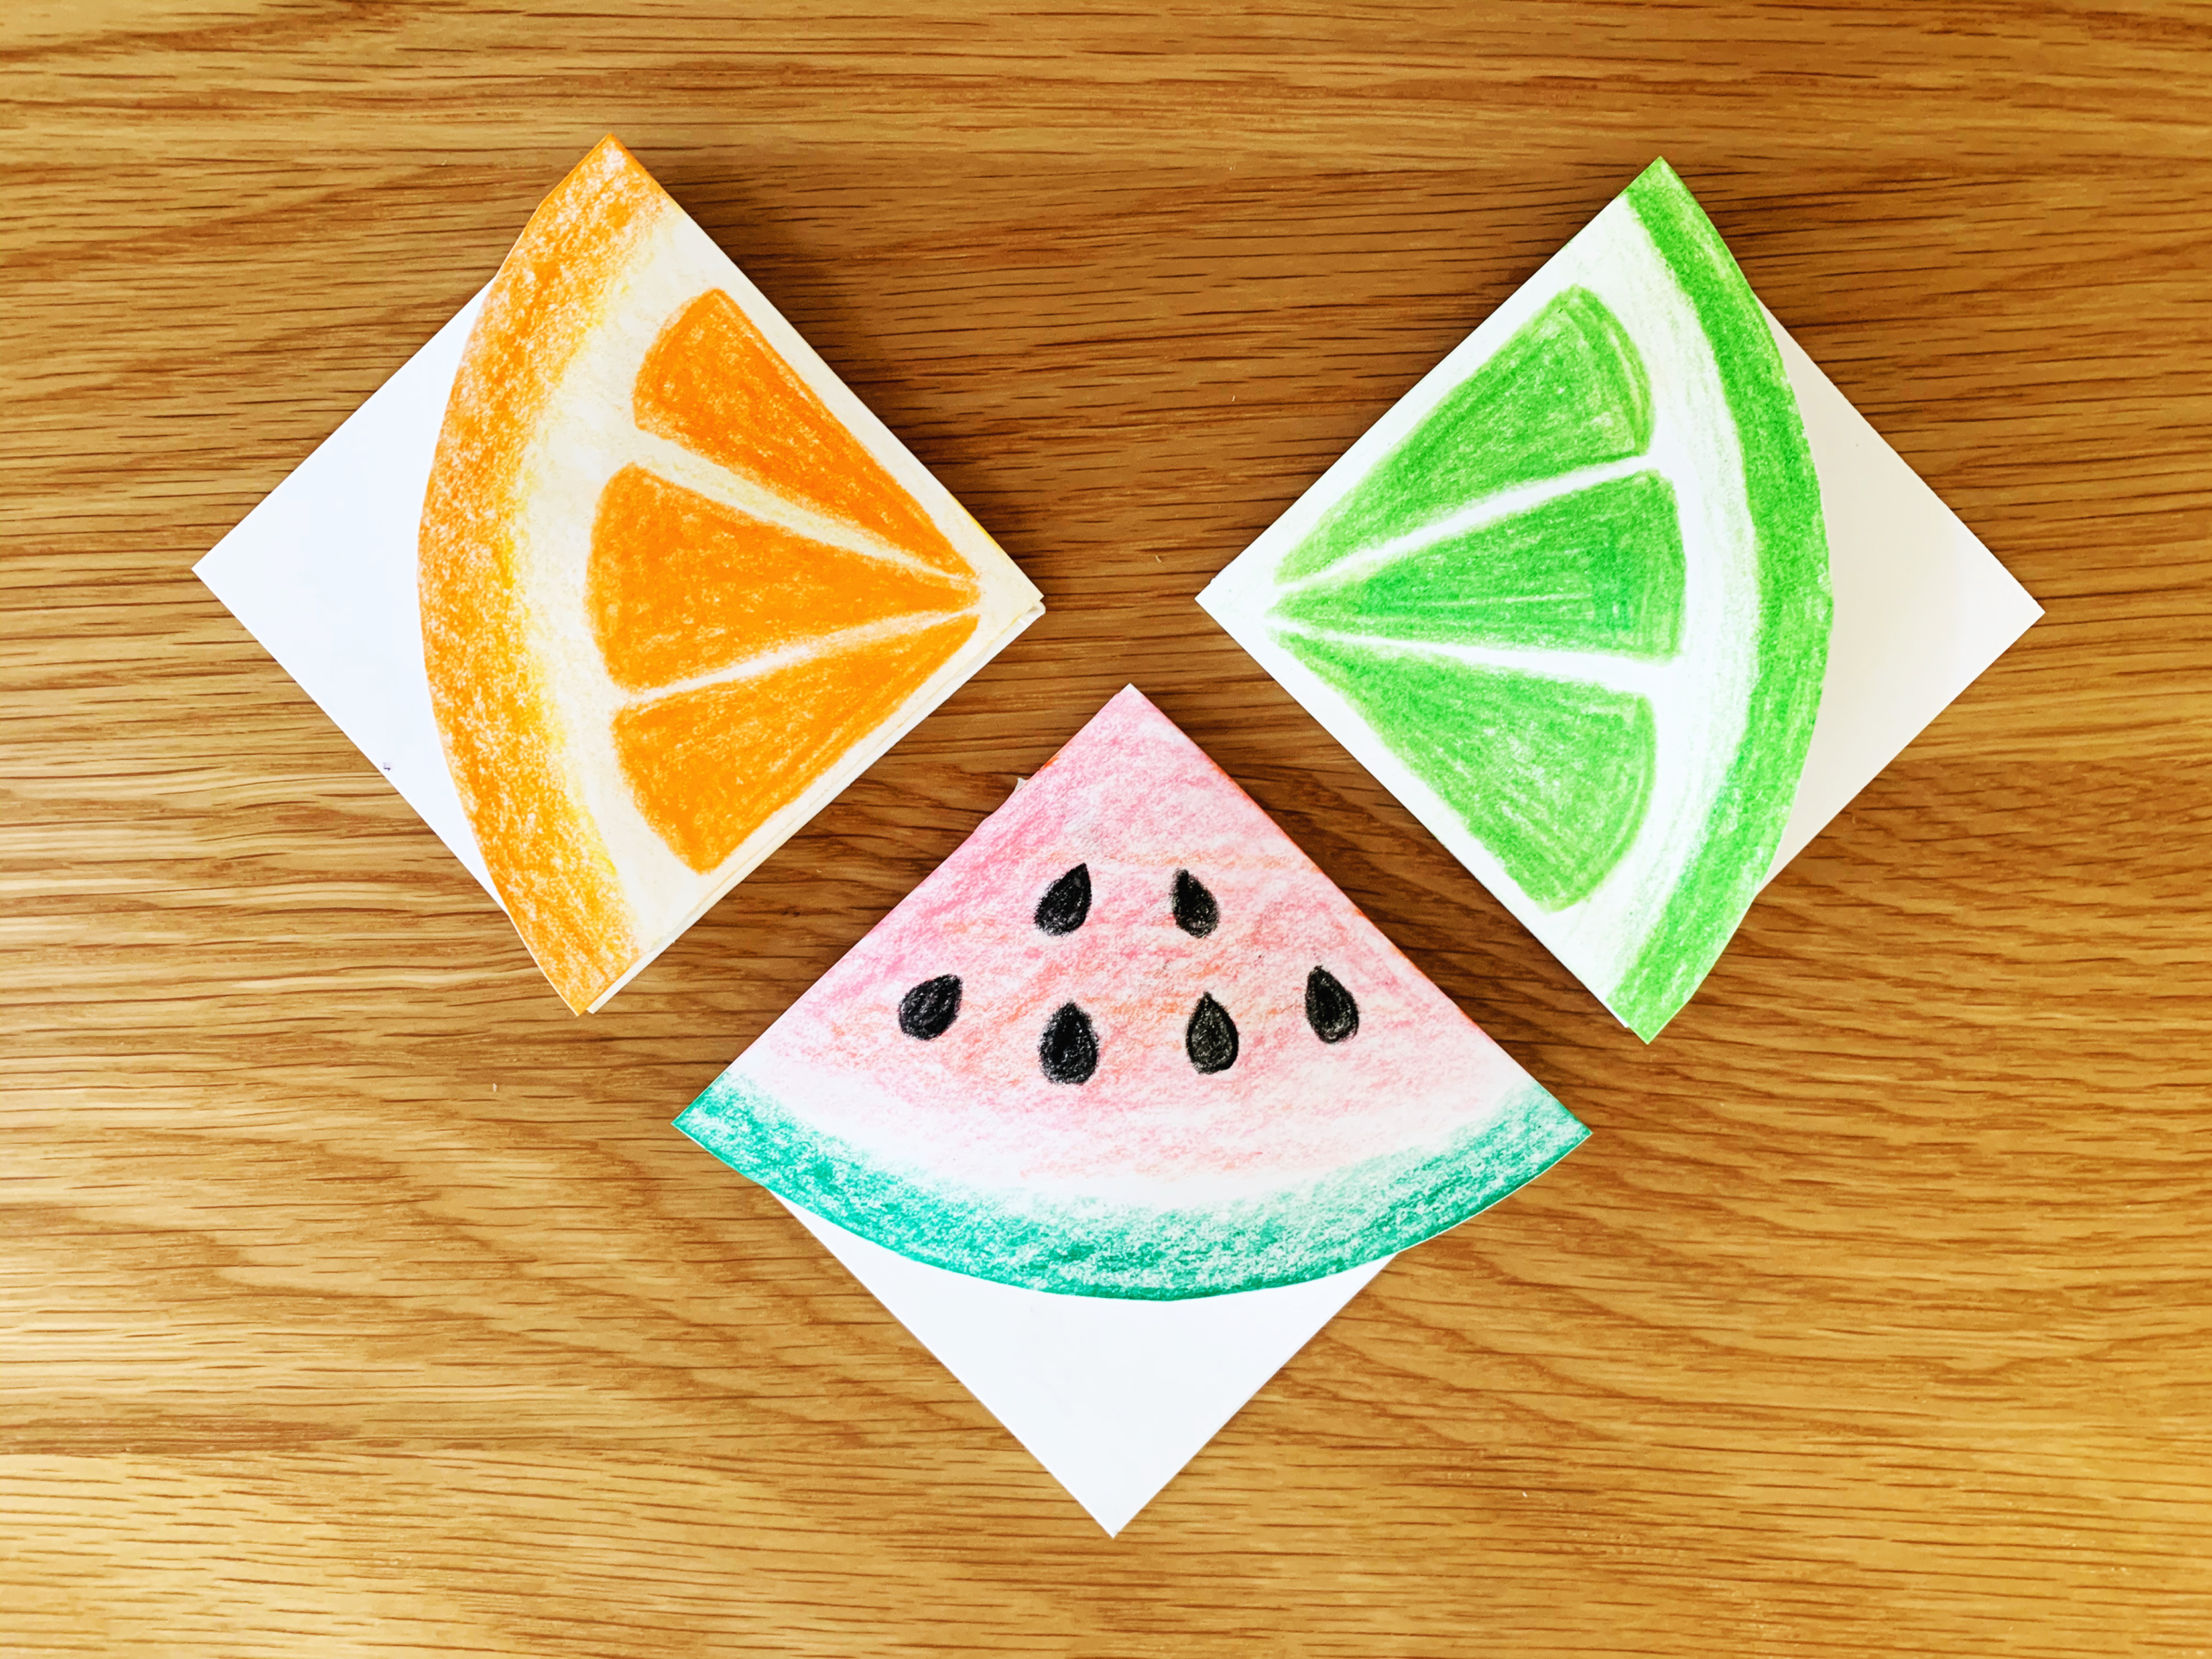
That’s it! Now you are ready to kick off your summer reading with these cute bookmarks. Let us know how you decided to decorate your bookmarks. I can think of a few other fruits we could add to our collection!