
By Chrysta Naron
Sandpaper letters are a popular Montessori material and a wonderful tool for helping young children master their ABCs. These letters cut from sandpaper and mounted on solid backgrounds allow children to experience the alphabet in multiple ways—before they have the fine motor skills to write the letters themselves. They can see how the letters are formed, and feel them as they trace their shapes. This sensory element can help them retain the names, shapes, and sounds of letters.
Pre-made sandpaper letters can run a little expensive, though. So why not make an activity of helping kids make their own sandpaper letters? Learning their ABCs is more fun and more memorable when they’re involved in the process from start to finish. Inviting your child to help create the letters reinforces their alphabet recognition, allows them to feel a sense of agency in their learning, and gives you quality time with your child. What a fun way to introduce this great pre-literacy activity while indulging in a little controlled mess!
Note: This activity can be adapted for kids with sensory processing sensitivity. See ideas at the end of the post.
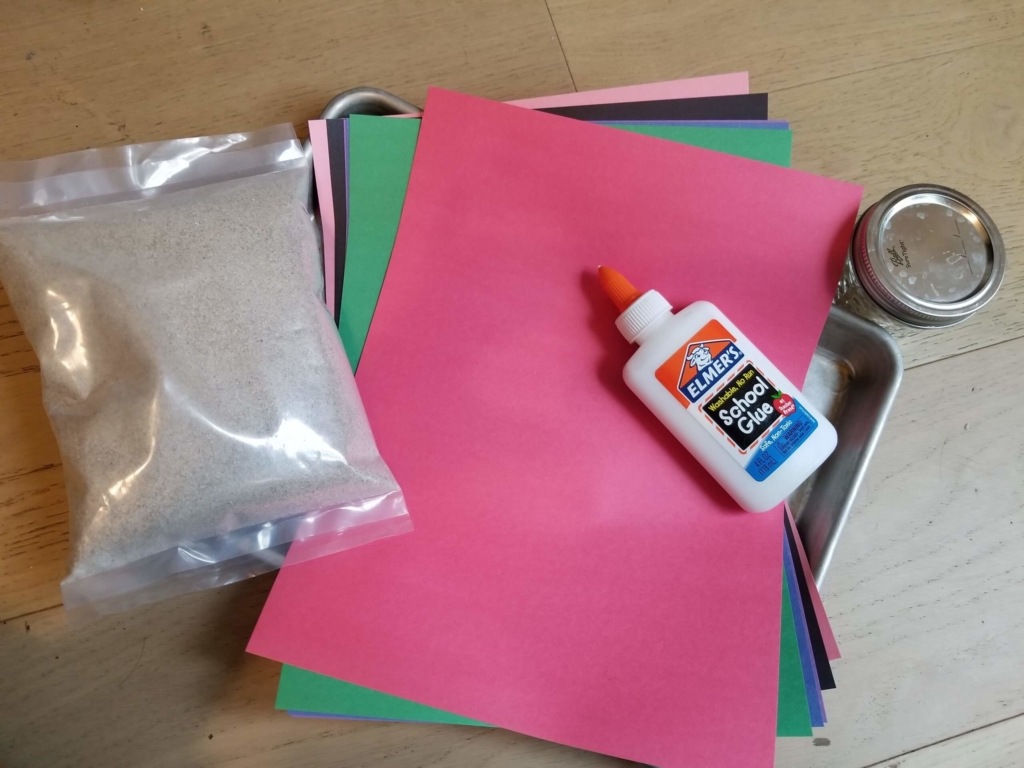
Materials Needed:
- Construction paper/Cardstock
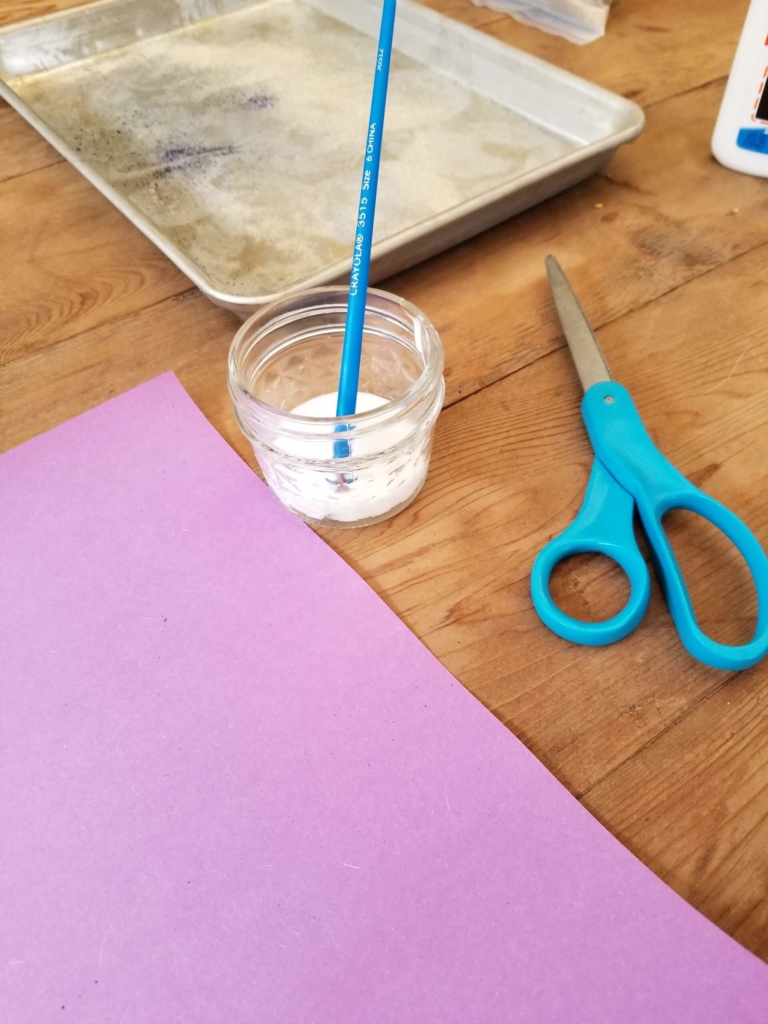
- Liquid glue
- Small bowl
- Paintbrush
- Sand (or other material; see suggestions at end of post)
- Cookie sheet
Cost: This activity mostly uses things you probably already have around the house. A five-pound bag of sand costs around $16, but feel free to improvise with some of the alternatives I mention below if you don’t want to buy the sand.
Step 1: Pour the liquid glue into the bowl. Dip your paintbrush into the glue and paint a letter of your choice onto a sheet of paper, taking up as much of the paper as possible. I recommend starting with the first letter of your child’s name. It’s recognizable and children are so excited to participate in activities that are specific to them.

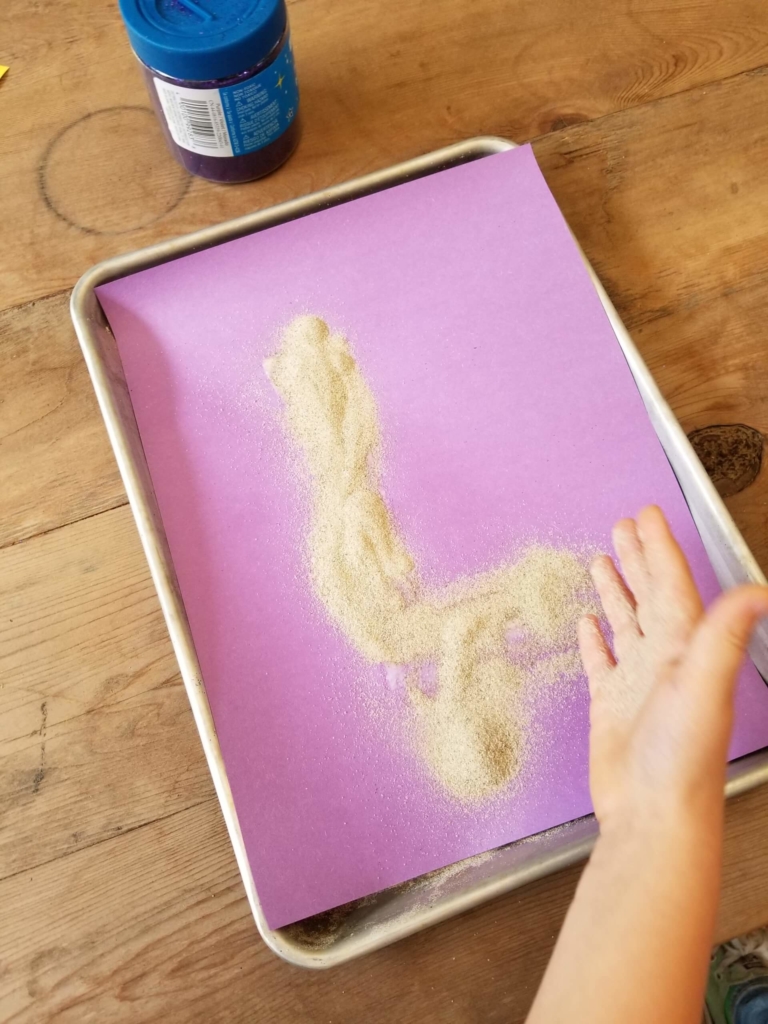
Step 2: Place the paper on a cookie sheet. Have your child pour or sprinkle sand over the glue. Let them dump as much sand onto the paper as they want—the letter should have plenty of texture and be very visible.

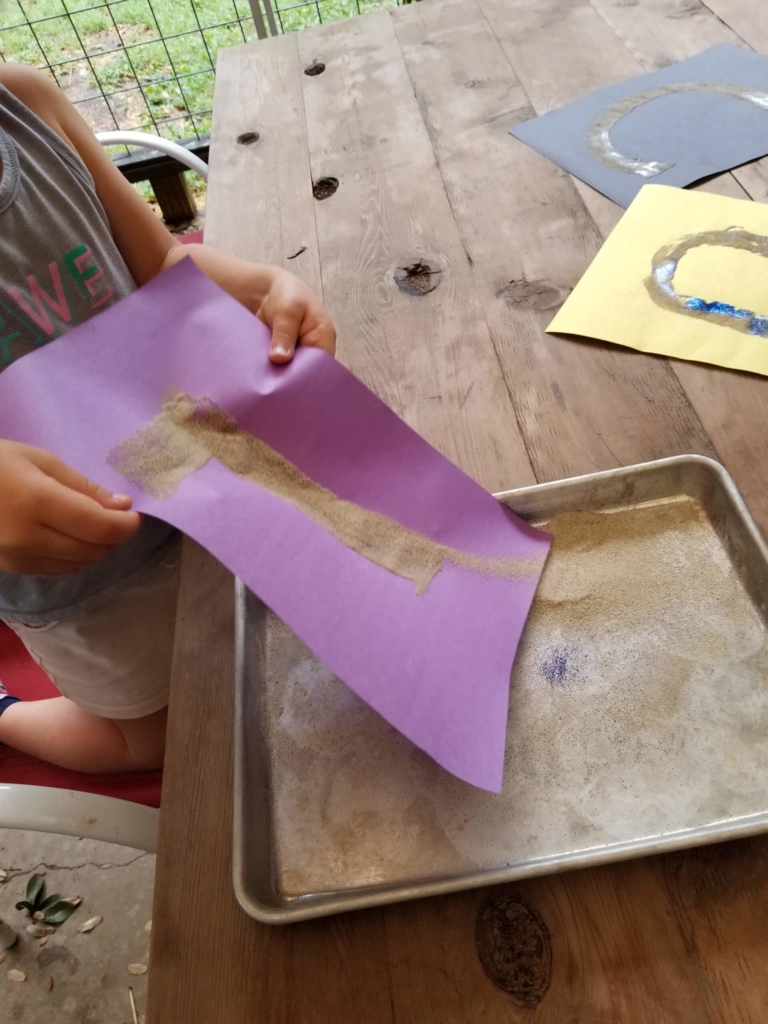
Step 3: Let your child pick up the paper and gently shake the excess sand onto the cookie sheet. Wow! Look at that letter!
Step 4: Set the letter aside to dry. Repeat the activity with as many letters as you want. Spell out the rest of your child’s name or the name of a pet. High-frequency letters, such as A, B, and C, and distinctive-looking letters like O and X are also great choices.
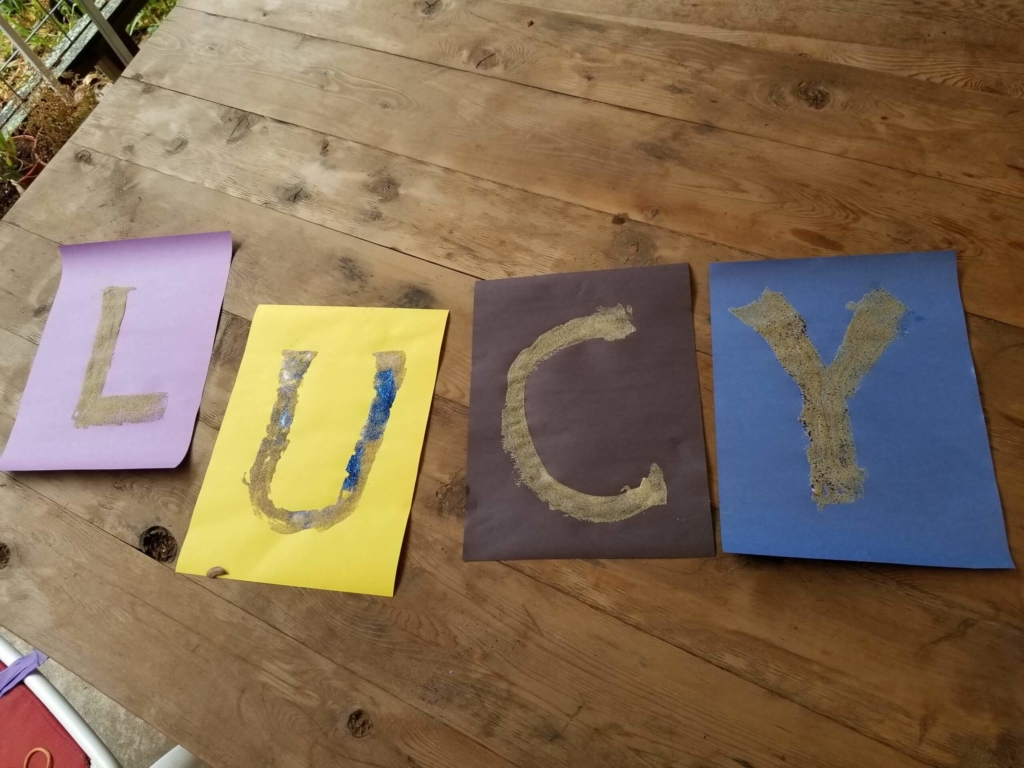
Step 5: Once the letters are dry, sit with your child and help them trace the letters with their finger or palm. If you made the necessary letters, rearrange them to spell words or names.
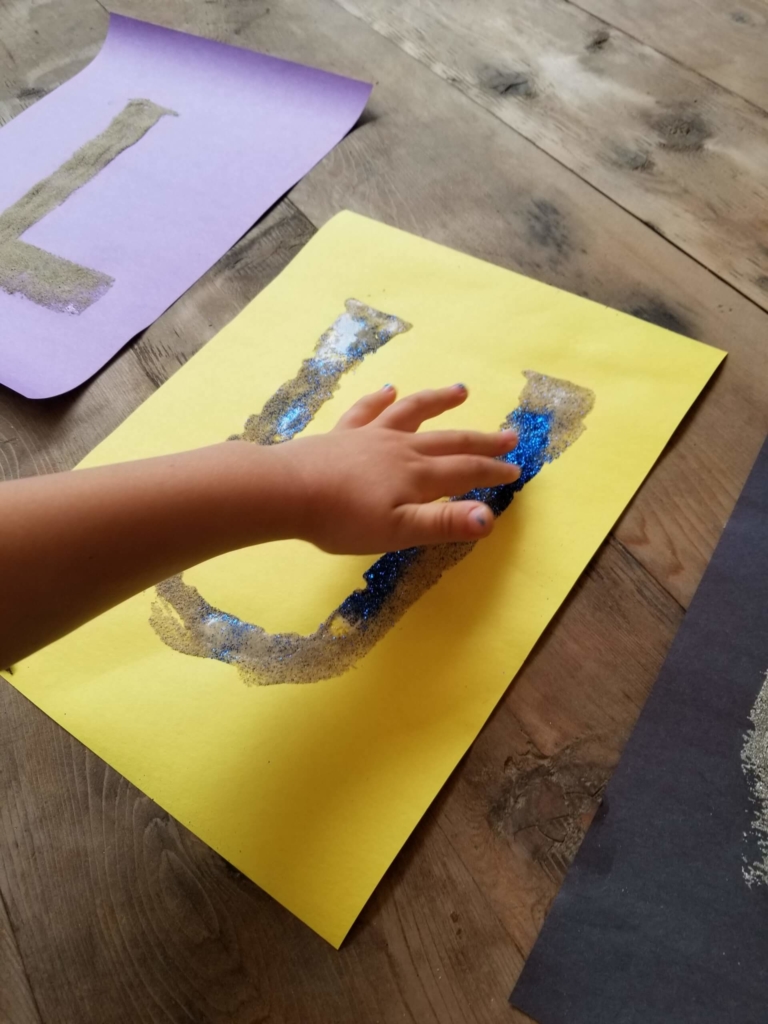
Alternatives to sand: If you don’t have sand, or your child doesn’t like the feel of sand, you can substitute the sand with other dry items, such as rice, cornmeal, or even dirt. Just make sure it has some texture to it. These letters can reflect your family and the interests of your child. Full confession: I love glitter, so I typically mix glitter in with the sand. It’s just so sparkly!
