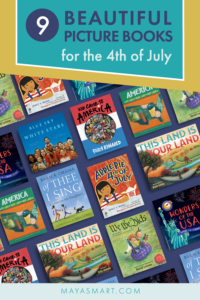
It’s time for the Fourth of July. A day of flags, picnics, parades, fireworks, and, now, books! After all, what better way to introduce your child to the significance of this holiday and what it means to you than through the written word?
This list of picture books for the Fourth of July gives families the opportunity to explore different ways people love America and a variety of American experiences. Granted, we’re certified book lovers, but we think these books will light up bedtime as much as fireworks!
Teaching our children about the Fourth of July is important. It’s so much more than just a single day when a document was signed. It is the neighborhoods we create, the schools we attend, the relationships we build, and the love we share. This year, may your family celebrate those beautiful parts of America with a good book, and hopefully a slice of apple pie.
Pin me for reference
The idea of recorded stories is not a recent one. In fact, in 1877 Thomas Edison recorded what we could think of as the first partial audiobook on his new invention, the phonograph—a machine he dreamed would help bring storytelling into every home. His choice of material? One for the toddlers: the nursery rhyme Mary Had a Little Lamb.
But it wasn’t until more recent decades and technological advances that audio stories truly took off, gradually with books on tape and MP3s, then exponentially with smart devices and speakers. Today, their remarkable popularity shows no signs of waning, and the kids’ segment of the audiobook market is the segment predicted to grow most rapidly over the coming years.
And with good reason: Parents value kids’ audio stories for keeping children entertained, helping them fall asleep at night or naptime, and helping active little ones settle down and sit still for a spell. Plus—while audiobooks shouldn’t replace hard copies or shared reading between parents and children—their value in boosting literacy and helping kids build a love of reading is increasingly recognized.
The benefits of using kids’ audio stories to support literacy
According to a literature review exploring their role in supporting children’s literacy, audiobooks can boost key skills, such as:
- Language comprehension
- Word recognition
- Vocabulary
- Pronunciation
They’re also rewarding in other literacy-relevant areas, sparking a love of stories and motivation to read, enhancing wellbeing, and boosting emotional intelligence and imagination.
While most of the research to date has focused on the benefits of audiobooks for older children, even very young readers and listeners should be able to learn from them. So, if you haven’t tried using them with your toddler, and want to complement your reading activities, there’s no better time than now to press play. Here’s how to use them for maximum benefit.
How to Use Toddler Audio Stories at Home and Beyond
One of the appeals of audiobooks is how easily you can incorporate them into everyday family life and routines. Yes, they’re handy for car journeys or longer trips. But you can also build them into mealtimes, bath times, and bedtimes, not to mention use them as a (much-needed) alternative to screen time.
Parents and caregivers can even still take part in story time while performing other tasks by listening in with their child. Preparing dinner with a squirmy kid around? Set them up with an audiobook in the kitchen with you. It shouldn’t replace shared reading from a physical book, which is crucial for building print awareness, but you can still engage with your child around the story, asking and answering questions or chatting about the plot—which is also critically important.
For parents with toddlers going through a less enthusiastic phase when it comes to reading, or who may be having a hard time sitting to look at books, audiobooks can also be a useful way to keep up their exposure to stories and children’s literature.
From trying and testing audio stories with my own daughter, I found it can take a little time for a toddler to get interested in them. After all, toddlers aren’t yet reading and still rely heavily on the pictures in a book to engage them and help them follow a story. So, try starting out with stories they know and love already, ideally paired with a book they can look at and follow while listening.
Also seek out short audiobooks that won’t tax a limited attention span. Stories with musical elements, sound effects or child narration can be big hits. Another fun idea is to give them toy figures or storytelling puppets, so they have an activity to occupy busy hands, help hold their focus, and kindle their imagination as they listen.
Where to Find Audio Stories for Toddlers
If you’re ready to try audiobooks with your toddler, the quality of many of today’s choices is impressive. Take a look at the winners and finalists of the Audio Publishers Association Audie Awards or the yearly list of notable children’s recordings from the Association for Library Service to Children to get started with some great titles.
Here are tips for where to find engaging audiobook titles and audio stories:
- Check out your local public library for read-along book and CD sets, or audiobooks pre-loaded onto MP3 players.
- Check your library’s website for audiobooks to download onto your smart device. Other online libraries may also allow you to download digital content online.
- When shopping for books, keep a lookout for publishers that include an audiobook—CD or QR code—as part of their offering. Or look for titles that have been recorded as audio stories since publication. You can read the story with your toddler first, knowing that you can introduce the audiobook version once they’re more familiar with it.
- Browse audiobook apps or apps with audio story content—music streaming services often include stories. There are numerous podcasts with read-alouds or original stories for kids.
- Consider borrowing or investing in an interactive kids’ story player that allows children to choose and play audiobooks or stream storytelling radio shows. These can be a fantastic alternative to letting toddlers listen to audiobooks on a tablet or phone, where the temptation to stray into videos or games is all too present.
- Get creative and record your own audio stories. You could read your toddler’s favorite, so they can hear it over and over again, or invent a new tale. This is a lovely way for grandparents and relatives to get involved, too!
Pin me for reference

By Chrysta Naron
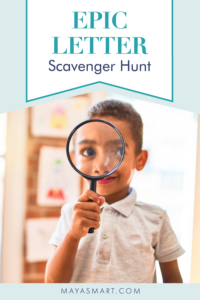
Scavenger hunts are a really dynamic way to get your children involved in the learning process. You can use them to teach math, vocabulary, science, colors, and reading! One of my favorite scavenger hunts to do with kids is an alphabet scavenger hunt. It’s free, fun, takes no prep work, and you can do it anywhere. How can you beat that? What’s more, it needs little to no adaptation for children with limited mobility.
With this particular scavenger hunt, your child will choose a letter and you’ll be searching and listening for that sound. This teaches children phonics as well as what we call phonemic awareness. Phonics is the skill of matching a letter to a sound: For instance, knowing S makes the sounds /s/. Phonemic awareness is being able to hear individual letter sounds within a word. That means being aware that the word sat starts with the sound /s/.
But why are phonics and phonemic awareness important? Both of these skills are important building blocks to becoming a reader. They are the major skills that allow children to hear a word, pick out each sound, and correlate the sound to the letters that make up that word—which is what much of early reading and writing is about!
Read on for teacher-approved and parent-tested tips on how to get the most out of an alphabet scavenger hunt with your young child.
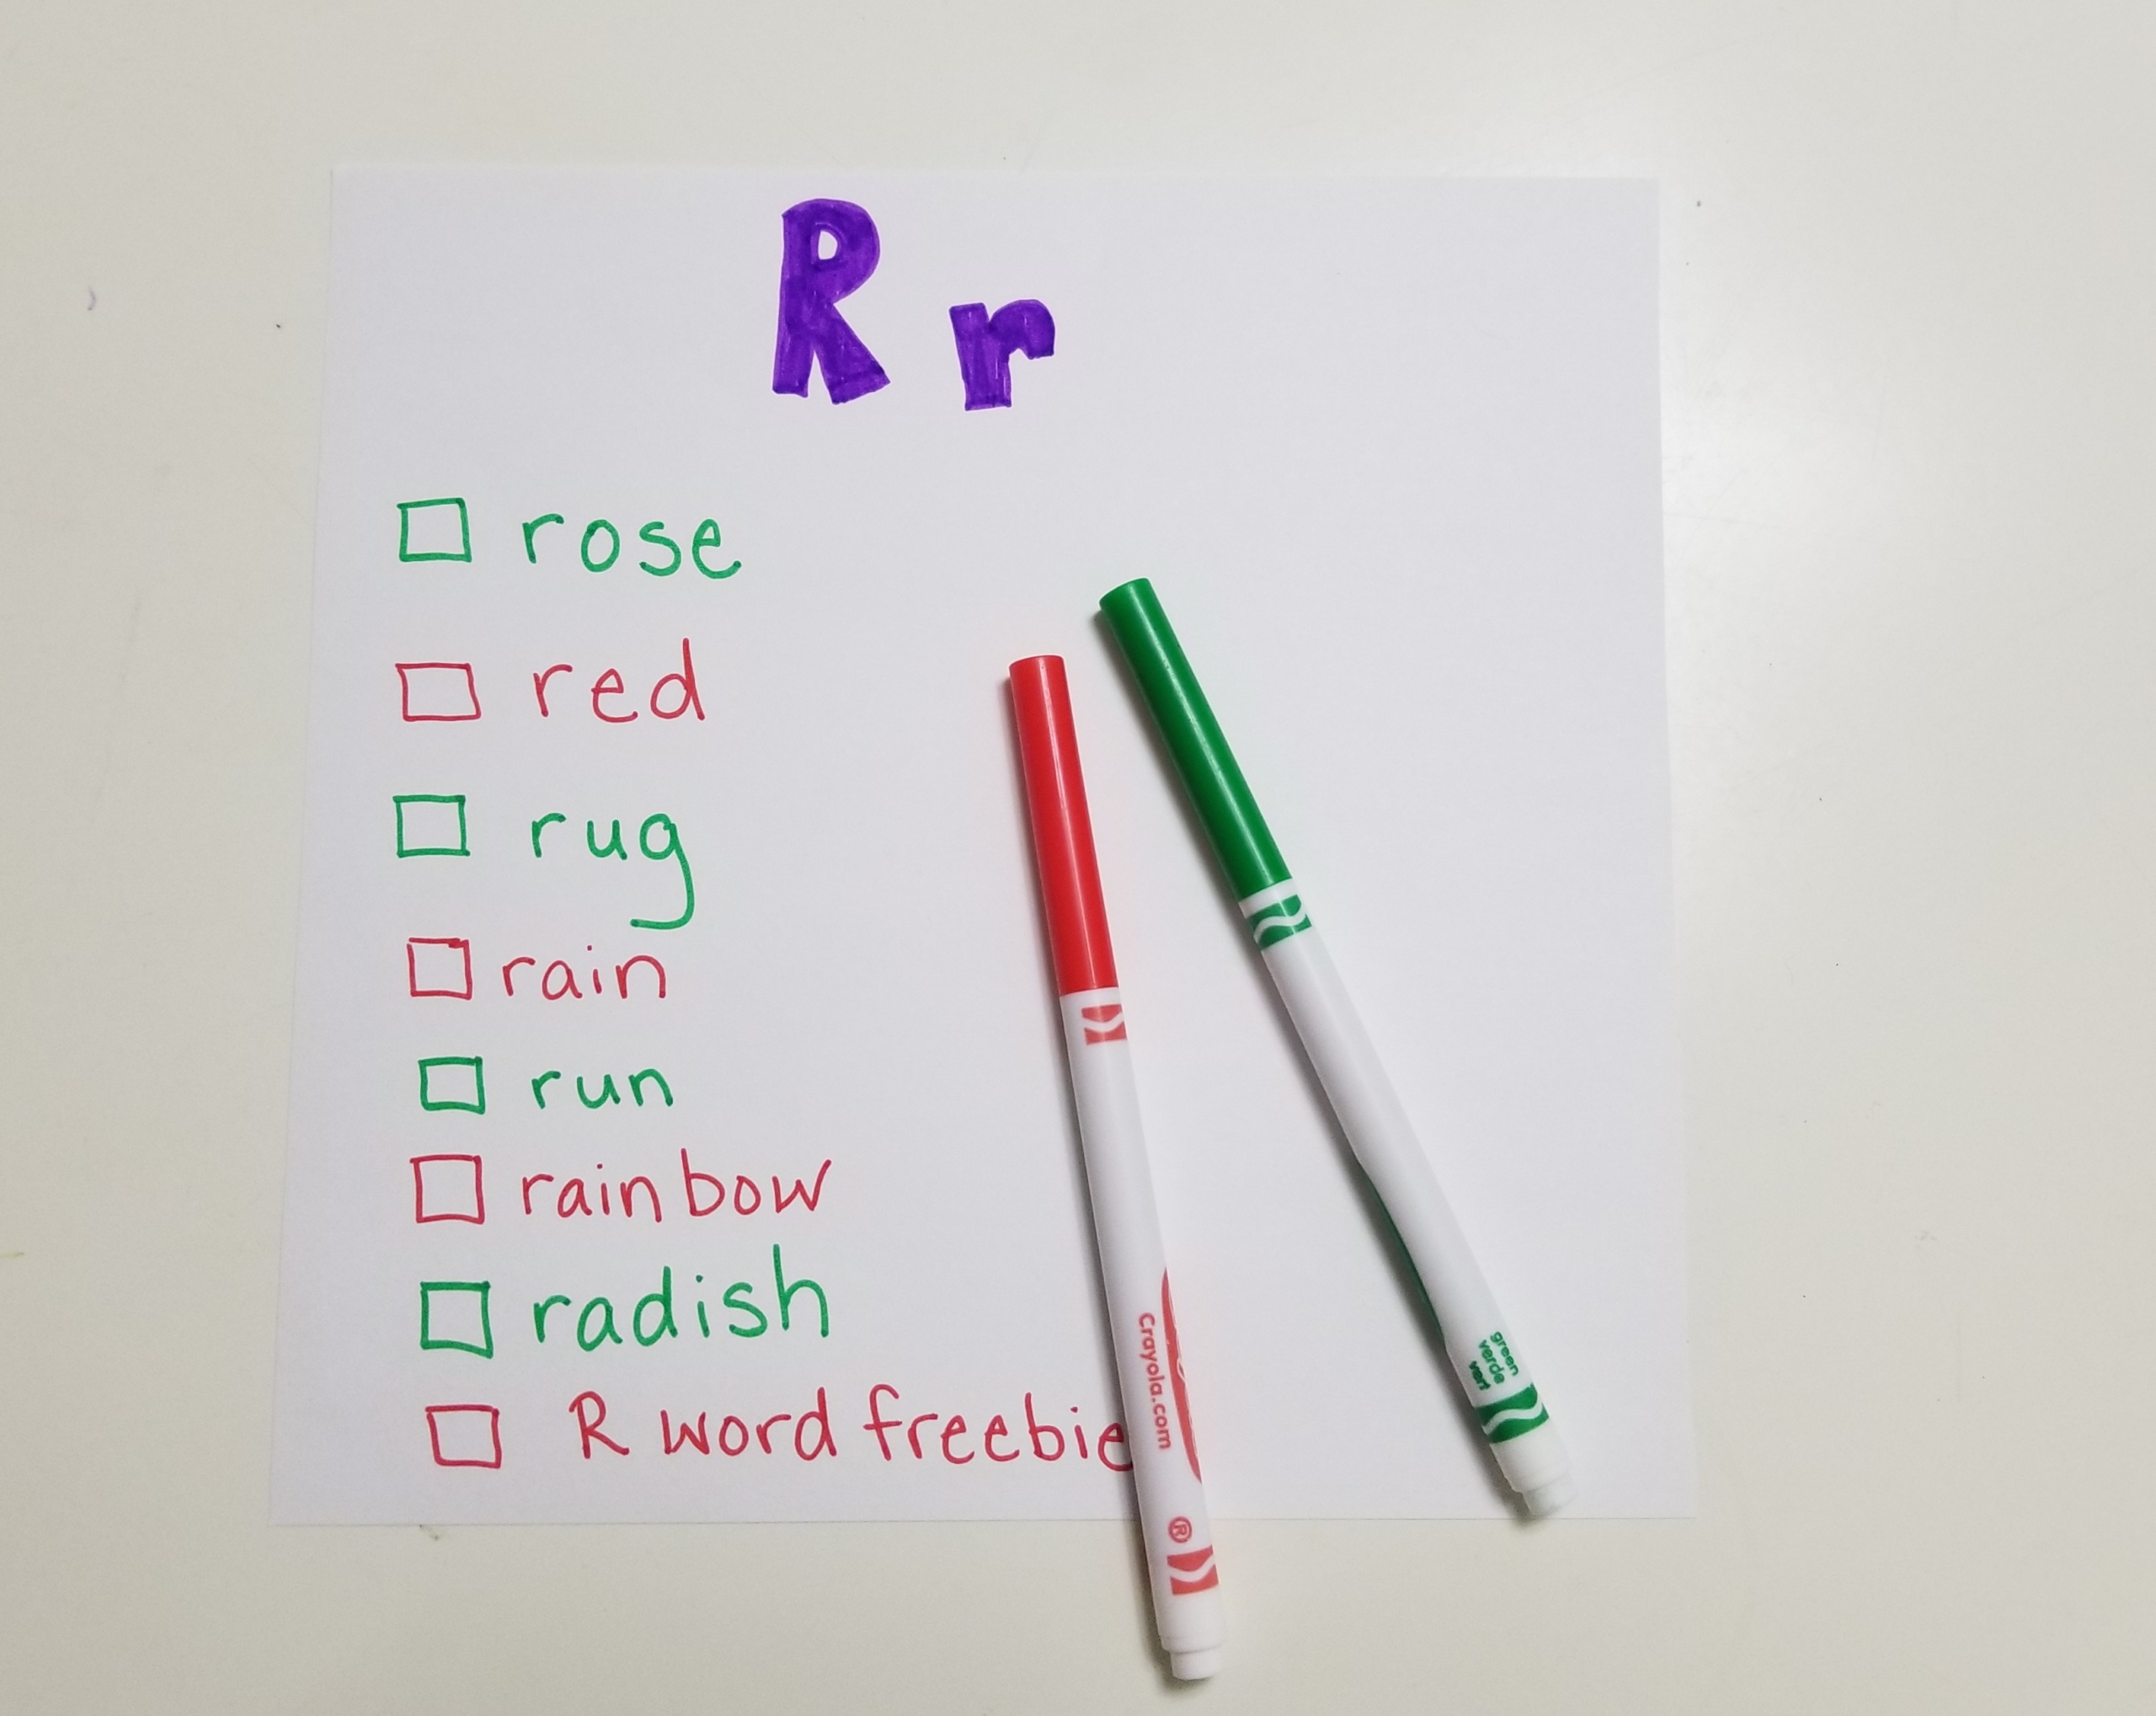
Step 1: Pick out a “letter of the day” with your child. Review the most common sound that letter makes. For example, O as in octopus rather than oval, or C as in cat rather than cent.
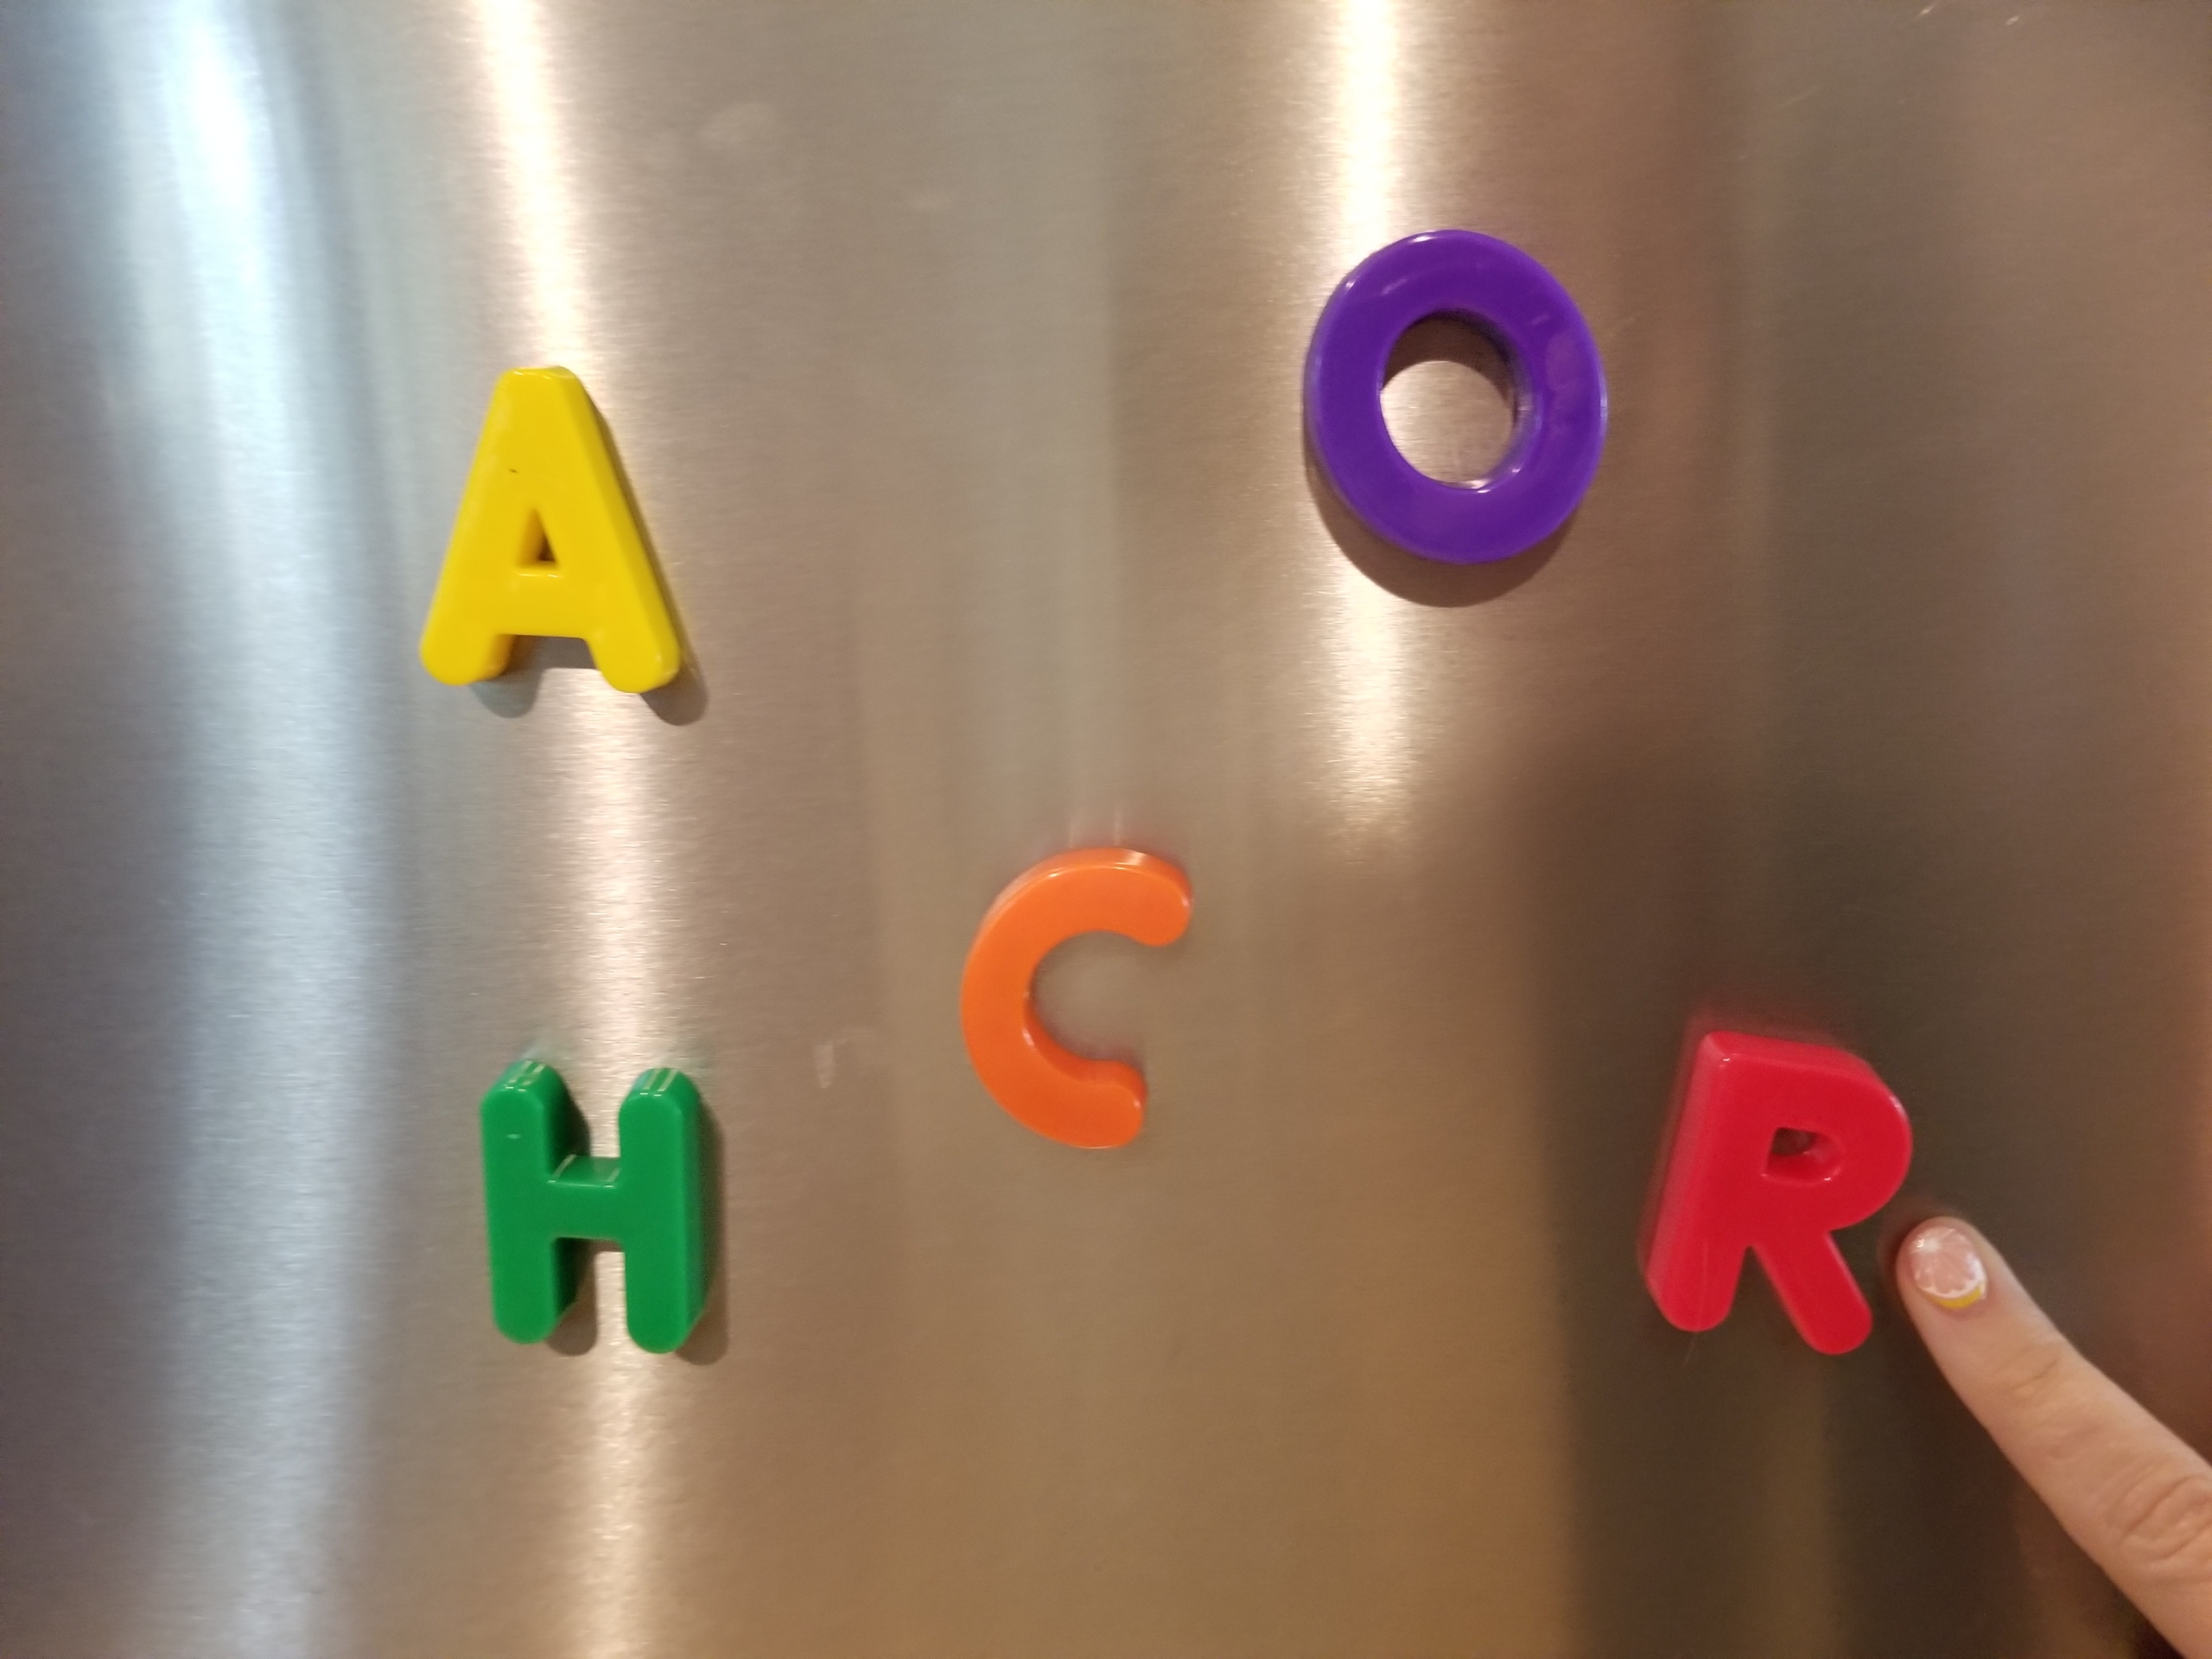
Step 2: With your child, create a list of 5 to 10 things that begin with that sound and that you may encounter during your day. Your list can include anything from objects to colors to names, etc. You can even include the lowercase and uppercase versions of the letter itself, so that you and your child can find it on signs, books, or packaging.
Allow your child to illustrate the list, help you write, or write the list independently. This will strengthen their familiarity with the letter and its sound. Plus, it’s fun! Put a checkbox next to each item, so you can mark it off when you find it.
Tip: I like to make sure to include a freebie spot too, in case we come across an unexpected item during our day.
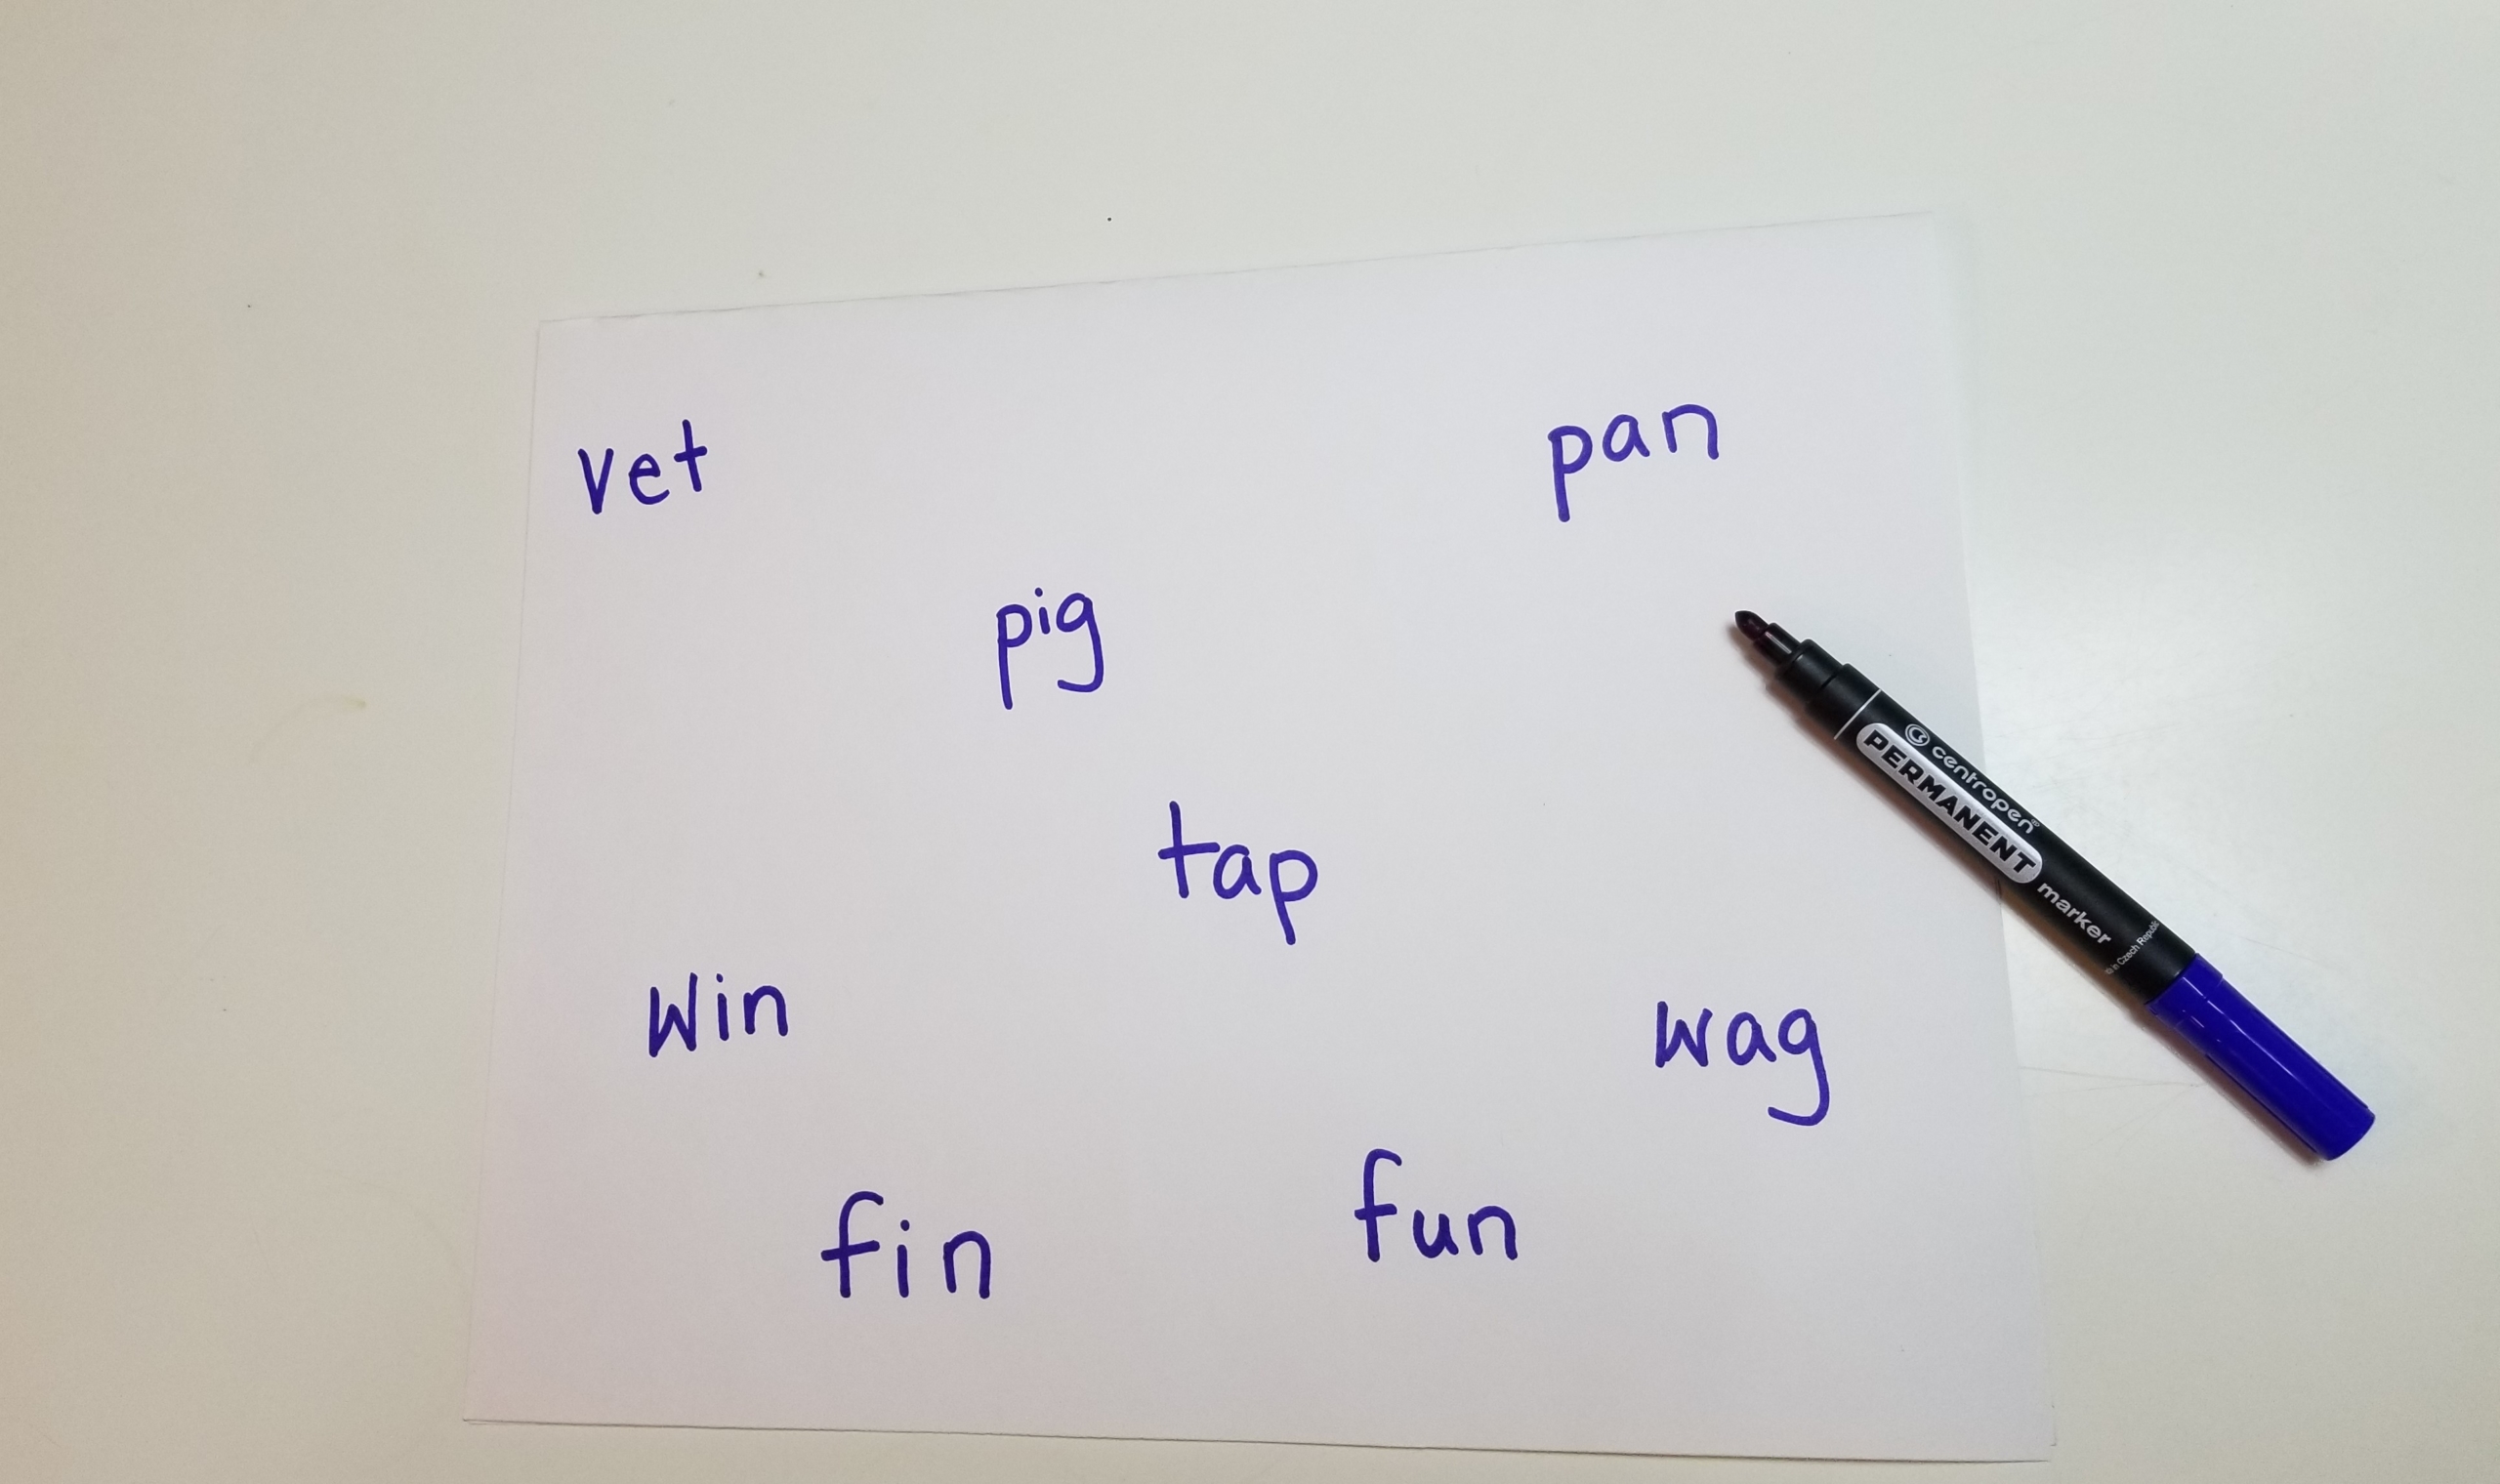
For example, for the letter P we might make a list like this:
- pink
- pillow
- pan
- park
- Peter
- P
- p
- P word freebie
Step 3: Now, the scavenger hunt has begun! Take your list with you throughout the day and ask your child to keep an eye out for the items on the list. Where will you find all these items? At home? At school? At the dentist? You never know where a surprise might pop up.
Bonus: If you feel comfortable letting your child use a camera or borrow your camera phone, I find that taking pictures can be a fun addition. Whenever your child spots the letter or something on the list, have them snap a pic! When you get home, you can sit and look at all the things you found. It gives ample time for bonding and helps deepen their understanding of the letter sound.
How do you keep letter learning fun in your home? Let us know in the comments.
Pin me for reference
I love glitter. Like seriously, l LOVE glitter. In my classroom there’s almost always a reason to add a little sparkle to our learning experiences. And because kids love glitter, too, I’ve developed a great Fourth of July reading activity that incorporates loads of it. We’re going to learn our letters with the sparkliest way of celebrating the Fourth—fireworks!
For an extra learning boost (and extra fun), we’ll add in my favorite Fourth of July book, Apple Pie 4th of July by Janet S. Wong. This book features a young girl, the children of Chinese immigrants. She spends the day working in her parents’ store instead of at the parade, and eating noodles instead of apple pie. Feeling like her parents don’t understand what it means to be American and to celebrate the Fourth, she becomes downcast. But soon enough she learns that there’s no right way to be American, and not one way to celebrate, either.
In this fun Fourth of July firework craft for kids, we’re going to focus on reading what are called consonant-vowel-consonant words, or CVC words. CVC words are words like mad or big. They’re easy to sound out for early readers, and children are often familiar with them. CVC words are a big part of learning to read, and this craft gives young readers a fun way to interact with them.
Materials:
- Glitter
- Kids paint (one color or multiple)
- Plate(s) (to hold the paint)
- Paper towel / toilet paper tube(s)
- Scissors
- Marker
- Paper
Cost: $5-$10 for glitter and paint (or free if you have them on hand!)
Kick off your Fourth of July firework craft with story time: Read Apple Pie 4th of July together (or any Fourth of July book that mentions fireworks!). This is a great opportunity to talk about the ways your family celebrates and ways that other families might celebrate. You can also take a moment at the end to admire the firework illustrations. They’ll make great inspiration for our craft!
Step 1: Write out a selection of around eight CVC words on a piece of paper. Choose some words that use the same letters, to challenge your child to pick the right word among multiple similar options. For example, fin and fun or cat and cut. See the picture for more examples.
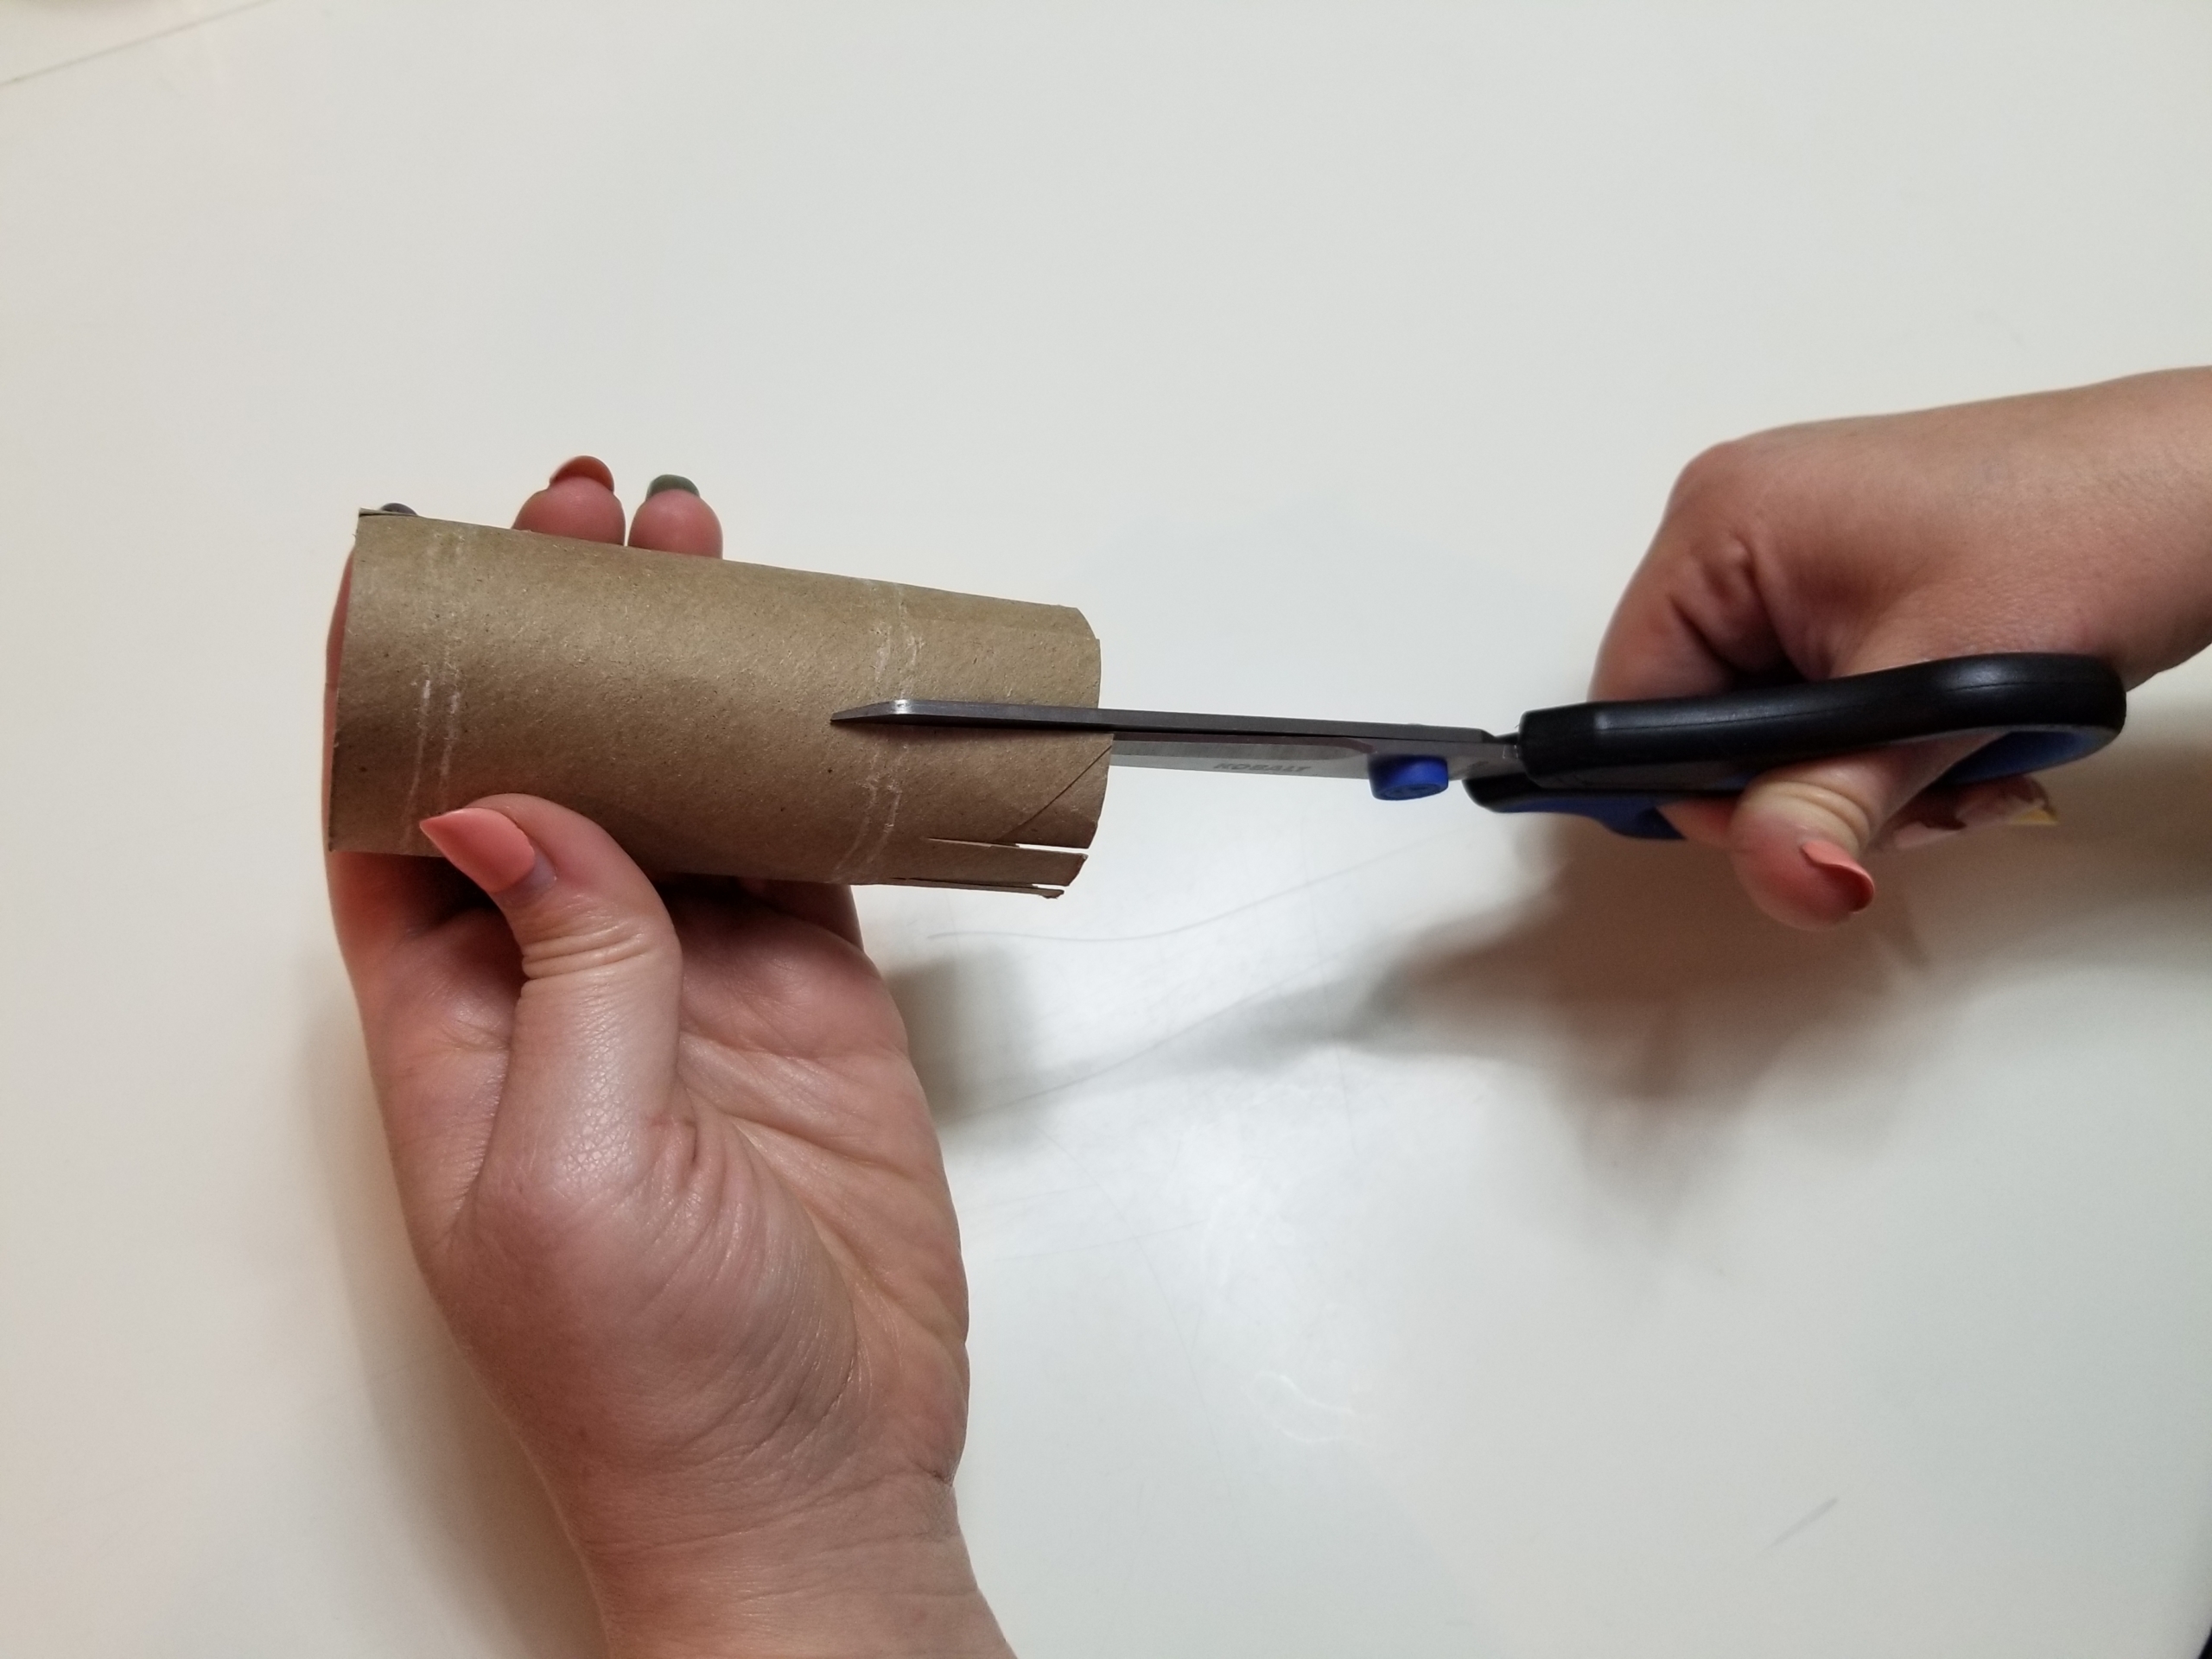
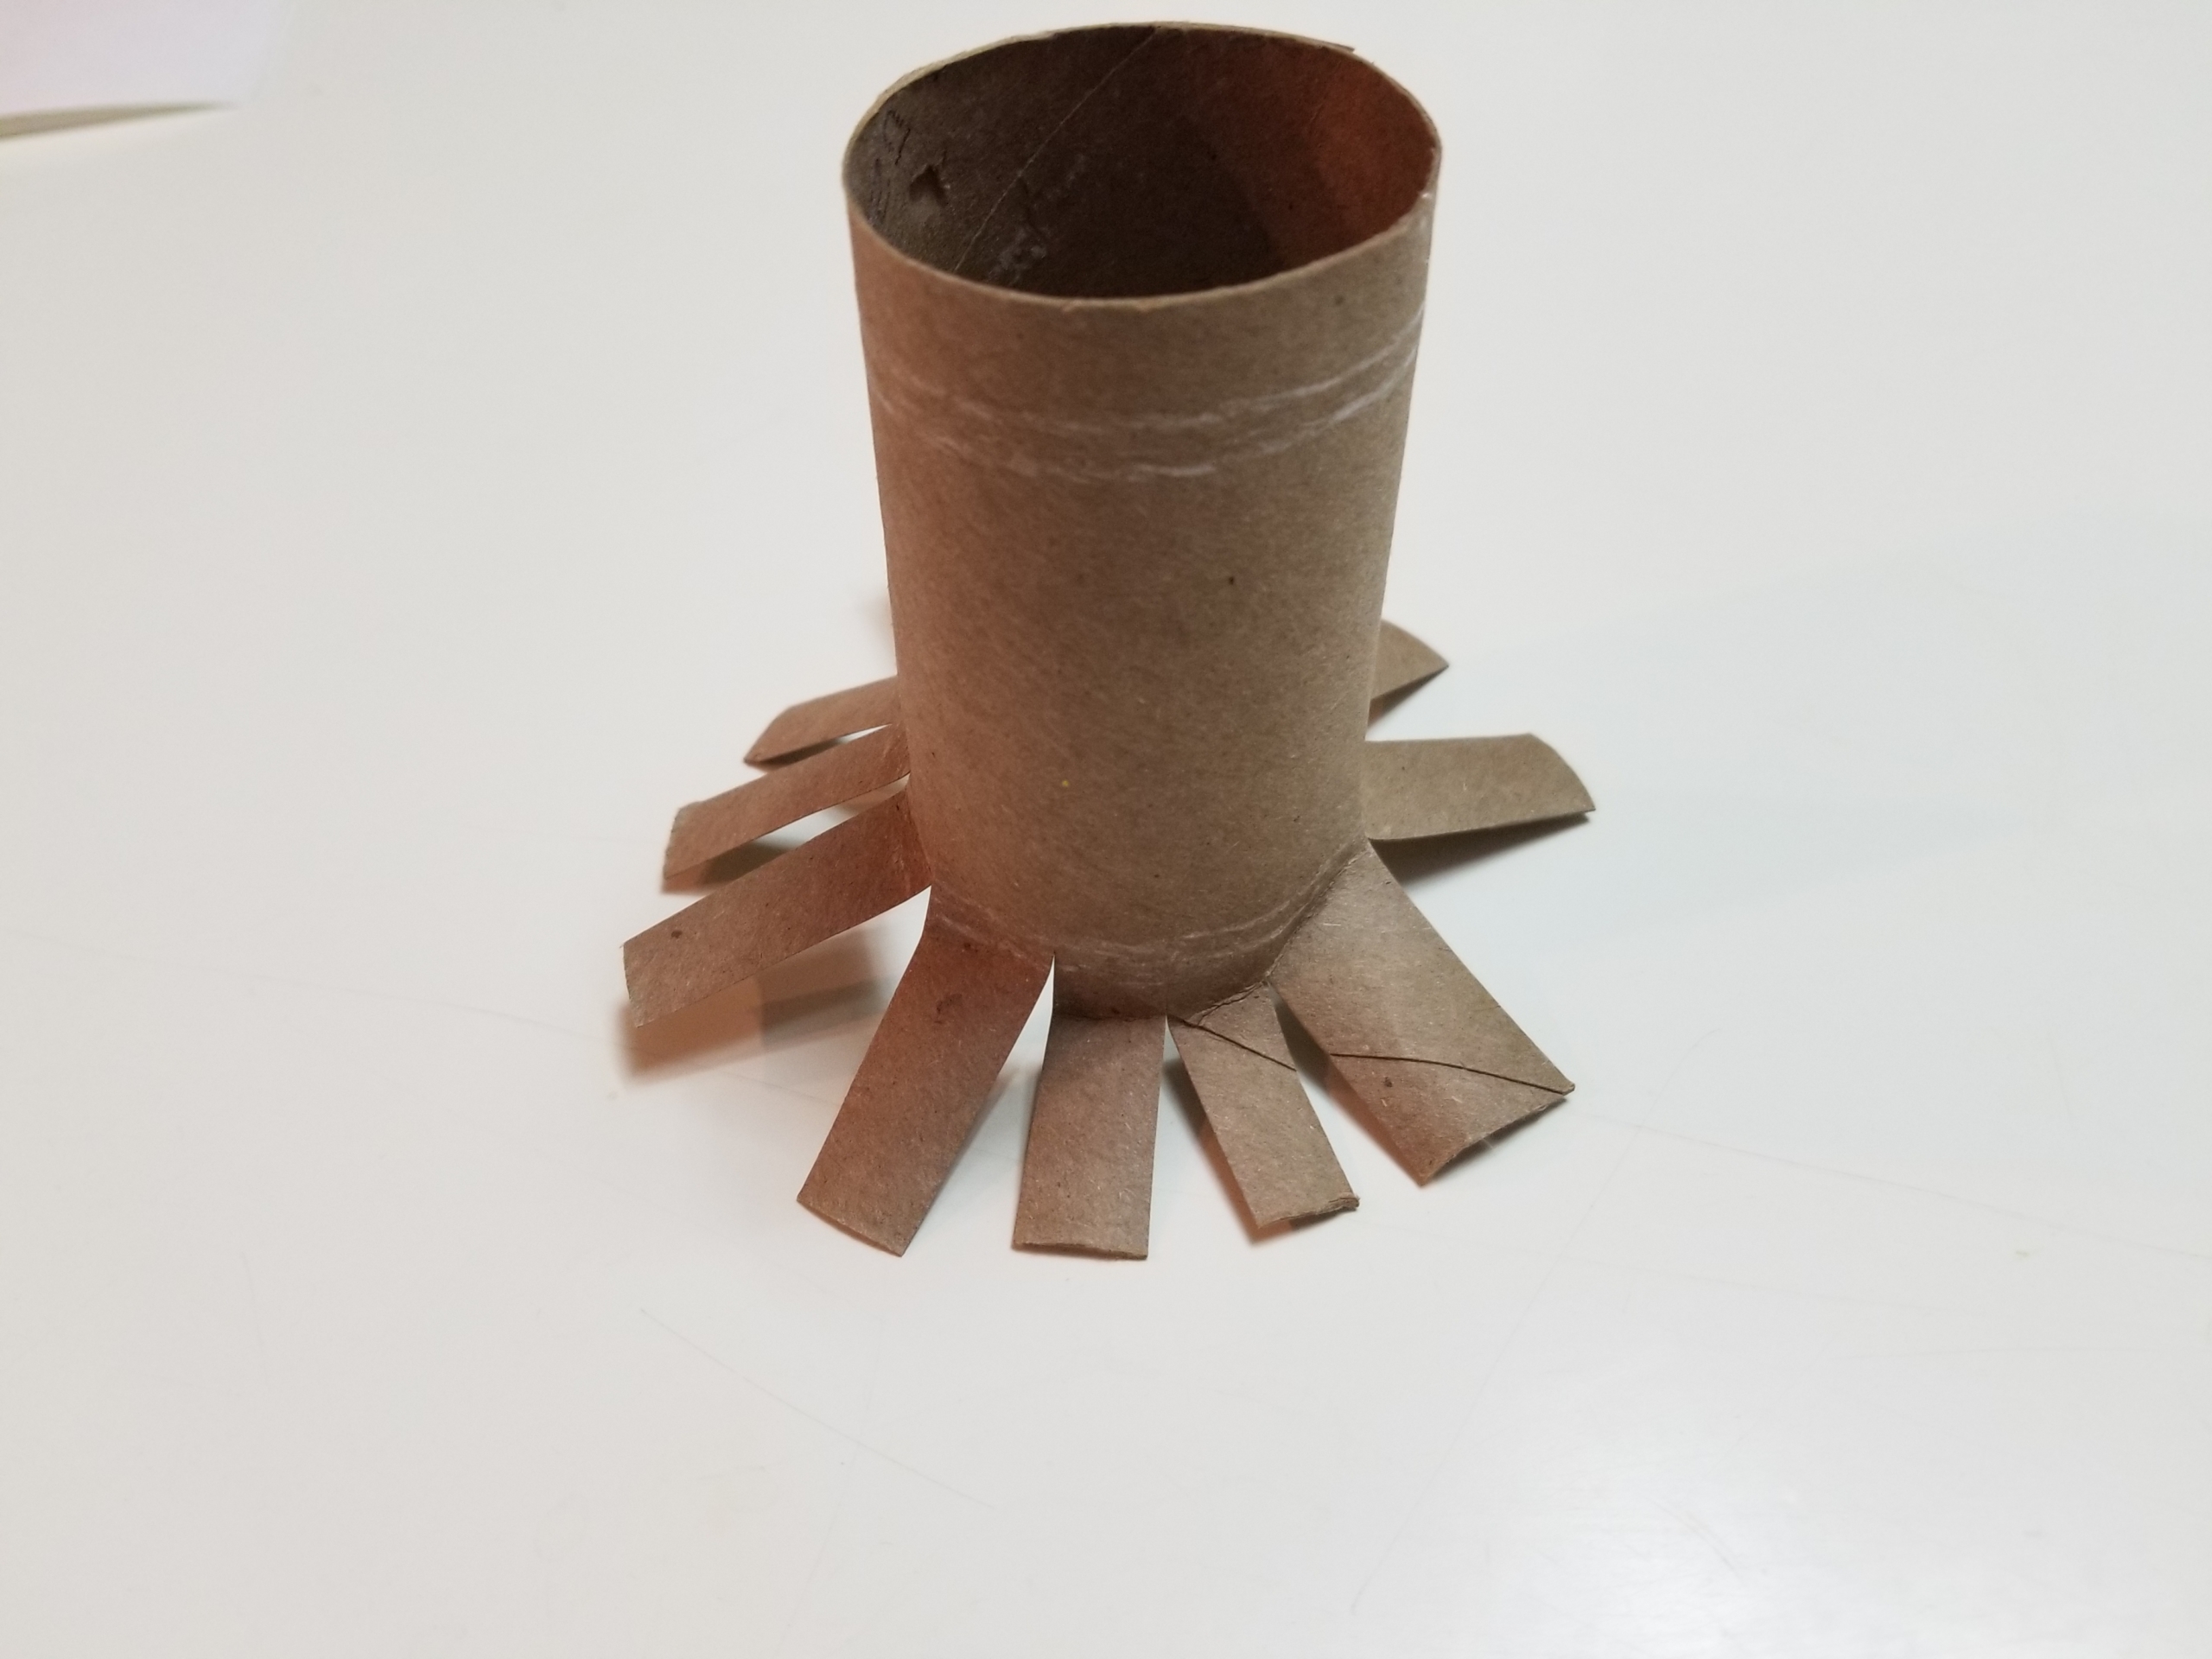
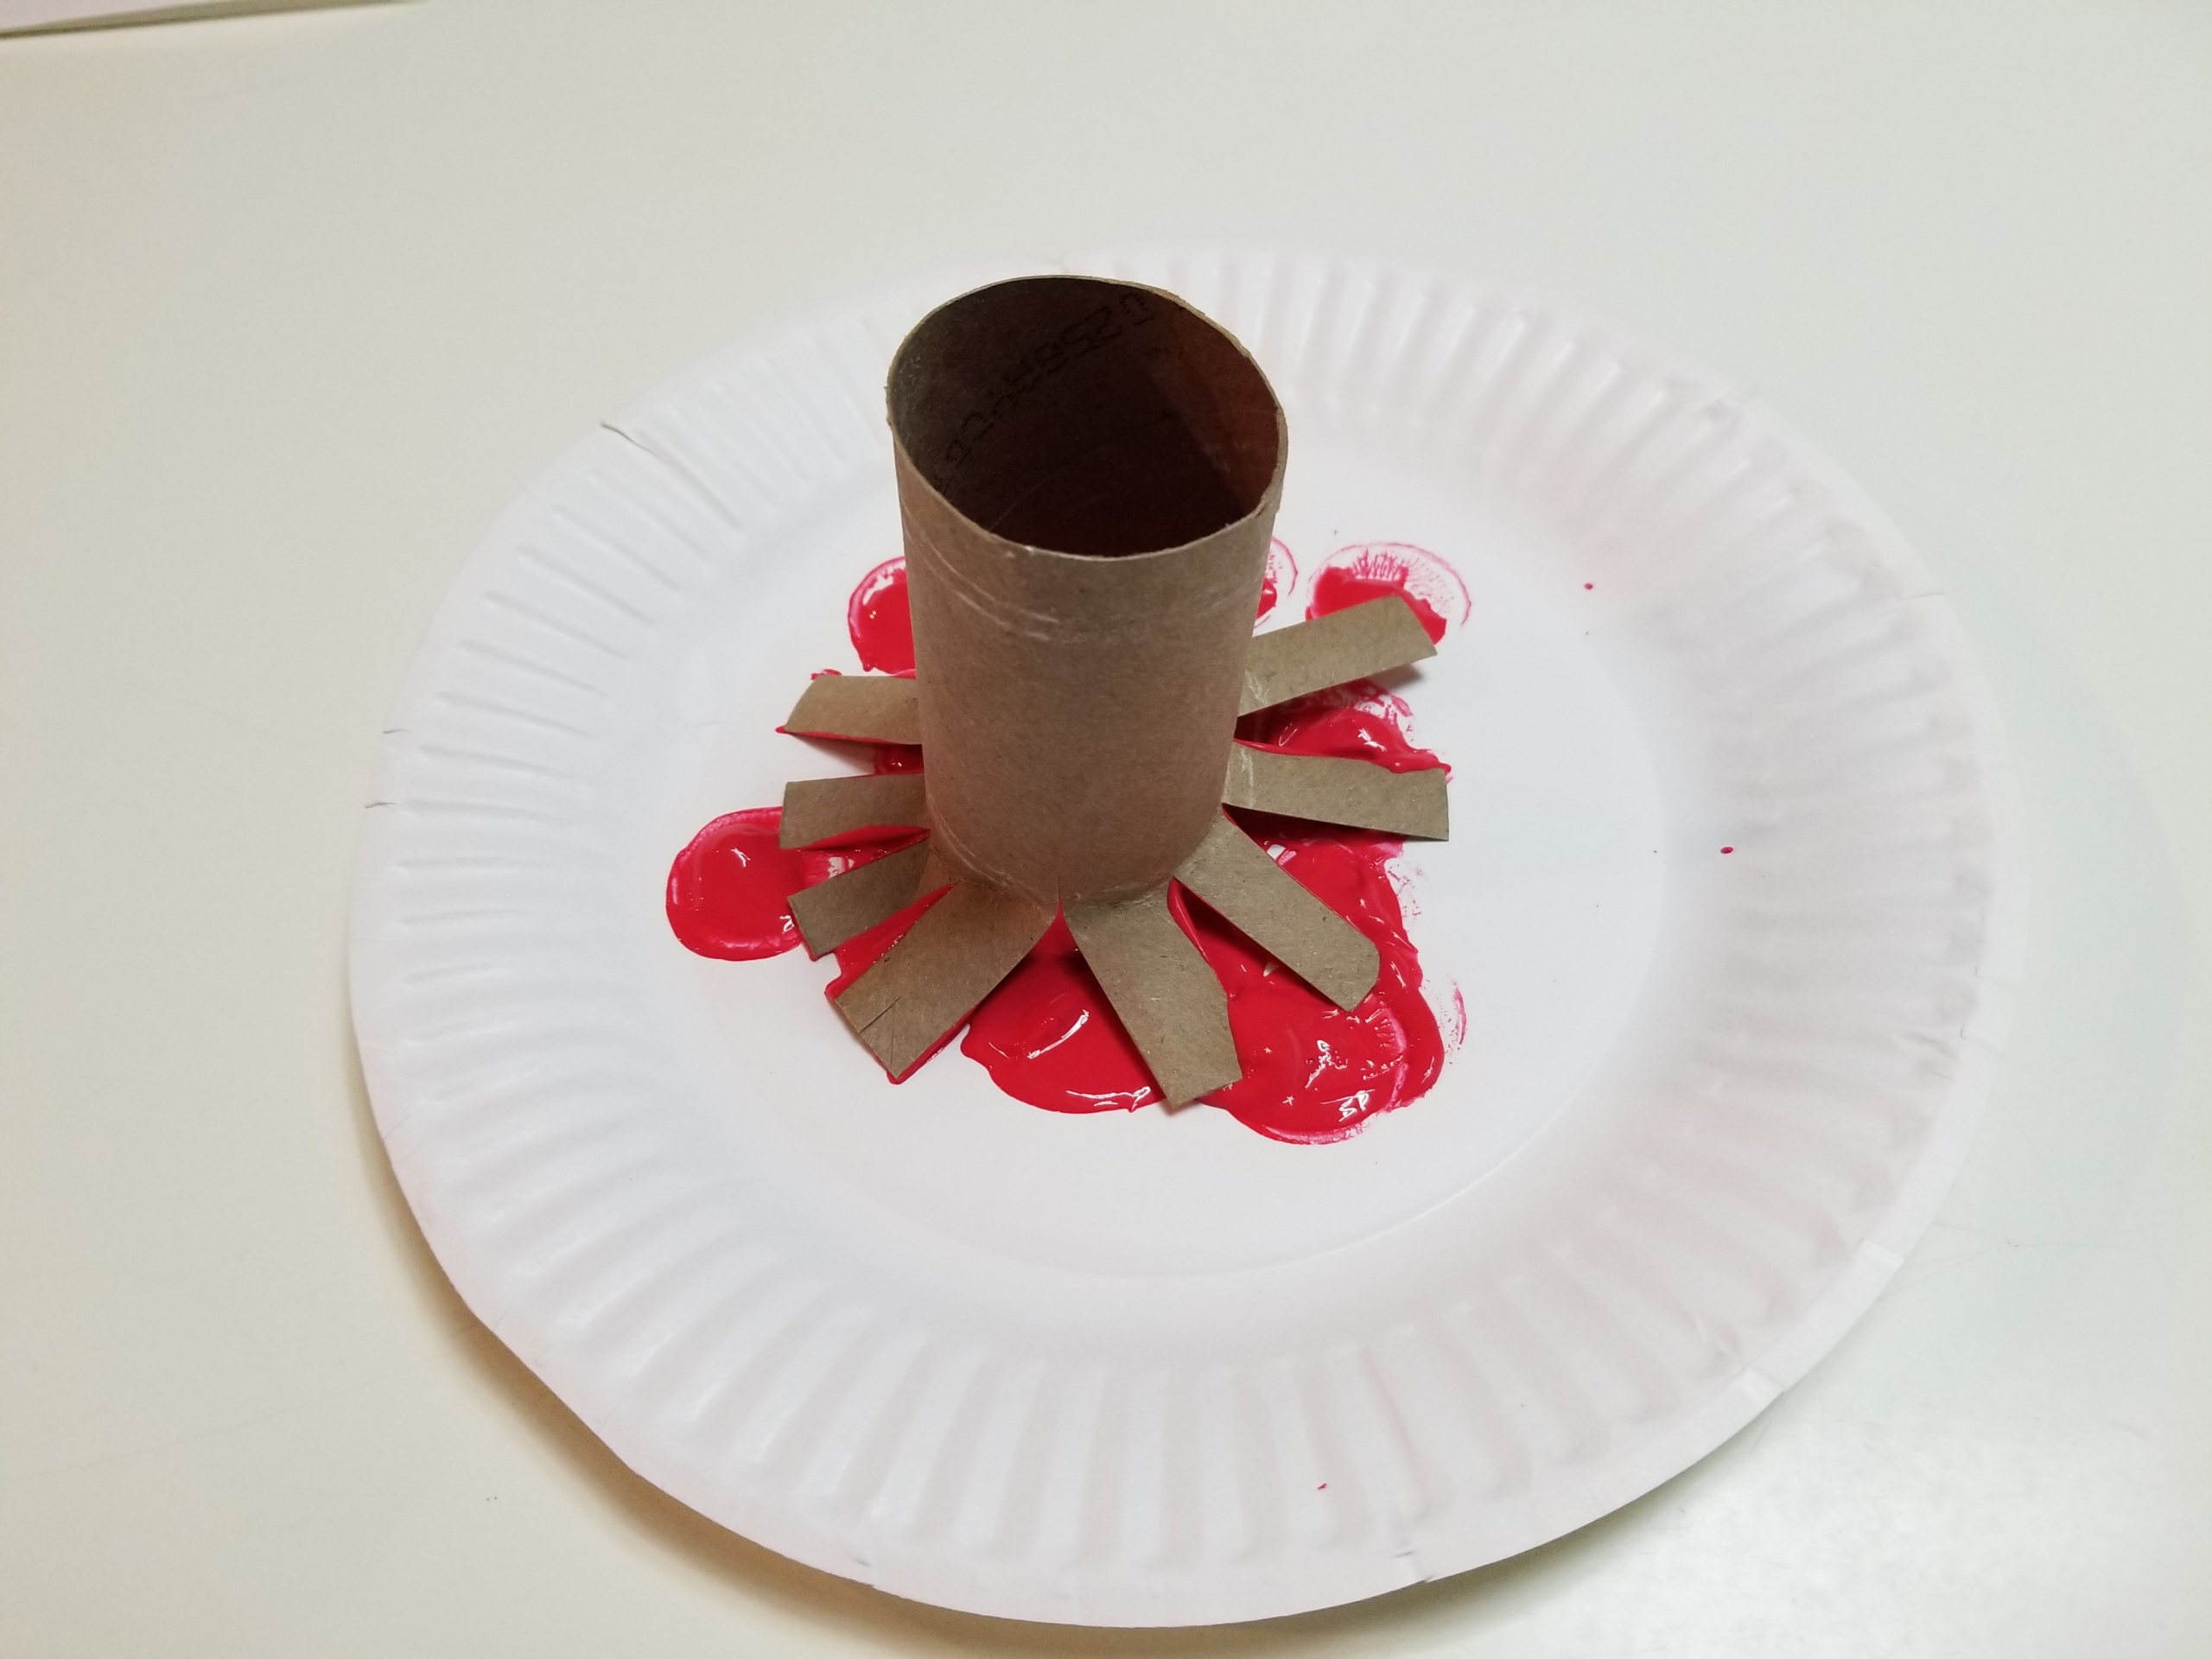
Step 2: Cut slits into the ends of the toilet paper tube, sort of like the petals of a flower, then bend the slits outwards, so they splay open. Now you have your classic fireworks shape! Use more than one tube if you’d like to use multiple colors of paint.
Step 3: Squeeze out some paint onto your plate (or plates if you’re using more than one color). I typically choose red or blue, but fireworks come in almost every color, so feel free to be as playful as you like!
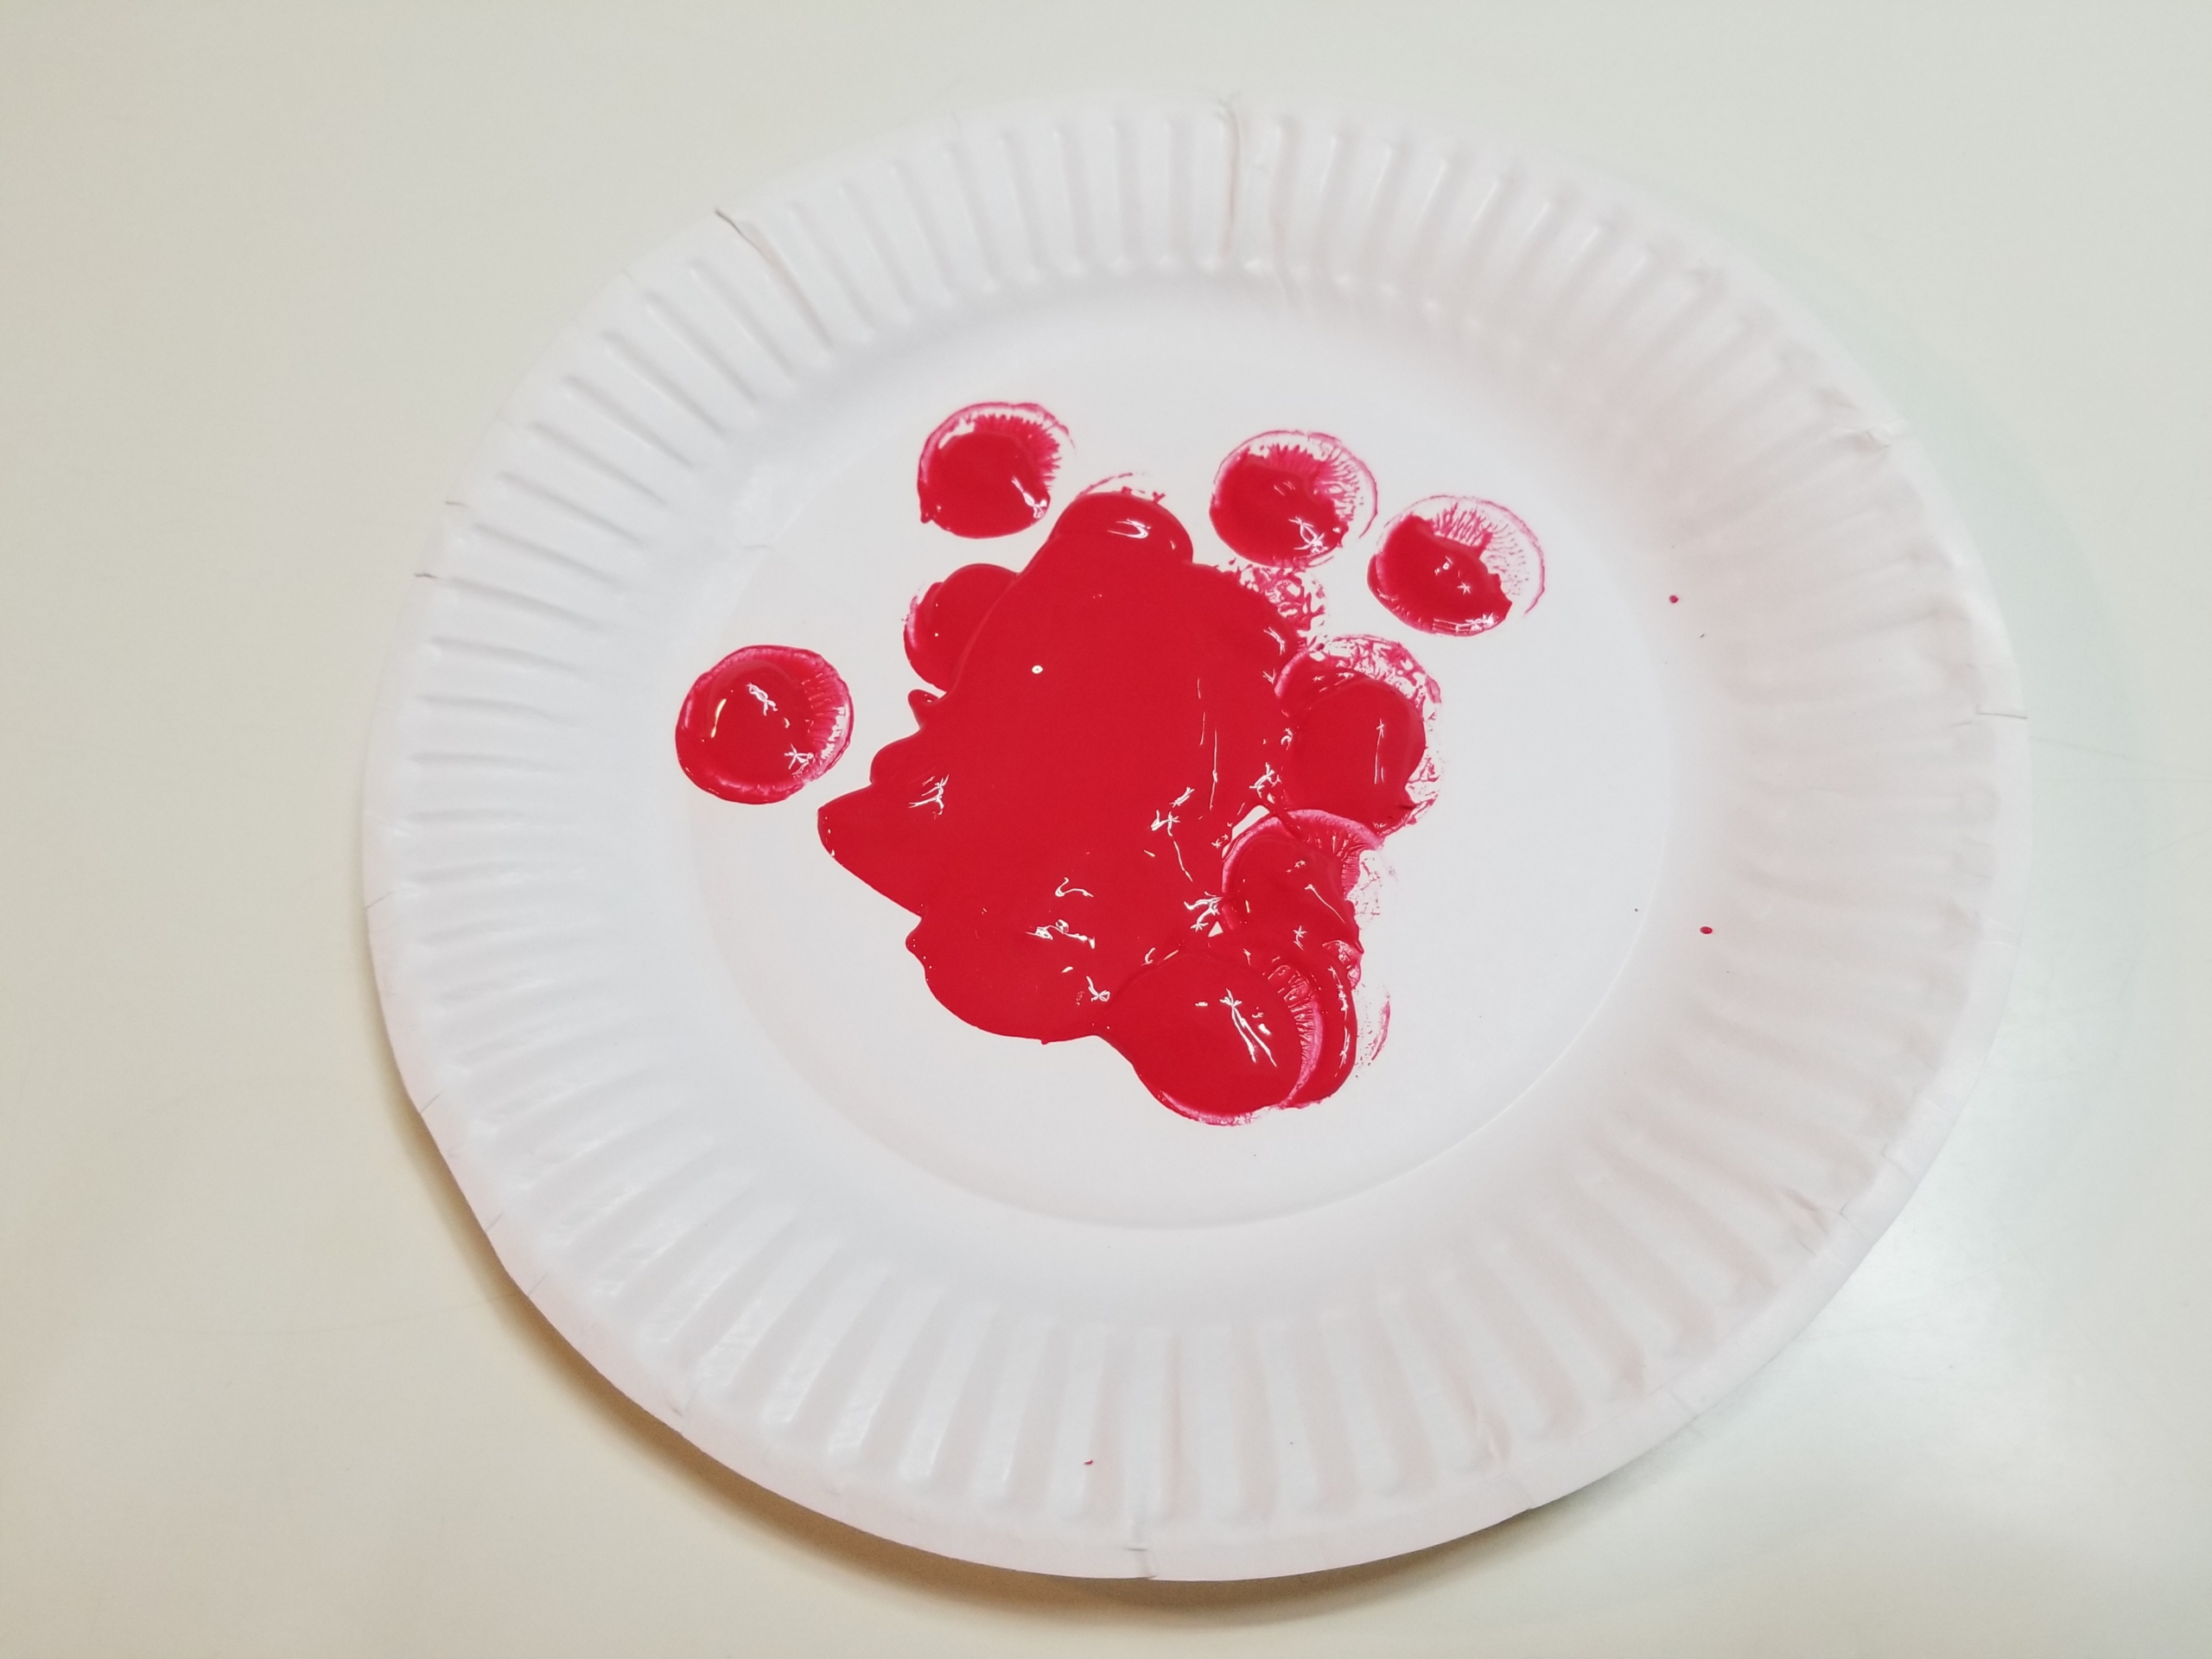
Step 4: Have your child press the toilet paper tube into the paint. Make sure to cover as much of the slits in paint as possible. Squish it around!
Step 5: Call out words that are written on the paper. Have your child take the time to sound out the words and find the right one. Then they can stamp the word with their firework!
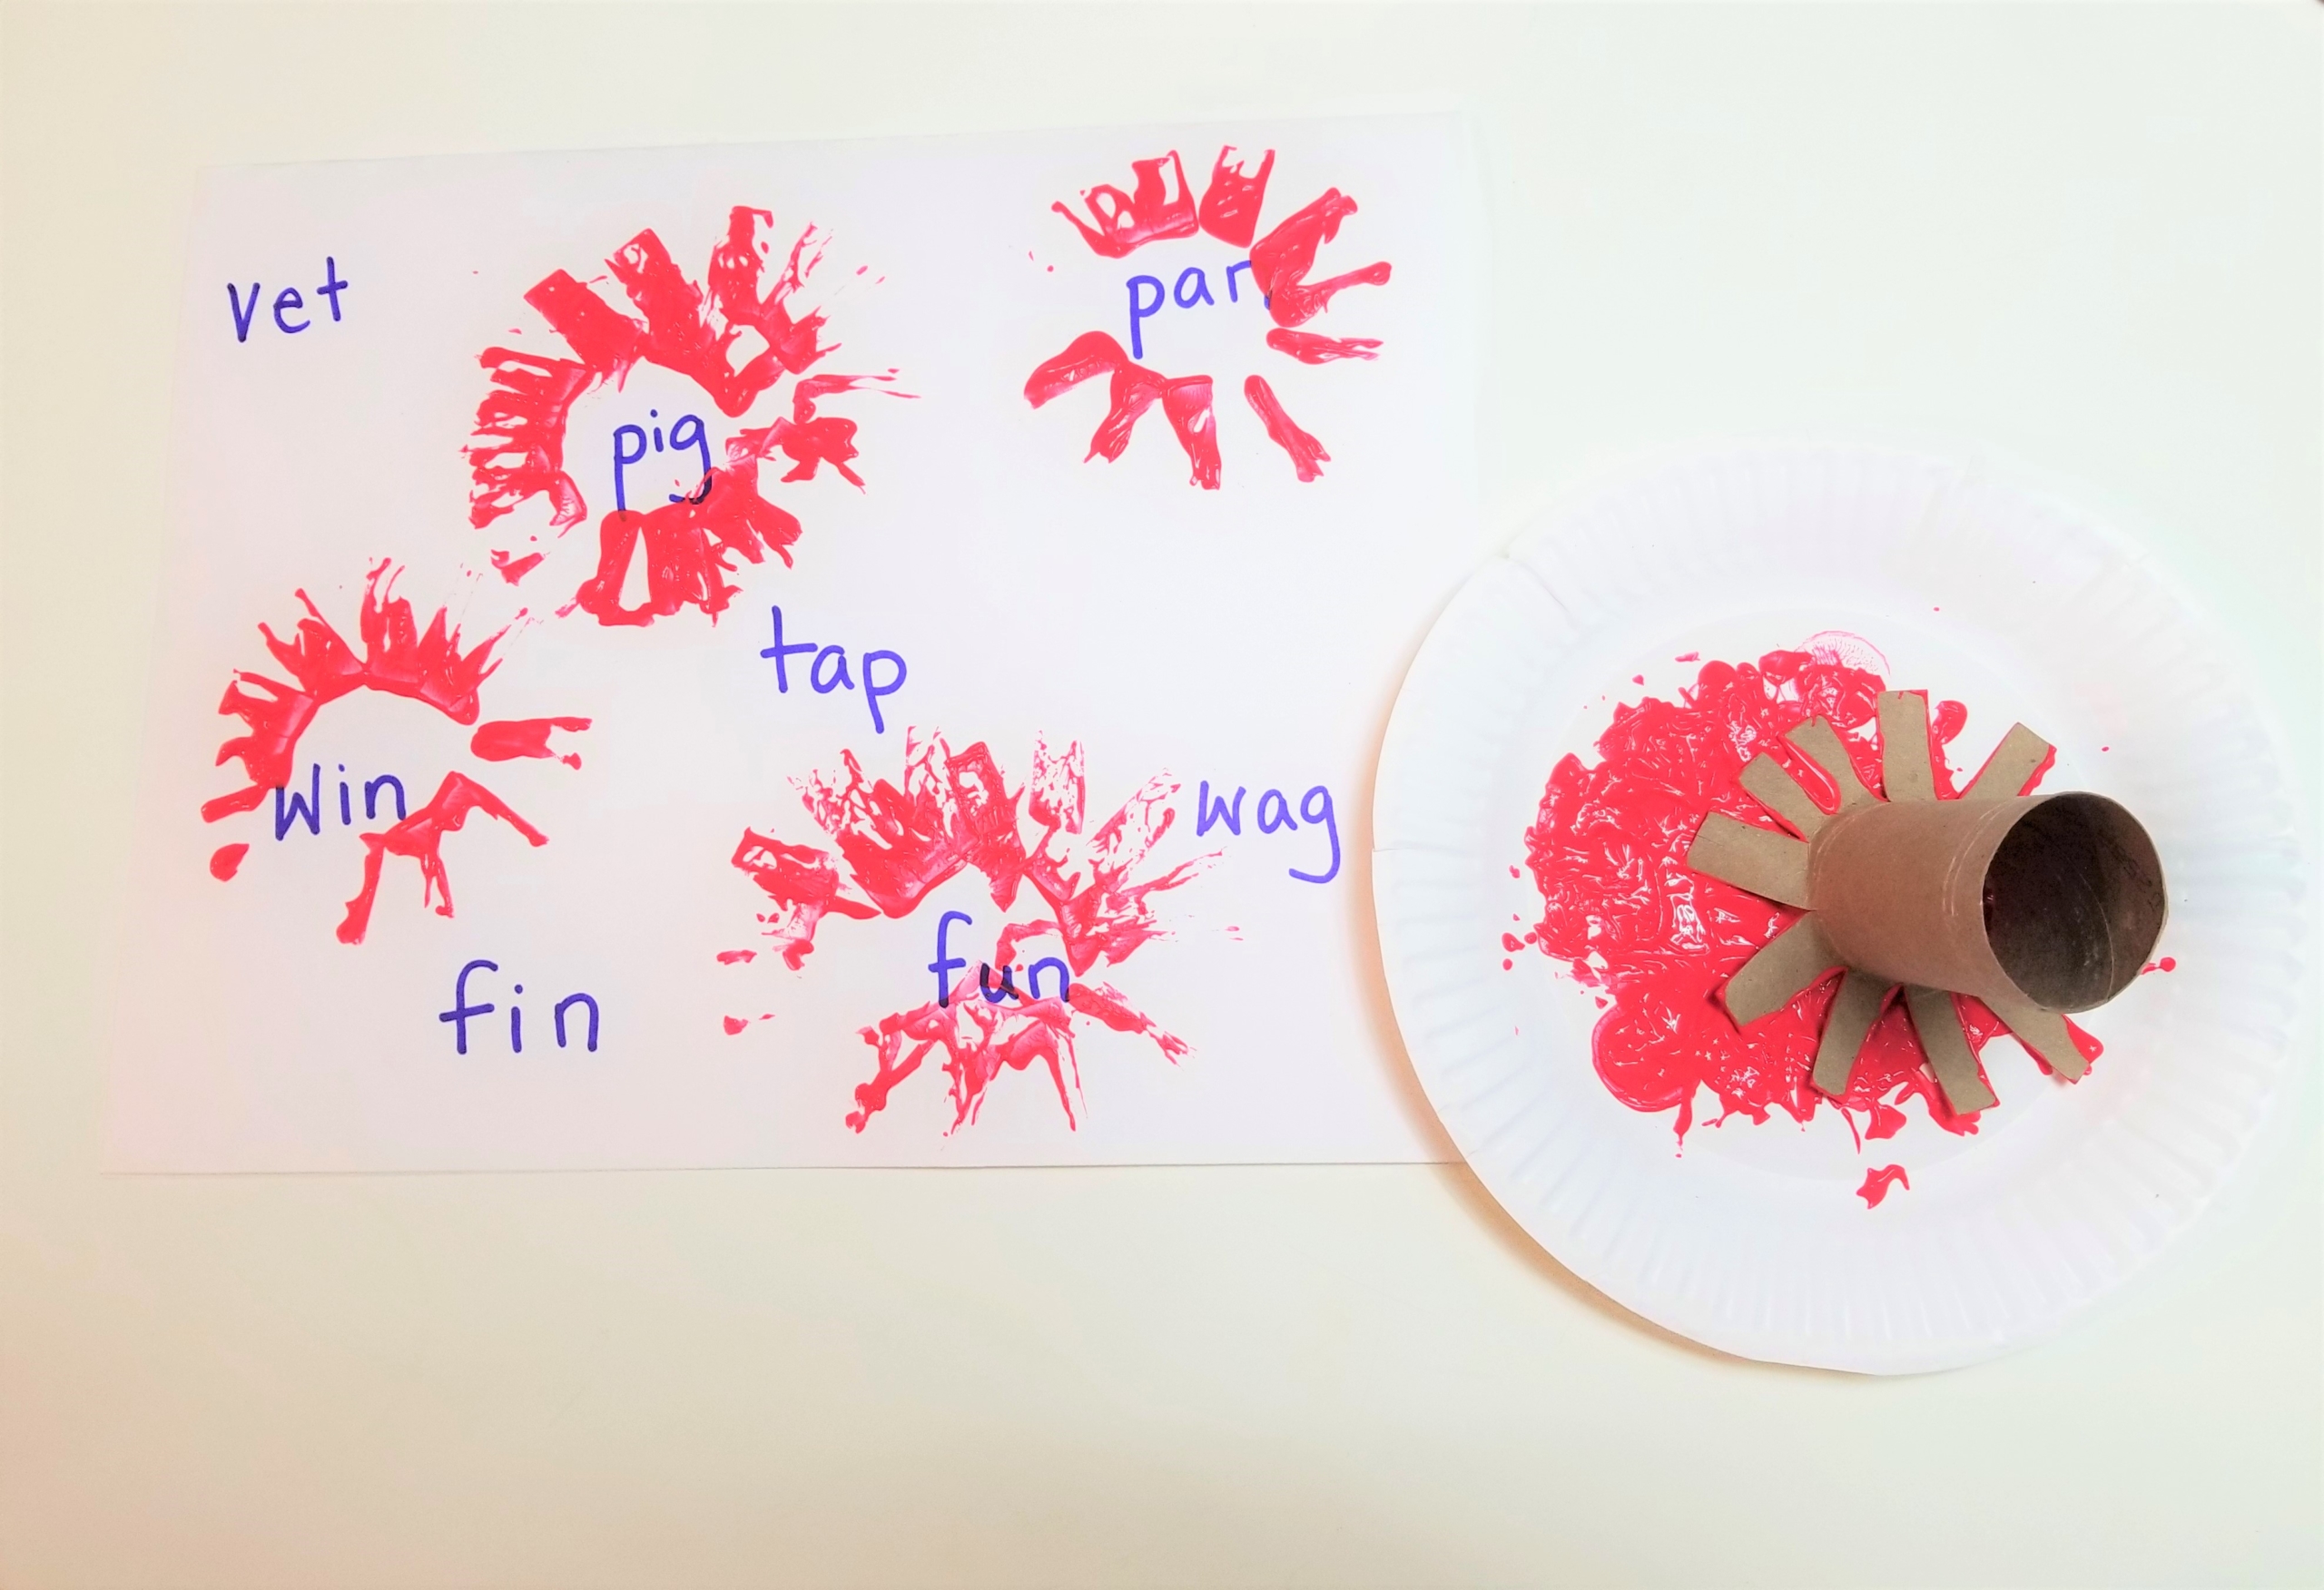
Step 6: When they’ve found all the words, it’s time to pour on the glitter. You can use a little or a lot! (I tend to vote for a lot.) The paint acts as glue and keeps the glitter in place.
Then tilt the paper and let the excess glitter slide off. Ta da! You’ve got a star-spangled spelling lesson!

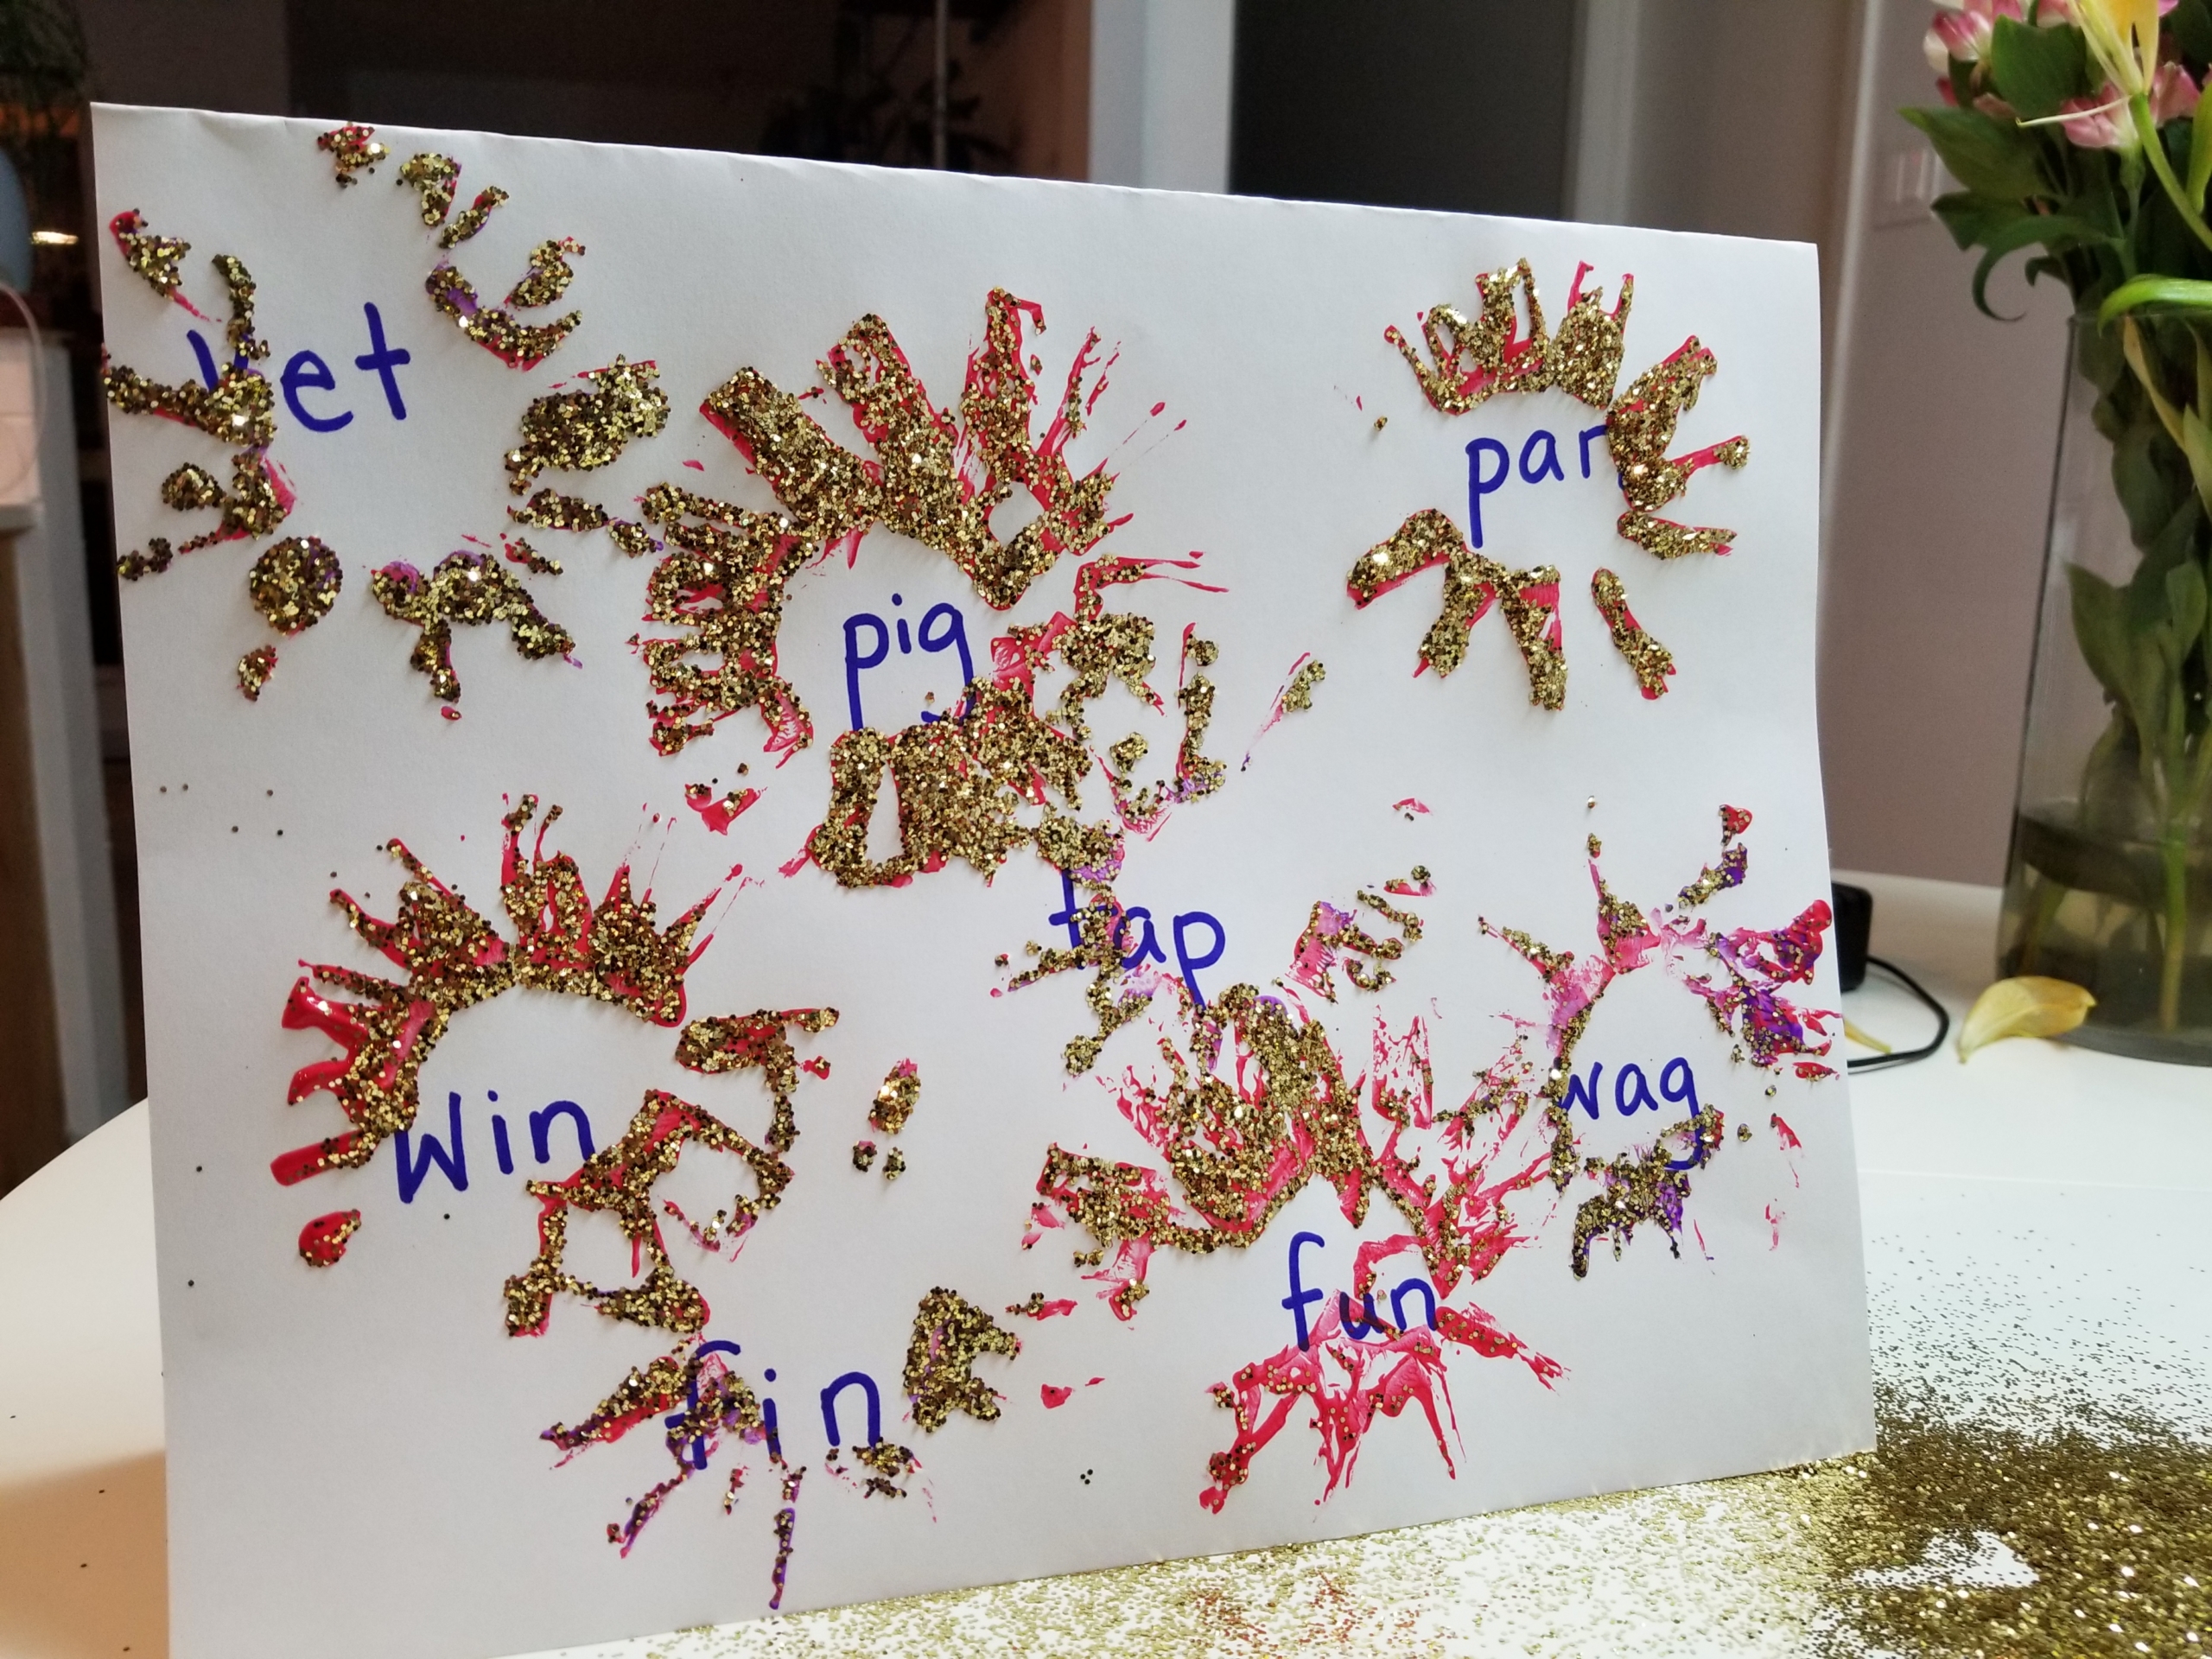
What I love about this activity (aside from the glitter) is that it scales really well. Whether you’re doing it with one child, in a small group, or with a whole party, you can do this craft! For children who might struggle with art due to sensory processing issues, this allows them to make art without having to get the paint on themselves.
Adaptation for younger and older kids: You can change the target from CVC words to letters of the alphabet for younger children or high-frequency words for more experienced readers.
Pin me for reference
*Photos by Chrysta Naron.
Summertime is almost here! Whether for your family that means hitting the road, getting outside, or lounging at home, we have some tips to keep your little ones learning at the same time. Hint: The key to summer learning is the same as the key to all learning with preschoolers—keep it fun. With that in mind, enjoy this roundup of fun summer learning games, activities, and more for preschoolers and young elementary school children.
Mix Summer Learning into Your Preschooler’s Outside Time
Getting your child kindergarten-ready (like helping your child succeed once they’re in school) requires a year-round commitment. But this definitely does not mean dark days drilling at a desk while your child pines for some play time. With just a little creativity, you can fit lots of letter learning and reading skills into outdoor play.
Try this easy DIY letter sounds soccer game, or check out our post about alphabet hopscotch and letter scavenger hunts for more inspiration. A nature walk story time is also a fun and special way to build literacy while enjoying time outside together, and has the added benefit that time in green spaces may help active kids focus.
Play Board Games and Card Games for Fun Letter Learning
So many board games include letter learning and simple reading skills. Sitting down to play any game that involves recognizing letters or words is excellent for building some learning fun into your summer. Check out our list of good educational board games to get you started.
You can even help your preschooler make your family’s own alphabet board game to maximize the learning and customize your fun. If your little one loves card games, you’ll also want to try this teacher-created rhyming version of Go Fish or our fun letter-learning adaptation of the favorite kids’ card game of War.
Do Summer Learning Crafts with Your Preschooler
Young kids love crafts! Whether your child is more into drawing, gluing, cutting, or building, there are endless super fun activities you can do with them that will also teach them crucial pre-reading skills. Our literacy activities and book crafts sections include loads of ideas.
For a start, check out our post on using playdough to teach letters. This fortune-teller craft is a perennial kid favorite, too, and crafty kids will like making word-family flowers as well. You can also help your child make an adorable little DIY accordion book to fill with an illustrated story of their own invention.
Take Summer Learning on the Road
If you’re going to travel this summer, you’ll need a plan to keep your child entertained in the car or plane. And guess what? It’s a great time to sneak in some more educational fun. From 20 Questions to Mad Libs, lots of favorite travel games can pack a powerful learning punch. Read our tips for educational road trip games for ideas and advice.
You can also help your child make a DIY activity book to keep them busy (and writing!) on the go. And we have some tutorials to make super cute and easy pencil cases to take with you, too—like this popular recycled pencil case and the convenient duct-tape pencil bag. We also recommend delving into the power of storytelling to build oral language skills for when you’re behind the wheel or otherwise unable to engage your child with books and paper. Audiobooks for kids can be a lifesaver on long drives, too, and add in more story time to your travel.
Read, Read, and Read Some More
And, of course, don’t forget to read and read some more, all summer long! Our post on how to keep kids reading over summer vacation is full of teacher-recommended, parent-tested tips. You’ll also want to scroll through our kids’ books section to find curated picture book lists on a whole range of themes. And our literacy activities section has a number of fun story time games and crafts paired with fabulous preschool reads.
In particular, don’t miss our lists of awesome alphabet books and precious picture books about puppies. Just make sure you check out our science-backed advice for maximizing the benefits of reading out loud to your kids for some simple hacks you can use to get more learning out of story time.
Engaging kids in creative storytelling is a time-honored pastime and a fun, screen-free vacation activity for the whole family. It’s also a powerful tool to build key literacy skills, from vocabulary and comprehension to imagination and fluency. There are so many fun methods to get the stories flowing, including classic games like taking turns saying a word or a sentence to create a goofy group story.
One innovative method we like involves storytelling dice and storytelling cards. These clever tools serve as prompts to help you invent a story on the fly, weave a plot with twists and turns, build suspense, and captivate your little listener. Then you can turn things around, and use them to prompt your child to improvise their own story, developing their voice and confidence along with their storytelling chops.
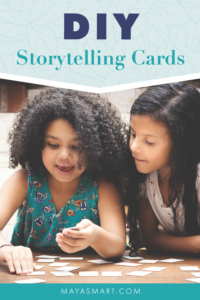
You can buy pre-made storytelling cards from various brands, but the truth is that all you need to make your own DIY storytelling cards is some old playing cards (or just index cards) and a magazine or two. It’s an awesome reuse of those incomplete card decks that any game-loving family acquires over time—read on to keep your mismatched playing cards out of the trash, your carbon footprint down, and your cash in your wallet. Why buy new when you can upcycle?
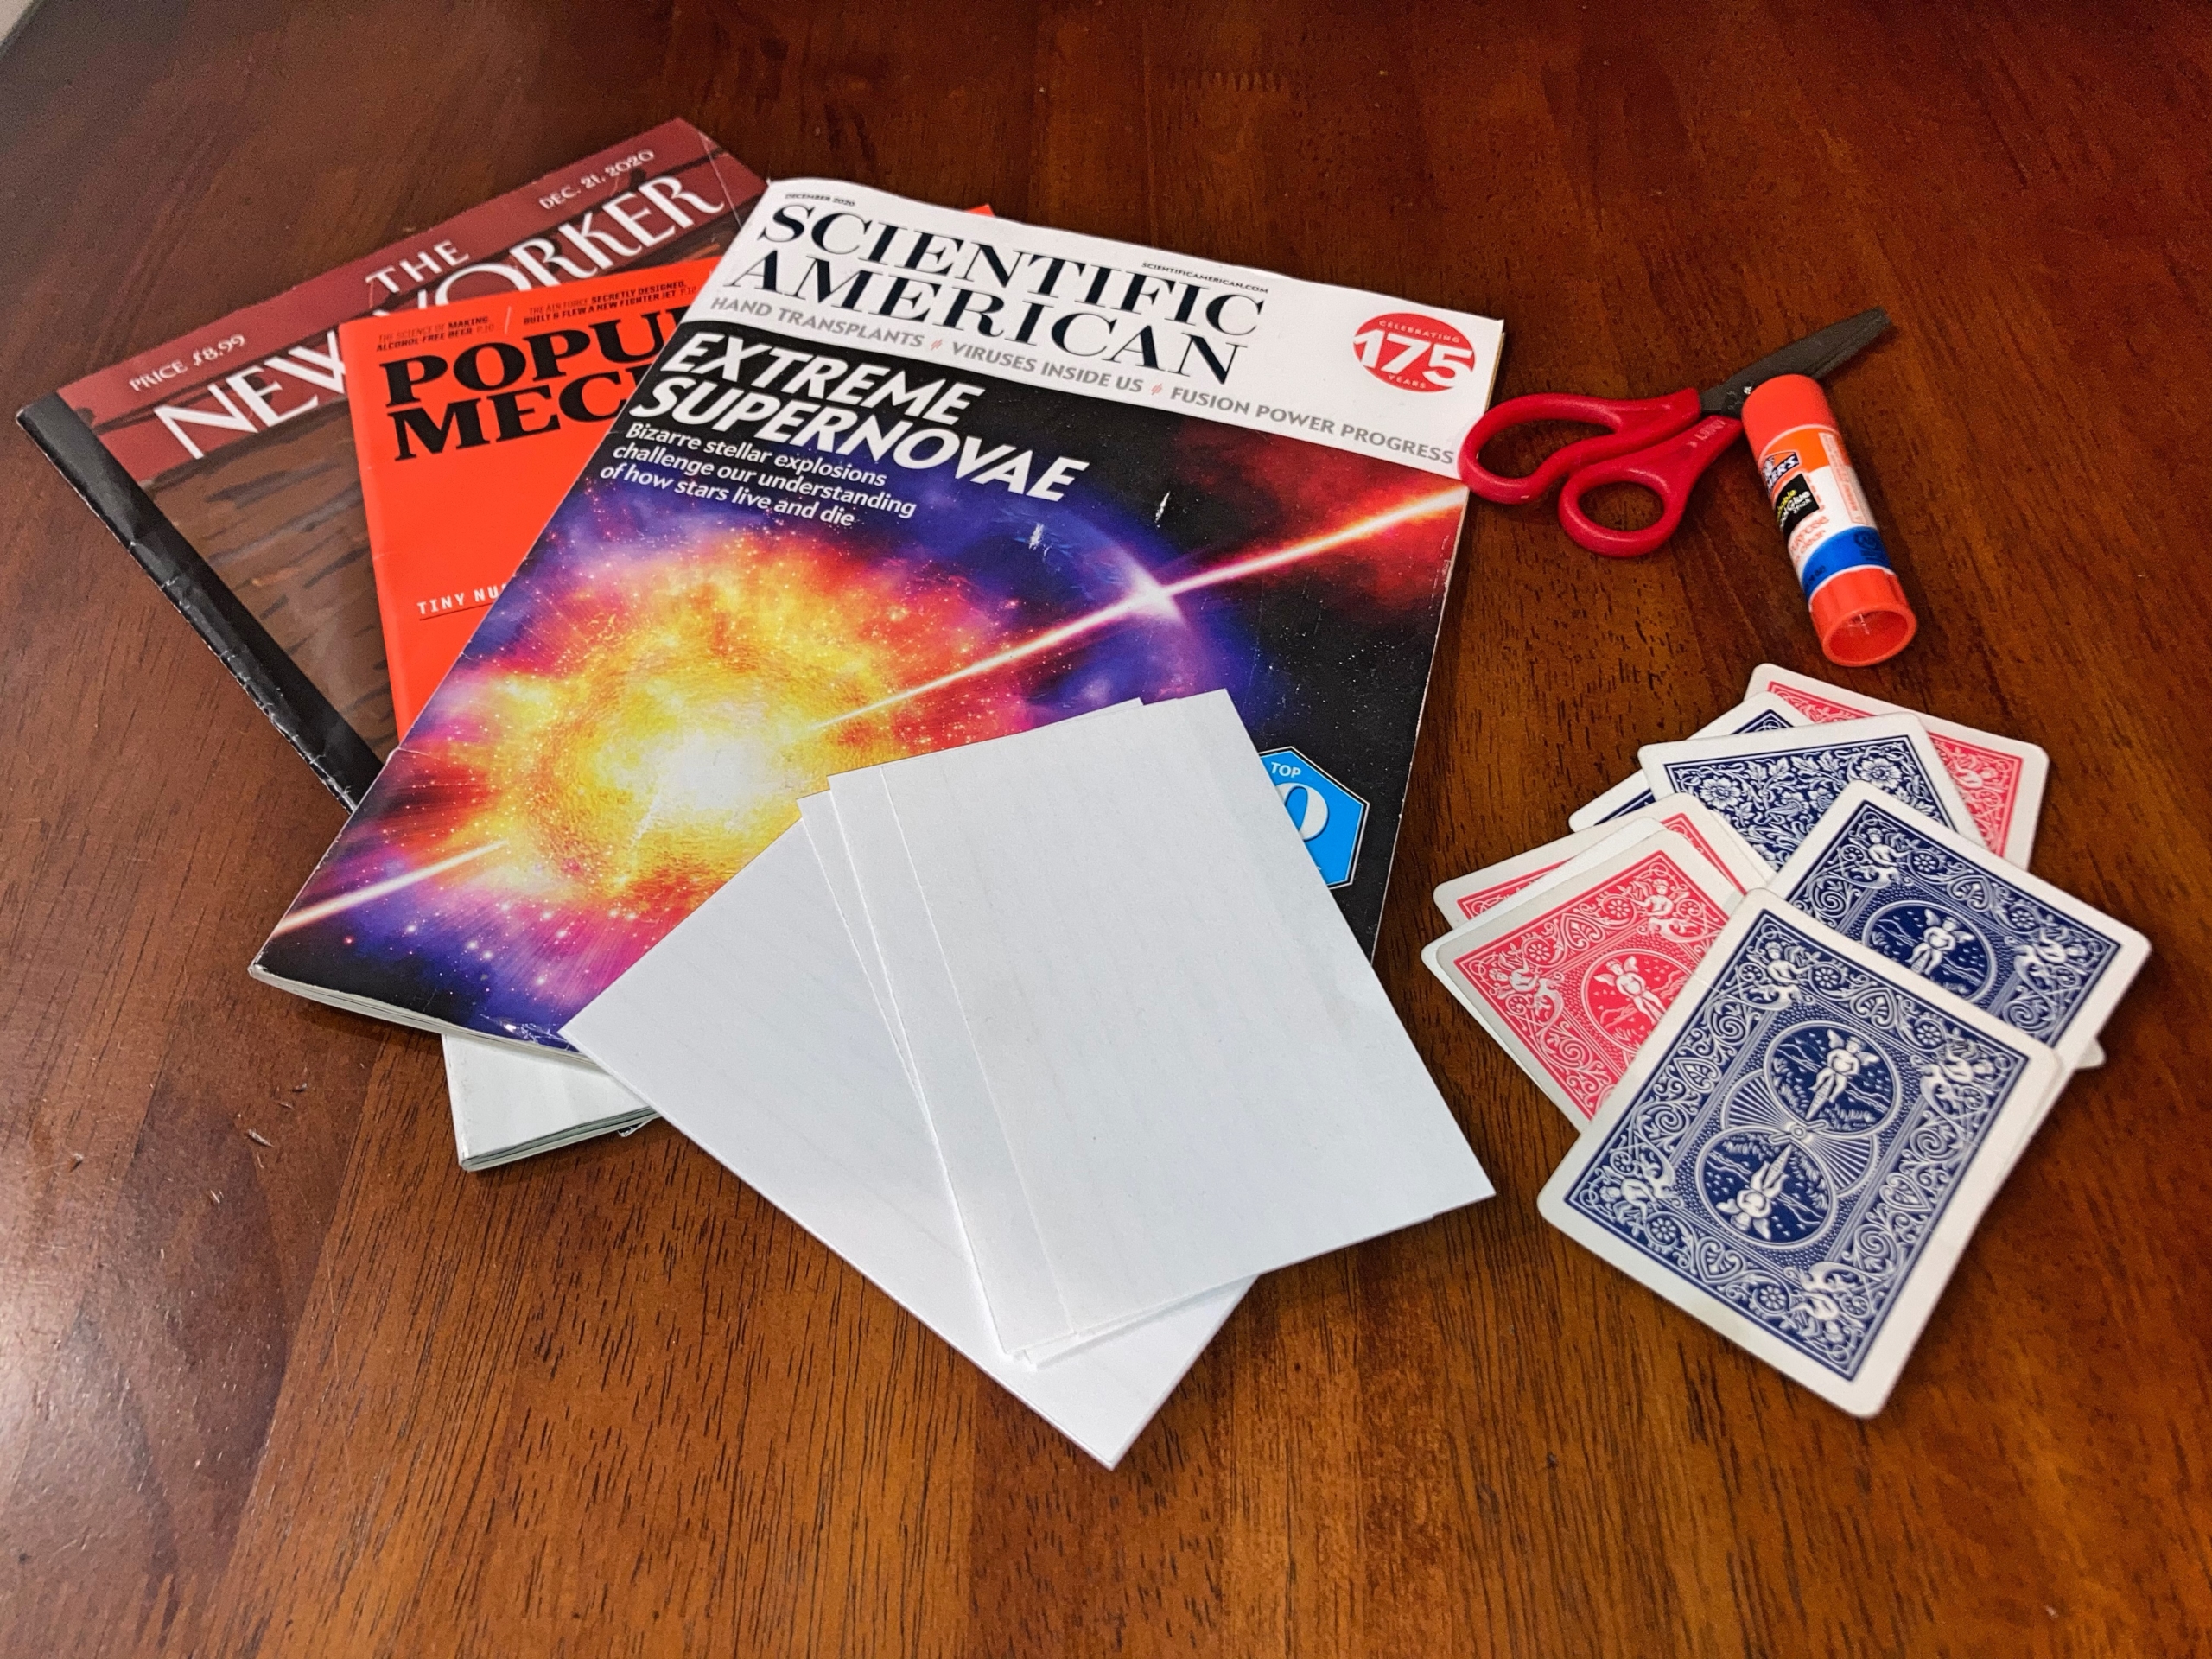
Materials:
- Old playing cards or index cards (at least six, or as many as you want!)
- Magazines or catalogs
- Glue stick (or glue, Mod Podge, etc.)
- Scissors
Cost: Free
Step 1: Start by flipping through any old magazines or catalogs you can lay your hands on for whatever fun pictures you can find (in a pinch, junk mail often has a lot of pictures that can work!). Check that the pictures are not larger than the cards you’re using, and then cut them out.
Tip: Look for pictures that will engage your child. Animals and people are great, but vehicles, toys, sports equipment, and other objects can work well too. Letting your child choose the pictures is a good way to involve them and make sure you use pictures they find interesting.
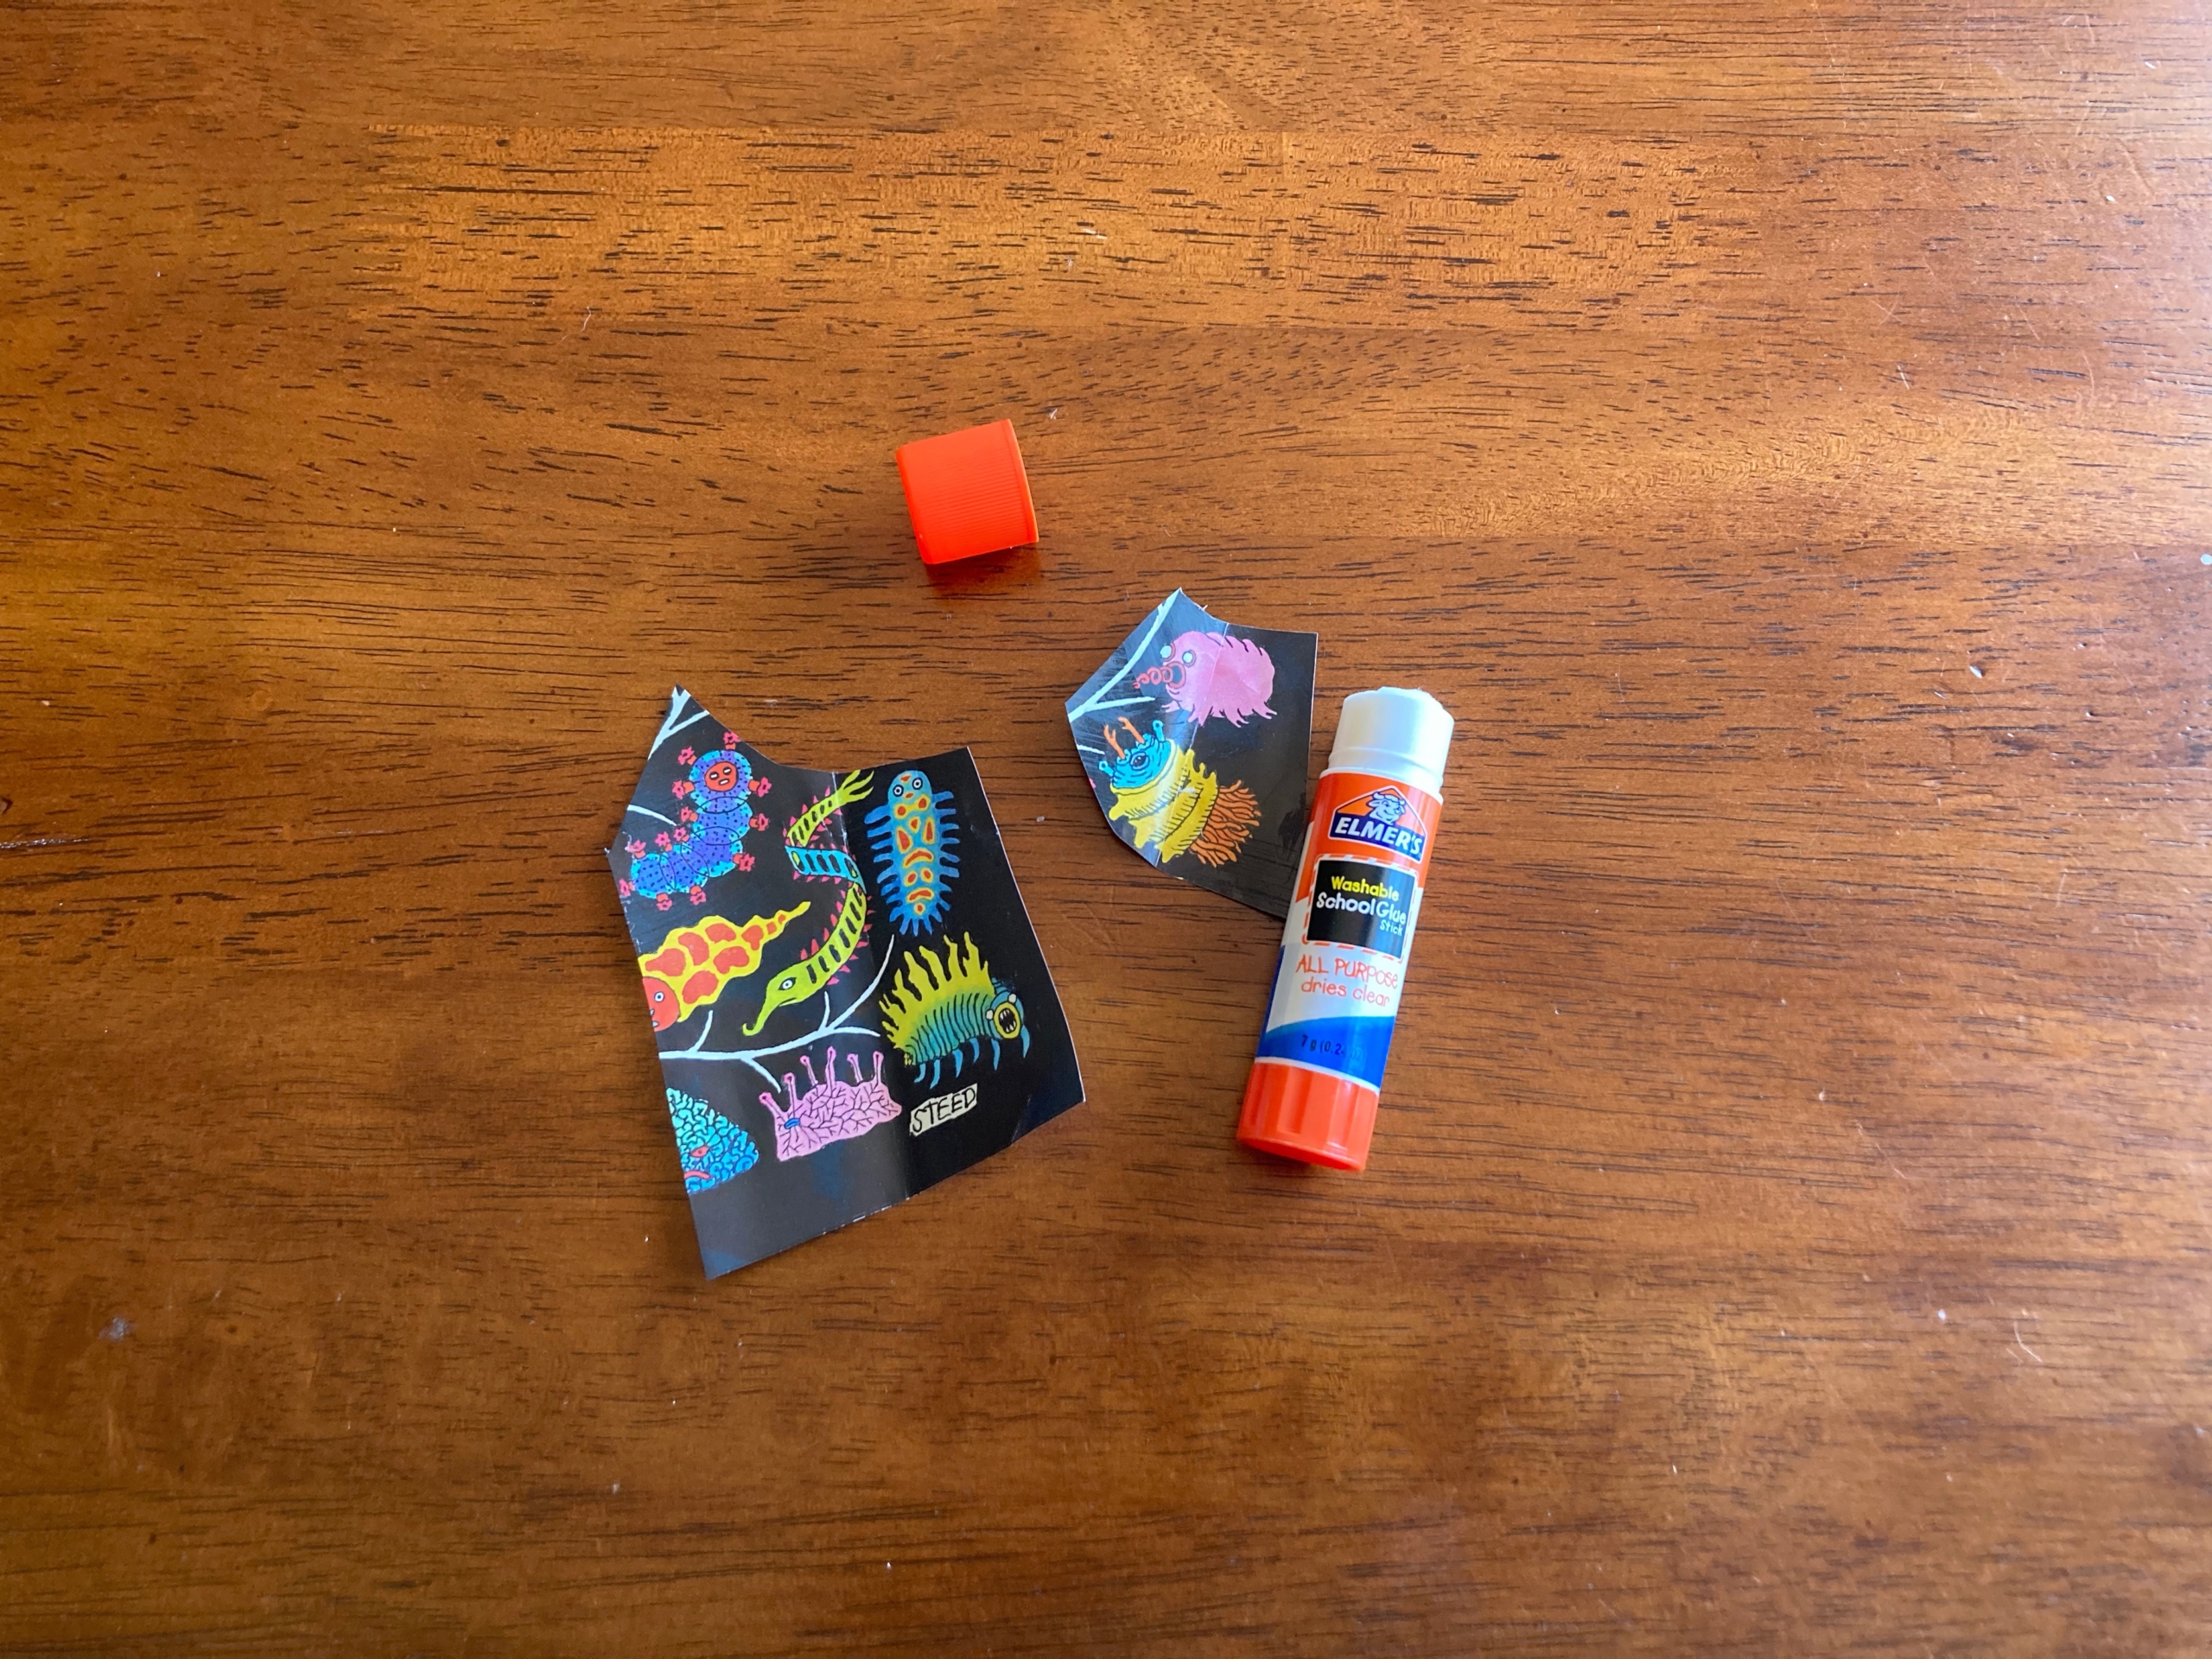
Step 2: Cover your work surface, if needed, and glue the pictures onto the number side of the playing cards or the blank side of the index cards. We tested out a variety of methods and found that a simple glue stick worked best for us. (Yay! Easy!) Painting on a thin layer of white glue or Mod Podge can work, as well.
Once the cards have dried thoroughly, lay them flat and cover them with thick books or other heavy objects overnight—the glue can curl them, but they’ll flatten right out after a few hours.
Optional: If you’re using index cards, you could consider encasing them with self-laminating sheets or wrapping them carefully in packing tape to make them more durable. Playing cards will already be nice and sturdy.
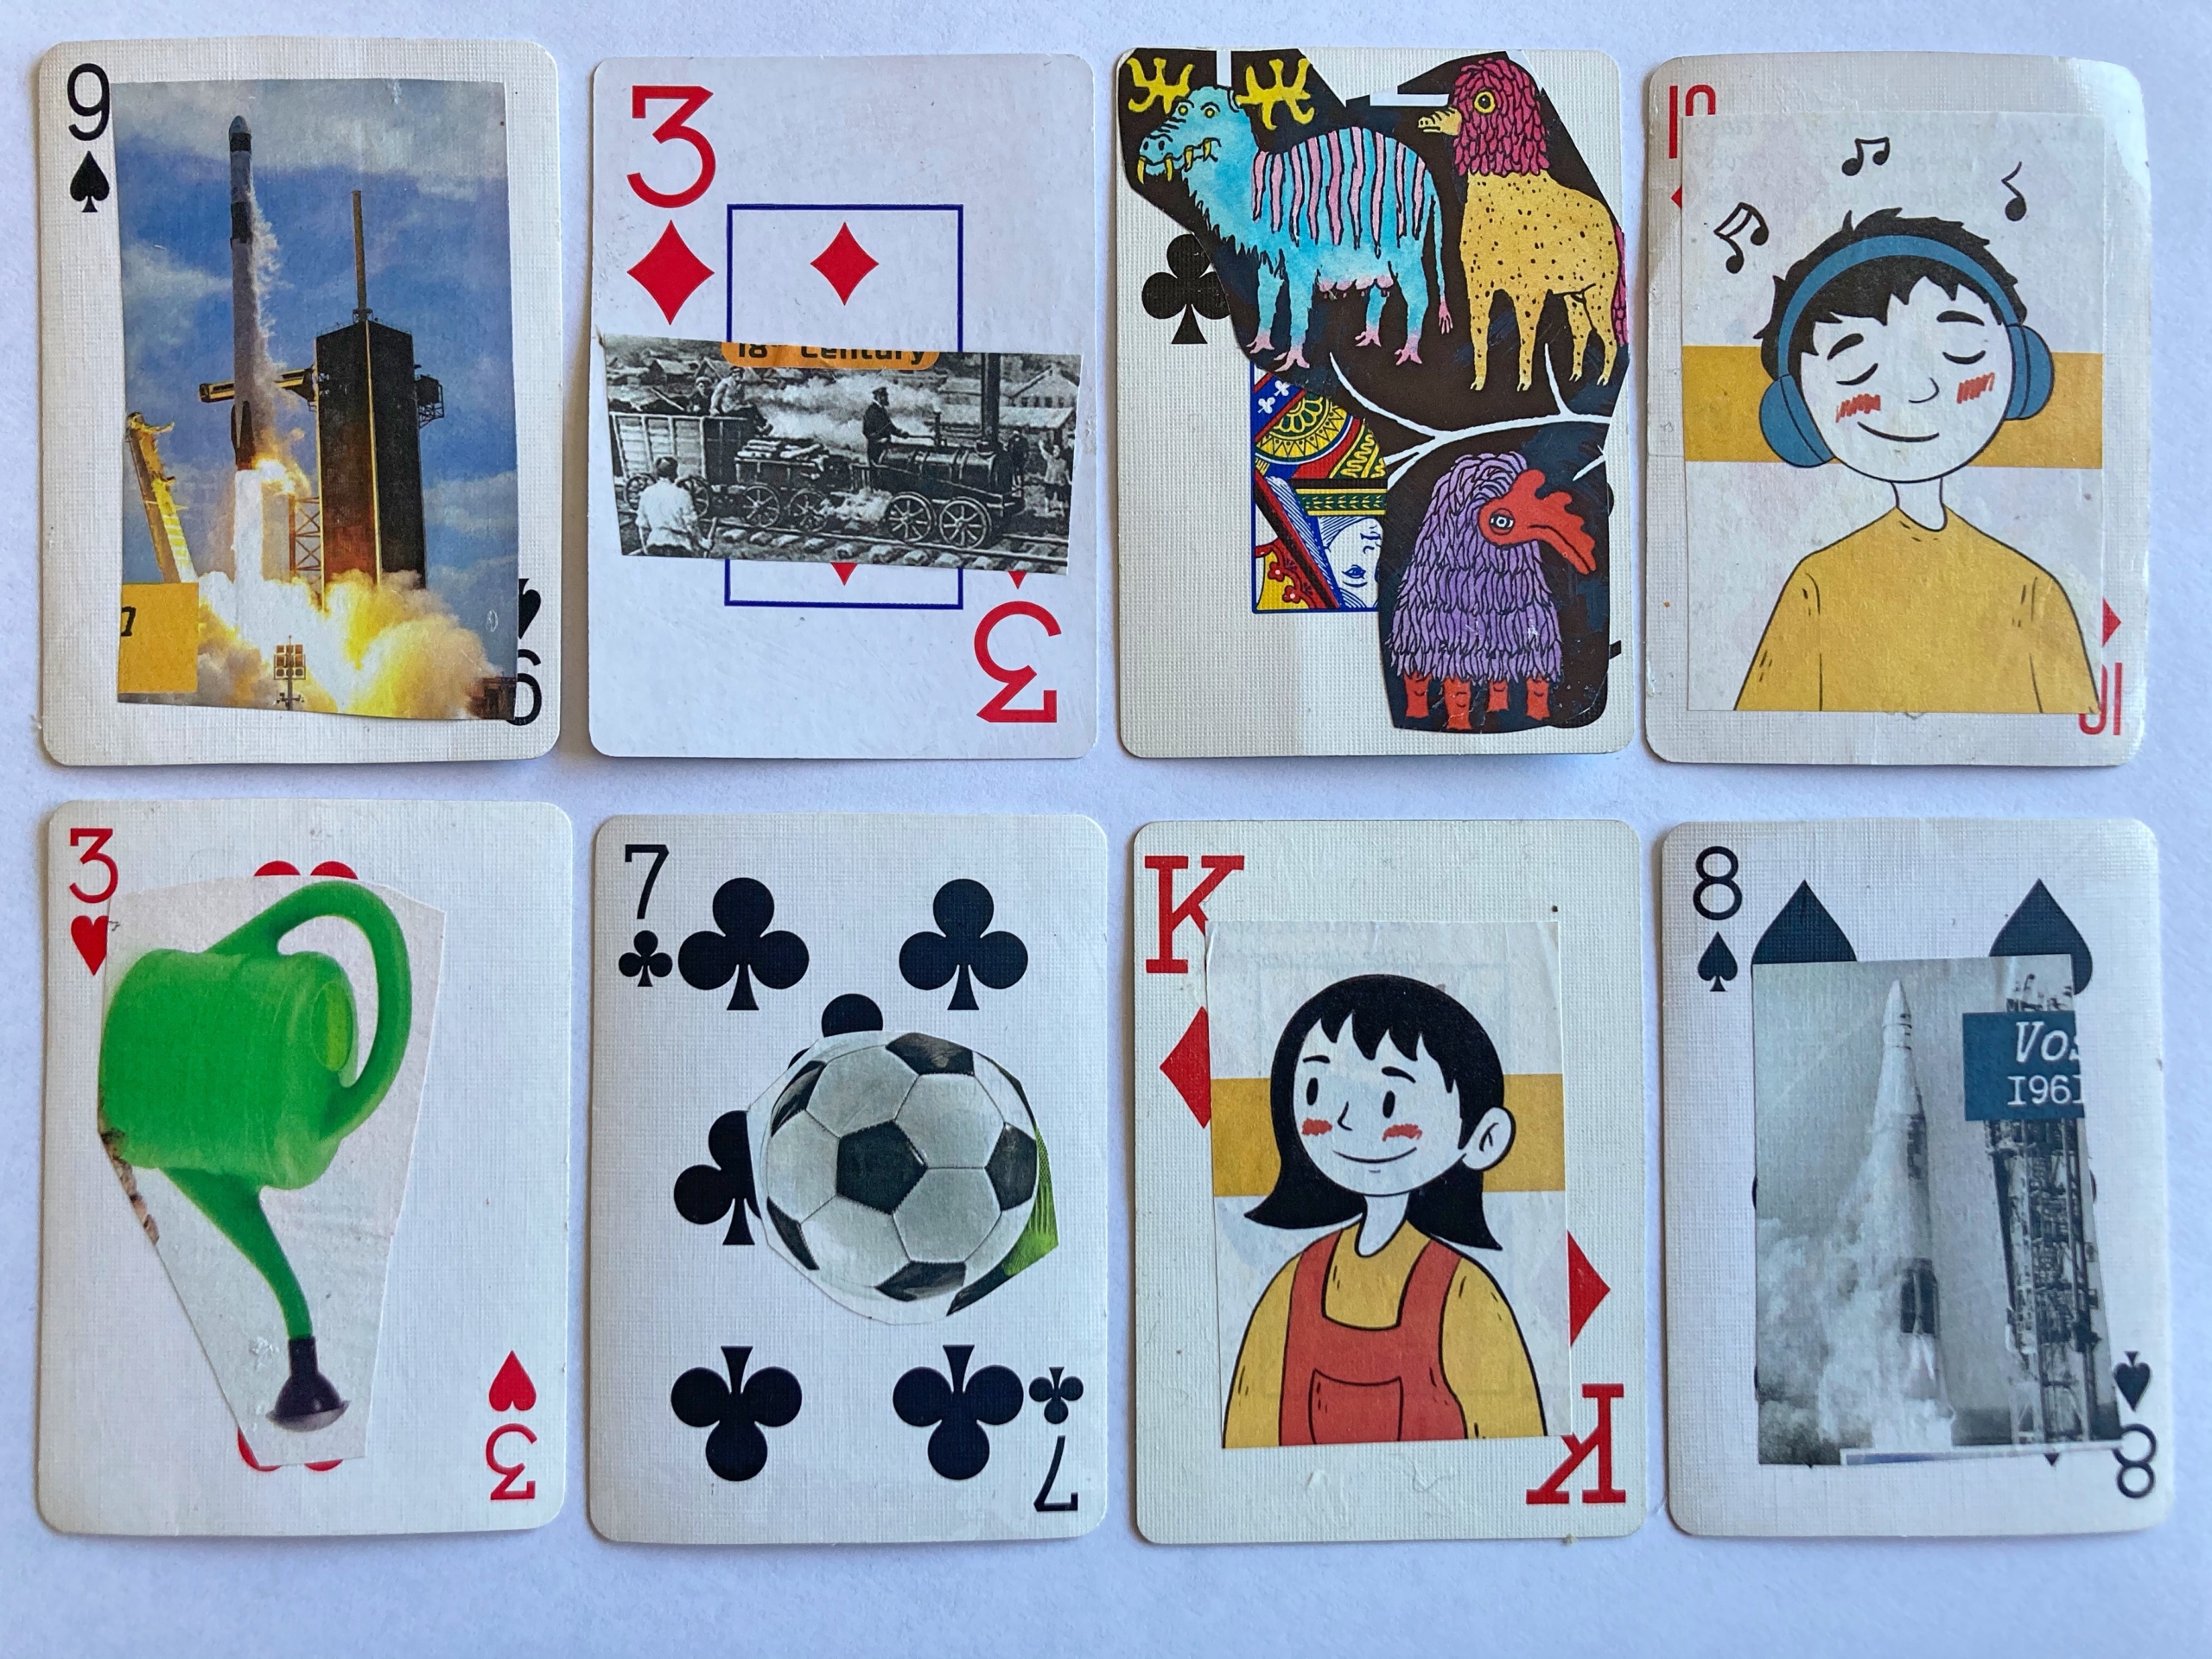
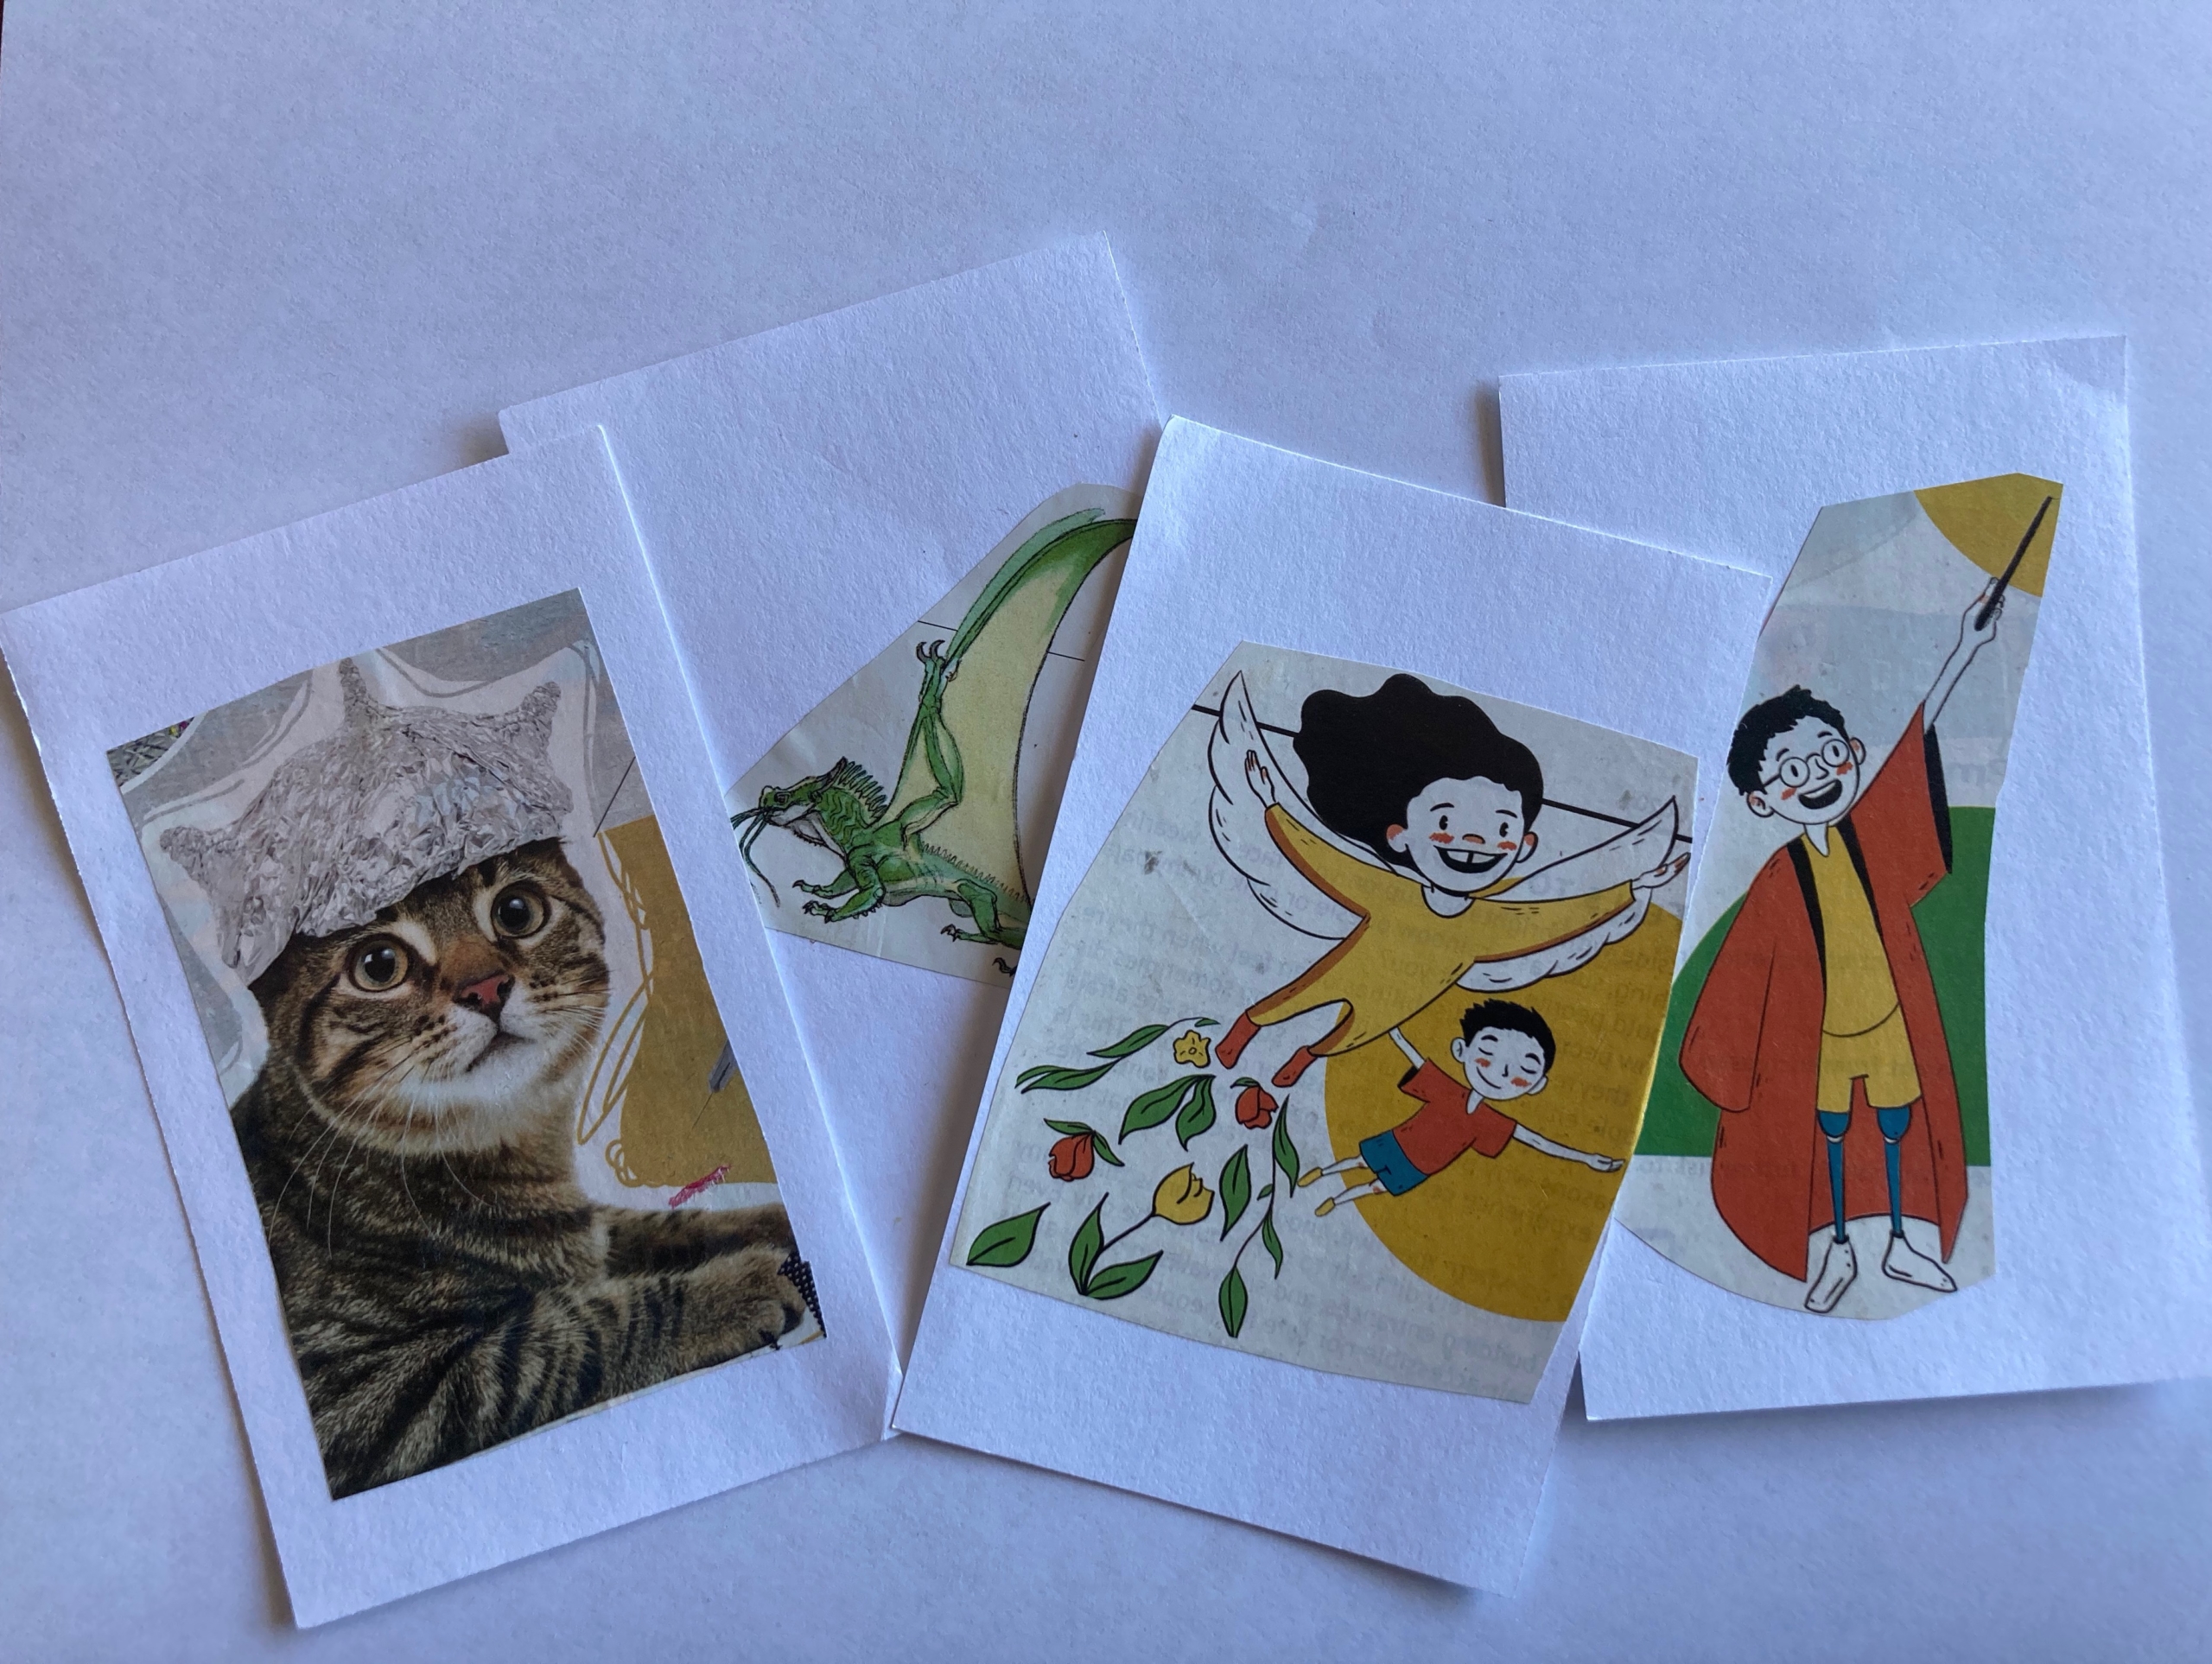
How to Play: Once your cards are ready, it’s time to let the stories begin. Turn over all the cards, mix them up, and then deal out your story prompts. You can turn over a number of cards and spin a yarn from the pictures, or you can turn over one at a time, adding another card every time you need a new twist to your tale. Use plenty of dramatic flair in your story, raising and lowering your voice, creating suspenseful pauses, or doing silly voices.
Let’s take a couple of examples using the DIY storytelling cards pictured above. Using a couple of the upcycled playing cards shown, a storyteller might improvise: There once was a boy who loved music and soccer more than anything in the world. One day, he was walking to the park with his mother when he came across a soccer ball along the way. That might not have been anything extraordinary, but there was something odd about this soccer ball. Oh, it looked like any soccer ball, sure, with its black and white shapes … but it wasn’t lying on the ground. No. This soccer ball was floating two inches above the sidewalk!
Or using the index-card storytelling prompts, you might begin: The Avalos family had a cat. Everyone in the neighborhood knew that, because that cat just loved to wander. It wandered over to Mrs. Small’s house for treats. It wandered over to the neighbor kids’ house for pettings. It wandered near and it wandered far. But it always came home for dinnertime. Until that one Wednesday when everything changed. That evening, the family sat down to dinner and the cat still hadn’t come home. Just before bedtime, they heard that cat meowing at the door. And when they opened the door, what did they see but the cat … with a hat!”
Add Some Writing: When it’s your child’s turn, offer to write down their story for them. They’ll be so proud, you’ll have a fun memory to keep, and it will help them build print awareness—the understanding of how letters and words on paper represent language. As they get older, have them write down their own stories, just asking for your help as needed.
If you want to add even more print awareness and word practice to the activity, you can write a word on each card with a permanent marker (e.g., ball, cat, etc.). The trick is to keep it fun and just mix in literacy practice in a natural way.
Adaptation for Older Kids: For kids who are reading, you can put more words on your cards or even make cards that have only words or phrases on them. Include unique, inspiring, silly, or spooky phrases to unleash your family’s creativity!
Keep your DIY storytelling cards in your bag for entertainment during long waits or car trips with your kids. They also make a cute homemade gift!
*Photos by Laila Weir
Pin me for reference
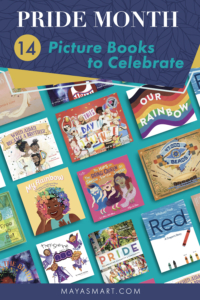
June is Pride month, a time to celebrate the LGBTQ+ community in all its wonderful uniqueness. It’s an opportunity for queer families and children to be seen and to share. Here are a few of the most joyful books with LGBTQ+ characters and stories for you to share with your child this month. Be prepared for giggles, touching conversations, and tons of rainbow color!
June is officially Pride Month in the United States, but we can celebrate and center the queer community all year round, and there are queer-friendly picture books for nearly any holiday or theme. You can also check out Drag Queen Story Hour for local story times!
Let us know your favorite picture books for Pride month.
Pin me for reference:
By Karen Williams
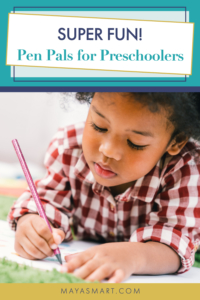
If your kids are anything like my daughter and nephews, they are absolutely fascinated with getting mail. Ava would squeal with delight when she heard the mail landing in our box and was disappointed that nothing came for her. Occasionally I’d slip a card in the stack for her so she could find it, and she’d be so excited. I also sometimes asked her uncle to mail her a short note, and she enjoyed sending him her artwork in return.
If your little one is the same, you may want to consider setting up a pen pal for them, even when they’re just in preschool. They’ll love it!
Benefits of Pen Pals for Preschoolers
Even pre-kindergarteners can gain advantages from having a pen pal. For starters, exchanging letters with a pen pal helps boost a child’s enthusiasm for writing. Your kid will love knowing that someone is reading the messages they create. Having a pen pal can also broaden your child’s perspective. They can learn about different cultures and ways of life, and even be inspired by the writing or drawing style of their correspondent.
Encouraging writing at a young age will give your preschooler an edge when it comes to literacy development. They’ll learn to make letters and words, and with enough motivation they’ll graduate to crafting complete and complex sentences with clear flow and thought (with spelling support from you, of course). Eventually, they will even start learning to read back the correspondence they get from their pen pal.
Indeed, there are many benefits to having a pen pal. And with your help and watchful eye, your preschooler can connect with a safe pen pal and start down the path to a fun and rewarding relationship that supports their literacy development. Let’s take a look at some ways you can begin to seek safe pen pals for your preschooler.
How to Find Safe Pen Pals for Preschoolers
As a parent looking to find a pen pal for your child, safety is a priority. You are always looking for ways to keep your child safe from dangerous situations, so it’s only natural that you’ll want to make sure you find a safe pen pan to write to them. Here are some options to get you started in finding them a correspondent.
The first place many people start is friends and family. Ask around to see if a family member is interested, or check with close friends. You can talk with your child and tell them about the people in your extended family and network. They may want to learn more about the cousin who lives far away, for example, or get to know the child of friends who live overseas. Or they may want to write a letter to deliver to their grandparents personally.
Another good place with safe pen pal potential is your community. There are plenty of people you may get to know in your schools, community centers, libraries, and more. Ask around among connections you trust. If you belong to any associations or groups, ask the members if they or their children would like to be a pen pal for your child.
You can also see if there are any children’s pen pal groups in your community. Is there one with a subject that piques your child’s interest? Such groups may be centered around games, TV shows, sports, and so on. Or, if you feel like taking the initiative, start your own group! This will allow the children in your community to connect with each other, compare writing and drawing styles, and form a lasting bond both with new friends and with writing.
There are groups already established that specialize in organizing people to write letters to others, as well. For example, some organizations will connect you with senior citizens who would appreciate getting letters and cards in the mail. Check out our post on helping your child write to a senior to learn more and find links to some of these groups.
Yet another option is for your child to become a pen pal for a soldier in the armed forces. There are several ways available to send letters to soldiers serving overseas. Some will even guide you on what to send and how! These letters will become part of a care package, and your preschooler may develop a lasting friendship with the recipient. Just be mindful that snail mail going to and from the armed forces can take quite a long time, so consider this route if you think you and your child have the patience for it.
Whoever you wind up connecting your child with, be sure that you read over not only what your child writes, but also what is written to them. This is key to keeping the relationship safe and happy for your little one.
What Should My Preschooler Write to their Pen Pal?
Anything! They can send a simple message asking how their correspondent is and sharing how they’re doing, mail a drawing, or solicit your help to write down a true or invented story for their pen pal.
If your child isn’t sure what to send to their pen pal, consider breaking the ice with a journal. Just give them a notebook and encourage them to fill it however they like. Their journal can be about anything—a place for their artwork, to log the names of favorite books, to write thoughts about their day, or even to practice their letters and shapes.
Encourage your young one to tell you about what they’re currently writing or drawing in their notebook. Then explain that they may want to share things in their journal with their pen pal.
More Opportunities for Letter Writing as Children Grow
As your child grows, they’ll start to become more curious about how the world works, how things are created, who does the creating, and more. This opens up opportunities for more letter-writing.
Encourage your child to write to public figures and role models. For example, if your preschooler has a favorite book, they could write to the author and ask more about the story or characters. If they are interested in space, you could try sending a letter to an astronaut. They can also write to a politician advocating for a cause they care about (see our post on advocating for library funding, for example).
There’s really no limit as to how creative you and your preschooler can be when you have a safe pen pal to communicate with. Are you considering finding a pen pal for your child? Let us know your ideas in the comments!
Karen Williams is a writer, content marketing strategist, and mom to Ava, living in Cleveland, OH.
Pin me for reference
Brunch. Breakfast in bed. Whatever your preference, a special morning meal with Mom is what Mother’s Day is all about for many families.
If you’re preparing a yummy surprise for a mother of young children, you can get the kids involved and turn it into a super adorable moment that’s also a learning experience by letting them run a pop-up restaurant for the occasion.
Young kids love pretend play, and they love doing real-life, grown-up things. Creating a Mother’s Day restaurant is the best of both, and it even sneaks in some crucial early learning that will set your kids up for success down the road.
In this sweet Mother’s Day activity, you’ll engage kids in creative play, create a treasured memory, help them practice writing, and craft a cute keepsake, too. Plus, avoid delivering a flour-covered kiddo along with breakfast!
Kick things off by planning the menu, whether you’re whipping up homemade goodies or putting together a few store-bought items with Mom’s favorite morning beverage.
Part of the beauty of this activity is that it gives young children a central role in even the simplest servings, so it’s awesome if you’re celebrating a mother who prefers a light meal, you’re not much of a cook, or you just don’t want to give the special lady a messy kitchen. (It’s also great as the finishing touch on a gourmet home-cooked meal, of course, so by all means don’t let us stop you if that’s your thing!)
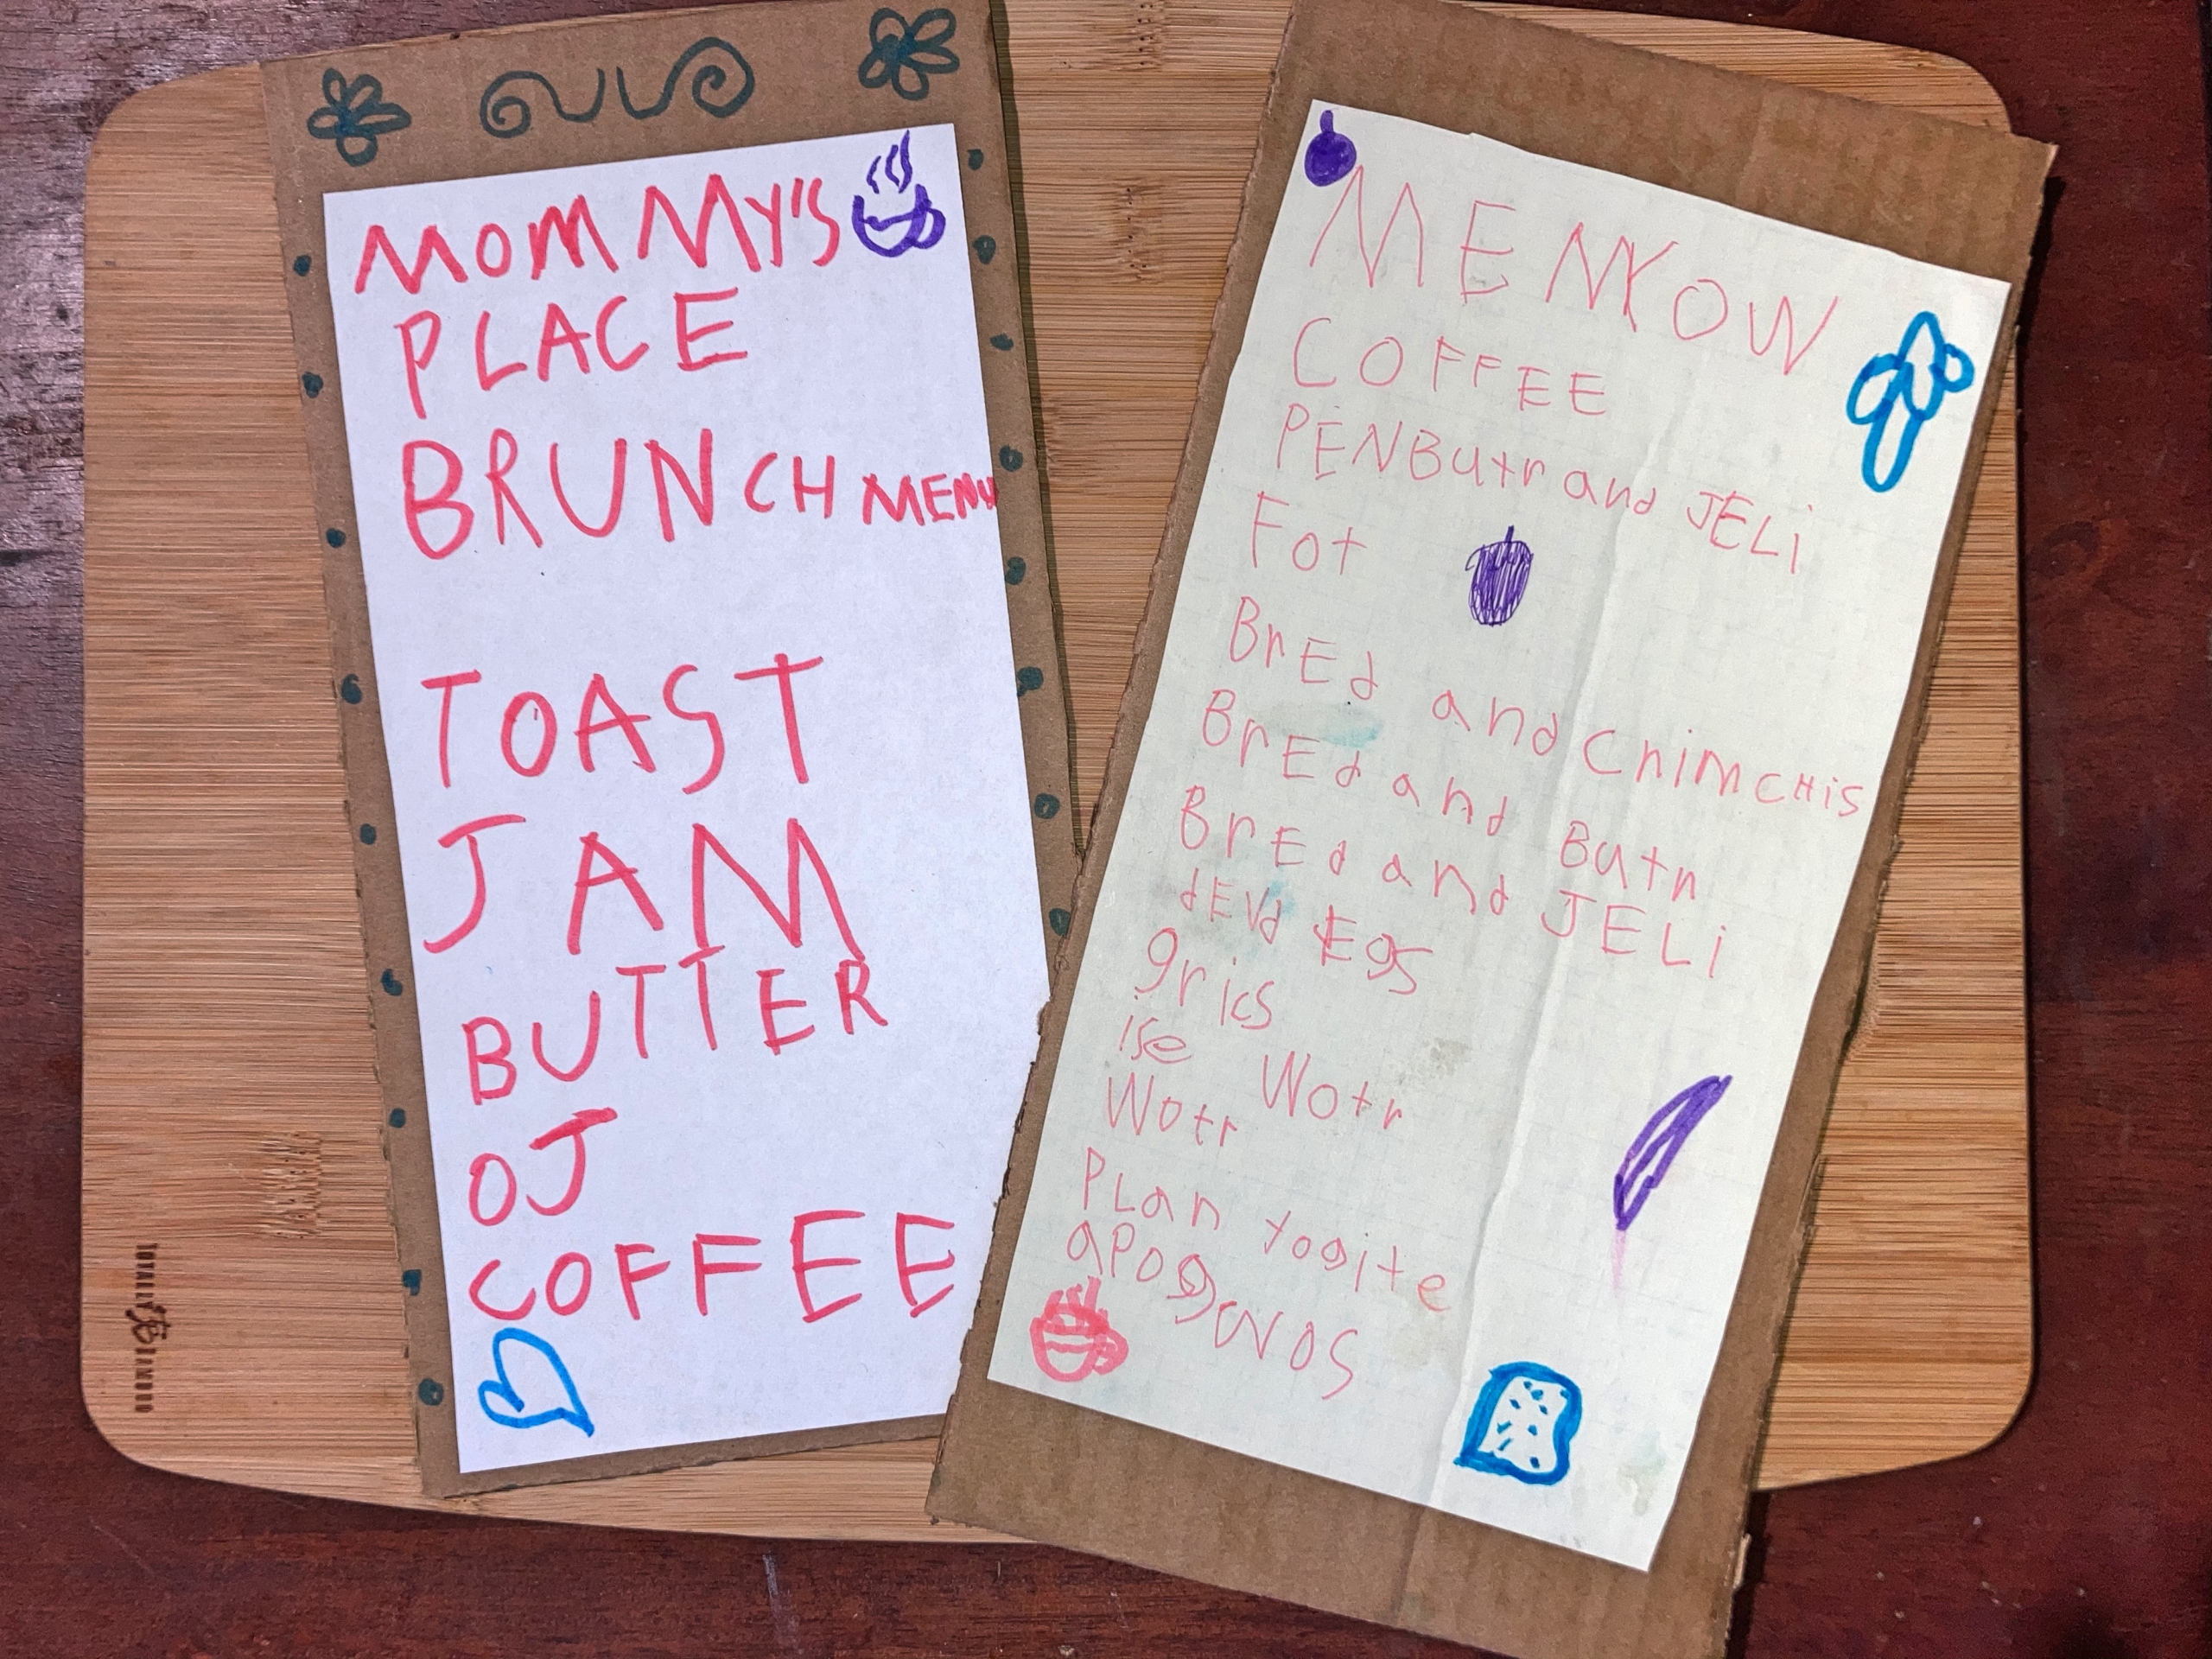
Once you know what you’re serving, you’ll help your little one(s) write up a pretty menu. For best results, you’ll want to use something firmer than just a piece of paper. A rectangle of cardstock or cardboard is perfect, or even a blank greeting card will work well.
If necessary, you can use a glue stick to paste plain paper over cardboard to create a plain surface. Tip: The back of an old notebook can work perfectly! Just trim it as needed with a pair of sharp scissors (grown-ups only).
Then grab some markers and help your child write up the menu! Start by putting a title at the top with the name of your restaurant, for example “Mommy’s Place or “Sanchez Family Mother’s Day Restaurant,” and then list all the items on offer. Have fun brainstorming your restaurant’s name together.
For the littlest kids, helping them write may mean gently holding their hand and guiding them in forming the letters, as well as doing some of the writing for them (for example, the title).
For kids who already know how to write some or all of the alphabet, tell them the letters one by one, or write a model on a separate piece of paper for them to copy. And for emerging writers, let them sound out the words all on their own!
Remember: Bring your patience! You’re creating something awesome for Mom and helping your kid learn crucial skills that will serve them well all their lives: It’s worth the wait.
When the writing is done, invite your child to decorate around the edges with curlicues, doodles, or other illustrations. Then be sure to have them sign their name and add the date to make the menu a sweet keepsake.
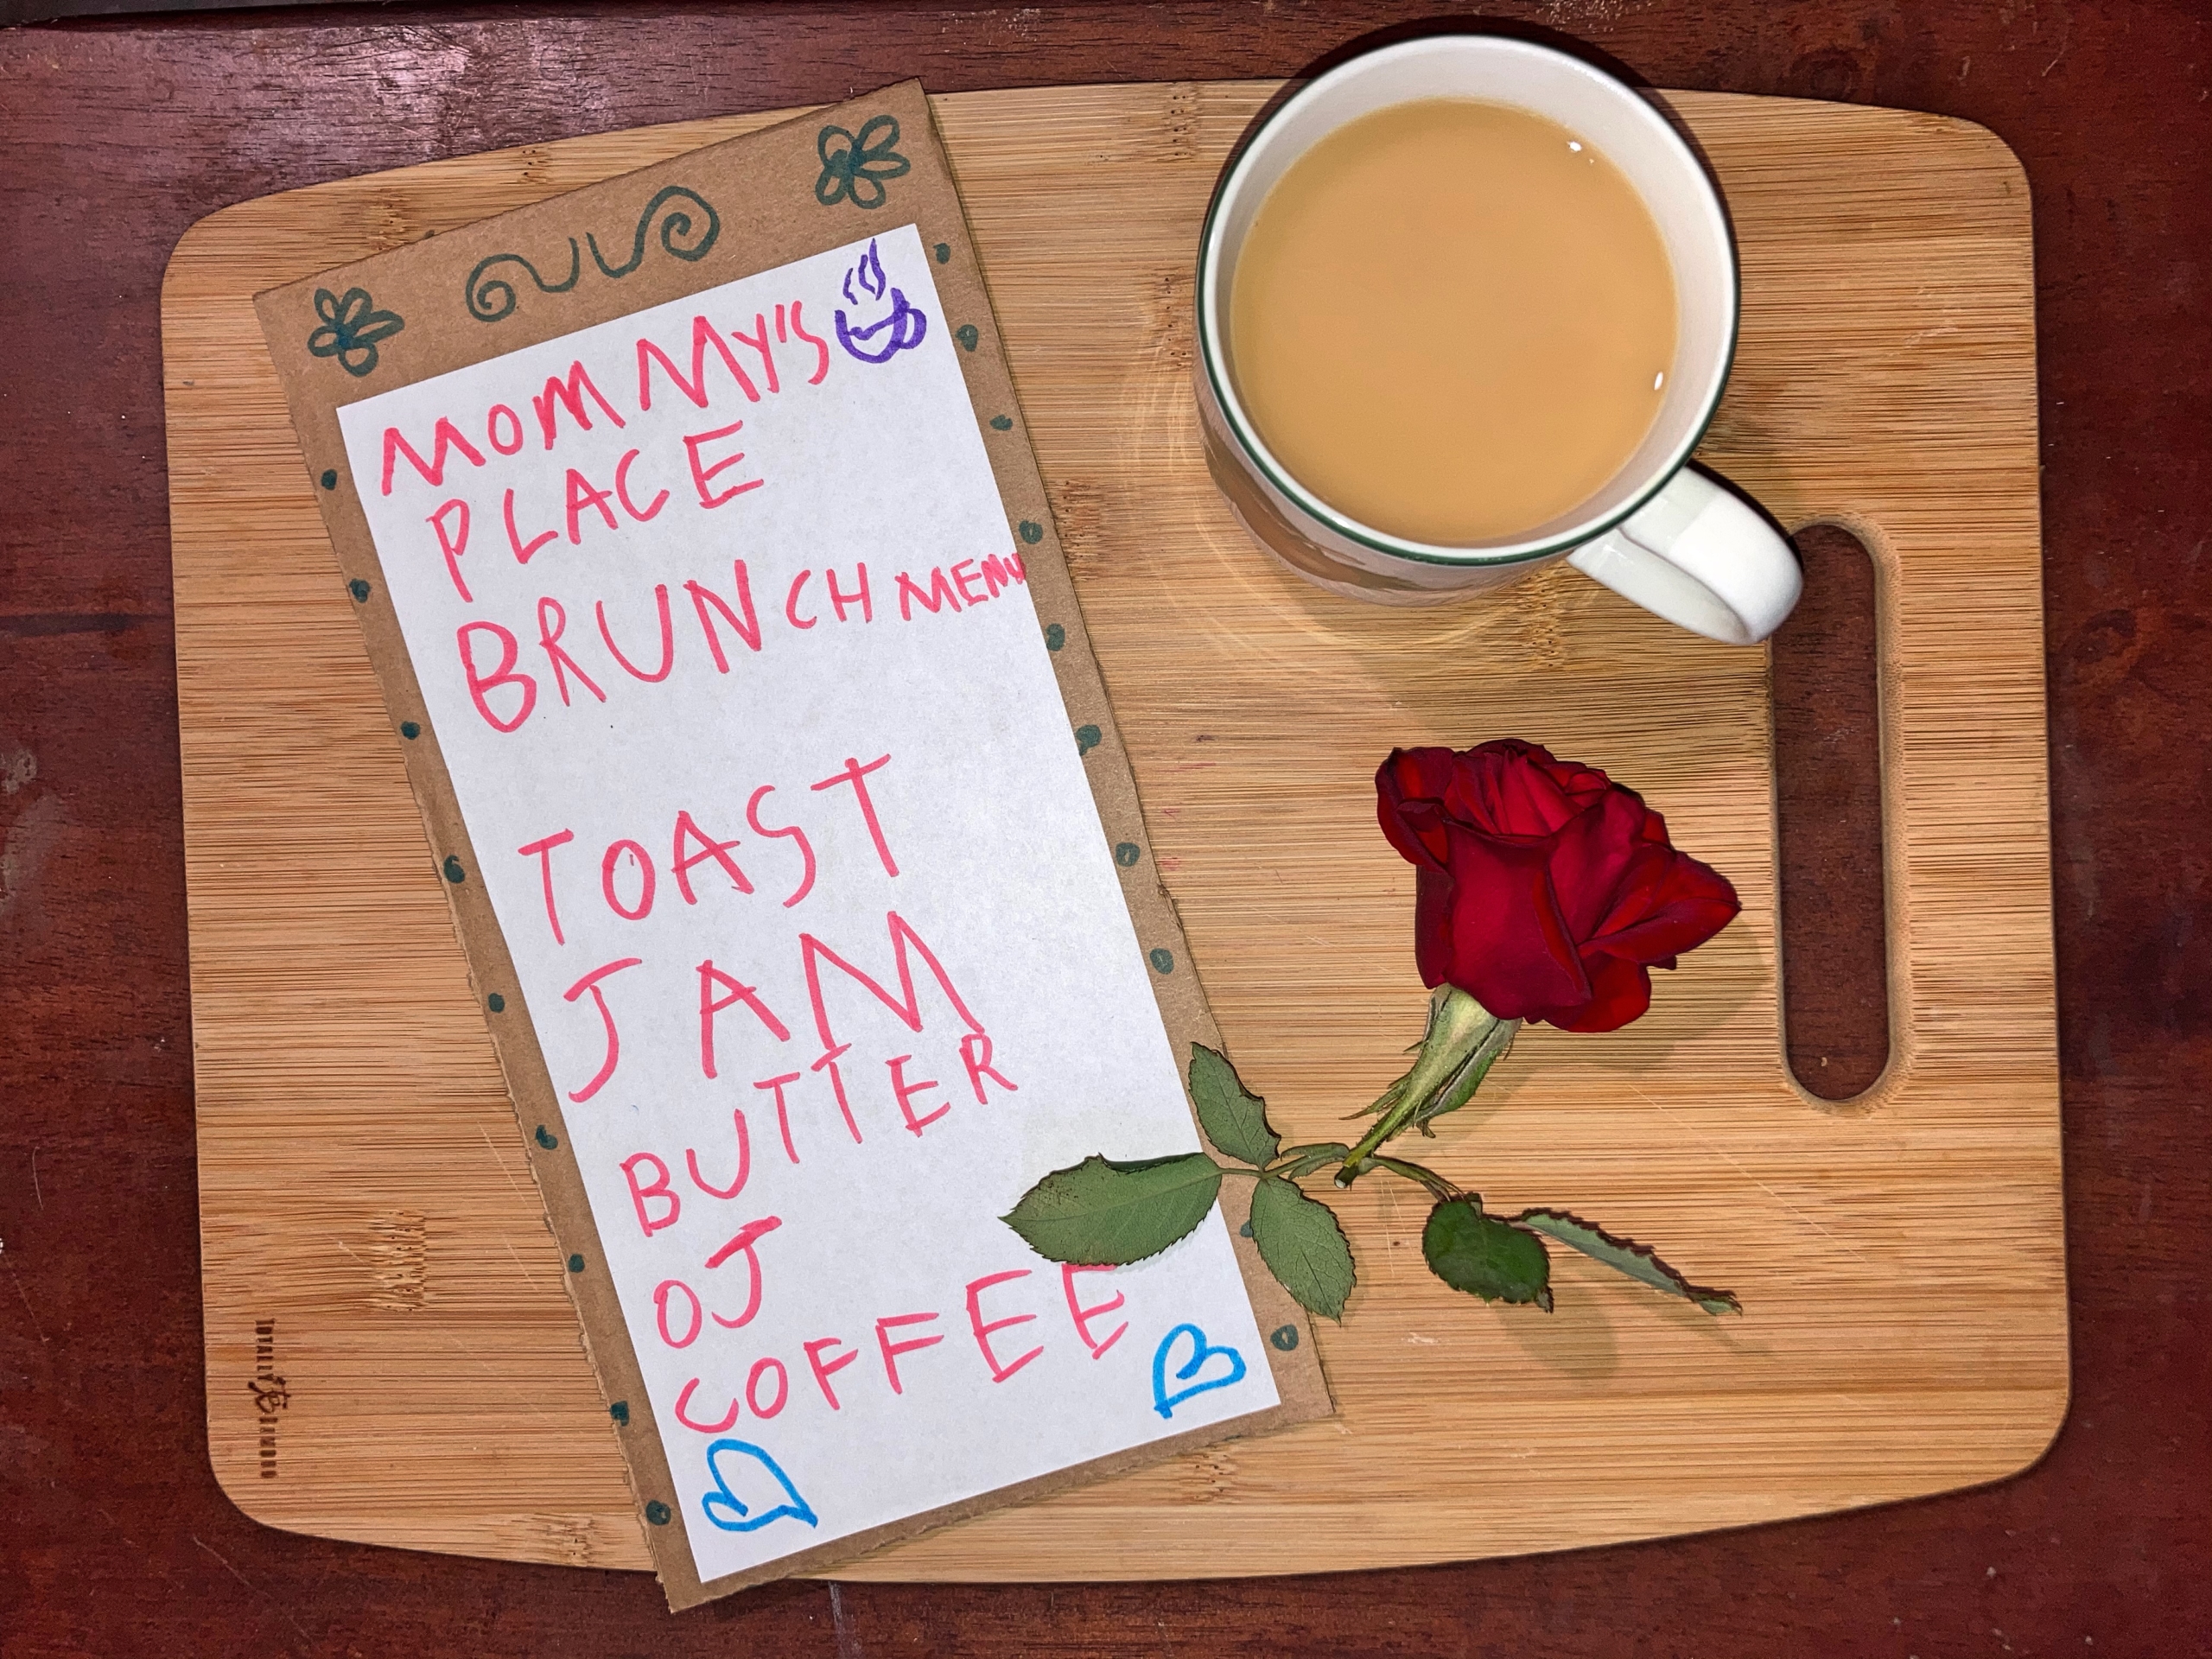
Now your restaurant is ready to open! Let your child dress up in an apron and even a chef hat if they have one (you can also cut an old tote bag to create a makeshift kid’s apron, if you’re feeling crafty!), or slip on some formal wear to serve as the restaurant’s host or hostess.
When they’re ready, they can go to Mom, surprise her with the menu, and take her order. Be sure to have your camera ready!
Bonus: Need more surprises to make the day special? You can also craft an adorable Mother’s Day love jar gift or pick up some wonderful picture books about moms. Kids will also enjoy making one of our adorable DIY bookmarks, which make sweet and practical gifts moms will love.
Happy Mother’s Day!
