It’s that time of year again. When kids are looking forward to a break from the classroom. When beach bags take the place of backpacks. And when parents begin rapping on my door with panicked looks asking, “What do I do to help them read?”
And I get it—with camps to attend, a desire to spend fun time together, and constant stories about summer reading losses floating around, summer reading can feel overwhelming.
Never fear! We’ve got you covered with five favorite summer reading tips to keep your young kids learning and having fun all summer long.
Summer Reading Tip 1: Lead by Example!
Make sure your children see you reading, especially in your everyday life. Sometimes a child will ask “Why do I have to read? Mommy doesn’t read.” But, of course, adults are reading all the time; kids may just not realize it.
Even if they don’t often see you sitting down reading a book, you can narrate your actions to show that you’re reading all day long. For example, if your child is near while you check emails, say, “I am reading emails.” After going to the store, make a show of reading the receipt. Point out ads on the bus or subway and read them out loud. When your child sees how much you can read, they’ll want to join in!

Summer Reading Tip 2: Silent Dinner
This one is for your kids who are already reading and writing a bit. One night, have a silent family dinner night. Give everyone paper and pencils with dinner. The one rule is no talking out loud! Write down questions about how everyone’s day was. You all have to respond by writing and sharing.
If you need to pass the salt—write it down and show the table your paper. This is a fun way to weave reading into an everyday activity. It also helps a reluctant reader take part without feeling like they’re being forced to sit and study. So much more fun than a workbook!
Summer Reading Tip 3: Stuffed Animal Story Time!
Children love to be the boss. It’s one of the reasons many kids like to play school and appoint themselves the teacher and the adult the student. They want to be in charge. If you’ve ever been to a group story time, you’ll notice that it usually includes the reader asking the audience to clap, make faces, or answer open-ended questions as they read. You can also model this when you read to your child.
Help your child set up a stuffed animal story time. They can set up their toys, choose the books to read, and even make a story time sign! Once everything is set up, join the stuffed animal audience and have your child read to you. If they struggle to read a word, patiently wait for them to try to figure out the word. Don’t jump in and read it for them. If they ask for help, offer guidance. Make it a fun, low-pressure experience!
Summer Reading Tip 4: New (to You) Books
Variety is the spice of life and the same is true of books. Change what’s on your shelf regularly and find different ways to acquire new books. From toys to new reads, children want to spend time with the newest thing they have—especially when they get to pick it out themselves!
Bringing in new books regularly means that children will want to sit and read (or be read to). Of course, new books can be expensive, but there are many cheap and free options. Visit the public library where you live. Many have story times and summer reading participation programs. You can also organize a book swap with friends and neighbors.
You can even make getting books an adventure! Check Nextdoor, Facebook, and Craigslist for yard sales and go out to hunt for inexpensive books that way. The Little Free Library program has an online map that shows you where to find book locations in parks and neighborhoods. Make a list and see how many different little libraries your family can visit this summer. It’s also a great way to give away books that your family no longer needs.
Summer Reading Tip 5: Keep it consistent!
However you choose to work reading into your little life, make sure it is consistently there. You don’t have to do the same activity every day, but make sure to incorporate some sort of reading into each day. Even if it’s as small as letting them help you read a takeout menu or texts from Grandpa, keep reading in the mix.
Reading can be challenging for children, and teaching a child how to read can be just as daunting. Just remember this: The drier and more high-pressure reading is, the more children tend to pull away from it. If you show how much fun it can be, your child will be drawn to follow your example.
Pin me for reference:

It’s fun to babble and coo with babies as they discover the big world around them, but this natural instinct is not only entertaining—early verbal communication is crucial for developing brains. It’s also a significant factor in academic readiness for kindergarten and beyond. Children entering school with a smaller vocabulary than classmates (a “word gap”) face a major hurdle that can be hard to overcome: Research shows that early language development underpins later literacy, and many children who arrive at school behind in key milestones never catch up.
National nonprofit organization LENA is on a mission to increase “early talk” in young children and make it easier for parents, teachers, and caregivers to consistently build up kids’ communication skills and vocabulary. Recognizing that many children spend much of their time in childcare, the organization has a branch focused specifically on supporting childcare providers to increase talk with their young charges. The branch is called LENA Grow.
“With many children spending as much as 60 percent of their waking time in childcare or preschool, increasing talk in early childhood classrooms is at least equal in importance to increasing talk at home if we are to make the biggest possible difference for children,” the organization argues. To that end, LENA has developed a technology solution aimed at helping daycare workers and preschool teachers close the word gap for their kids. Read on for LENA Grow’s recommendations.
Take Turns
LENA says in its latest study that young children should engage in 40 conversational turns—“simple, back-and-forth alternations between a child and an adult”—every hour for optimal brain development. But that can be more difficult to accomplish in a group-care setting than in the one-on-one intimacy of a home, and research shows that only a dismal six percent of children in care are getting that level of interaction.
LENA developed technology to track caregiver-child communication to help rectify that shortfall. With LENA’s “talk pedometer,” caregivers record a child’s speech throughout the day, which is then fed into software to analyze the data for areas of improvement. The program provides coaching for teachers and childcare workers, as well, to support them in bringing their charges up to speed.
The organization also shares tips on how to effectively engage babies and young children in ways that will build their brains. Following are three research-based recommendations that caregivers and parents alike can put into practice.
Follow the Child’s Lead
Following a child’s lead is one of two key strategies LENA recommends, because it gives them space to initiate and learn. According to its report, “Infants indicate their interests through their gaze (what they are looking at), through touching and manipulating objects, through gestures (e.g., pointing, reaching), and through babbling.” Follow up on those interests with talk.
Respond to children’s natural inclinations and interests by affirming their attempts at speech, asking questions, and matching their tone. While a common problem is not talking enough to babies and toddlers, caregivers should also avoid talking too much. Offering a healthy amount of silence gives little ones room to initiate and respond.
Practice “Recasting”
The second strategy LENA suggests is “recasting,” which simply means repeating what a child says with additional details or more complete syntax. This strategy is obviously best suited for children who are beginning to actually talk, although tuned-in caregivers may use a similar approach with a baby who points and babbles enthusiastically at, say, a red balloon. “Yes, look at that balloon! See how red it is,” they might respond.
Repeating information with slight changes not only gives feedback to the child, but also highlights the new information presented. Additionally, it serves as a gentle form of correction and clarification.
If a child says they want a toy, try asking, “Do you want this toy or that toy?” or affirming, “Yes, you want the red toy.”
Don’t Forget to Read Aloud
Reading books out loud offers tremendous benefits for caregivers and children. And it’s never too early to begin! Reading aloud to infants builds brain networks, boosts language skills, and accelerates vocabulary growth. It’s also an easy way to practice following the child’s lead and recasting.
Just like how you talk to children matters, how you read aloud makes a big difference, too. Ready to get more benefits out of reading aloud? Start with this blog post rounding up our top tips: How to Maximize the Benefits of Reading Aloud to Your Kids.
Opportunity: Apply for the LENA Grow Launch Fund
If you’re a childcare provider interested in trying LENA’s technology, you might explore applying for one of its Grow grants to buy talk pedometers for your program.
Designed for teachers and caregivers, LENA Grow offers coaching sessions and talking tips along with its specialized technology and analysis. Instead of burdening you with doing research or planning extra activities, LENA does the work for you by tracking and analyzing children’s language.
Last year, its grants provided more than $525,000 to teachers and caregivers to purchase LENA talk pedometers for their classes. The 2021 deadline to apply is May 15.
What other methods have you found successful in engaging with your kids? Let us know in the comments!
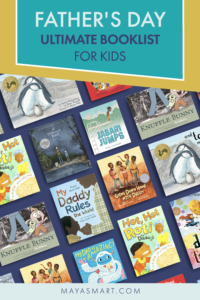
Father’s Day is fast approaching! It’s a great moment to honor Dad—and all the special guys in your and your child’s life. This year, why not create a celebration of dads, uncles, and grandpas on your bookshelf? The gift of a book is wonderful in and of itself, but the gift of time spent reading together is priceless. We’ve curated a list of some favorite Father’s Day picture books to celebrate all the men we care about. Let’s have some fun and read together!
Bonus: Father’s Day Reads for the Other Men in Your Kid’s Life
Pin me for reference
Raising a successful reader means more than having books around and sending your child off to school when the time comes—unfortunately, all too many kids are coming out of U.S. schools less than literate. To ensure children’s success, parents should actively teach them the ABCs and then support them all the way through learning to read, write, and spell well.
But what if your child just can’t sit still? There’s no need to force things. Instead, find ways to meet them where they are and bring the learning to them. This can mean going on a letter scavenger hunt around your neighborhood, singing alphabet songs in the car, doing goofy finger play and reciting rhymes that support literacy, and engaging kids in all kinds of ways that don’t involve worksheets of flash cards.
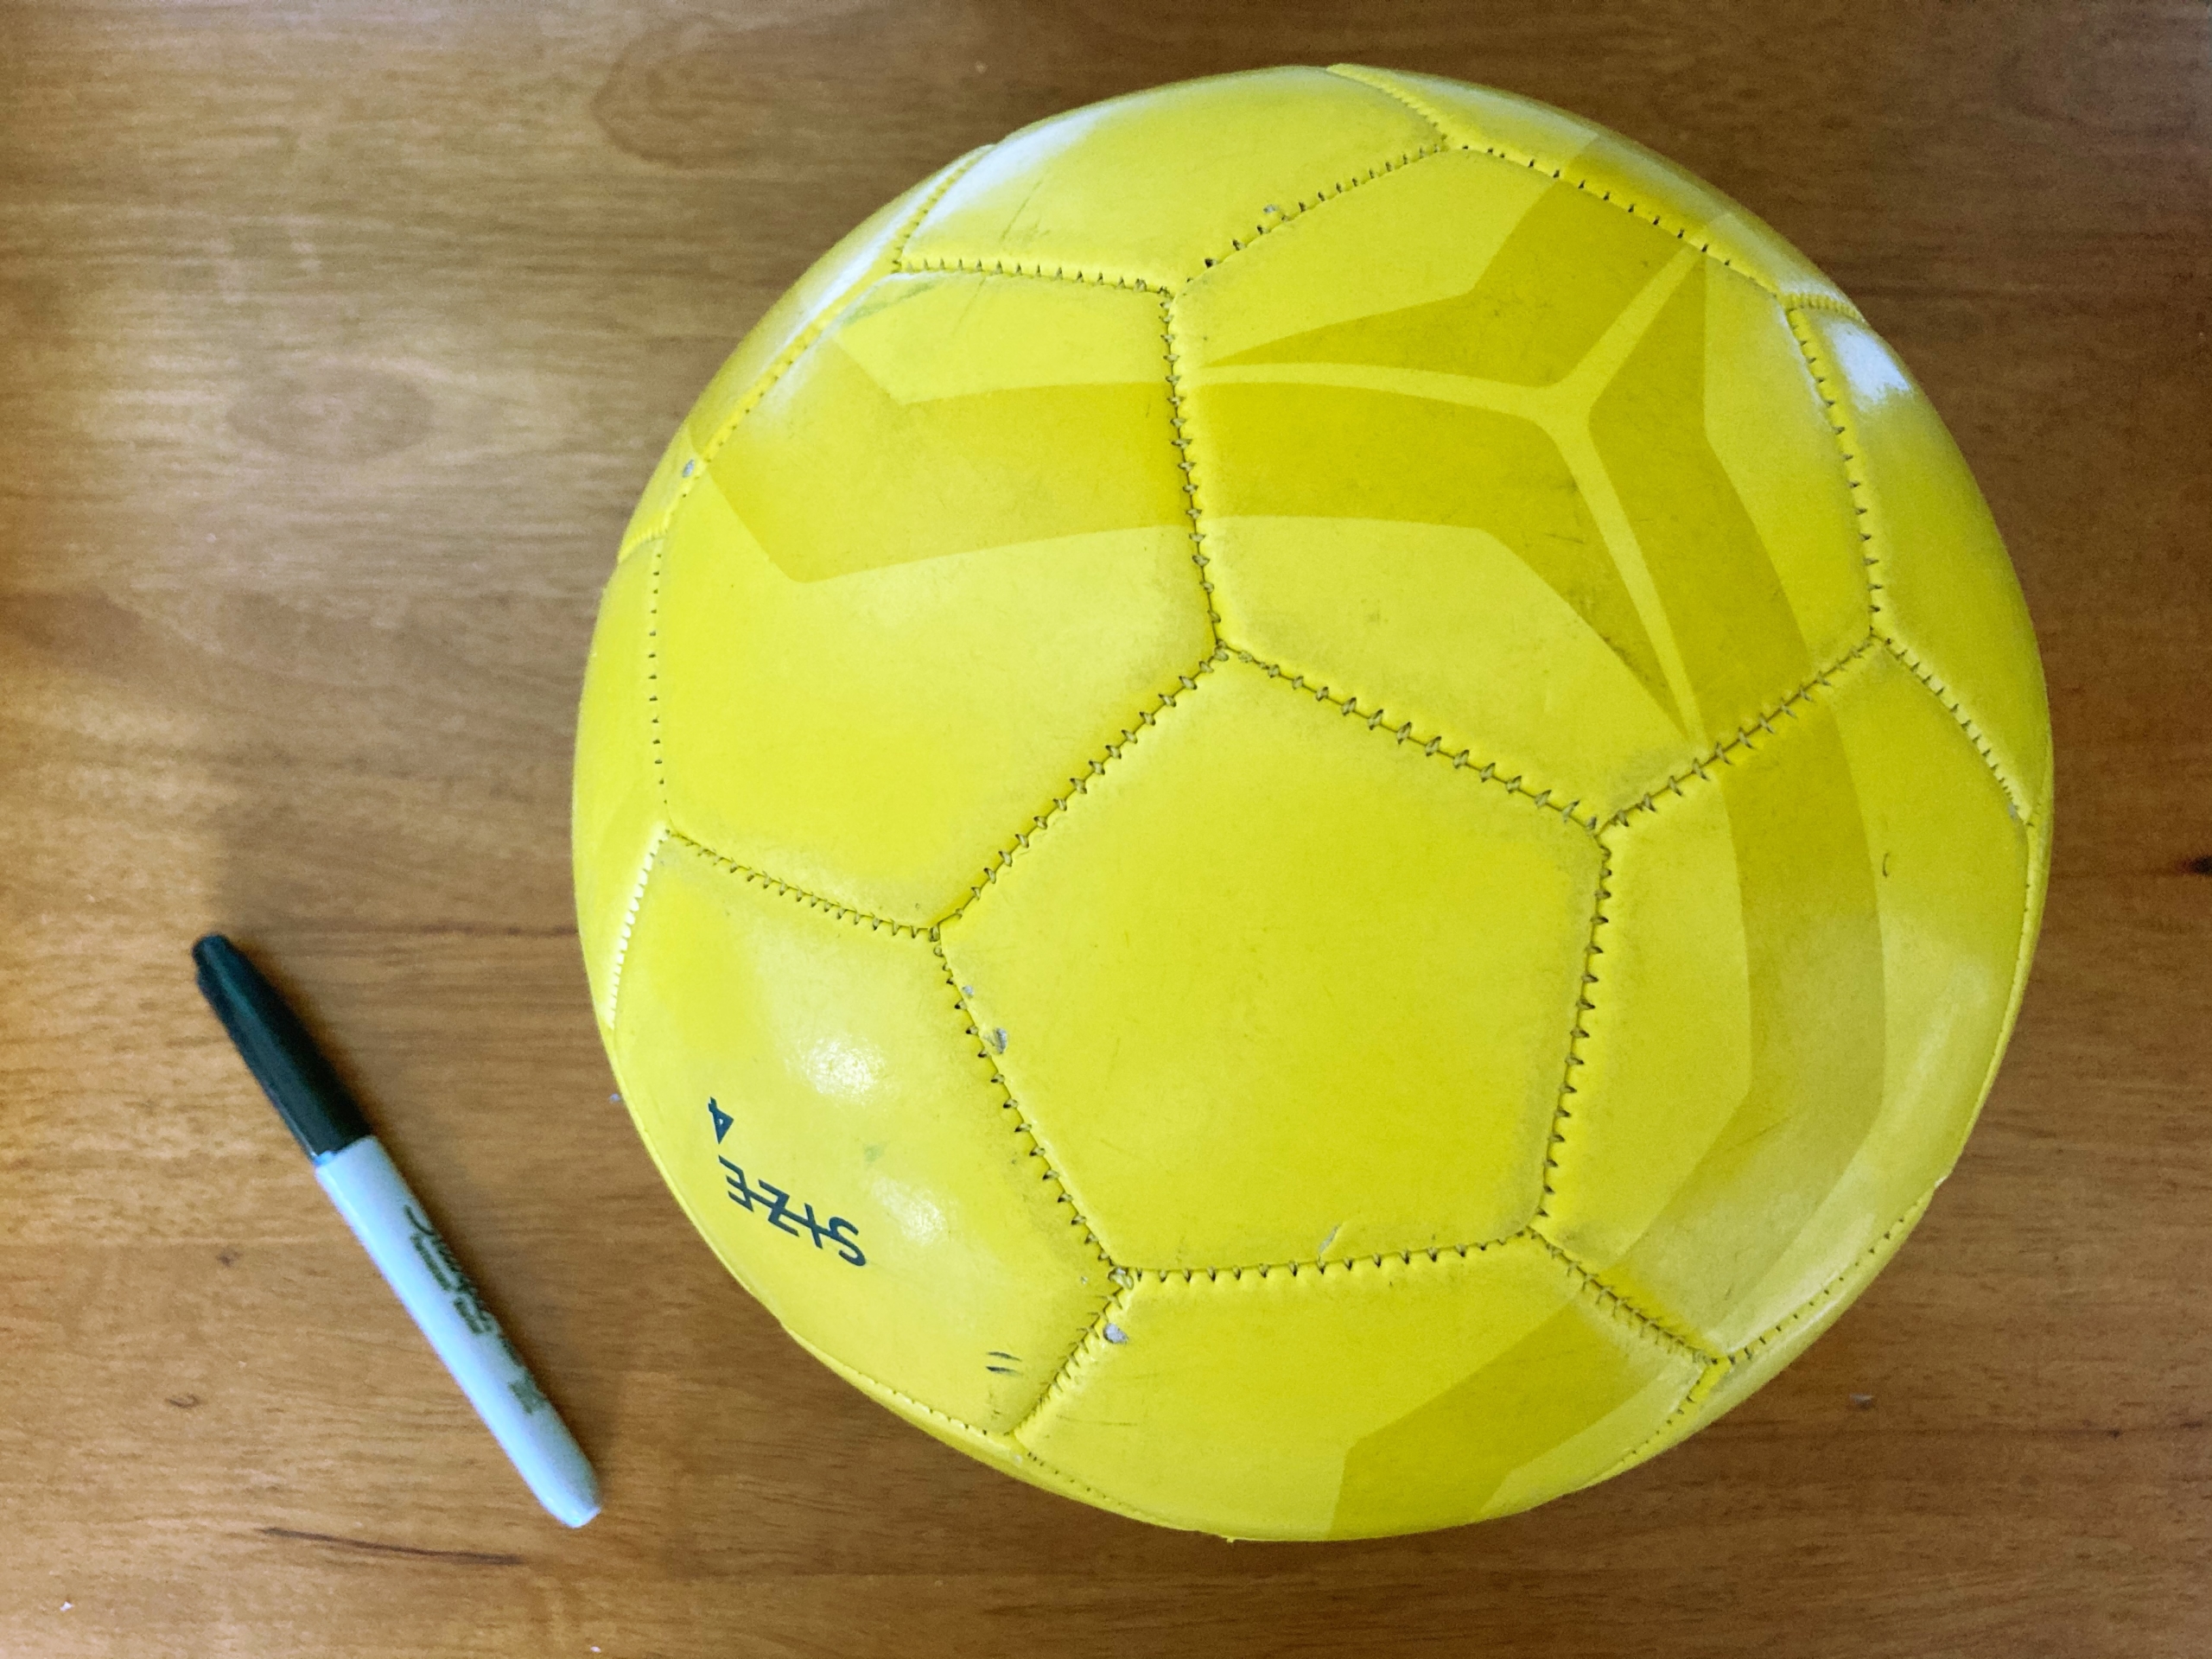
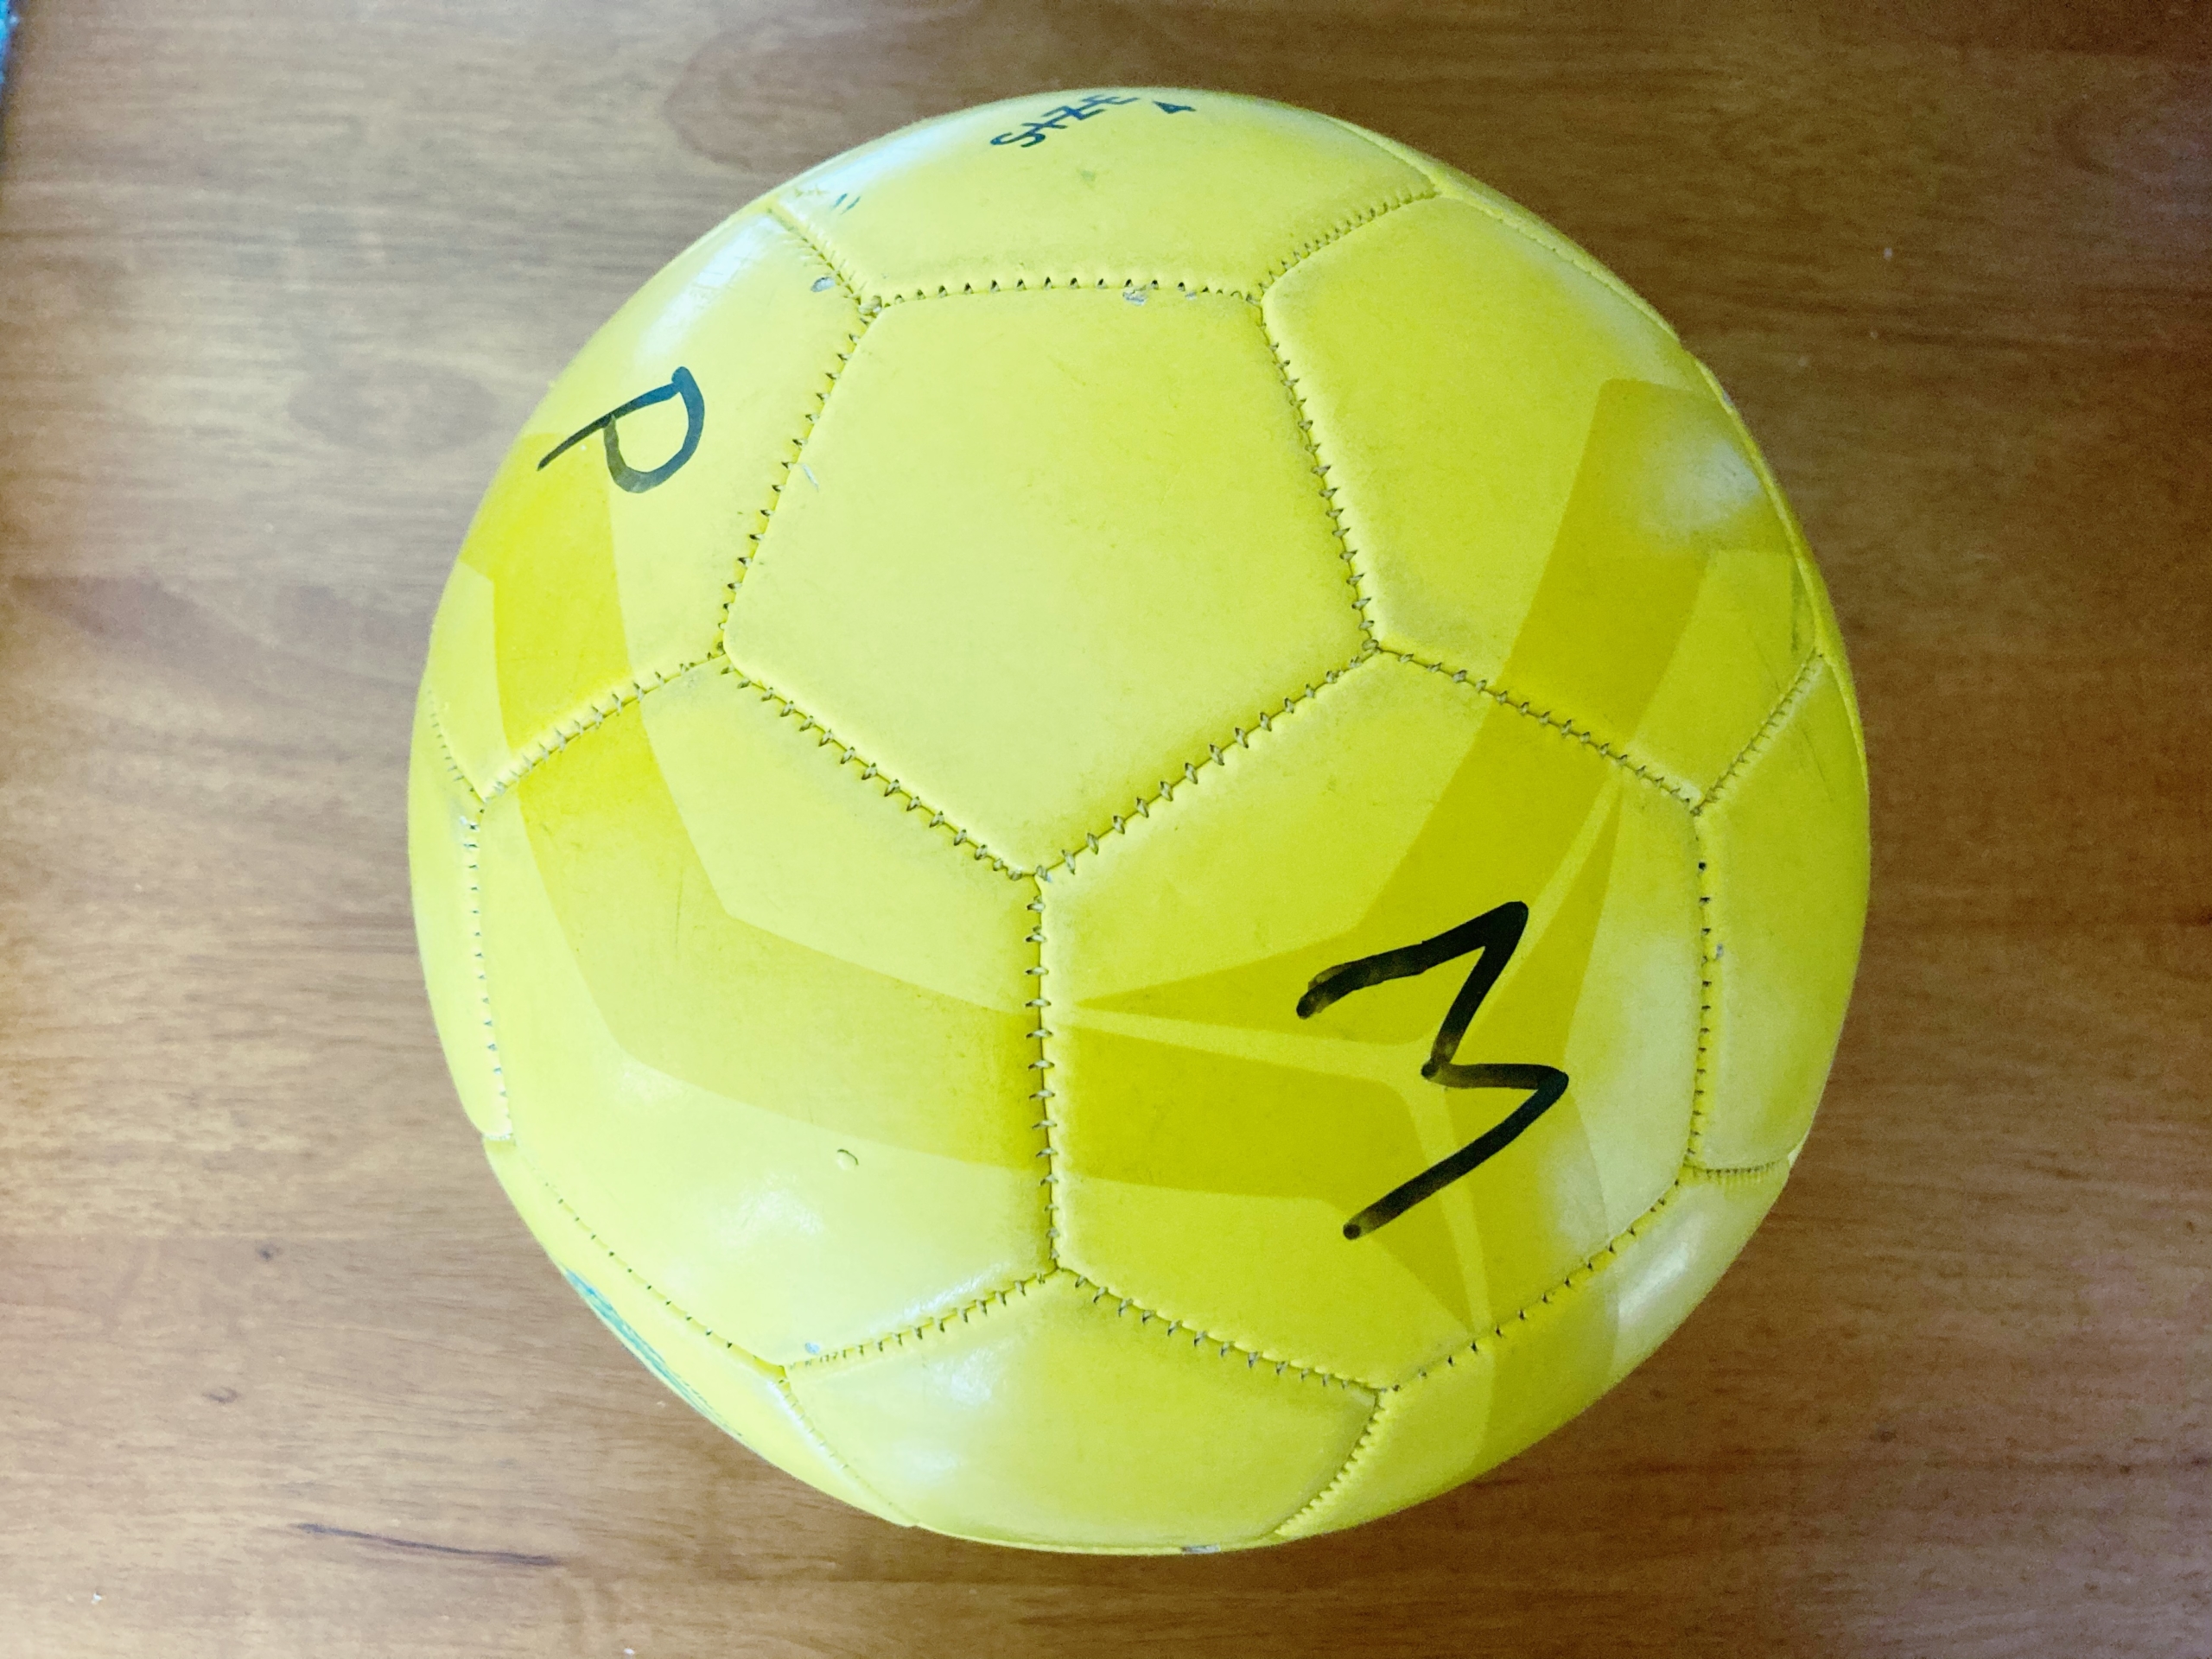
Ditching the worksheets or flash cards (or taking a break from them) doesn’t mean you don’t need to drill certain skills, though. And that’s where some creativity can go a very long way. Try this letter-sound and sight-word soccer game to work in a little practice with active kiddos who’d rather be running around than drilling indoors. It’s a fun trick to teach reading to kids who can’t sit still. And guess what? The fresh air and exercise may do you both some good, too!
Materials:
- An old soccer ball, volleyball, kick ball, beach ball, or other larger ball
- Permanent marker or dry-erase marker
- List of letters, sight words, or spelling words for your child to practice
Cost: Free if you have a ball to upcycle. Or pick one up for a few dollars!
Preparation: Just write your target letters or words on the ball. Easy as pie! However, we do have a few tips for you, as well as levels of play to move your child through. Scroll down to read them.
Tips:
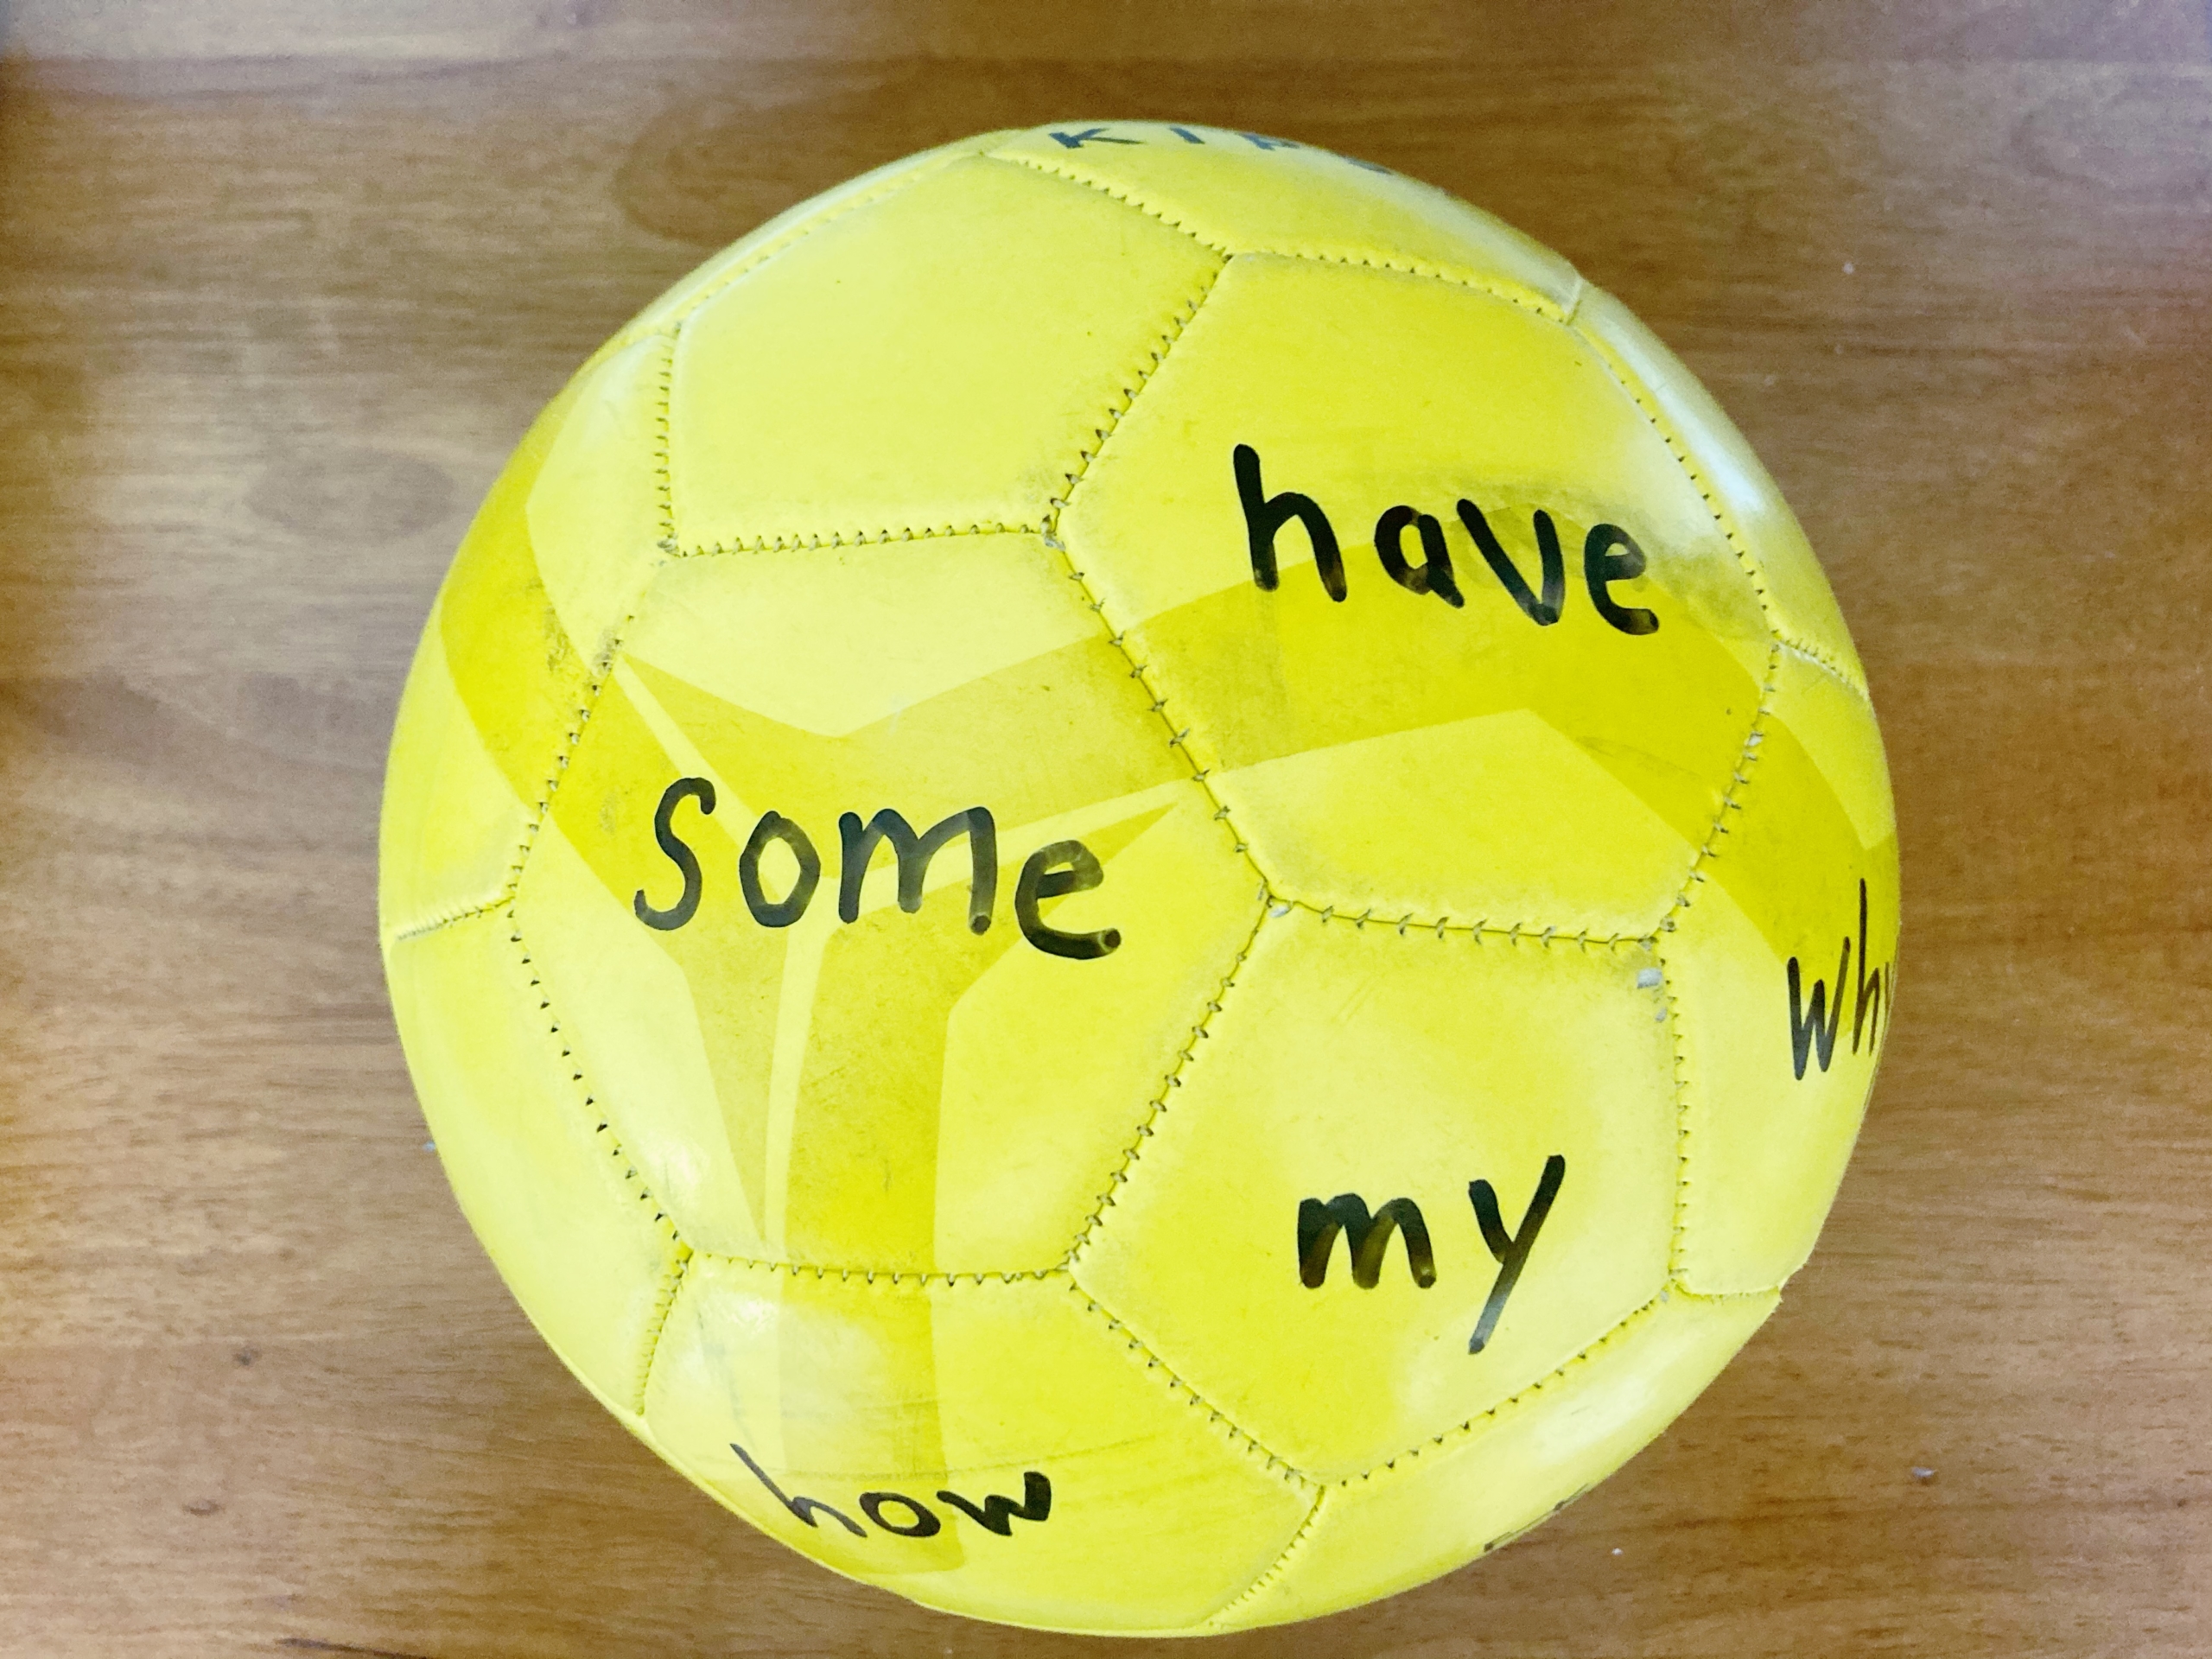
- Start by writing just a few letters or words spaced apart around the ball. As your child gains knowledge and confidence, add more in the spaces in between.
- Using a permanent marker will ensure your writing doesn’t smear as you play, but you can also try a dry-erase marker in order to change up the letters or words over time. It will wipe off little by little as you play, but dry-erase markers have some staying power on certain balls, so you can go ahead and experiment.
How to Play Letter-Sound Soccer or Sight-Word Soccer
Just play ball! You can sit on the ground facing one another (with your legs open in a V to catch the ball if you miss) and roll it back and forth, toss it to each other if your child is ready to catch, or kick it back and forth, stopping the ball with your foot each time. When you get the ball, read the letter or word facing you, then invite your child to do the same on their turn.
Tips:
- Your number one goal is to make practice fun, so keep your game light-hearted, brief, and playful. Fit your play to your child’s attention span; it’s better to play a few minutes regularly than burn them out on the first go.
- When your child doesn’t know an answer or makes a mistake, avoid showing frustration or disappointment. Instead, act excited about getting to help them (“Yes! I get to help you for once! You’re such a big kid, and I still want to be able to help you sometimes!”) and then move on quickly.
Levels of Play for Different Ages, Stages, and Interests
- Letter names: For the youngest kids, it’s best to begin with common letters written in capital letters. Start with frequently used consonants, such as M, N, B, P, W, H, T, G, K, D, N, and G—plus your child’s first initial and any other familiar letters.
- Letter sounds: As your child begins to recognize the letters, you can quickly integrate letter sounds into your game. Take turns identifying the sound each letter makes as you toss (or kick) the ball back and forth. As soon as your child is ready, change things up by asking your child to make a word that starts with each sound when their turn comes.
- Vowels: The next level is to add in vowels: A, E, I, O, and U (and sometimes Y, if you like). Explain that each vowel can make a long sound (A as in cake) or a short sound (A as in apple) and then practice through play!
- Sight words: Write words your child is learning to read on the ball. To keep the fun up and frustration down, we recommend mixing in some words they already know with some that are more of a stretch. Include your child’s name and any other family names they know; you may also include “mama,” “daddy,” etc. Slowly add new words over time.
- Sight-word sentences: You’ll want to add some twists and turns to your game play to keep your child from getting bored. You can take turns making up silly sentences with the words you read, or throw the ball back and forth a few times and then make up a sentence together with all the words you read.
- Spelling words: You can keep playing this game with kids’ spelling words as they grow. Sometimes there’s nothing for it but to memorize tricky words (“might,” “could,” and “would” come to mind!) and games like this can help make the memorization bearable.
Bonus Storytelling Version for All Ages
- Storytelling: Kids of any age can benefit from storytelling games, which engage them in hearing and inventing stories, building up their language skills, imaginations, and fluency in the process. You can create a storytelling soccer game for any age by drawing simple pictures or writing creative words around the ball. Just pass the ball back and forth a few times, then take turns making up a story based on the pictures or words that came up.
We hope this game inspires you on ways to teach your child to read even when they can’t sit still—or just when you both need a little active fun. Enjoy! And be sure to let us know if you come up with any fun adaptations of this game with your little ones.
*Soccer ball pictures by Laila Weir.
My Daddy knows most everything
When his powers are unfurled,
And I’m not scared of anything—
My Daddy rules the world.
— Hope Anita Smith
This poem from Hope Anita Smith’s book, My Daddy Rules the World: Poems About Fathers, reminds us of how fathers or father figures can make a child’s world a better place. In this activity, we’ll draw on our love for them and our love for reading to make a wonderful gift—a Father’s Day acrostic poem!
“What is an acrostic poem?” you might ask. An acrostic poem is a poem that uses each letter in a word to begin a new line that describes or relates to the original word. For example, here’s such a poem for the word sun:
Shines all day
Up in the sky
No one brighter
Acrostic poems make great gifts because they’re so specific to the person who receives them. No two are alike, even if two people write about the same person! A personalized poem is so much better than a store-bought card. They’re also fun and simple to come up with (no rhymes required!), so they’re perfectly suited to make free, easy Father’s Day cards with preschoolers.
From a reading and writing point of view, they’re also a great literacy-building activity—children have to rely upon their alphabetic knowledge to think of words that begin with each letter, as well as practicing handwriting and spelling. It’s a good chance to break out a children’s dictionary, too! To add an extra literacy element, you can make your Father’s Day card part of a story time activity, beginning by reading Poems About Fathers together with your child.
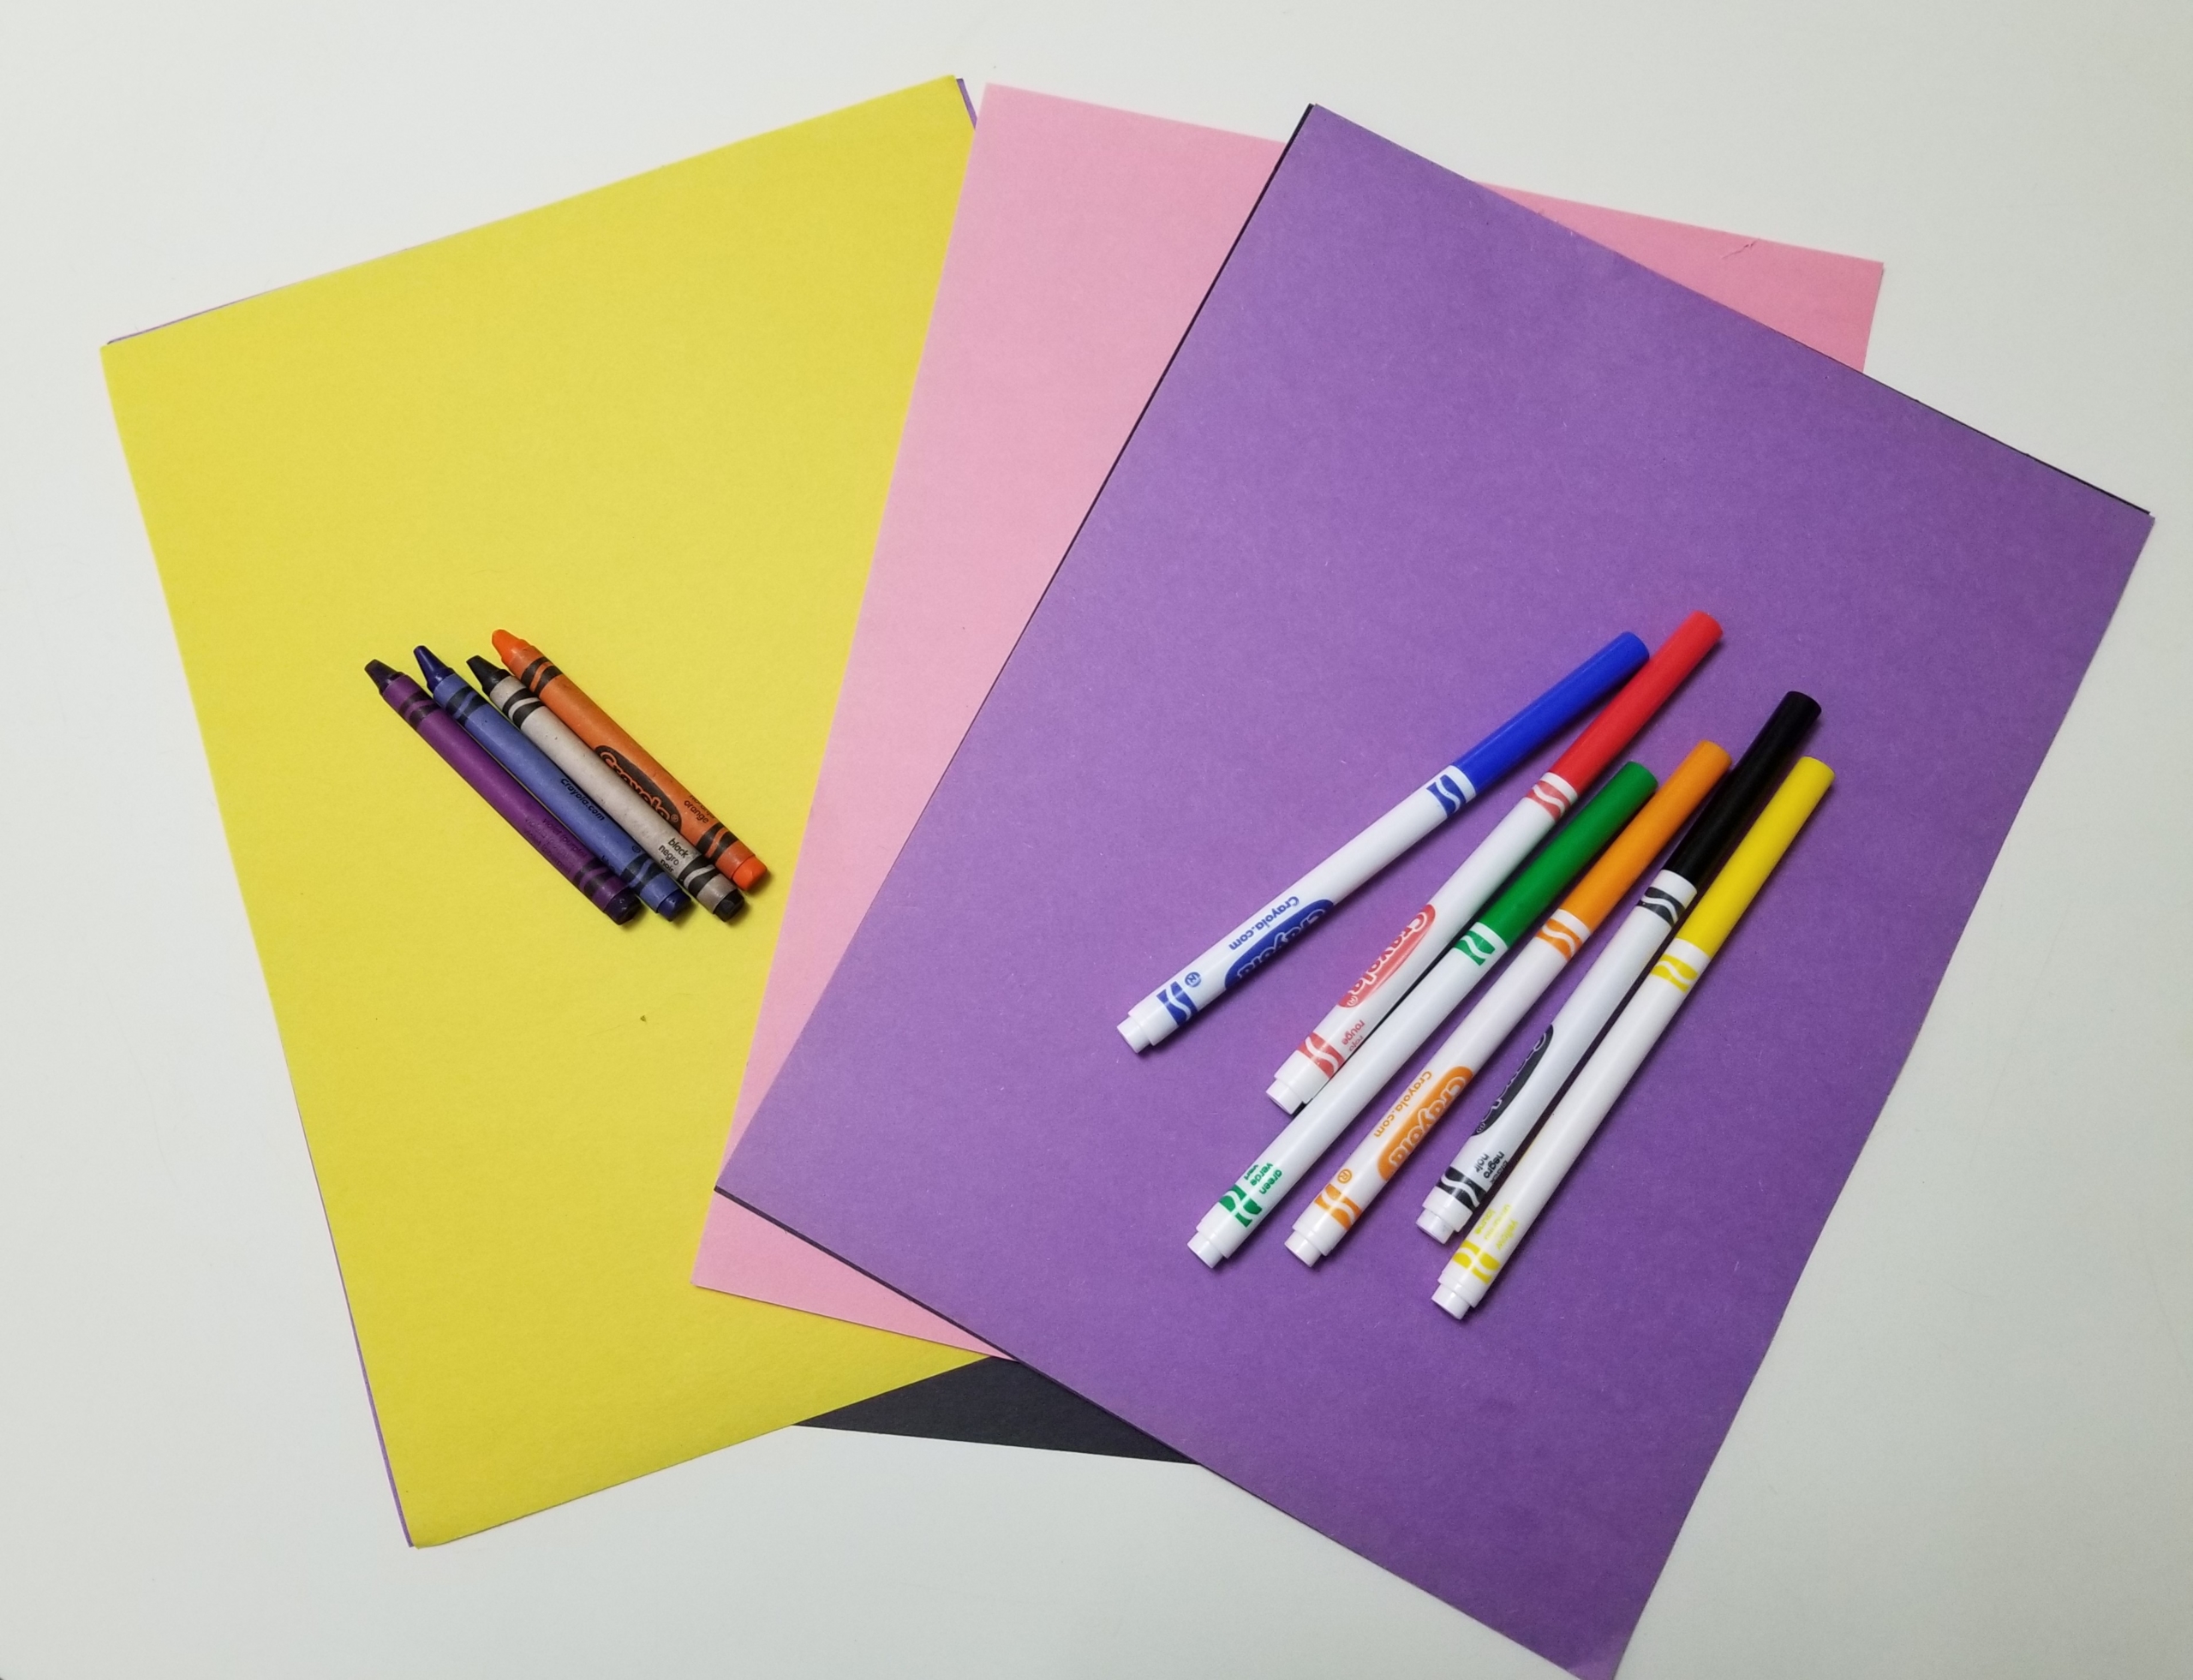
Materials:
- Paper
- Markers or crayons, etc.
- My Daddy Rules the World: Poems About Fathers by Hope Anita Smith (optional)
Cost: Free! (Look for the book in your local library if you want to incorporate story time with your craft.)
Step 1 (optional): Cozy up with your child and read My Daddy Rules the World: Poems About Fathers by Hope Anita Smith.
Step 2: Talk about the things your child’s father (or uncle, grandpa, or other important masculine figure that you’re celebrating) does for your child and the family. Discuss ways they spend time together, or their father’s likes and dislikes. This will inspire your little one in writing their poem.
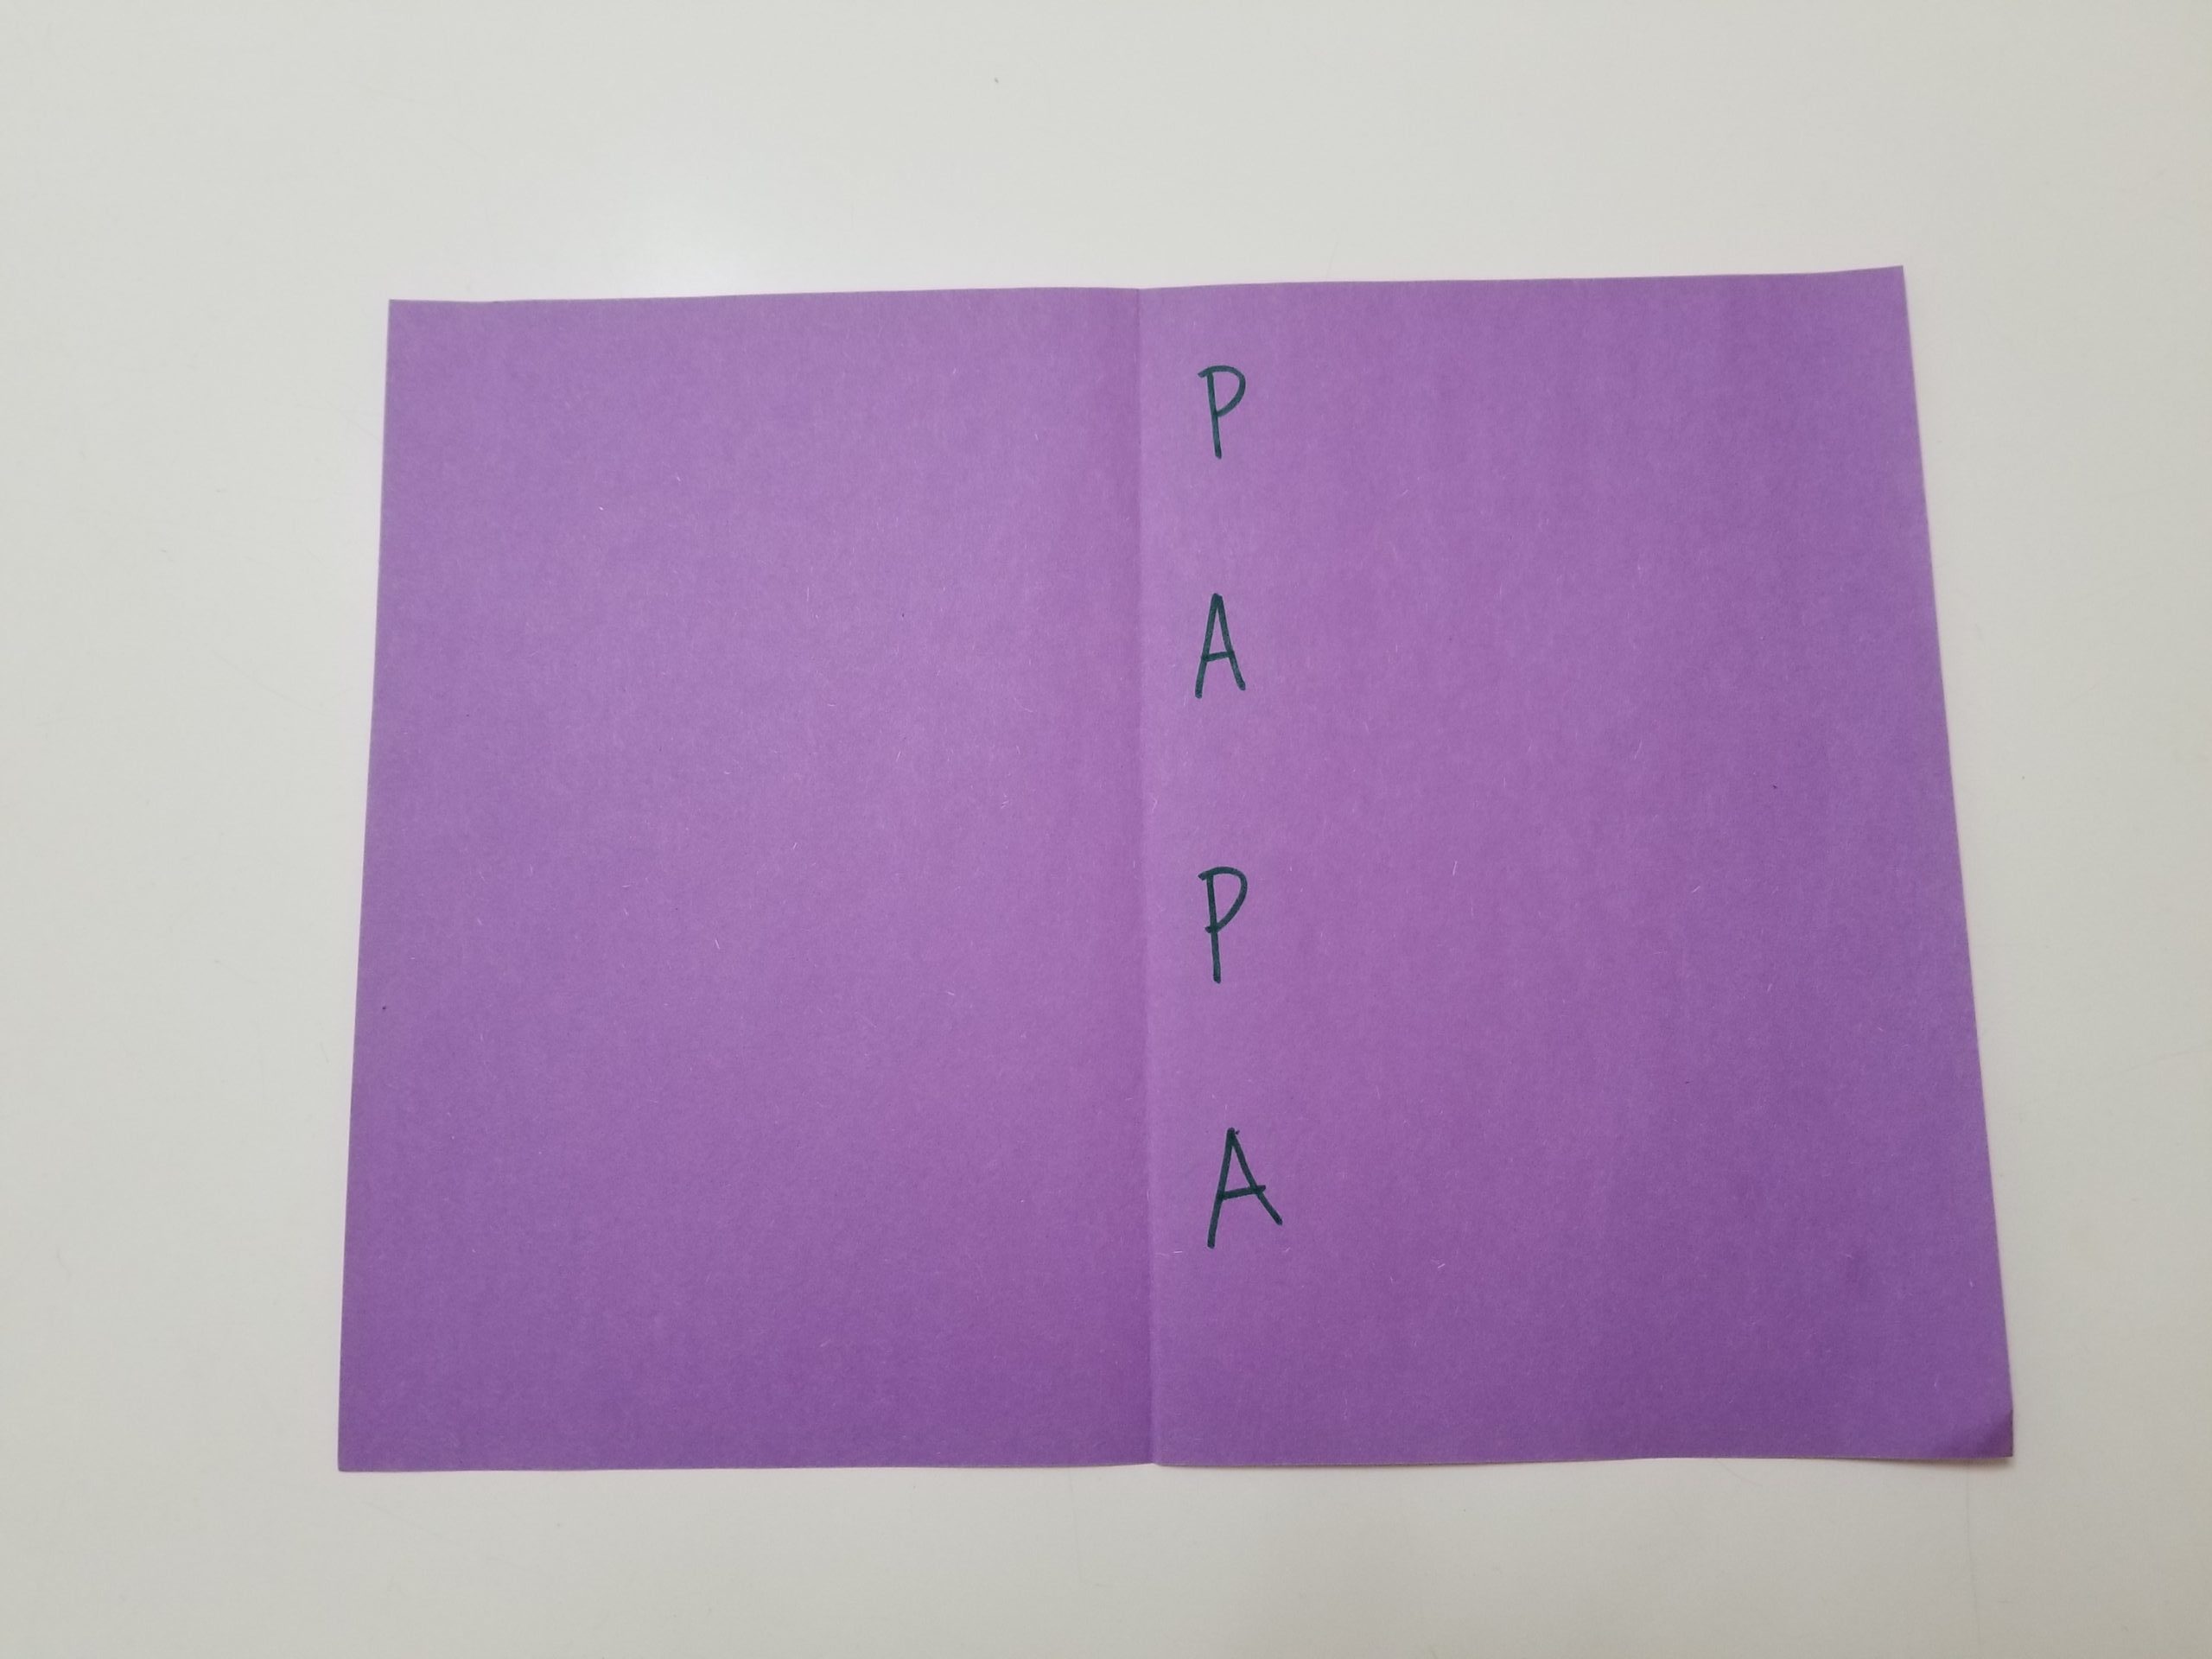
Step 3: Take a piece of paper and fold it in half, making a card. On the inside, have your child write their father’s name vertically down the side of the paper. This can be the name they call their father (e.g., Dad, Papa, etc.) or their father’s actual name. If your child is very young, you can write the letters for them or have them trace the letters. For older children, let them write the letters independently.
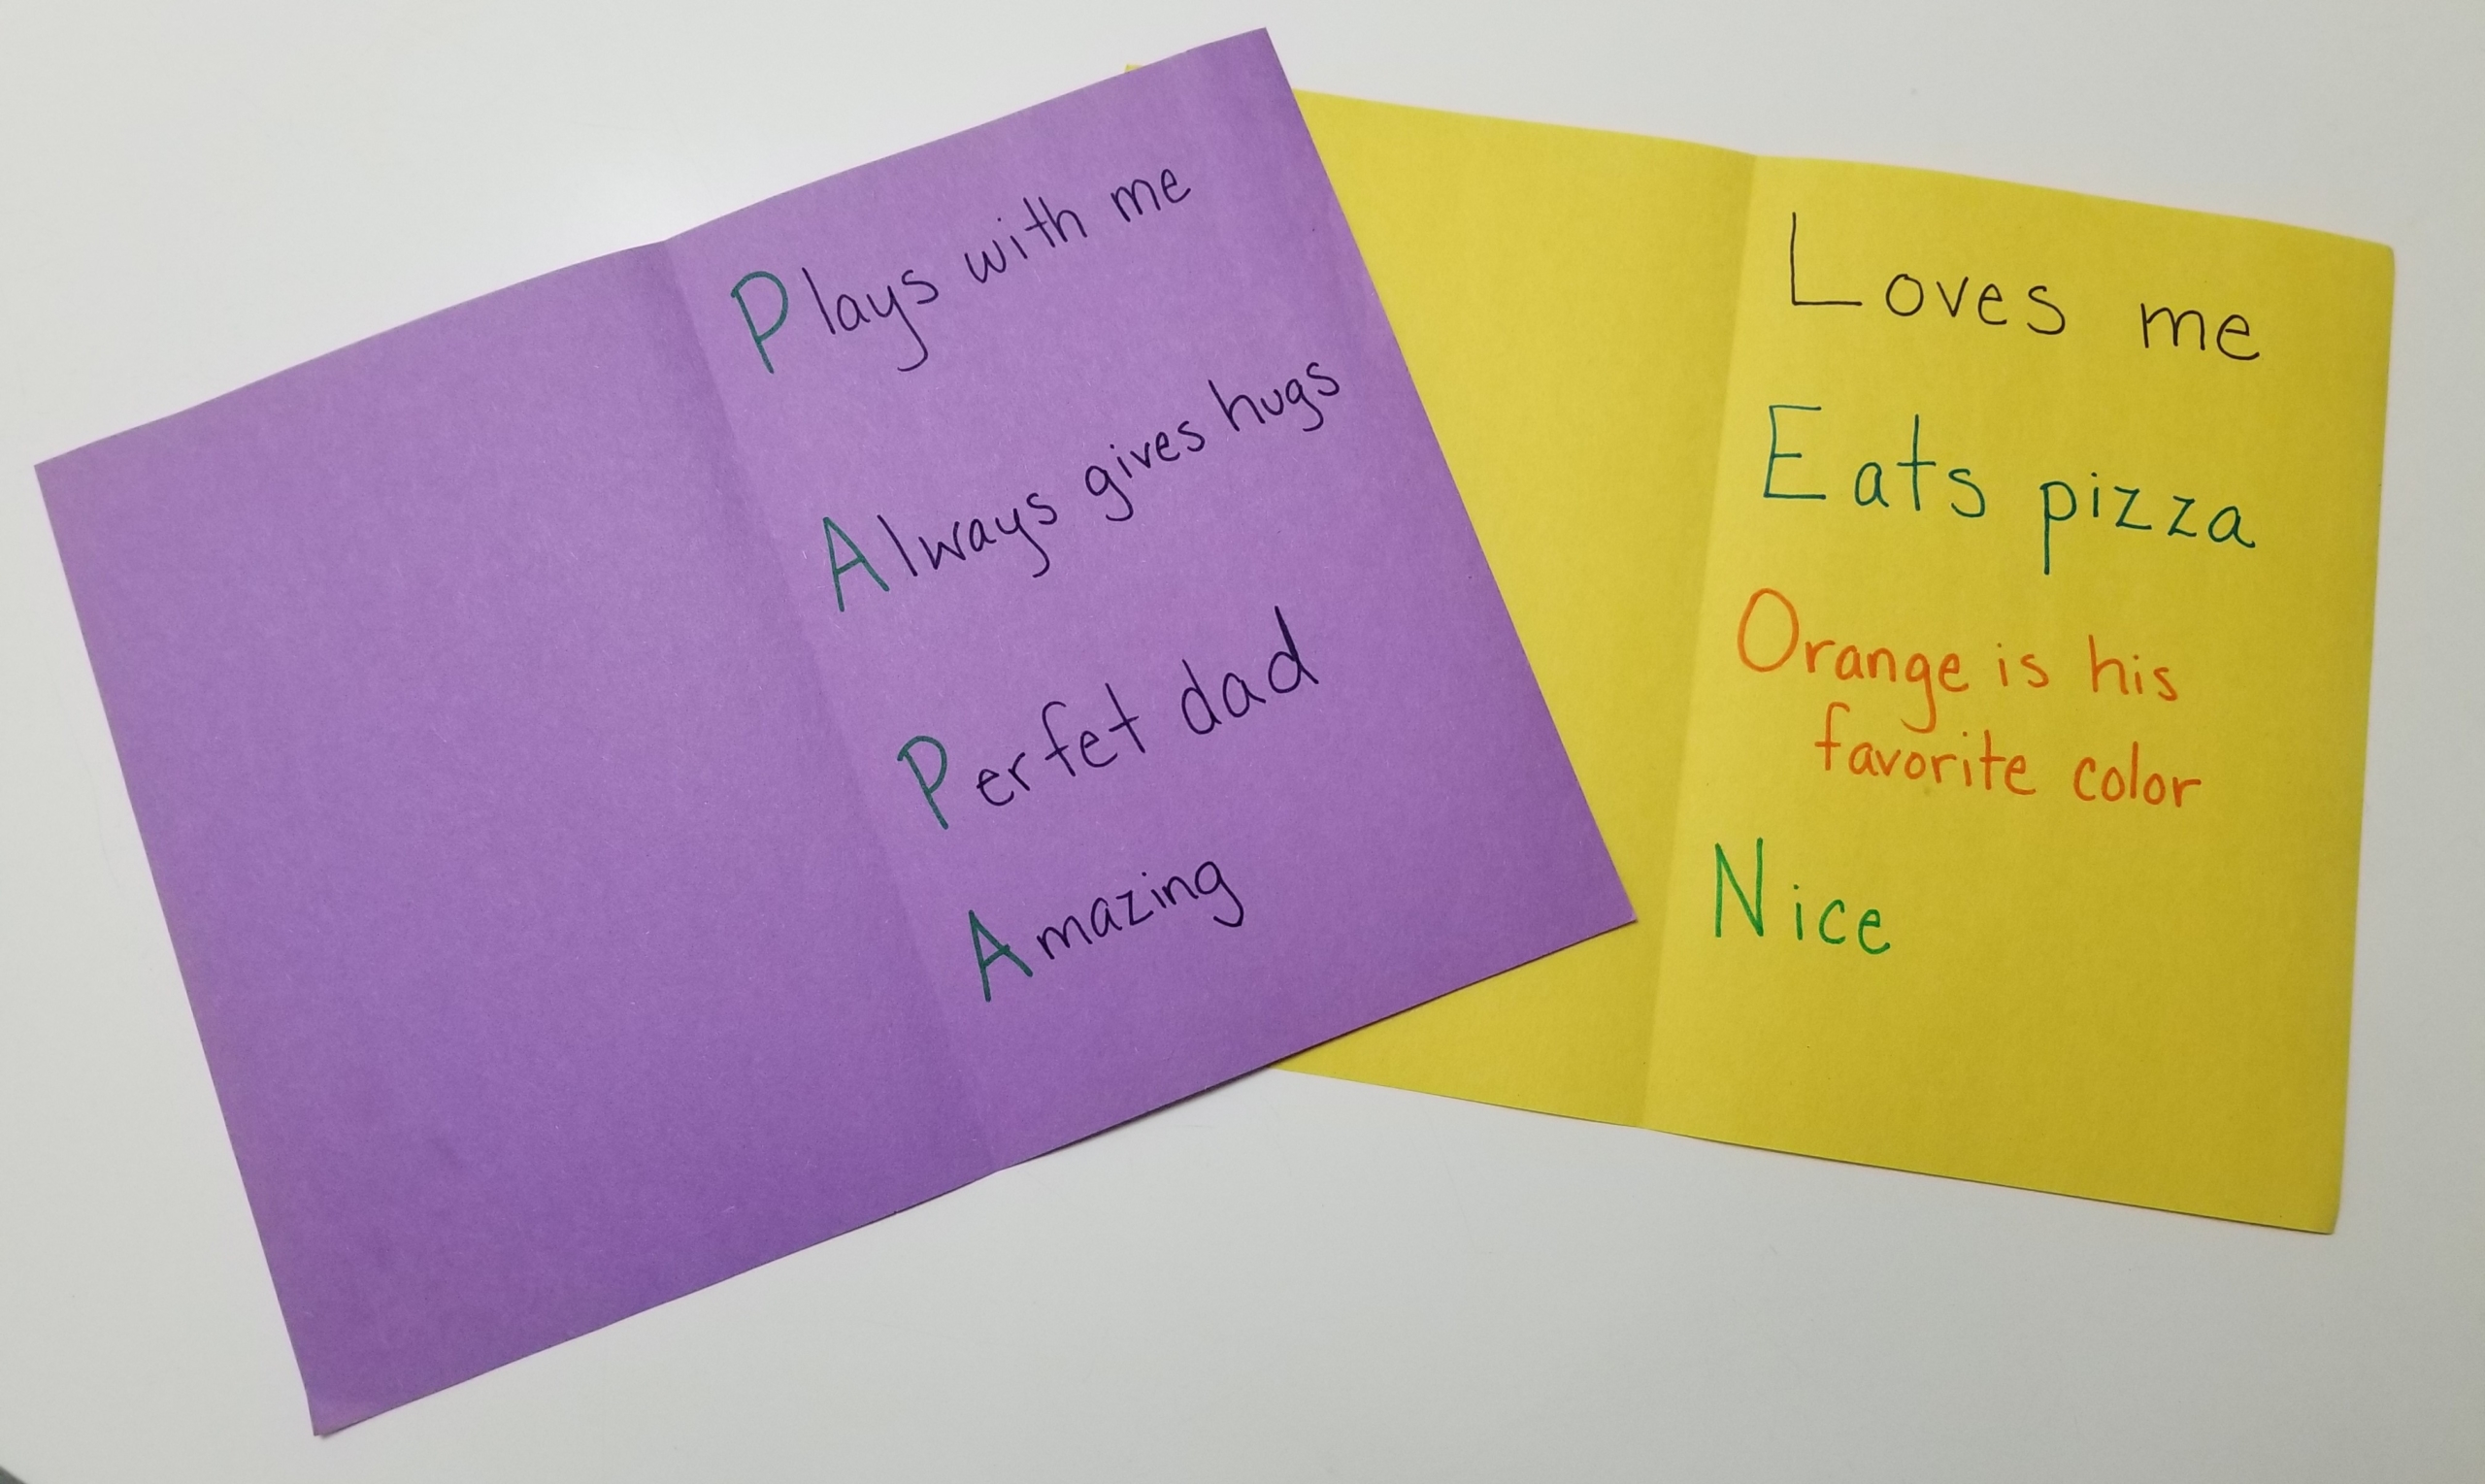
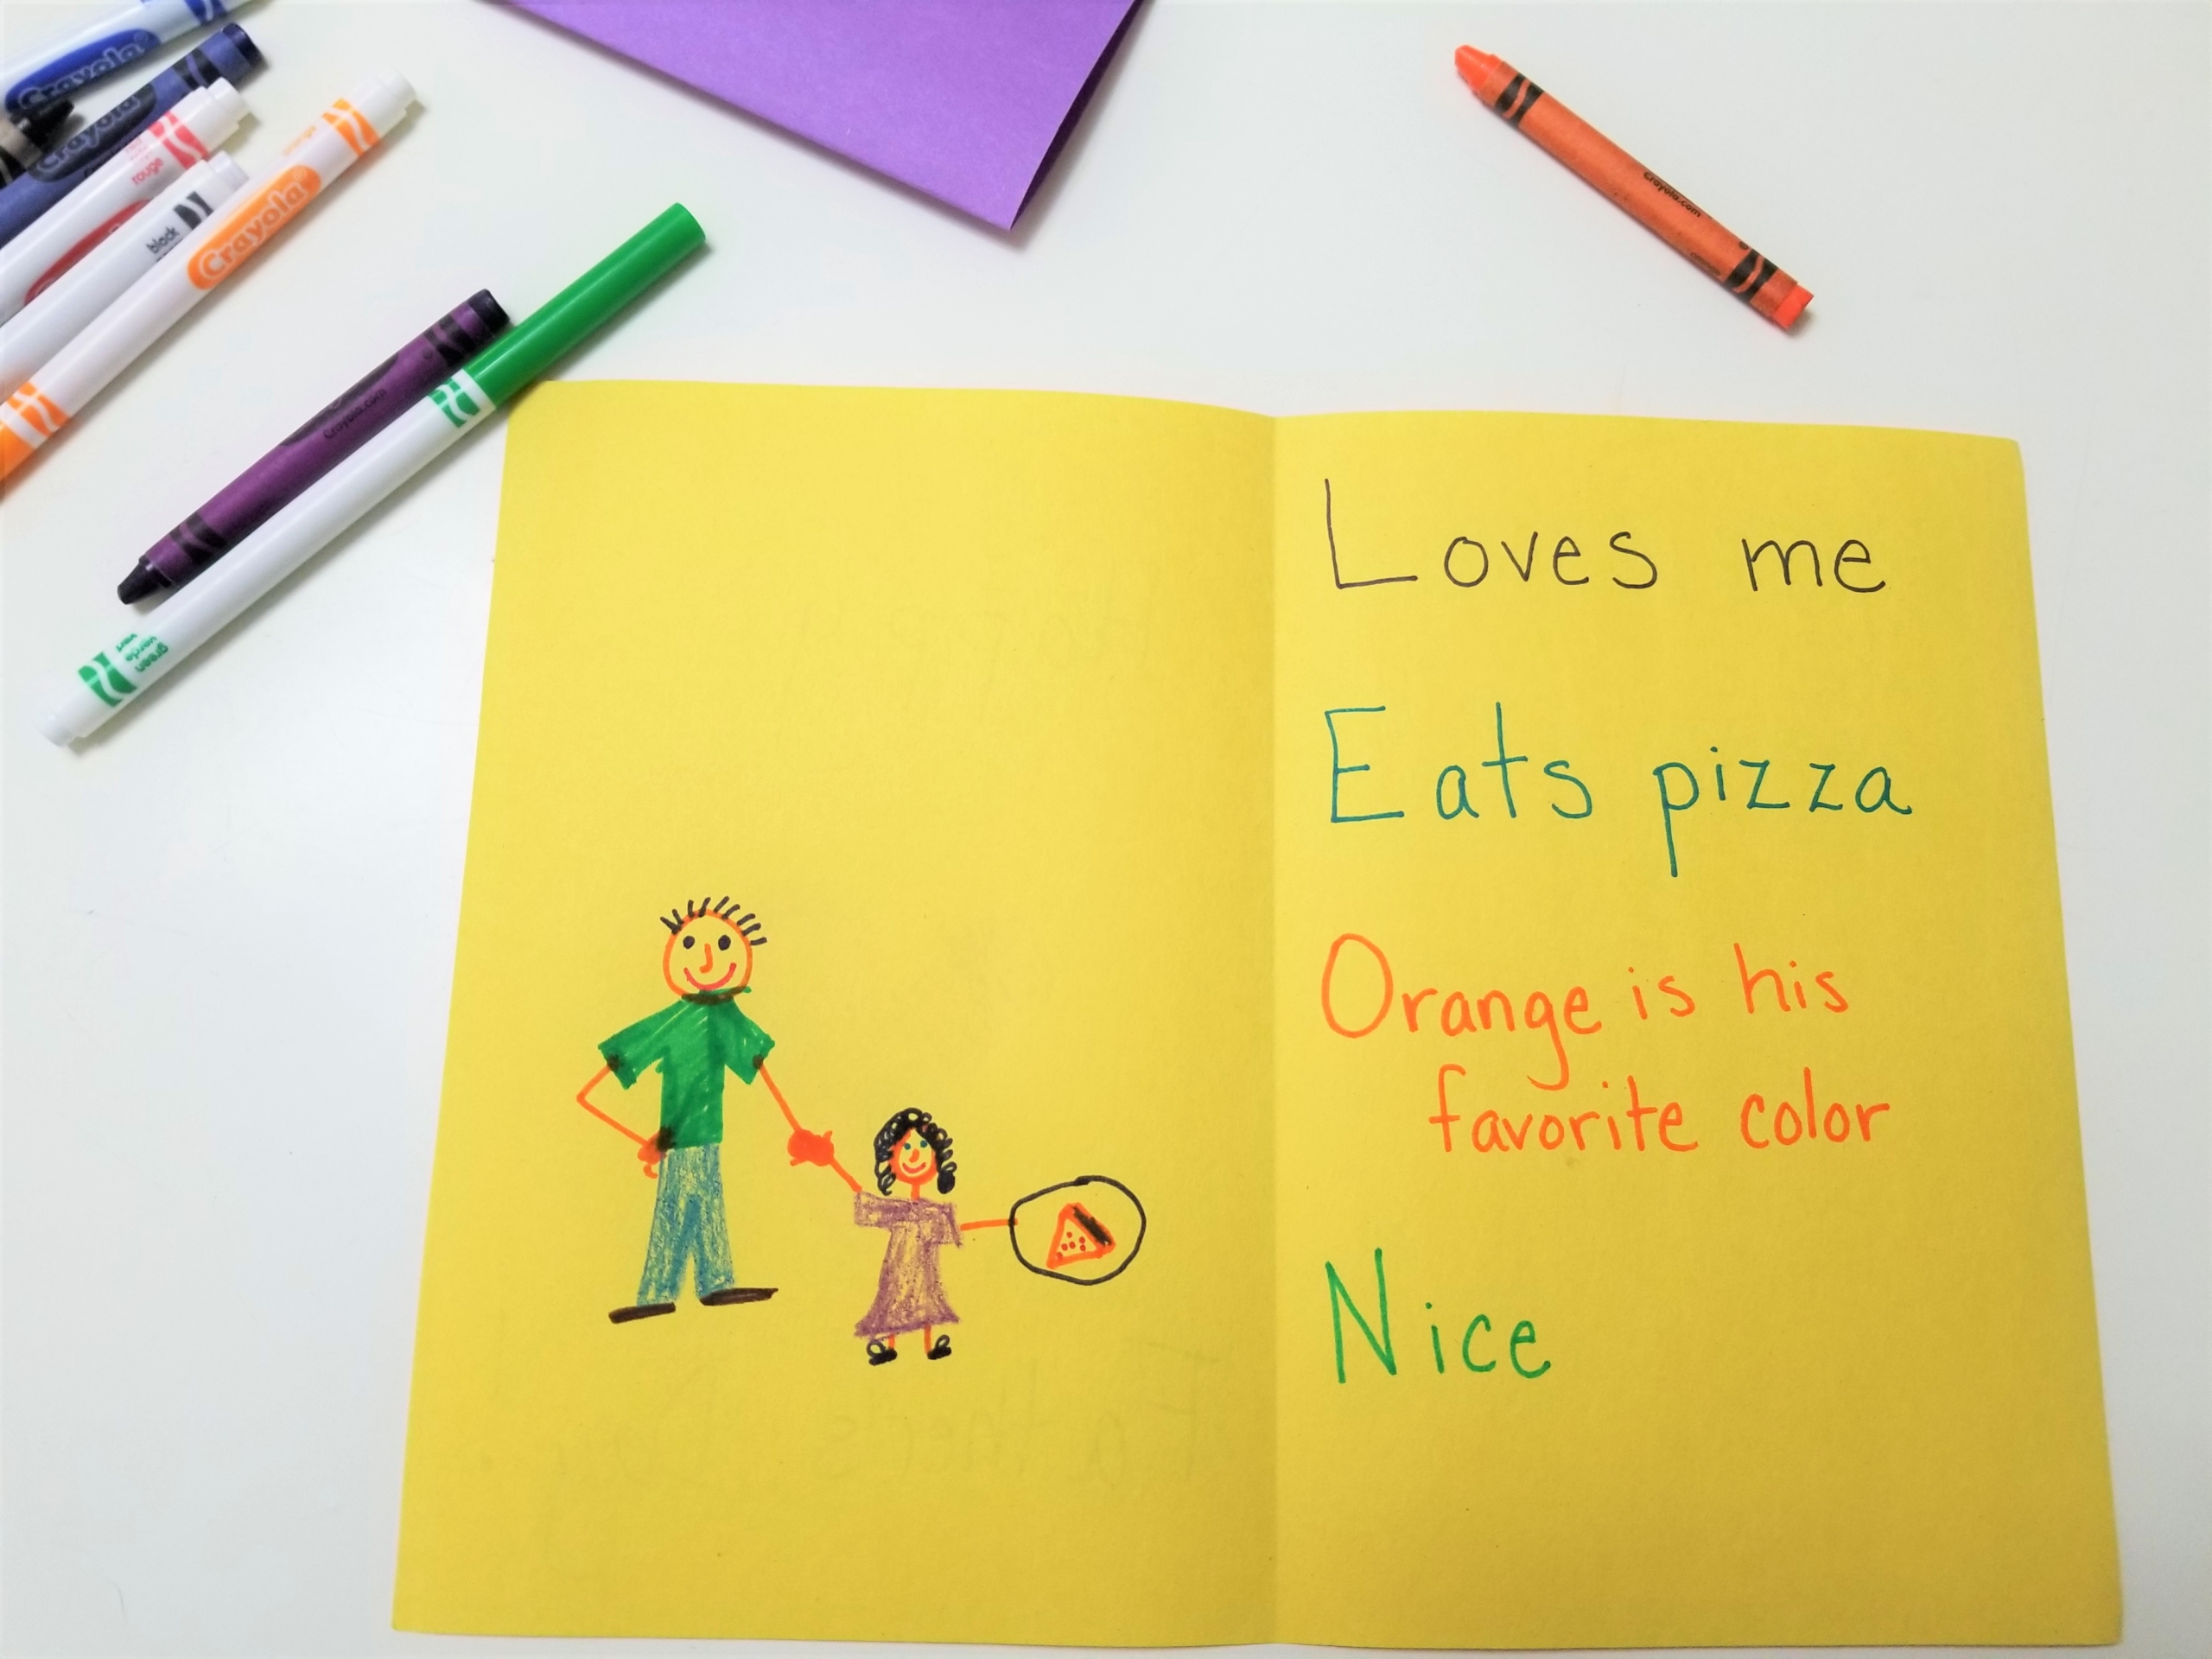
Step 4: Have your child think of qualities of their dad’s that begin with each letter, and write them down on the page (as shown in the pictures). Help your child identify the sound of the letters and brainstorm words that begin with them as examples. This is an important opportunity to reinforce their knowledge of letter sounds.
For younger children, you can write the words for them. For older children, help with spelling only if they ask. Otherwise, let them sound the words out, and remember that the process is what’s important. Mistakes are how we learn. If the outcome has some misspelled words, that’s okay! It shows they made the card themselves.
Step 5: Let your child decorate the card!
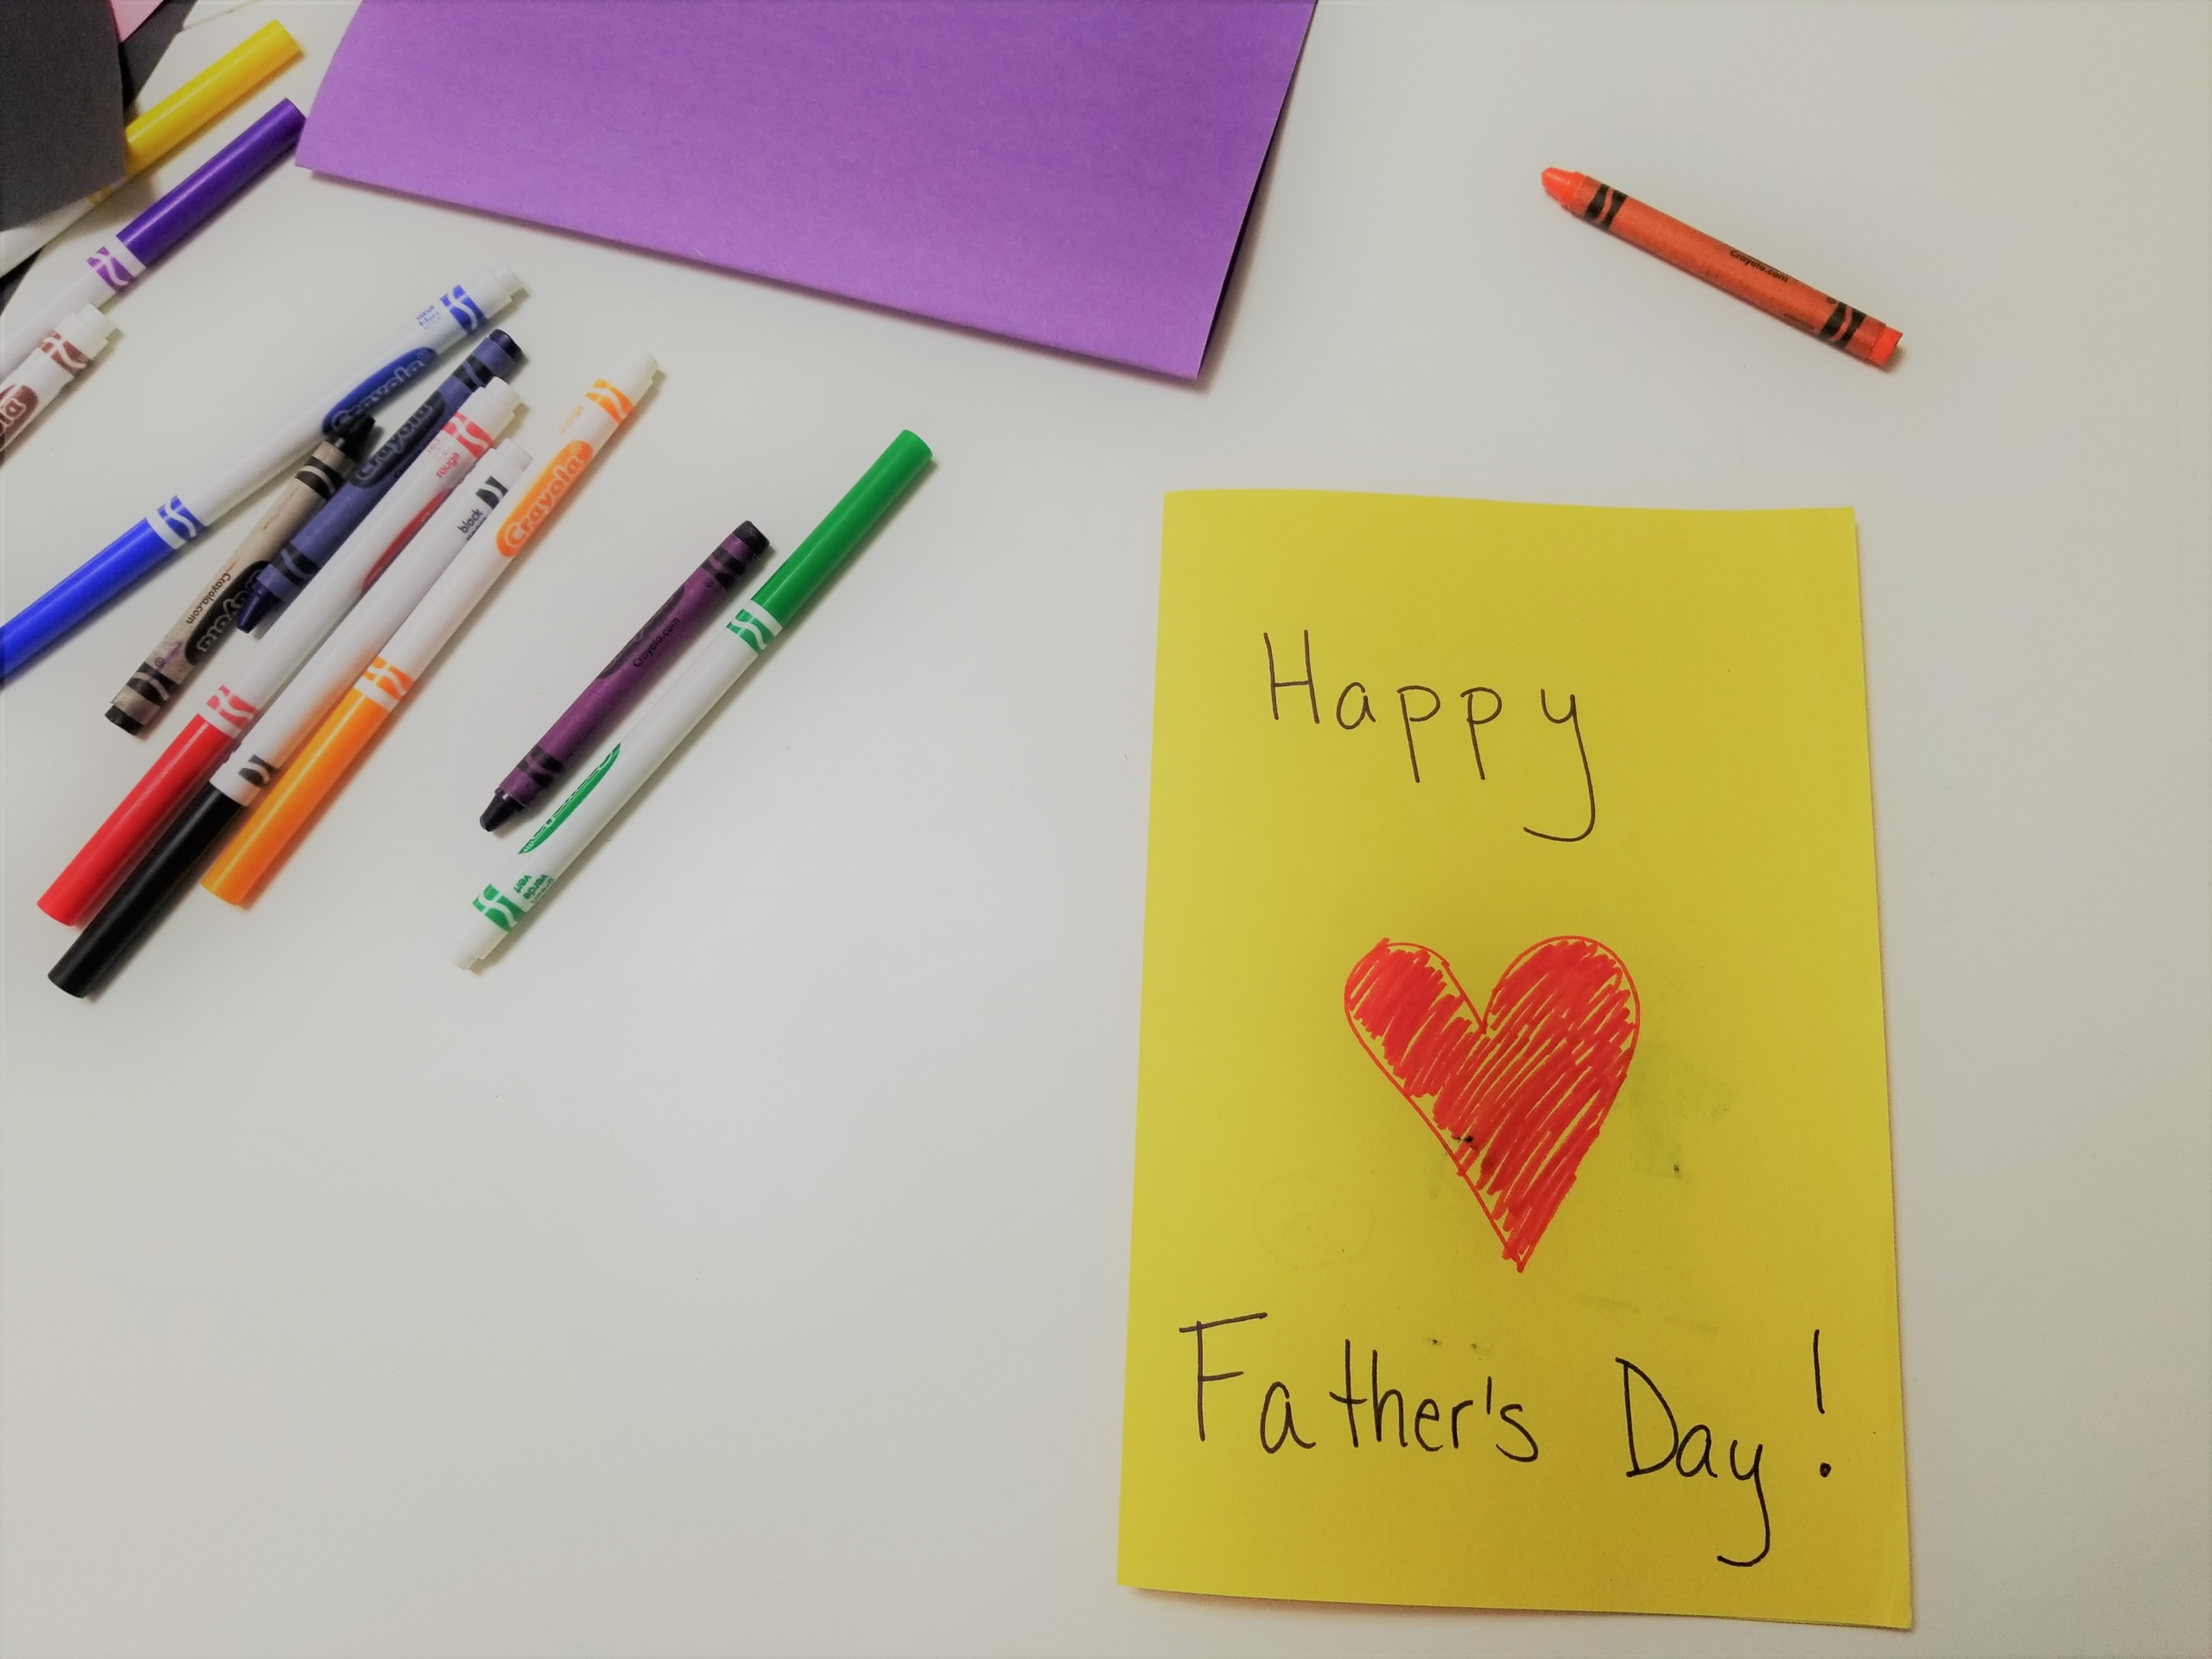
This Father’s Day acrostic poem is free, easy, and (most importantly) super special! Just like Dad. As a fun tradition, you can have your child make a new one every year and see the changes that happen as they grow.
Pin me for reference

Telling and sharing stories is a tradition so ancient and universal that some say that it’s what makes us human. It’s also an incredibly powerful tool for engaging children and building literacy. In fact, some teacher training suggests that storytelling supports all areas of literacy learning—listening skills, imagination and creativity, language use and story structure, and more—as well as improving cultural connection.
But we knew that, didn’t we? The power of story is visible in everything from the draw of television to the ubiquitous childhood cry (so often heard as bedtime passes into night) of “tell me a story!” Spinning a tale, whether tall or true, is one of the best ways to spend time with the little ones in our lives. However, turning the tables can be great too, and not just because it gives tired parents a break: Encouraging children to invent and share stories builds their fluency and their confidence as future writers.
In celebration of the ancient power of sharing stories, we’ve pulled together some cute crafts to spark storytelling in your family. We invite you to check them out, tell a tale or two, and then ask your child to tell one of their own.
Create a Storytelling Puppet
Telling a story with a puppet is loads of fun, and it really helps self-conscious kids (and grownups) deflect the limelight and come out of their shell. You—or even better, you and your child—can make an adorable storytelling hand puppet out of a paper lunch bag. We’ve got tutorials and printable templates to make a mythical lion puppet inspired by Lunar New Year traditions and to make a super-cute bunny puppet. Or draw your own animal or other character to inspire your family’s storytime. Silly voices encouraged!
You can also create mini storytelling puppets by drawing little faces on the tops of craft sticks or on cardboard cutouts glued to craft sticks.
Upcycle Building Blocks into Storytelling Dice
Storytelling dice are a fun game to get your creative juices flowing. Just roll the dice and make up a story based on whatever pictures are showing. You can buy premade dice, but why not save the planet and engage your kids in a craft by recycling some old building blocks into your own DIY storytelling dice? Our Easter Storytelling Dice tutorial shares how to make Easter-themed dice, but you can adapt it to any theme or topic your family is interested in.
Make DIY Storytelling Cards
Another adaptation is storytelling cards, which have different pictures (or creative and inspiring words, for older kids) on each card. Just shuffle them, deal a few cards, and let the story roll!
Check out our tutorial to make your own storytelling cards from old playing cards or index cards.
How, when, and where do you get the stories rolling in your household? Do your kids love real-life memories or tall tales best?
Liked this article? Share it!
We have a saying in our family of three children: Siblings are friends for life. But along the way to that lifelong relationship are plenty of challenges, competition, and complicated feelings.
Encouraging first children to get excited for an upcoming sibling, and then supporting both younger and older children through the emotional ups and downs of their relationship, will help them develop that special bond. And a well-selected book is among parents’ most powerful tools to gently nurture siblings through each stage, cultivating their relationship without ever feeling heavy-handed.
Read on for tips on using story time to build the sibling connection, plus suggestions of picture books for siblings that will help with each.
Share What to Expect for the Expecting Sibling
Small children have no idea what’s coming when their family is expecting a new baby. Helping them understand is the first step to preparing them to welcome and embrace their new sibling and all the changes of an expanding family. Think of “big brother/big sister” books as “what to expect when you’re expecting” for first children. It’s well worth reading a range of these books to get your kid primed—and pumped. Here are a few to try, and you’ll find lots of other options at your library or bookstore.
Suggested titles:
Other options include I’m A Big Brother Now and I’m A Big Sister Now by Katura J. Hudson, winners of the 2019 Ben Franklin Gold Medal Award in the children’s picture book category, as well as the popular I’m a Big Sister/Brother books by Magic Schoolbus author Joanna Cole and I Am a Big Sister/Brother by author/illustrator Caroline Jayne Church.
Address Big-Sibling Jealousy with a Book and a Cuddle
For children who are used to being their parents’ “only”—especially older kids who have a firm grasp of what it means to have a baby on the way—it’s natural to have mixed feelings about sharing their parents, possessions, and lives with a new sibling. These feelings can occur before and after the new little person shows up. A relevant read and a good cuddle will go a long way toward making your first-born feel accepted, and then letting them move on.
Suggested titles:
Cultivate Pride in Older Siblings
Being an older sister or brother means sharing with and adjusting to sometimes-demanding little ones, but it also means special privileges and responsibilities. Helping children feel proud of themselves and their role is a huge part of cultivating their satisfaction and self-confidence, as well as their warmth toward their younger sibling(s).
Suggested titles:
Use Books to Deal With Big-Sibling Meltdowns
Tantrums and emotional outbursts are part of learning to deal with (and manage) big feelings, and there can be a whole lot of big feelings in sibling relationships. And after parents have to set firm limits with an older child (or maybe even let their own emotions run away with them in the face of a meltdown), finding a way to reconnect and help the child grow from the experience is key. Once again, the right book and a good hug can be just the ticket.
Suggested titles:
Use Books to Support Younger Siblings and to Connect the Two
You’ll be busier and busier as your family’s “new baby” grows into a bona fide little person with complicated emotions of their own. But taking time to read and connect with them around their little-sibling experience will continue to be an invaluable investment. We’d need a whole other article to delve deeply into this stage, but here’s one favorite to get you started.
Suggested title:
Like this post? Share it!
Libraries are a lifeline to their communities. With free WiFi, technology, programming, and—of course—books, they’re also a refuge for many. Libraries not only support reading skills but also equip vulnerable populations like the formerly incarcerated with the tools necessary to learn technology and find jobs, narrowing gaps in internet literacy as well as actual literacy.
In The Library Book, Susan Orlean beautifully sums up their function: “All the things that are wrong in the world seem conquered by a library’s simple unspoken promise: Here I am, please tell me your story; here is my story, please listen.”
Despite being closed during the pandemic, libraries have continued to provide key community resources and offer hope during a dark time. To ensure all libraries can keep serving their communities and allowing space for people to hear and share stories, the American Library Association (ALA) is launching its annual #FundLibraries Campaign to make sure libraries are fully funded in the upcoming fiscal year.
For the 2022 budget, ALA is urging Congress to invest $206 million in the Library Services and Technology Act (LSTA) and $50 million in the Innovative Approaches to Literacy (IAL) grants. These grants ensure essential library services like STEM programs, business development, WiFi and technology access, literacy resources, and more are available to the 116,000-plus public, academic, and government libraries across the country.
If your local library has made a difference in your life or you value the difference it’s making for others, ALA offers a variety of ways you can join in their annual campaign—and teach your kids about advocacy. This post will share how to support libraries through easy actions you can take as a family.
Visit Your Local Library
While it might seem like an obvious step, using your local library is one of the best ways to support it. While many libraries are currently not open for indoor browsing because of COVID, take advantage of online reservations for curbside pickup and the option to borrow digital books. Plus, many libraries have additional programming to encourage kids to read, like crafts and activities you can do at home, virtual events, and reading challenges.
Support Your Library on Social Media
We’ll support extra screen time if it means advocating for literacy! According to ALA, “vocal community support helps libraries secure much-needed funding”—and it shows some much-needed love to your librarians. Follow your local library on social media and, during National Library Week from April 4 to 10, use the hashtag #MyLibraryIs to share how your library has made a difference in your life.
To support federal funding for libraries, post with the hashtag #FundLibraries and use one of ALA’s suggested captions. Here are a few ideas to get your kids involved and spark their creativity:
- Interview your kids about why they love their local library and their favorite books. And then flip the script and let them interview you.
- Challenge your kids to a photo scavenger hunt and post your family’s favorite literacy-themed picture.
- Play dress-up together by each dressing up as a favorite literary hero or heroine.
As a reminder, only post videos and pictures of your kids with their consent!
Write to Your Members of Congress
Model civic participation by helping your kids write a letter, asking your members of Congress to support library funding. Letter writing is a literacy-boosting activity for kids of all ages. It encourages creativity, builds communication skills, expands vocabulary, and—in the case of snail mail—offers handwriting practice. Writing is also an advocacy tool and an easy way to empower your children to advocate for causes they care about.
Use an online template to draft a letter, and then, once it’s ready to go, ALA makes it easy with an online form so you can directly reach out to your state’s representatives without tracking down each office’s contact information. In addition to encouraging members to support funding, ALA suggests inviting them to attend a library tour. A virtual tour allows librarians to share why funding is crucial and build a relationship with potential library allies. (Before suggesting a tour, make sure to first coordinate with your library to make sure it’s a possibility.)
After your kids send their letter, keep the conversation going and encourage them to continue practicing this new advocacy tool. If you have an elementary schooler or preschooler, explore topics they might care about with picture books for an age-appropriate introduction to different causes. (You can start with our roundup of books on water conservation!)
Let us know in the comments how your family is advocating for library funding. What causes are your kids passionate about supporting?

By Tulani Thomas
In my family, Earth Day is every day. We strive to cherish our planet and never take it for granted. Every day we can do small acts that make a big difference: This is the ethos that I have always taught my children. I try to incorporate nature-friendly living into so many areas of our lives that it becomes second nature (pun intended). We turn the lights off when leaving a room, use reusable water bottles, turn the water off when brushing our teeth, and, yes, eat loads of leftovers to reduce our food waste.
These are some ways that I instill in my children green habits that will serve them and the environment well as they grow. As with any habit, they’re formed through repetition and revisiting the same idea in different ways. Children love stories, music, play, and crafts. So I encourage finding playful ways to bring the message home, from sharing picture books on environmental topics to engaging in kitchen play about food-to-table concepts or making crafts with recycled items.
Read on for tips about how to create easy, free Earth Day activities for preschoolers at home to teach your kids green habits, all beginning with a few great reads. (And then check out our related post on An Earth Day Read-Aloud and 3 Fun Activities to Build Early Literacy.)
Start Your Earth Day Activities for Preschoolers with Books
Picture books are one of the best ways to introduce and reinforce any lesson or habit with young kids. That’s why I wrote a children’s book to help families teach their children to care for our planet, called TuTu Goes Green. It’s also why I recommend introducing children to environmentalism through picture books and then reinforcing the messages with related activities.
Begin by choosing and reading a selection of age-appropriate books. I designed my book specifically to introduce these concepts, and there are so many other great options to choose from as well. Some of my favorite titles that empower children to be change agents for our world are: The Berenstain Bears Go Green by Jan and Mike Berenstain (this is an oldie but a goodie), The Big Beach Cleanup by Charlotte Offsay, and the Save the Earth series by Bethany Stahl. (For older kids, check out Heroes of the Environment by Harriet Rohmer.)
But books are just the jumping-off point. To really build comprehension and bring home the message, how you and your child talk about and act upon a book’s messages are key. In fact, research shows that parent-child conversation around story time involves more complex language and more diverse vocabulary than usual. It gets the child thinking and deepens their understanding, meaning your read-aloud time packs a lot more punch.
Here are ways to build on your eco-story time and deepen your kids’ comprehension:
Incorporate Earth Day Games into Your Everyday Activities
Any parent of young children knows that play is key. Anything you want to teach them, from pre-reading skills to environmental lessons and beyond, is better with games!
Simple games can turn everyday chores and lessons into fun for your preschoolers, so look for opportunities to revisit the messages in your Earth Day books with playful moments throughout your day. Be sure to remind them how what they’re doing is like the characters in the picture books you read.
Here are some ideas:
- Start counting and see who can turn off the lights the fastest. Explain that this is a great way to save energy. Congratulate them for being environmental heroes!
- Make it a game to see how little food your family can waste. Invite your child to help package even small amounts of leftovers to save and help you come up with creative ways to work leftover food into new dishes. (How about a smoothie from all those half-eaten bananas and other fruit preschoolers love to leave around?)
- Invite them to help the planet by sorting used containers and other (safe) household waste into recycling. Have them separate plastic, paper, and other recyclables. Preschoolers love sorting, and it reinforces to them what materials are recyclable.
- Bonus: If possible, provide simple waste baskets your child can put in various rooms of your house and help them write labels, such as “paper” and “plastic” on them.
Hands-on projects can show the impact of their actions
Teaching children about environmental issues can be challenging since it’s such a vast topic, and children may struggle to see how their small acts can affect the whole planet. Here are some ways to make these concepts more palpable for preschoolers:
- Put a large bowl under the faucet while your child brushes their teeth, and leave the water running. Children are always amazed to see the bowl overflow. Then show them how much water they use if you have a cup of water pre-filled for their brushing and rinsing. Physically comparing the amount of water they use when the faucet is left running really brings home how much water is wasted that way.
- Use plastic water bottles for a week and save all your empty bottles. Kids will enjoy counting up all the plastic bottles you accumulate to recycle at the end of the week. (Let them write down the number using tally marks, practicing their writing skills at the same time). Look at the pile and invite them to imagine how many bottles you would use in a month, then a year! You can also use this method with pre-packaged snacks vs. reusable snack containers, reusable bags, and so on.
We can teach our children how to live green and build their reading comprehension and literacy skills at the same time—incorporating both goals into everyday life is simple and fun. Easy, free Earth Day activities for preschoolers like the ones above will ensure your kids develop great habits and important skills from the start. So get reading and go green!
Like this article? Share it!

“Families are like branches on a tree. We grow in different directions yet our roots remain as one.” The author of this saying is unknown, but its wisdom resonates with so many of us.
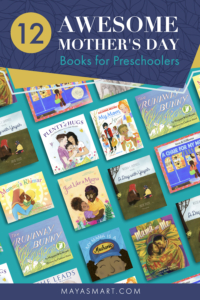
In my family, so much of our love is rooted in shared books. The women of the family have always made time to read with their growing children, nieces, nephews, and grandchildren. These reading roots helped every single one of us grow into the people we are today and continue to shape us. This Mother’s Day, I want to share a list of some of my favorite books that celebrate the wonderful women in our families.
I hope you enjoy these Mother’s Day reads. But even more importantly, I hope you enjoy spending time creating strong roots together with your family.