This craft takes advantage of seasonal enthusiasm to build your child’s vocabulary and help them learn to recognize, read, and spell new words. Fun holiday words, that is, of course!
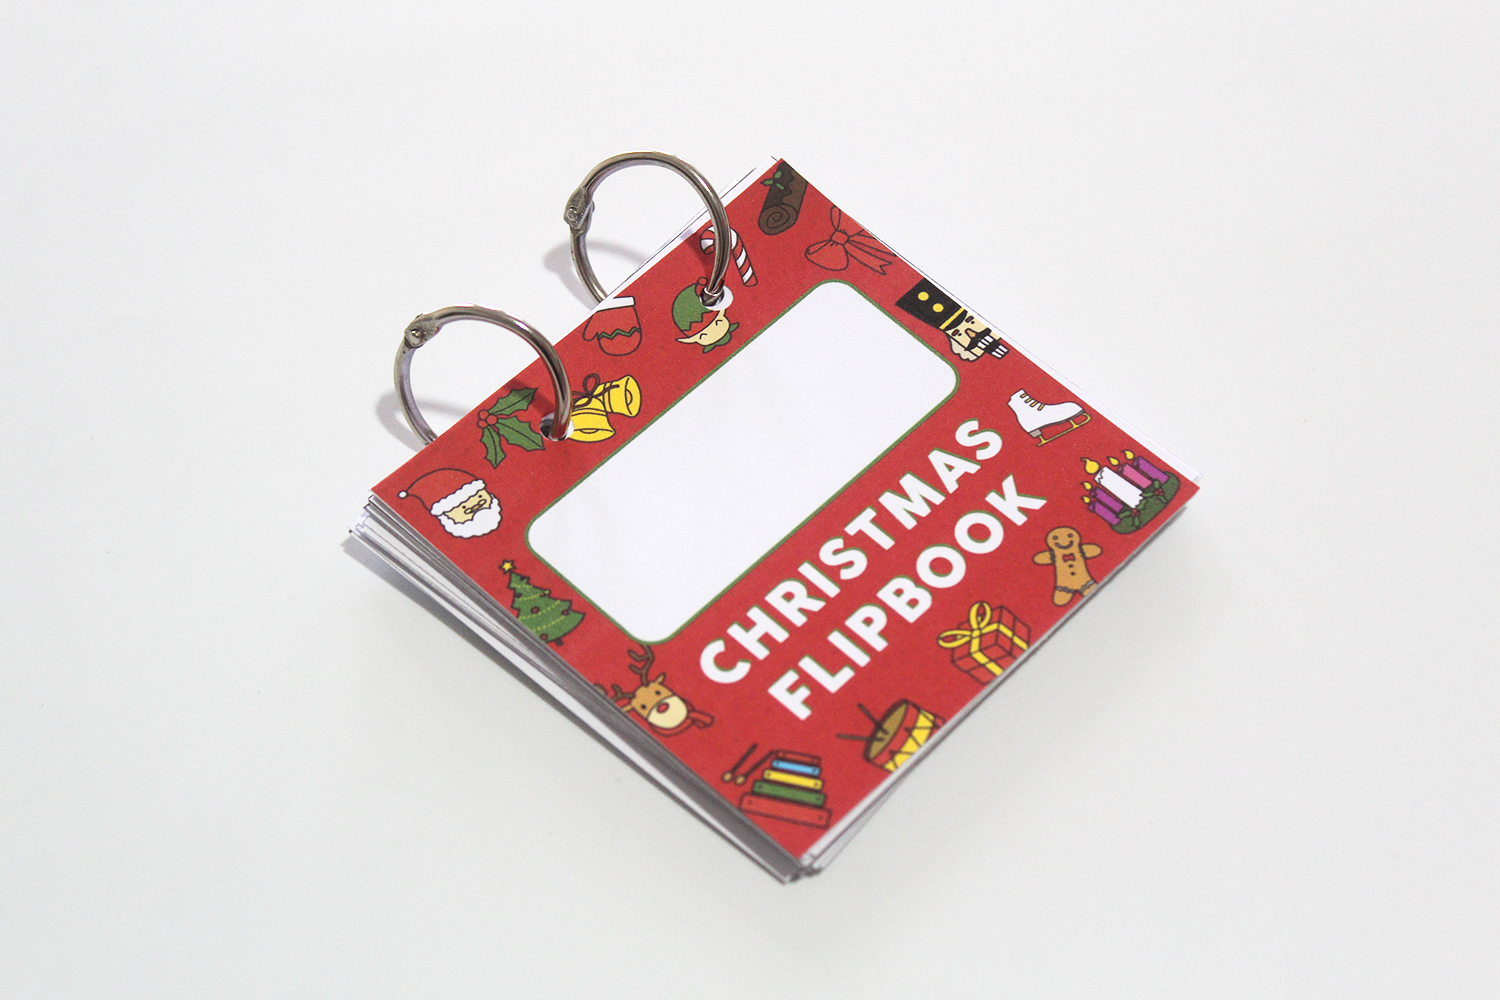
With our free Christmas alphabet printable, you’ll make an adorable flipbook to keep or gift. (Tip: It makes a super-cute stocking stuffer or a fun present from an older child to a younger one.) The flipbook is easy to make, you can use it time and again, and it’s a great way to teach young children new Christmas vocabulary. For fun ways to engage your child with their flipbook, see the end of this post.
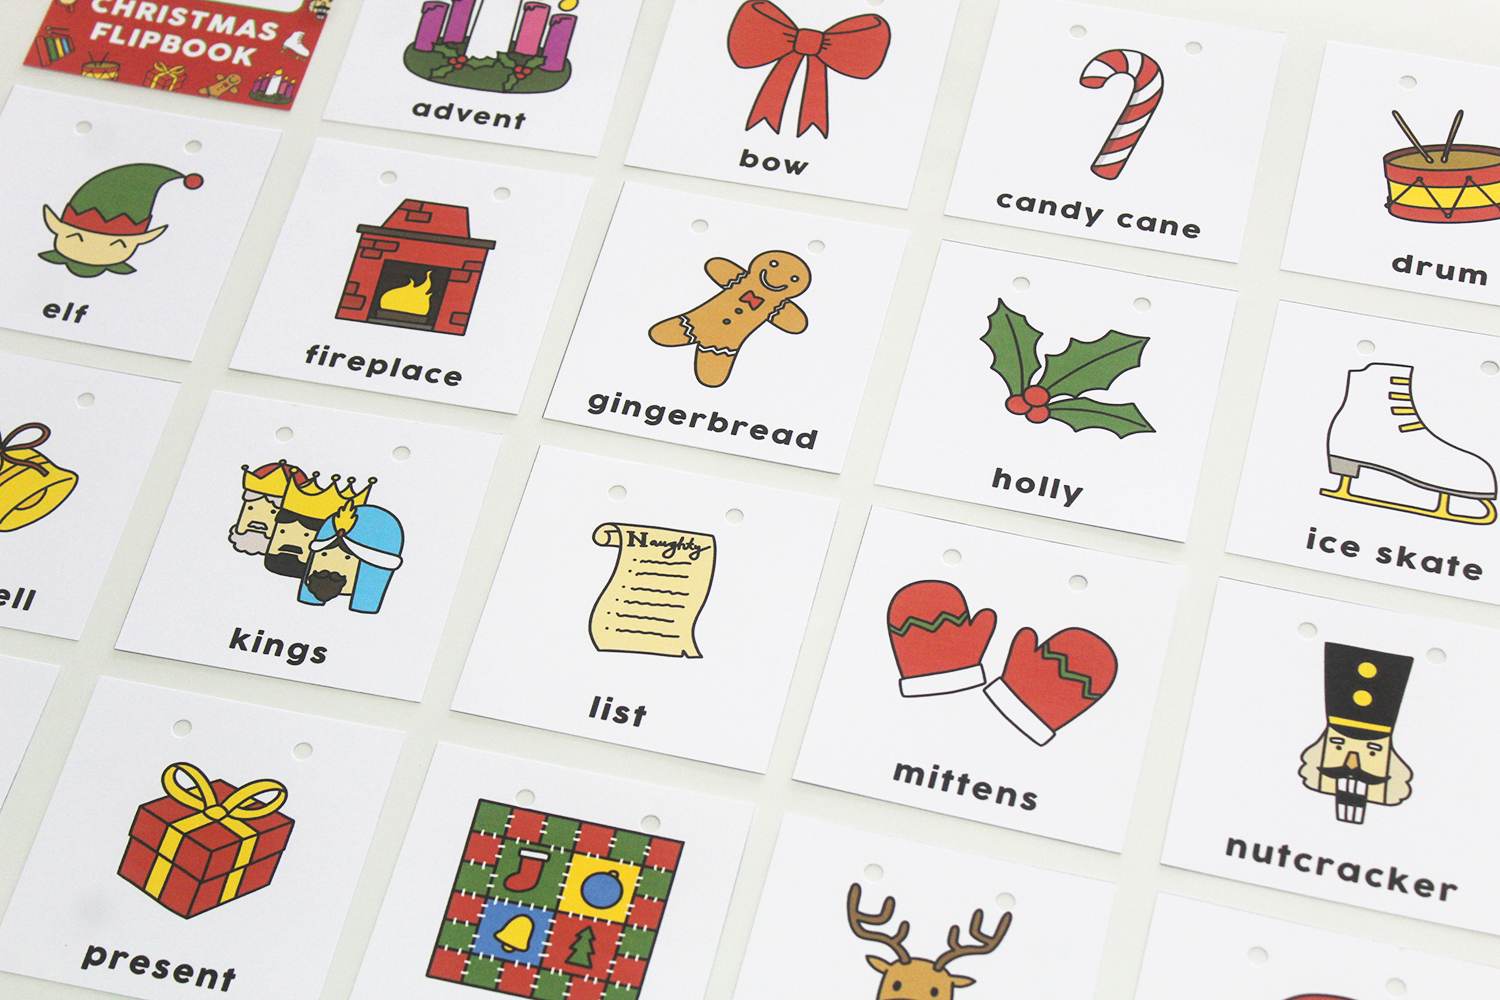
This free Christmas alphabet printable consists of twenty-six seasonal words and illustrations from A to Z. It also includes a flipbook cover where you can write your child’s name. Happy Holidays!
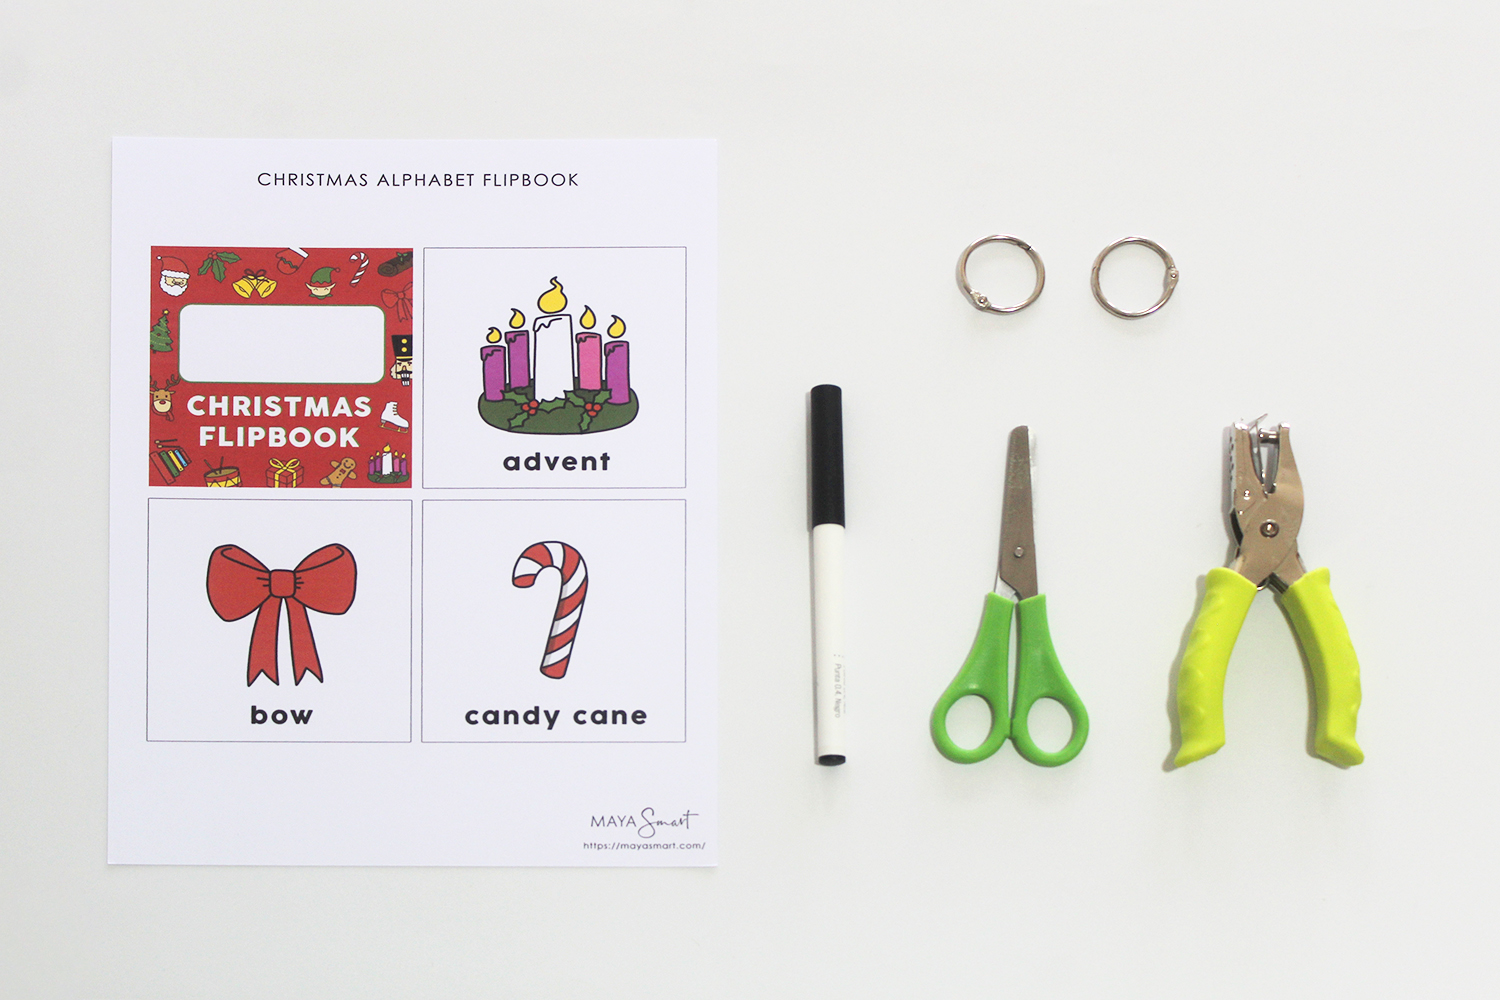
Materials:
- Printer
- Cardstock paper (7 pieces) or normal paper + cardboard
- Ring-binder clip (2 pieces) or string/ribbon
- Scissors
- Hole punch
- Pen or marker
- Laminating sheets (optional)
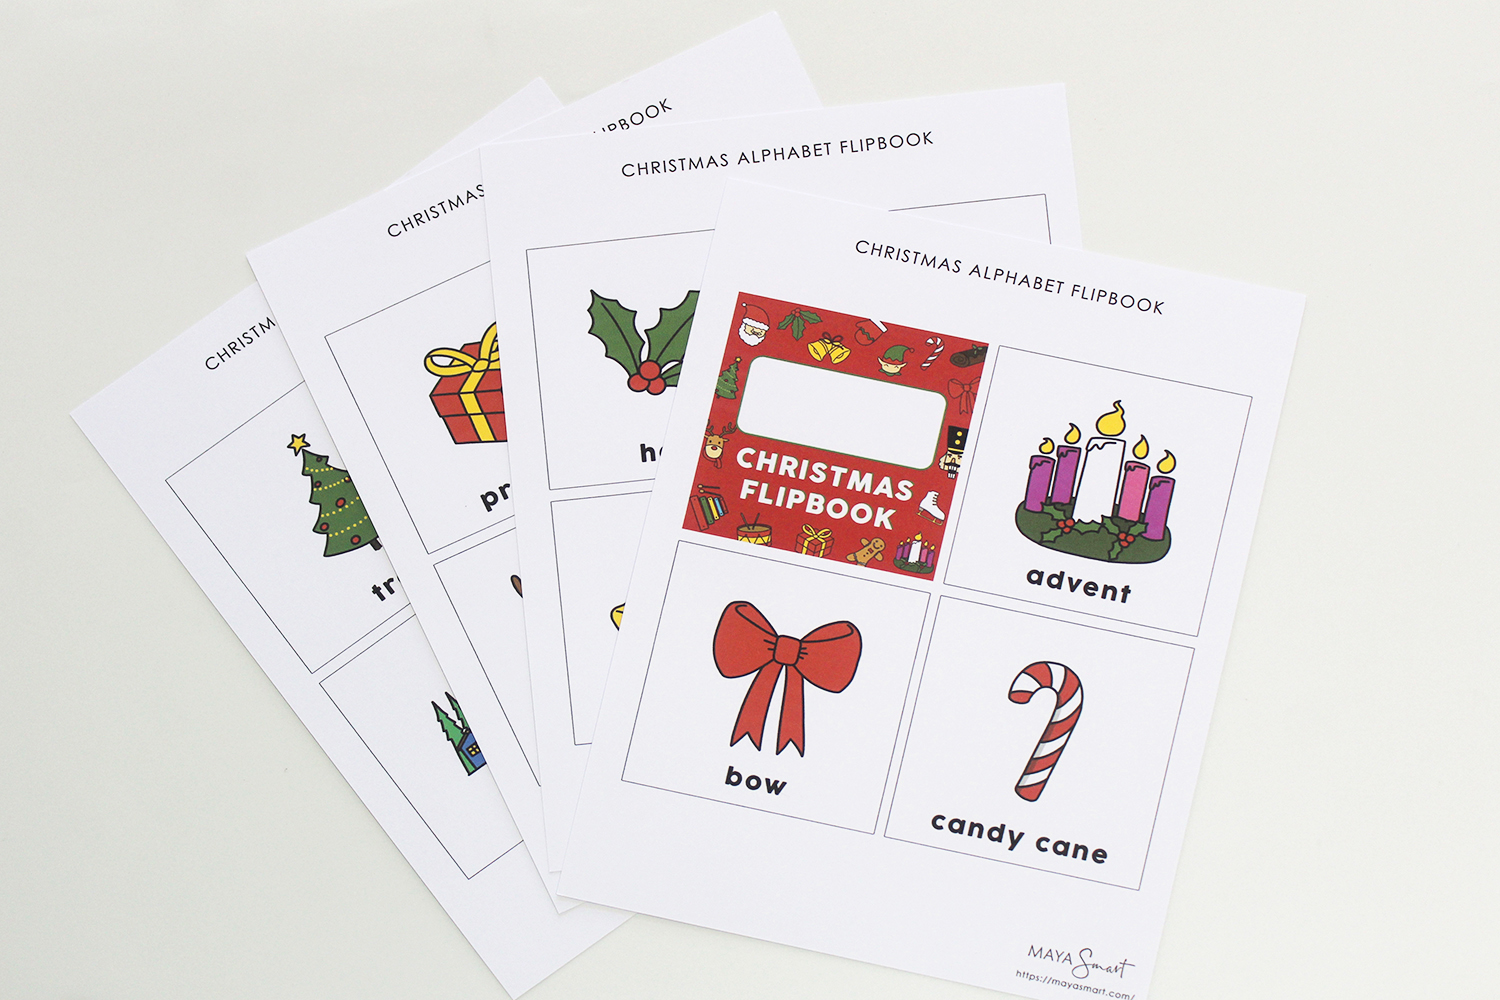
Step 1: Begin by printing out your free Christmas alphabet flipbook template on seven pieces of cardstock. Cardstock is thicker than regular paper, which makes it perfect for flipbooks.
Tip #1: If you have no cardstock available, you can print the template on normal paper and glue it onto cardboard.
Tip #2: You can also print the template on normal paper and laminate it. (Use self-laminating sheets if you don’t have a laminator.) This will make your flipbook waterproof and more durable!
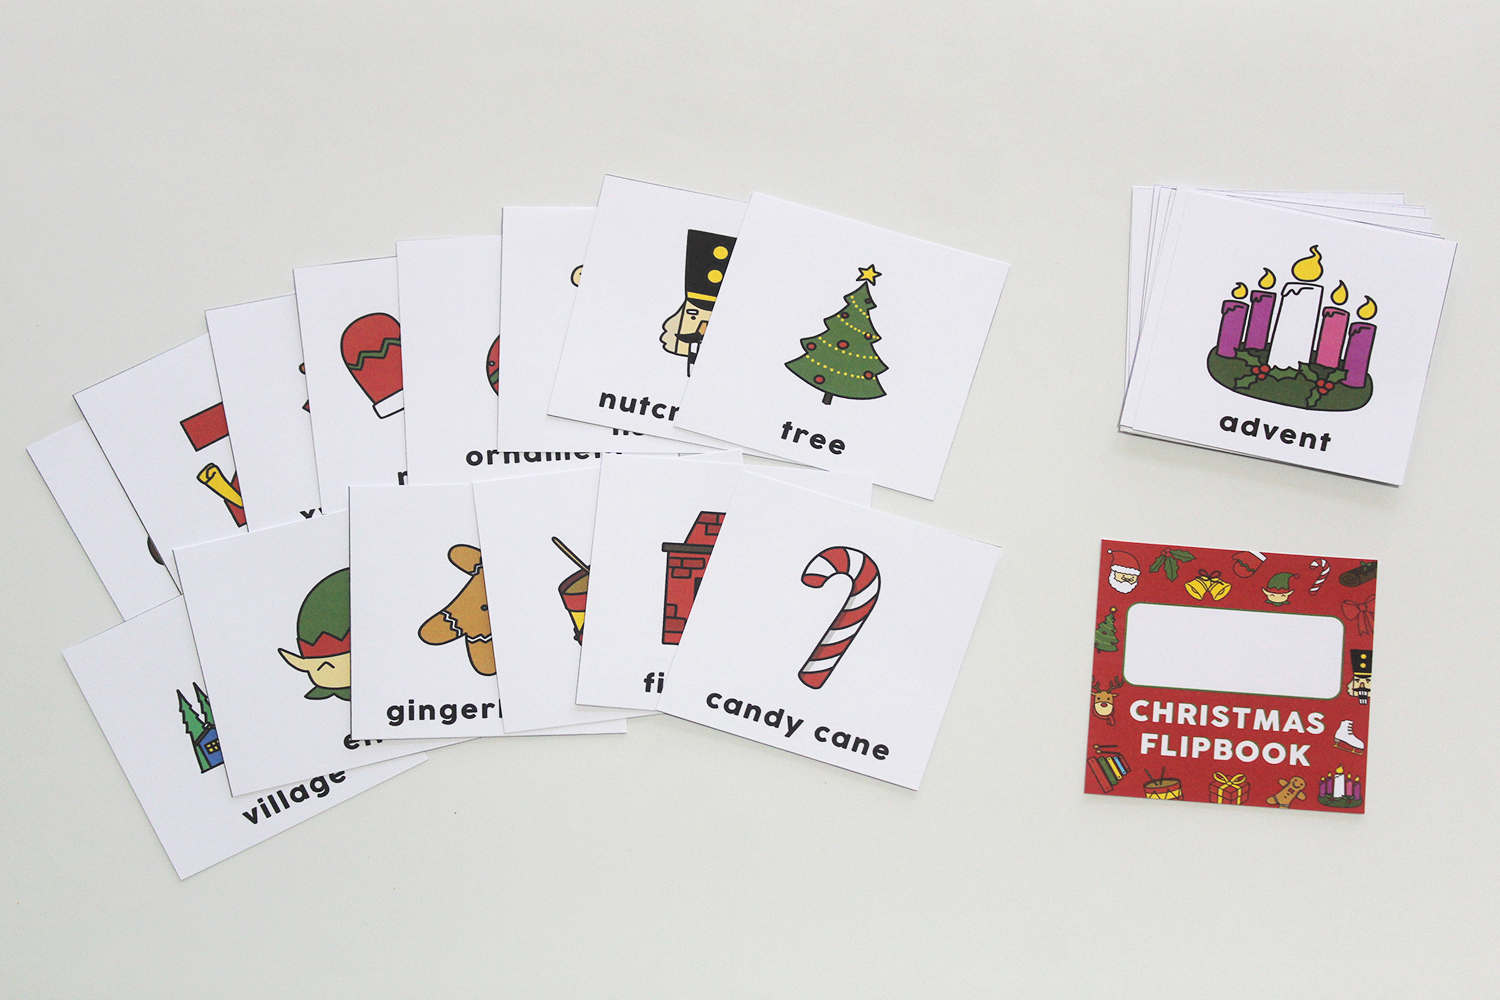
Step 2: Next, cut out the template. You can also invite your child to cut out the cards since the lines are straight. It’s great practice for their fine motor skills in using a pair of scissors. Of course, supervise your child during cutting.
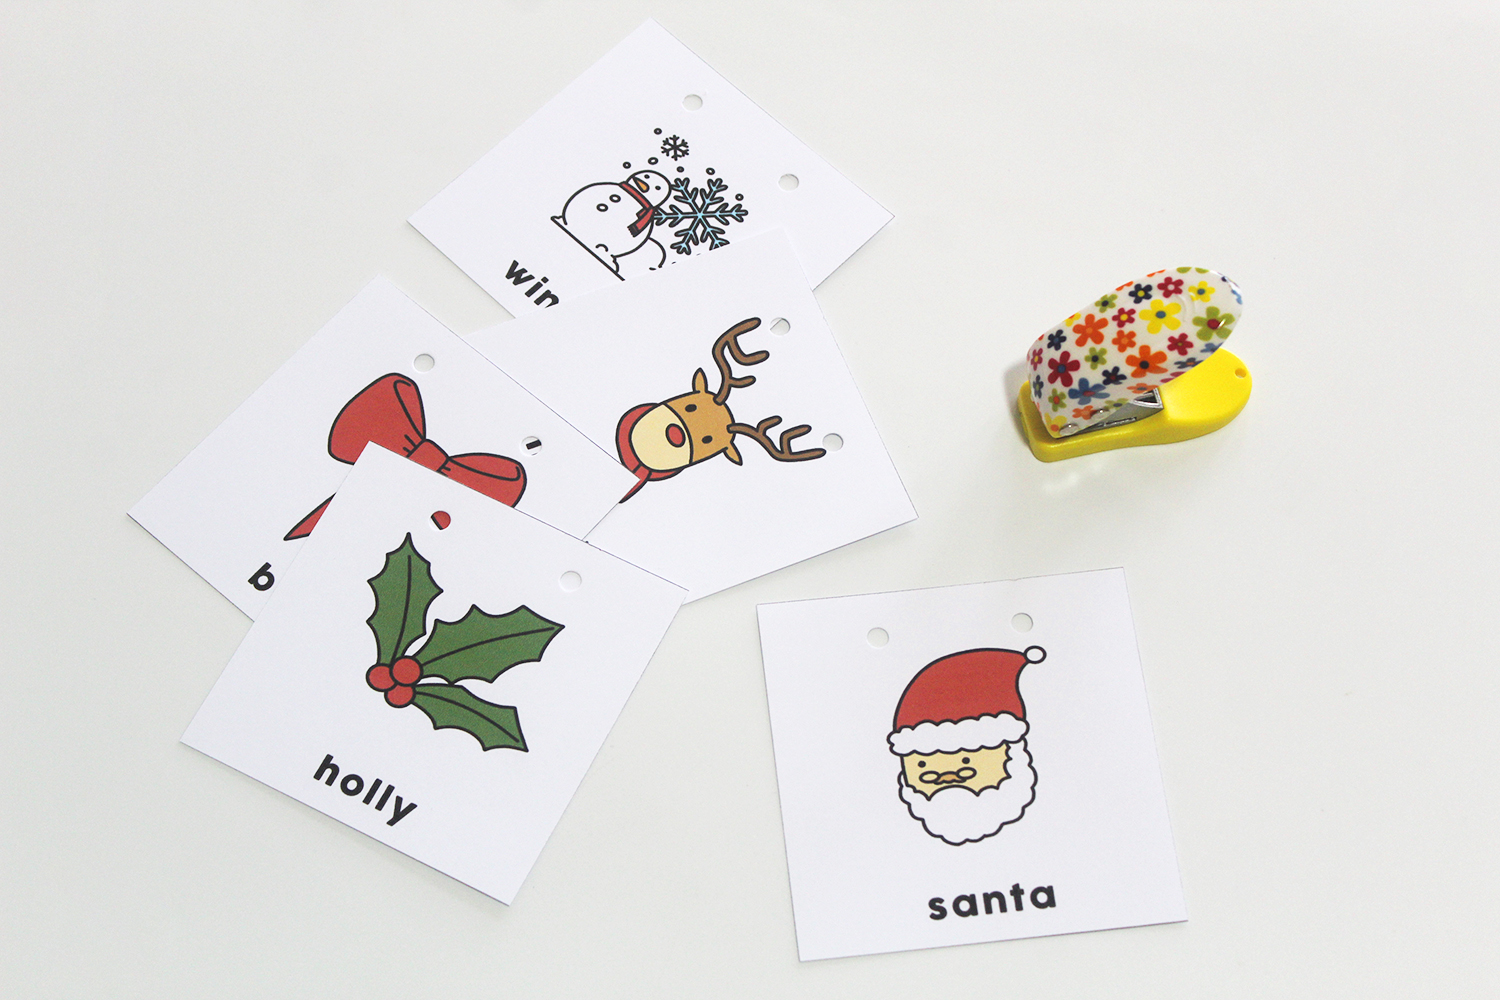
Step 3: Then you need to punch two holes on each card. Make sure the holes are placed in the same position on all cards.
Tip: You can place one card with hole punches carefully over another card and trace the holes on the top card onto the bottom card to ensure placement.
Step 4: Alphabetize the cards and put them into a stack that goes from A-Z.
Step 5: Insert the ring-binder clips into the two holes in the stack.
Tip: If you don’t have ring-binder clips at home, you can use a piece of string or ribbon to tie the cards together.
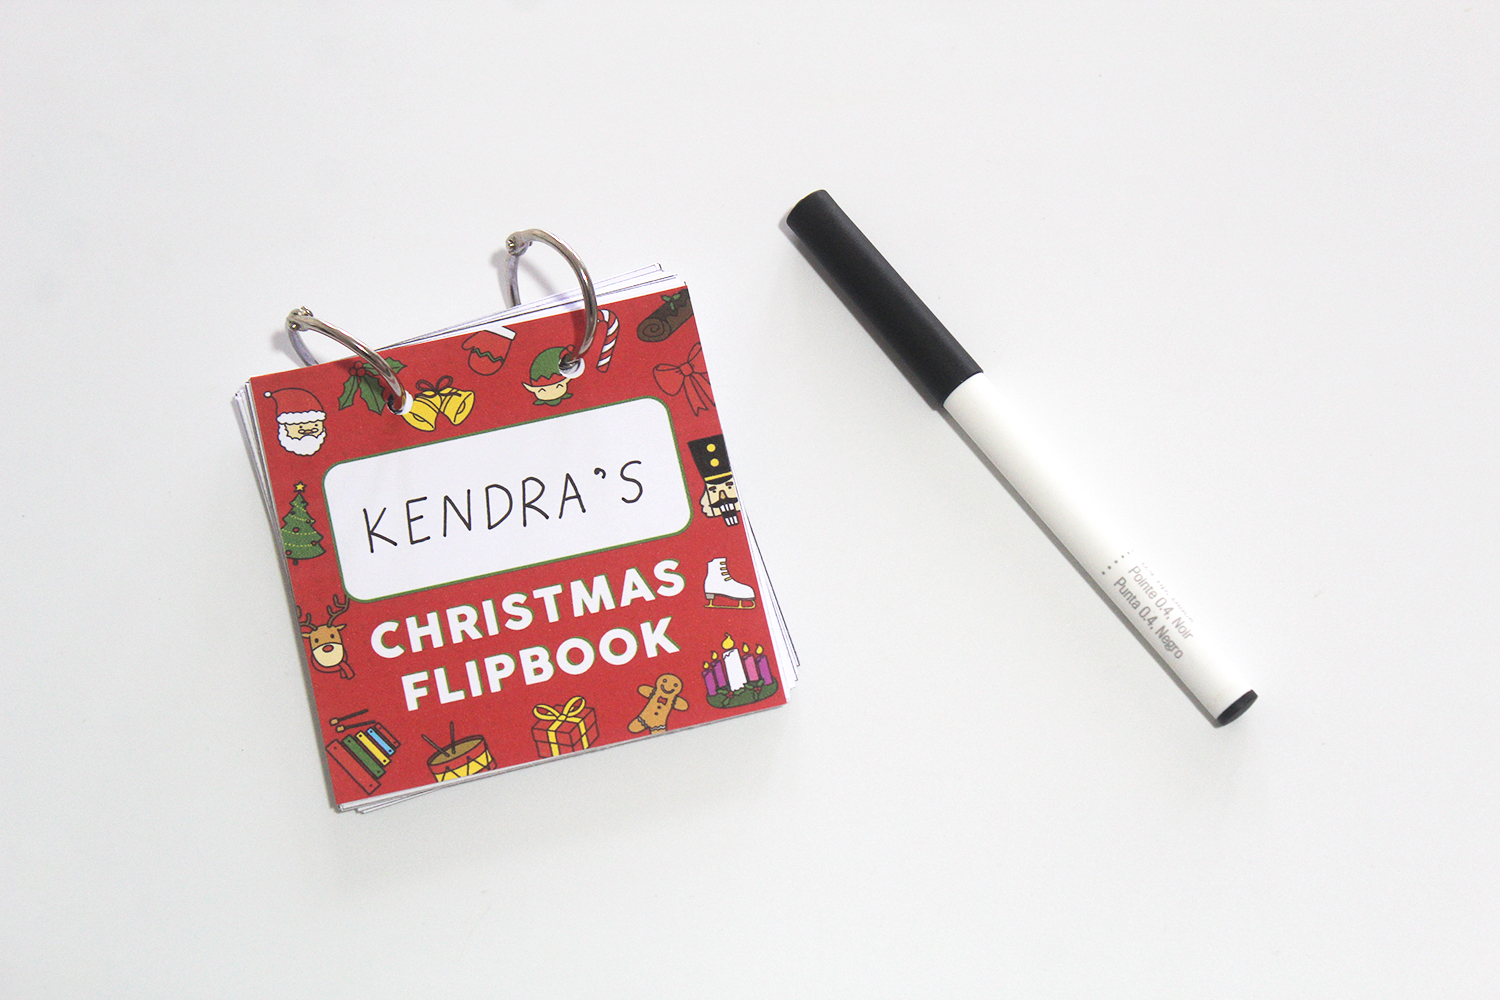
Step 6: To make the Christmas flipbook more personal, write the name of your child on the cover page. You can also help your child to write their own name.
This Christmas alphabet flipbook is great for a variety of ages. For younger children, you can use the flipbook to introduce new Christmas vocabulary and practice reading the words. For older kids, you can ask them to write a sentence using the Christmas-related words in the book, or use them as prompts for storytelling. Play around with flipping to random pages and making up a story or silly sentence based on the word on that page, for example. Have fun!
We’d love to see how your craft turned out! Feel free to connect with us on social media to share some pictures!
Is there any sport quite as universal as the game of soccer? Whether you call it football or soccer, there’s nothing like cheering on your country in the World Cup or yelling Gooooooal! when your favorite player scores.
Like all sports, soccer showcases teamwork, perseverance, and discipline—wonderful qualities to reinforce during read-aloud time. To help you encourage the little players and fans in your life, we rounded up some of the best picture books about soccer. Read on for stories about legendary players, the unifying power of the game, and silly characters that remind us that while sports may be competitive, they’re also a whole lot of fun.
For Pelé fans, add Pelé: King of Soccer/El Rey del Fútbol by Monica Brown to your reading list, too. Rudy Gutiérrez’s bright, fanciful illustrations spill off the page and immerse you in the life of Pelé, aka the King of Soccer in this inspiring bilingual picture book.
Note: The book ends with a note to parents and educators with information on how organizations in northern Indian villages are using soccer to combat child marriage, which could serve as an important conversation tool with older children.
Note: References to violence, while not graphic, might make this story better suited to more mature readers, but this read is sure to spark important conversations with your children.
For more soccer reads by Mina Javaherbin, try Goal! or Neymar: A Soccer Dream Come True.
December is creeping closer, bringing its flurry of wonderful winter holidays! With those holidays come beloved traditions—favorite dishes, decorations saved and hung year after year, and stories to be told. Every family has their personal favorite tales and books (The Night Before Christmas is a staple in our household, like so many others). Traditions are a wonderful part of the holiday season. But what if, this year, you added some new books to your mix, to become new traditions, too?
How would you know which books to choose? If you look at many of the classic American Christmas books, they’re written by white authors. Christmas is a holiday that includes families of every race and ethnicity, so shouldn’t the holiday books we read our children? Black children deserve to see themselves in books and stories, and non-black children need to see how Christmas in the United States truly looks. There are so many incredible Christmas books by black authors, so we’ve curated a list of eight favorites, plus some other lovely winter holiday books by black authors, for you to add to your reading traditions.
The winter holidays are a time for love, warmth, and togetherness. And what better way to celebrate those things than to get snuggle up cozy with the people you love and read books that bring us all together? You’ll never be lacking in holiday spirit when you pick up one (or all) of these fabulous Kwanzaa, New Year’s, and Christmas books by black authors. Who knows? You might even find yourself reading them all year round.
The soccer World Cup is one of the most-watched events on Earth. And with dozens of teams representing countries around the globe, it is truly an international event. This can make watching it a cultural experience as well as sports entertainment. The stories of the players’ hard work and resilience can also inspire young kids tackling their own challenges and dreams.
Whether your child already loves soccer or has never watched a match, the World Cup is an opportune moment to share the world’s most popular sport. And picture books are a wonderful way to build on the tournament buzz while introducing young kids to the incredible diversity of cultures and countries that love soccer—aka football, fútbol, and fußball. From the Caribbean to Canada, from South Africa to Southeast Asia, these stories show kids that soccer belongs to everyone, everywhere.
This post curates 11 lovely picture books that offer fun reading for a World Cup story time. You’ll find book options for different kinds of readers, from the sports-obsessed mini-Messi to the child who just loves a great story.
Before we adults learned how to read and write, we were introduced to the 26 letters of the English language. For most of us, our first encounter with the alphabet was singing the ABC song. But the truth is kids need to learn a lot more than to slur letter names together in song (adorable as that may be) to prepare for kindergarten and beyond.
They need to learn what letters look like—and which of the 52 uppercase and lowercase shapes actually indicate the same letter, among other things.
A powerful and fun way to teach your child upper- and lowercase letters is through play. There are a lot of educational toys on the market nowadays, but why add more plastic junk to the world (and shell out cash) when you can make your own homemade educational toys that are just as effective?
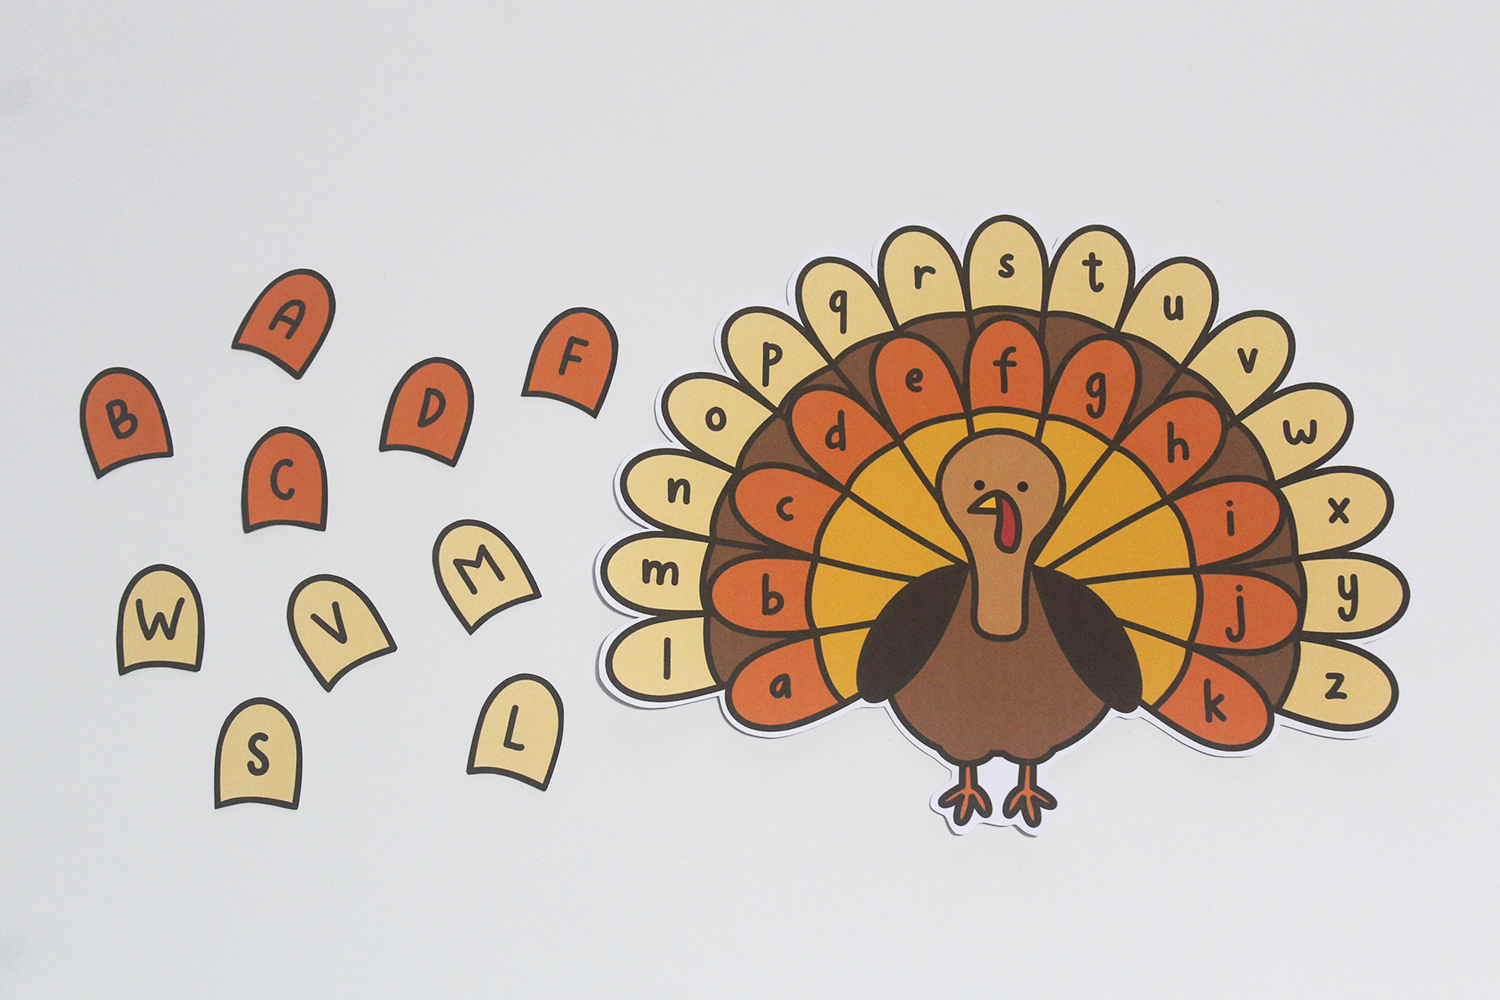
That’s why we created this free printable to encourage you to make your own fun, low-waste, and low-cost educational Thanksgiving activity. It’s a DIY turkey letter-matching game that’s easy to put together and designed to teach your child to match corresponding upper- and lowercase letters.
Our printable consists of a cute turkey page with lowercase letters and a page of turkey feathers with uppercase letters. It also comes with a black-and-white version of the printable for easier printing, so don’t stress if you’re low on ink. Have fun!
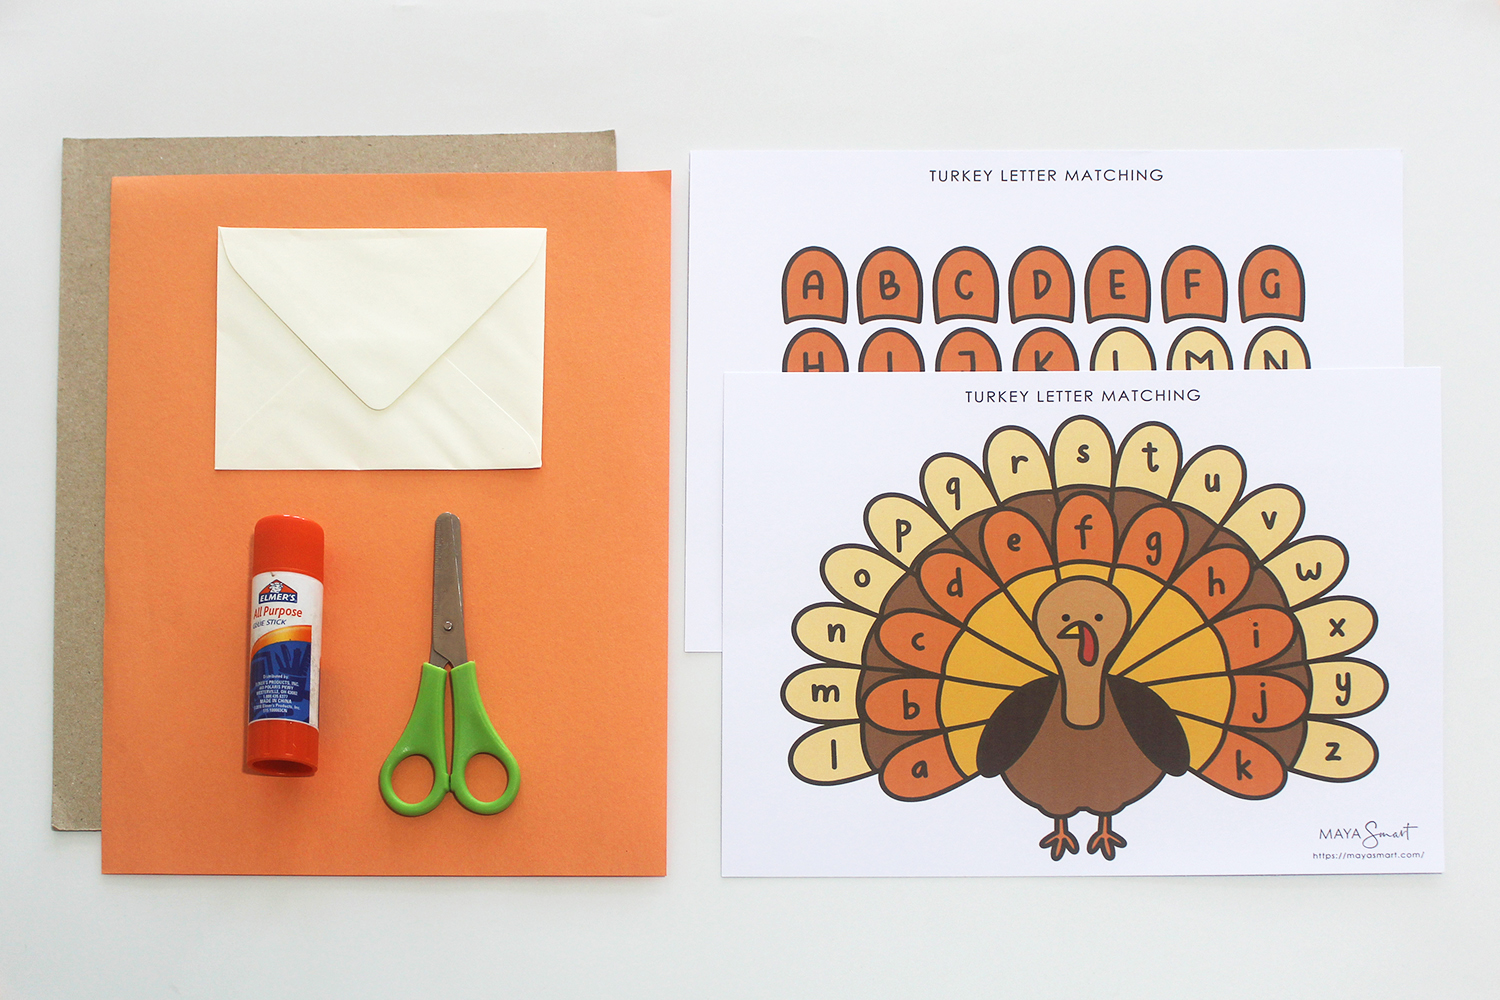
Materials:
- Printer
- Cardstock paper (2 pieces) & colored paper (1 piece)
- Envelope
- Scissors
- Glue
- Cardboard cut to the size of letter paper (optional)
- Contact paper / laminator (optional)
Step 1: Enter your email above and then check your email for the PDF! Choose our full-color turkey letter-matching game printable or our low-ink black-and-white turkey letter-matching game printable. Then print your template on two pieces of cardstock or regular paper.
Step 2: Next, carefully cut out the letter shapes from the template. (You can also cut out the turkey if you want to put it on a differently colored background, or you can just use the whole turkey page.)
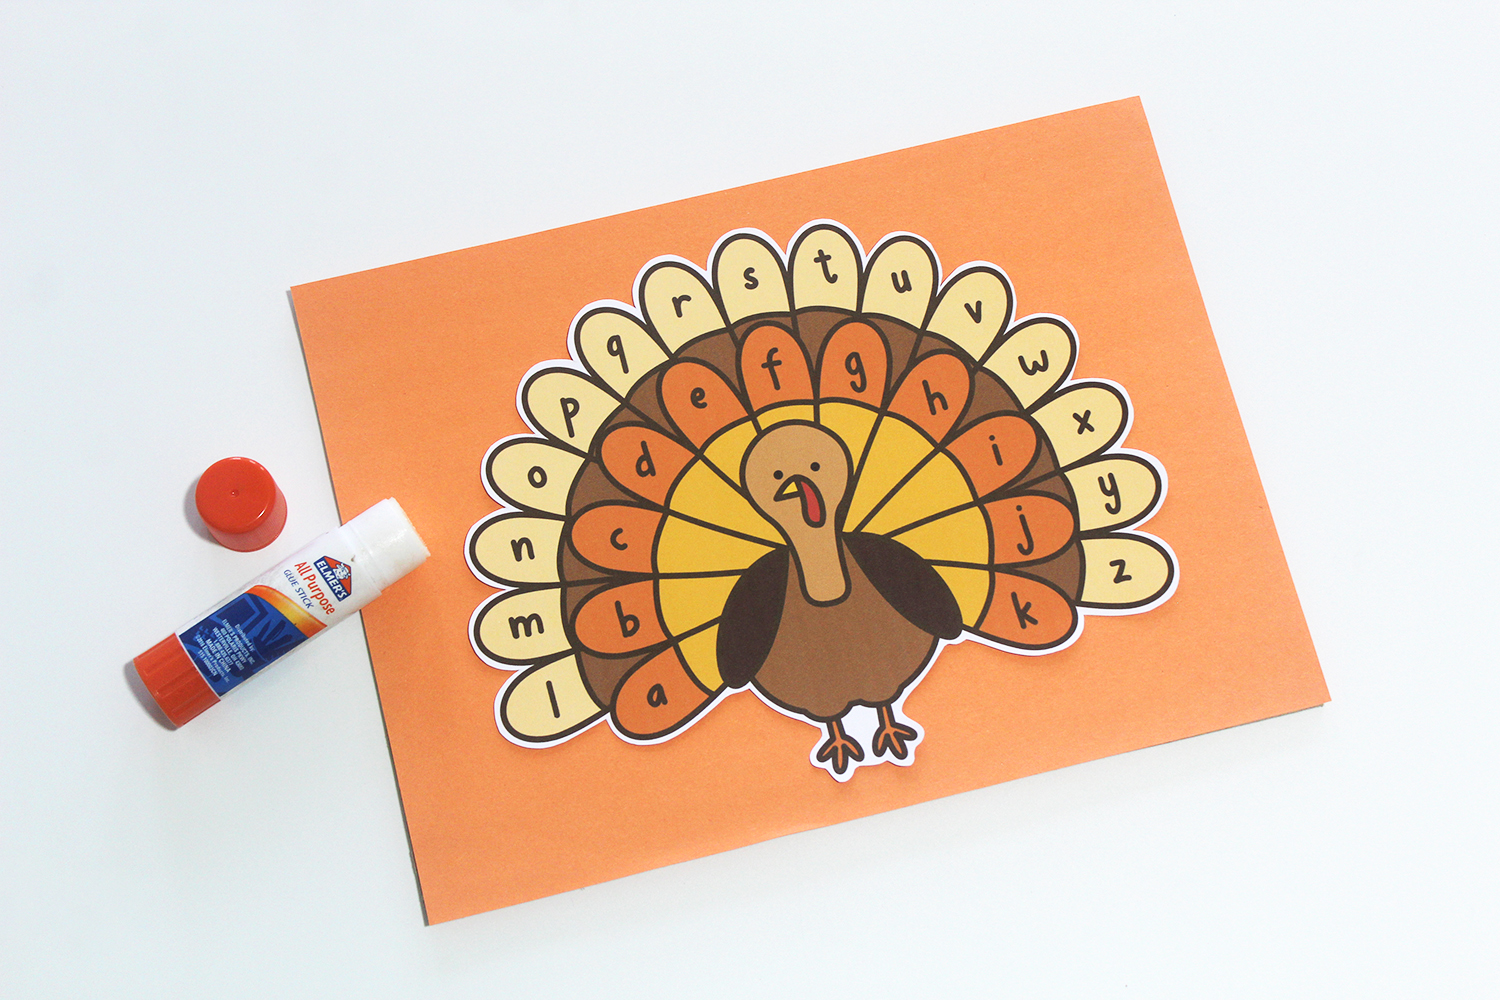
Step 3: To make your game sturdier and have it last longer, you have two options. You can paste your turkey onto letter-sized cardboard (cut some from a cereal box or notebook back) or you can laminate the page in contact paper or self-laminating sheets.
Note: If you decided to use a differently colored background, glue the turkey cutout onto colored paper. Laminate or paste the whole thing onto the cardboard.
Step 5: Flip over the cardboard or laminated sheet and glue the envelope on the back.

Step 6: If you are not using the game with your child right away, slip the cut-out letters inside the envelope so that they won’t go missing. This way, they are well-contained and are ready to use in your next learning play session.

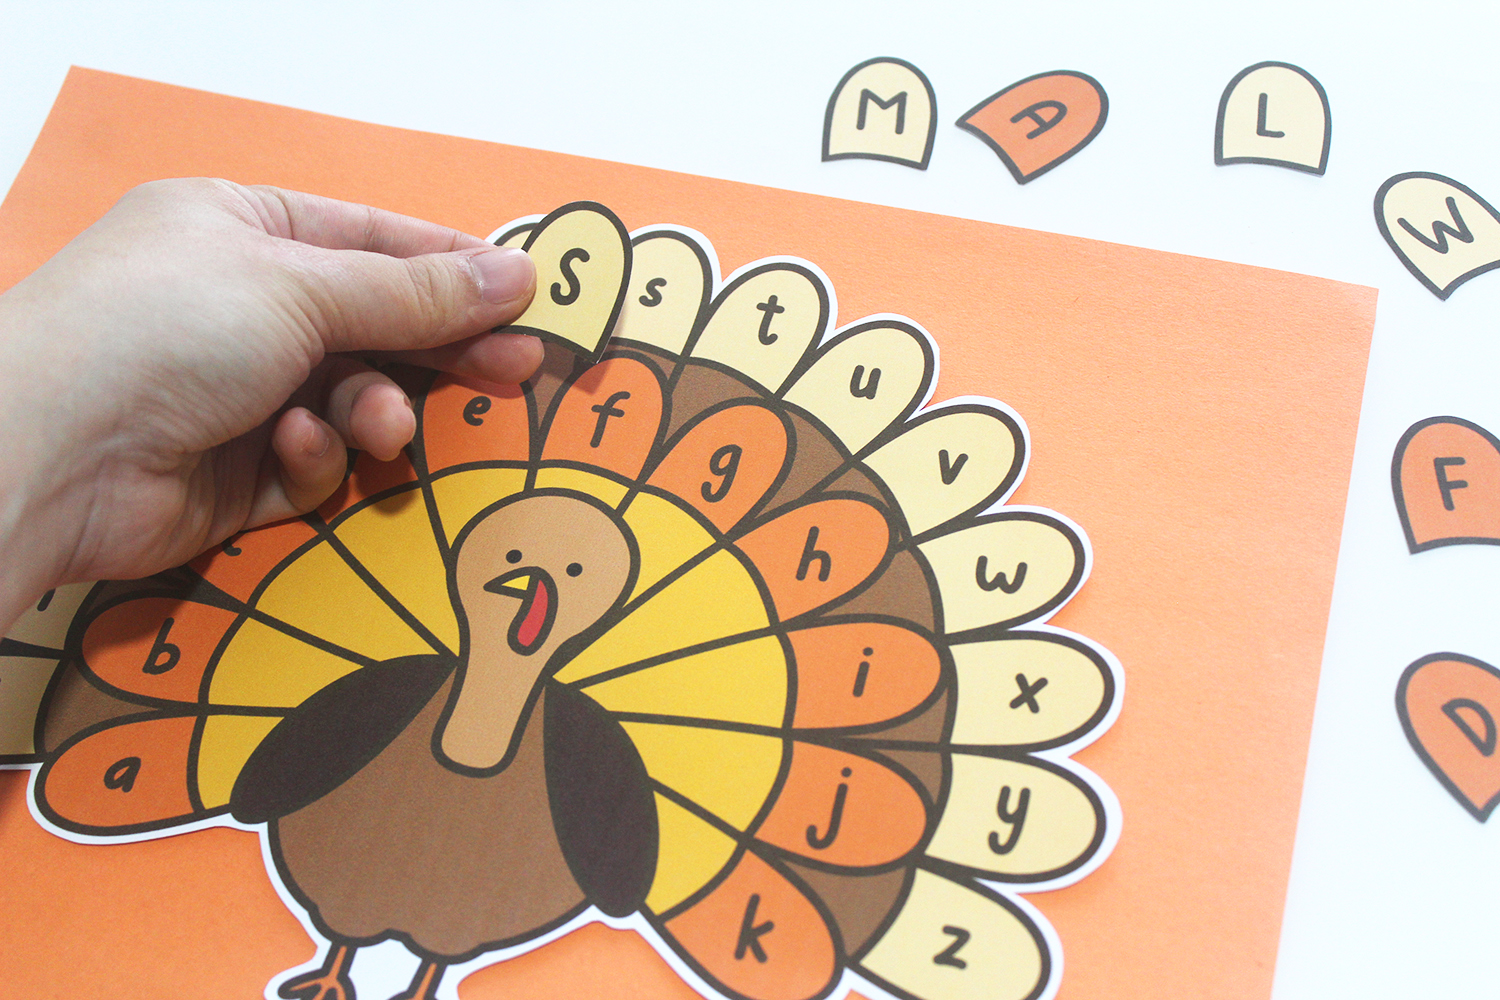
How to play
Now that you are done making your DIY turkey letter-matching game, it’s time to play! Invite your child to identify the letters of the alphabet. Then ask them to see how many upper and lowercase letters they can successfully match together. You can also practice each letter sound while matching the letters.
We hope this educational Thanksgiving activity will offer a playful and interactive learning opportunity for you and your child this fall season. Have fun!
For this classic autumn recipe, you can use the seeds from Halloween jack-o-lanterns or Thanksgiving pie pumpkins. They’ll make a yummy snack to keep your little revelers fed, as you model eco-friendly, low-waste living.
Plus, you can use the recipe to help your child practice reading double vowel sounds. To start, enter your email below to get a PDF of this recipe and all our other Read with Me Recipes emailed straight to your inbox, formatted to be accessible for beginning readers.
Print the pumpkin seeds recipe and look at it with your child. Explain that EE can make a long E sound, as in seeds, and OO can make an ooh sound, as in scoop. Next, help your child find and circle all the words with double E or O in the recipe, and then practice reading the words together.
After that, let your child take the lead on reading the instructions, if they’re ready, as you prepare your snack together. Just be sure to help your child with the hot oven.
Note that you can also use the recipe with kids who aren’t ready for reading yet. Just point to each word as you read the instructions aloud. Pause to point out specific letters they may know, or introduce them to letters such as their first initial or a frequent and easily recognized letter like O.
If they have some familiarity with the ABCs, you can ask them to find or circle all the instances of a certain letter in the recipe. (For letter-teaching tips, see How to Teach Your Child the Alphabet: The Ultimate Parent’s Guide.)
Happy Fall!
Tips for teaching kids to read with recipes:
- Introduce your child to how recipes work. If you’re not sure they know them already, be sure to explain vocabulary like “ingredients” and other cooking terms. (Even though we won’t be reading such complicated words in this recipe, they’re important words to learn.) One of the biggest challenges for beginning readers—and most important oral language underpinnings of literacy—is just knowing and understanding all the words they’ll encounter in print.
- Watch out for specific words in the recipe they may not be familiar with, such as “pulp” and “paprika” in this recipe, and give a simple definition.
- For little ones who aren’t reading much yet, just pointing out what you’re reading and emphasizing a few key words or letters is enough. If you make the recipe again, you can help them find the words you pointed out before.
- Use this as an opportunity to show them punctuation, as well as words and letters. Point to the commas, periods, or other punctuation marks, and explain what they mean.
- If they can’t read the recipe on their own, give them chances for success by asking them about what they do know, gently underscoring key knowledge. E.g., ask, Can you find a letter T? or What letter does this word start with?
- For kids who are reading already, encourage them to read the recipe themselves. If they have trouble, just calmly help them with any words they can’t quite get.
- Bring your patience. Give your child space to read a word (or identify a letter) before you jump in, but be prepared to help if they’re showing signs of frustration.
Roasted Pumpkin Seeds
Note: This recipe involves using a hot oven. It’s not appropriate for children to complete on their own. Adults should supervise and help with opening the oven and stirring the hot seeds.
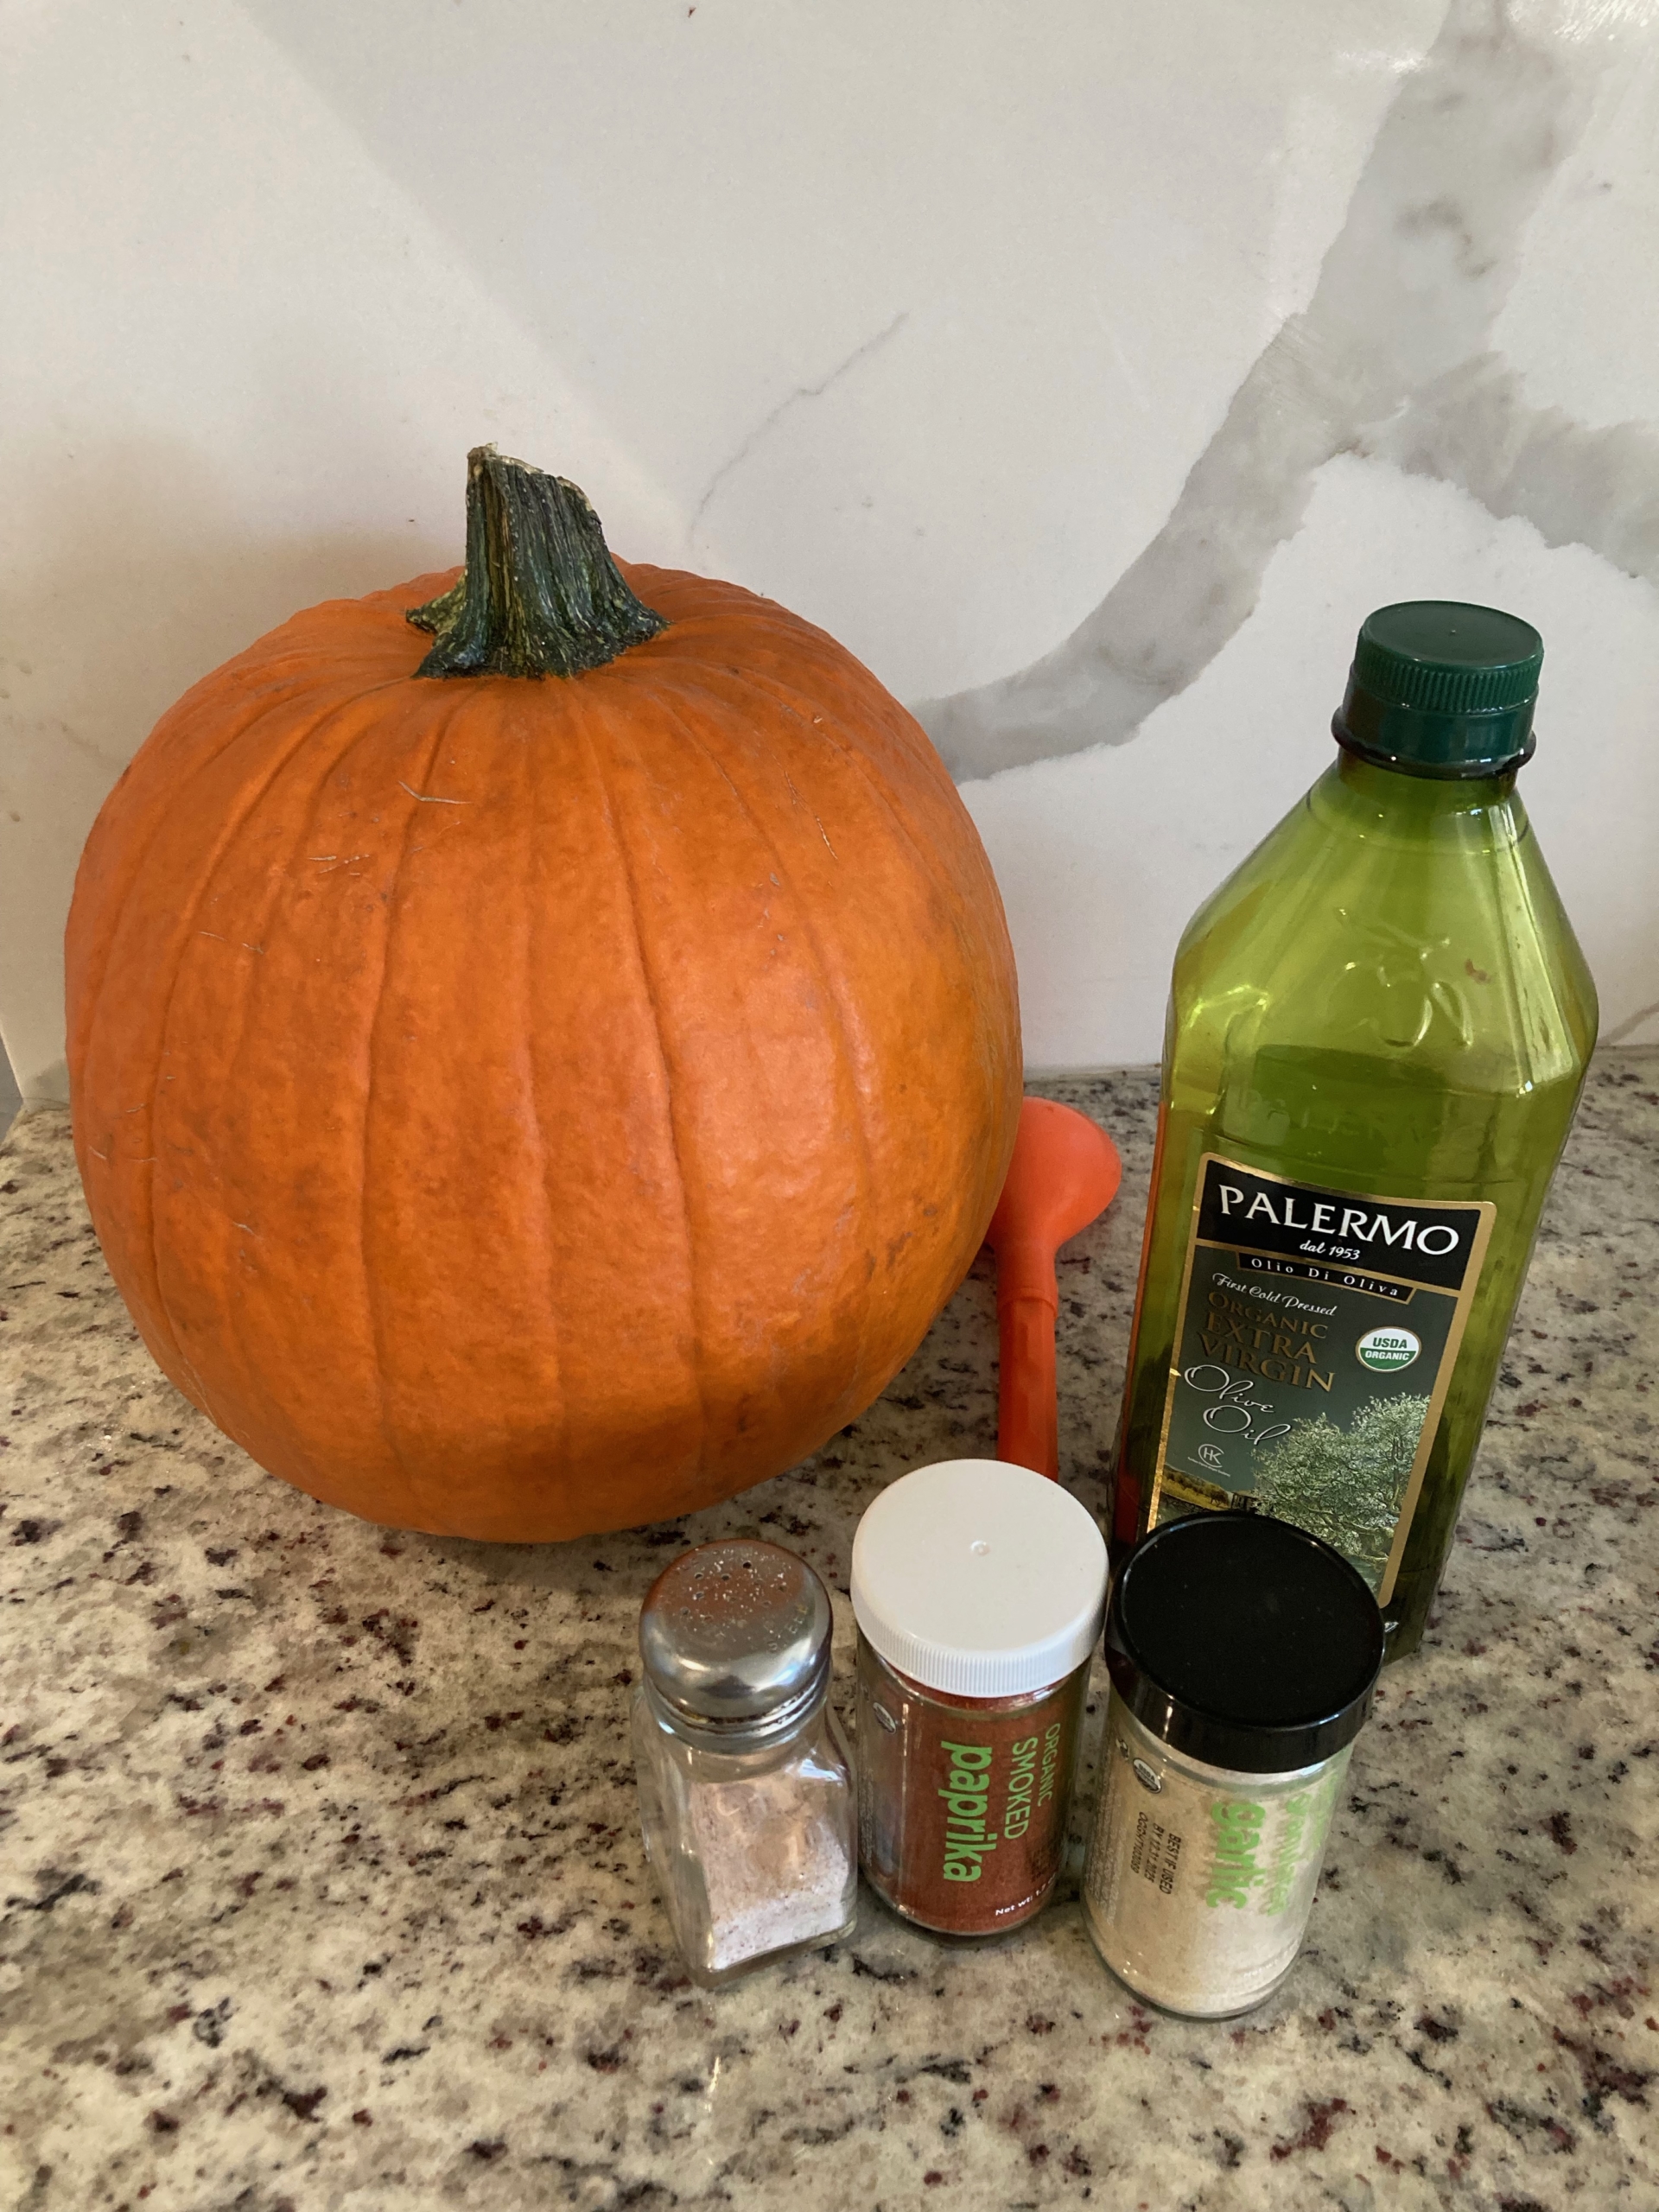
- 1 pumpkin
- Oil
- Salt
- Garlic
- Paprika
Step 1: Heat the oven to 350 F.
Step: 2 Scoop the seeds out of the pumpkin. Pick the seeds out of the pulp.

Step 3: Dry the seeds. Put them in a bowl.
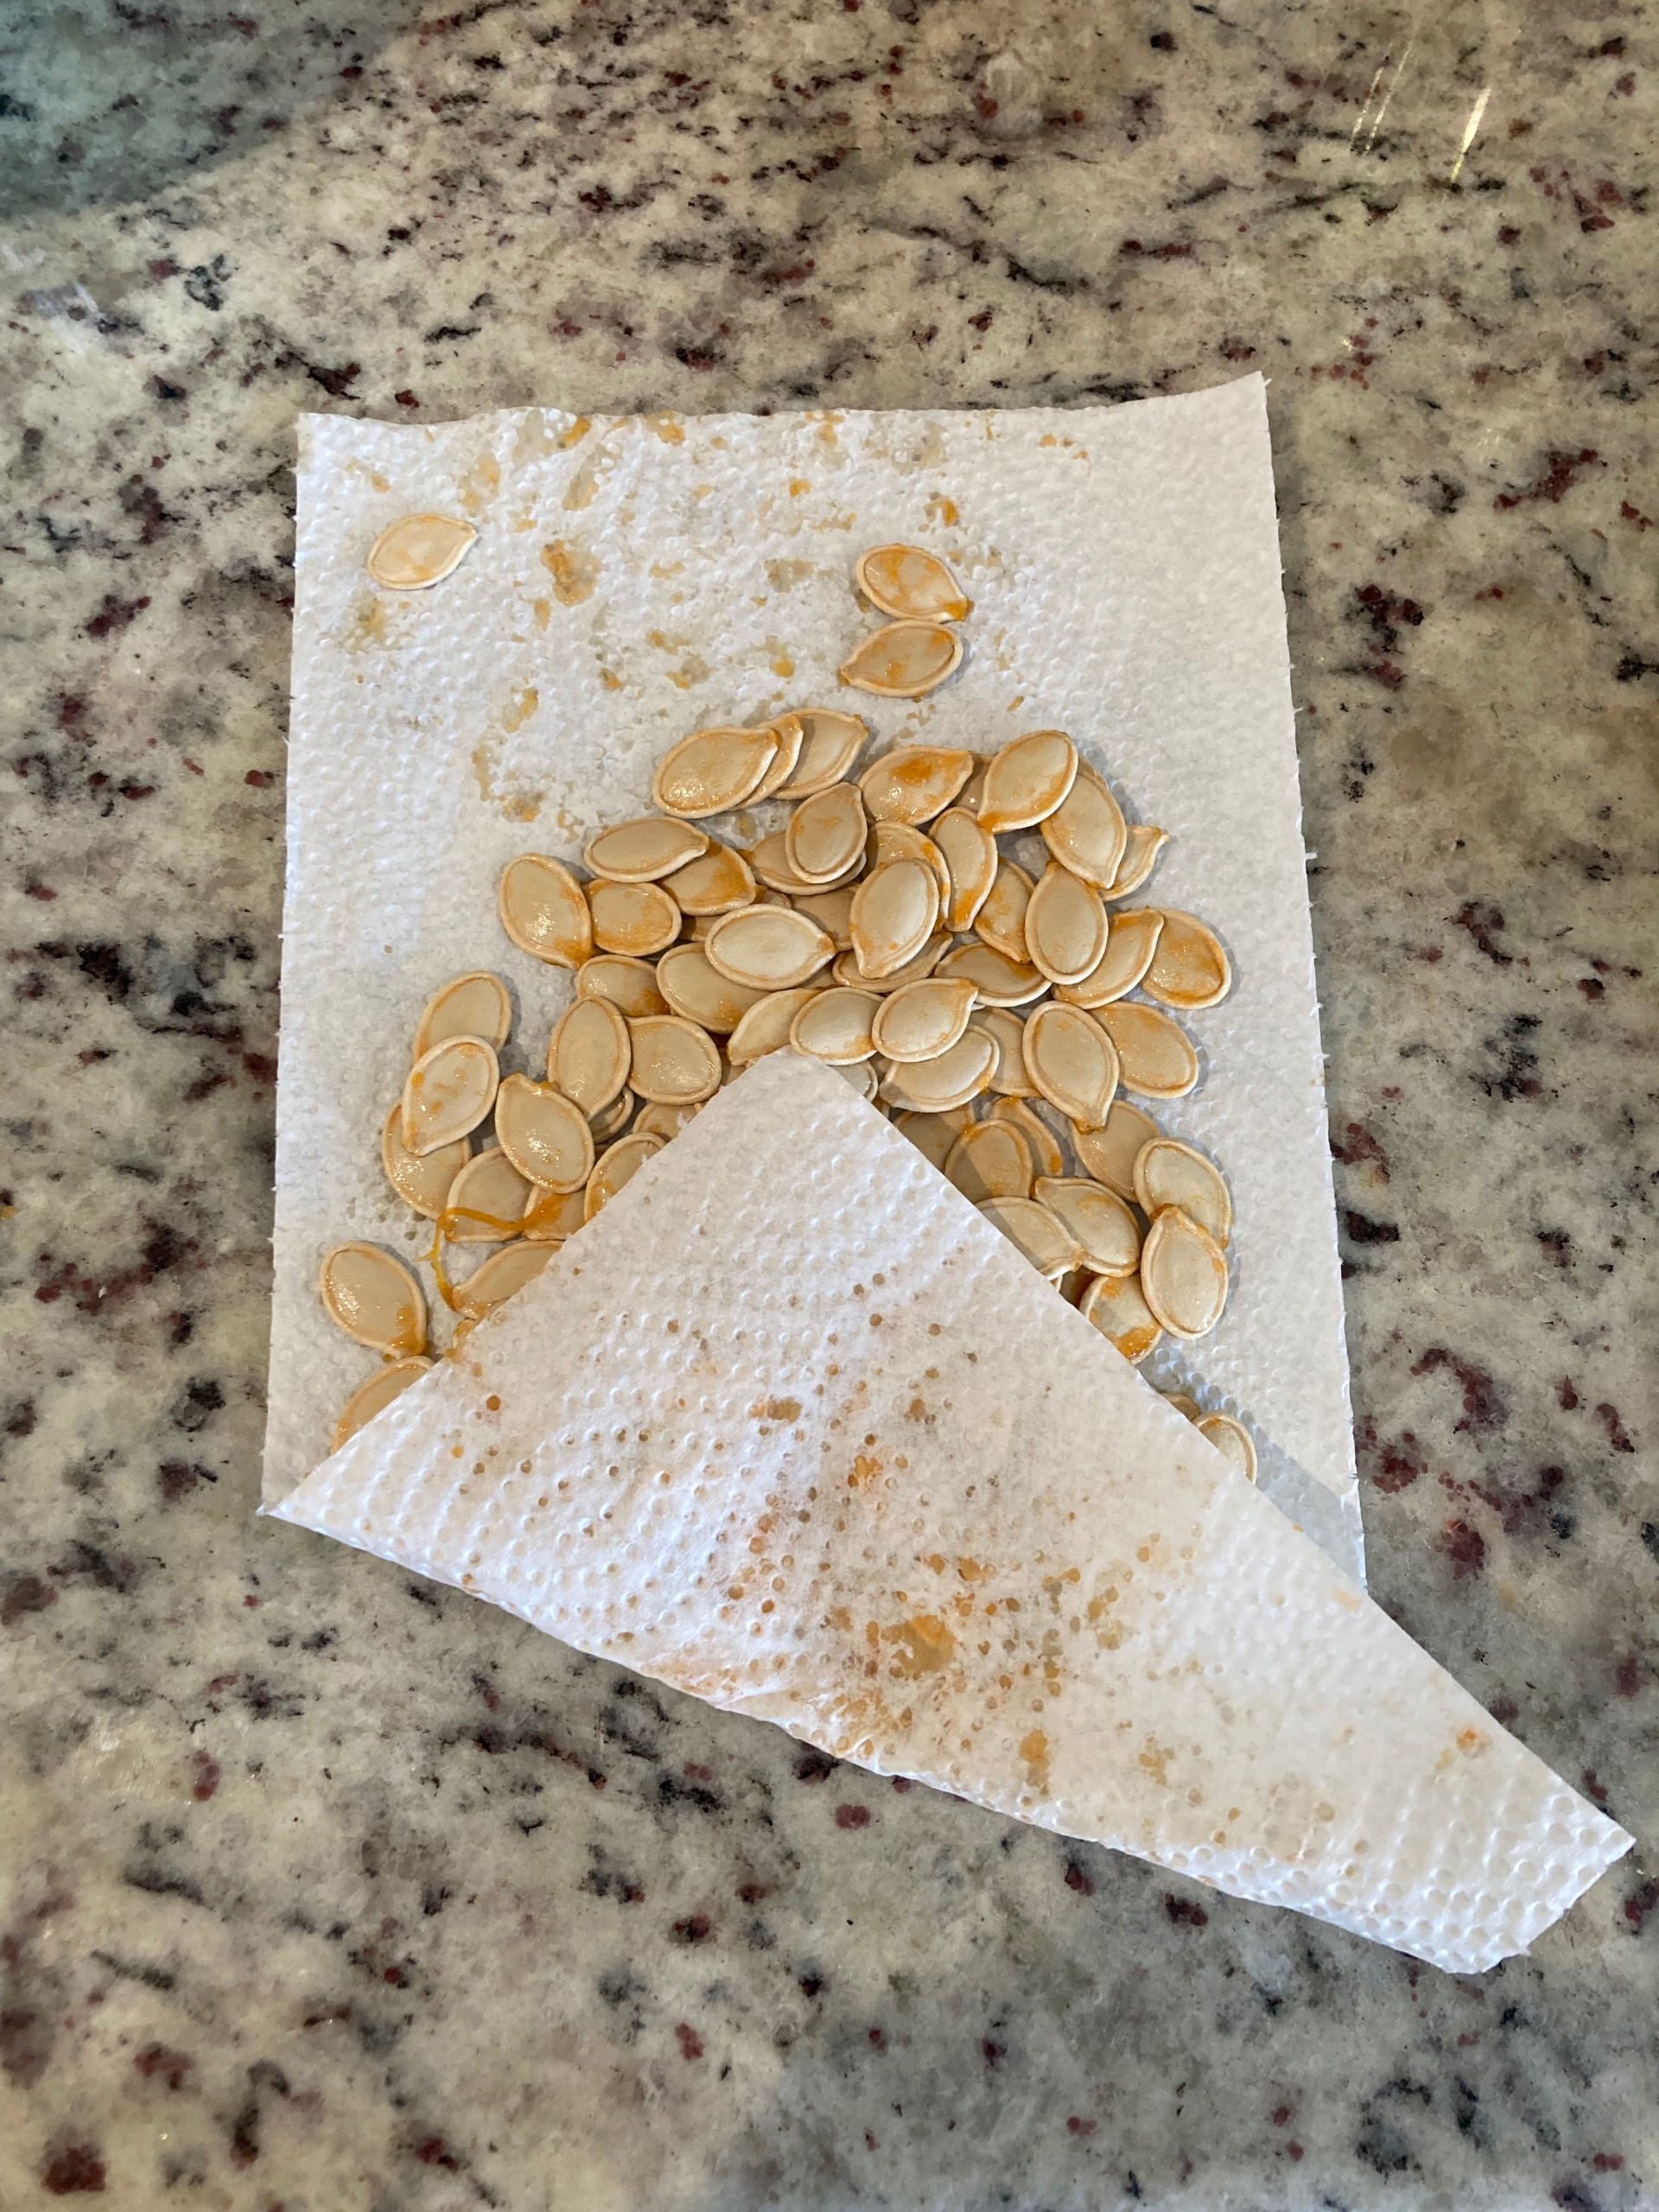
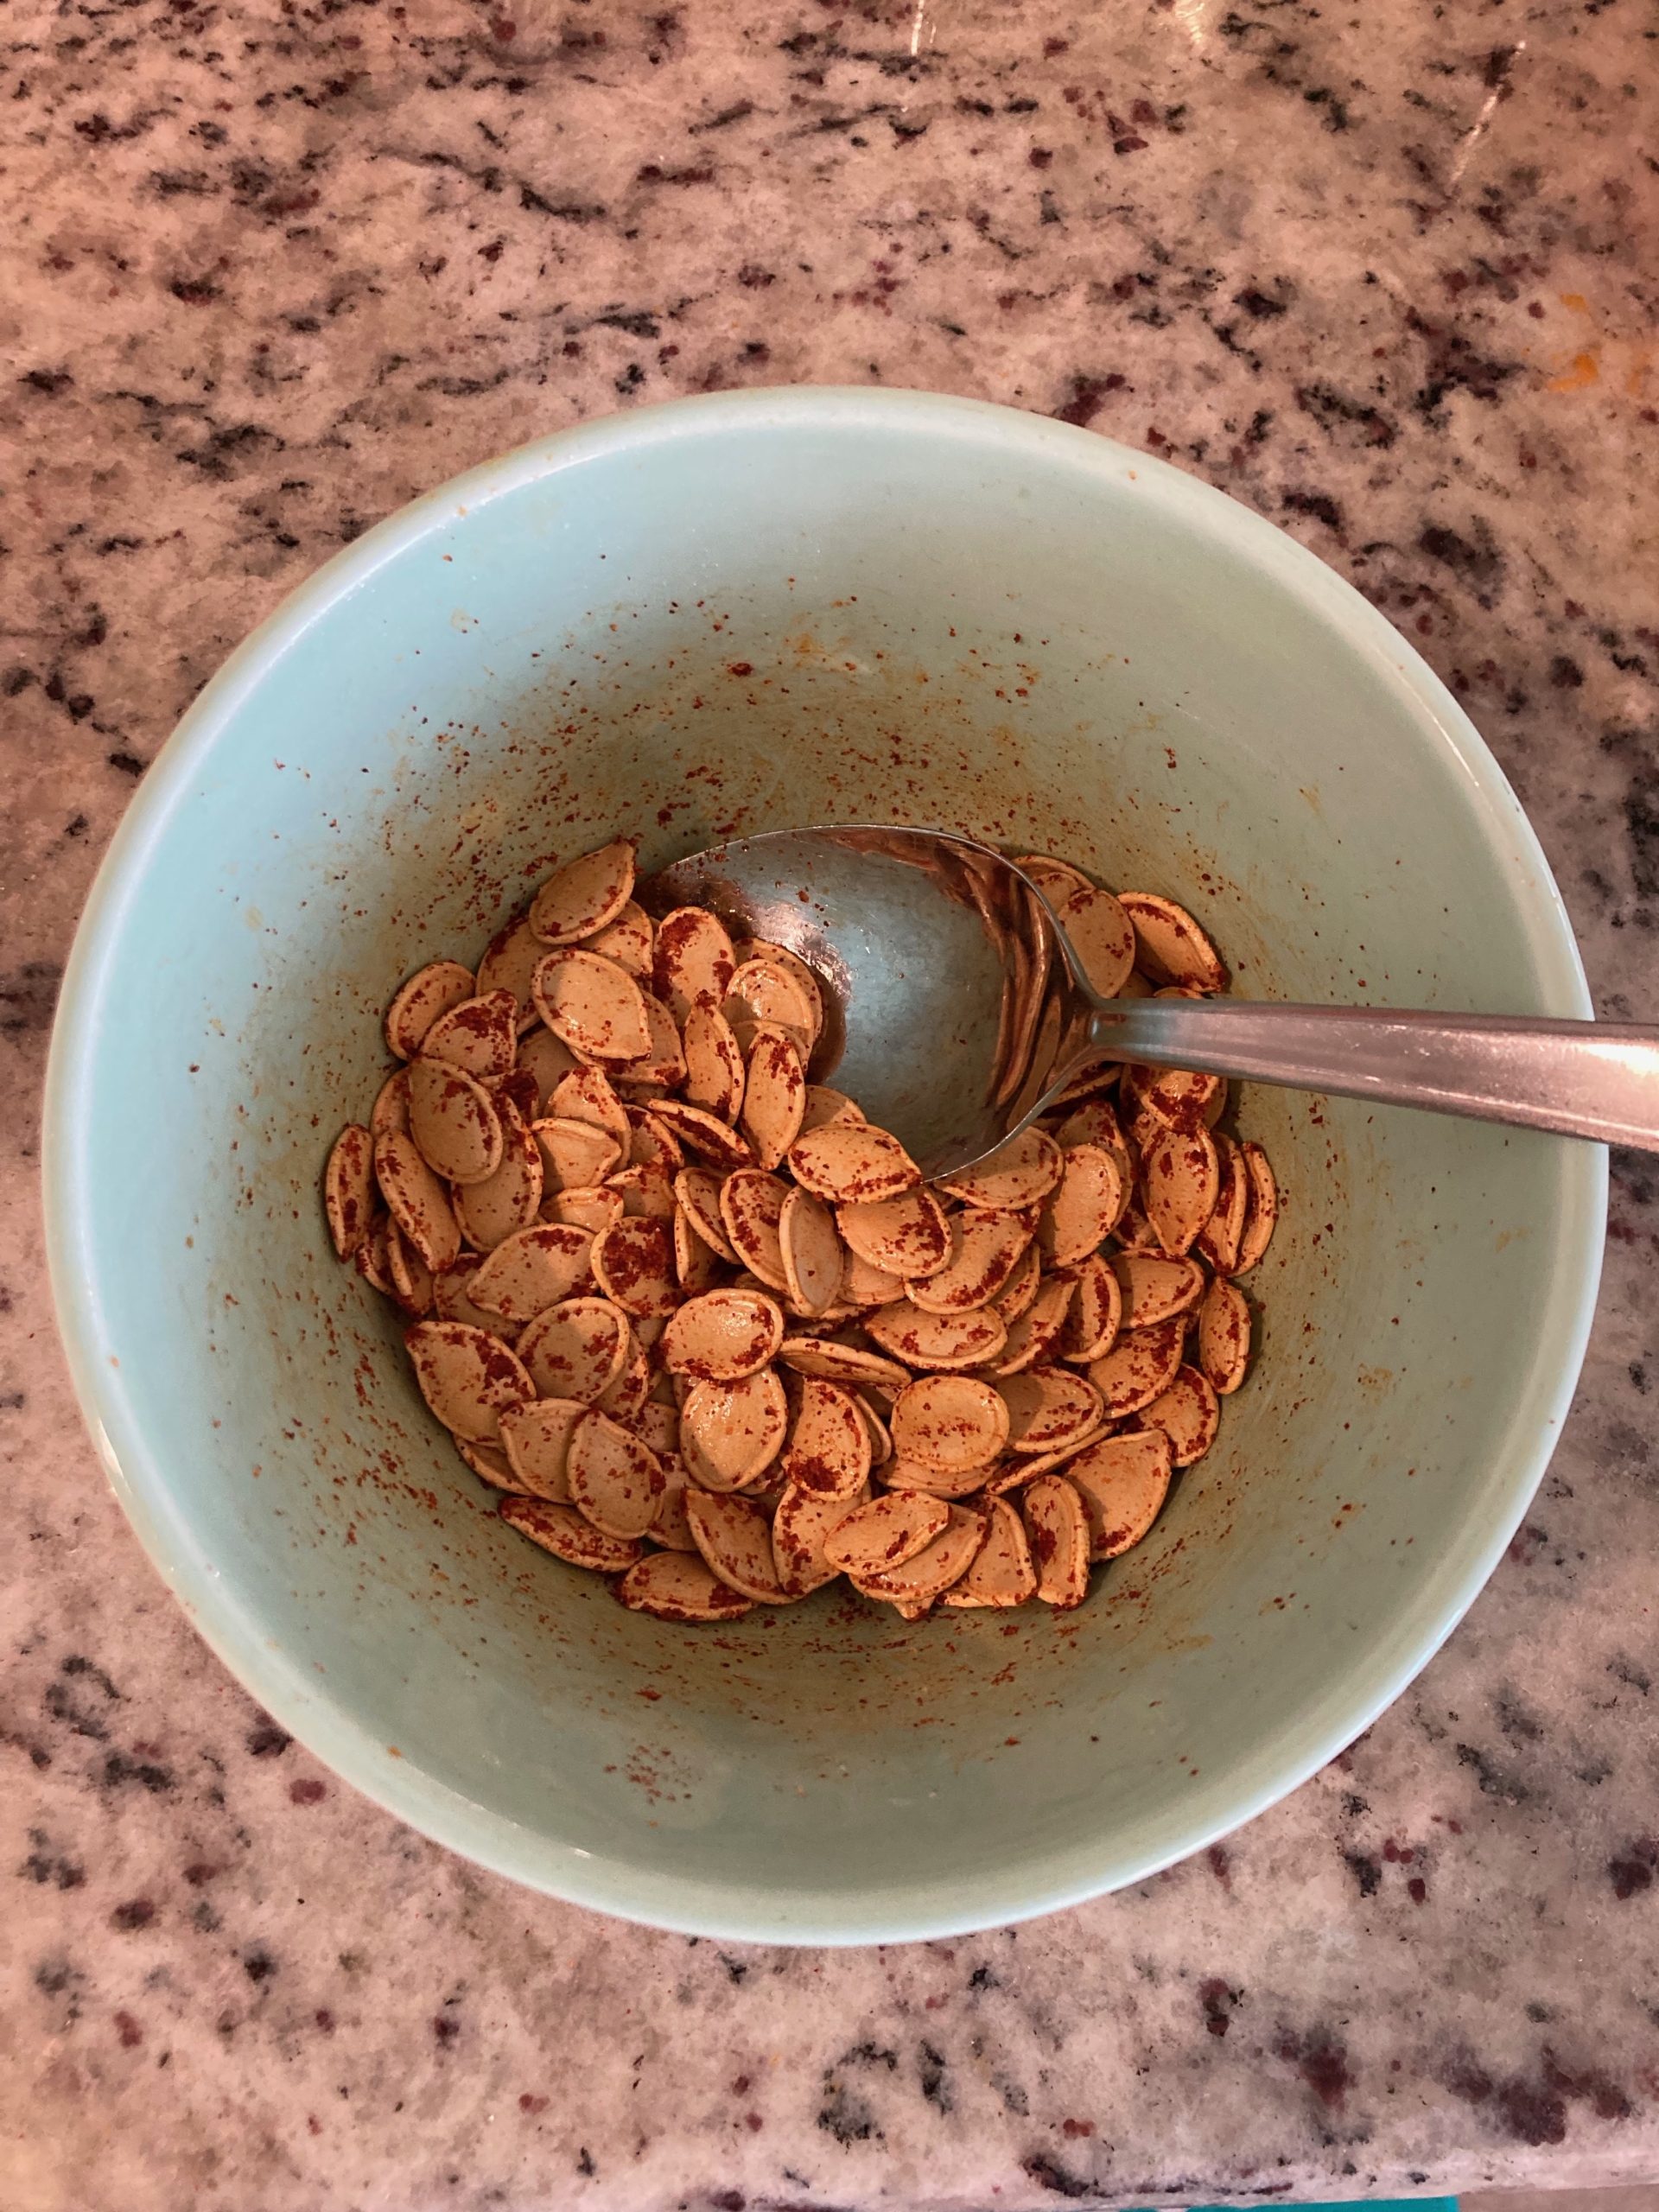
Step 4: Add a little oil and some salt, garlic, and paprika. Stir well with a spoon.
Step 5: Lay the seeds flat on a baking sheet. Put them in the oven.
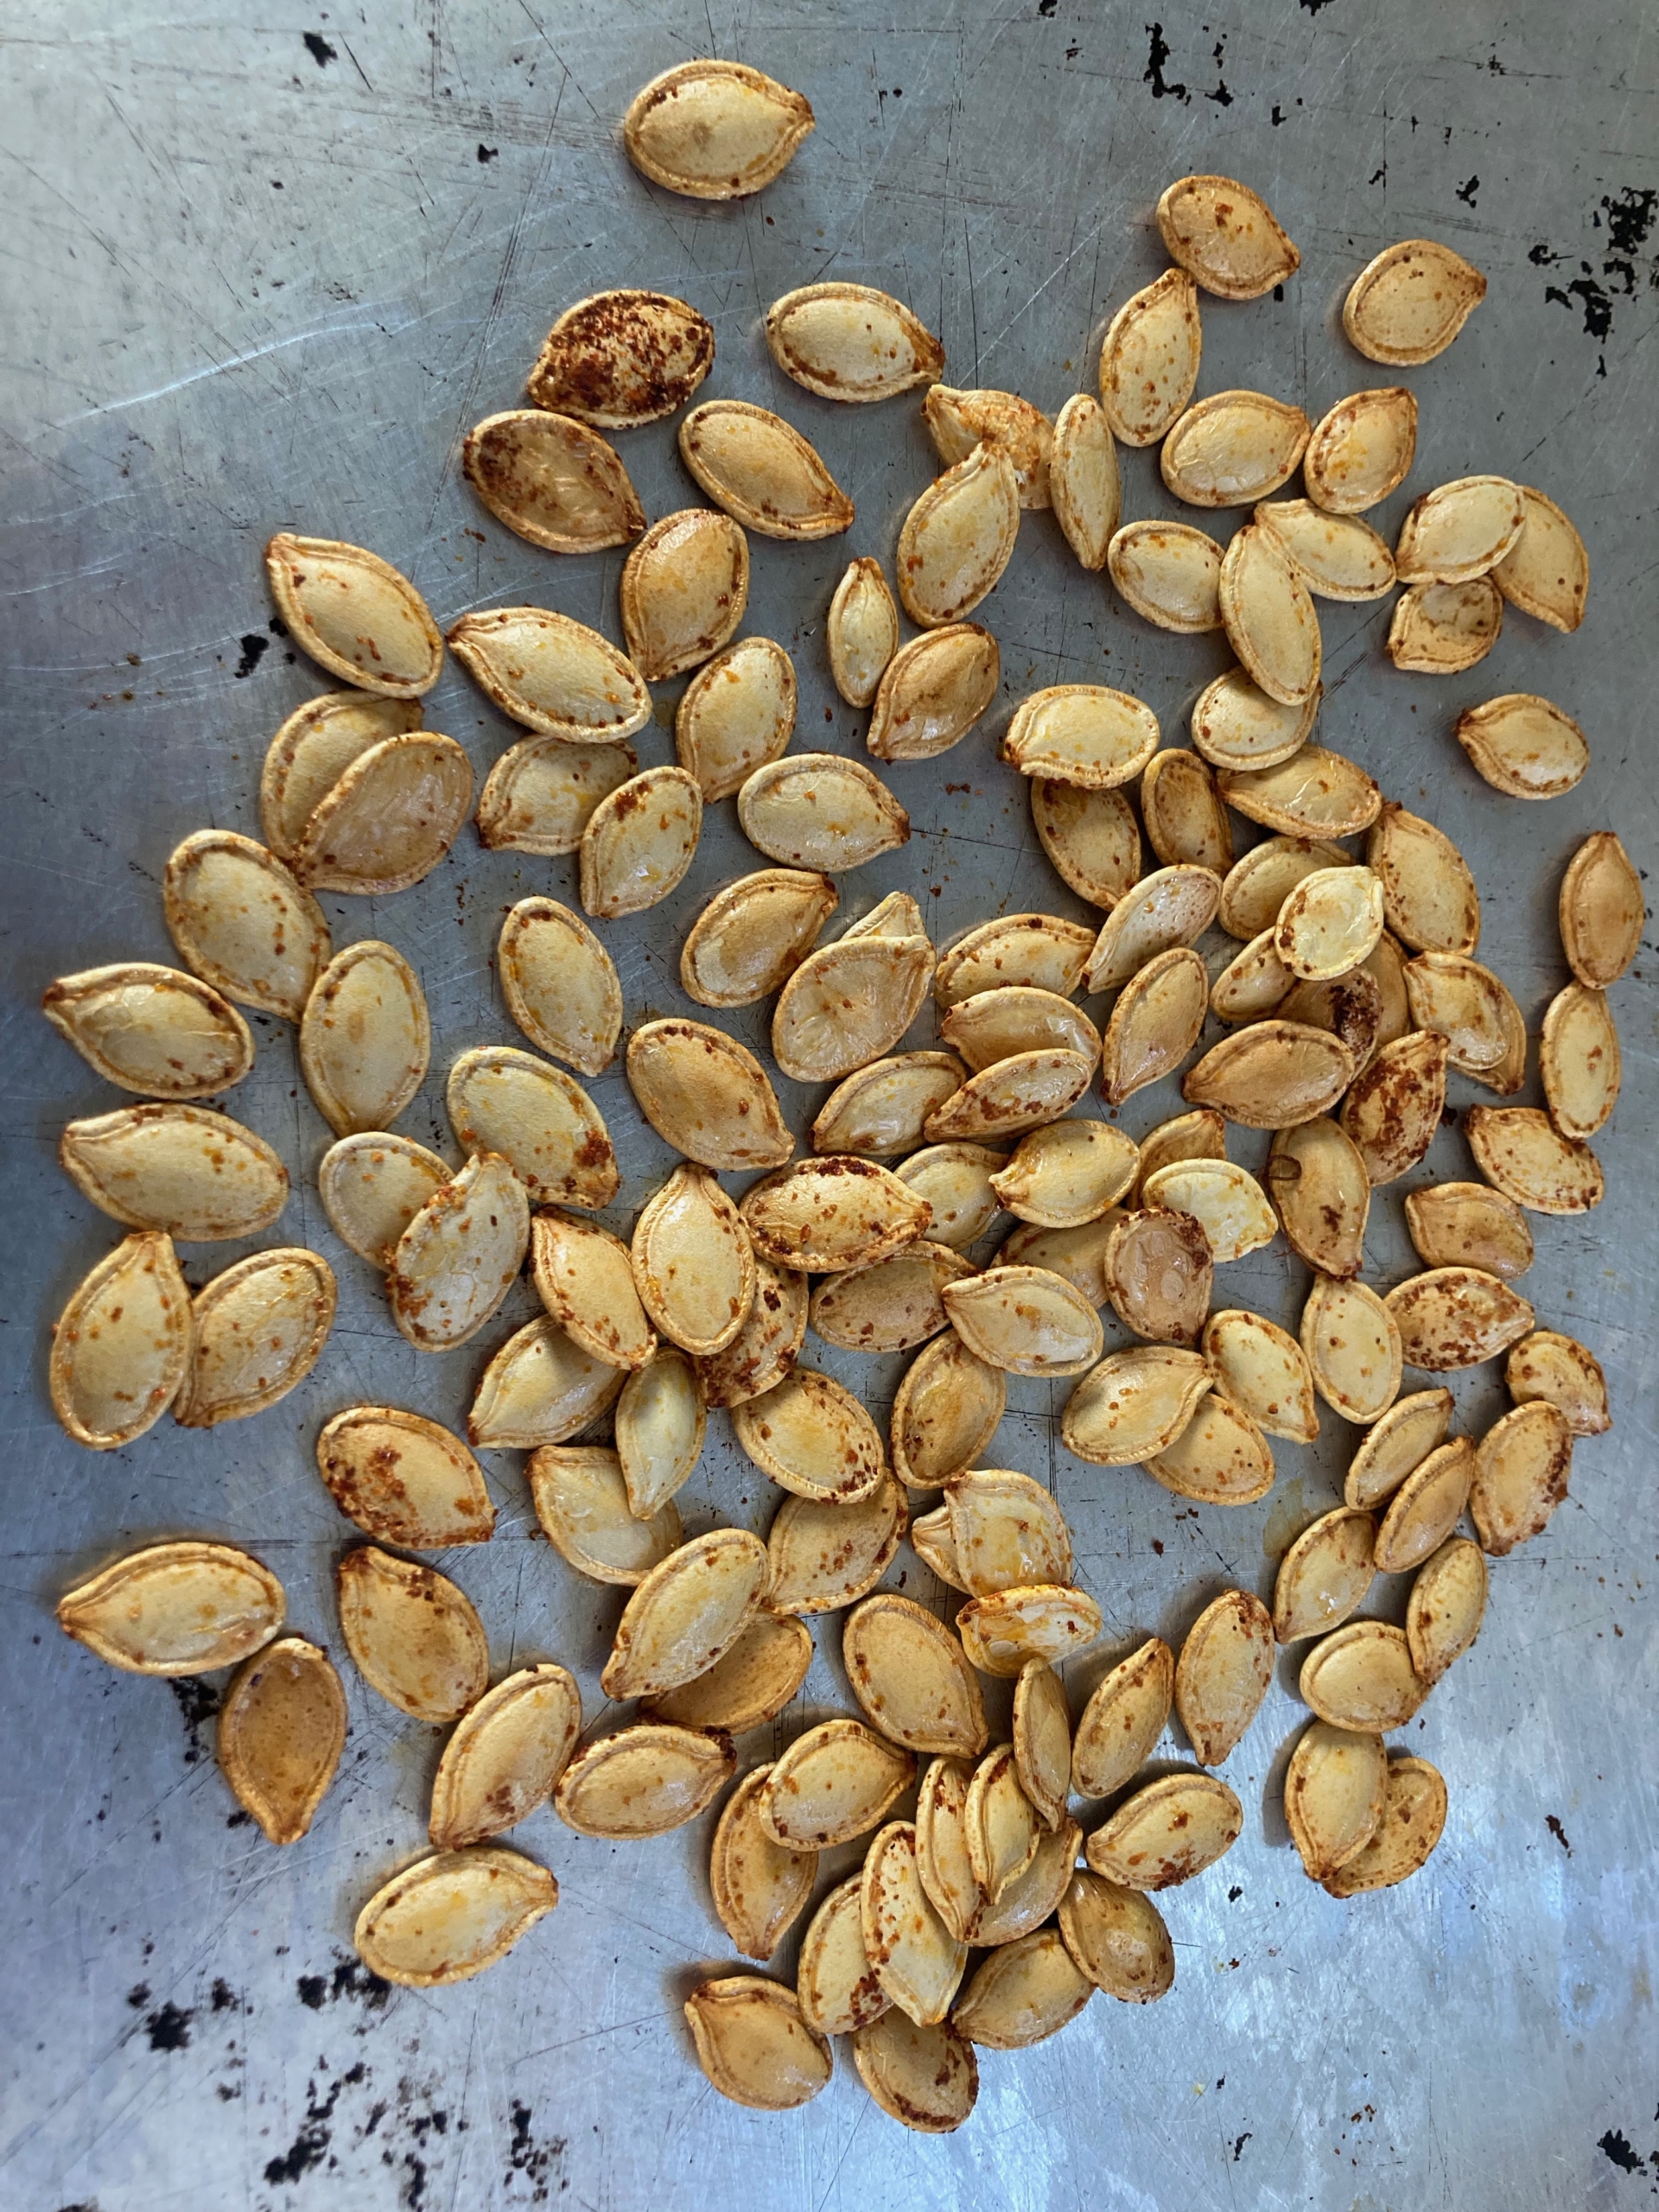
Step 6: Check them after 10 minutes. Seeds are done when they are crisp and brown.
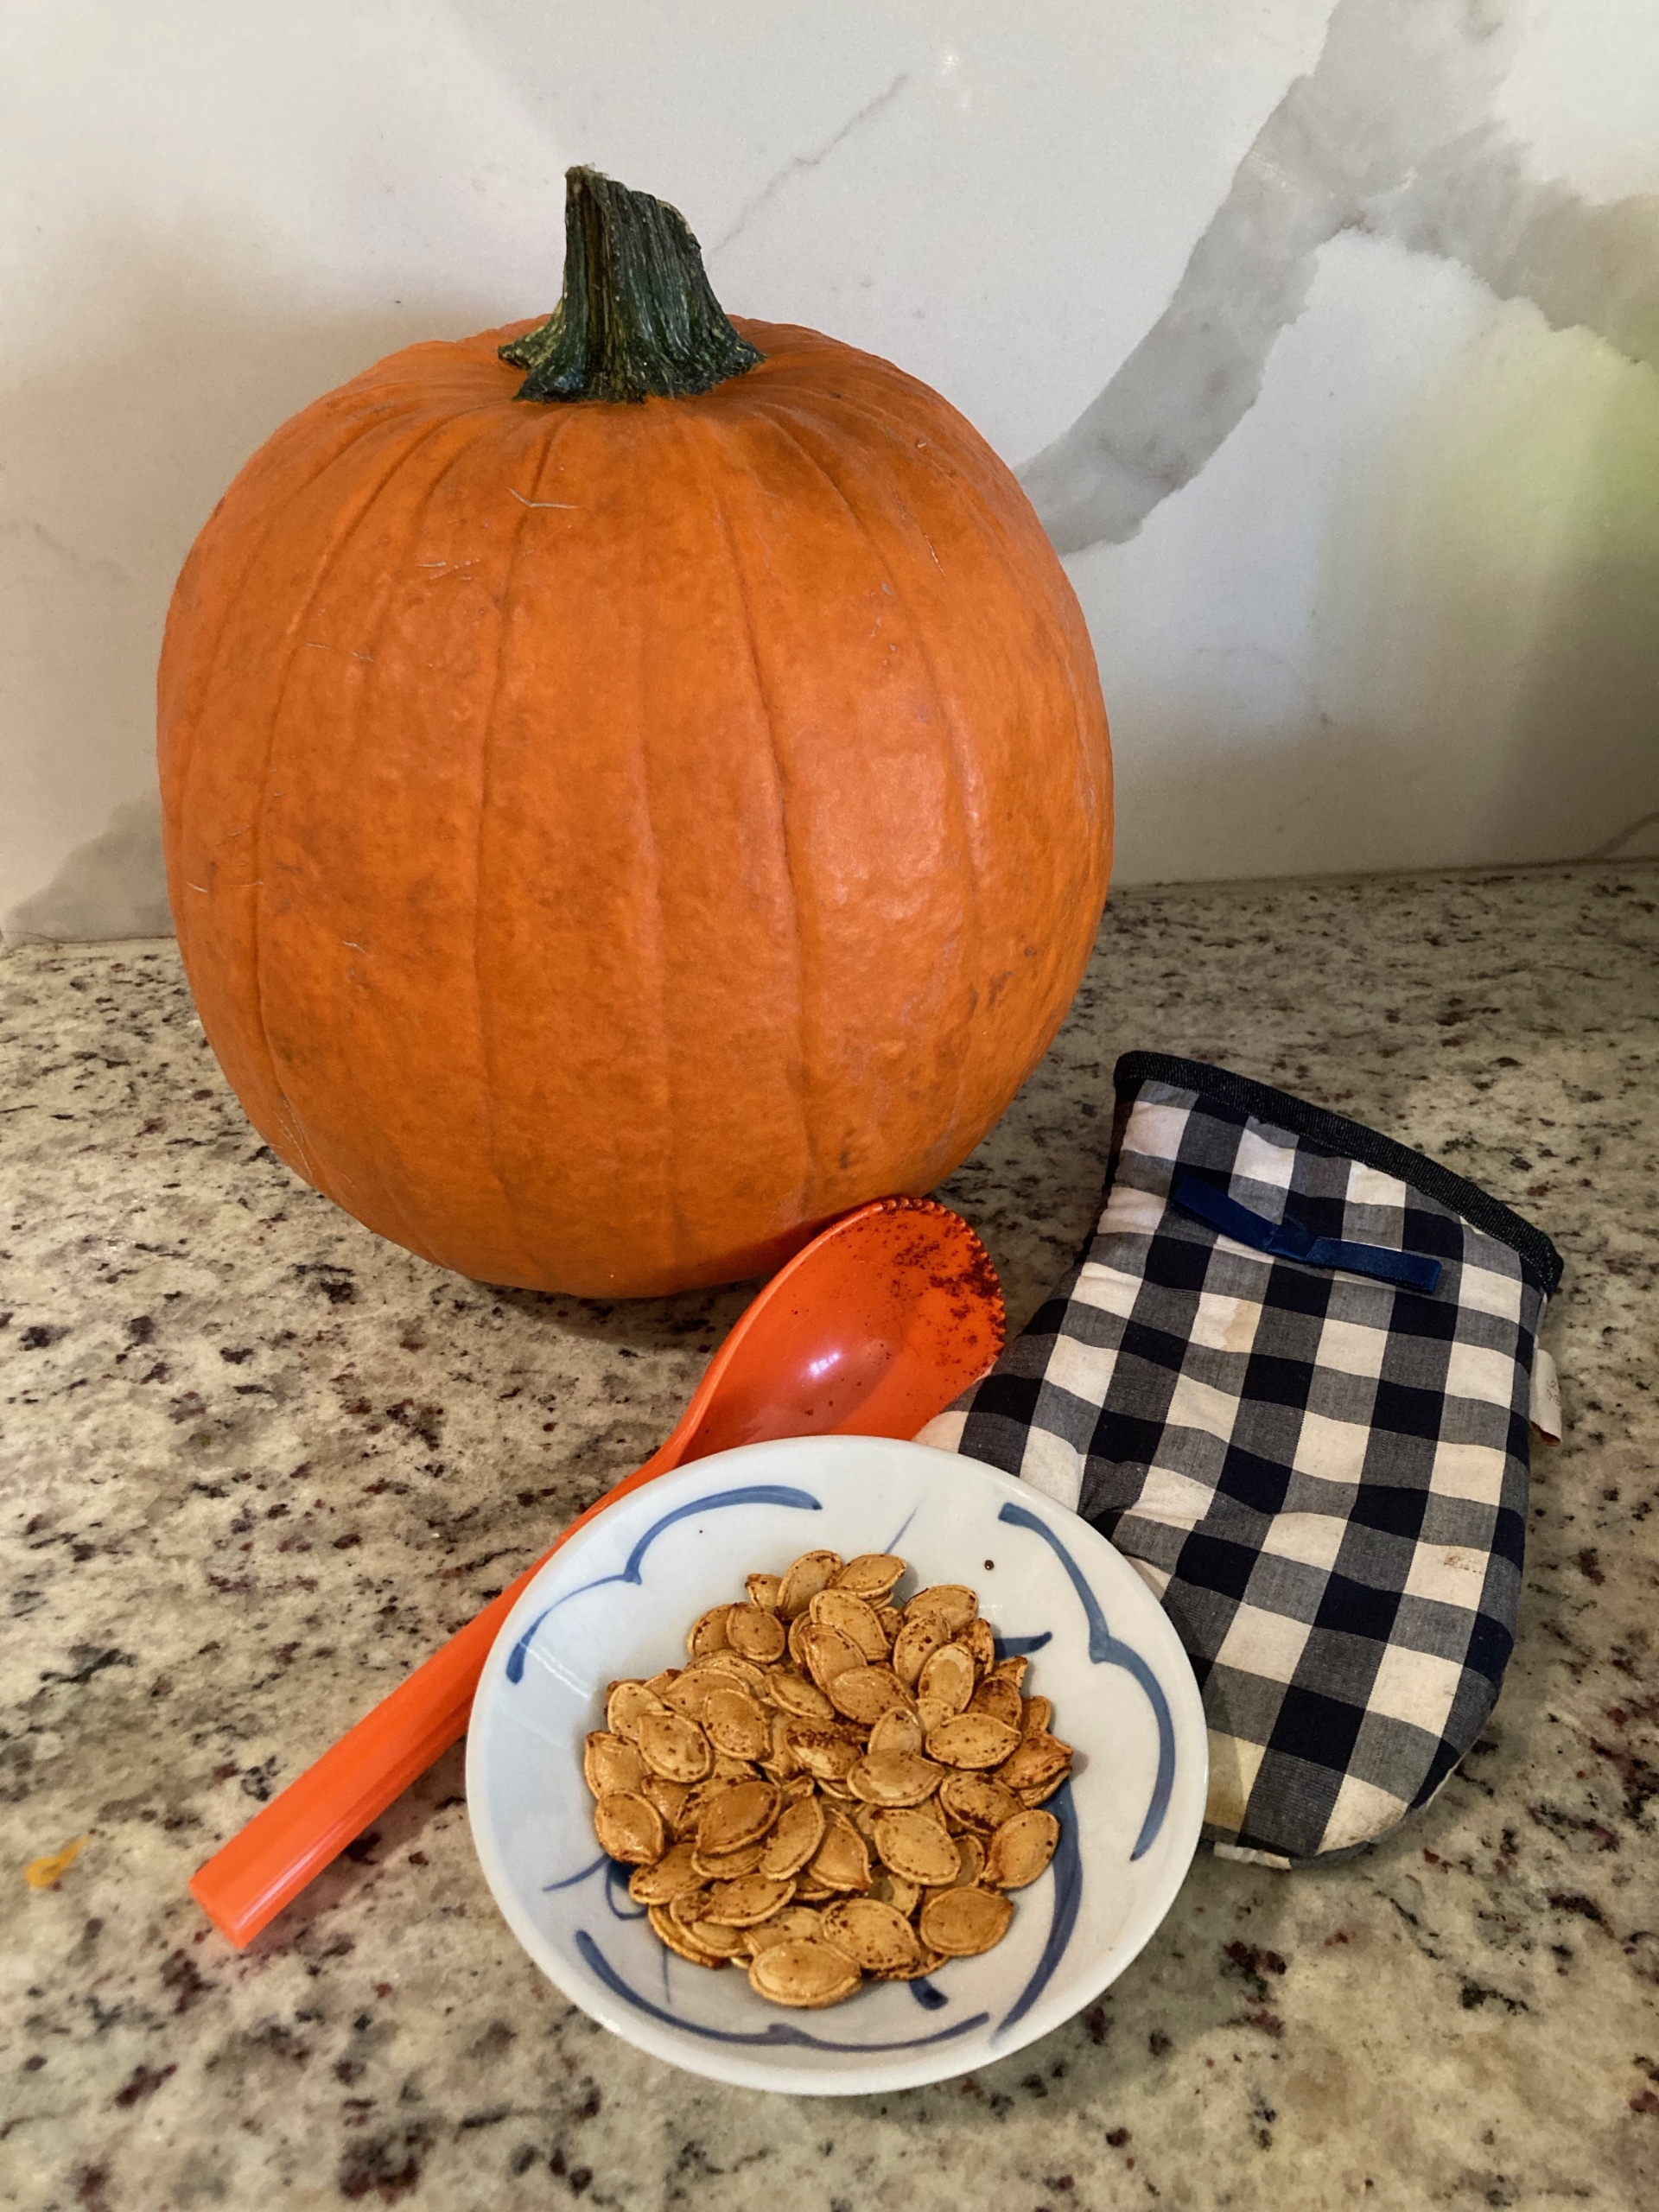
Enjoy!
One of the big stumbling blocks for kids learning to read is the multitude of spelling variations in the English language. Take the letter combinations IGH and IGHT. No child attempting to sound these out would guess that they indicate a long i sound (or, in combination with E or A, a long a sound), yet they do.
While thankfully these spelling patterns only feature in a relatively small selection of words, they’re found in some very common ones—and some very festive ones. This holiday lights craft and reading game takes advantage of seasonal words from light and bright to neigh and sleigh to highlight these unusual letter combinations.
Use this tutorial to craft a colorful, creative activity that offers a playful way to practice words spelled with IGH and IGHT. Because, from fishing for alphabet magnets to layering spelling s’mores, kids learn through playing.

Materials:
- Wooden clothespins (6)
- Construction paper (multiple colors)
- Yarn
- Glue
- Tape
- Scissors
- Pen or marker
Cost: $5-10
Set the Scene (Optional)
Set the mood for your crafting session by settling in and reading a book about the holiday season. New approaches to classic Christmas tales, such as Silent Night by Lara Hawthorne, and ‘Twas the Night B’Fore Christmas: An African-American Version by Melodye Rosales, will delight your child and give them plenty of opportunities to see IGH and IGHT words in action.
While assembling the game pieces, you can further enhance your child’s mastery by referring to words that you read in the book. Discussing what the words mean, how they fit into the story, and how they relate to your child’s life can increase their vocabulary, as well as improving their reading skills.
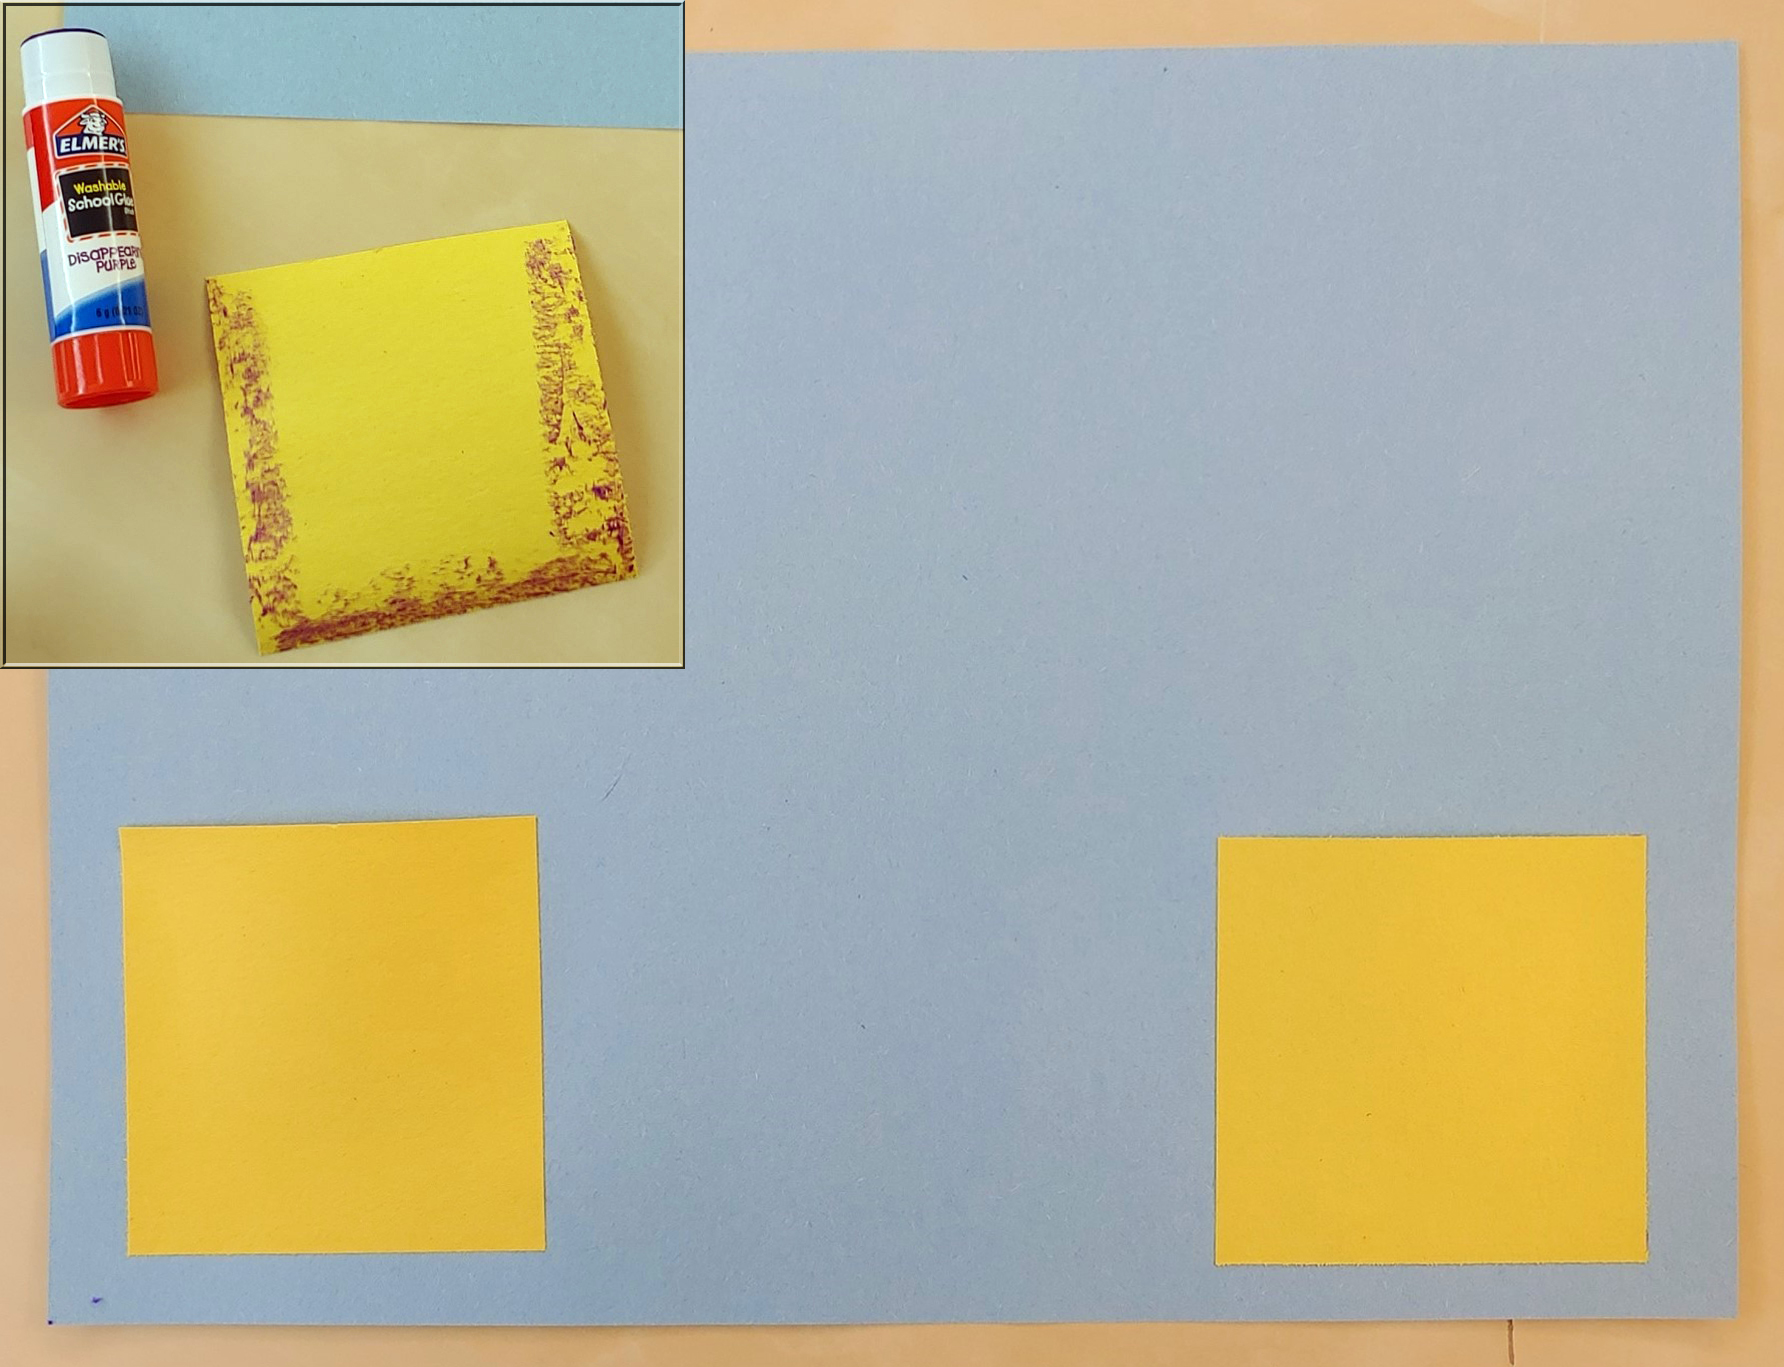
Step 1: Choose a piece of construction paper for your base. Then, using a different color than your base, cut out two three-inch by three-inch squares. Apply glue to the squares on three sides, then stick them to the lower corners of your base sheet of paper. Leave the top of the square open, creating two pockets.
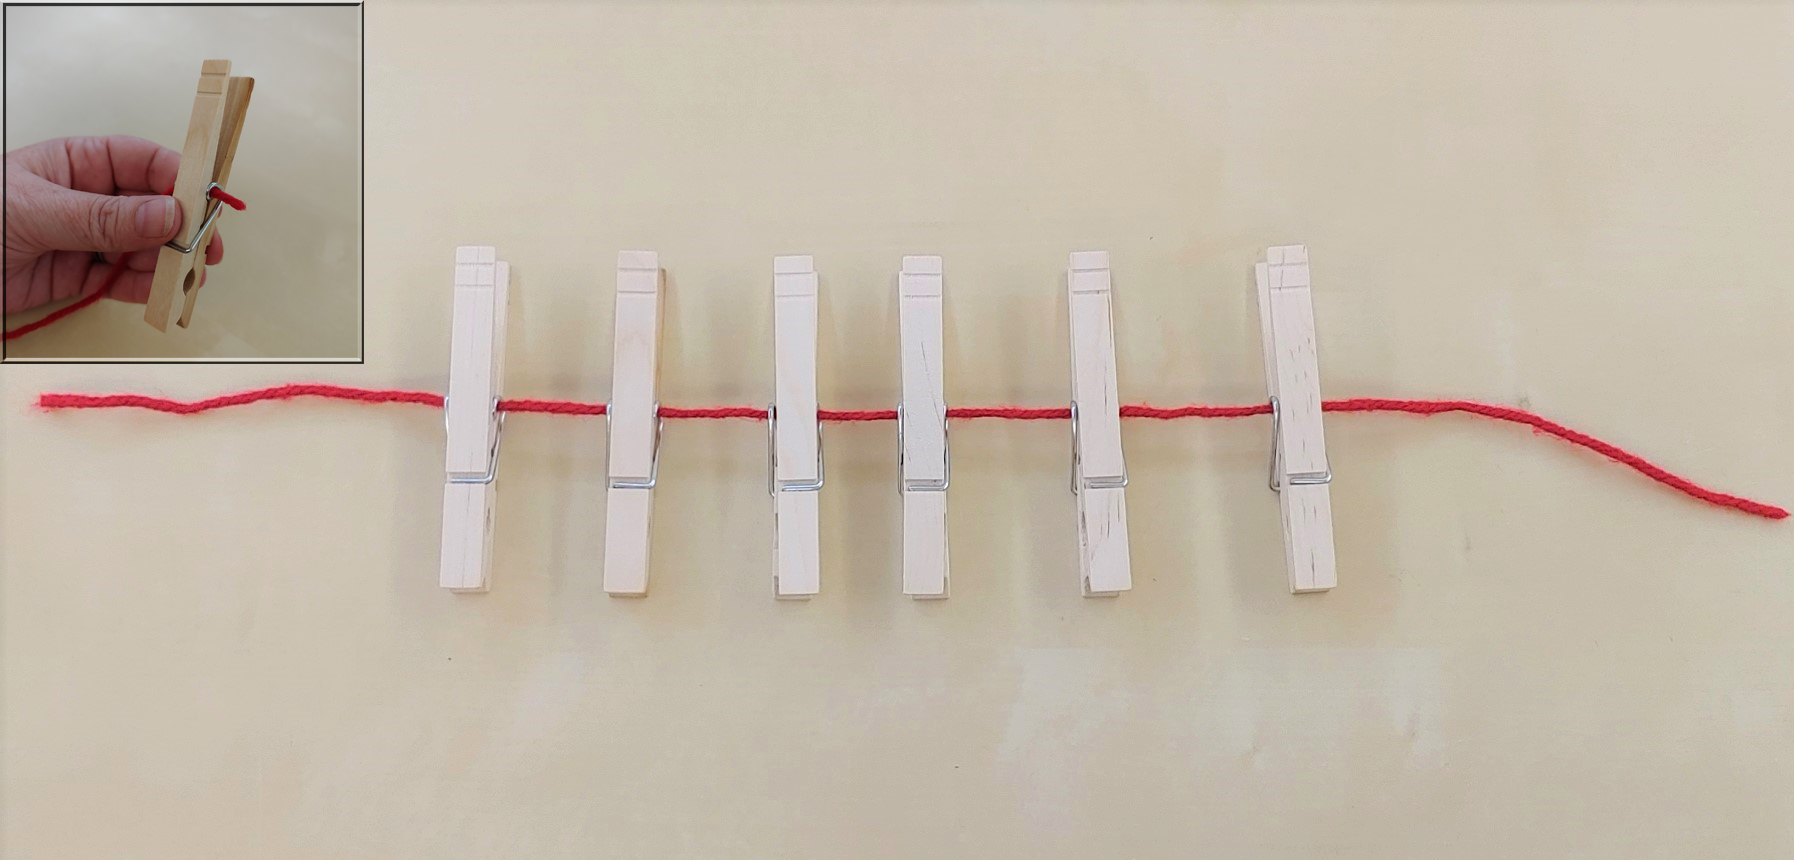
Step 2: Thread the yarn through the metal loop in the clothespin to create a stable line. Thread together a total of six clothespins.
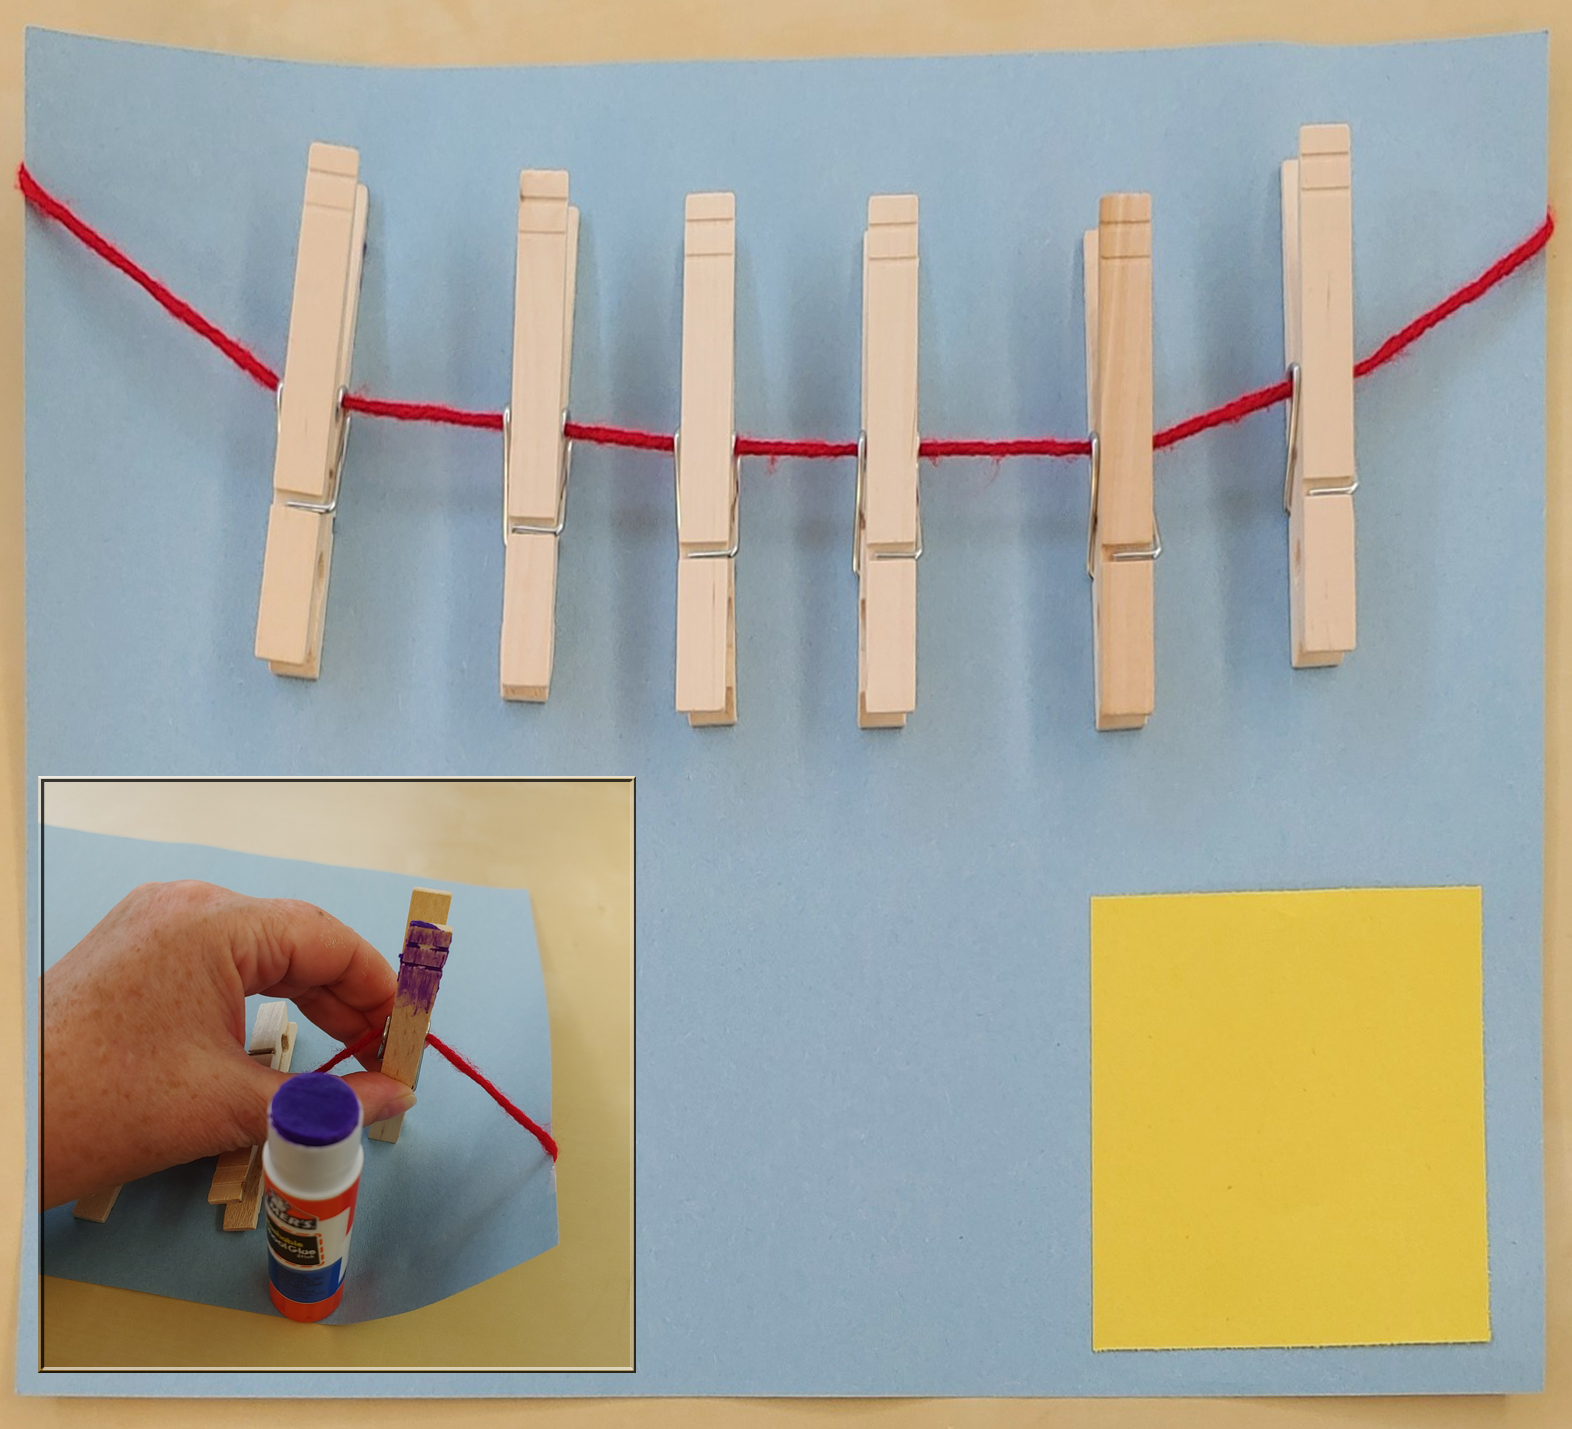
Step 3: Lay the threaded clothespins on the construction paper. Position them above the pockets, close to the top of the paper. Wrap the ends of the yarn around the edges of the paper and tape them to the back, about half an inch from the top.
Add a thin layer of glue to the back of each clothespin and press it into place. Keep the clothespins as evenly spaced as possible.
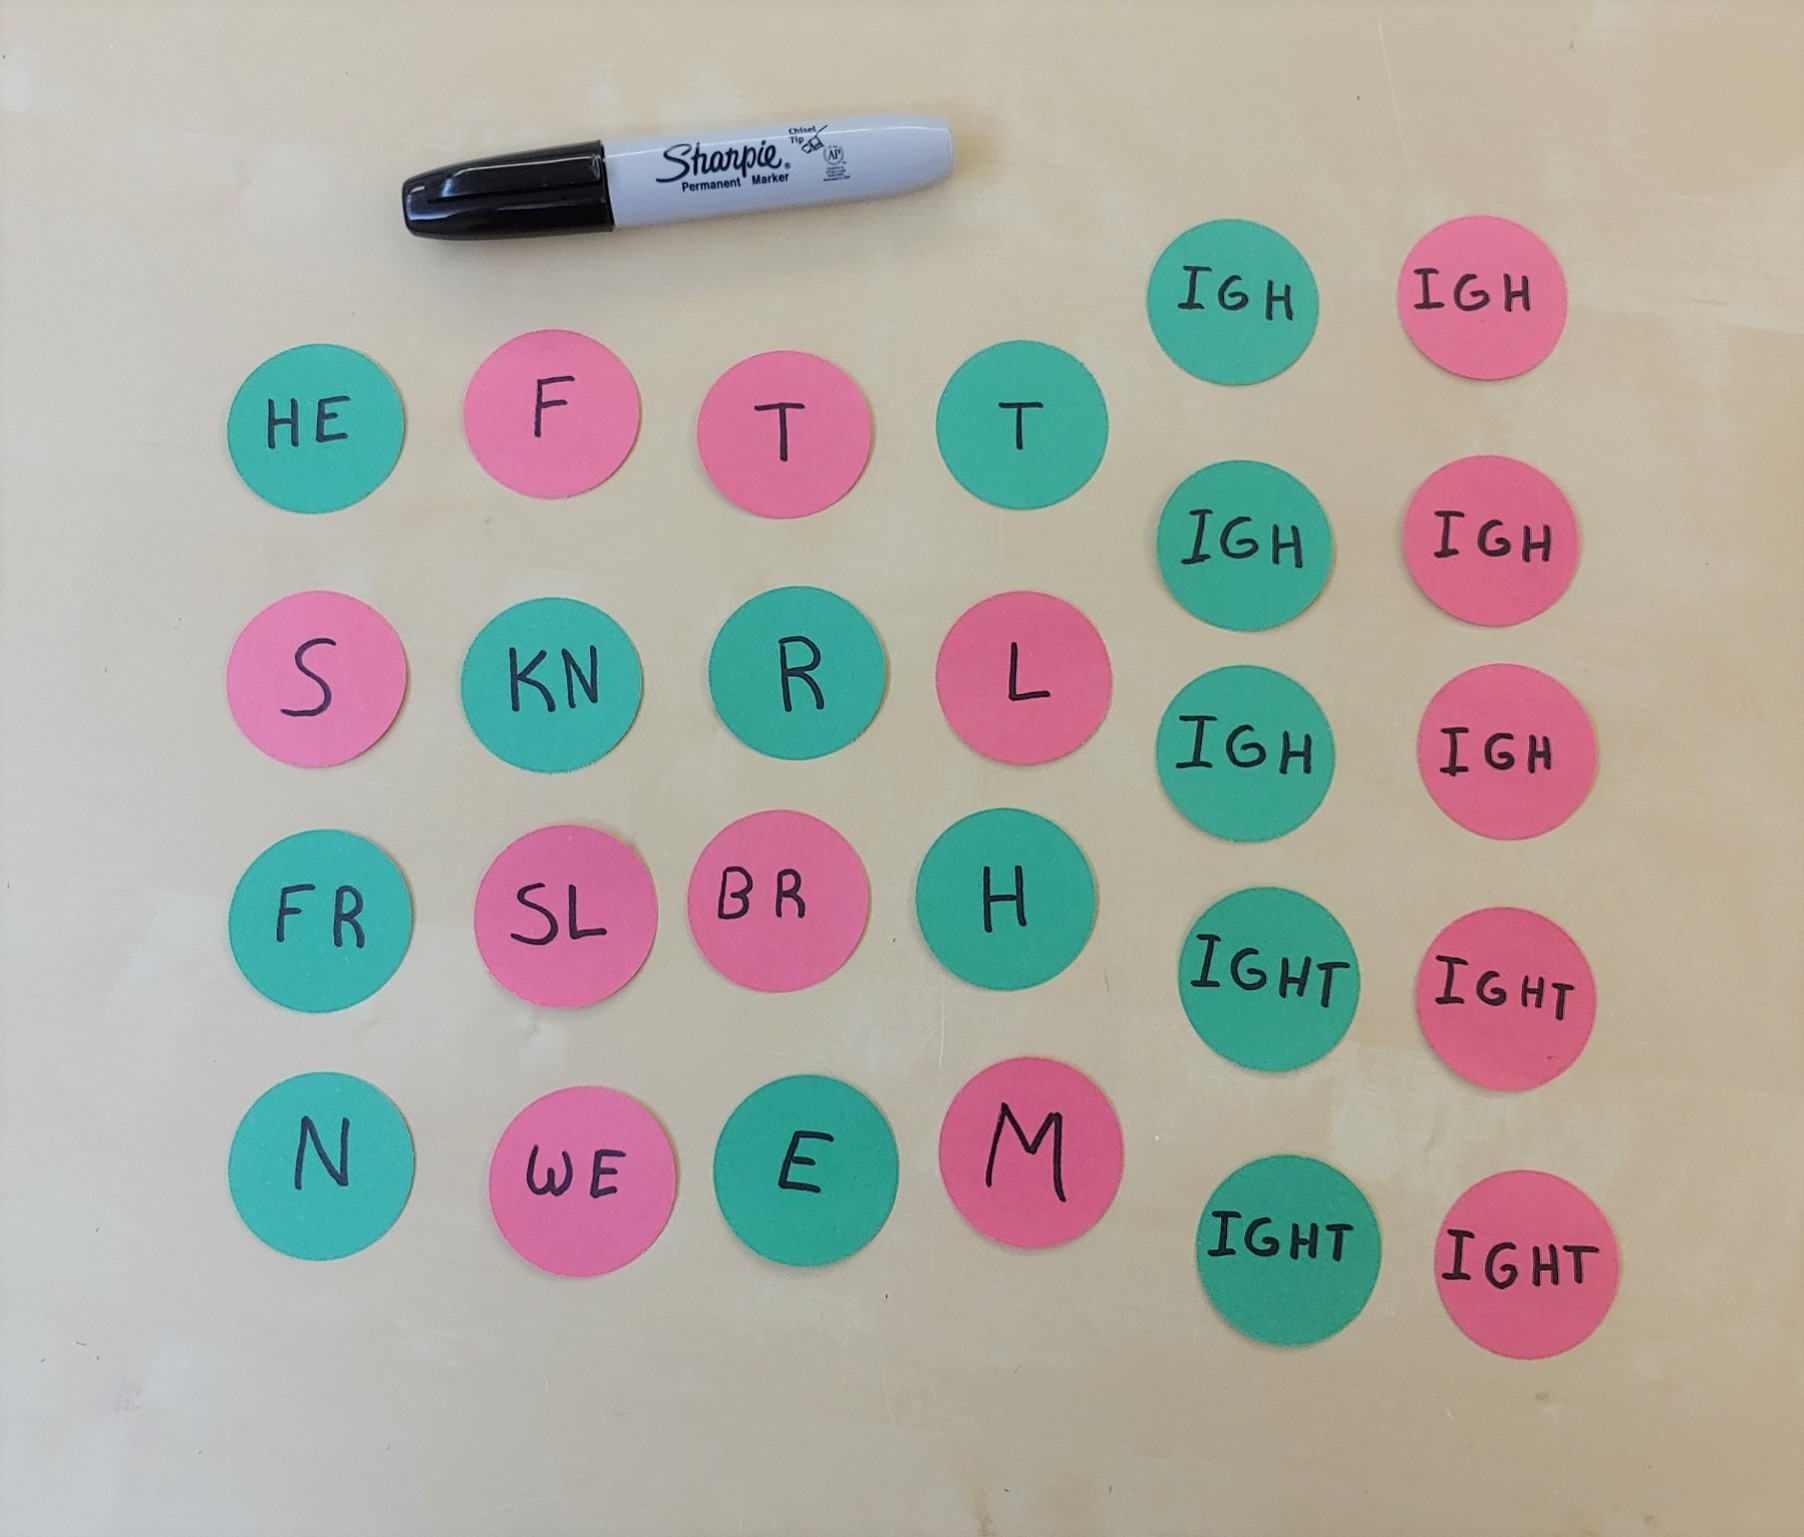
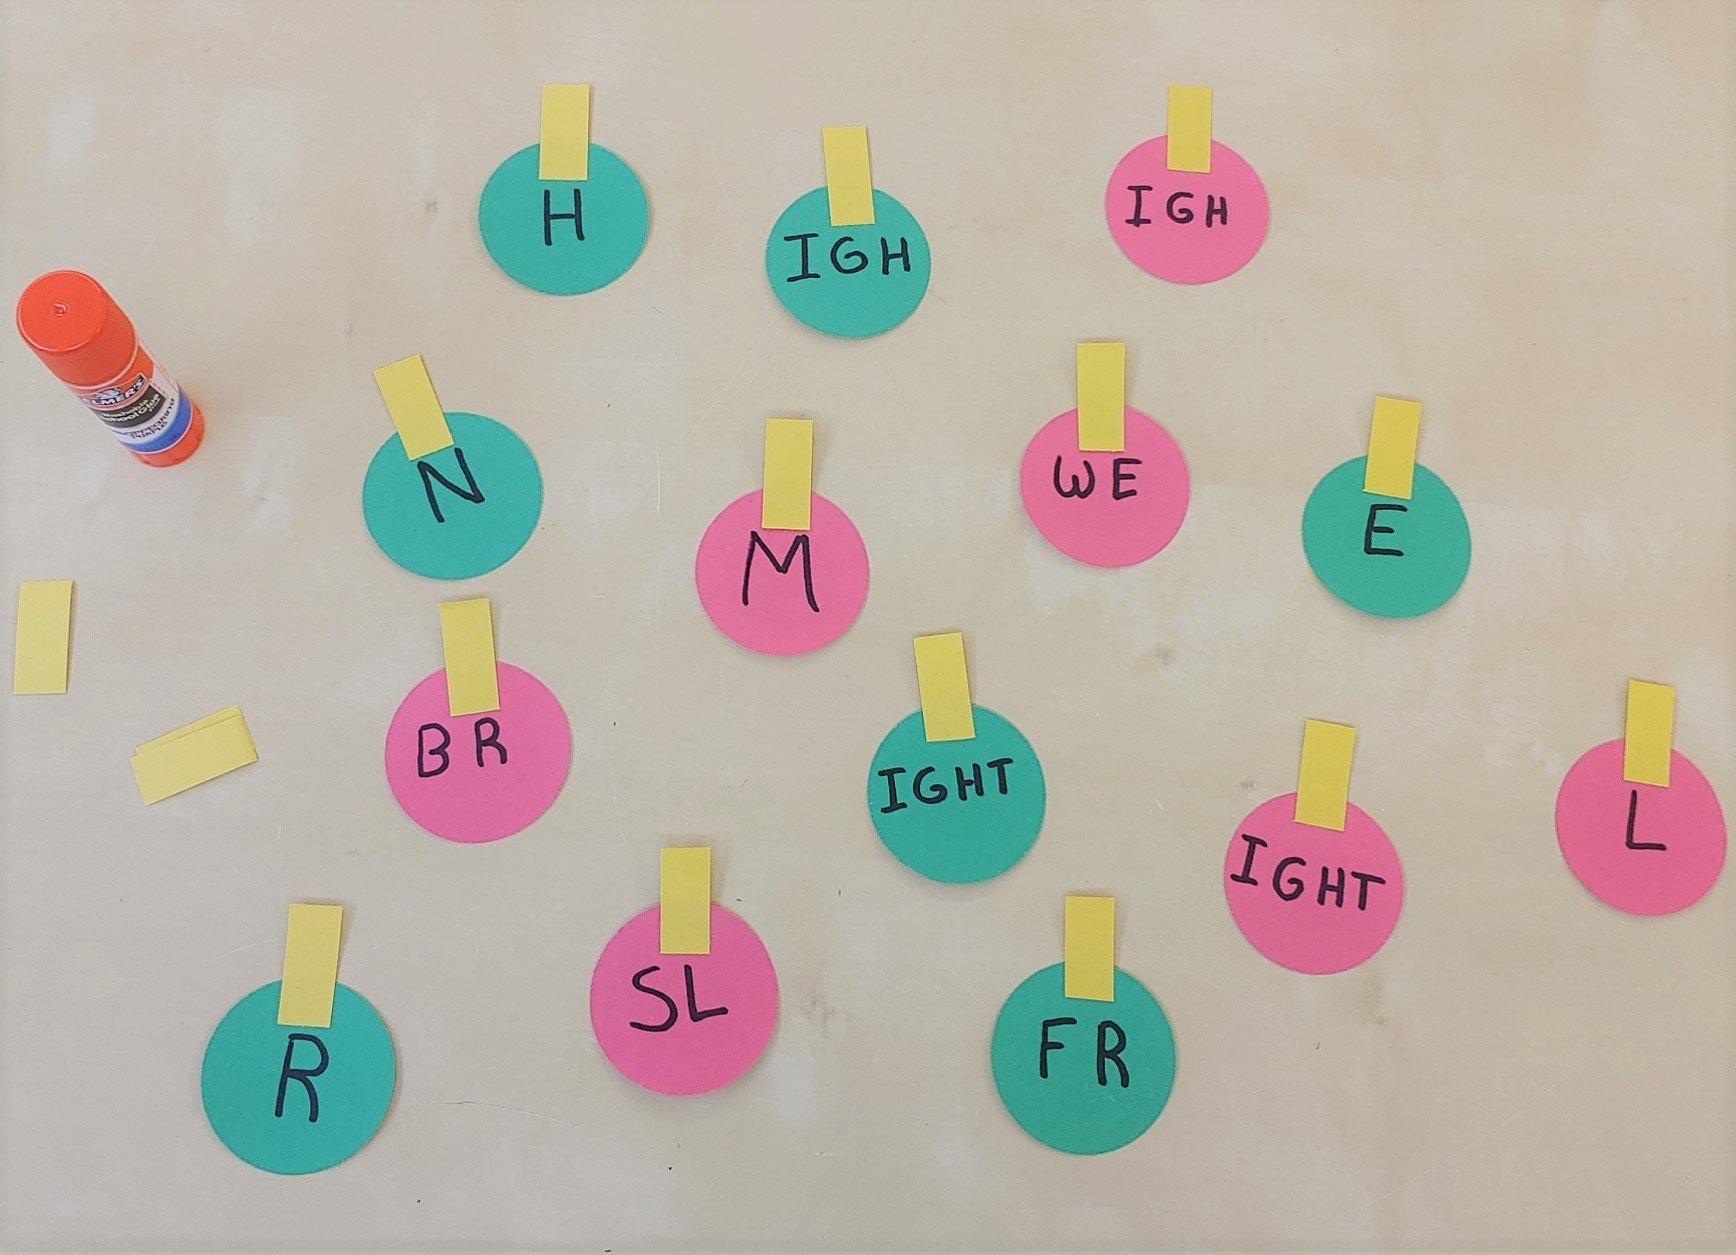
Step 4: Cut out around 25 to 35 one-inch circles in two or more holiday colors. Cut out an equal number of small rectangles, approximately half an inch long and a quarter-inch wide.
Write the letters IGH and IGHT on two or three circles of each color. Adorn each of the remaining circles with the other letters that make up IGH and IGHT words. Select words from the lists below, or use them all.
Tip: For beginners, start with the words that make a long i sound, then add in the long a sound words later for an extra challenge.
List of simple IGH and IGHT vocabulary words:
Words that make a long i sound: bright, fight, flight, fright, height, high, knight, light, might, night, right, sigh, sight, slight, tight
Words that make a long a sound: eight, neigh, sleigh, straight, weigh, weight
Step 5: Glue a yellow tab to each circle, transforming it into a Christmas light bulb, and allow to dry.
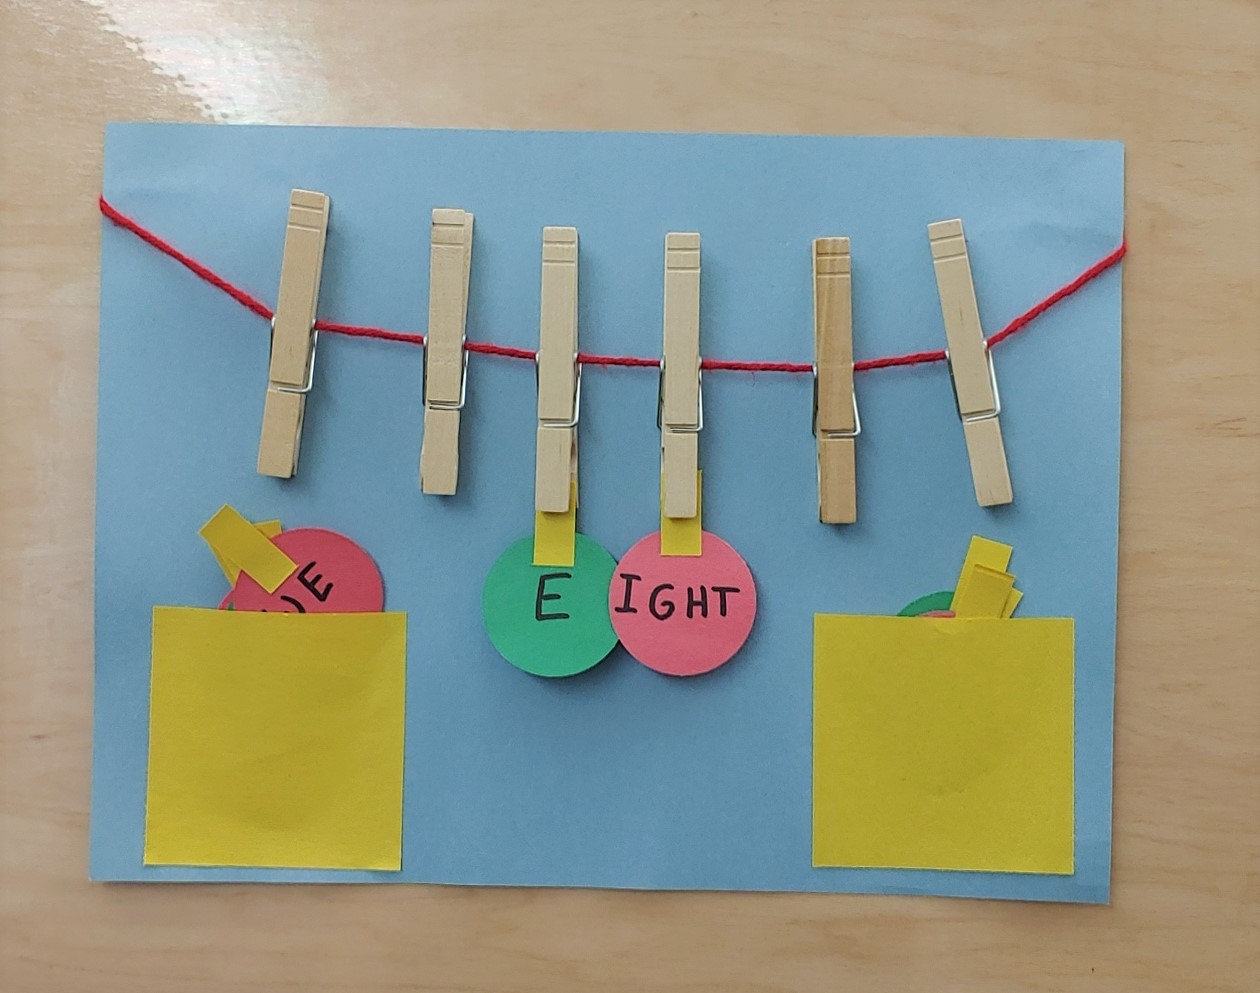
Step 6: Tuck the paper Christmas lights into the pockets.
How to Play: Introduce the IGH and IGHT letter combinations to your child, or review if they’re already familiar with them. Go over the concept that words with the long i sound can be spelled several ways. The letters and letter combinations I, Y, IE, IG, and IGH can all make a long i sound. Explain that words with the IGH letter combination are often followed with a T, creating words like sight and, of course, light.
Hang the game on the refrigerator with magnets, on a door with tape, or on a cork board with pins, and start playing! Show your little one how to hang their Christmas lights by clipping the yellow tabs into the clothespins. Explain that choosing different bulbs or switching up the order will result in new words, and then help them read the words that they create.
Extra challenge: For kids who are ready, explain that adding an E or A before these letter combinations can form a long a sound instead. Introducing words such as eight or straight will keep this game challenging for more advanced readers and spellers.
We hope this simple, DIY holiday lights craft and game will delight your child and make learning to read and spell these unusual words a lot more fun.
By Chrysta Naron
Anyone who’s watched educational videos with kids has probably seen one (or many) with the words printed at the bottom of the screen and a cheerful ball bouncing from word to word, guiding viewers along the text of a song or story. Other times, instead of a bouncing ball, the words might be highlighted, one by one, by a yellow box. The ball or box helps us follow along to the lyrics of “Hakunah Matata,” for example, or read along to Goldilocks and the Three Bears.
When children are initially learning to read, it can be difficult for them to keep track of where they are in a text. This kind of emphasis on each word in turn really helps them keep their spot and their focus. Let’s face it, though: Bouncing a ball on your copy of Goodnight Moon is really tricky to do. Pointing to each word with a finger is the classic alternative, but it can be hard for little ones who fidget, and many kids let their finger slip and so still lose track of where they are.
So we’re going to share with you an easy trick for teaching kids to read by making a simple DIY read-along tool. It’s a fast and truly helpful way for children to keep track of where they are on a page. Rather than pointing under a word, this method highlights the word itself. It also directs their focus to one word at a time, allowing them the space to sound it out, observe its spelling, and ask questions around it.
Materials:
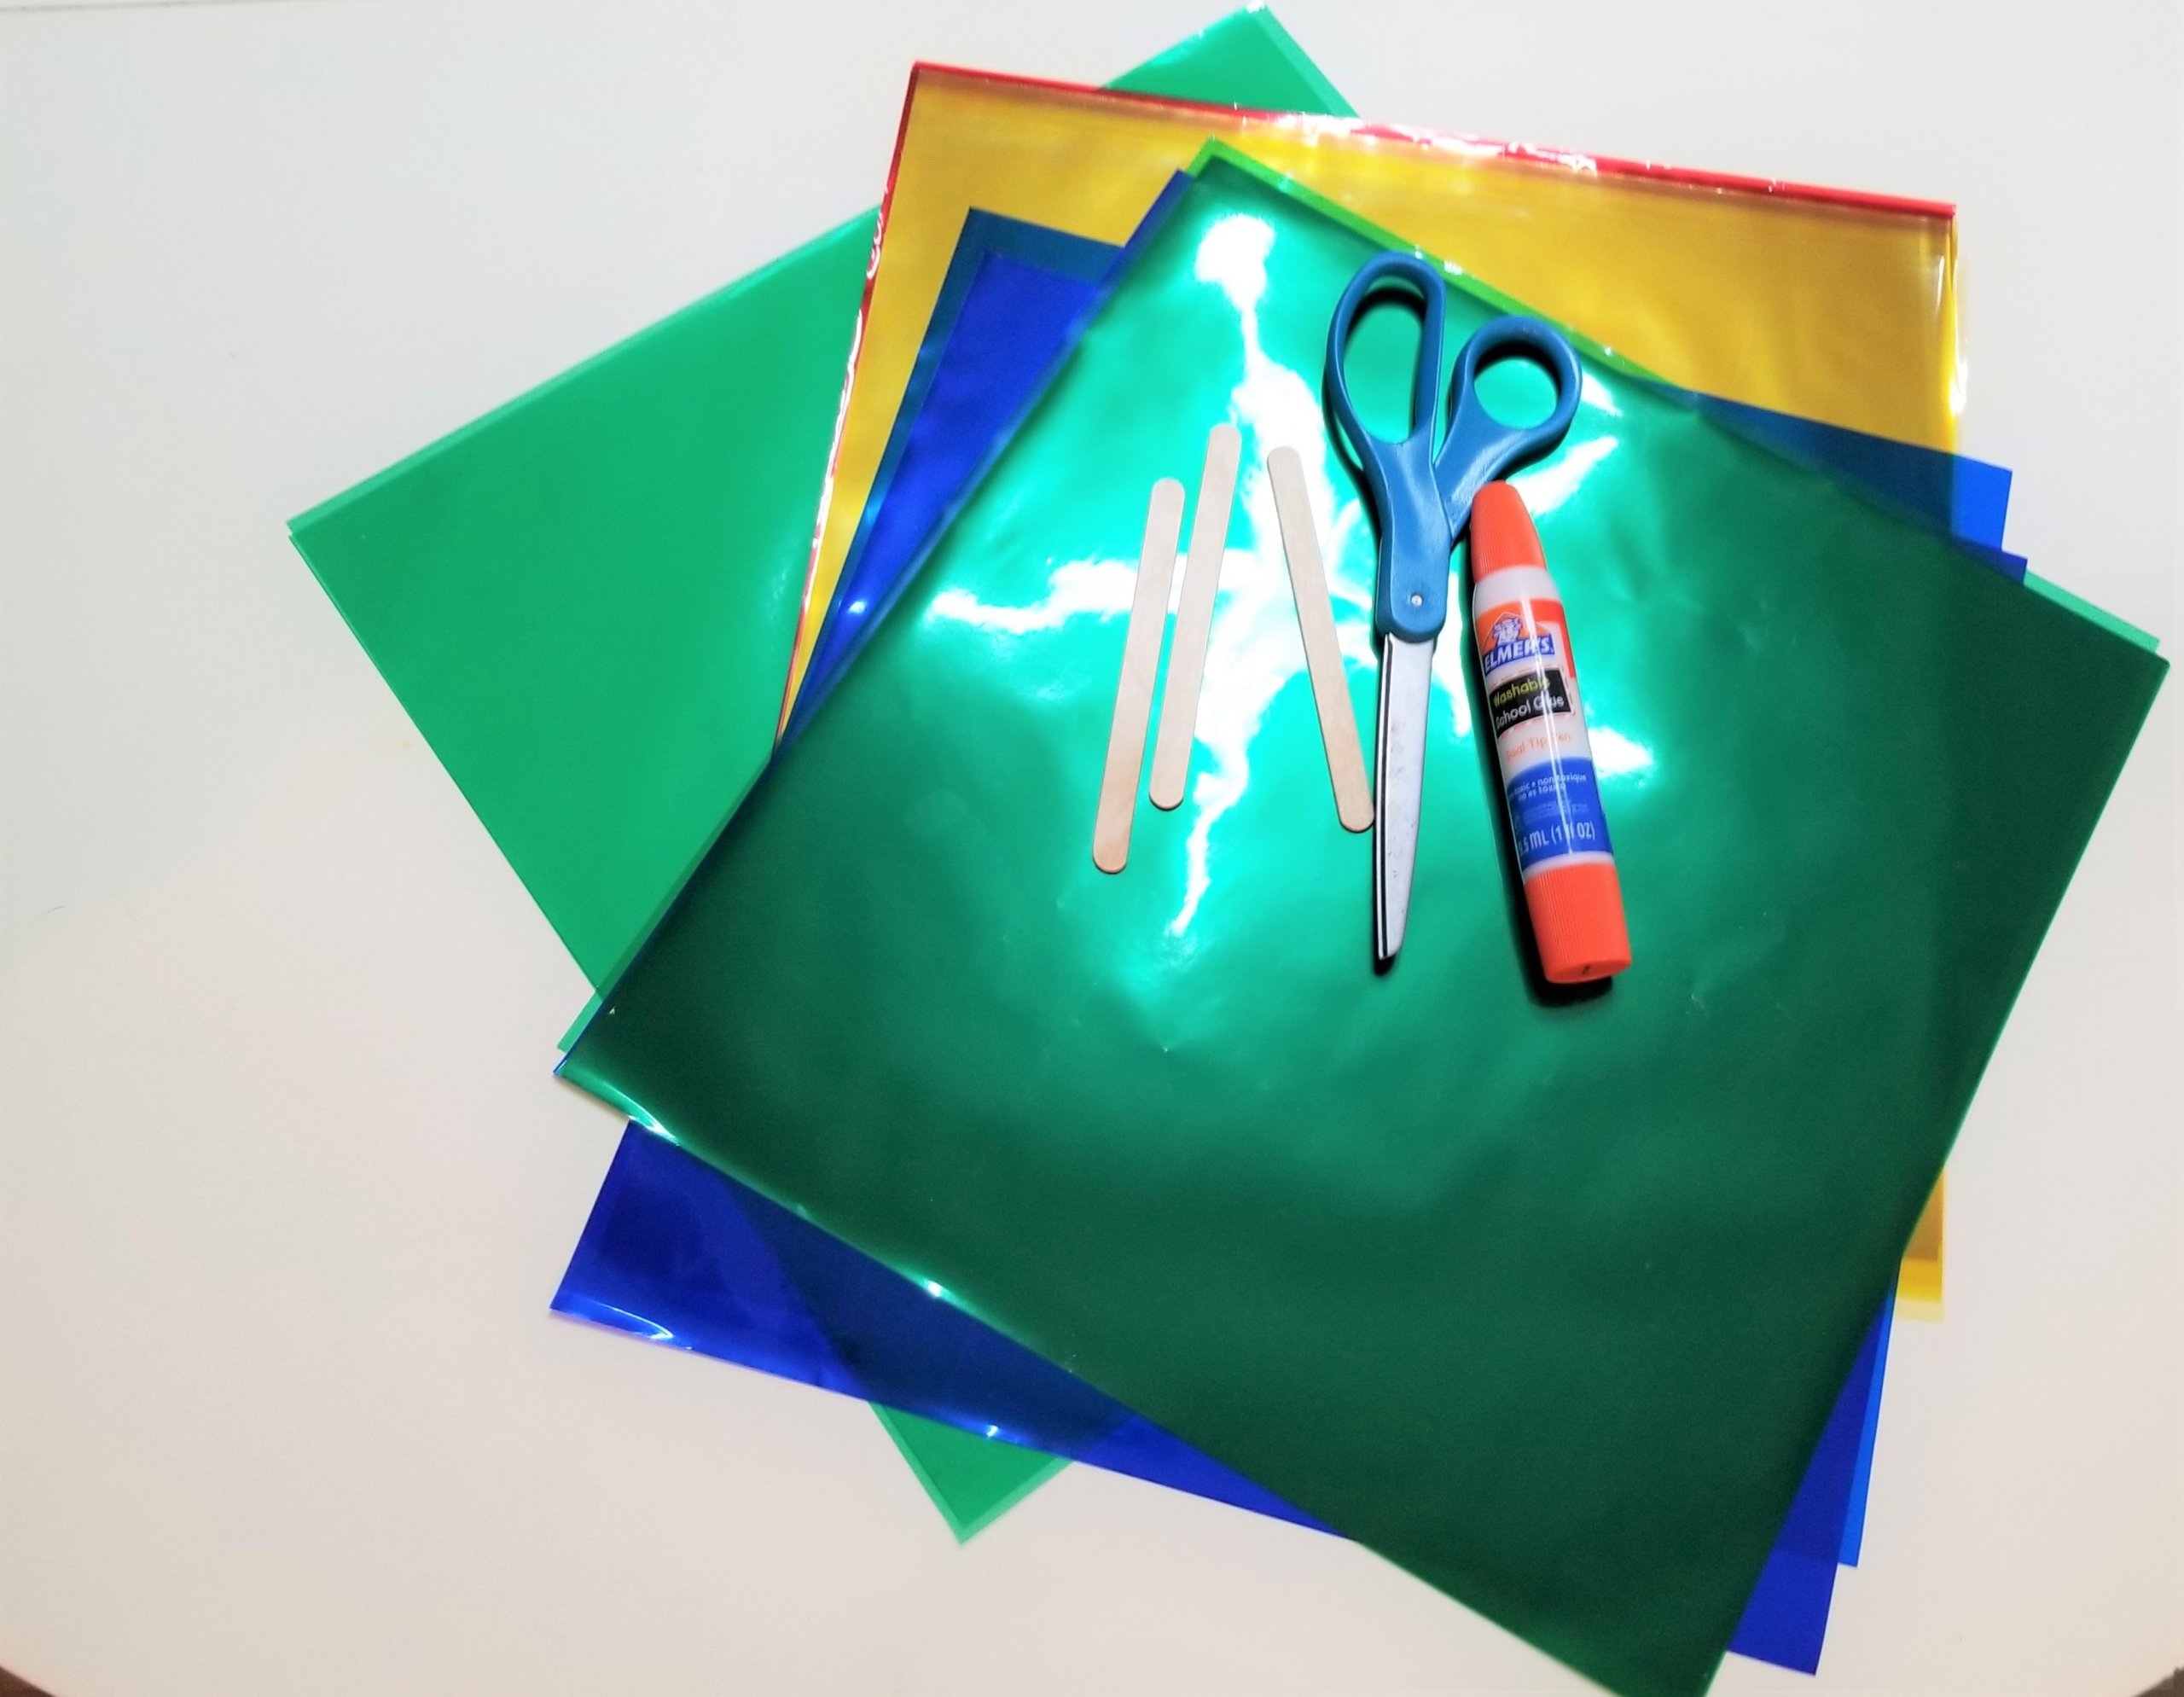
- Plastic transparent folders or colored cellophane sheets
- Craft sticks
- Scissors
- Glue
- 1 quarter (optional)
Cost: $3
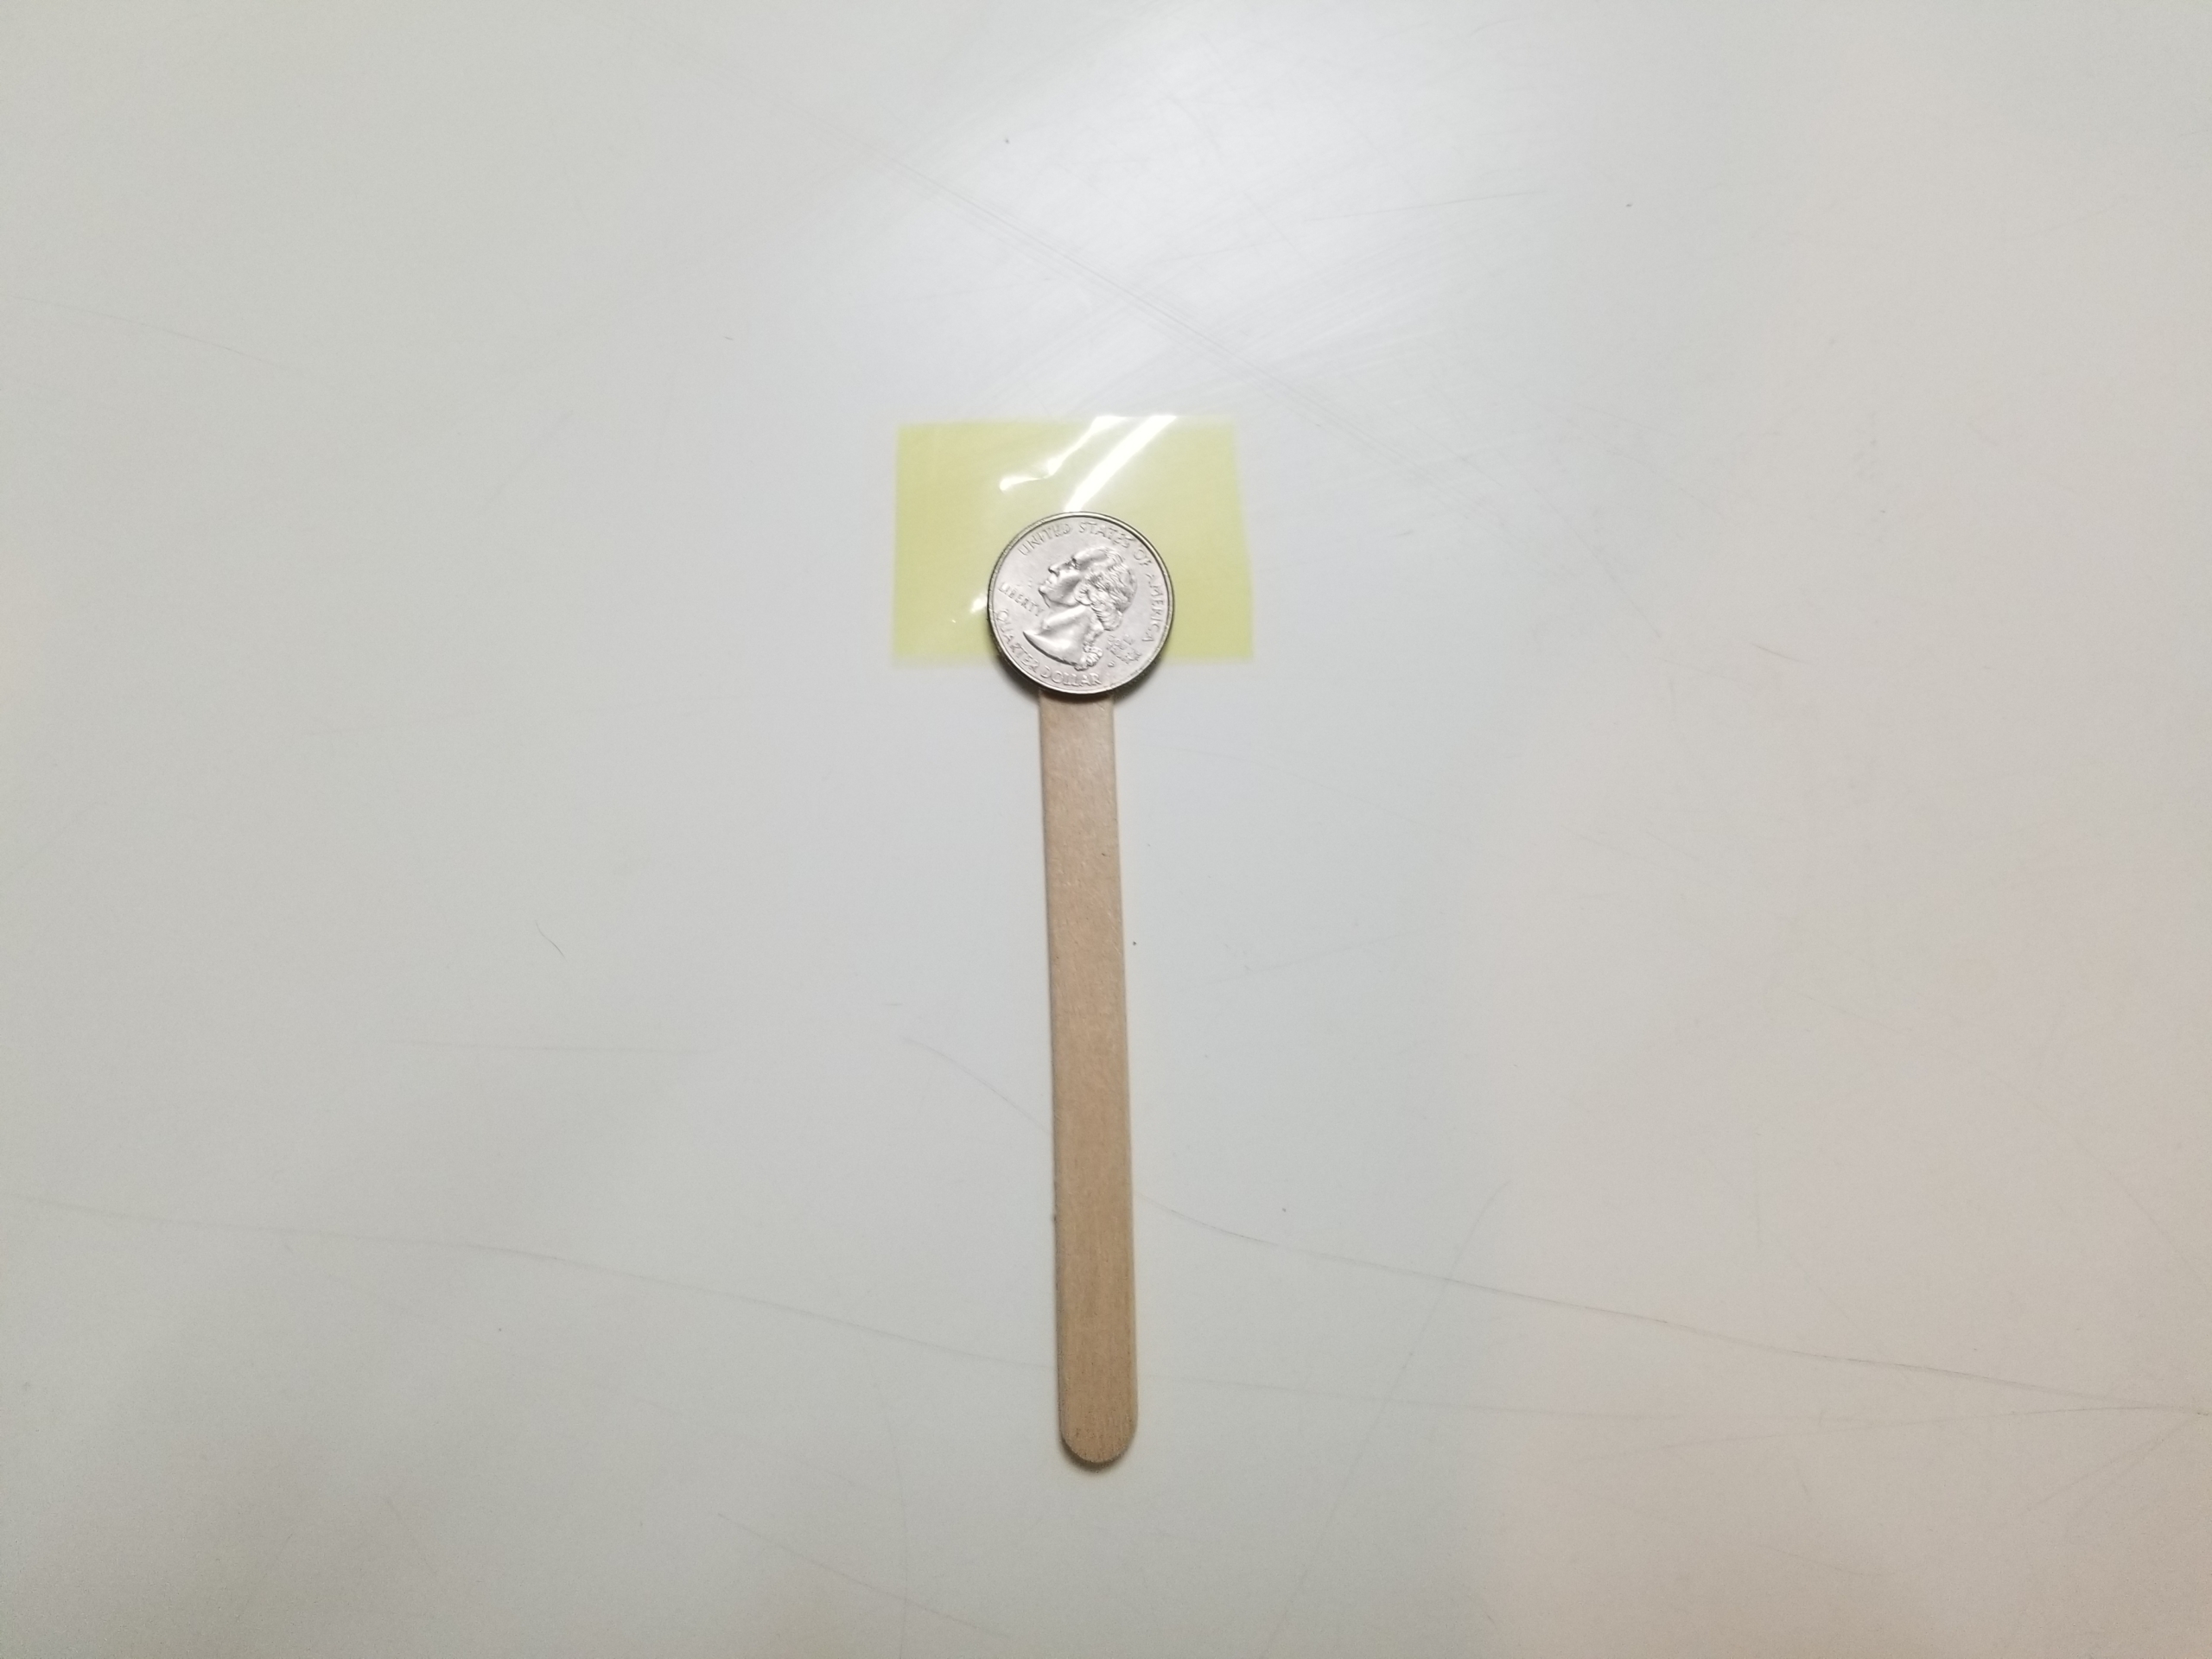
Step 1: Use your scissors to cut a small rectangle (about an inch wide) out of the folder or cellophane sheet.
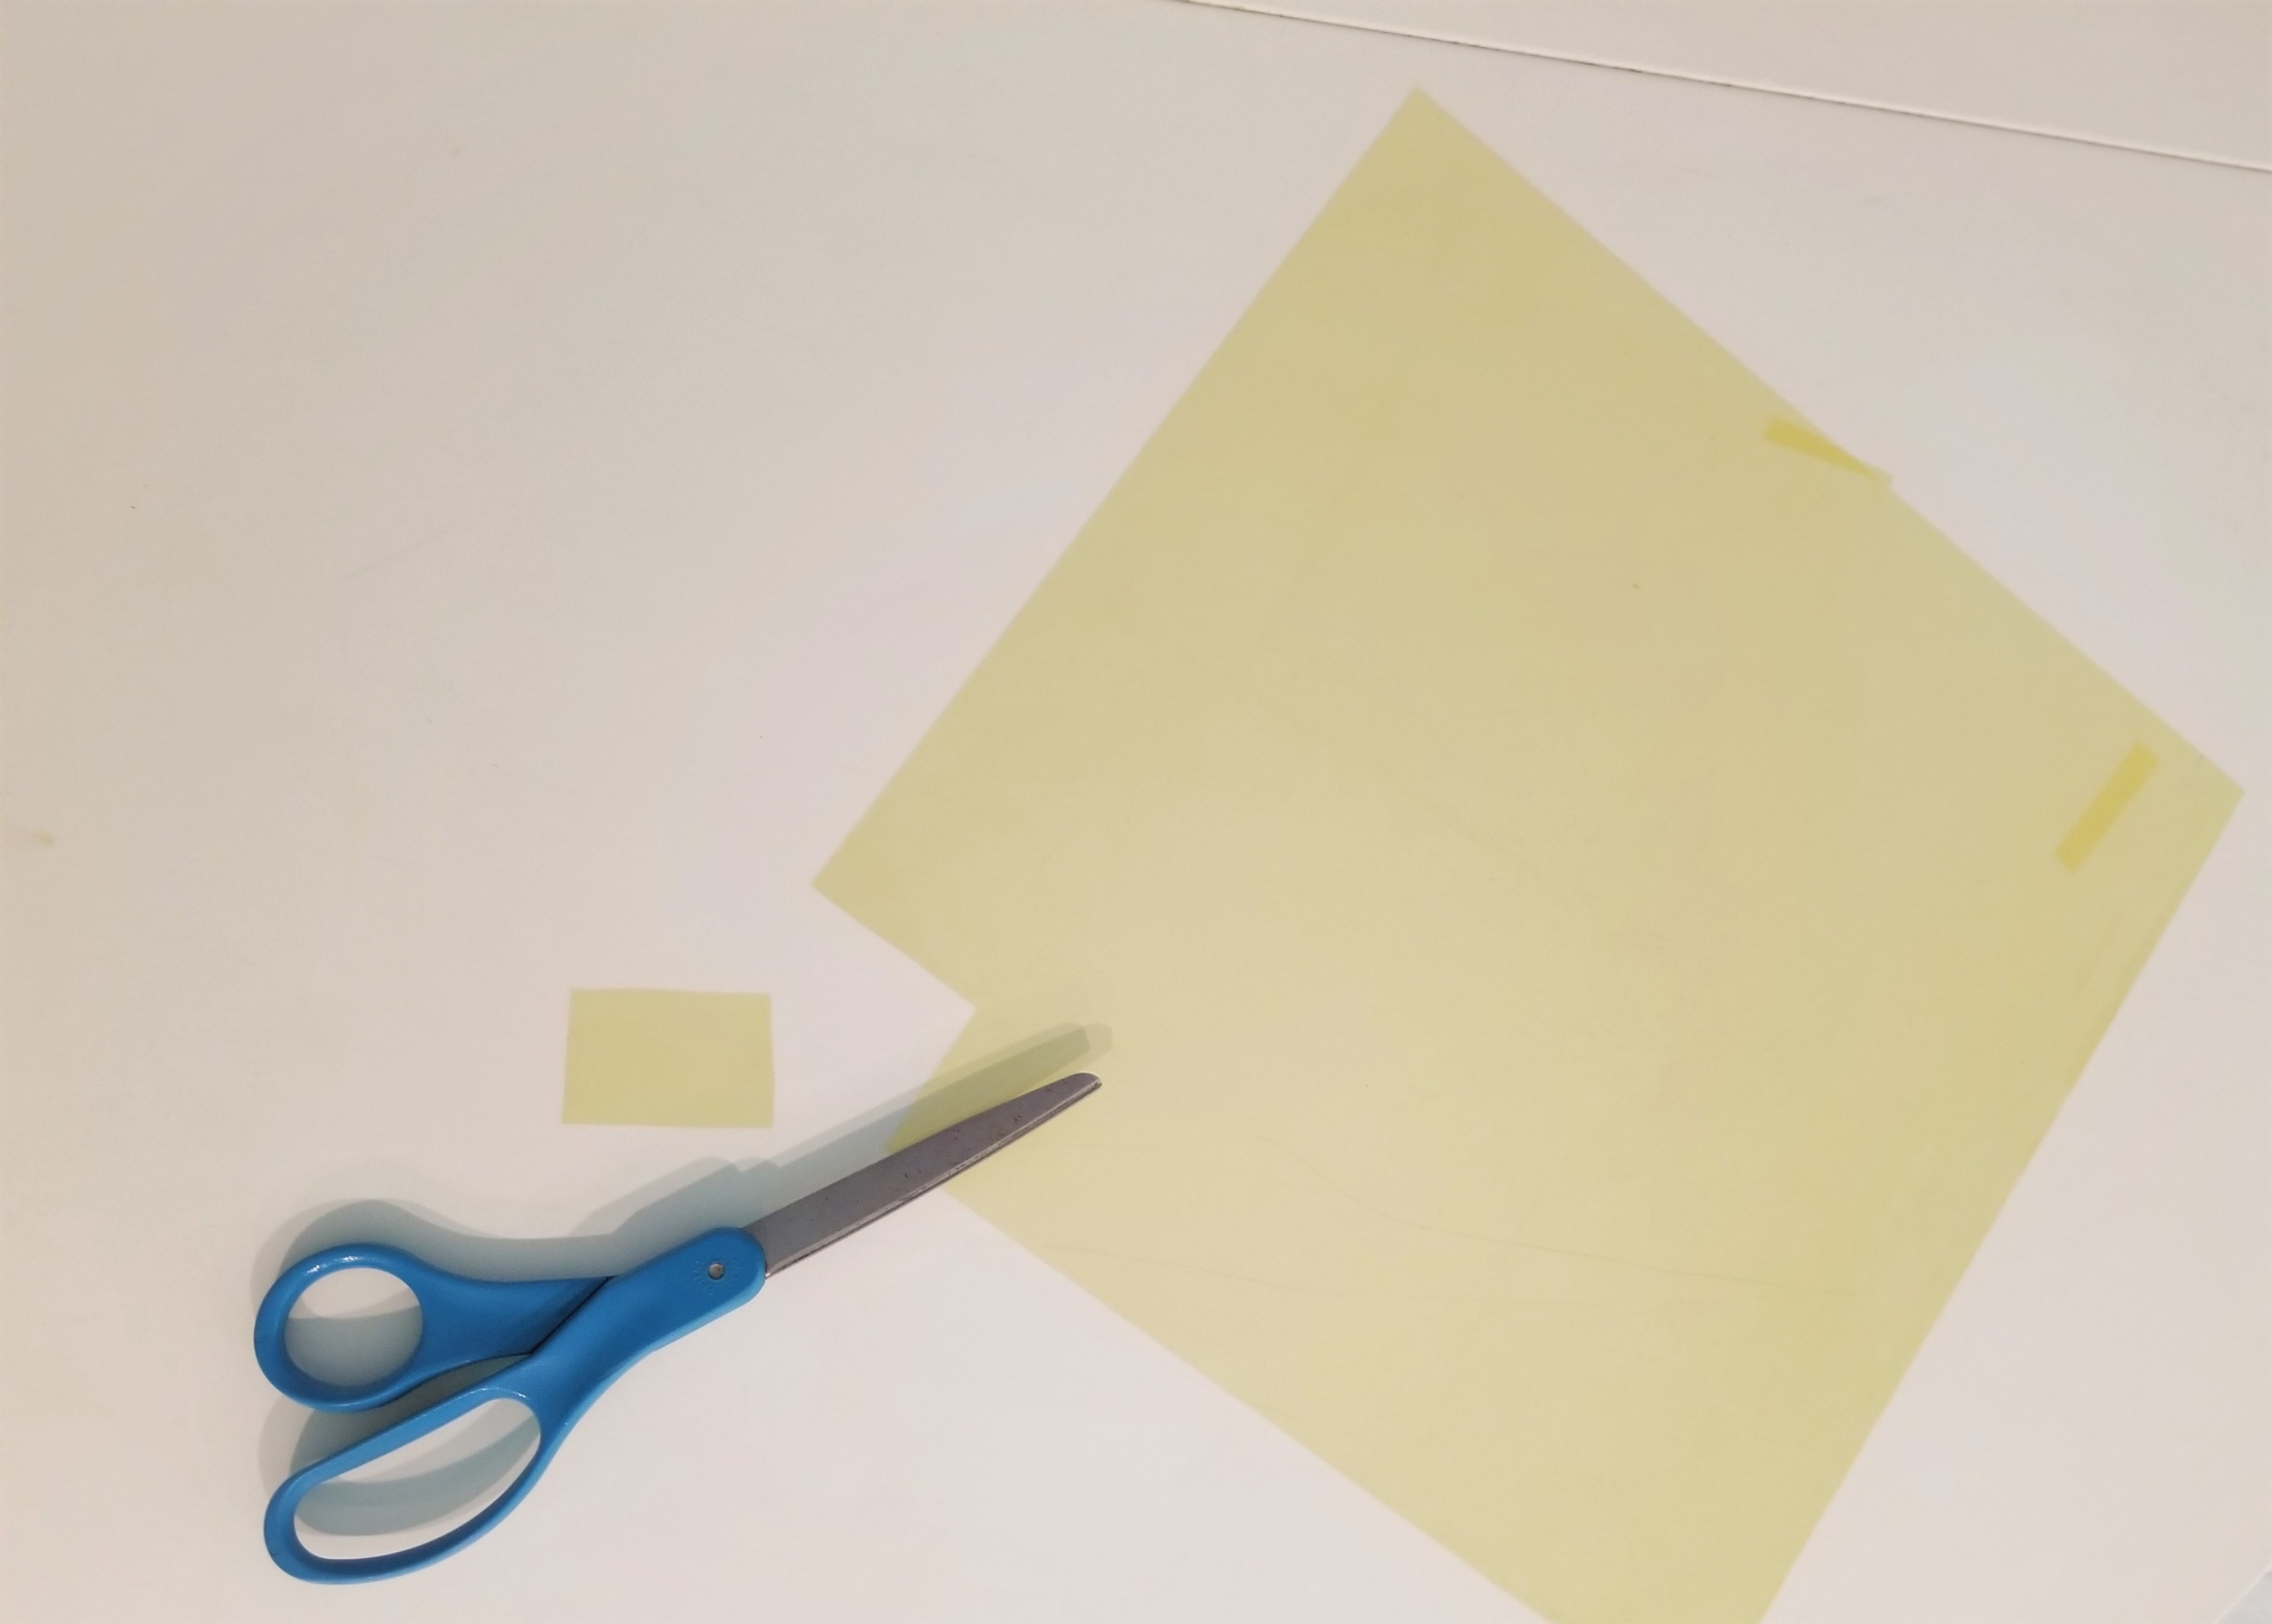
Step 2: Glue the rectangle to your craft stick. I recommend using liquid glue or even a craft glue like Modge Podge if you have some handy. Liquid glue bonds the plastic to the wood much better than a glue stick.

Step 3: Use your finger to press down firmly on the plastic to adhere it to the craft stick. You can also place a quarter on top instead of your finger if you like. It will also add the pressure you need to make sure the glue sticks.
Step 4: Once the glue is dry, it’s time to read. Demonstrate to your child how to use your new reading tool by placing the colored rectangle over a word. As you read, move the rectangle along, one word at a time.
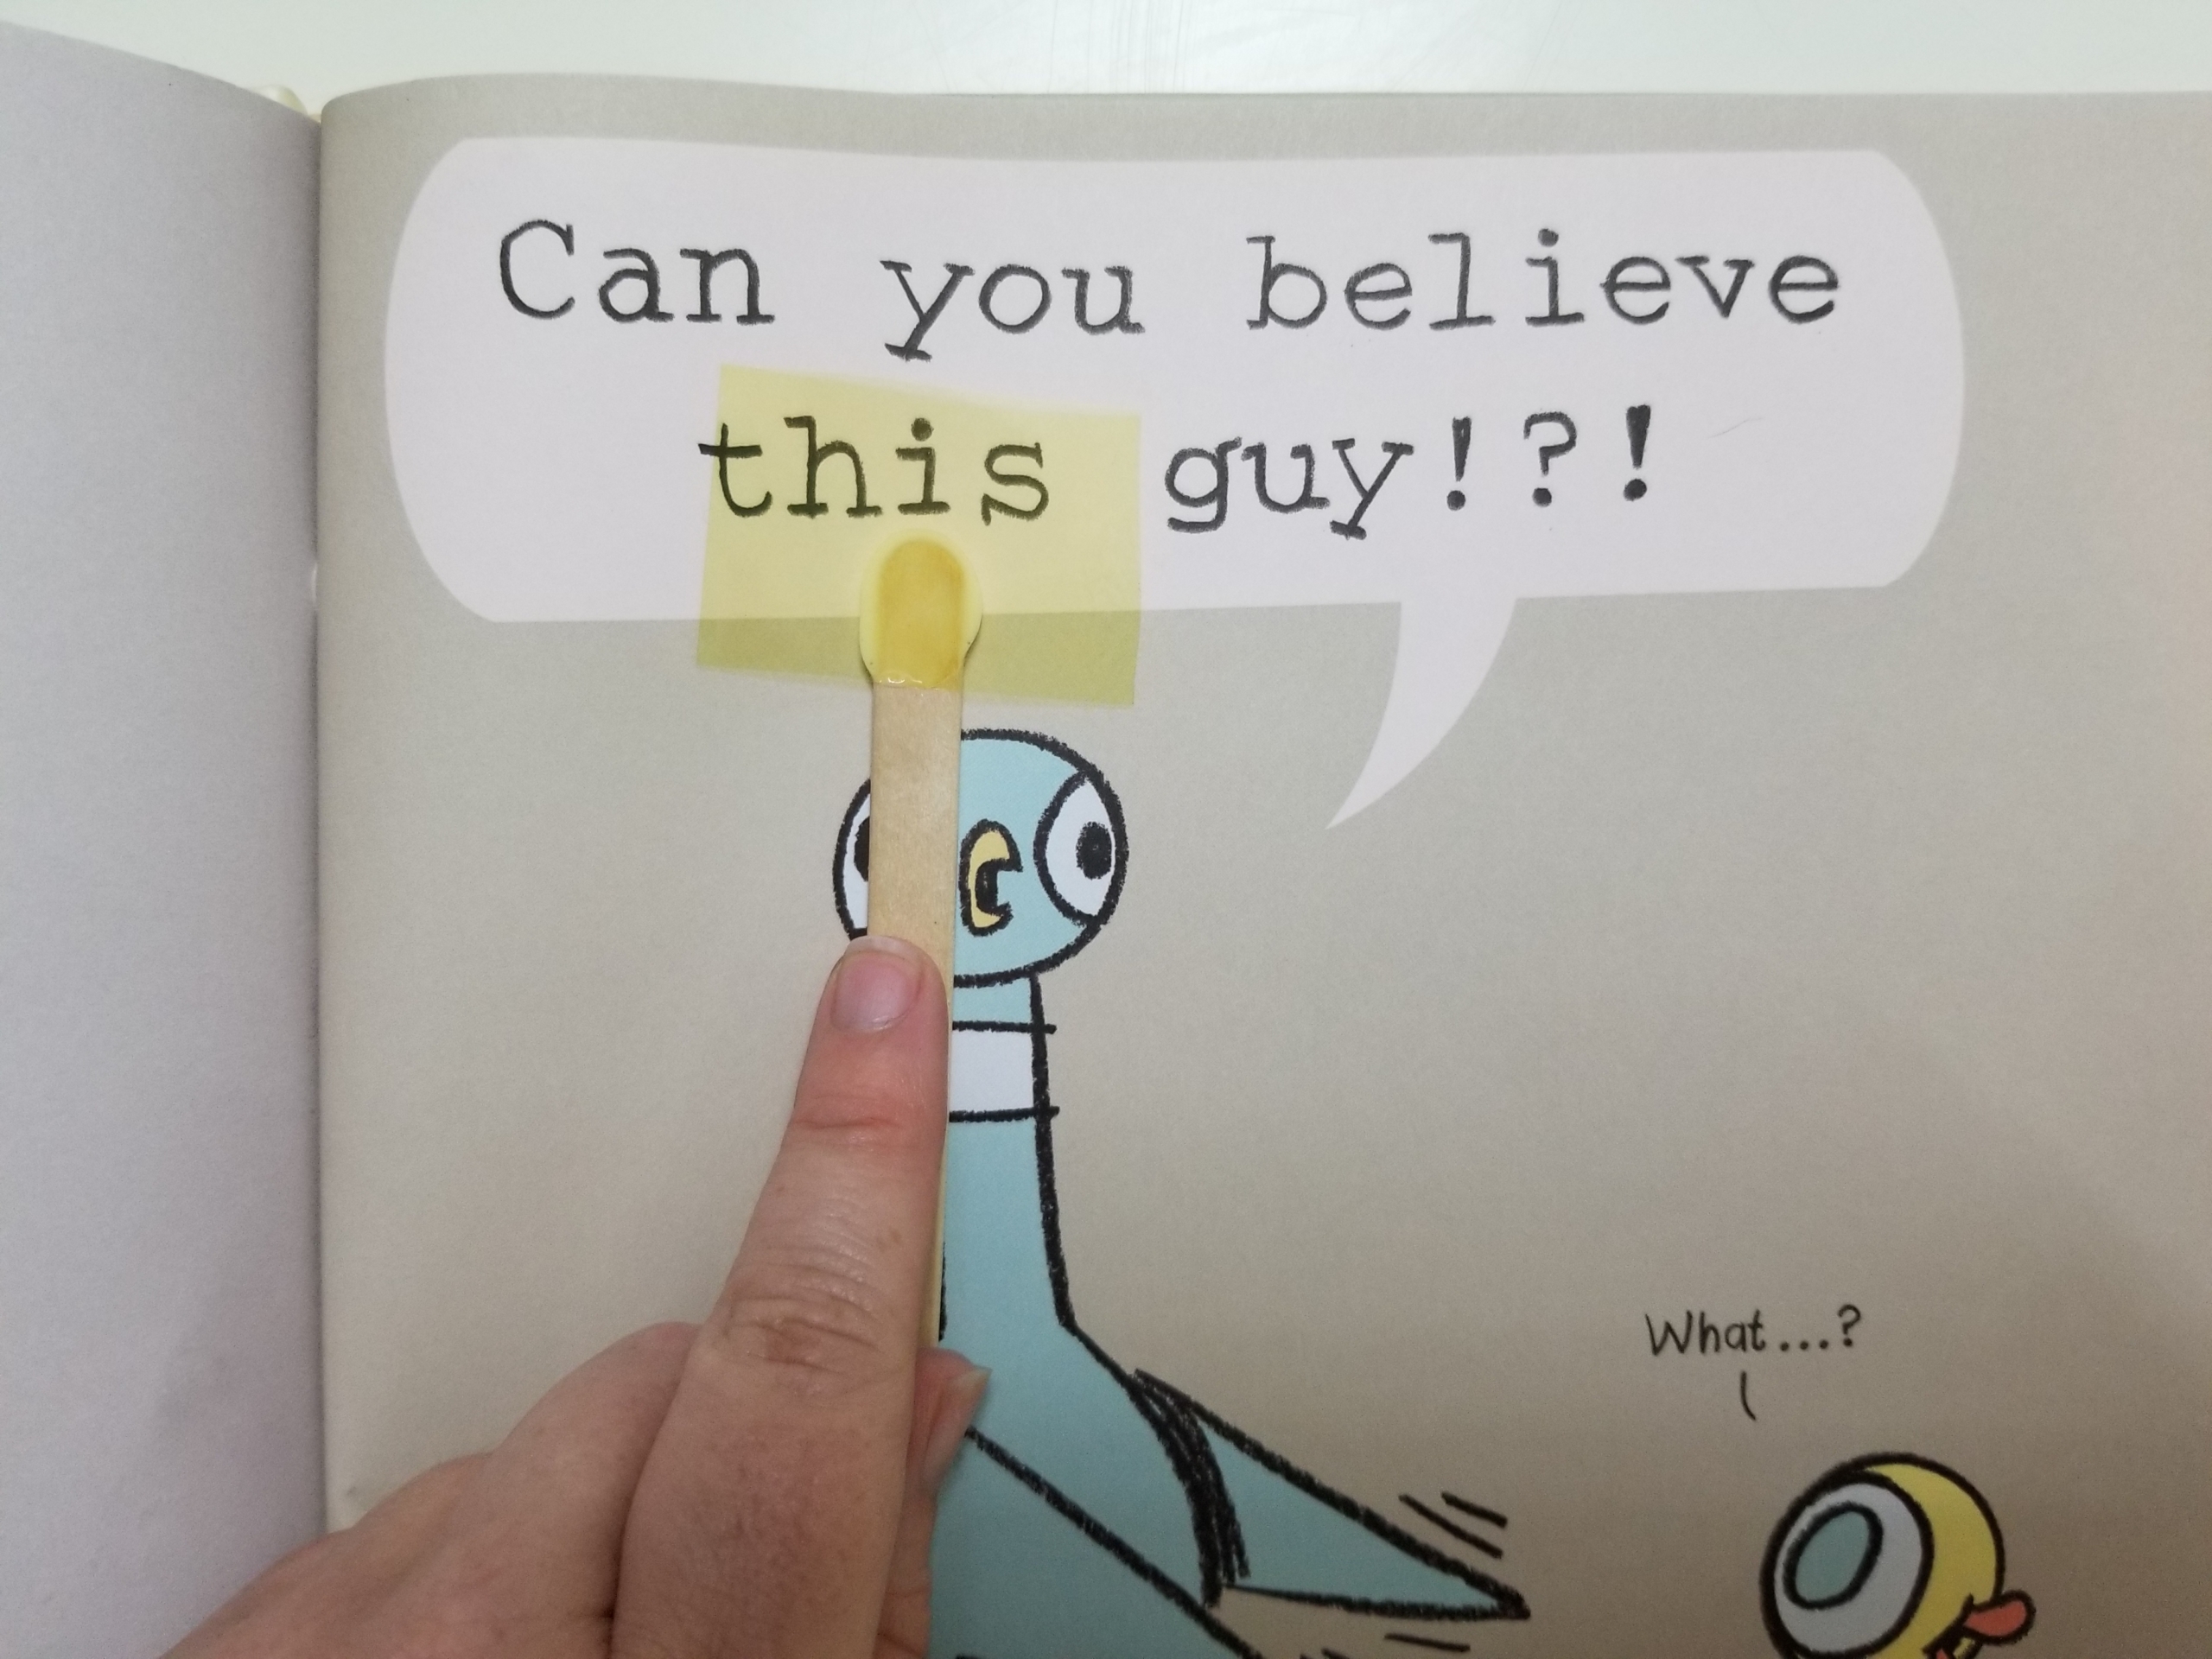
Ta-da! You’ve done it! What’s more, the tool has value beyond storytime whenever a child needs to lock in a single word. In kindergarten and first grade, for example, teachers sometimes ask children to find specific sentence components, such as nouns. This tool helps children examine each word one by one as they read, supporting them in giving greater attention to the task at hand.
How are you using your DIY read-along tool? We’d love to know what books you and your child are reading, and what methods you use to help your reader develop.
Halloween is one of my favorite holidays. It has costumes, candy … and lots of ways to make learning fun. Building little moments of literacy practice into everyday activities is the best way for parents to raise a thriving reader. So we’ve put together some favorite tips for how to make Halloween a reading holiday.
For many parents, teaching your child to read can feel a bit scary. But with these fun tricks, Halloween reading becomes a real treat for kids—and their mummies, too!.
Bring Characters to Life
This Halloween, make books come alive with your Halloween costumes or decor! You or your child can dress up as a favorite book character for trick-or-treating or a Halloween party. You might even find a book that offers characters for everyone in the family. After all, why let kids have all the fun?
Some options from picture books include Max and the Wild Things from Where the Wild Things Are, Where’s Waldo and all his buddies, Winnie the Pooh and his pals from the 100-Acre Woods, Madeline, Curious George and the Man with the Yellow Hat, or Anansi the spider!
Chapter books also offer loads of costume ideas, from classics like Alice in Wonderland and Charlie and the Chocolate Factory to Harry Potter, Hunger Games, and beyond.
Is your child’s heart set on being Elsa or a mummy? No problem! Carve or paint your pumpkins to look like book characters, instead! Kids will love giving the pumpkins accessories, too. After all, Pete the Cat definitely needs white shoes, and Cinderella could probably use a slipper.
Write Halloween Cards
We all know that candy is the most common thing kids give and get on Halloween. However, you can also create Halloween cards. Have your child use stickers, paper, markers, or any other art supplies to create festive cards. Use this as an opportunity for children to practice writing and spelling. If your child is younger, you can draw letters of dotted lines for them to trace. If they are more advanced readers and writers, let them take the lead and create the text themselves.
You can mail the cards to family and friends. (Children love sending actual mail and getting mail in return!) You and your child can deliver them to neighbors or (if your child’s school allows) deliver them to classmates. You can even hand out the cards with candy to trick-or-treaters!
Bonus: Help your child make cards to send to elderly people who may be isolated, through groups such as Love For Our Elders or Doing Good Together. (See our post on helping kids write to seniors.)
Candy Wrapper Reading
Here’s a quick and easy one: Practice reading the names of the candy! When you buy candy to give out or go through the candy your child collects, try reading the names on the wrapper together before they gobble it up.
With younger children, you can simply focus on naming the letters or the first sound of the candy’s name. For older children, encourage them to try reading the names. They can even write a list of every candy they were given on Halloween, and rank their favorites or tally the number of each. It’s all about working reading into everyday moments that help children flourish.
Play with Your Food
What do you do with all those pumpkin seeds once you’ve carved your pumpkin? Don’t just throw them out! You can reuse them for reading.
Simply wash the seeds until they’re free of the stringy goo that surrounds them. Pat the seeds dry, and get ready to spell!
Ask your child to use the seeds to create the first letter of their name. Then see if your child can spell their whole name out using the seeds. You can use them to practice upper and lowercase letters, as well as spelling. And if you’re not a family that carves pumpkins, don’t worry! You can do the same thing with Halloween candy.
Bonus: Roast the pumpkin seeds first with a little oil and salt to make a tasty snack your child can eat after spelling with it! Just follow our Read With Me Roasted Pumpkin Seeds Recipe.
Cast a “Spell” Over Decorating
This Halloween, integrate writing and reading into your Halloween decor and fun wherever possible. Write down Halloween-themed words for your child to read, or use our free Halloween-themed alphabet spinner printable to choose words.
Once they’ve read the word, have them create a decoration that goes along with it. You can use simple words for younger children, such as web, bat, or cat. For older children try words like pumpkin, witch, or even vampire. Have them draw a picture of the item or cut a shape from construction paper to hang on the wall.

Sometimes, I’ll even do the opposite. I’ll ask the kids to spell a word for me and if I read it correctly, I get to make that decoration. It helps children practice their spelling, and they love getting to “be in charge” of adults.
This way, you’ll be integrating reading into your Halloween decorating and making literacy so much fun.
Halloween Story Time
Finally, let’s not forget one of the key parts of learning to read: Spending time reading books. Snuggle up with your little monster and read your favorite Halloween books.
Bonus: Hold a costumed story time or a Halloween party story time with friends for extra fun.
Like this post? Share it!
I woke up at 3 a.m. on the morning of my daughter’s return to full-time in-person school this year and cracked open Unwinding Anxiety by Dr. Judson Brewer. It seemed like the perfect book to help set the right tone for the long day ahead.
I was anxious because it was my daughter’s first day at a new school in a new state. I was anxious because the school had sent a heads-up email the night before warning that there could be pick-up delays due to a bus driver shortage. I was also anxious because of the pressure I felt to have a great day at work myself. As all parents can attest who’ve labored in months-long distraction with COVID-disrupted childcare, school, and work routines, having eight uninterrupted hours to do your thing is a godsend not to be frittered away.
My daughter had been jittery the night before. She asked me, her human alarm clock, to rouse her at 5 a.m. to make sure she didn’t miss the bus expected at 7:03 a.m. That morning, before she ventured out of the door, she checked and double-checked the list of items to bring to school on the first day. Water bottle. Check! Lunch. Check! Extra masks. Check! And, despite the foreboding email of the night before, our cheerful driver pulled up a few minutes early.
We didn’t speak of it directly that morning, but sending her into an elementary school building full of hundreds of under-12 (and therefore unvaccinated) children is in and of itself a major cause for concern. She’s a super-conscientious kid, and her first day of school recap included the observation that they should let kids out of the cafeteria and onto the playground sooner, to lessen time in an enclosed space with unmasked kids eating. She has a point.
All of that’s to say that if you and your child are feeling a bit nervous amid these early school days, you’re not alone. We’re in it with you, and can offer a few practices that we return to again and again. These practices help us respond well to the worry we feel in the moment and (hopefully) reduce its duration, intensity, and likelihood of return.
Plan your response to anxiety in advance.
The specific circumstances that trigger anxiety in a child (or parent) may vary from day to day, but worry, doubt, and concern tend to be recurring forces in all of our lives. So it just makes good sense to plan our basic response to anxiety in advance, so that we can respond quickly, effectively, and consistently when it shows up. My chosen response, for example, consists of three elements inspired by tidbits I’ve picked up from books and articles, along with my own personal experience of what works.
When I notice that my daughter seems ill-at-ease or worried about some future event, I take a deep breath and tell myself to be a VIP. I love a good acronym, and this one does double-duty. To begin with, it’s a label and reminder for how I want to show up for my daughter: as a very intentional parent. Secondly, it stands for what I need to do to fulfill that aim: value and validate her feelings; investigate and imagine the ways anxiety manifests in her thoughts, body, and behavior; and preserve and predict positive outcomes.
Value and validate feelings.
The first order of business when you observe fear and worry in your child is to acknowledge their feelings and confirm that they’re fine with you. You might tell them that you can handle the outpouring of emotion they’re feeling. They needn’t hold back or censor their fears or feelings on your account and, more importantly, they can feel their feelings and handle them, too.
I usually start by saying, It’s okay to feel what you feel. Don’t try to fight whatever’s coming up for you. Just recognize that it’s there and relax into it. Accept and allow the feelings. This wasn’t always my default response, but years of telling her the opposite (Don’t worry. It’ll be fine.) didn’t work. When you tell a child to quickly turn the page on an emotion, it tends to make them only cling more strongly to it. If she could eliminate anxiety with just the desire to eliminate it, she wouldn’t be anxious and I wouldn’t be writing this post. Rather, I’ve learned that dispelling incessant worry is a process, and it starts with fully acknowledging feelings.
The mindfulness language of awareness and acceptance is very familiar to my daughter, because her dad and I speak it daily. The words, gestures, or actions that you choose to value and validate your child’s feelings will likely be different from mine, adapted to the age, stage, and needs of your child, plus your own unique ways of speaking with them. The point is always to do what works best for your particular child and circumstances, tweaking over time. As author Michael Hyatt puts it, “Everything good in our lives is the result of extensive, exhaustive trial and error.”
Investigate and imagine how anxiety manifests in our thoughts, bodies, and behavior.
The I in my VIP acronym is for both investigation and imagination. After you’ve validated your child’s feelings of uncertainty or worry, prompt them to get curious about their experience of the emotion, by asking them how anxiety shows up for them. Your goal is to help your child become more aware of the thoughts and emotions fueling their worry, so they can begin to change their relationship to them.
When kids become observers of their fears, they create the space to think, feel, and behave differently. As Brewer (the author of Unwinding Anxiety, the book I cracked open so early that first morning of school) puts it, “Simply bringing a kind, curious awareness to those sensations and feelings will help you move from habitually feeling like you have to do something to fix a situation to simply observing your experience, watching the problems lessen and disappear on their own.”
I say things like, How does worry show up for you? What does it feel like in your body? How does it affect your behavior? My daughter once told me that worry felt like “drawing inside my stomach with a pencil.” But sometimes kids can’t easily articulate what they’re feeling. That’s when the imagination part comes in. You can offer up some ideas or observations to help. You might gently ask, Is there a tightness in your stomach? Do you have a headache?
Mind you, the goal of this exercise isn’t to name a litany of ailments, but to model getting curious about feelings and developing a rich vocabulary to describe them. Think quality of exploration and observation versus quantity of issues. Shifting focus to a sensory exploration of the symptoms of your child’s anxiety pulls you out of rumination about the object of your anxiety (the late bus, the new teacher, COVID, etc.). Intentionally observing thoughts and emotions dampens the restless, antsy quality of worry with the calmer, expansive spirit of inquiry.
Attending to their own breath, body, thoughts, and feelings in the moment can be a powerful tool for breaking habitual cycles of anxiety, unlike, say, using a fidget spinner or Pop It! Despite their marketers’ claims, the benefits of toys designed to relocate worries from brains to hands are unsubstantiated. They may calm a child momentarily, but distracting from anxiety is different from unseating it altogether. For the latter, teaching mindfulness practices are our best bet.
Pro tip: Sometimes enjoyment is enough reason to let a kid play with a toy. We don’t have to pile pseudoscience on top.
Preserve and predict positive rewards.
After you’ve validated your child’s feelings and nudged them to get curious and investigate the nature and manifestations of those feelings, be sure to end on a positive note. Cement any positive benefits your child experienced from investigating their feelings by asking what they got out of the exercise. Maybe their stomach feels a little less knotted or they are no longer picking at their cuticles.
Whatever their response, it’s a step toward balancing out the negativity bias that makes us humans accentuate the negative more than the positive. Even if your child says I don’t know or Nothing, you did good work by raising the possibility that observing worry can dissipate it.
I also like to project some positivity into the future by leading my daughter through a visualization or mental walkthrough of the fearful event ahead. Imagine that the bus is pulling up. When the doors open, you can greet the driver with a smile, introduce yourself, and pick out a great spot to sit.
Other times I’ll simply affirm my belief that something good’s about to happen. I think it’s going to be a great day and you’ll meet kids who will become wonderful friends over time. The latter may have a don’t-worry-it-will-be-fine ring to it, but, trust me, it resonates better after the validation and investigation steps happen than when you bring the positivity alone.
VIP is my practice for helping my child with her worries, but you may recall that I opened this post talking about my own anxiety. Sometimes we teach what we most need to learn. So the next time anxiety creeps up for you or your child, start by valuing and validating the feelings (versus ignoring or suppressing them), then take it from there.
