Happy New Year! Lunar New Year, that is. Whether Lunar New Year is part of your family’s traditions or something you’d like your child to learn about, this activity is a fun way to share literacy and learning around this celebration.
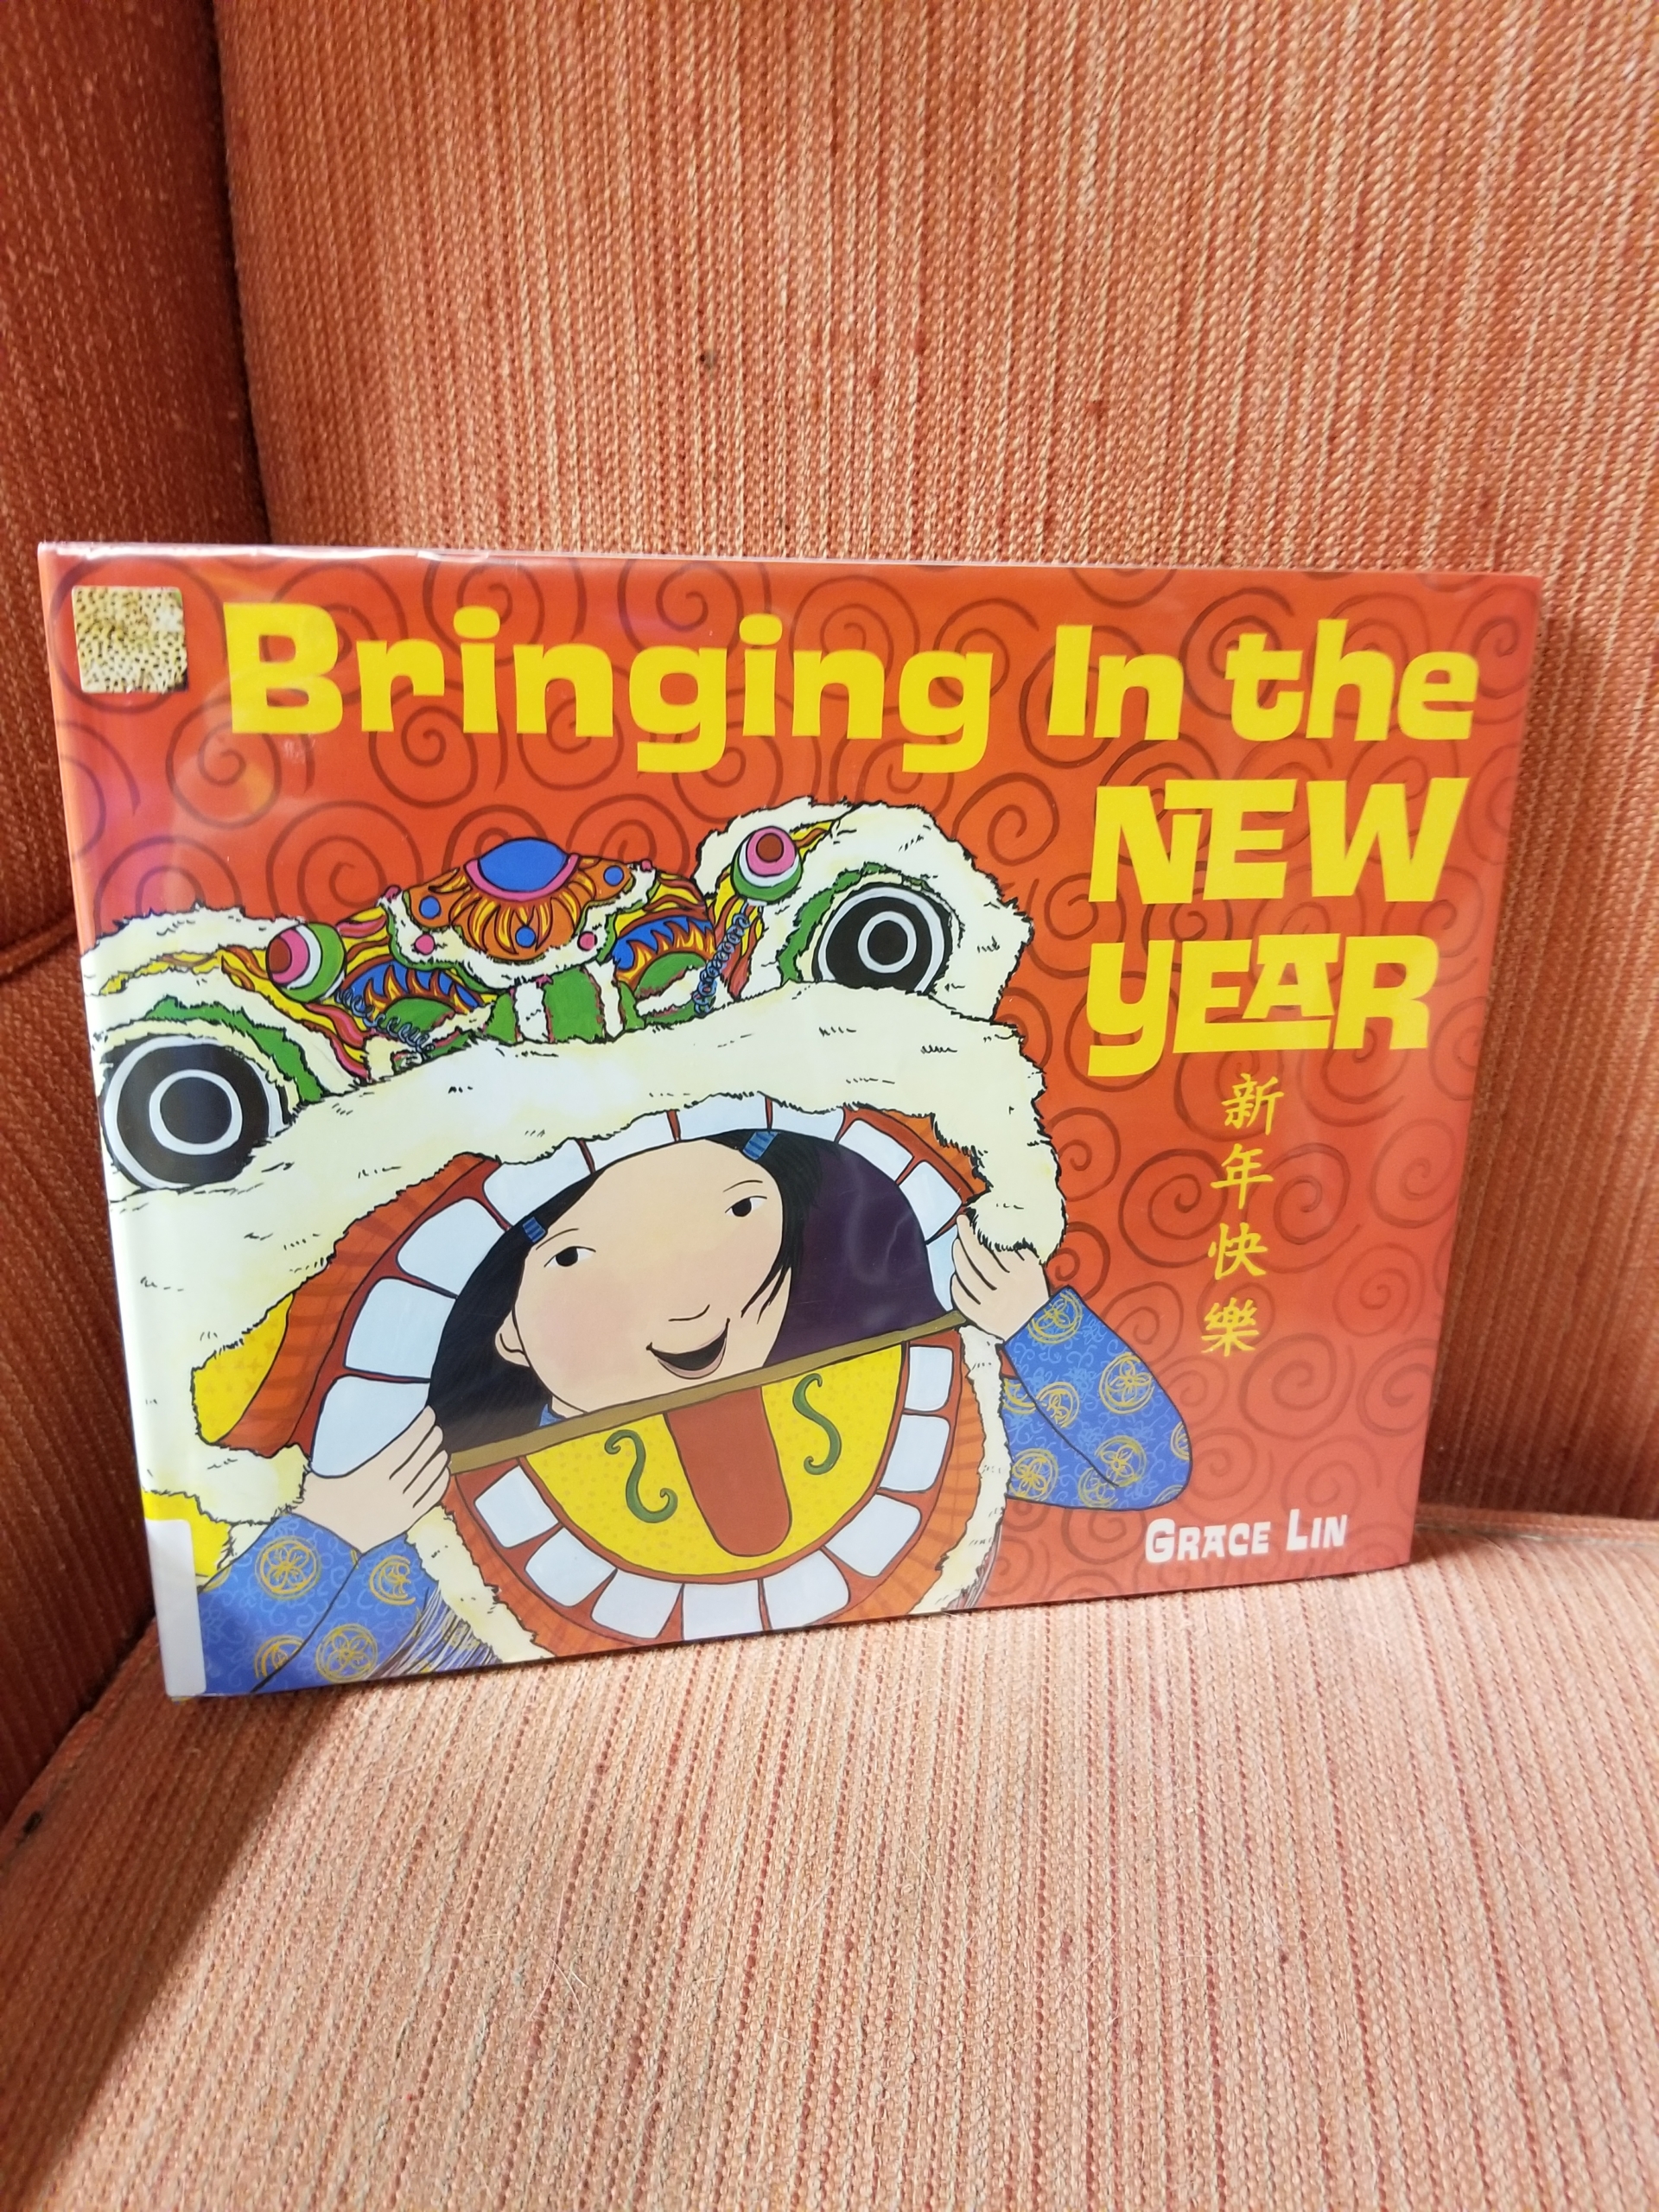
A book is always my number one choice for diving into any holiday or topic with children. And for this activity, I highly recommend Grace Lin’s Bringing in the New Year. Its vibrant illustrations, fold out pages, and simple text are a joyous way to explore Lunar New Year together.
In this story time activity, you’ll first read the book aloud to your child and then teach them how to read and write the names of loved ones as you create Lunar New Year envelopes for family members. It’s a great way to tie cultural traditions and literacy together in a fun and brain-building package.
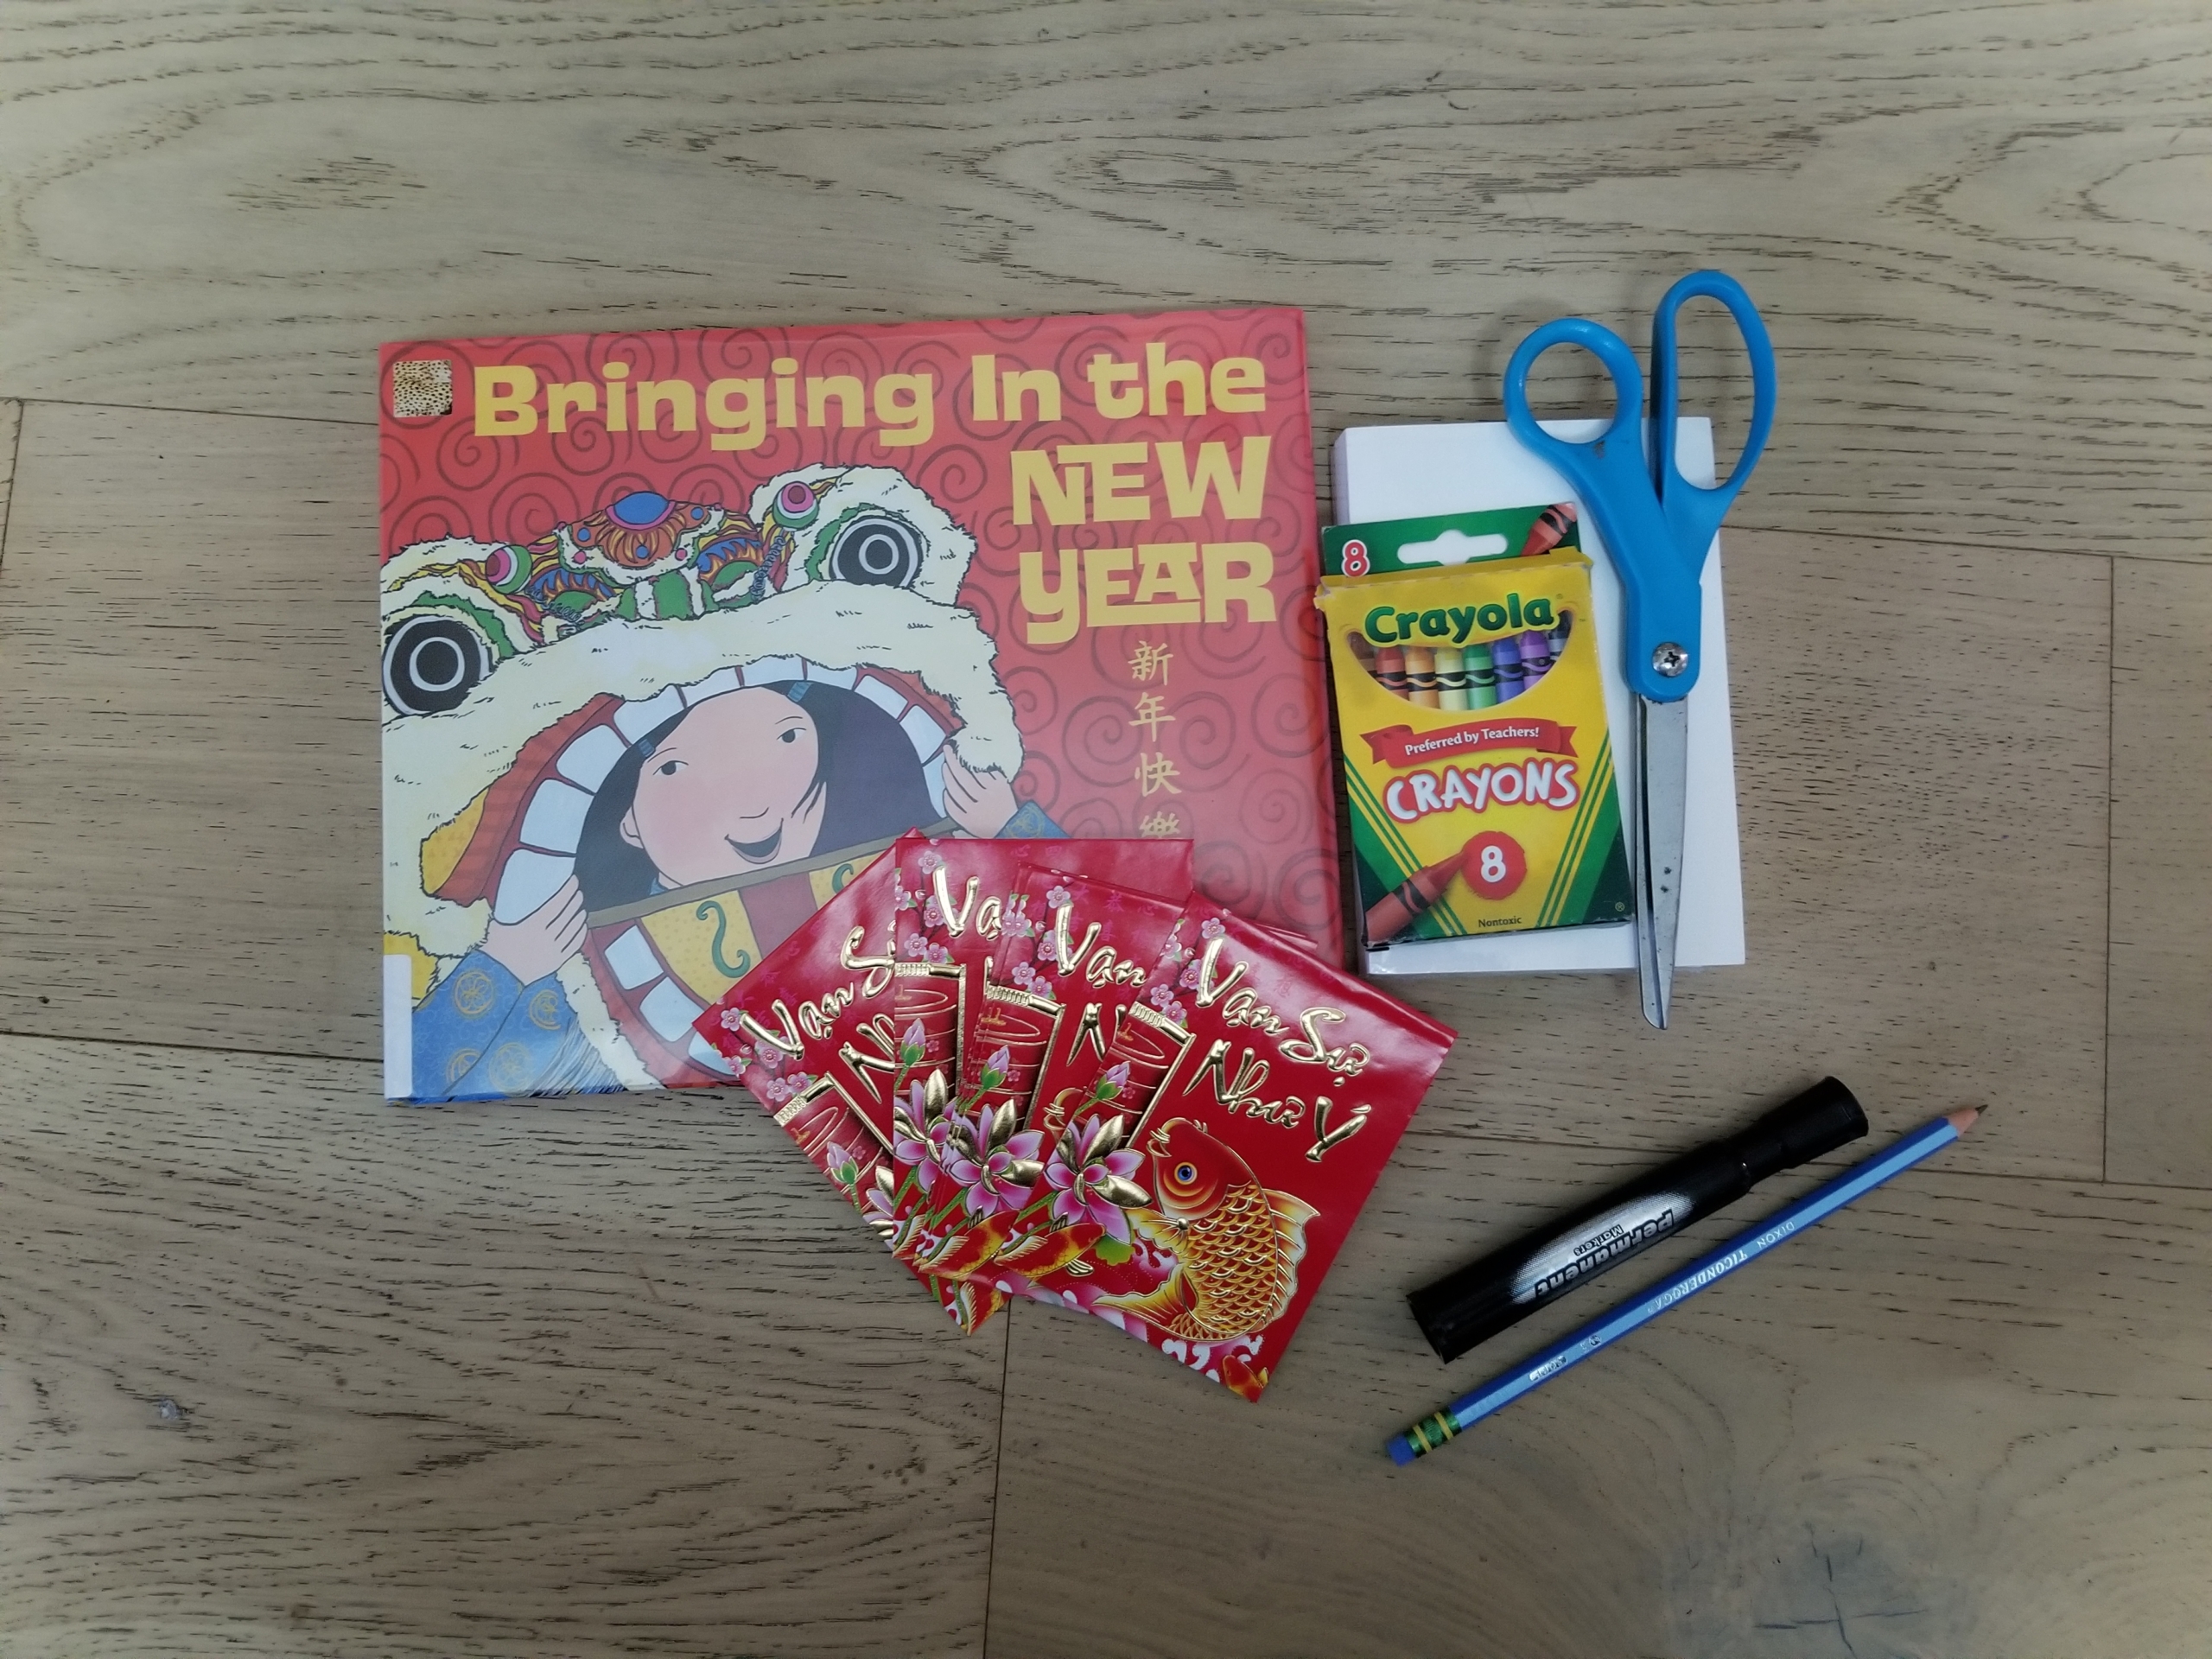
Materials:
- Bringing in the New Year by Grace Lin
- Red envelopes (enough for each member of your family)
- Index cards
- Pen and crayons
- Scissors
- Optional: Paintbrush
- Optional: Black paint (watercolor or tempera)
Cost: $5 to $10 excluding the book.
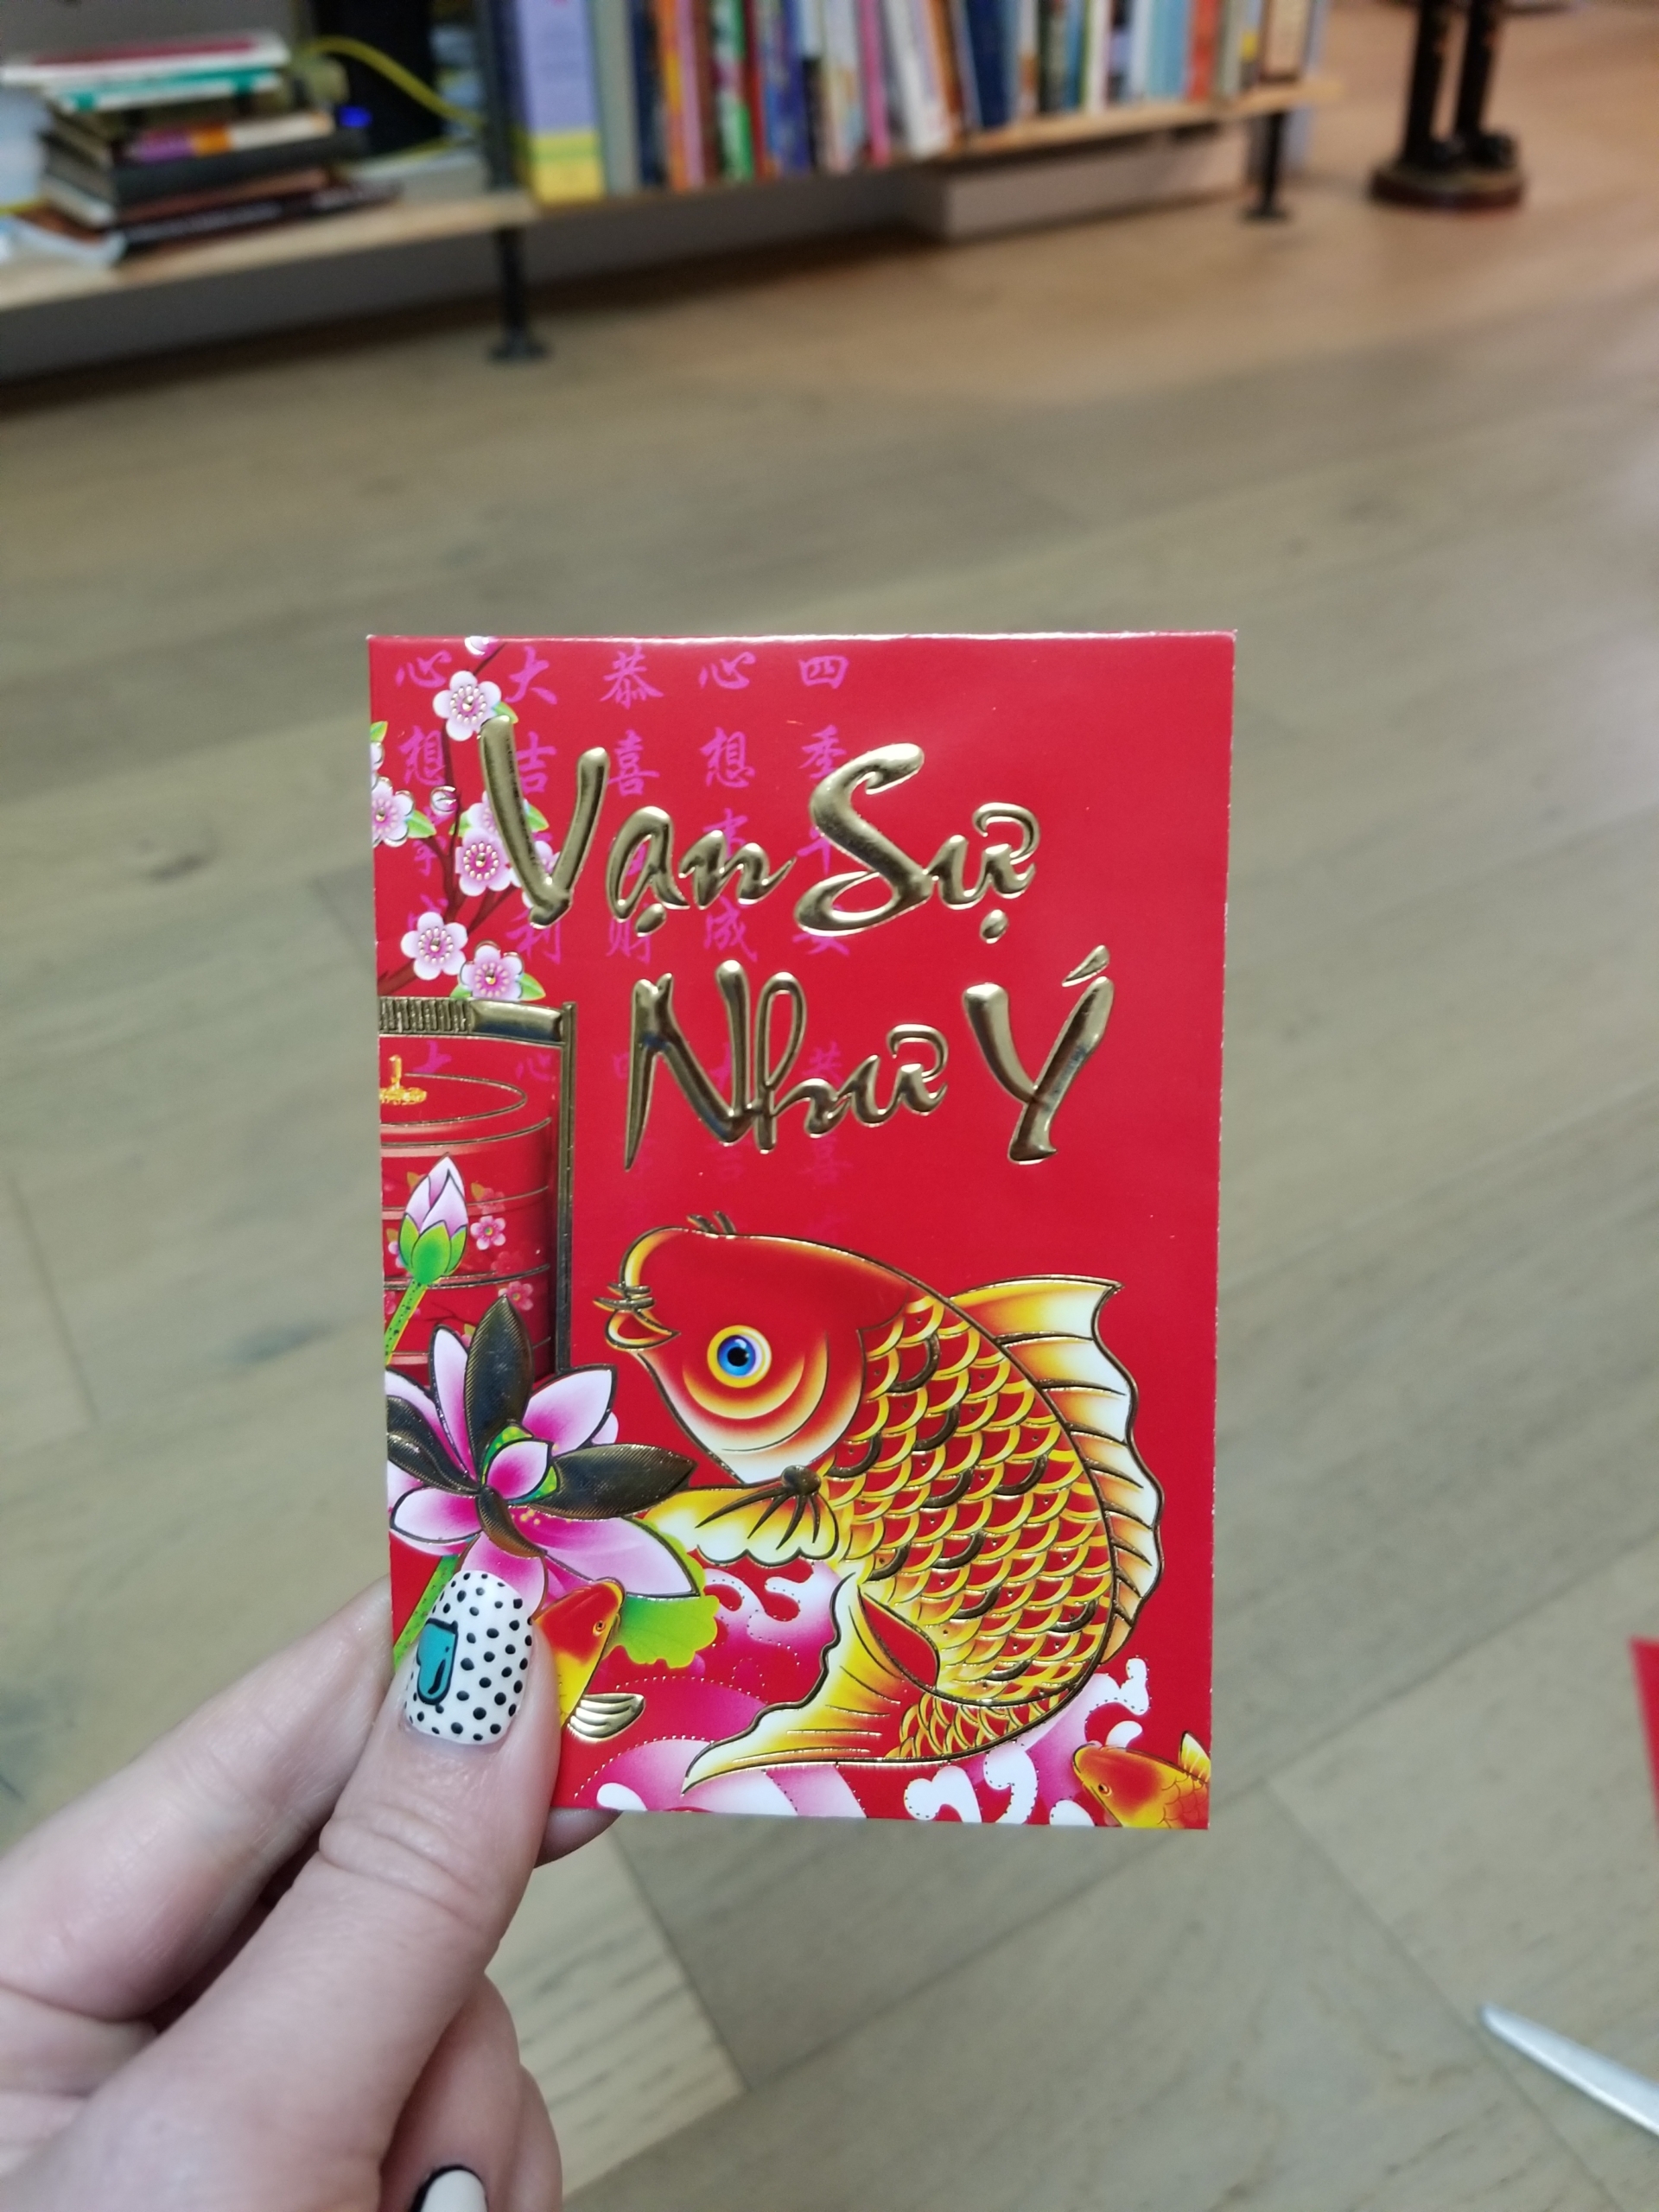
Tip: You can get plain red envelopes at any craft store or a stationary store. However, if you live in a town with an Asian neighborhood or market, you may be able to get beautiful red envelopes specifically for Lunar New Year.
Step 1: Read Bringing in the New Year by Grace Lin. Throughout the pages, children are holding red envelopes. Look for them with your child as you read. Allow time for your child’s questions and discussion, all of which builds literacy and bonding (check out our post on how to engage kids during read-alouds for maximum literacy benefit).
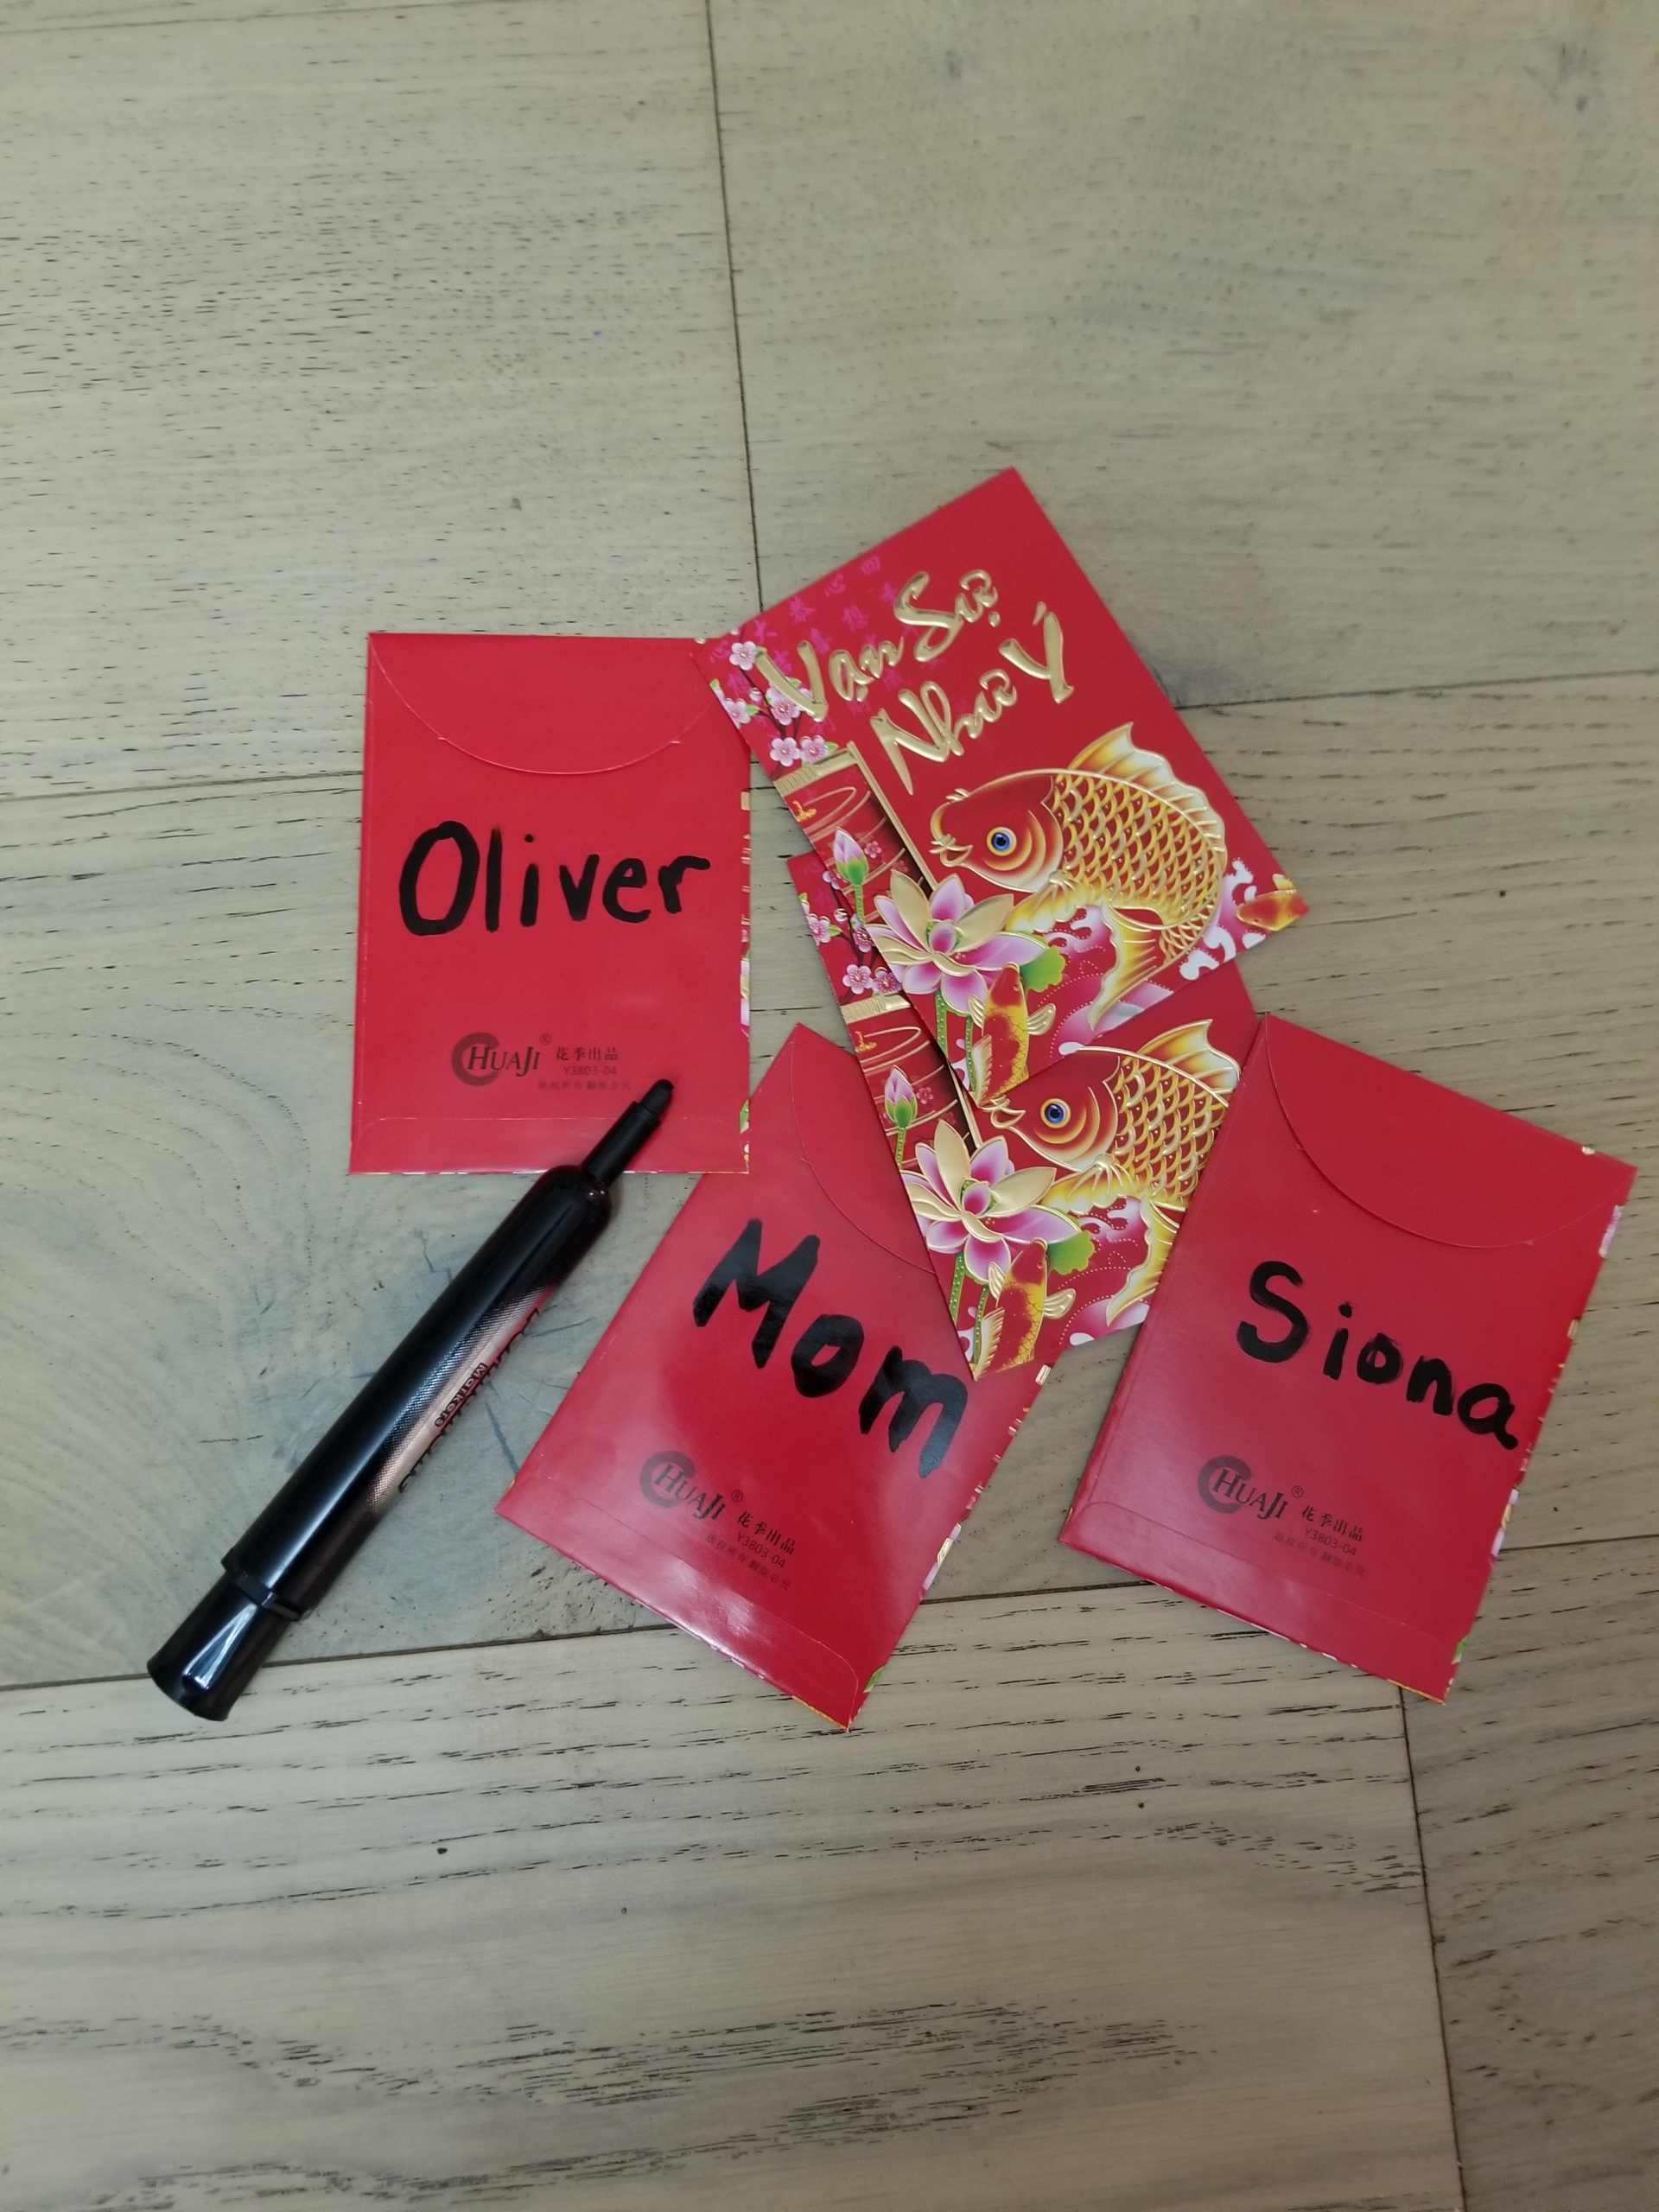
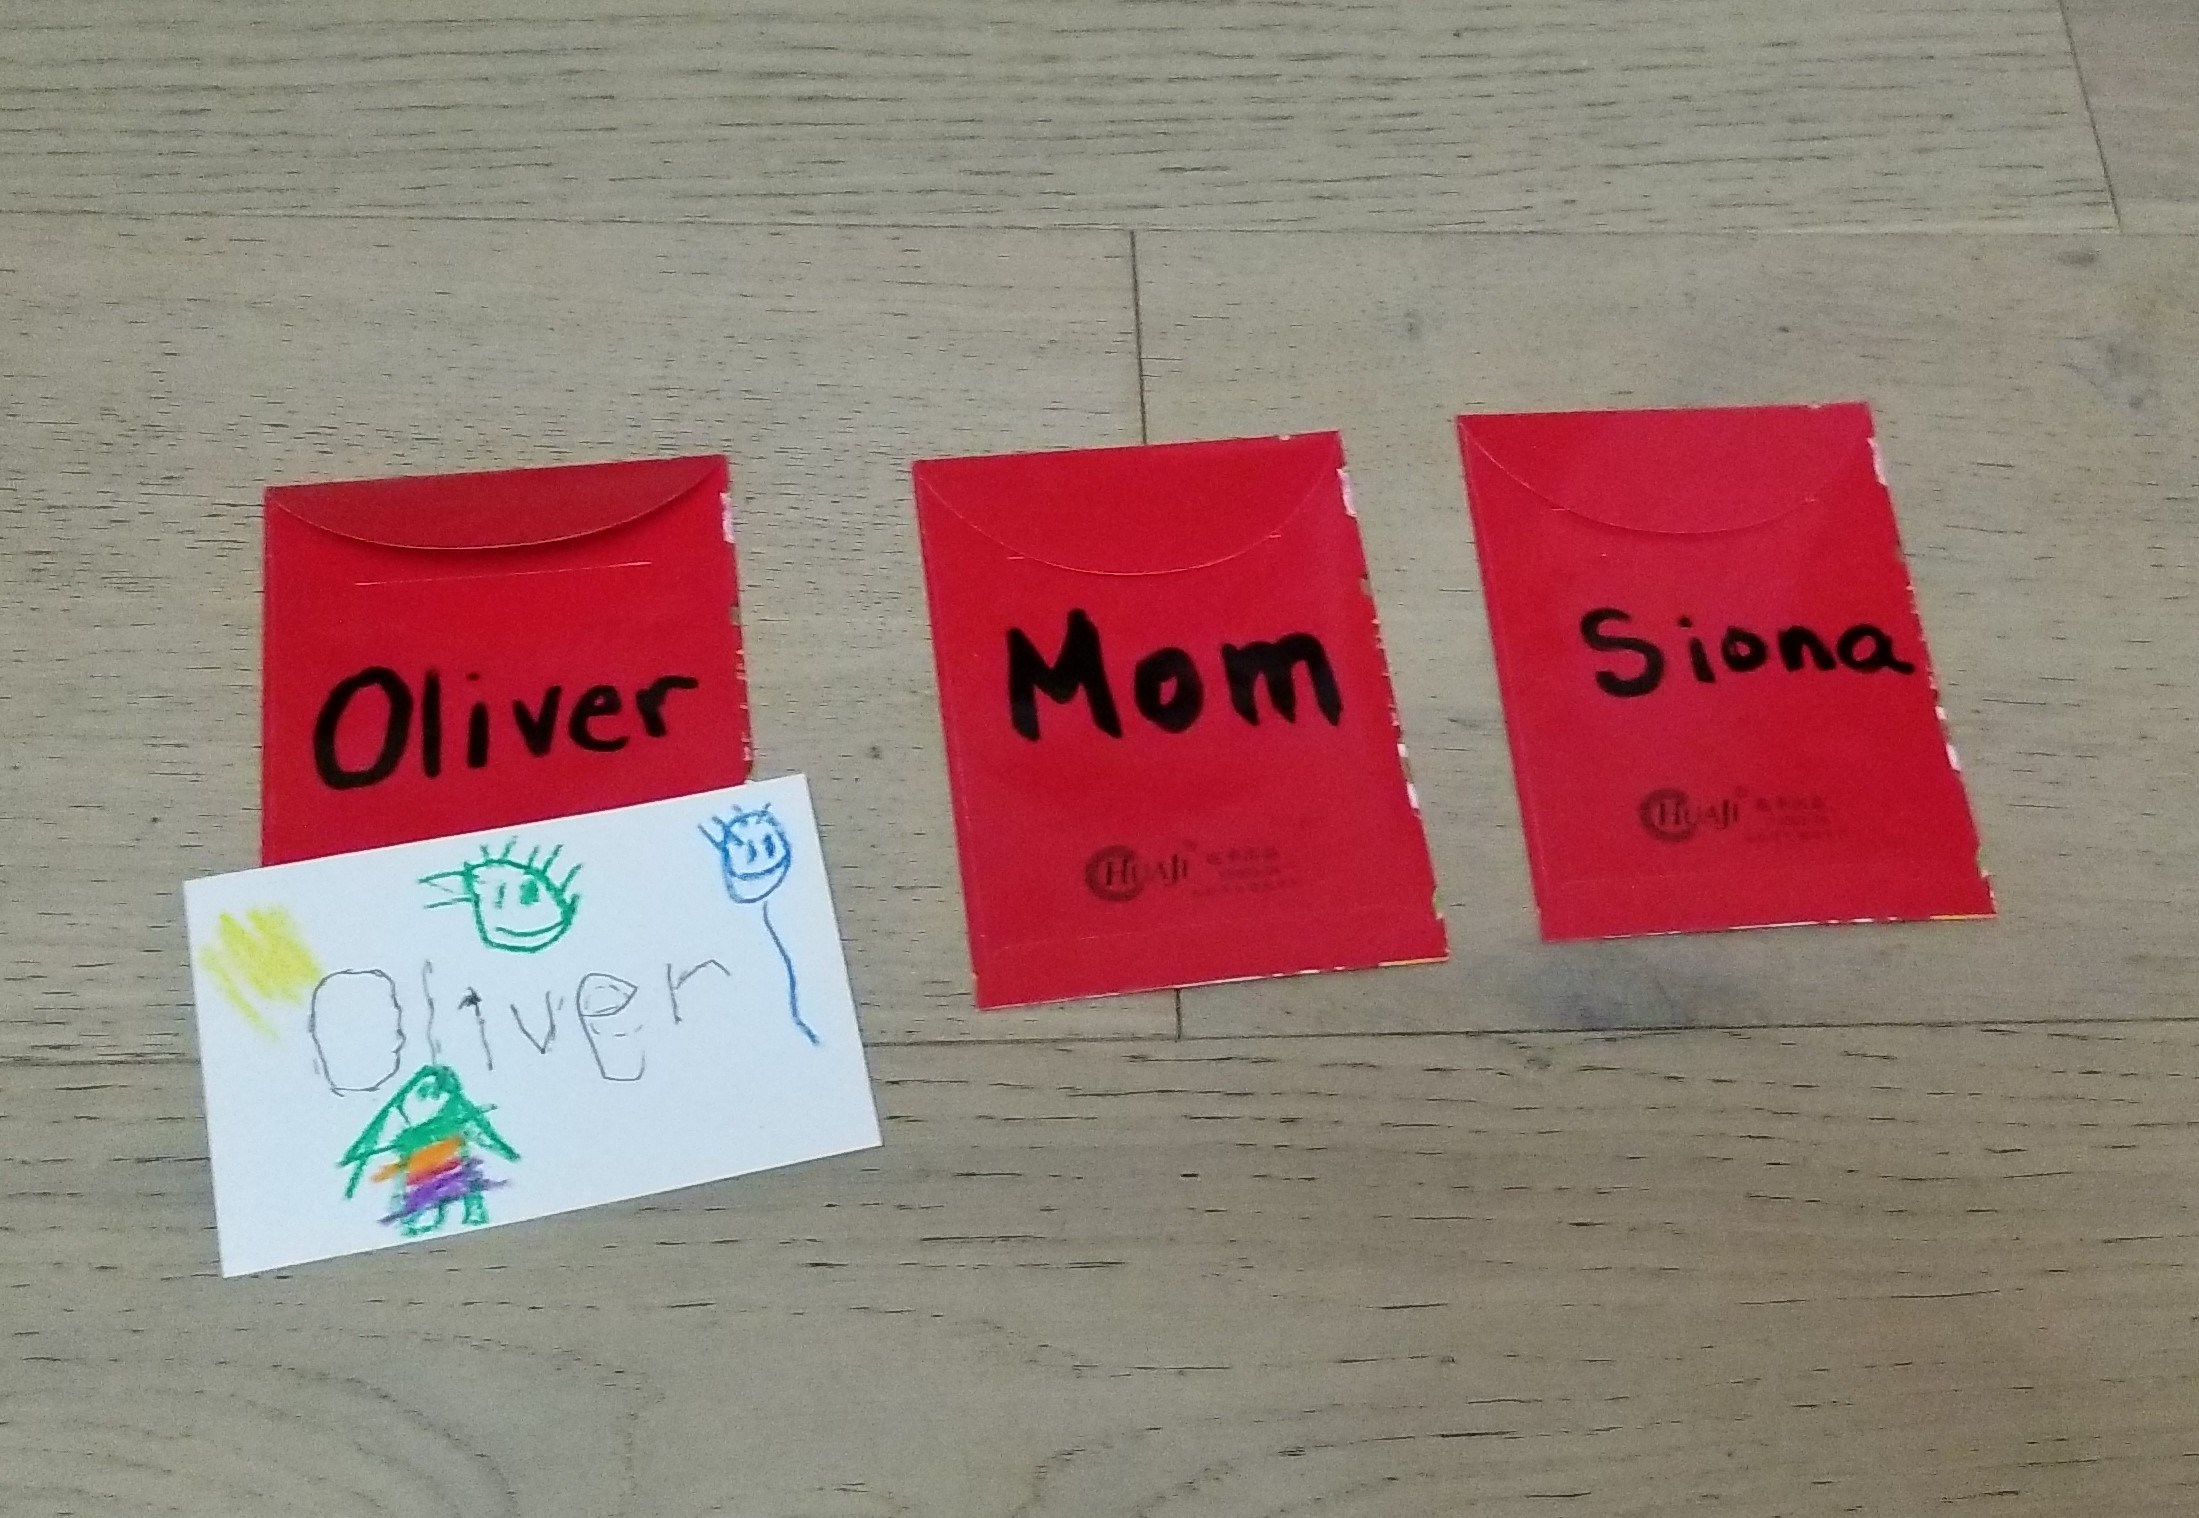
Step 2: On the outside of each envelope, write the name of one family member. You’ll make one envelope for each member of your family.
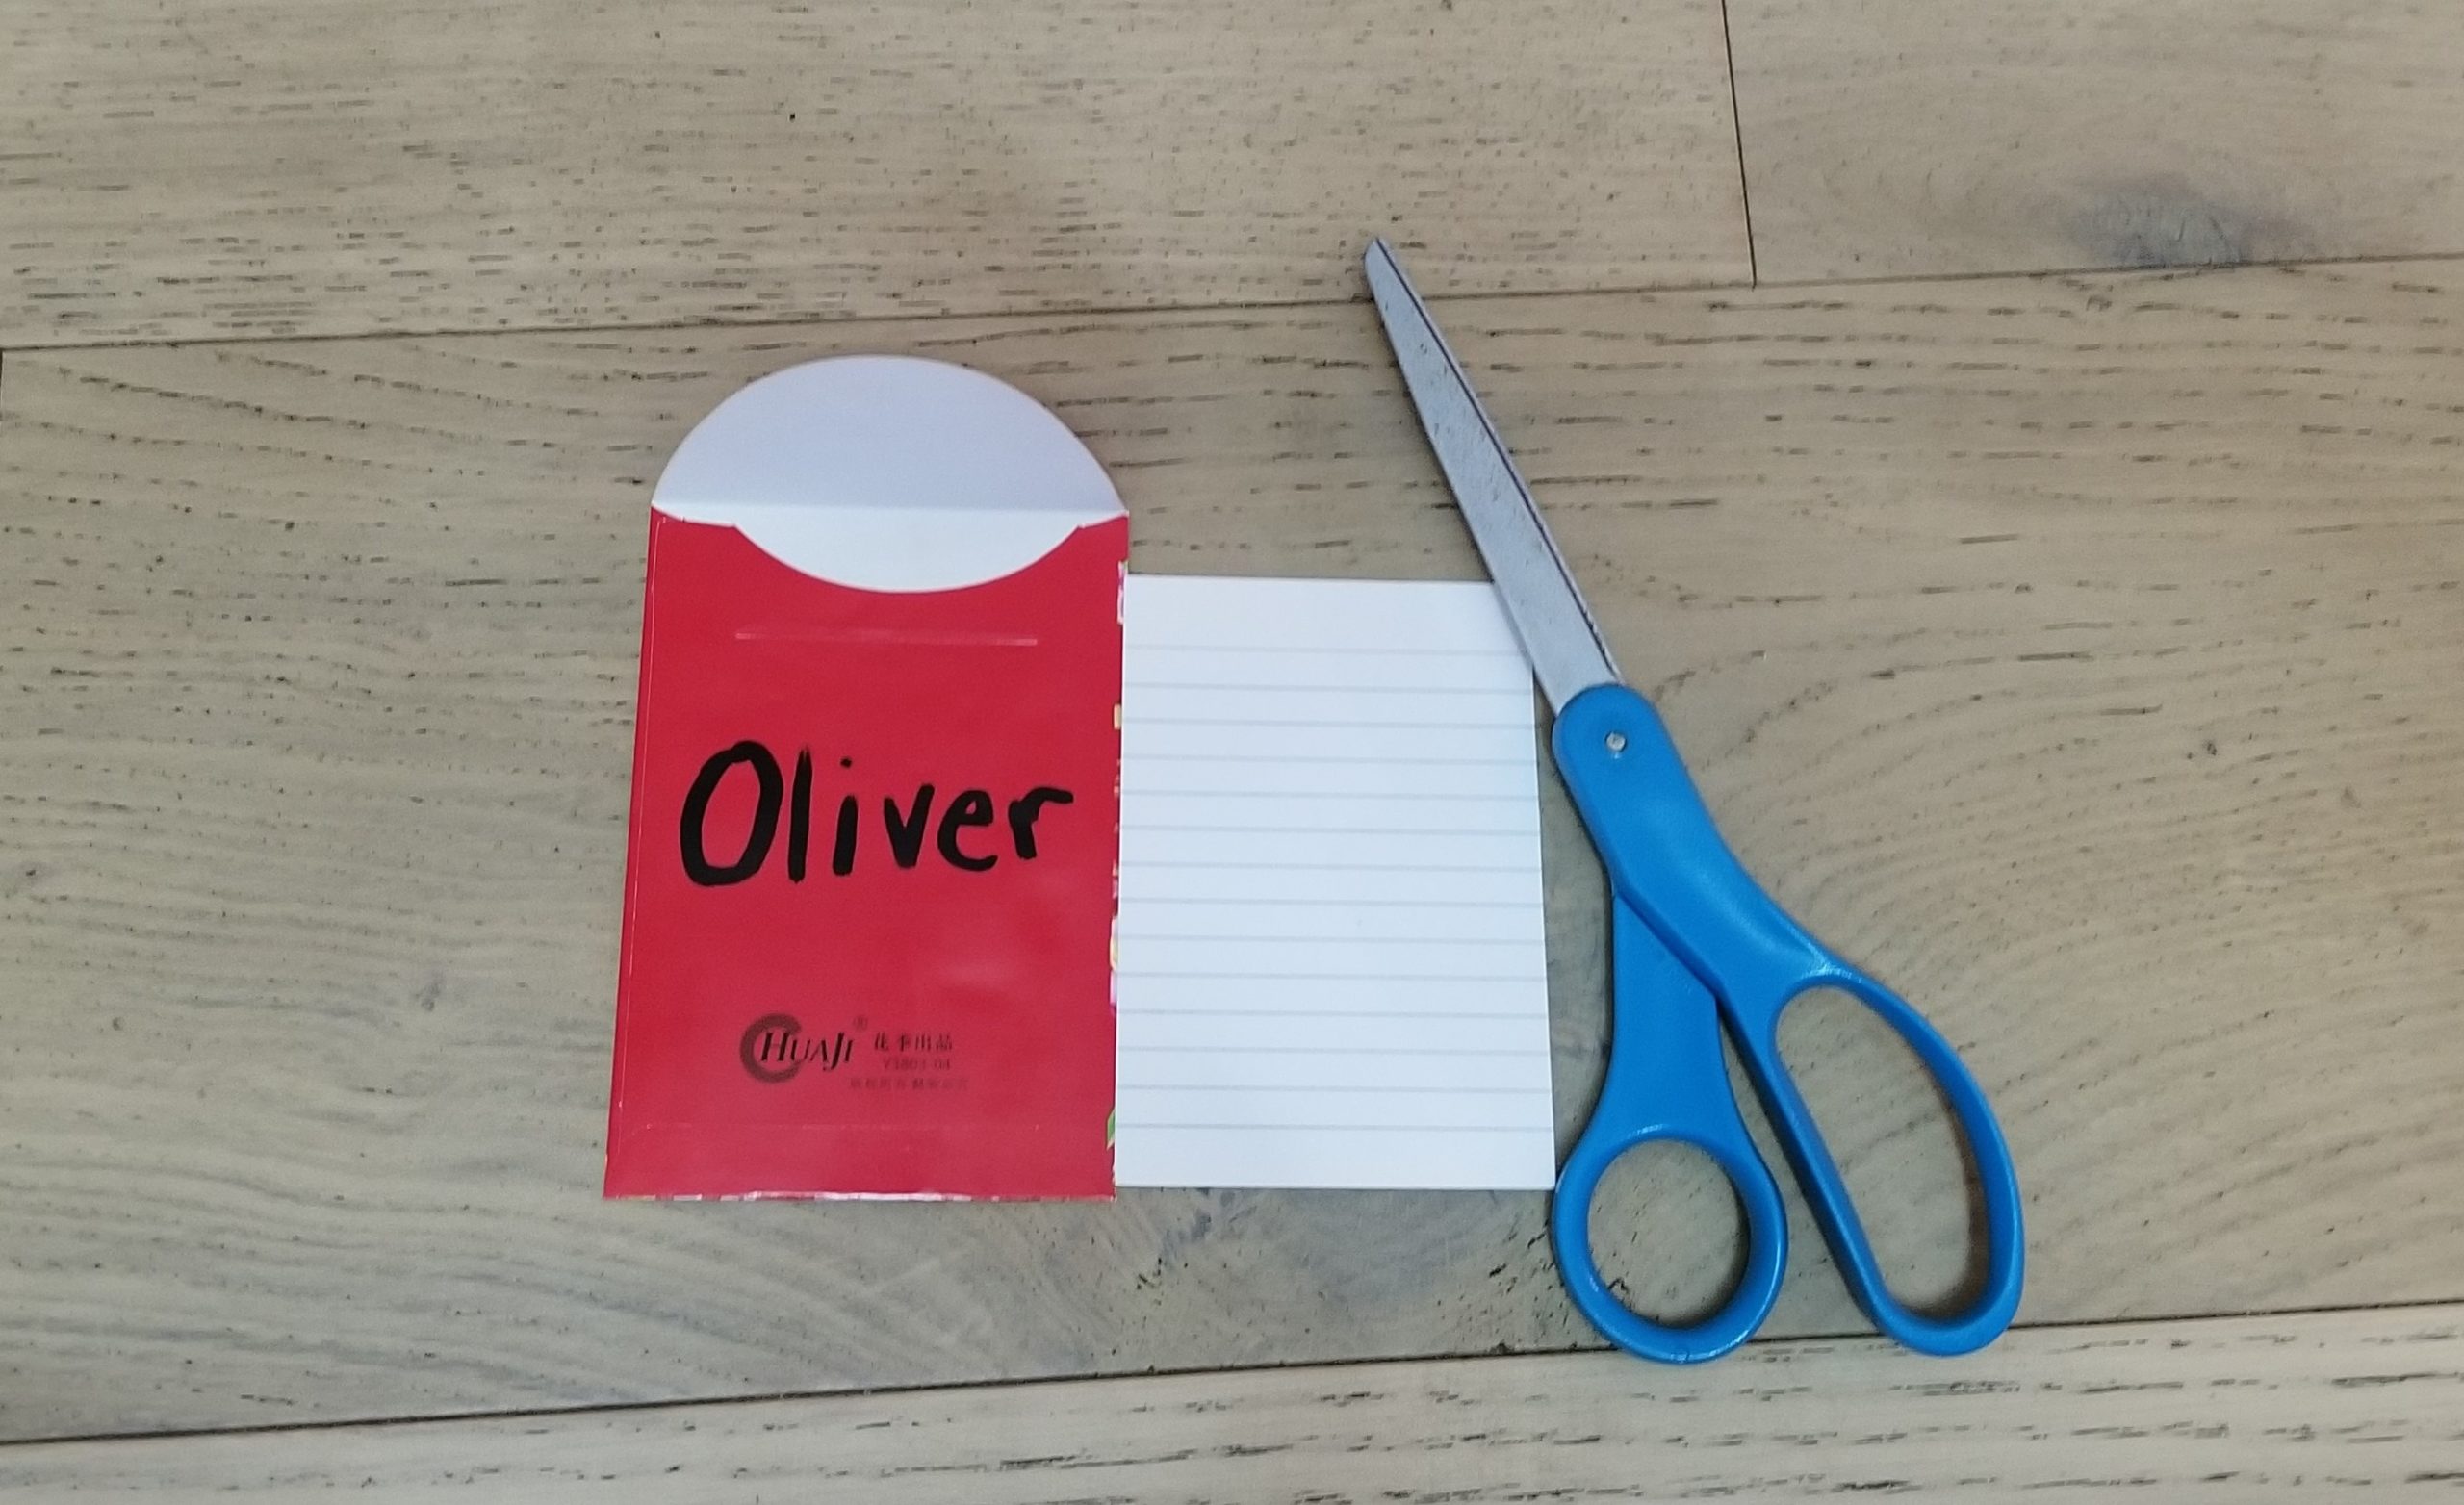
Step 3: Next, you’ll help your child write the name of each family member on a separate index card. But first, check if your cards will fit into the envelopes. If they’re too large, trim them to fit in easily. Tip: If your child isn’t ready to write freehand yet, write each name with dotted lines and let them trace it.
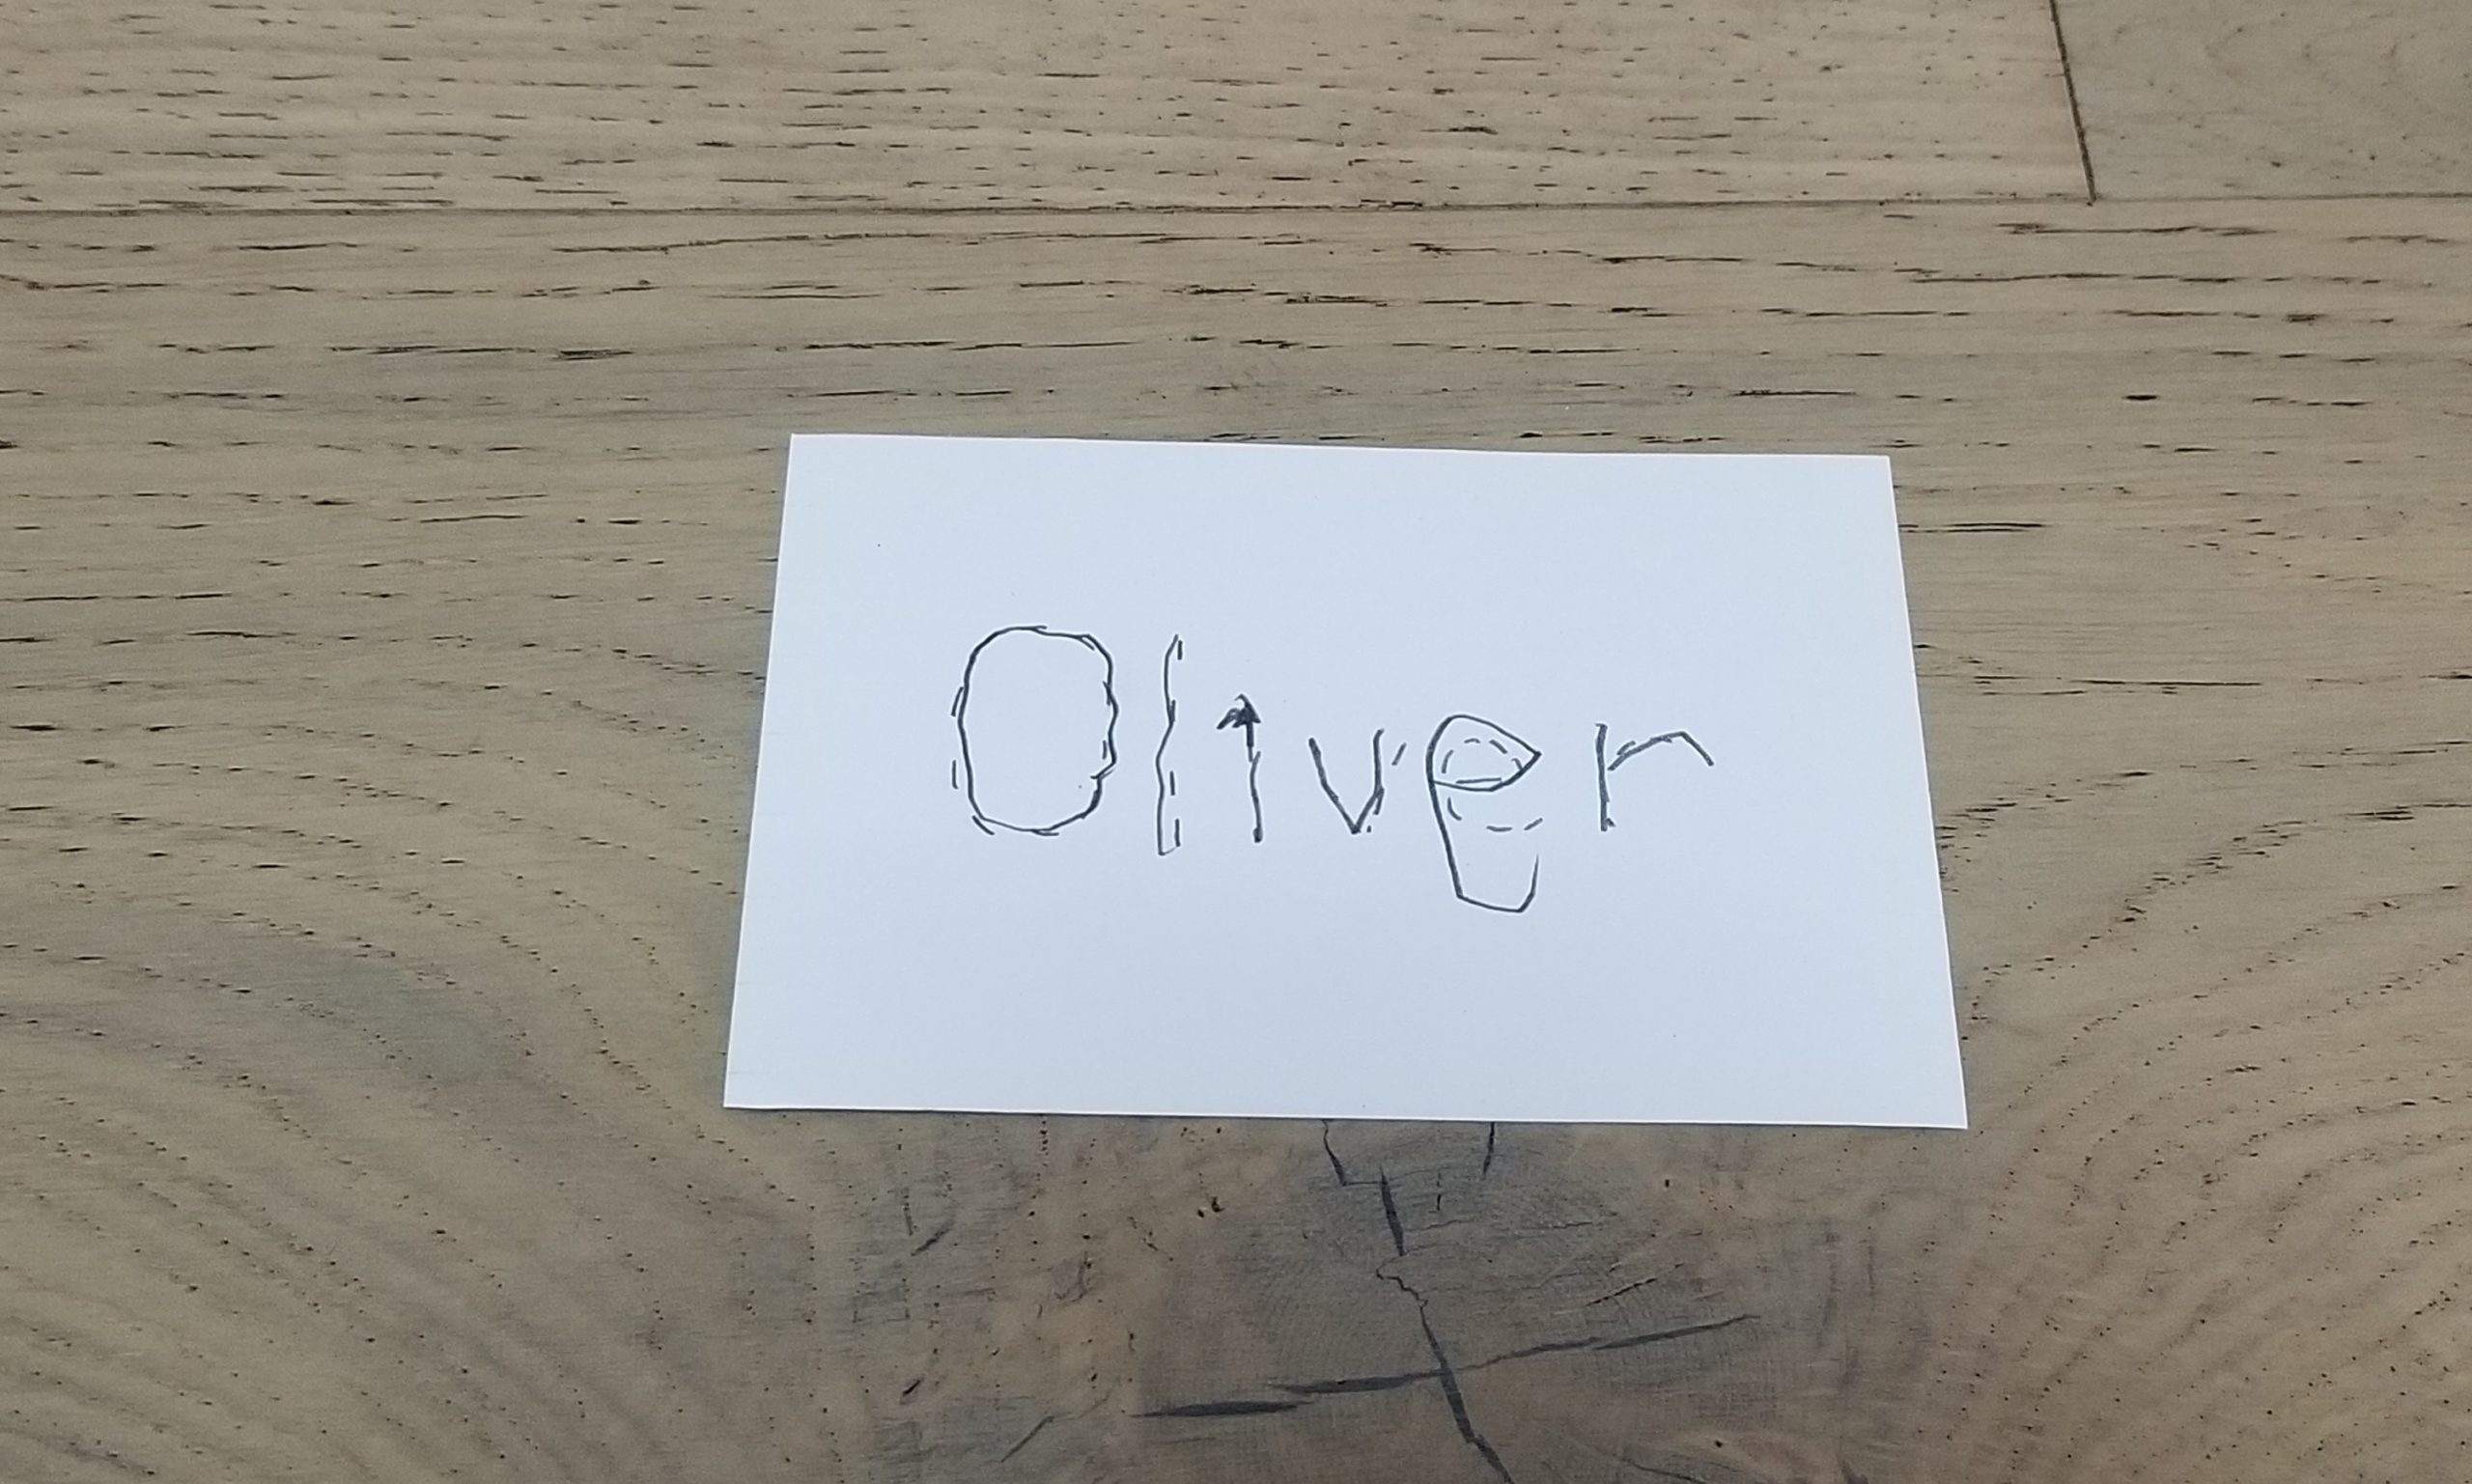
Optional: If you like, you can point out the images of Chinese calligraphy in Bringing in the New Year, then invite your child to paint the names, rather than writing with a pen.
Step 4: Let your child decorate the card any way they like. The more original, the better!
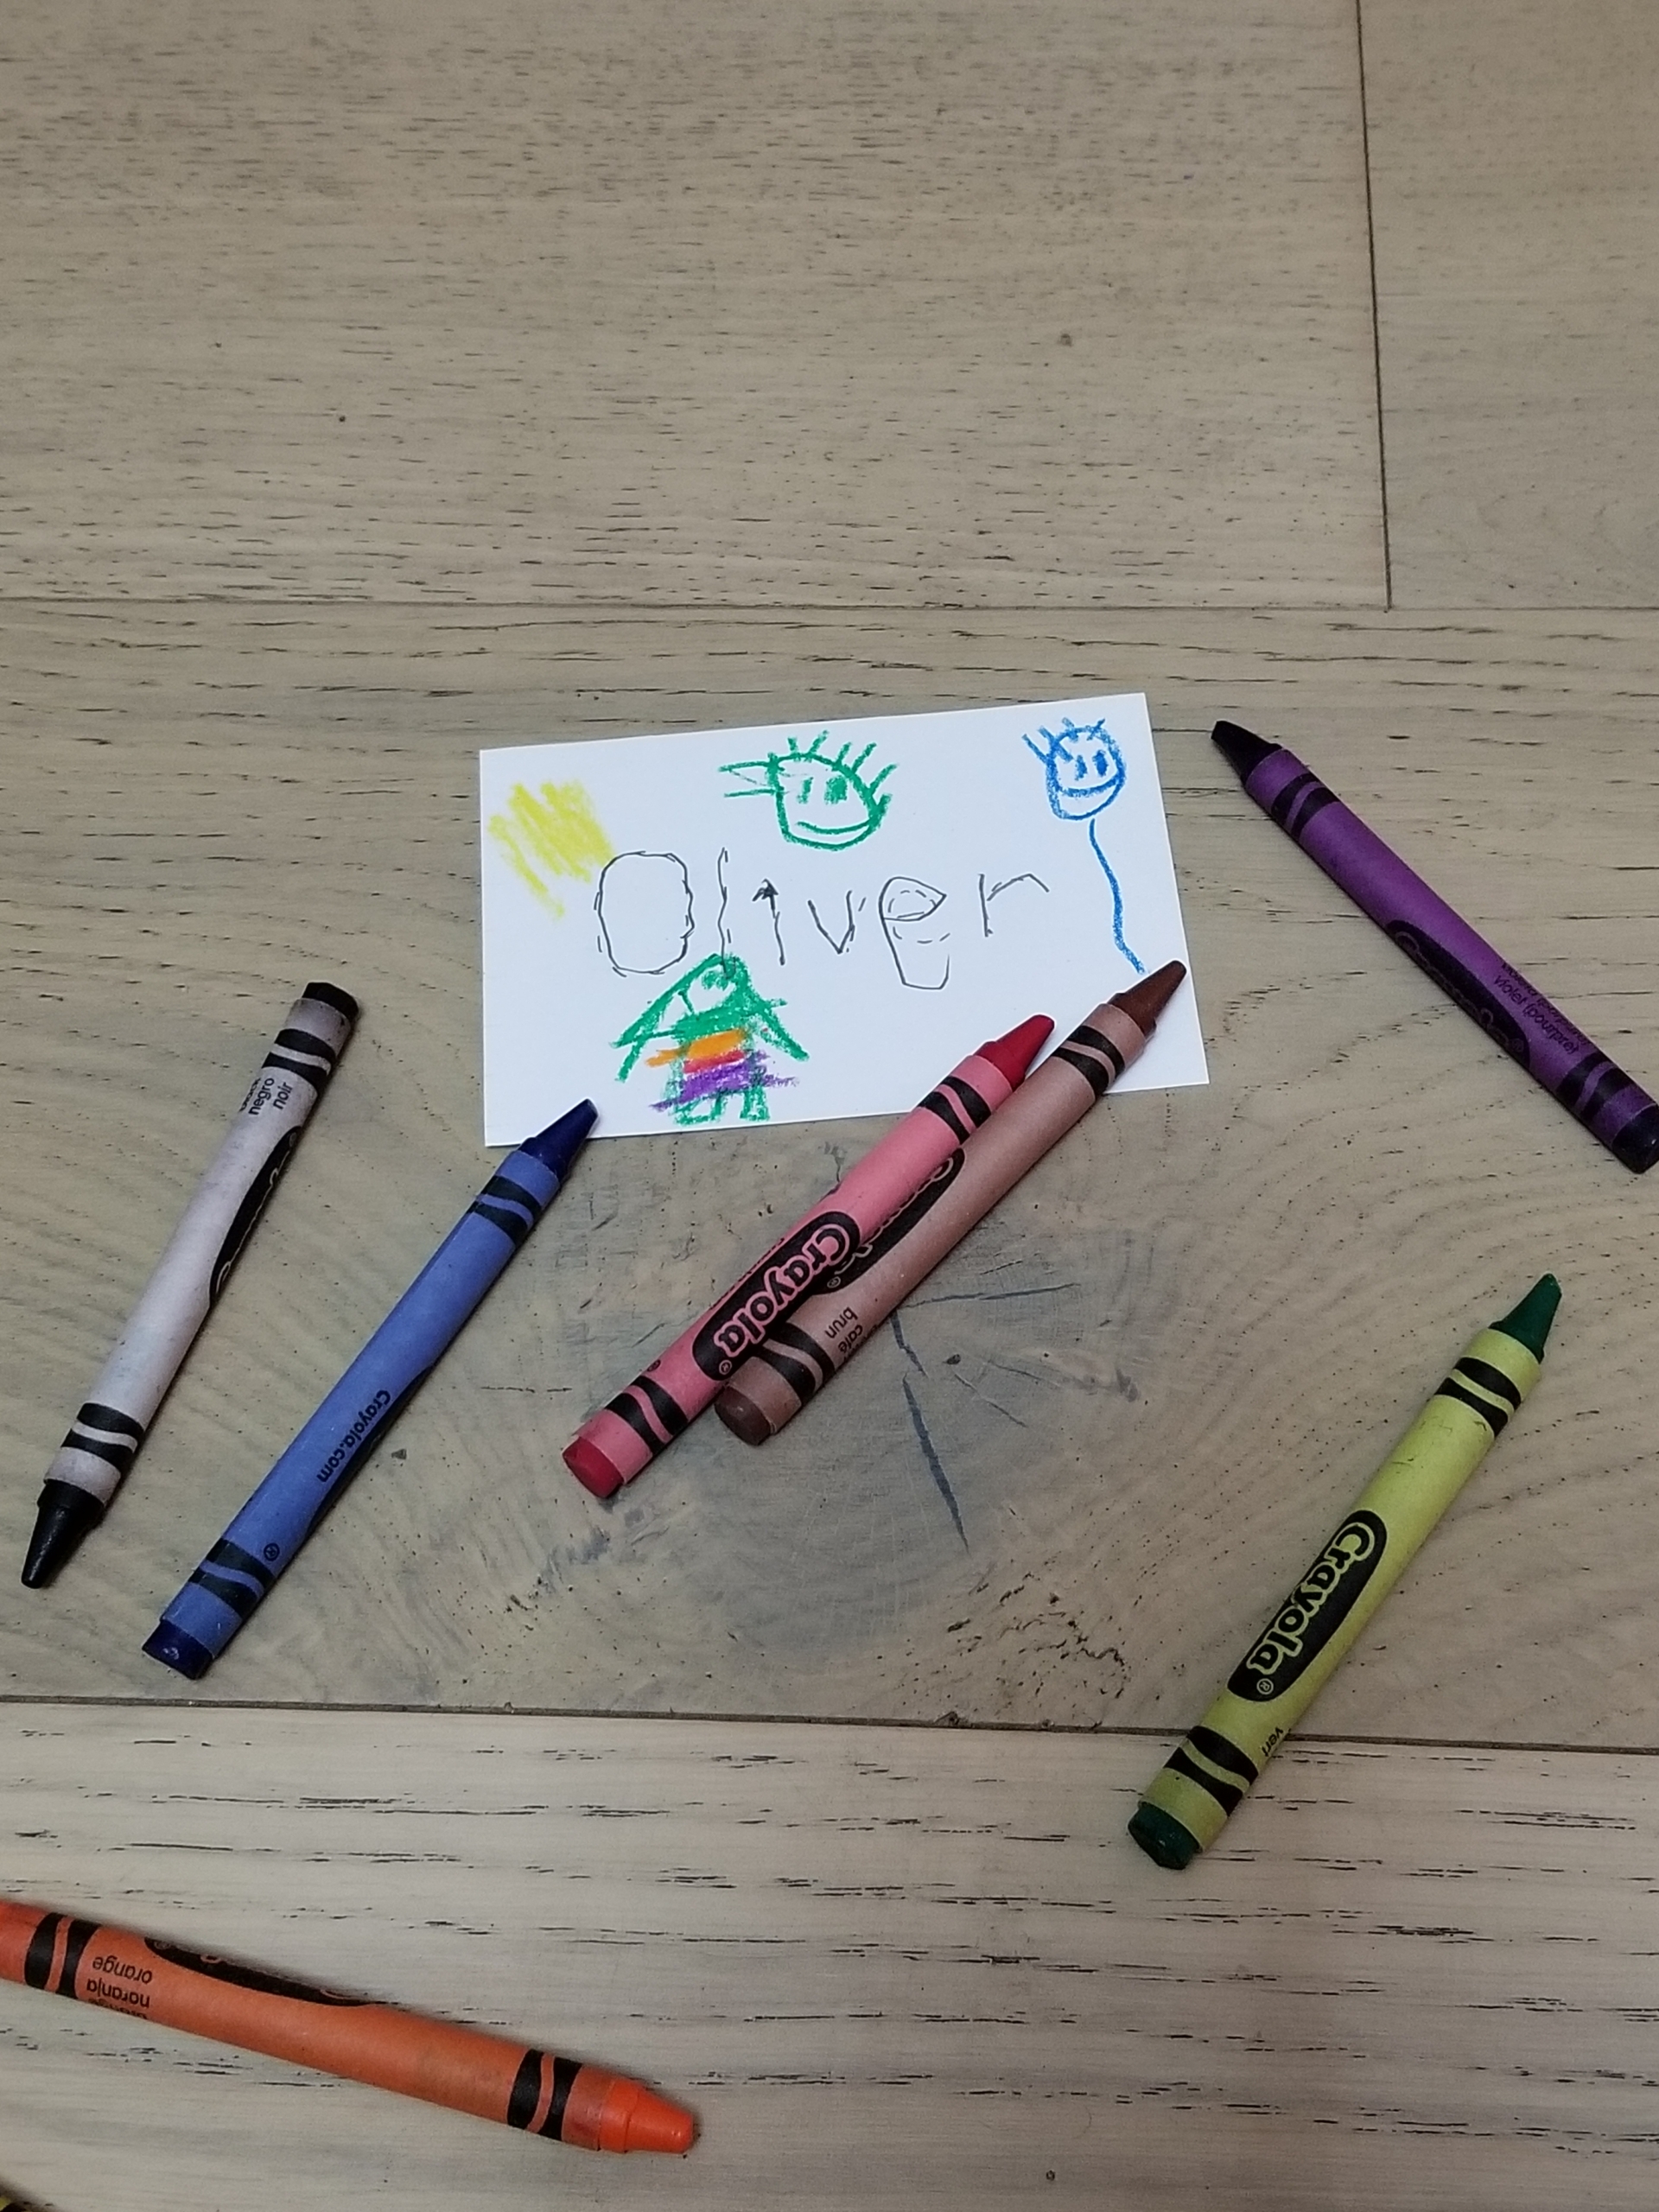
Step 5: Read the names on the envelopes aloud together. Next, ask your child to match the card and envelope with the same name. Your child can now put each card into the matching envelope.
Now it’s celebration time! Help your child deliver the envelopes to their family members.
Reading and writing are tremendous achievements for children. You can share this accomplishment with them as you share this special holiday. Let us know how you’re supporting your child’s literacy during the Lunar New Year.
Reading resource for parents
More information about Lunar New Year: The dates of Lunar New Year are not set, like January 1st. As the New York Times puts it, “It can be easy to think of a calendar as a scientific given, or a reflection of the laws of the universe. In fact, as these holidays remind us, there are as many ways to track time as there are cultures and languages. Each calendar reveals something about how the people who created it relate to the world around them while also preserving rich cultural identities and memories.” Lunar New Year is celebrated throughout many parts of Asia and with many different holiday traditions. These may include fireworks, dragon dances, family visits, eating oranges, and the giving of red envelopes filled with money to children.
It’s the season of love, and Valentine’s Day presents us with the perfect opportunity to explore the concept of love with our little ones. How does love make us feel? How do we show our friends and family we love them? What does love have to do with being kind?
These 14 children’s picture books about love reinforce early literacy and offer a wonderful starting point for conversations about love in all its forms. Whether it’s love for the planet, love for our friends, or even self-love—let these titles take you and your child on a reading journey that highlights what it’s really all about.
Pin Me for Reference :
Teaching reading and all the early literacy skills that underpin it requires time and repetition. As a teacher, I always seek activities that keep this practice variable and exciting. And as a certified chocoholic, how could I pass up the chance to mix up Valentine’s Day chocolate and literacy into one fun learning game?
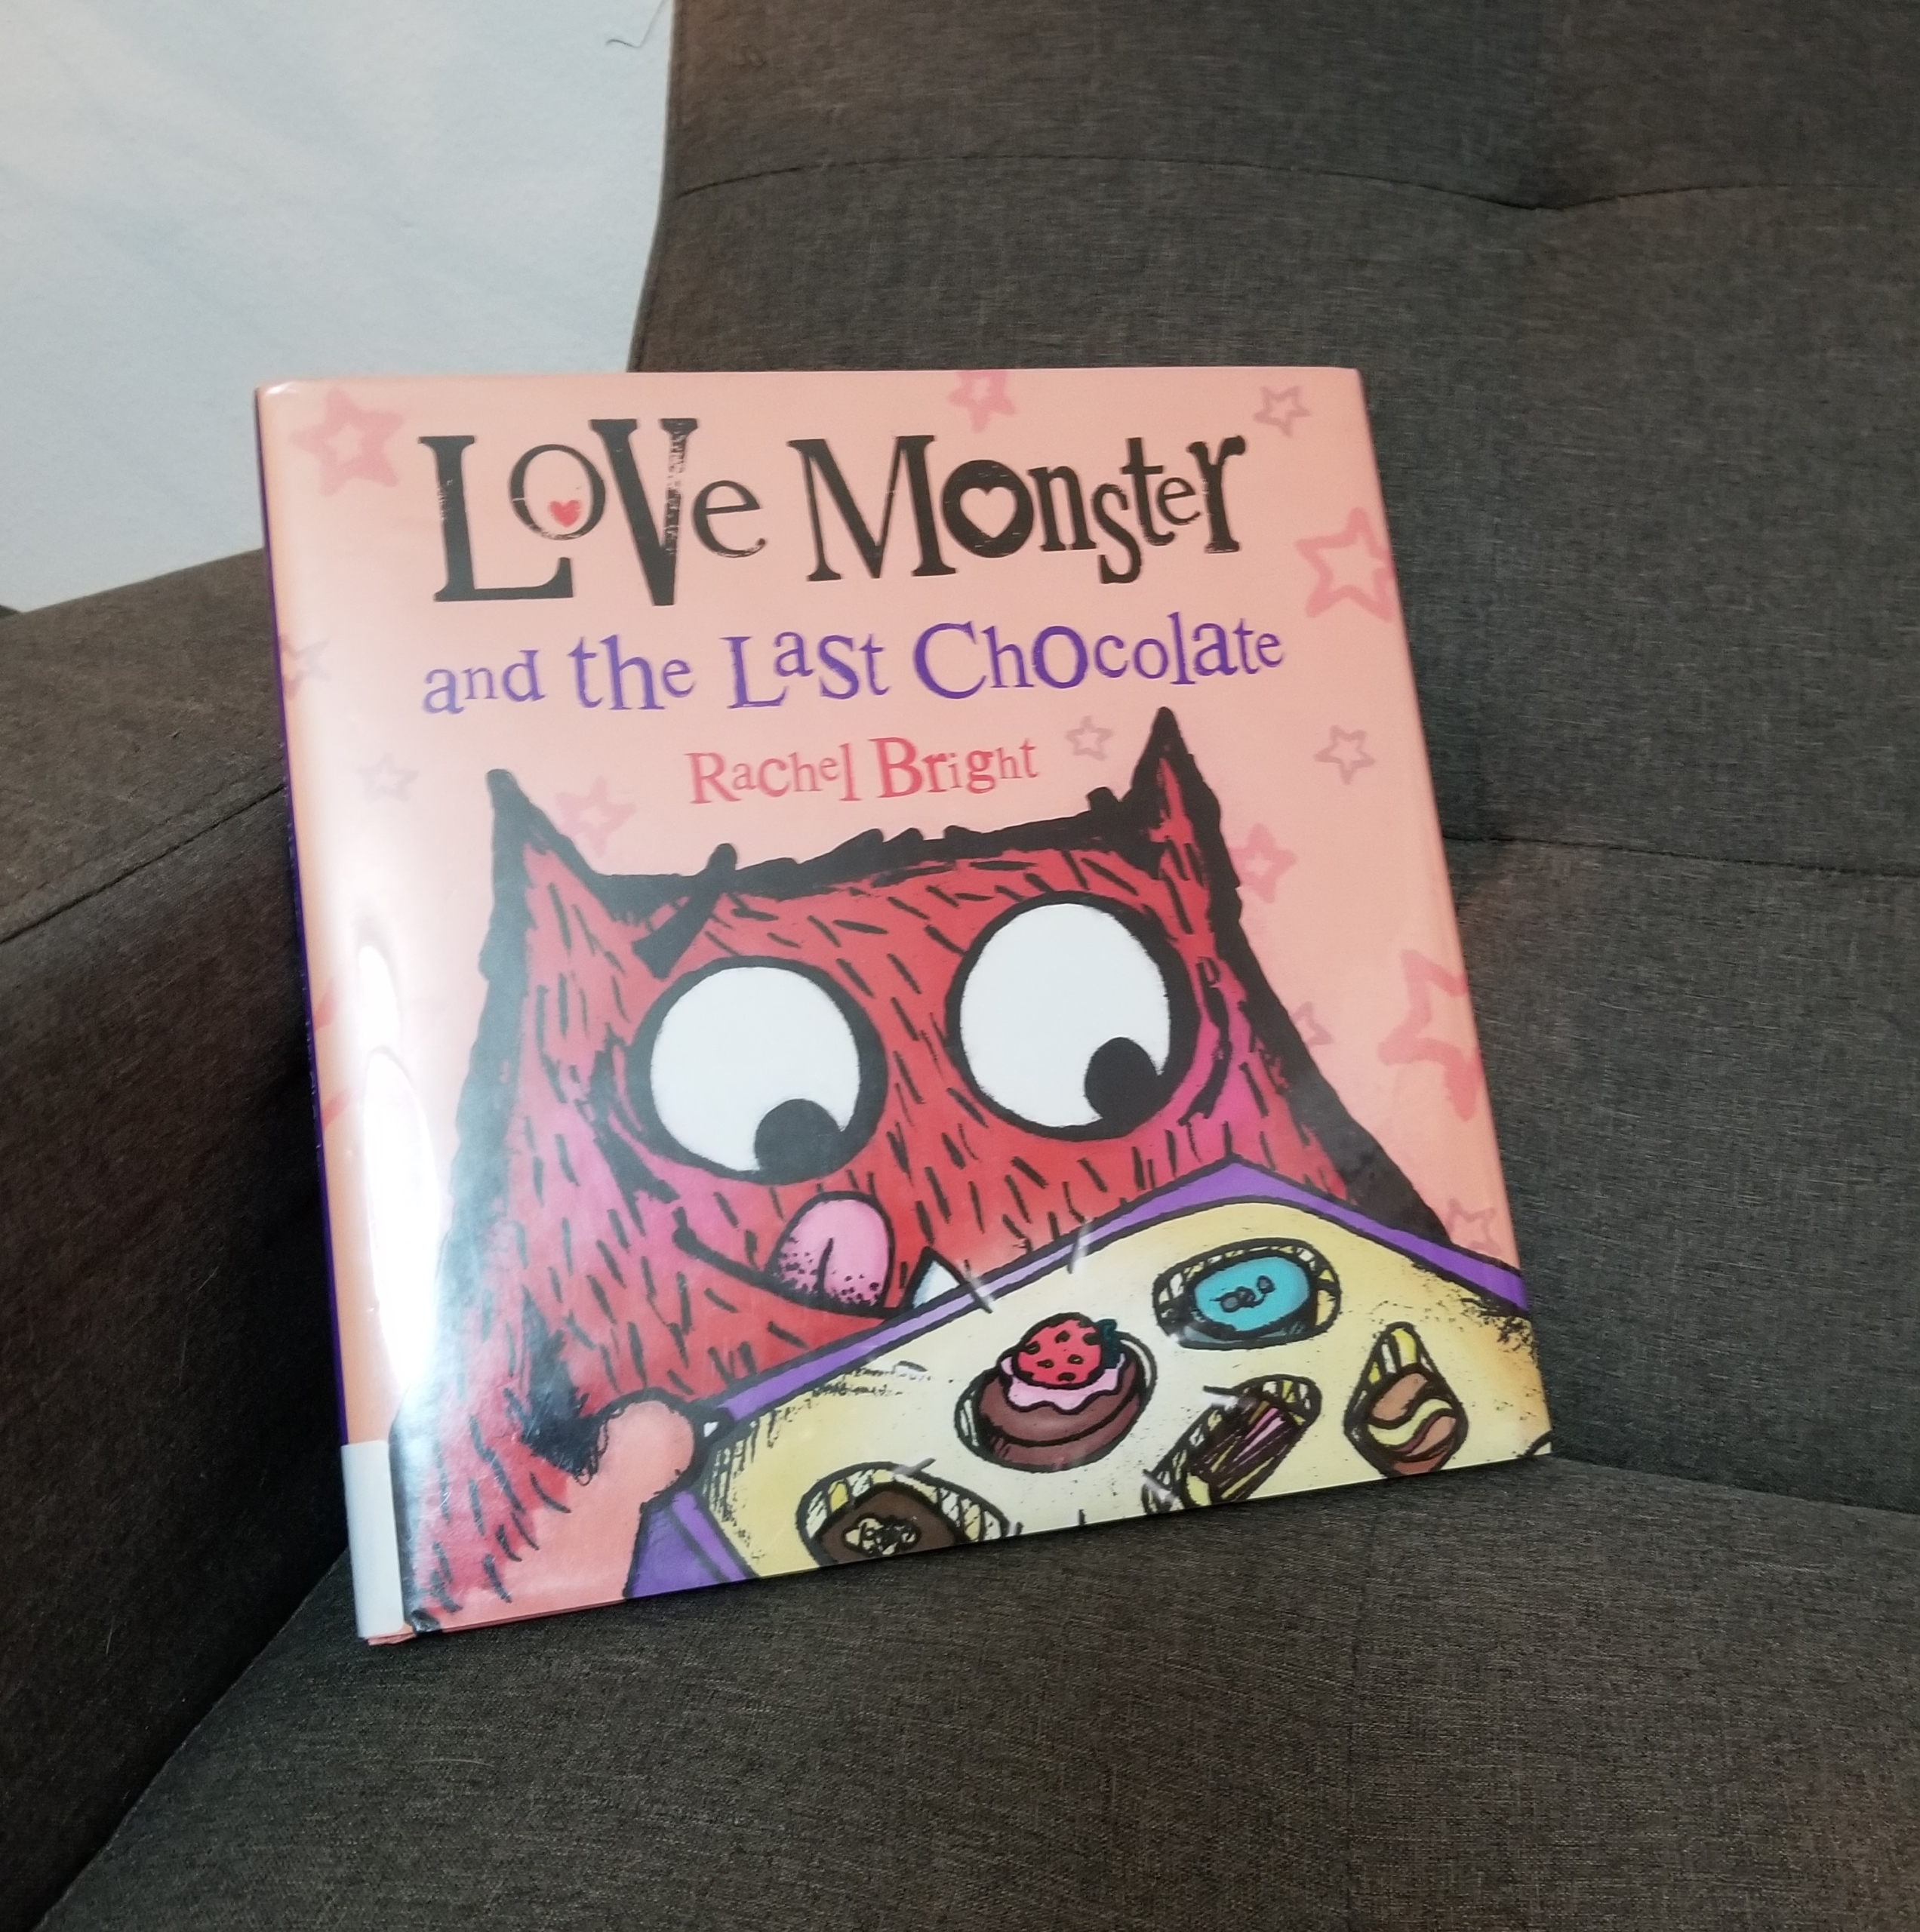
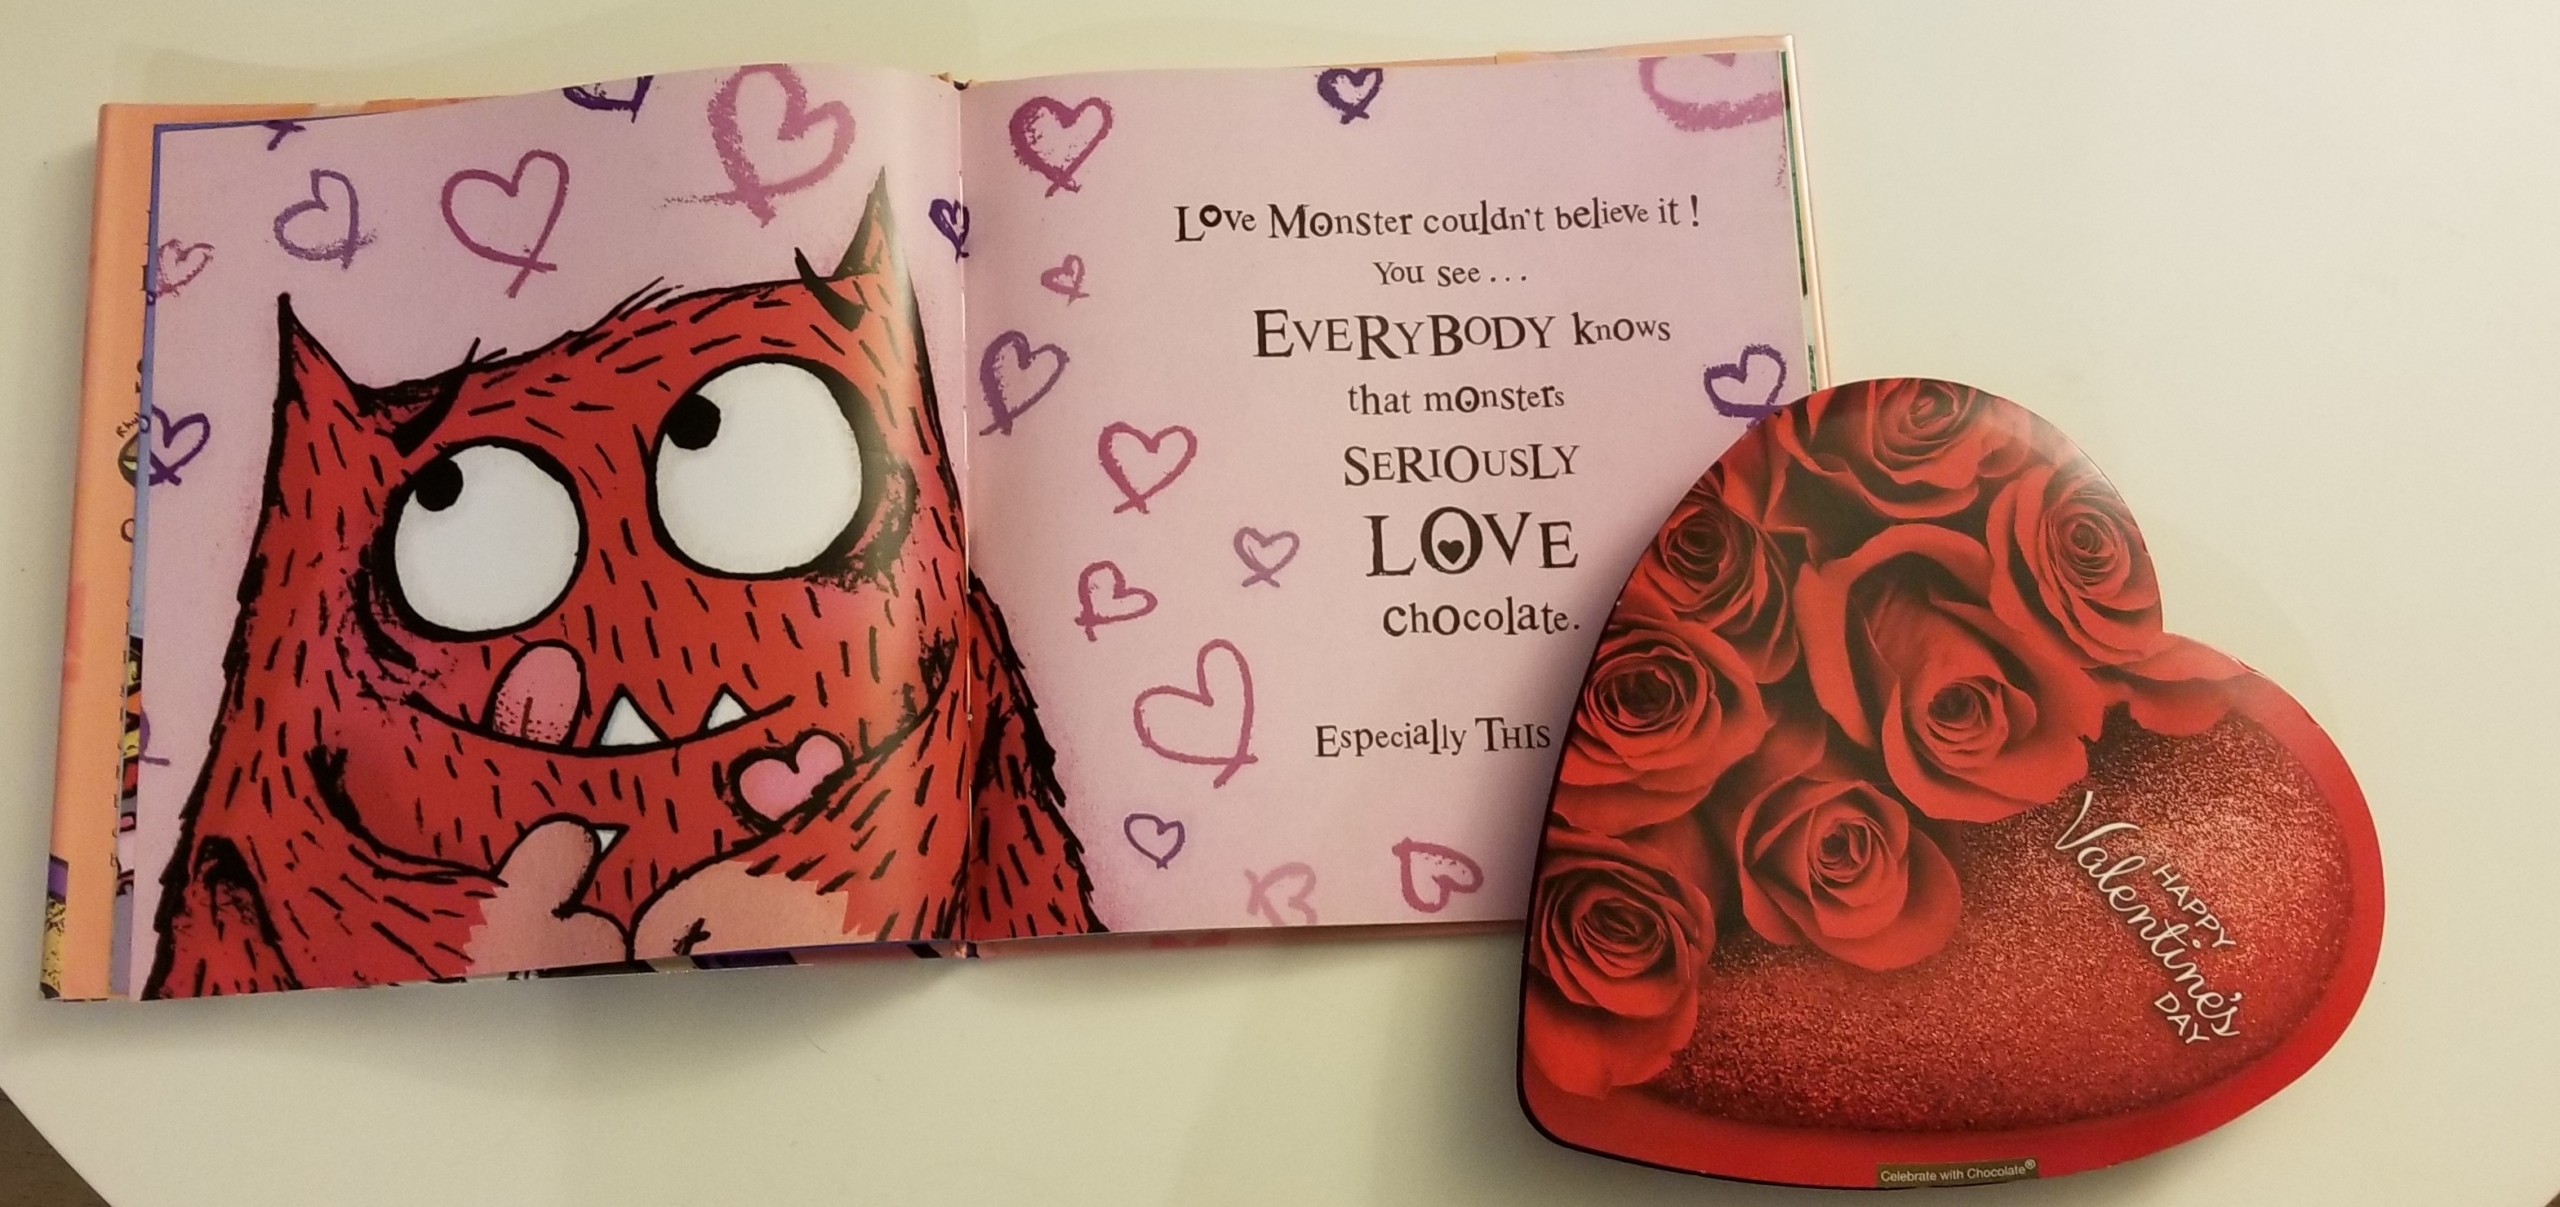
This activity begins with spending quality time reading a sweet picture book to your child. A part of Rachel Bright’s Love Monster series, Love Monster and the Last Chocolate is a delightful book that teaches children about friendship, generosity, and, of course, chocolate! Valentine’s Day can easily become a holiday that’s simply about candy and how much they get. This book sparks conversation about what it means to be thoughtful and how generosity is a way of showing how much you care about someone.
After reading together, you’ll upcycle a chocolate box into a memory matching game that teaches children to pair uppercase letters to their lowercase counterparts. This is important because so many uppercase and lowercase letters look nothing alike. Sure, O and o are easy enough, but E and e or G and g? To an early reader, these pairings don’t seem logical, so reinforcing them is crucial. This easy activity leads your child from a read-aloud that engages them in conversation about love and friendship to an interactive game that takes their letter learning to the next level.
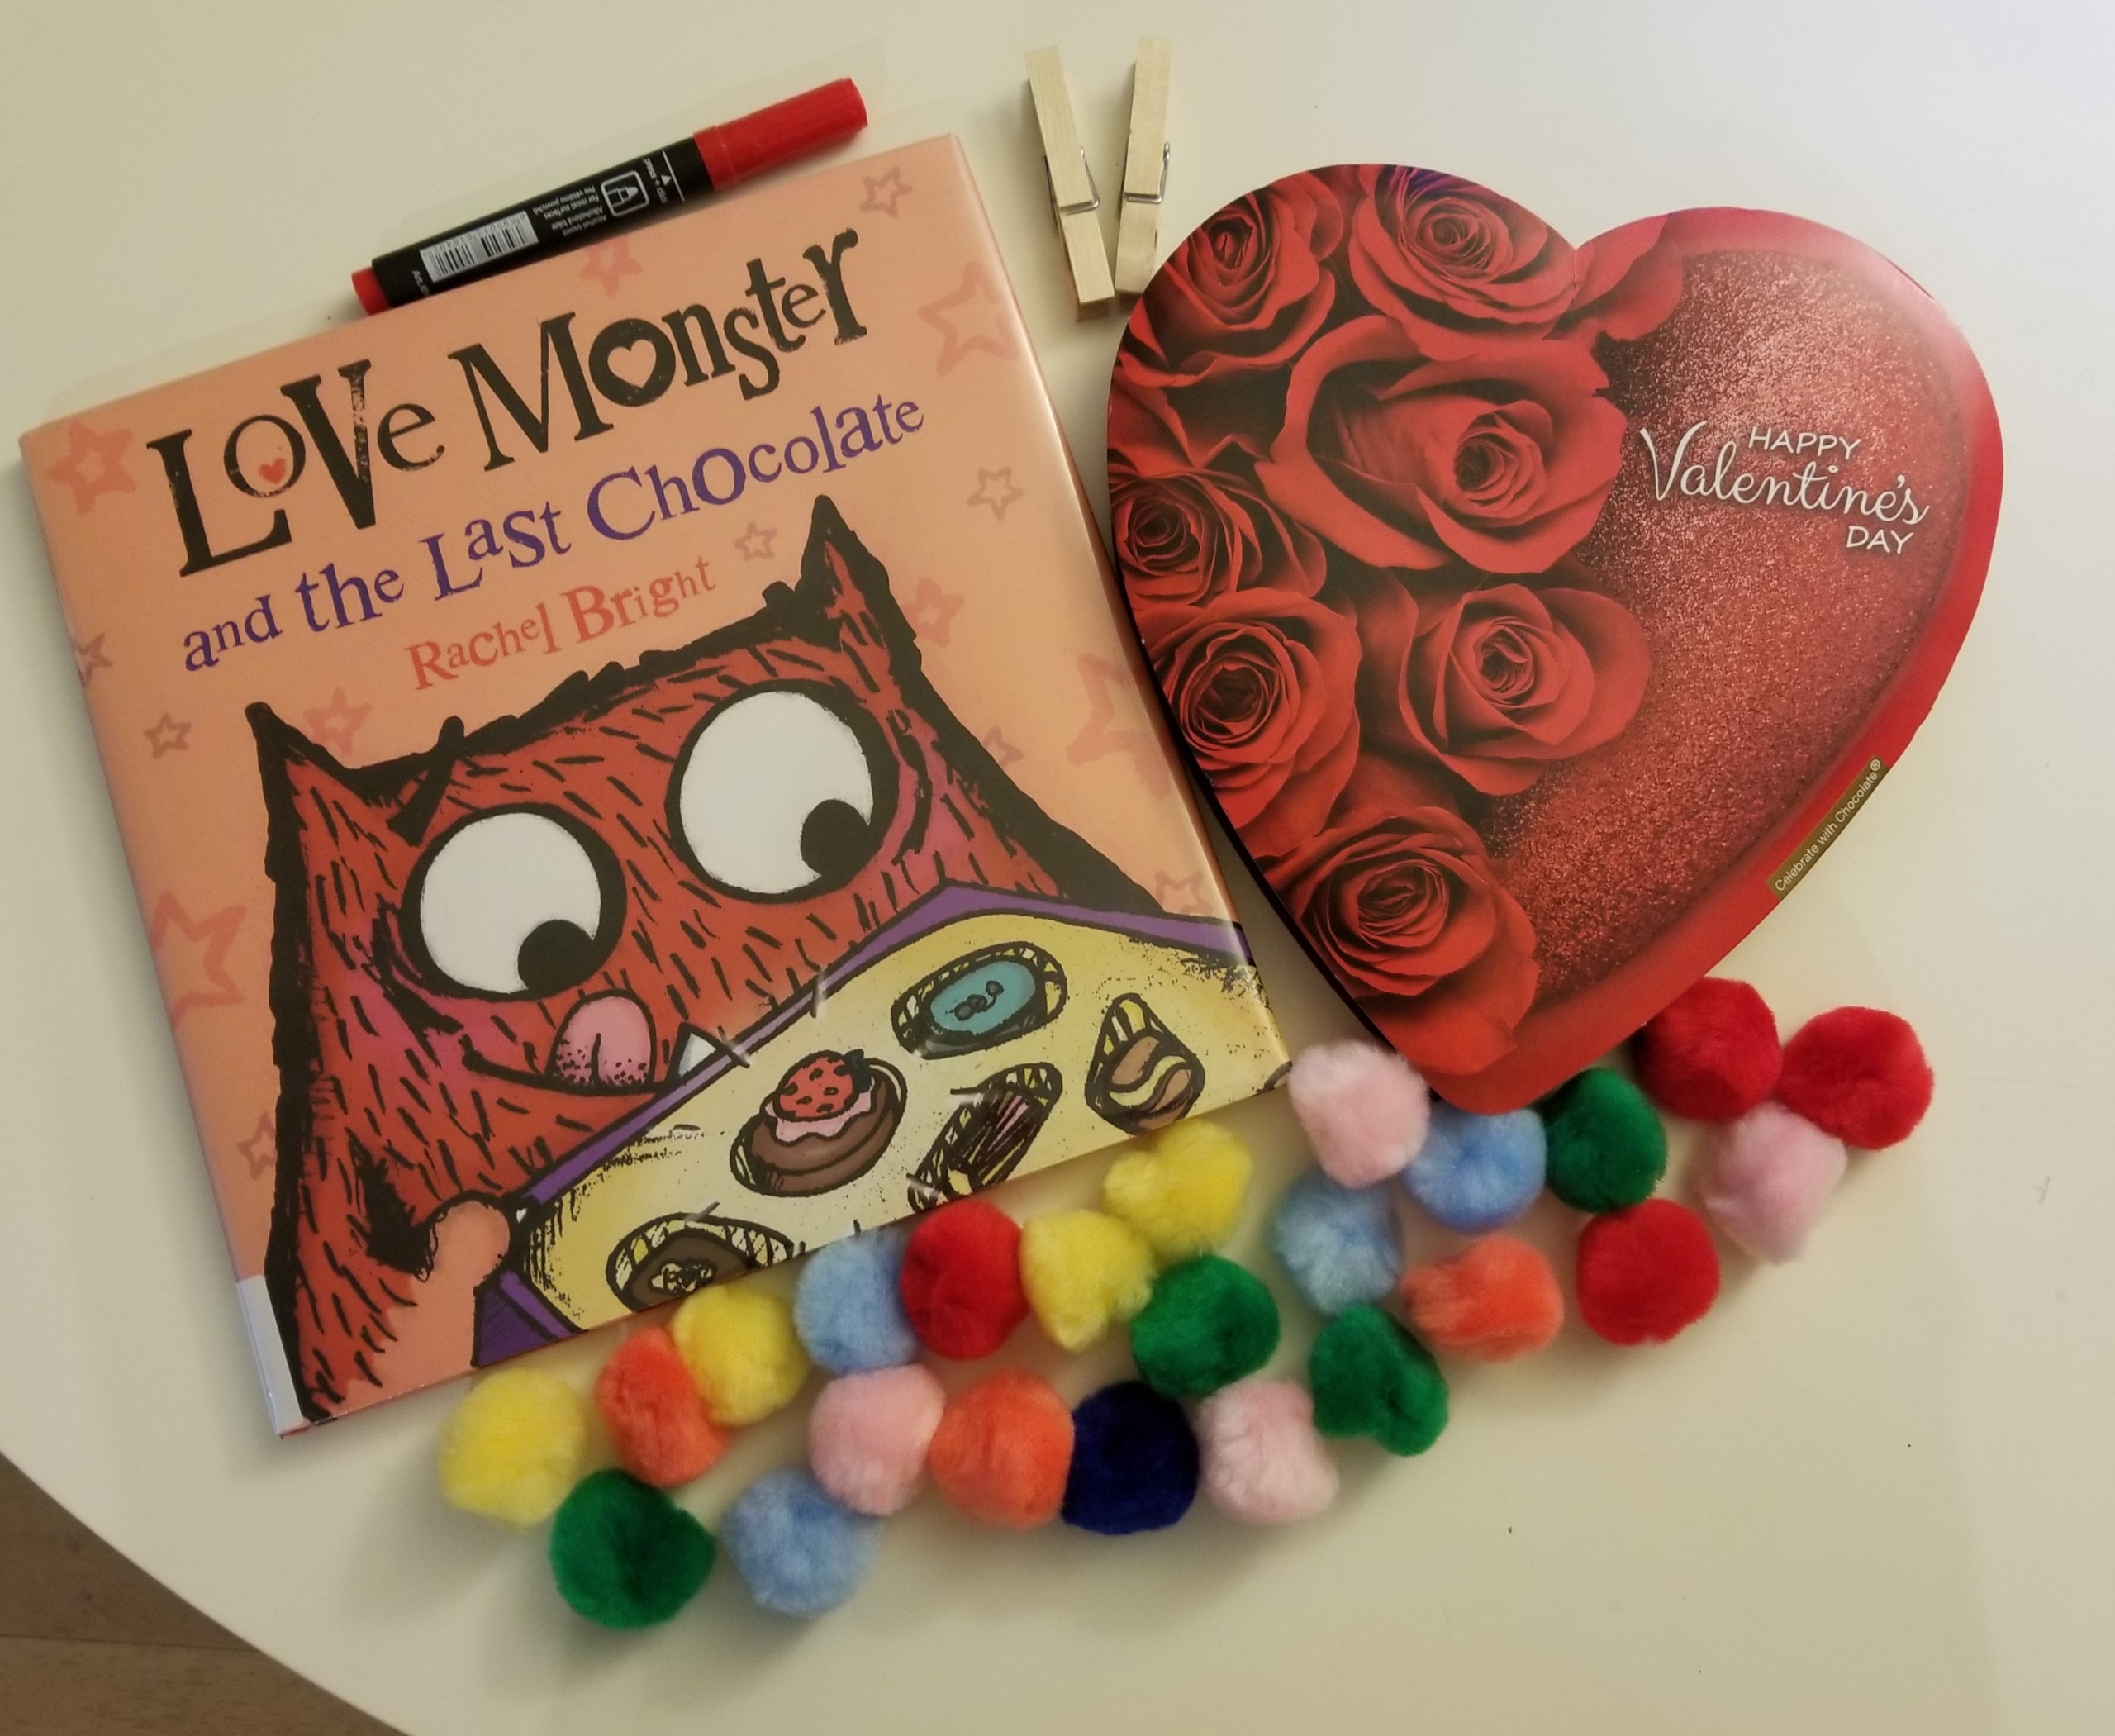
Materials:
- Love Monster and the Last Chocolate by Rachel Bright
- Valentine’s chocolate box
- Pom-poms
- Paper
- Scissors
- Markers
- Hot glue gun if your chocolates have paper wrappers instead of an insert with spaces for each chocolate
- Tweezers or clothespins (optional)
Step 1: Snuggle together and read Rachel Bright’s Love Monster and the Last Chocolate. Allow time for literacy-building tangents (check out our post on how to engage kids during read-alouds for maximum early literacy benefit).
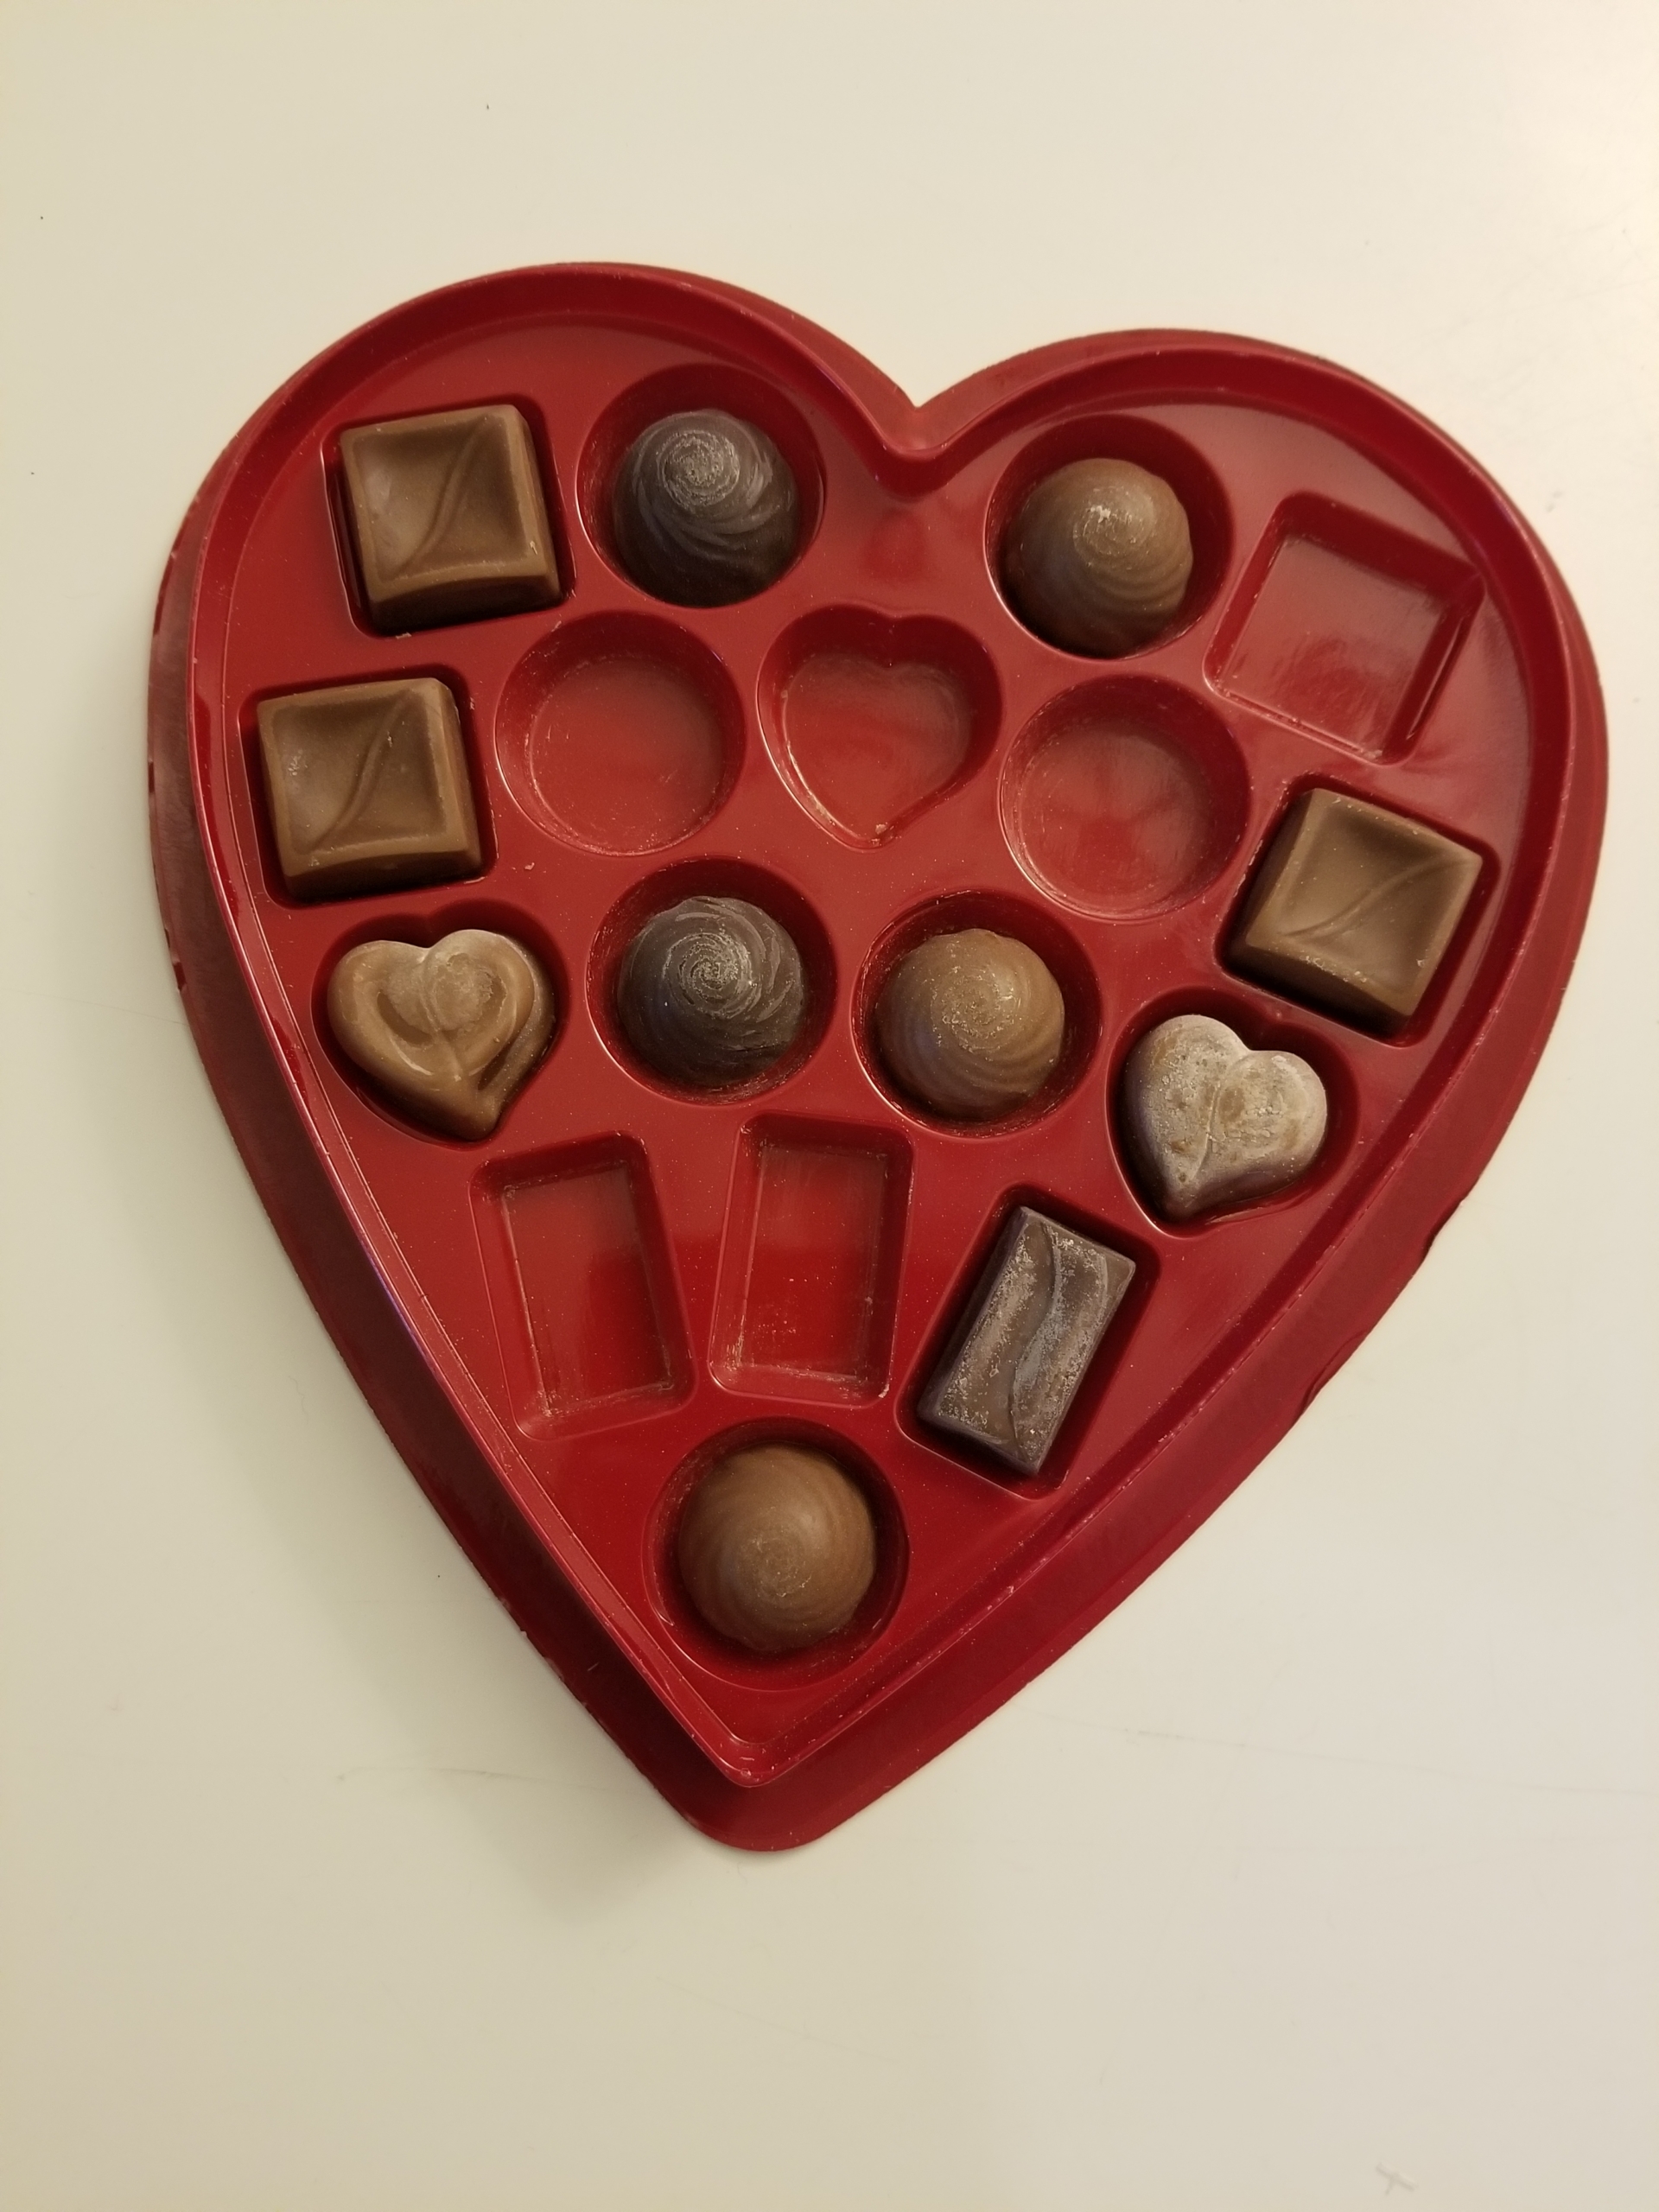
Step 2: Empty out the chocolate box! Share some with your child, and save the rest. (If you’re like me, you’ll want to keep some to reward yourself for your patience in the face of tantrums or missed naps!)
If you have the kind of chocolate box with little papers around each chocolate instead of an insert like the one shown below, glue the papers into place.
Step 3: Cut out pieces of paper that fit into the empty chocolate spots. If your box has paper wrappers, the pieces of paper should fit into each wrapper.
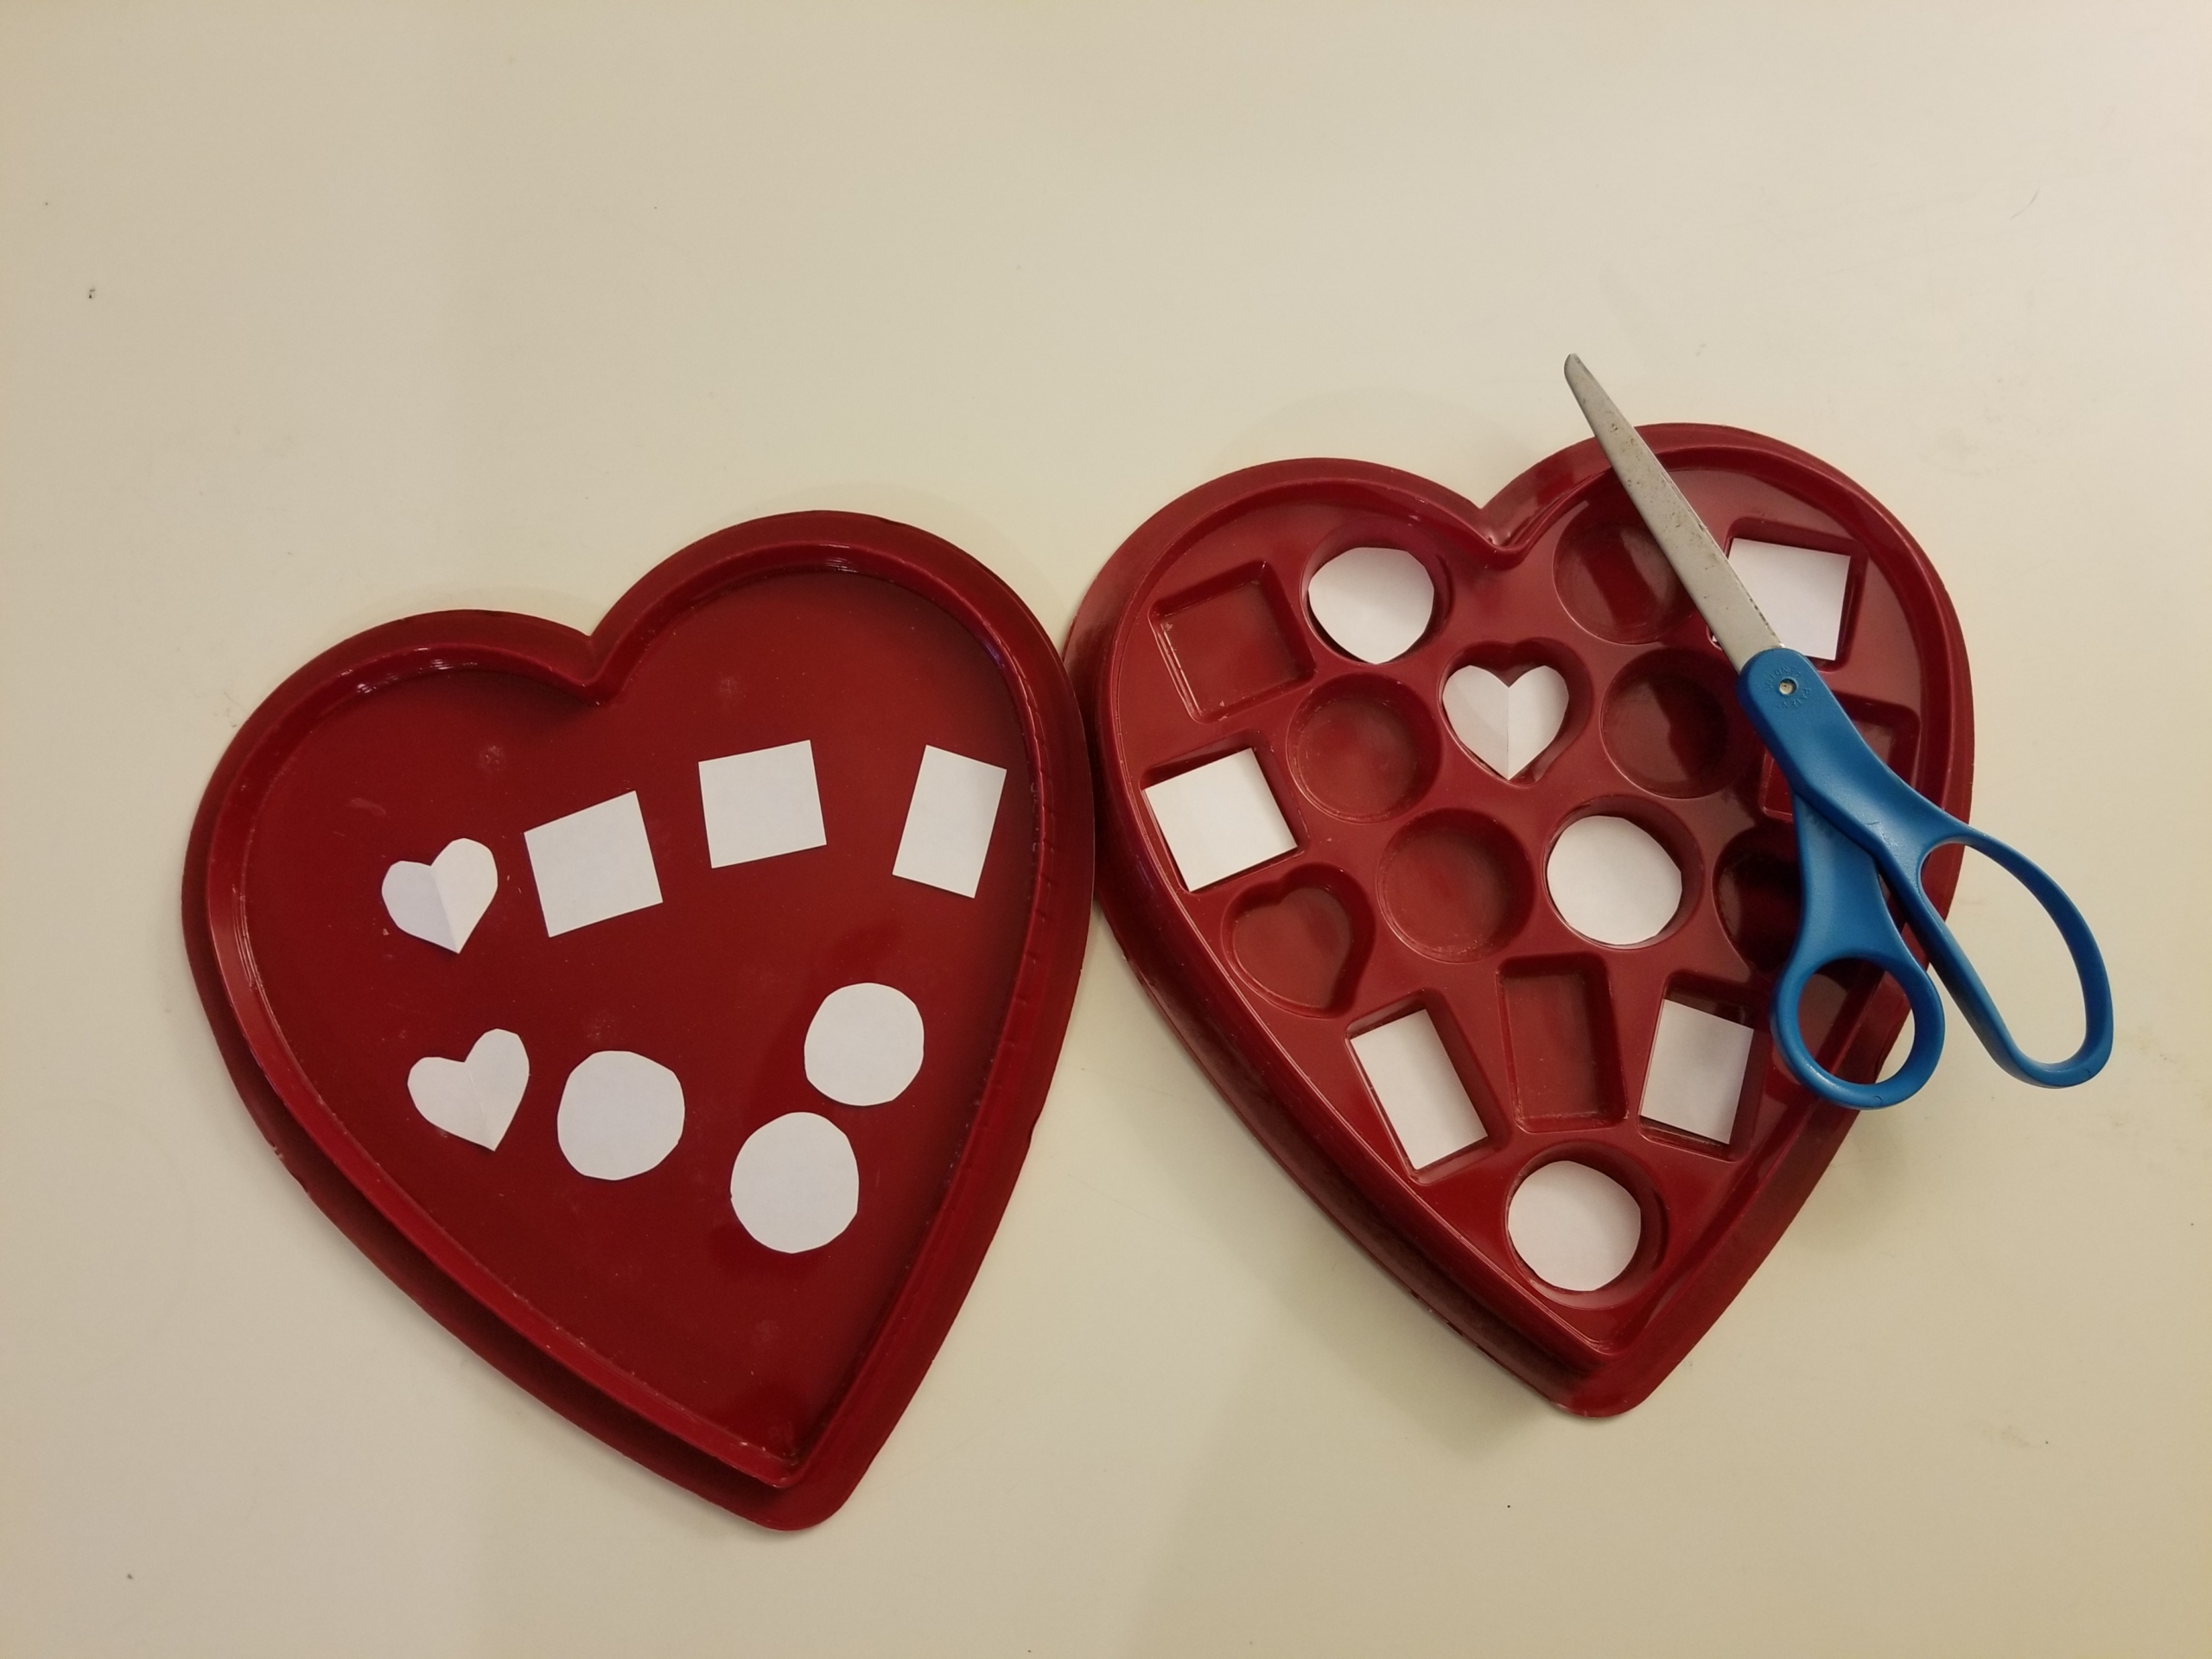
Step 4: Write a single uppercase letter on one of the pieces of paper, then write the letter in lowercase on another piece. You’ll write one uppercase and one lowercase of each letter, to make pairs. Continue until you have enough letters to fill the spaces. (If there are an uneven number of spaces, just leave the extra spot empty or fill it with a cute picture.)
Tip: When choosing letters, children respond well to the letters in their own name. Also, for kids who are just beginning to learn letters, l recommend avoiding multiple lowercase letters that look very similar. For example, b, d, p, and q all in the same game can be very confusing and discouraging.
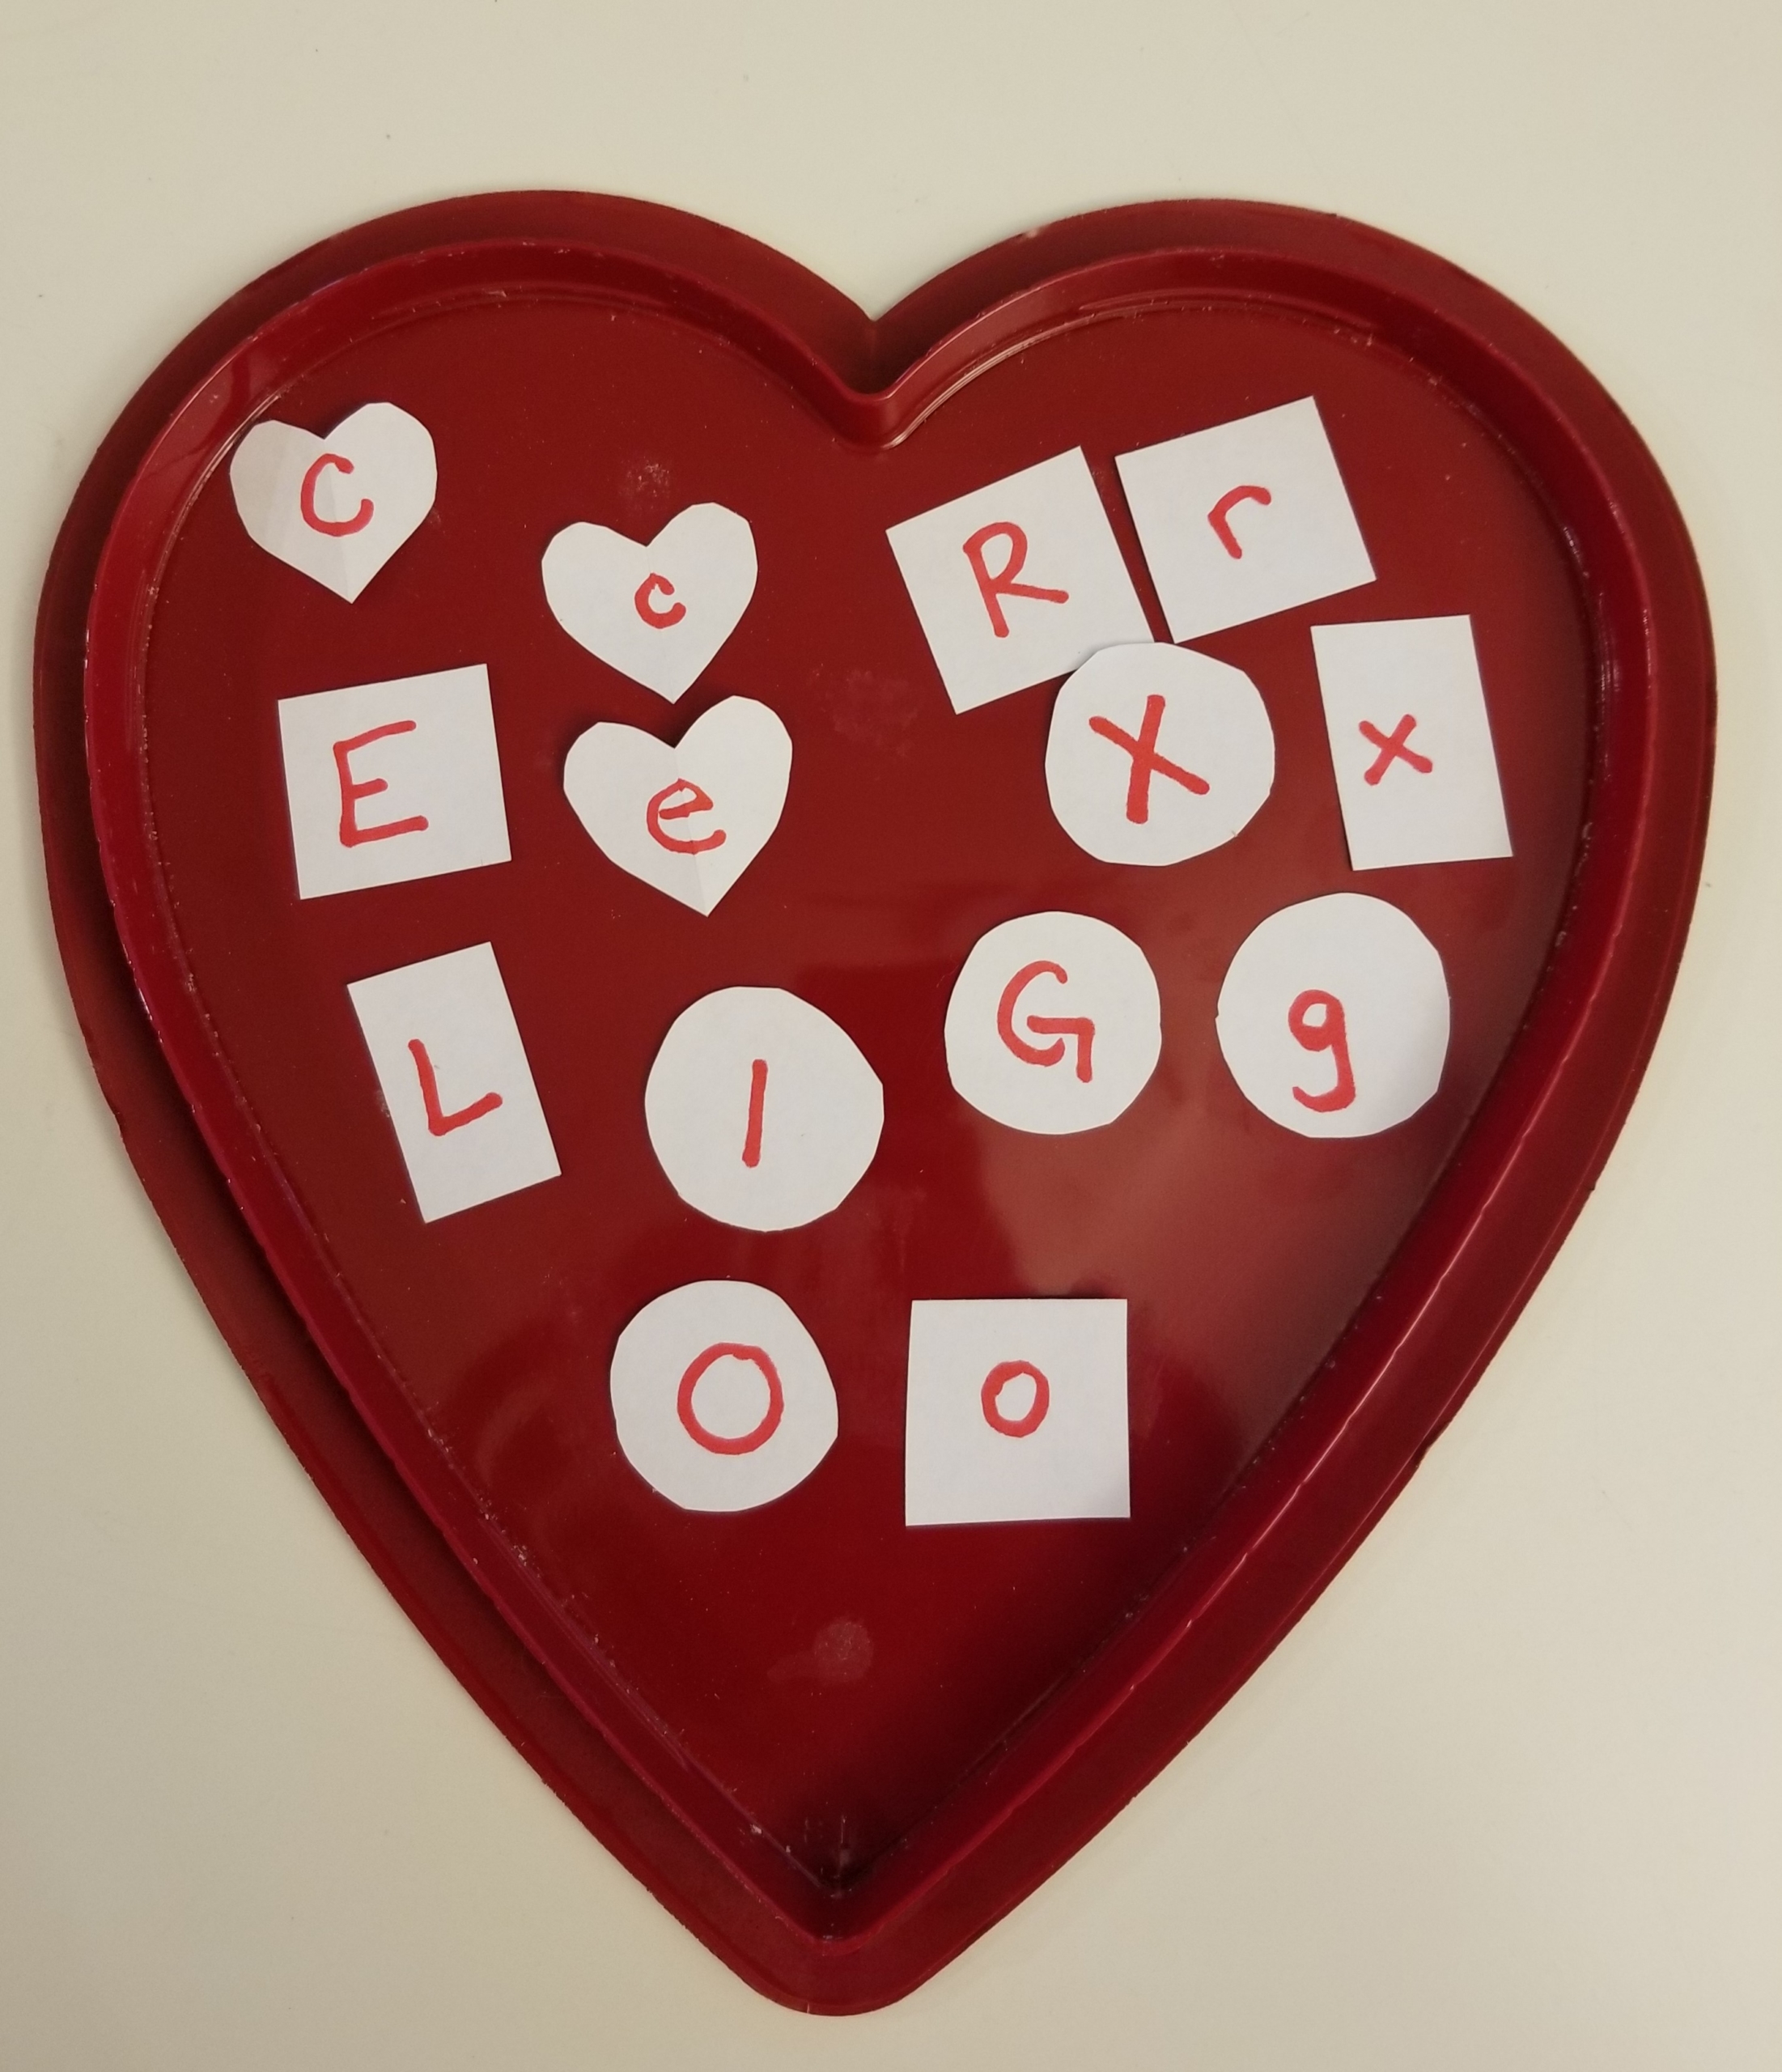
Step 5: Place the paper shapes into the empty chocolate spots, then cover each with a pom-pom. Be sure to mix up the pairs.
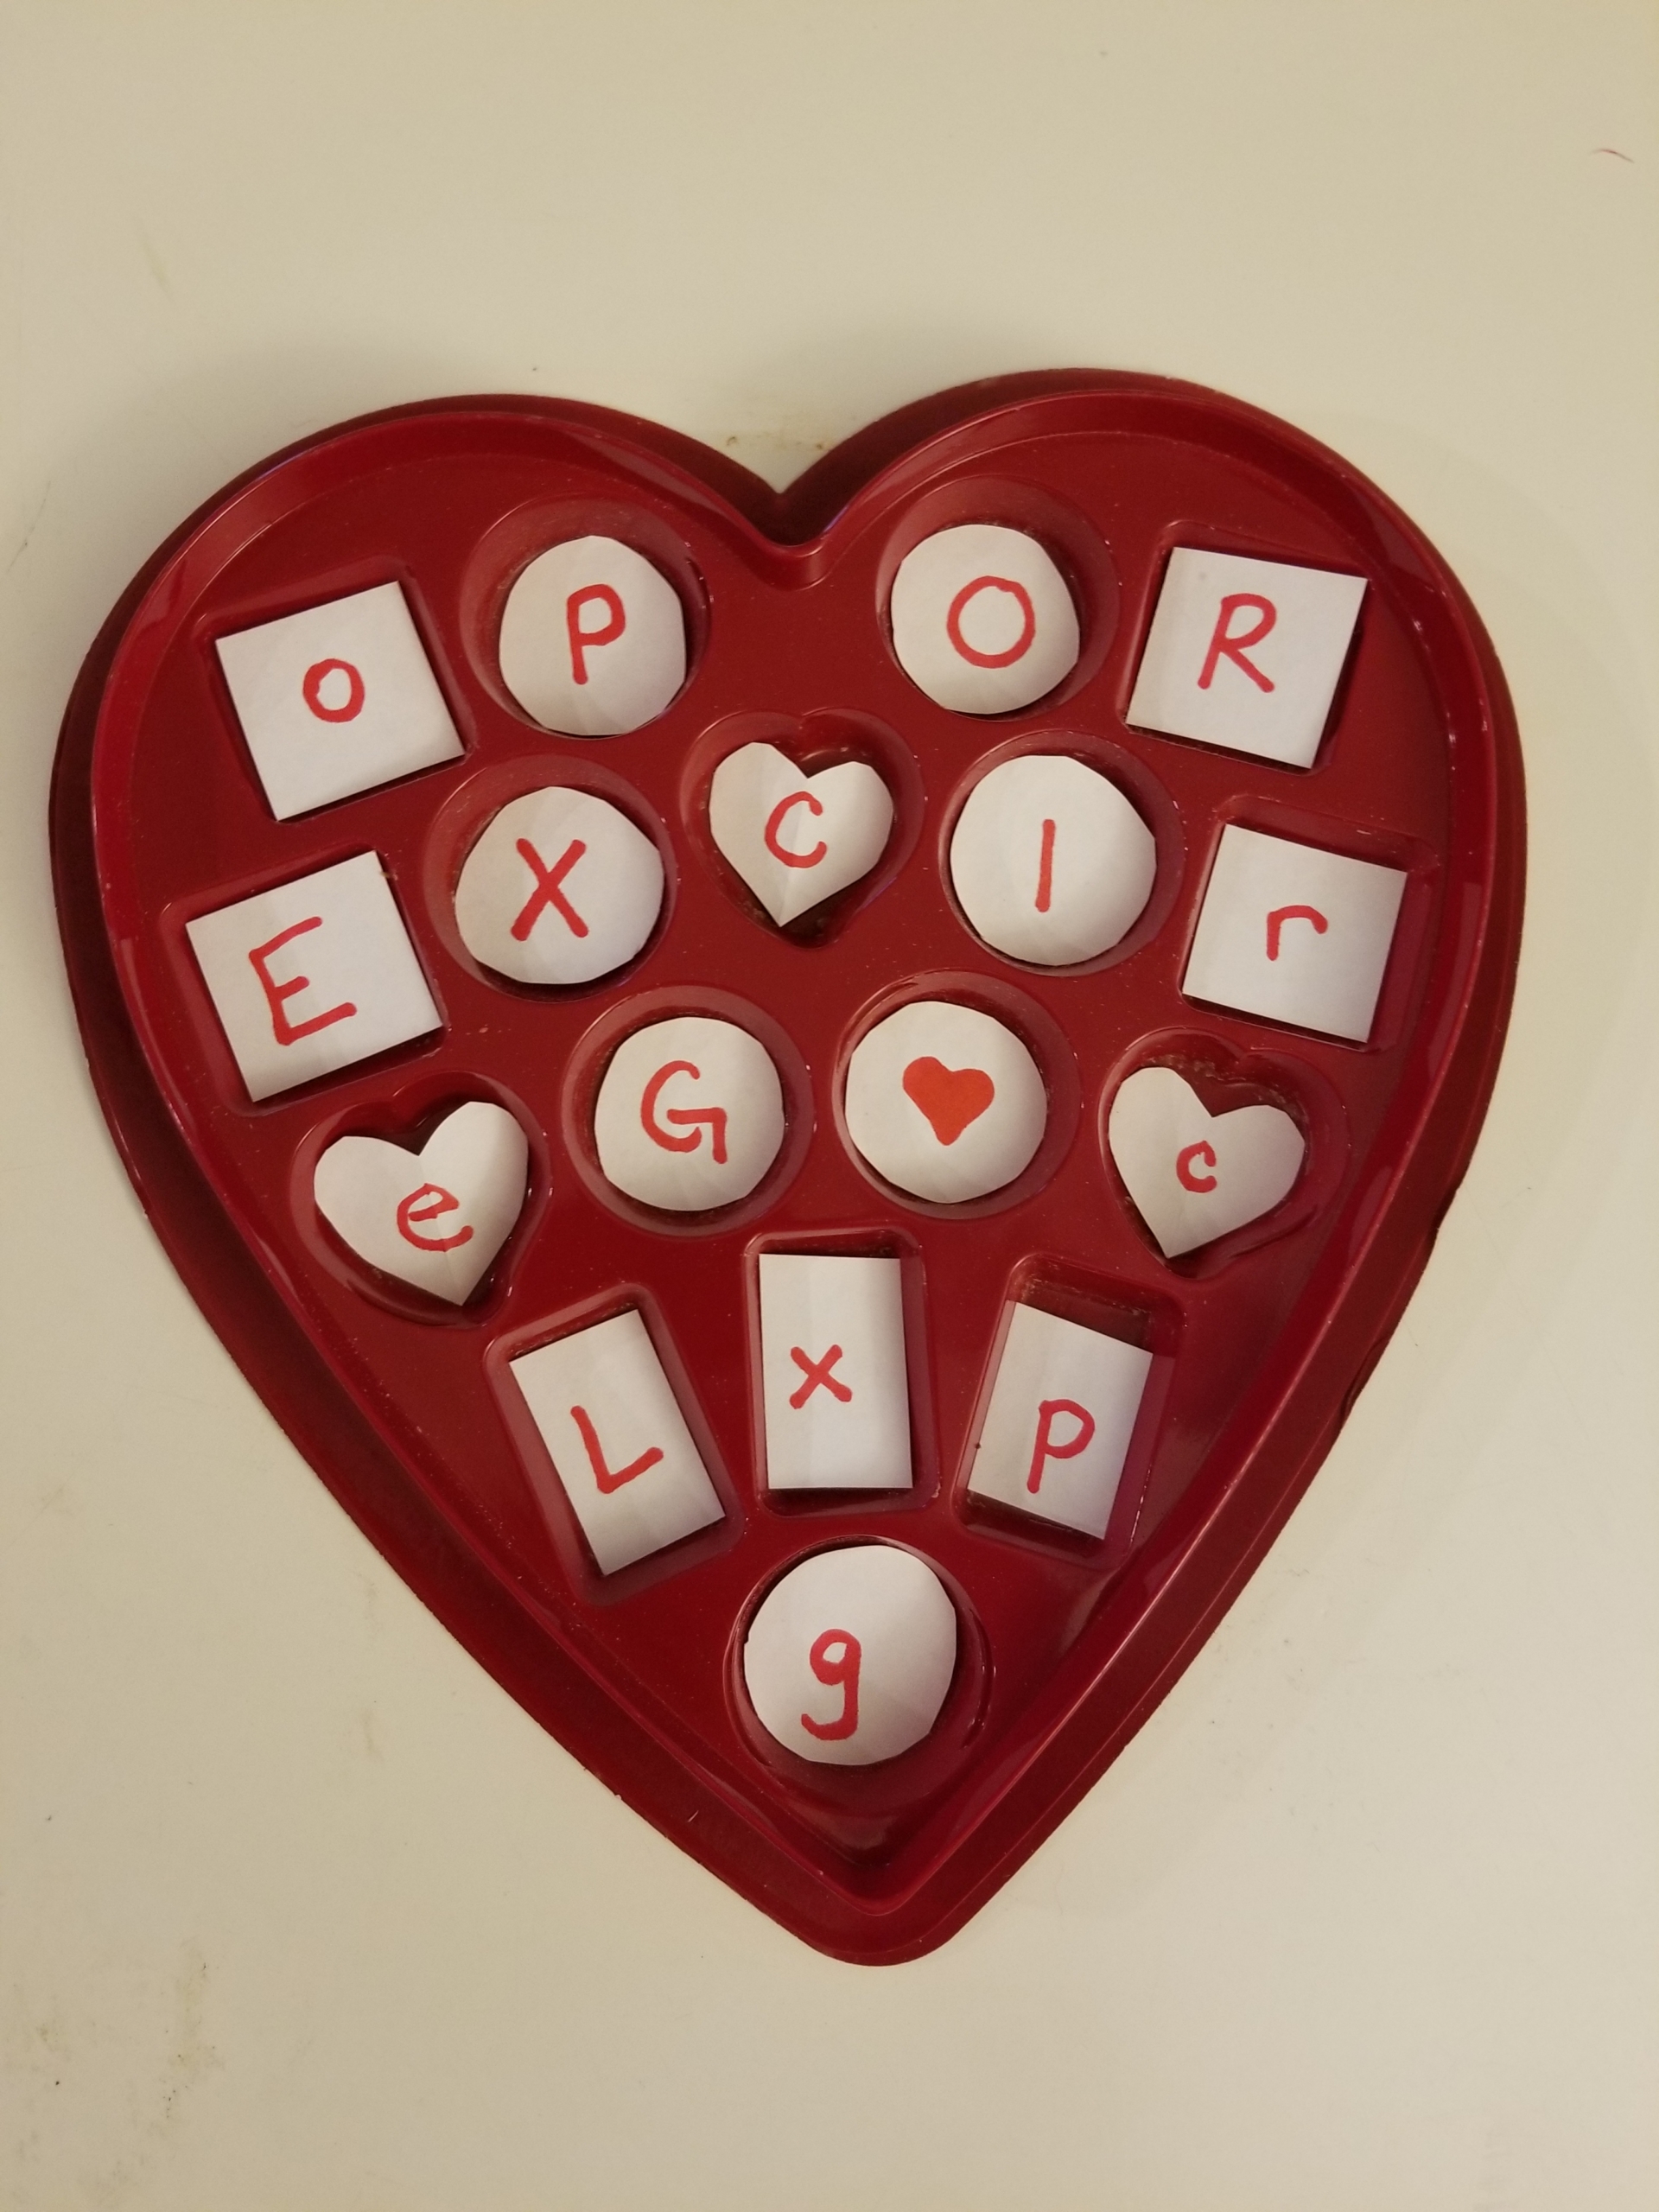
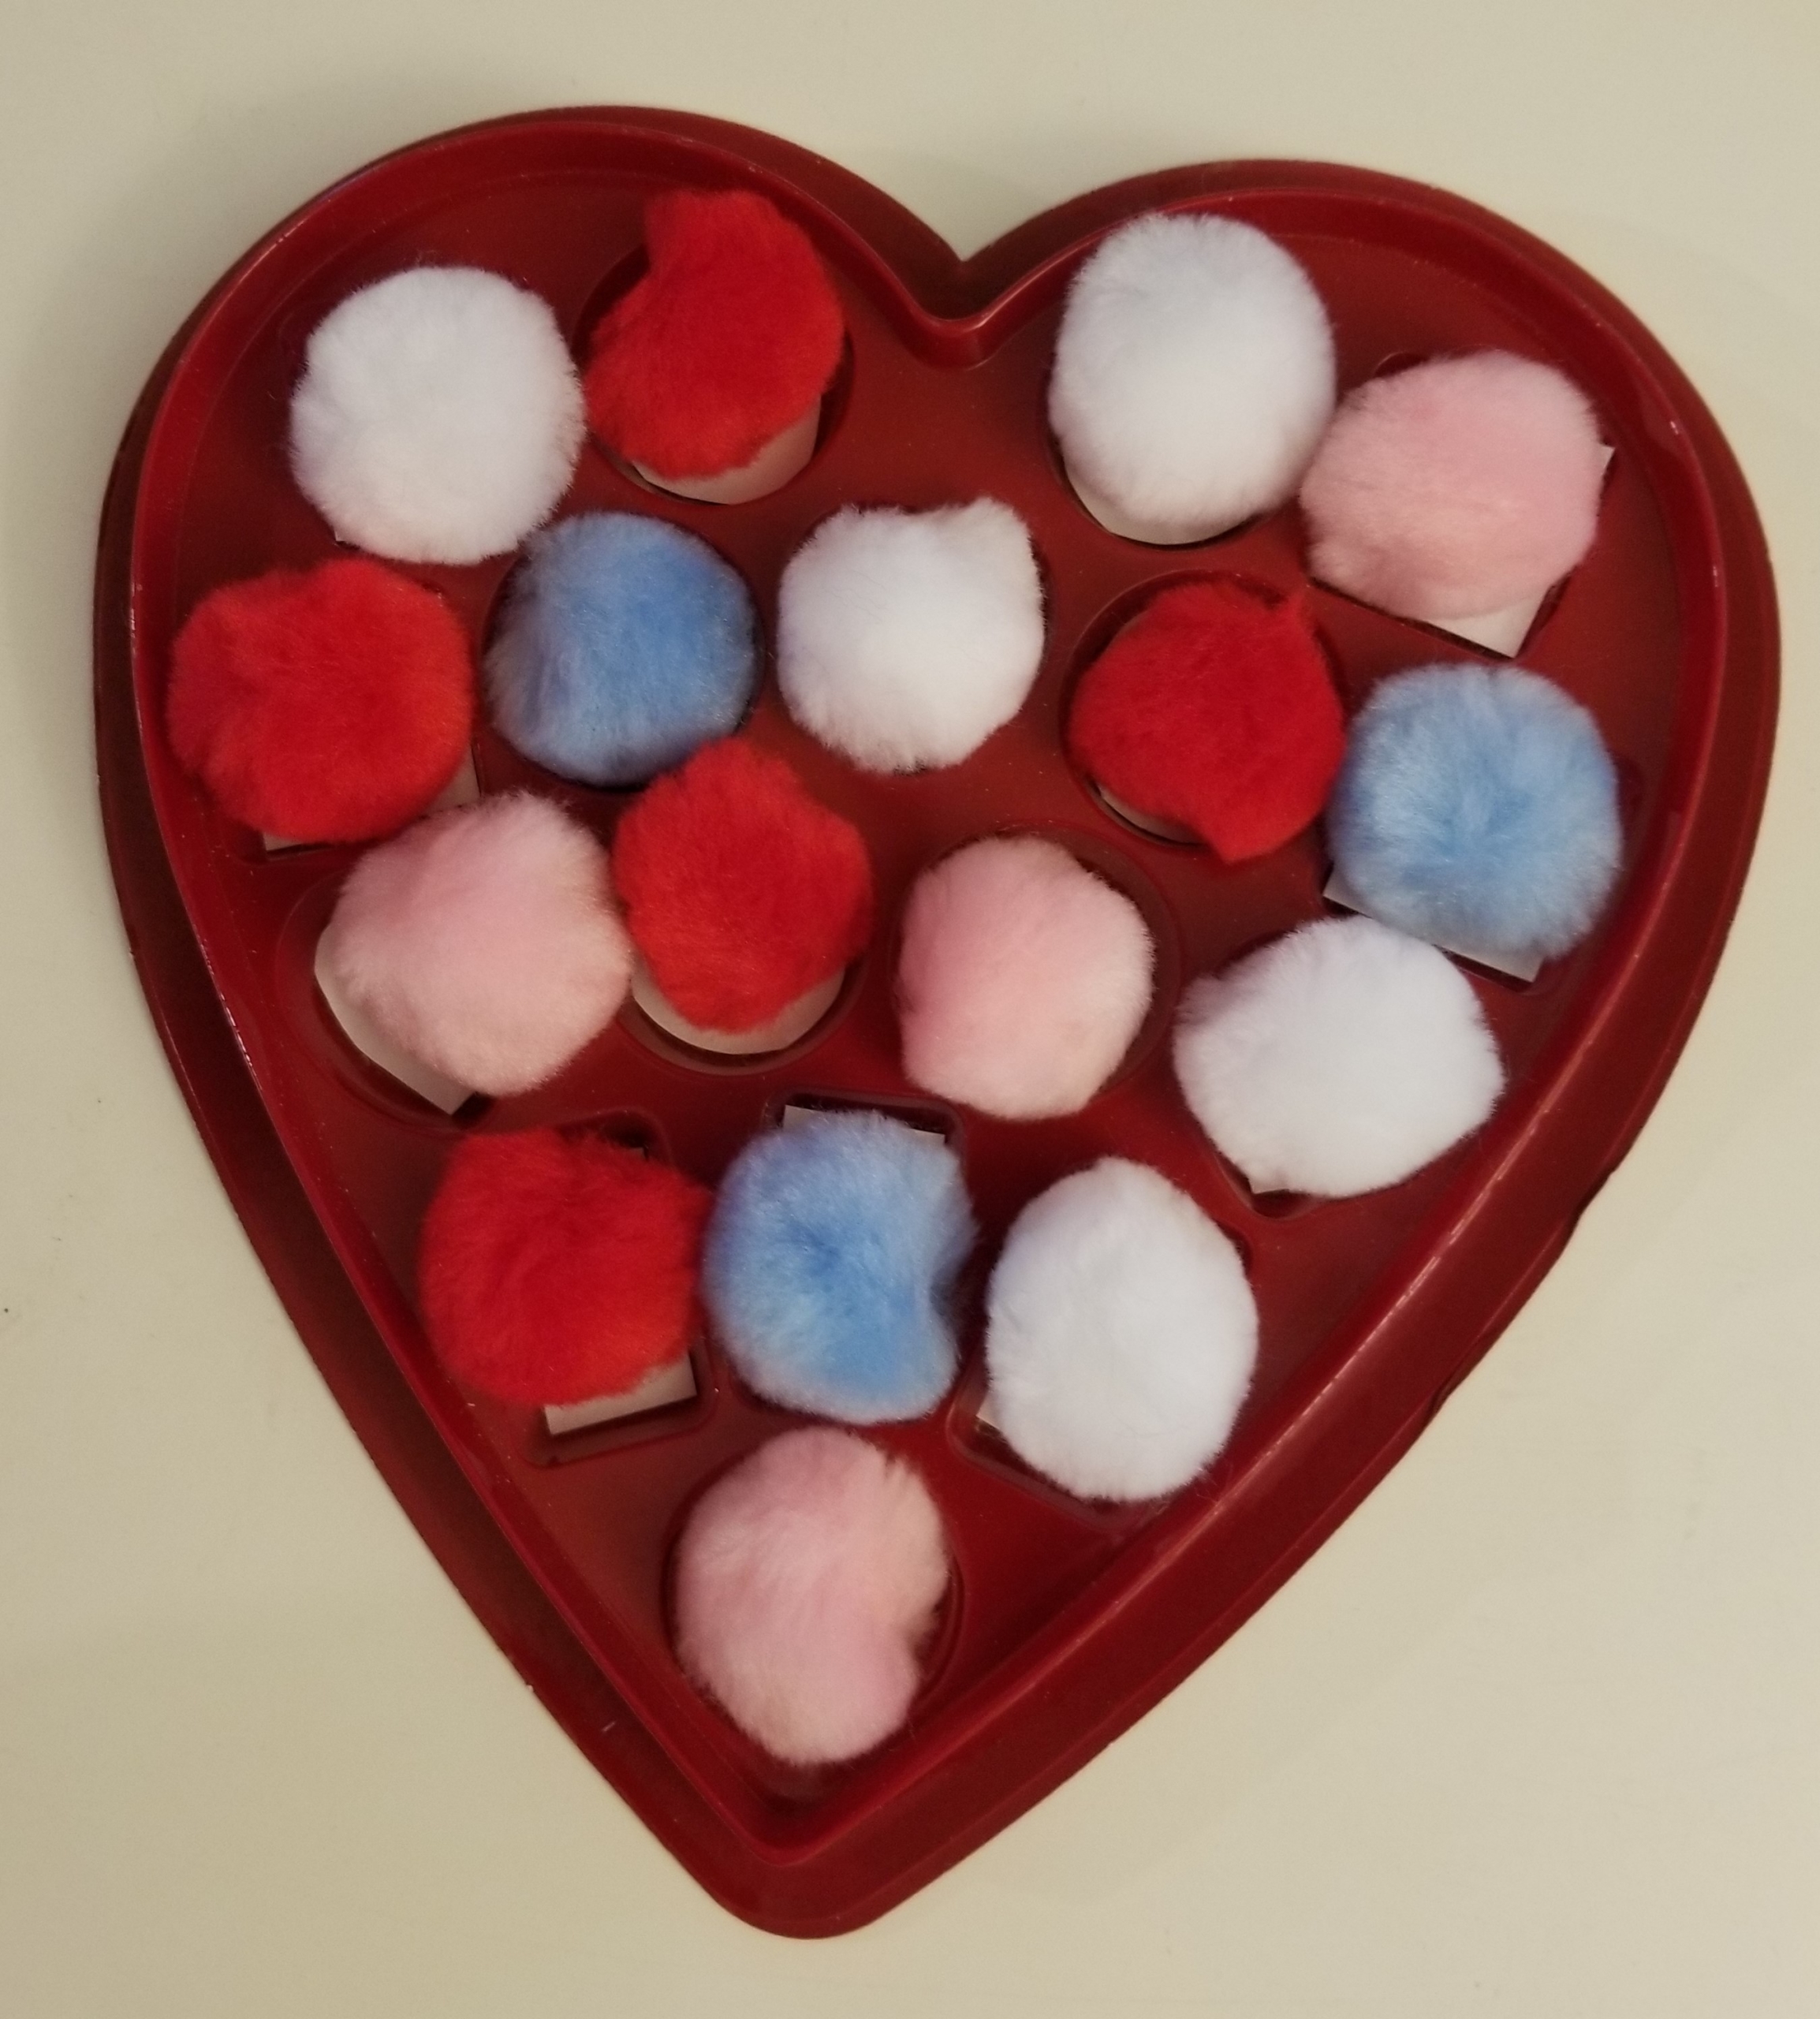
Step 6: Give your child the box and take turns lifting the pom-poms to look for letter matches! This game works just like a classic memory matching game: Each person lifts two pom-poms on their turn. If they get a match, they can leave the letters uncovered. If not, they put back the pom-poms to hide the letters again. When looking at the letters each time, use the moment to reinforce their names and sounds.
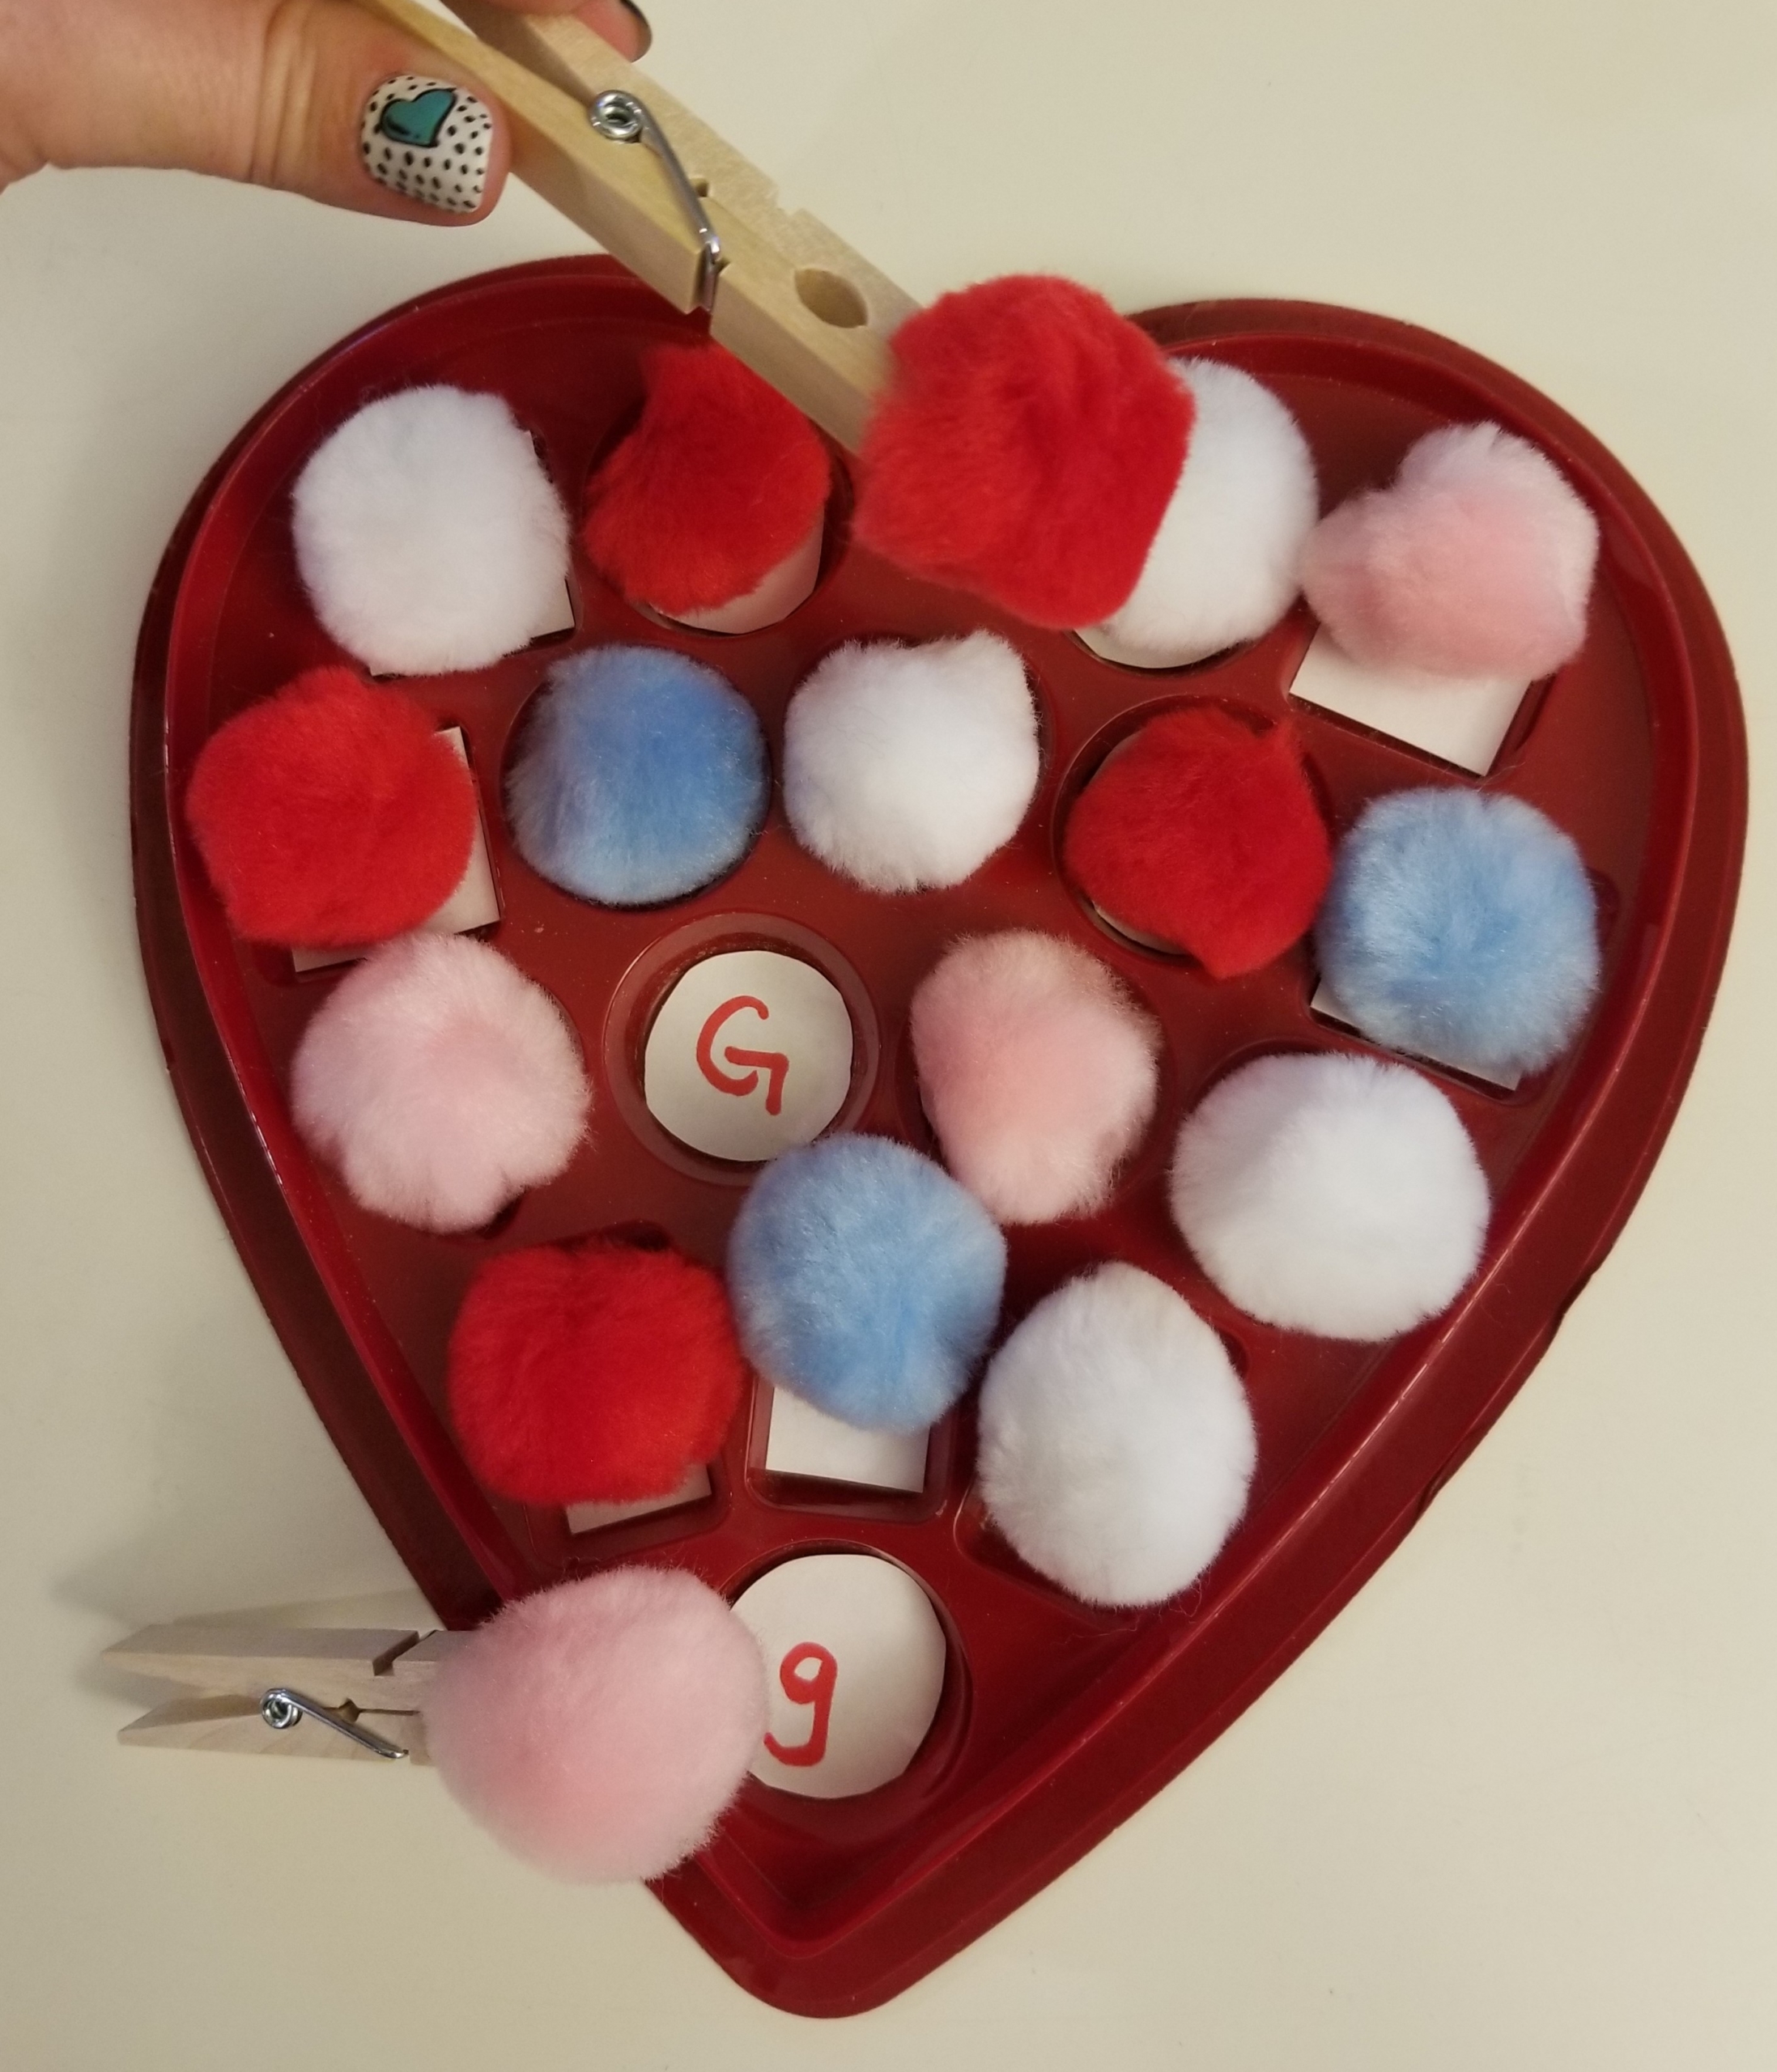
Optional: I use clothespins or tweezers as a way to pick up and put down the pom-poms. It’s a great way of developing fine motor skills and teaching proper pencil grip.
This activity is also easily adaptable. You can change the letters with each game, keeping it fresh and eventually using all 26 letters of the alphabet. You can adapt the game to teach counting, writing a number on one piece of paper and then drawing dots on its corresponding match. Or, for more advanced readers, pair rhyming words as matches.
There’s nothing as sweet as spending time with your child, so sneak in all the snuggles and playtime you can. Bonus: Enjoying a guilt-free chocolate treat in service of a good cause!
Pin Me for Reference :
There are hundreds of books dedicated to exploring the life, dreams, and work of Dr. Martin Luther King, Jr. Among picture books alone, approaches to King’s story include cradle-to-grave biographies, roundups of his famous speeches and quotes, and deep dives into stories of the March on Washington, the Montgomery Bus Boycott, his memorial in Washington, D.C., and more.
So how’s a parent to choose which books are best to explore with their child?
Here are a few of my top tips for finding the right-fit book to deepen your child’s knowledge of Martin Luther King, Jr.’s legacy and the American history it so vividly illustrates, plus write-ups of some great options curated by early childhood educator Chrysta Naron.
Explore Young MLK Jr.
Be sure to read books that depict King’s early life and his development into a Civil Rights Movement leader in adulthood. Stories that show King as a child and trace his rise in stature (and impact) help kids begin to see the roots of their own greatness—how their circumstances, education, and choices as young people today forge their futures.
Here are some great options:
Martin’s Big Words: The Life of Martin Luther King Jr. by Doreen Rappaport
This is a lovely choice because of the ways it seamlessly weaves historical context with direct quotations to illustrate how King learned to use “big words”—powerful, poetic, persuasive words—to fuel social change.
My Brother Martin: A Sister Remembers Growing Up with the Rev. Dr. Martin Luther King Jr. by Christine King Farris and illustrated by Chris Soentpiet
It’s often easy to place people on pedestals and think of them in just one light. King was a great man with incredible vision, strength, empathy, and fortitude. But he was also a little brother. He was a prankster, a friend, and the son of a preacher. My Brother Martin provides a personal and intimate look at King’s childhood and upbringing through the eyes of his sister, Christine King Farris. It offers insights into their family life, experiences, and the early influences that shaped him into the iconic civil rights leader he became. If you love a good origin story, this one is tops.
Put Leadership in Context
King is such a widely recognized historical figure that it’s easy to assume that kids know more about the man and the details of his life story than they really do. Years of Black History Month presentations and “I Have a Dream” speech snippets often don’t add up to a deep knowledge of what exactly King stood for, what he aimed to accomplish, and how he went about the work.
So be sure to include a solid chronology, such as I’ve Seen the Promised Land by Walter Dean Myers, in the mix of books you choose. And Martin Rising: Requiem for a King presents the final months of King’s life in verse.
My Daddy, Martin Luther King Jr. by Martin Luther King III and illustrated by AG Ford is an excellent way to get into King’s story from the perspective of his son. Martin Luther King III is a human rights activist who followed in the footsteps of his father. In 2013, he took pen to paper and crafted this lovely children’s book about his relationship with his dad.
The book explores the loving relationship King had with his children and how his work influenced their lives. What would it have been like to have been the son of such a prominent man? This book shows King’s life and values from another angle we rarely see. It is a touching book that makes this historical icon that much more knowable to us.
And while King’s “I Have a Dream” speech (or a segment of it) is a staple in classrooms across the United States, it’s also worth delving into the text of that most-famous and most-quoted speech. The book I Have a Dream, lusciously illustrated by Kadir Nelson, is a beautiful and accessible way to enhance your child’s understanding. This rendition brings King’s words to life for young children, making the message more accessible and engaging. For an even more immersive experience, consider playing a recording of King’s delivery of the speech as you go through the book.
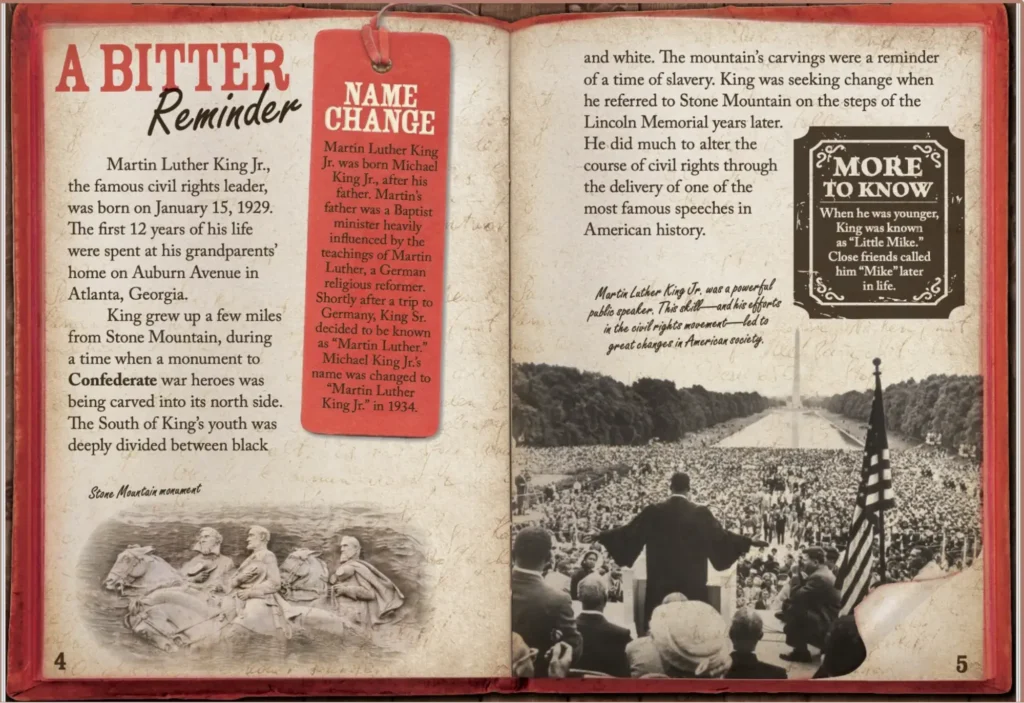
Keep in mind that the segregation, violence, and injustice of the Civil Rights era (and today) is difficult subject matter, but books needn’t be relentless in their focus on the tough stuff. Particularly with denser, more challenging material, kids crave and respond to a little digression now and then to lighten the cognitive load. Look for books that use info boxes and other graphic elements to keep things engaging. Take this page from Martin Luther King Jr. in His Own Words by Ryan Nagelhout. The eye-catching bookmark illustration and “More to Know” boxes break up the main text and deliver fascinating tidbits.
Go Behind the Scenes
Although history is often told with a focus on great men doing big things, the reality is that many people participate in the slow march toward progress. One of my absolute favorite behind-the-scenes books is A Place to Land: Martin Luther King Jr. and the Speech That Inspired a Nation by Barry Wittenstein. The text describes the making of the “I Have a Dream” speech, alongside gorgeous illustrations by Jerry Pinkney that show the faces of those who helped King craft his message and the numerous everyday heroes who inspired its content. Young readers will gain valuable insights into the collaborative, deliberative nature of writing to fuel social change.
As a Kirkus reviewer wrote, “Wittenstein’s free-verse narrative perfectly captures the tension leading up to the speech as each adviser urged his own ideas while remaining a supportive community. Pinkney’s trademark illustrations dramatize this and the speech, adding power and further illuminating the sense of historical importance. Gives readers a fresh and thrilling sense of what it took to make history.”
Another excellent option is The Youngest Marcher by Cynthia Levinson and illustrated by Vanessa Brantley Newton. It’s a touching exploration of the Civil Rights Movement, suitable for both parents and their young children. The book beautifully narrates the remarkable story of Audrey Faye Hendricks, the youngest participant in a pivotal moment of the movement.
Through vibrant illustrations and age-appropriate language, it introduces young readers to the profound impact King’s teachings had on Audrey’s courageous stand against segregation. This book serves as an accessible and engaging tool for initiating conversations with children about the values of equality, justice, and the enduring legacy of the movement for civil rights. It also offers a wonderful opportunity to understand the impact of King’s personal relationships on individuals like Audrey.
More books that show MLK in community with others to make change include:
- Memphis, Martin, and the Mountaintop: The Sanitation Strike of 1968 by Alice Faye Duncan
- The Teachers March!: How Selma’s Teachers Changed History by Sandra Neil Wallace and Rich Wallace
- Martin & Mahalia: His Words, Her Song by Andrea Davis Pinkney & Brian Pinkney
Grapple with the Big Ideas
Older children who know King’s biography may be ready to dive into less straightforward accounts of his legacy. Faith Ringold’s My Dream of Martin Luther King explores King’s legacy through the deeply personal lens of a dream the artist had.
“In my dream, Martin appeared first as a child in a place so huge that it encompassed the whole world and all its people,” she writes in an opening scene. “There were children and old folks, men and women of all colors, races, and religions. They carried bags containing their prejudice, hate, ignorance, violence, and fear, which they intended to trade for hope, freedom, peace, awareness, and love. Some people had bigger bags than others, but everybody had something to trade.”
Touching on America’s terrible history of discrimination, violence, and segregation, the book ultimately points toward progress and optimism born of imagination. Abstract, yet resonant, it spurs more sophisticated conversation about the nature of our waking dreams and the path to accomplishing them.
Like this post? Share it!
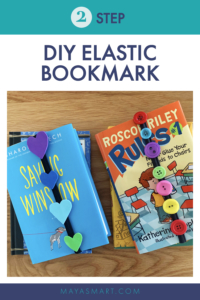
At last! A bookmark that won’t slide out of place and get lost in the depths of kids’ backpacks (or yours). Bookmarks are key tools in raising readers, and we’ve got you covered with this super-simple, two-step bookmark craft that makes adorable, functional page markers in minutes flat. All you need are some simple materials and a bit of creativity—or just start with our examples.
You can easily turn these elastic bookmarks into an awesome holiday craft, gift, or party favor by decorating them with holiday colors or shapes cut to fit your theme. There are endless possibilities when it comes to embellishments: We picked a few of our favorites from craft-drawer staples, but they’ll be cute with just about anything you have on hand! This kid-friendly DIY book craft is perfect for all ages. You’ll just want to supervise kids using the hot glue gun.
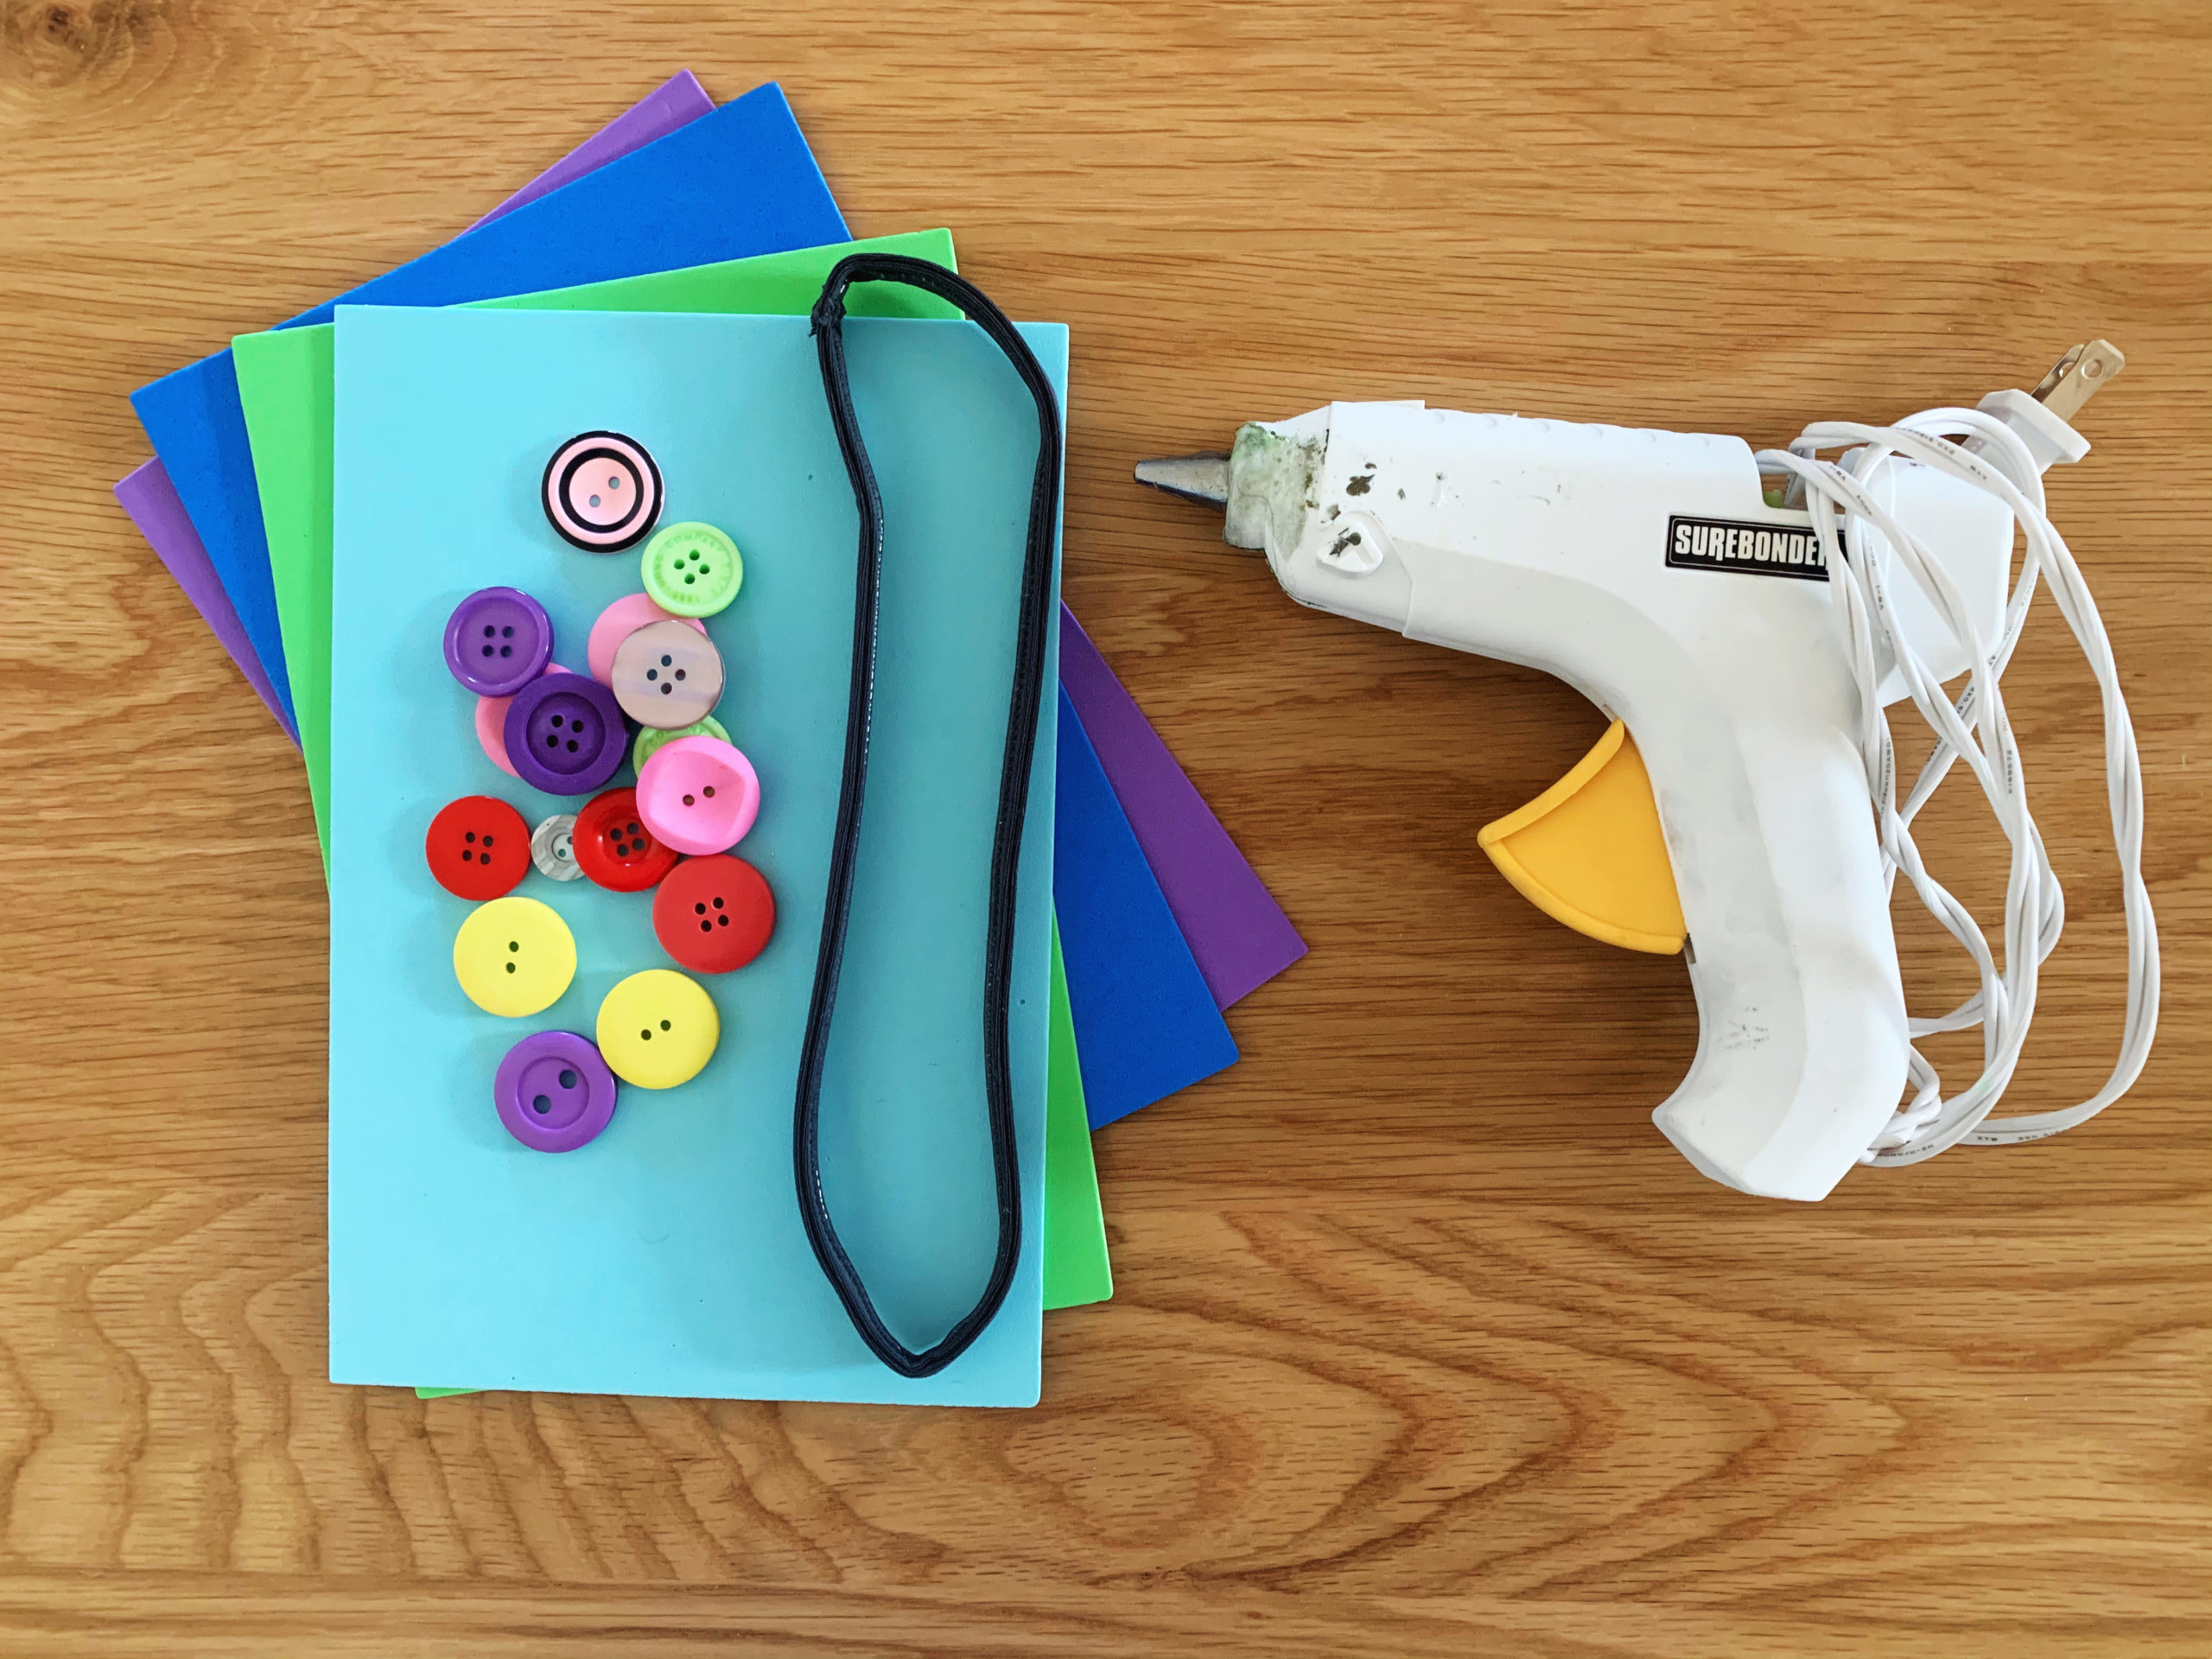
Materials:
- Elastic headbands (make sure they’re the flat elastic variety)
- Hot glue gun
- Embellishments of your choice!
Embellishment Ideas: There are so many options out there, but here are three recommendations to get you started!
- Buttons: Maybe you have some mismatched buttons around the house … send your kids on a scavenger hunt through the junk drawers!
- Craft-foam letters/shapes: Cut out letters or shapes from craft foam.
- Paper flowers: Make one of our paper flowers out of old book pages. After all, what better way to decorate a bookmark than with upcycled book pages?
Have other ideas in mind? Please share in the comments below—we would love to hear what you come up with!
Cost: Parents of kids who like to pull their hair back often have one (or a few!) too many elastic hairbands around, in which case this is the perfect way to clean out that bathroom cabinet. Otherwise, you can purchase a pack of headbands online or at a local drugstore for about $5. Glue guns are high on our list of must-have craft tools and average around $10. Get creative with your embellishments, and that part should cost you nothing!
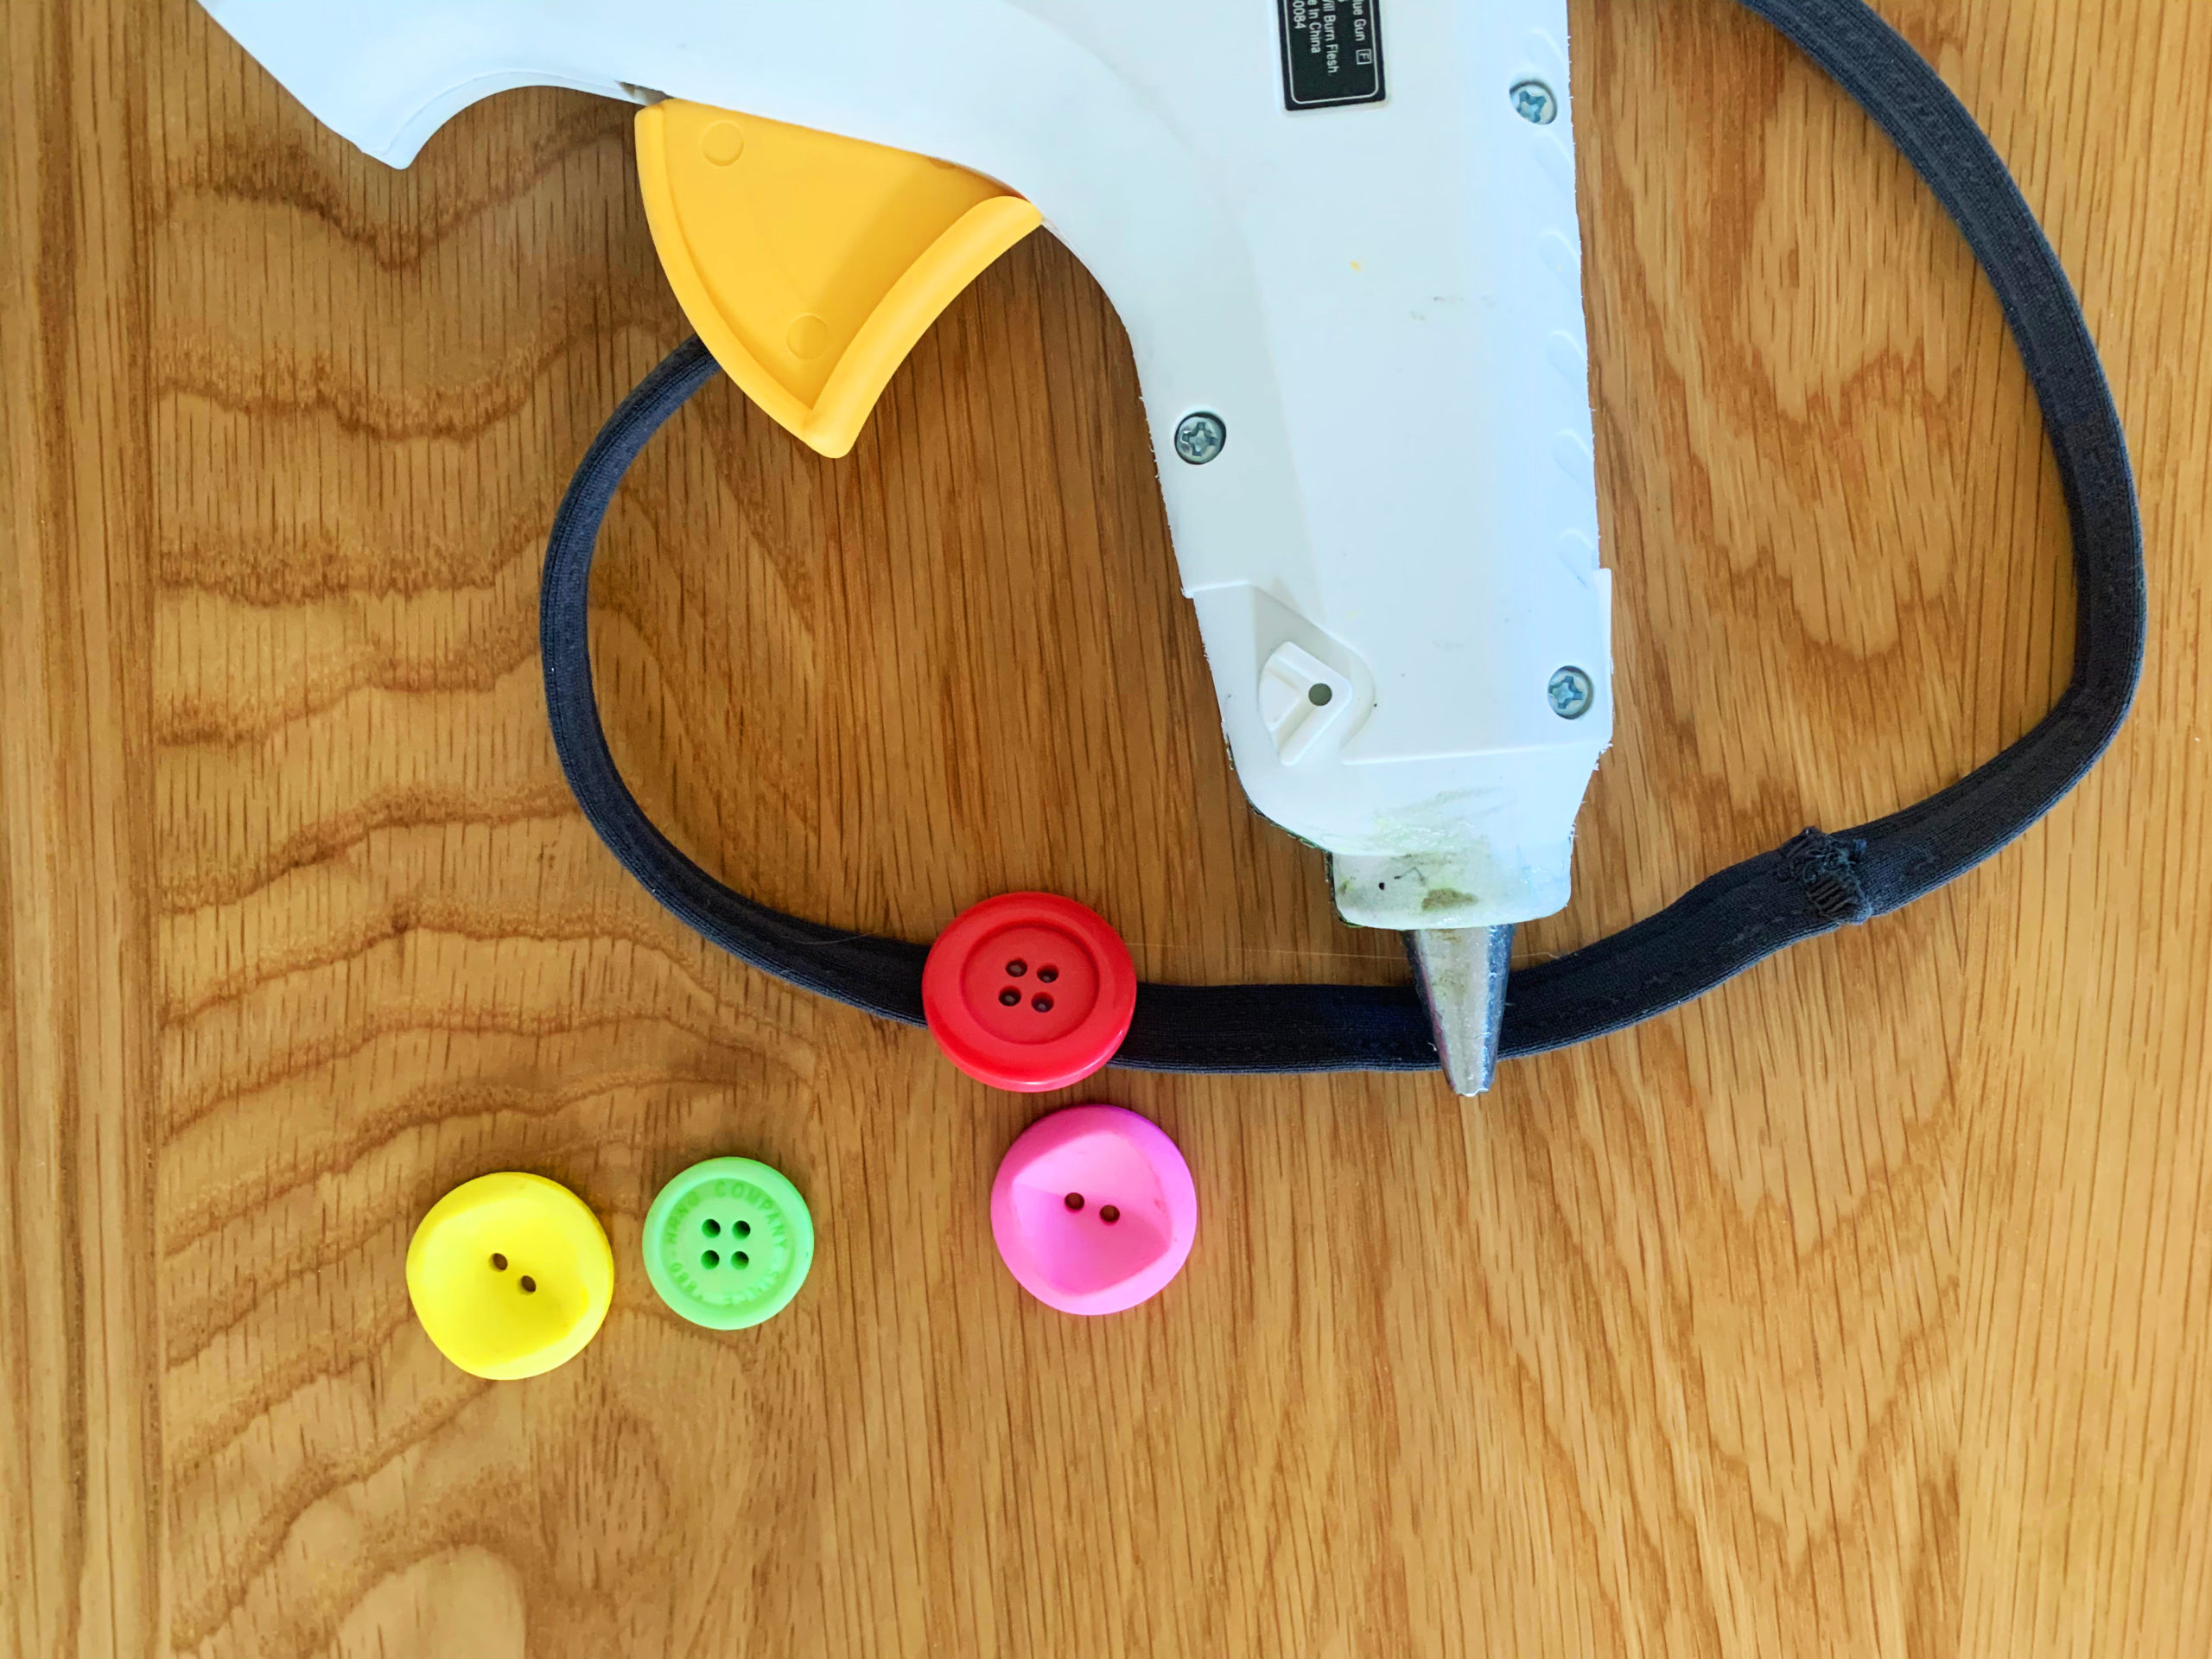
Step 1: The first step is just to plug in your glue gun and let it heat up while you gather or make your embellishments. Remember: Kids will need your supervision for the glue gun. If you are making your own embellishments, go ahead and do that now.
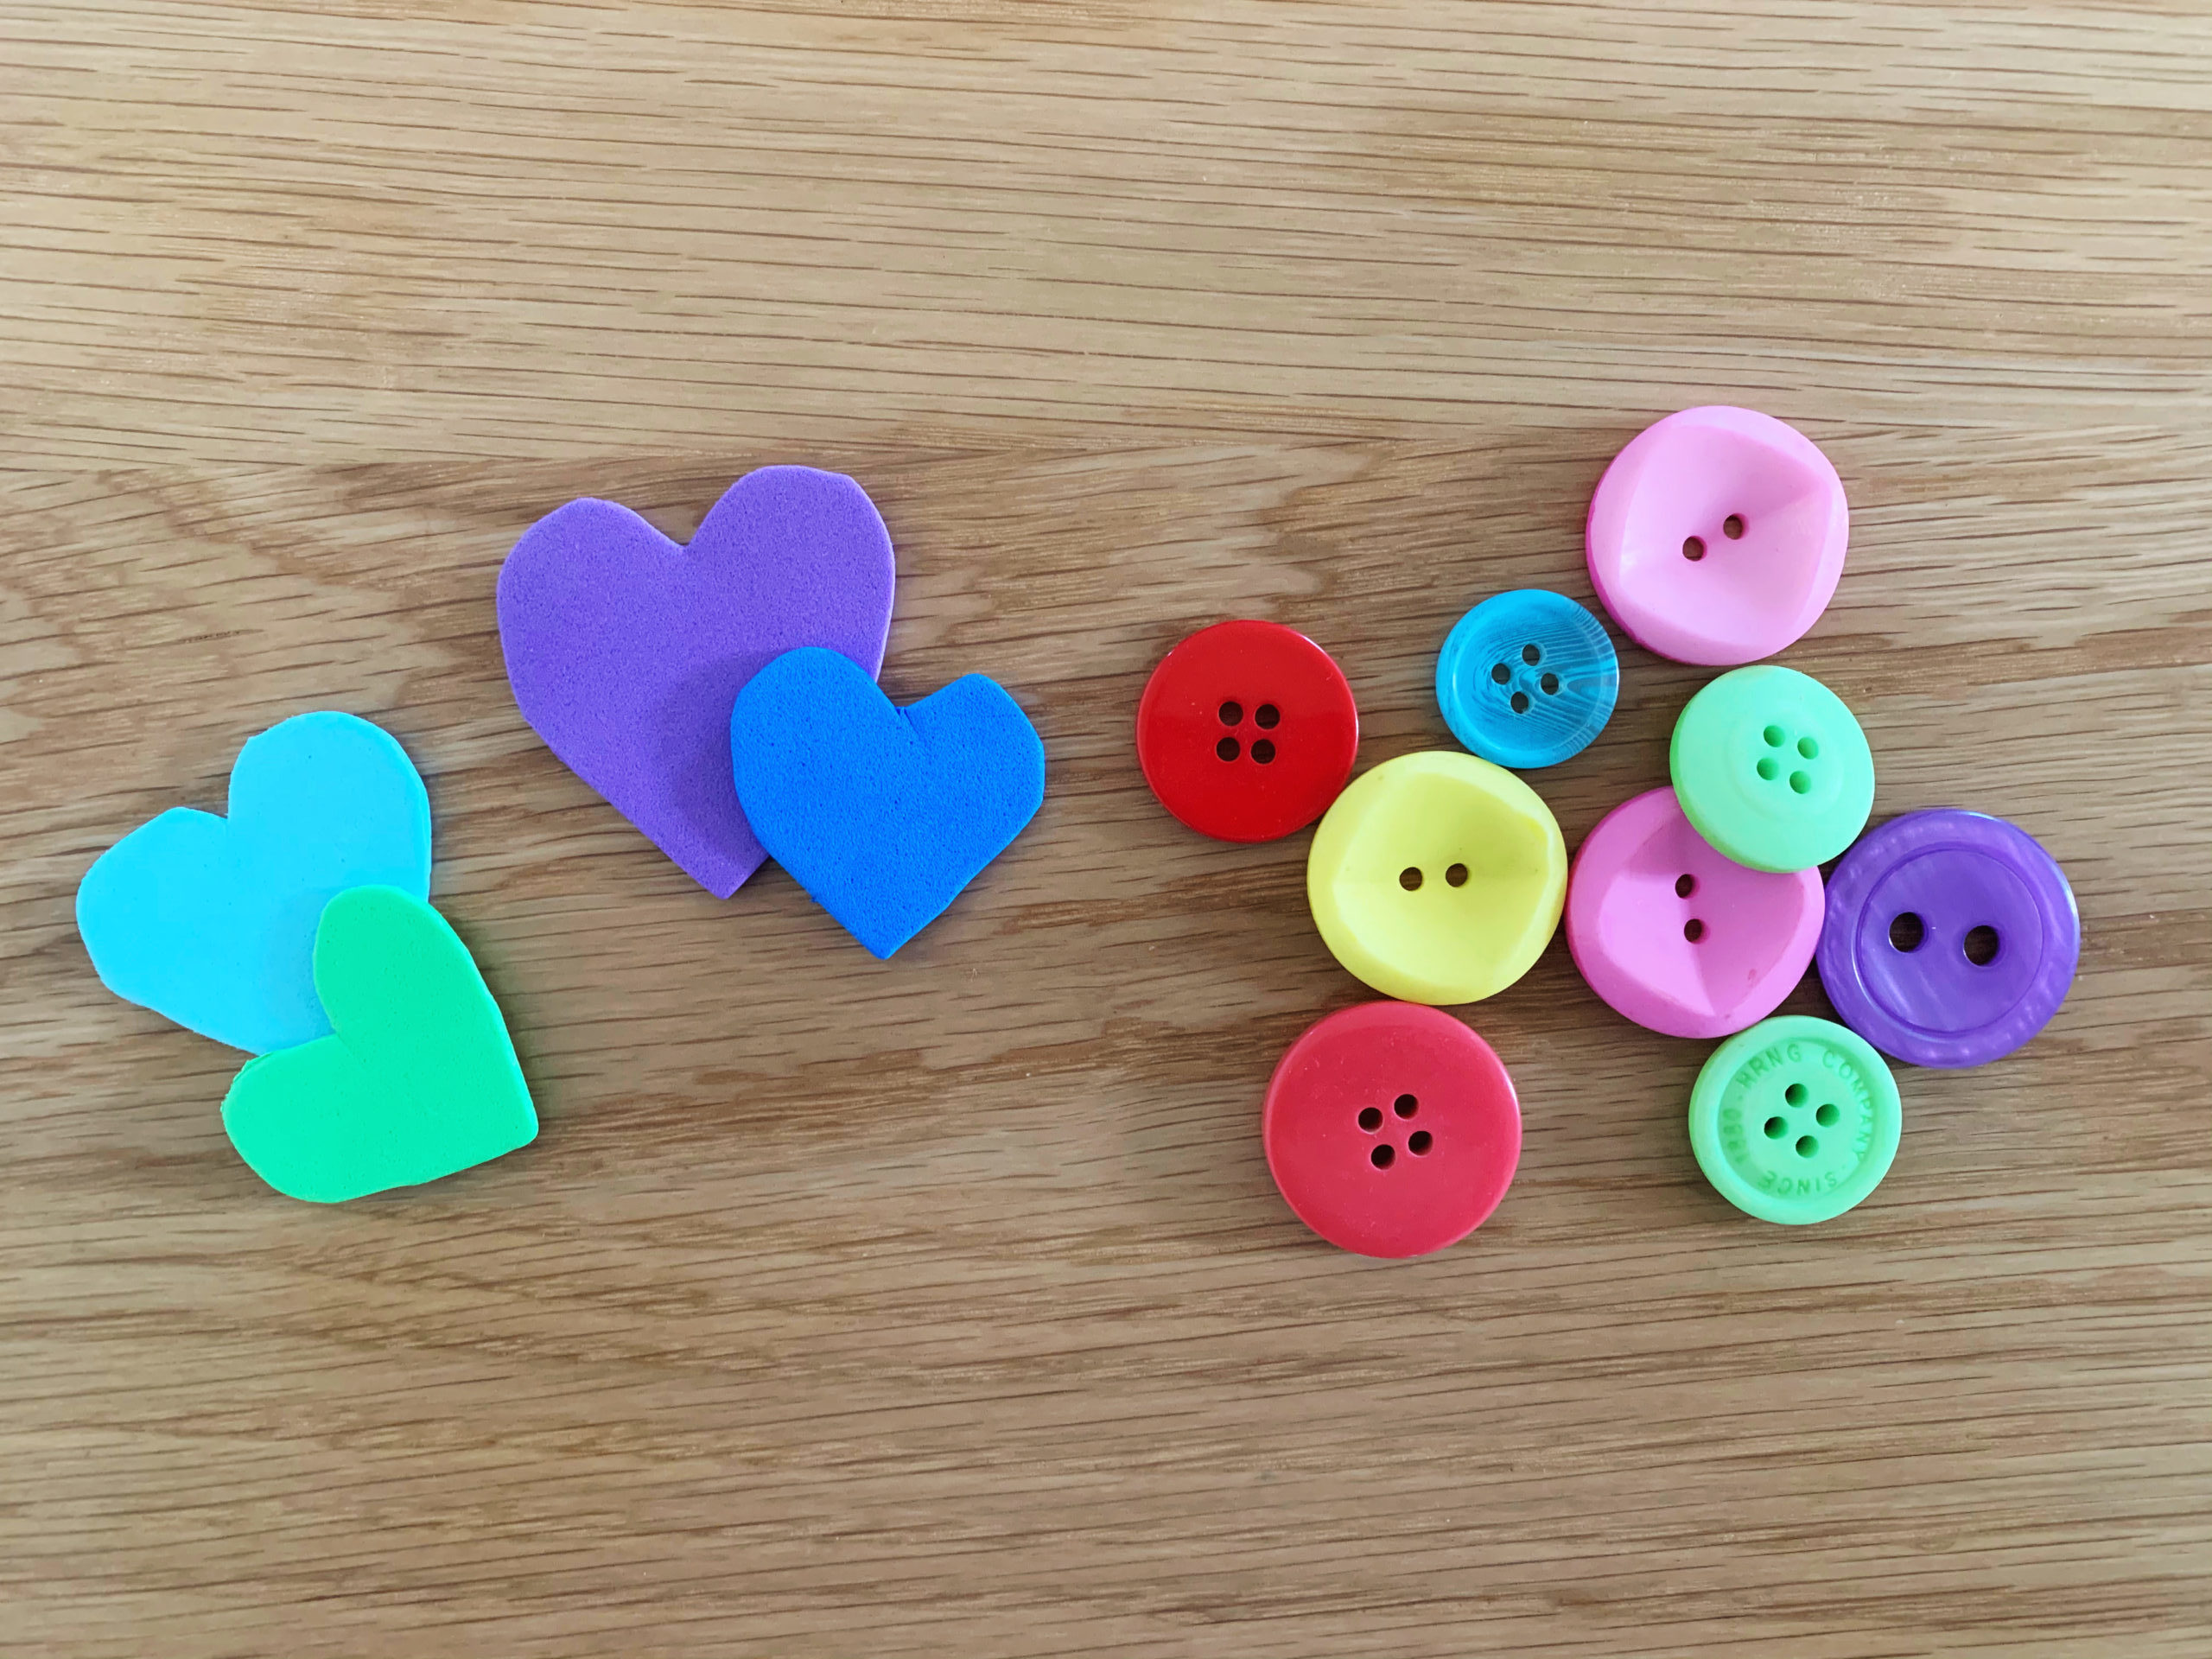
Step 2: Next, simply use the hot glue gun to attach your embellishments along one half of the headband. Make sure you don’t use more than half, so there’s a flat side to go inside your book—in fact, I recommend covering a little less than half. You can choose to add a lot of embellishments lined up close together, or you can space out just a few cute touches. Tip: If you’re spacing them out, you may want to mark where you want them to go, so as to get an even result. Let the glue dry fully, and then your new bookmark will be ready to use.
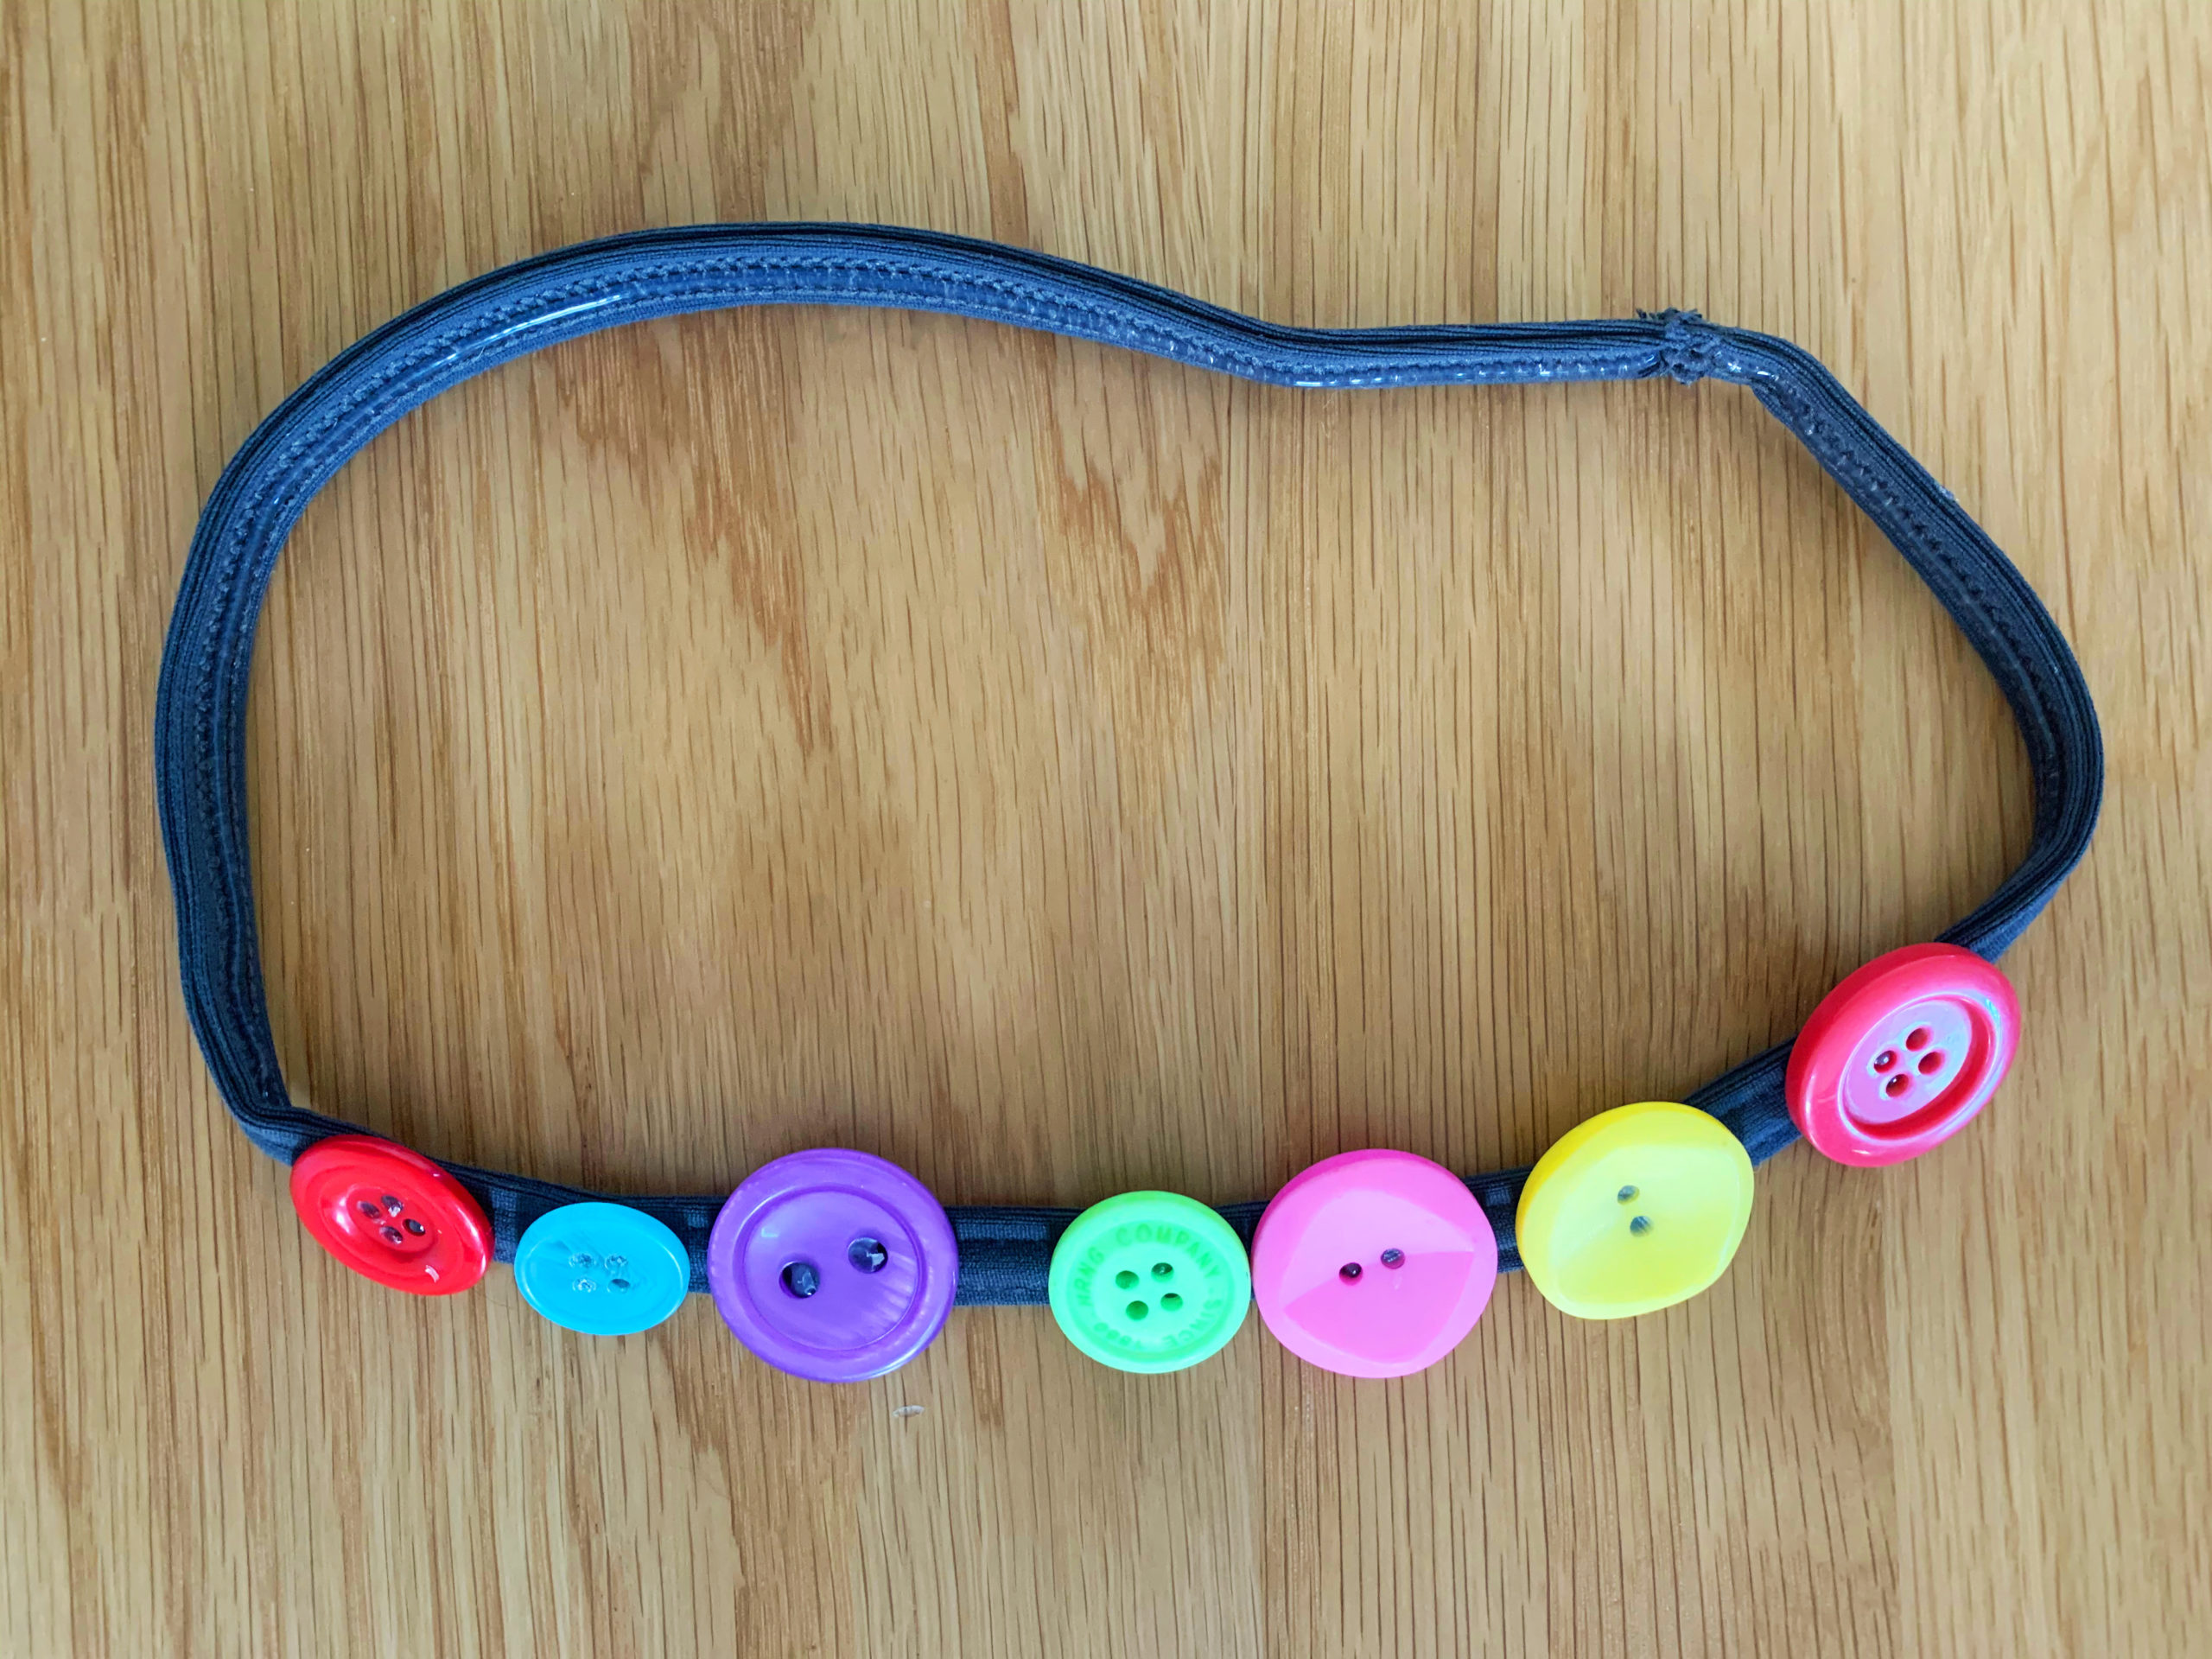
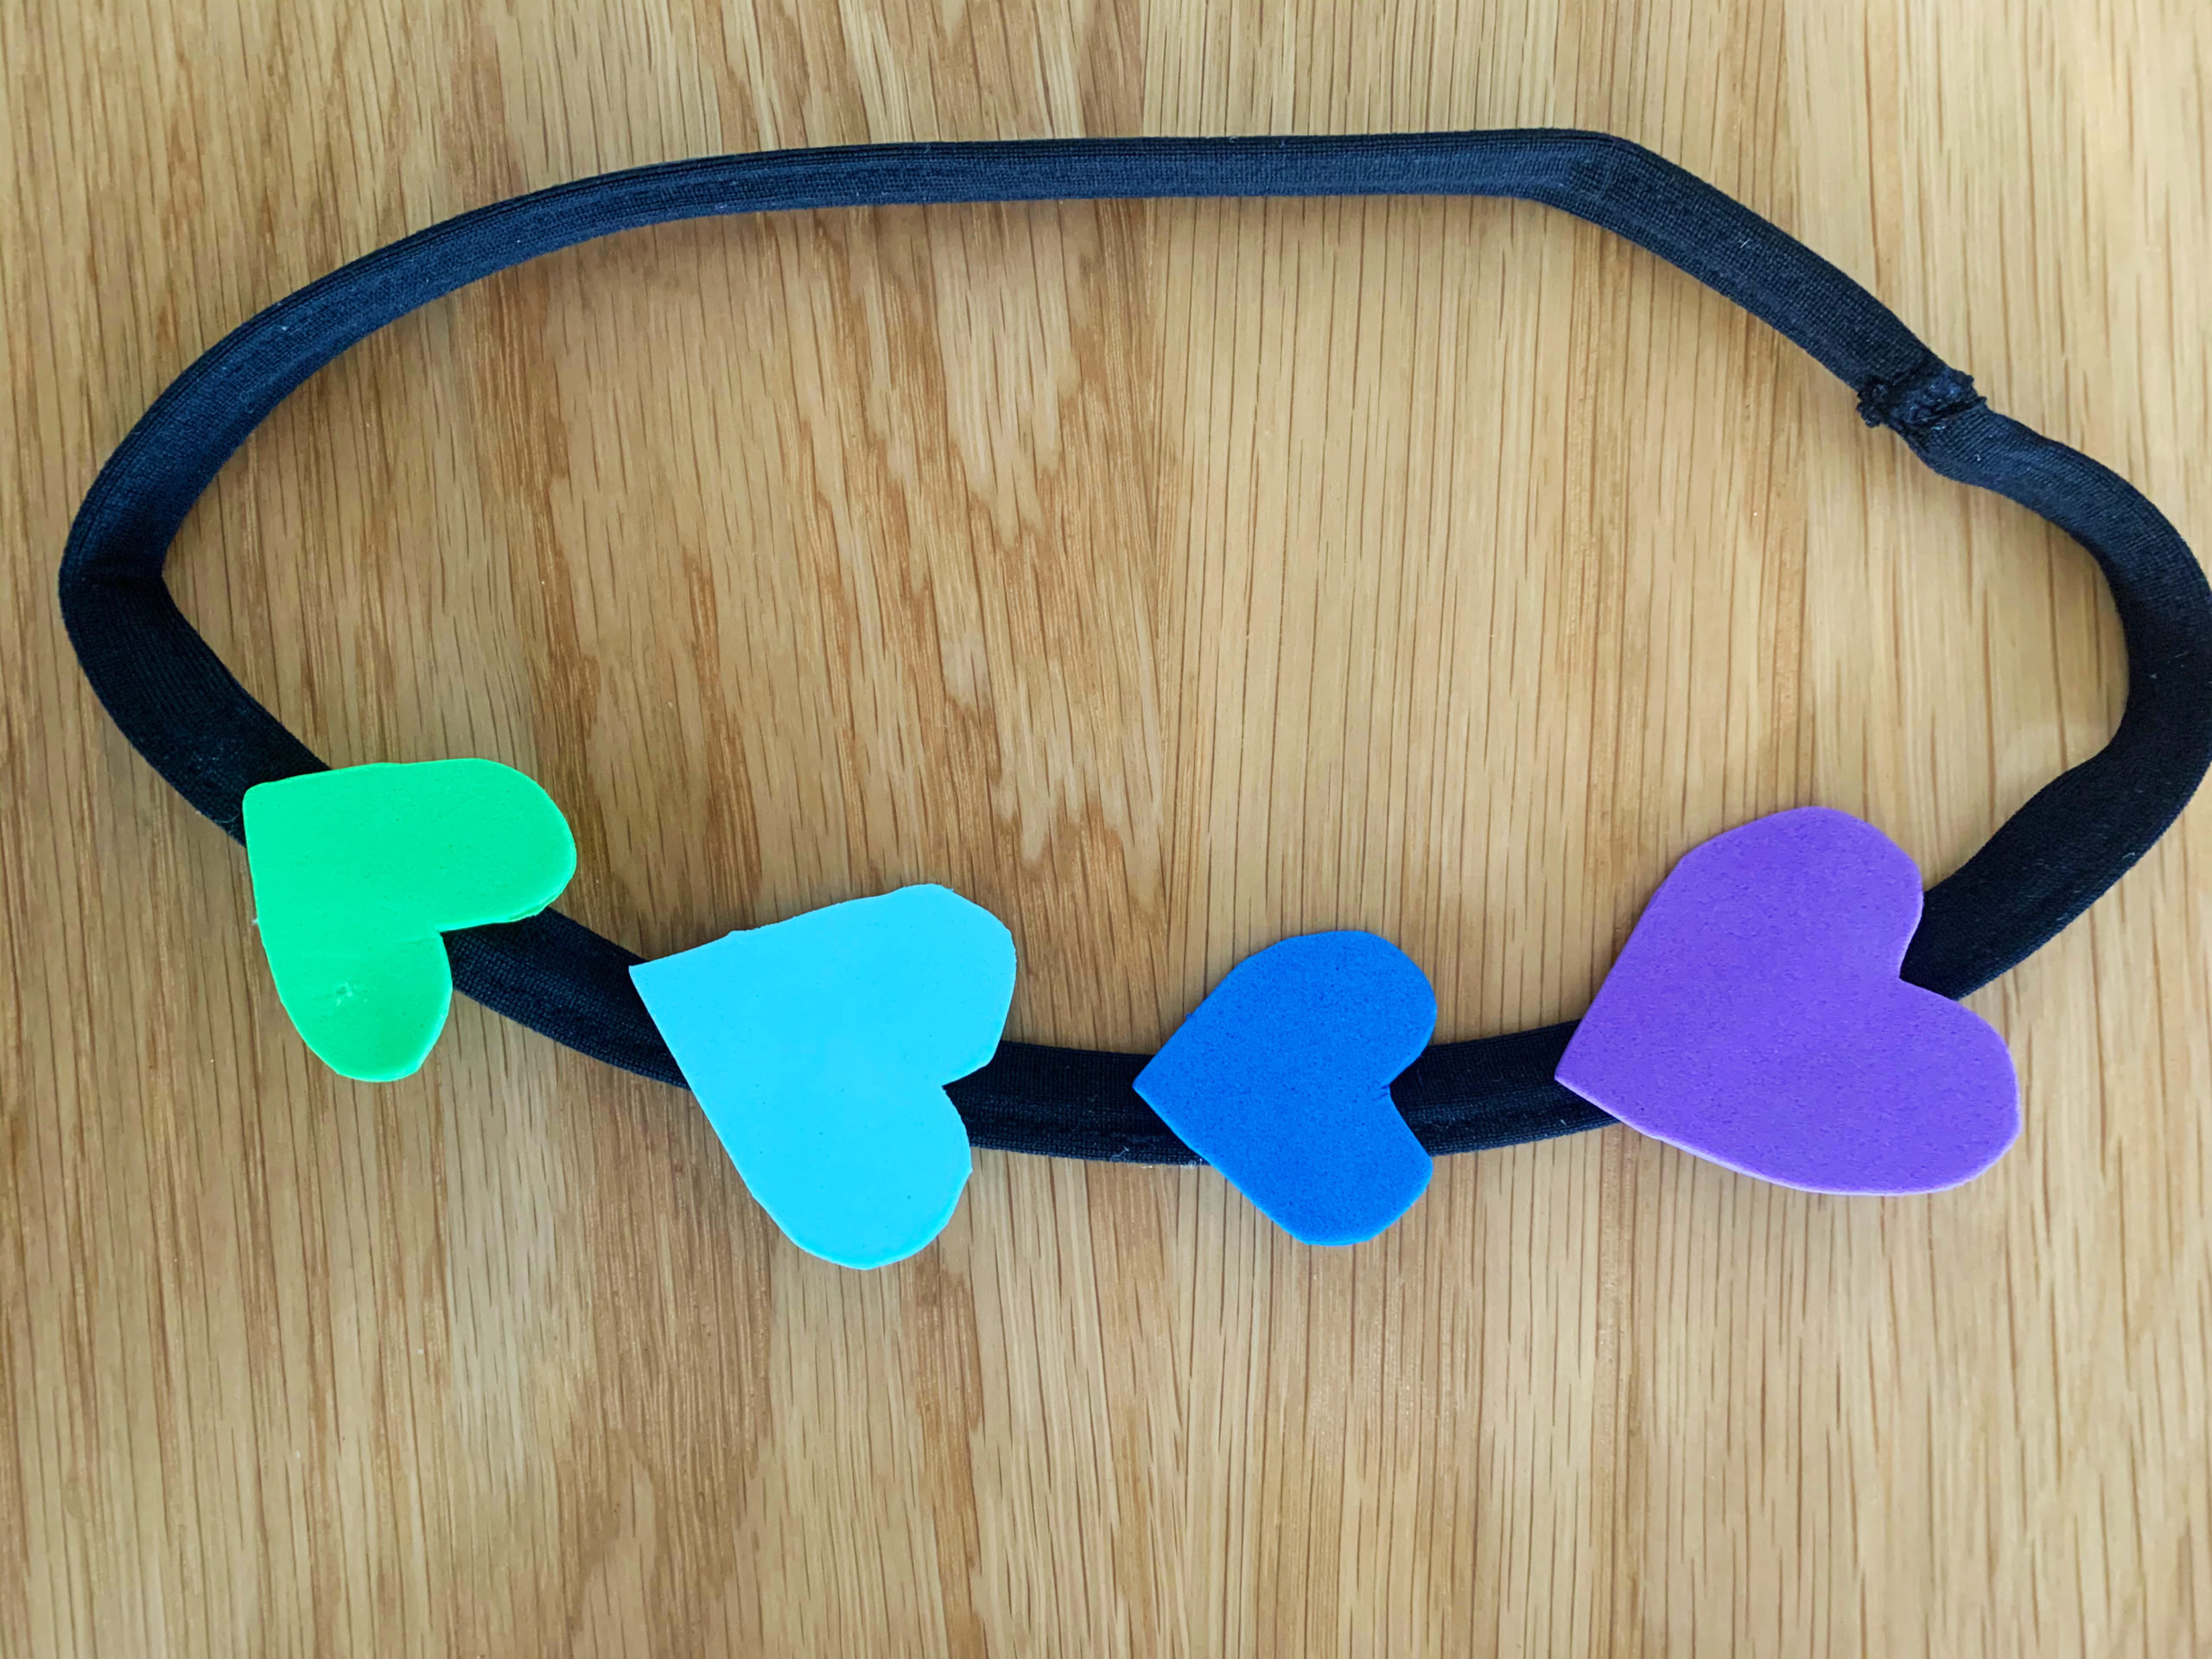
While this DIY book craft is joyously simple, you can get as creative as you want in making beautiful embellishments. But we love that even with just a few buttons, you can turn out a super-cute bookmark to save a page in your next book. With all our bookmark crafts, there is no excuse to fold down a corner!
Check out our other bookmarks and let us know which is your favorite: Bookmarks for Kids, Chucky Tassel Bookmark, Fruit Slice Corner Bookmarks, Cute Cat Bookmarks.
By Chrysta Naron
If you’ve ever sat with a beginning reader, you’ll notice that knowing letter sounds doesn’t magically jump straight to reading words fluently. Learning how to blend those sounds into a word is your child’s next step to literacy. However, it can be tricky to demonstrate without just doing it for them. With this word slide, your child will learn this key reading skill and be able to control the speed at which they read.
This simple activity is a great tool to teach reading. It’s something that you can make relatively quickly and with items you probably already have around the house. It has the added eco-friendly benefit that you can use it over and over again. (Always a plus in my book.) As a teacher, using these as a small-group activity gives children agency and the added skill of learning to help each other, a great chance for some social-emotional learning. This can be an awesome sibling bonding opportunity!
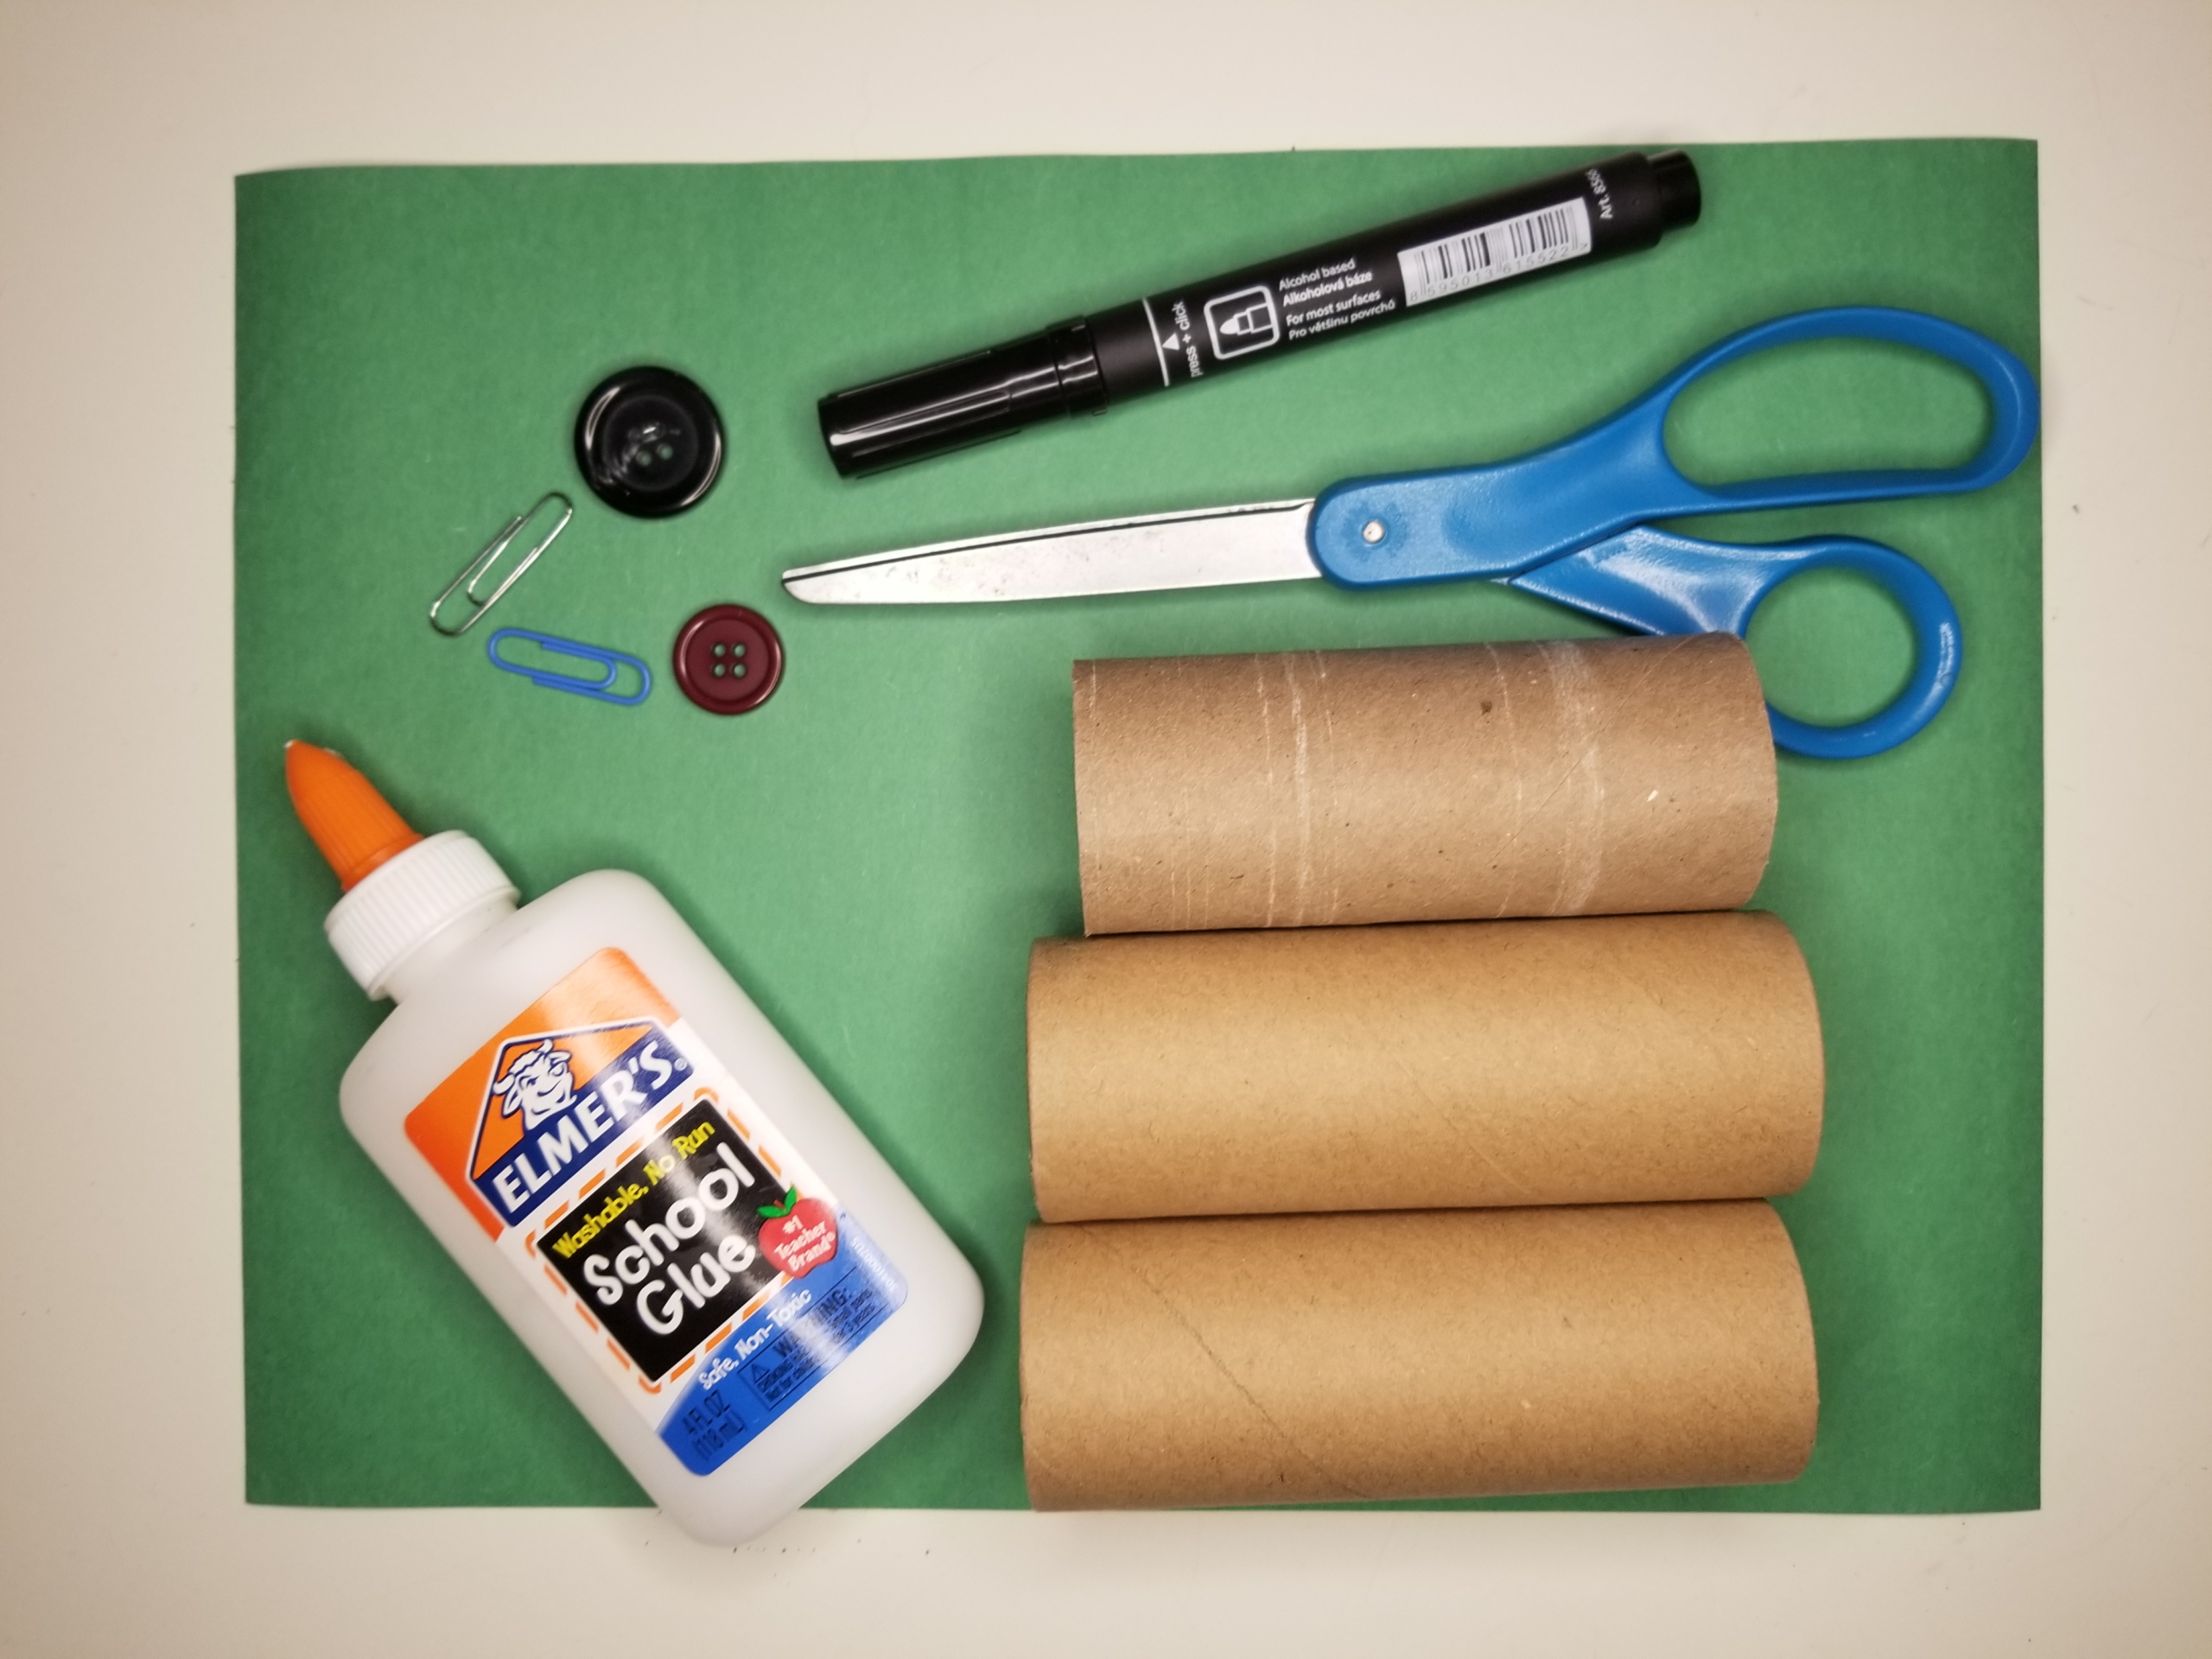
Materials Needed:
- 3 paper towel tubes
- Paper
- Marker
- Glue
- Scissors
- Buttons
- Paper clips
Cost: Free if you already own the materials!
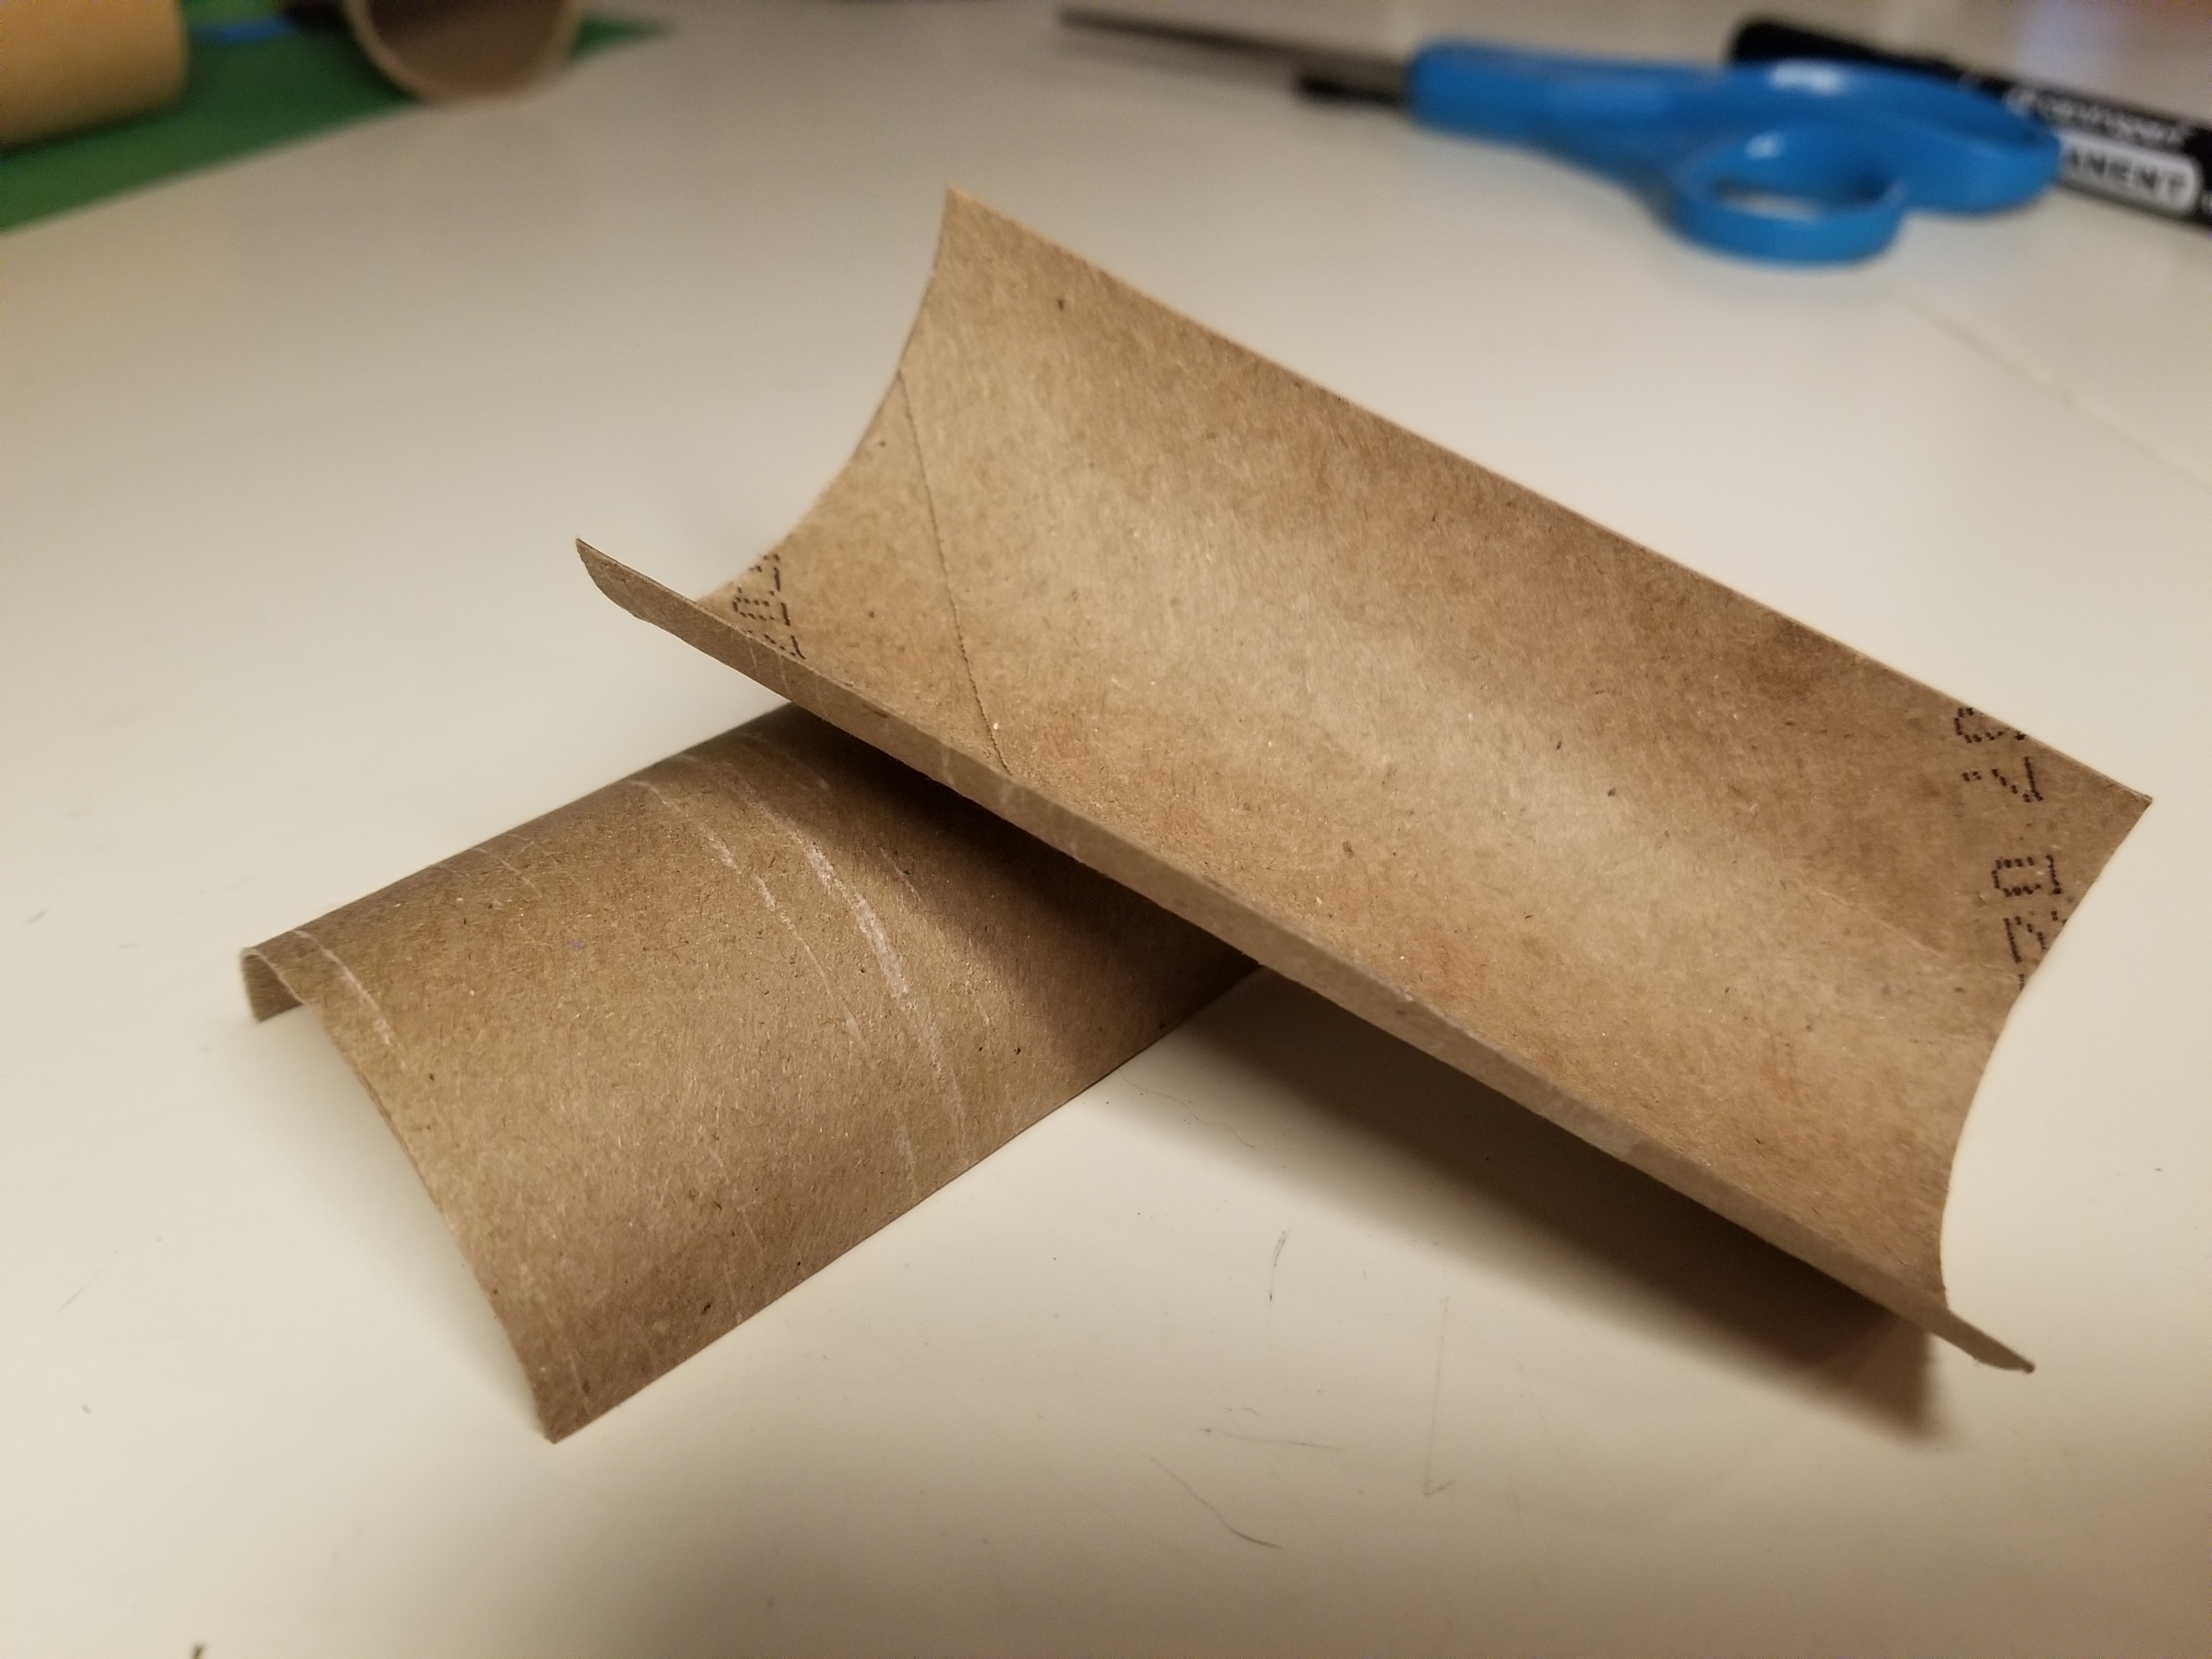
Step 1: Cut the paper towel tubes in half lengthwise, so each tube creates two arches. These are now your “slides.” Keep five for use today and save the sixth for another day.
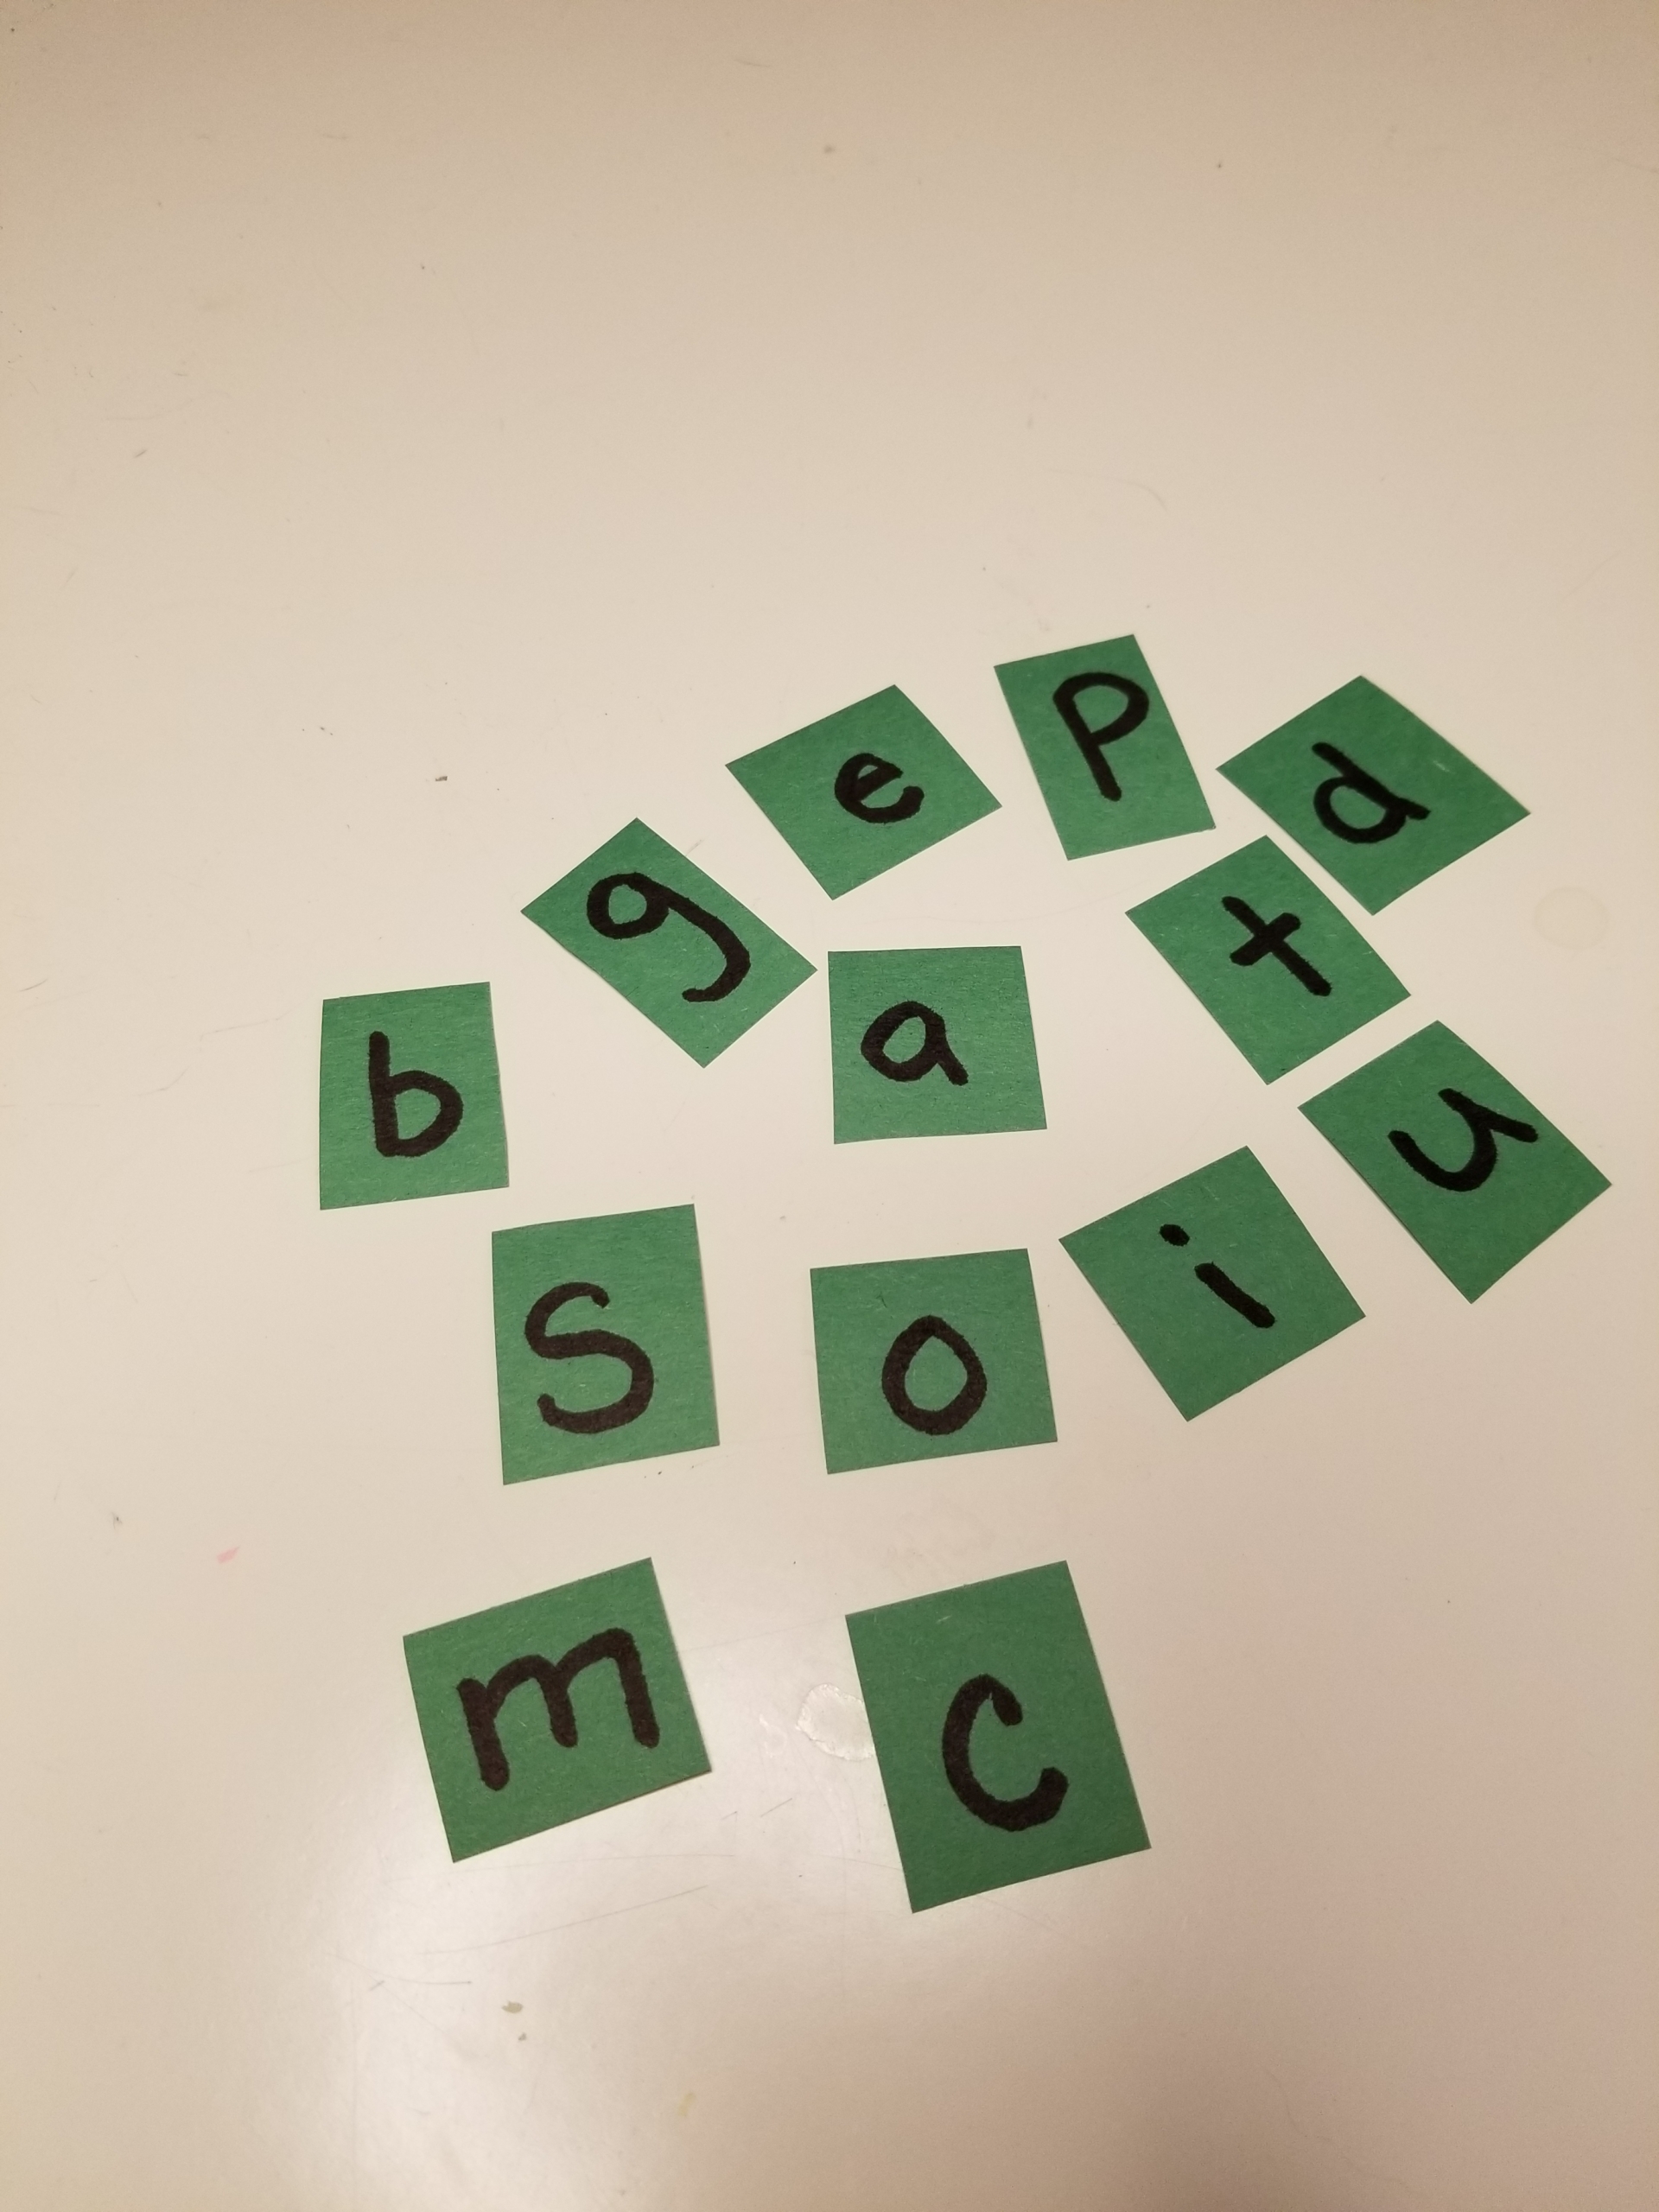
Step 2: On the paper, write a variety of letters, making sure to include all five vowels. You might want to write some letters twice, so you can make words like dad, mom, or pop. Cut out the letters onto little squares.
Step 3: Glue a vowel into the middle of each slide. Make sure to do it on the inside of the tube. Otherwise there will be a lot of falling and no sliding!
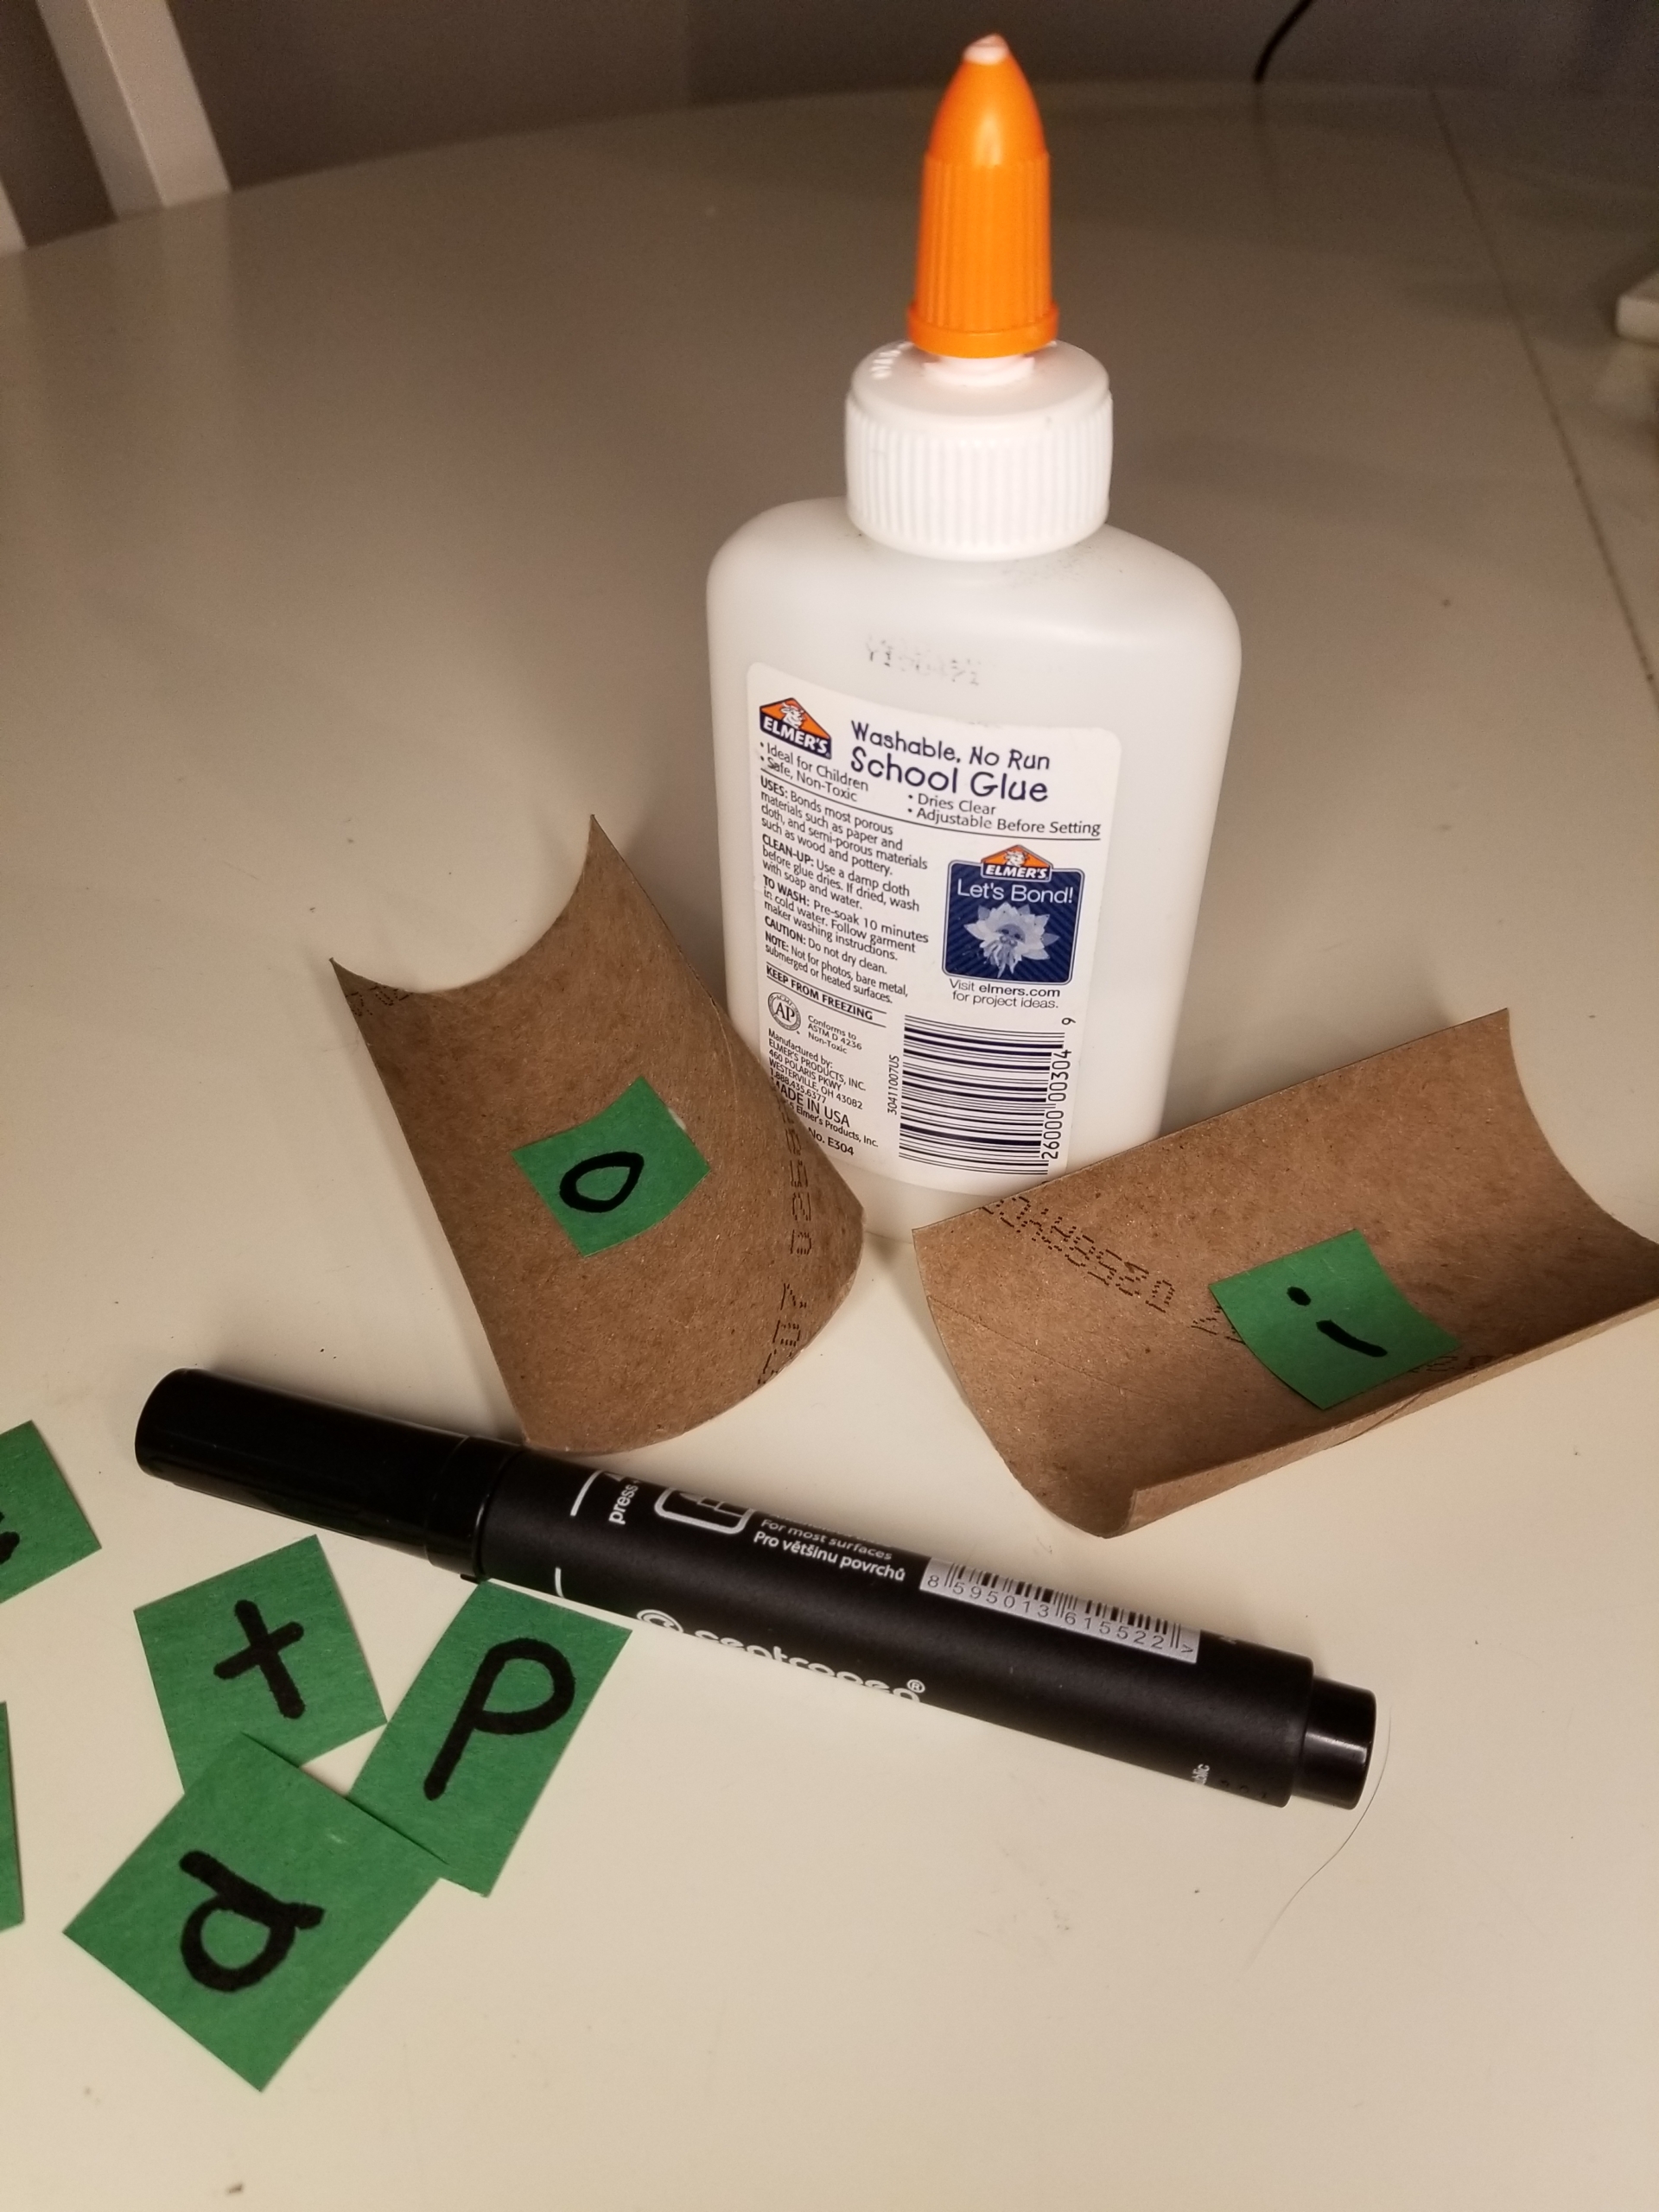
Step 4: Choose a letter to put on either side of the vowel, to make a word. For example, on your slide with the letter O, you might add the letters P and T to make the word pot. For the letter A, you might choose S and T to make sat.
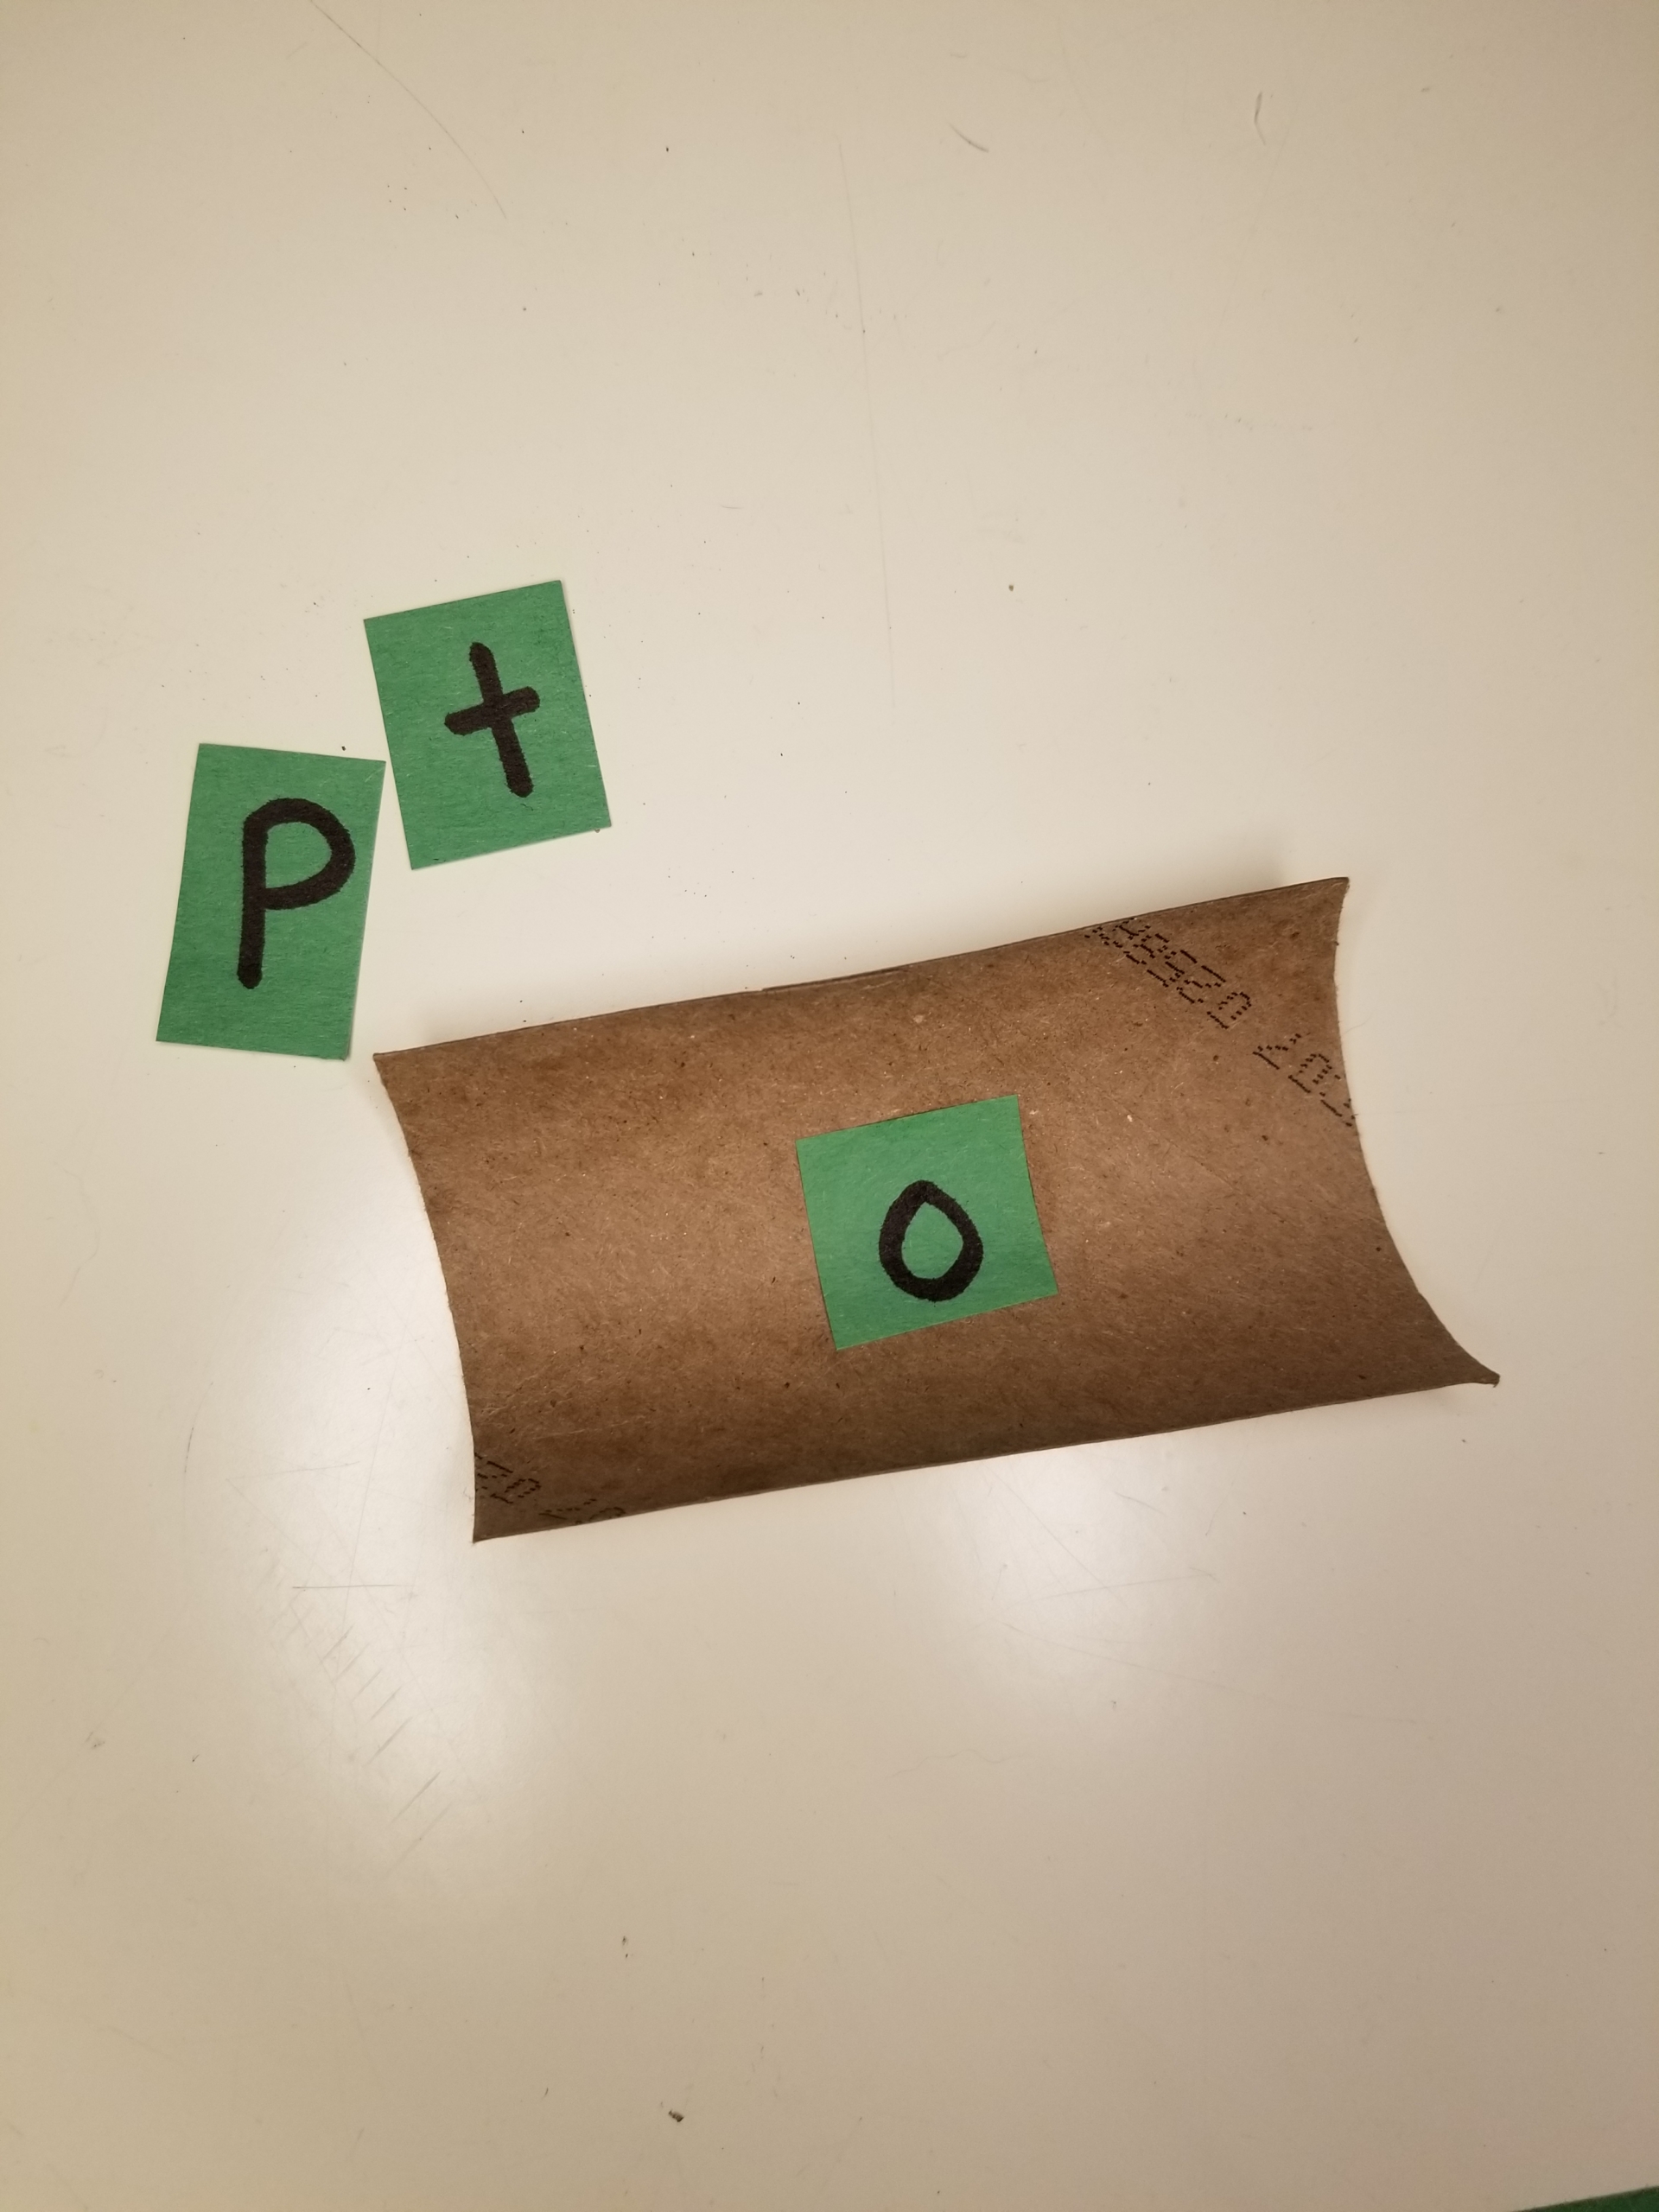
Step 5: Next, attach the outer letters with paper clips on each end of the slide.
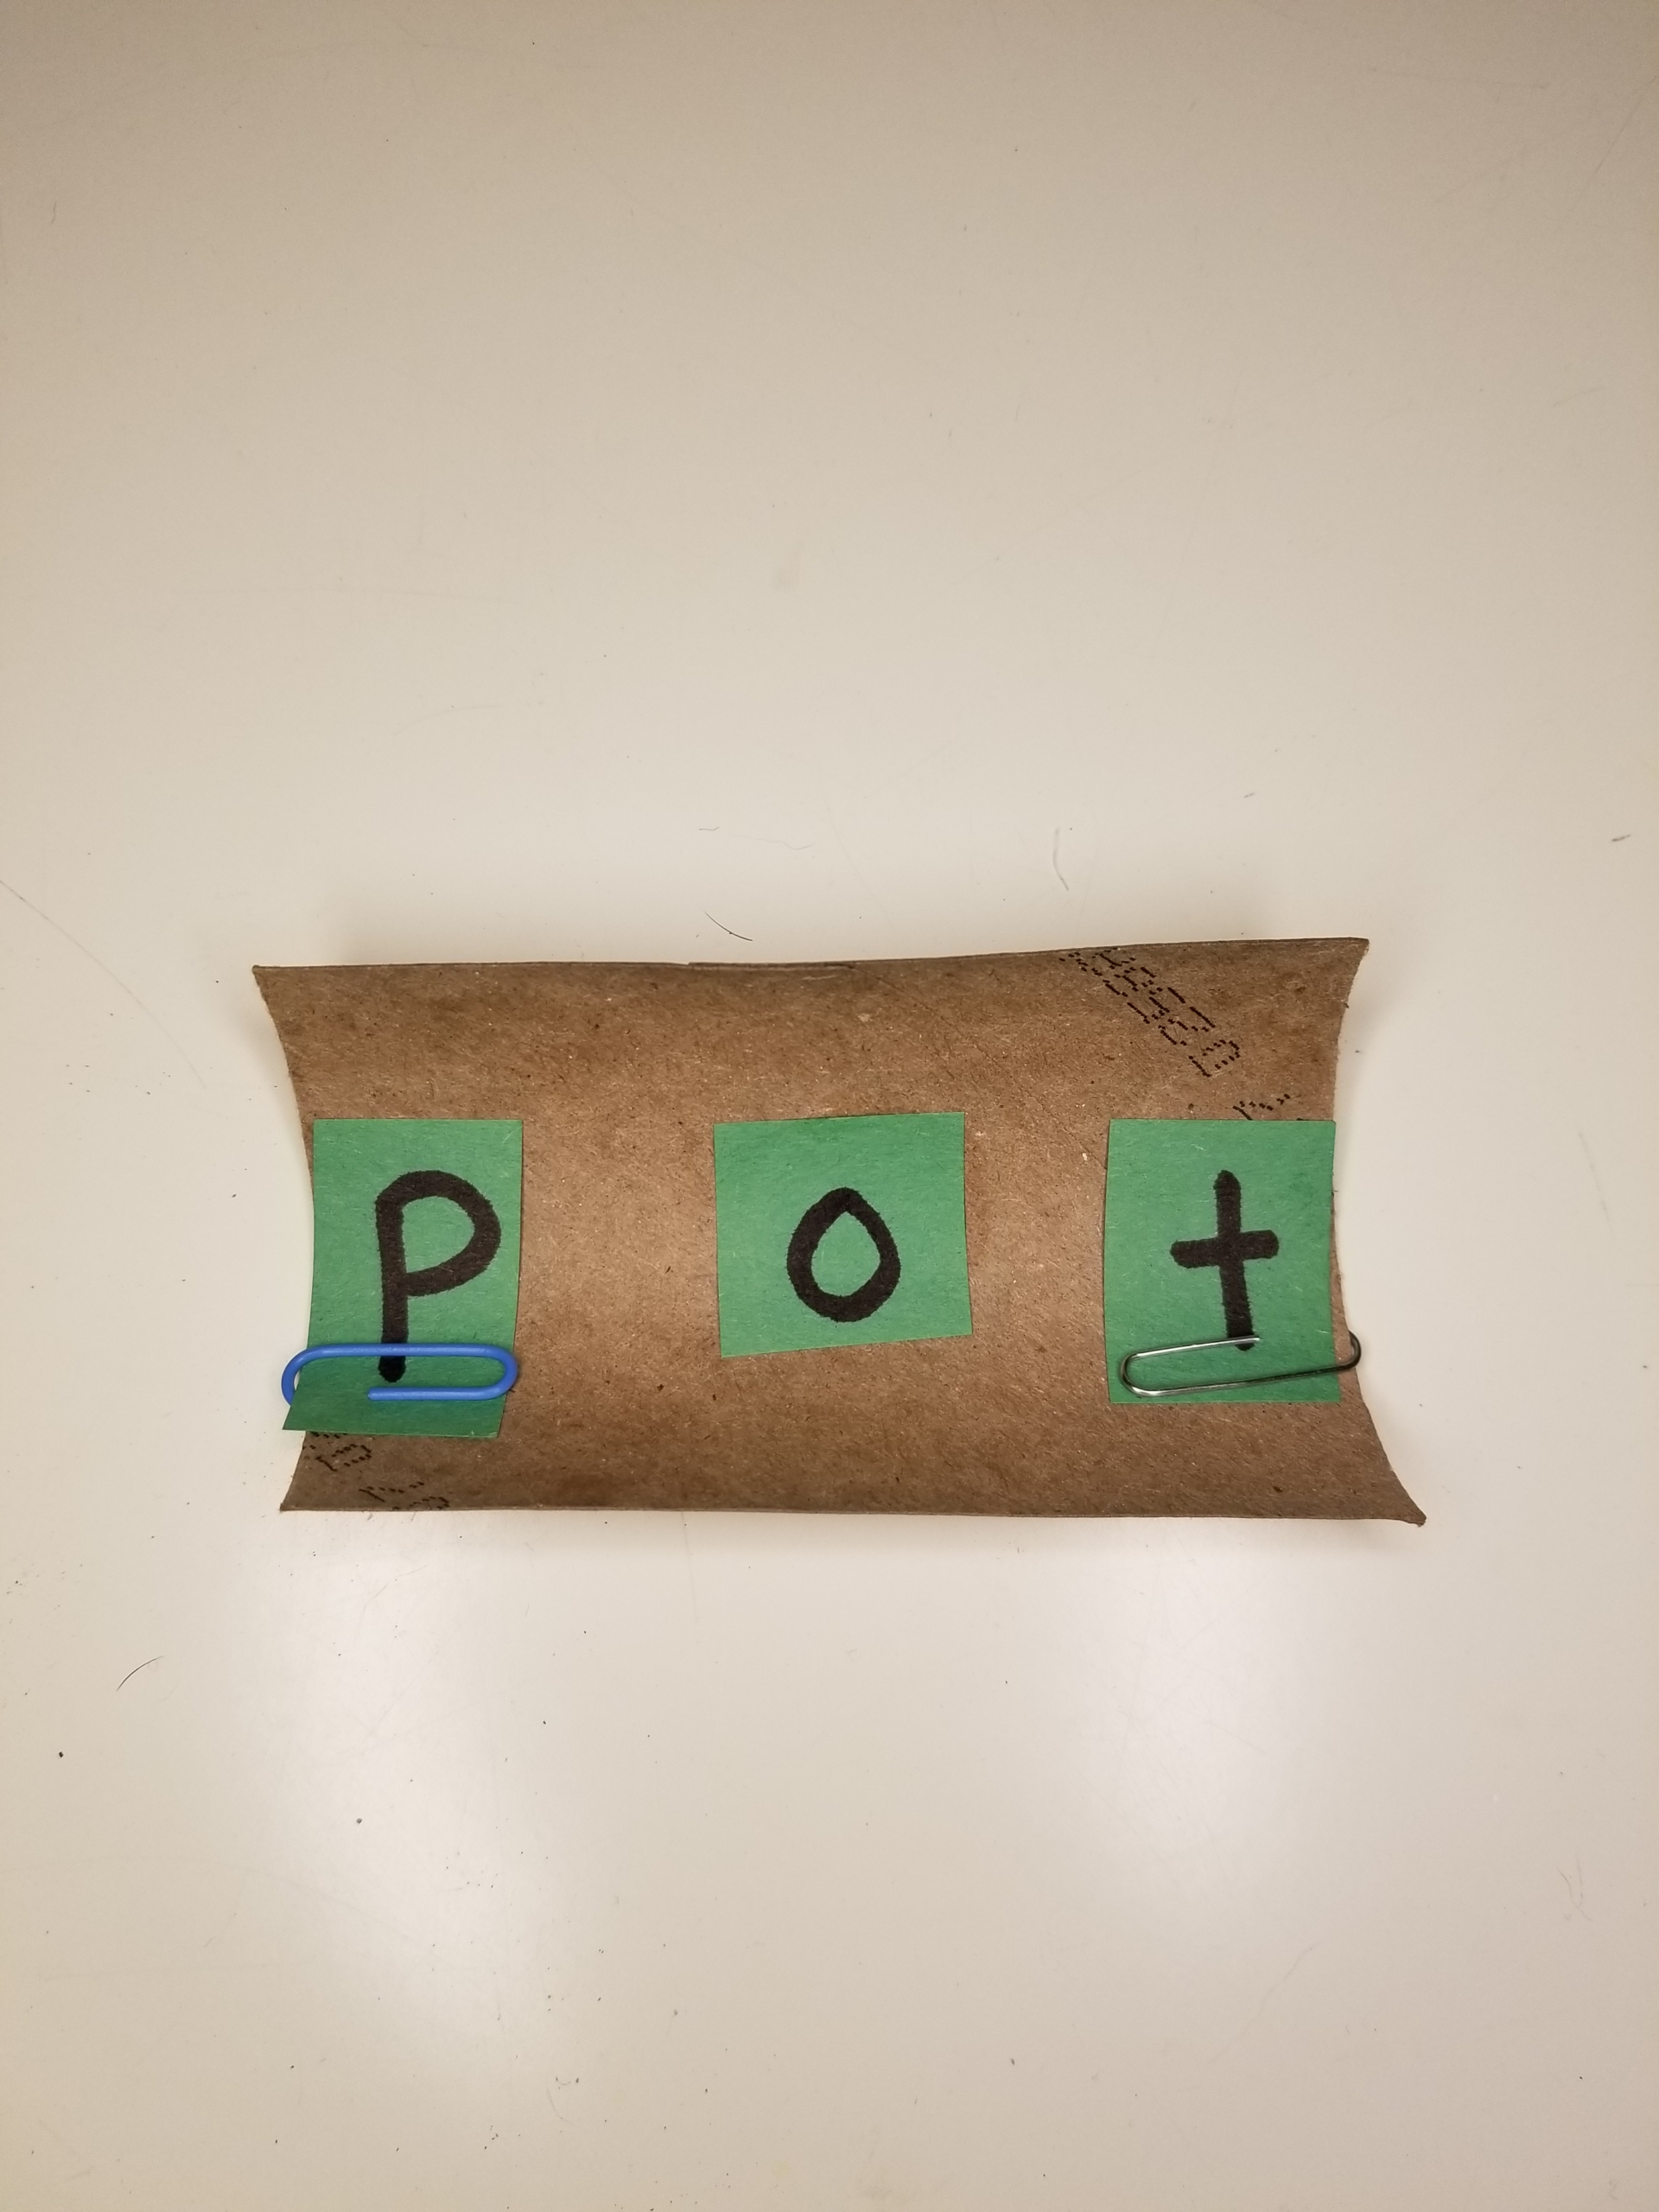
Step 6: Sit with your child and help them say each sound on the slide individually.
Step 7: Hold the slide flat and put the counter next to the first letter. Slightly tilt the tube so the counter slides down. Say the letter sounds as the counter slides along each letter. Now, let your child take over and slide again, then again a little faster—sliding the sounds faster and faster until they form a complete word!
Tip: If you don’t have buttons, you can use other small, smooth items like pennies, counters, or checkers. I would avoid round beads, as it is difficult to control the speed at which they slide.
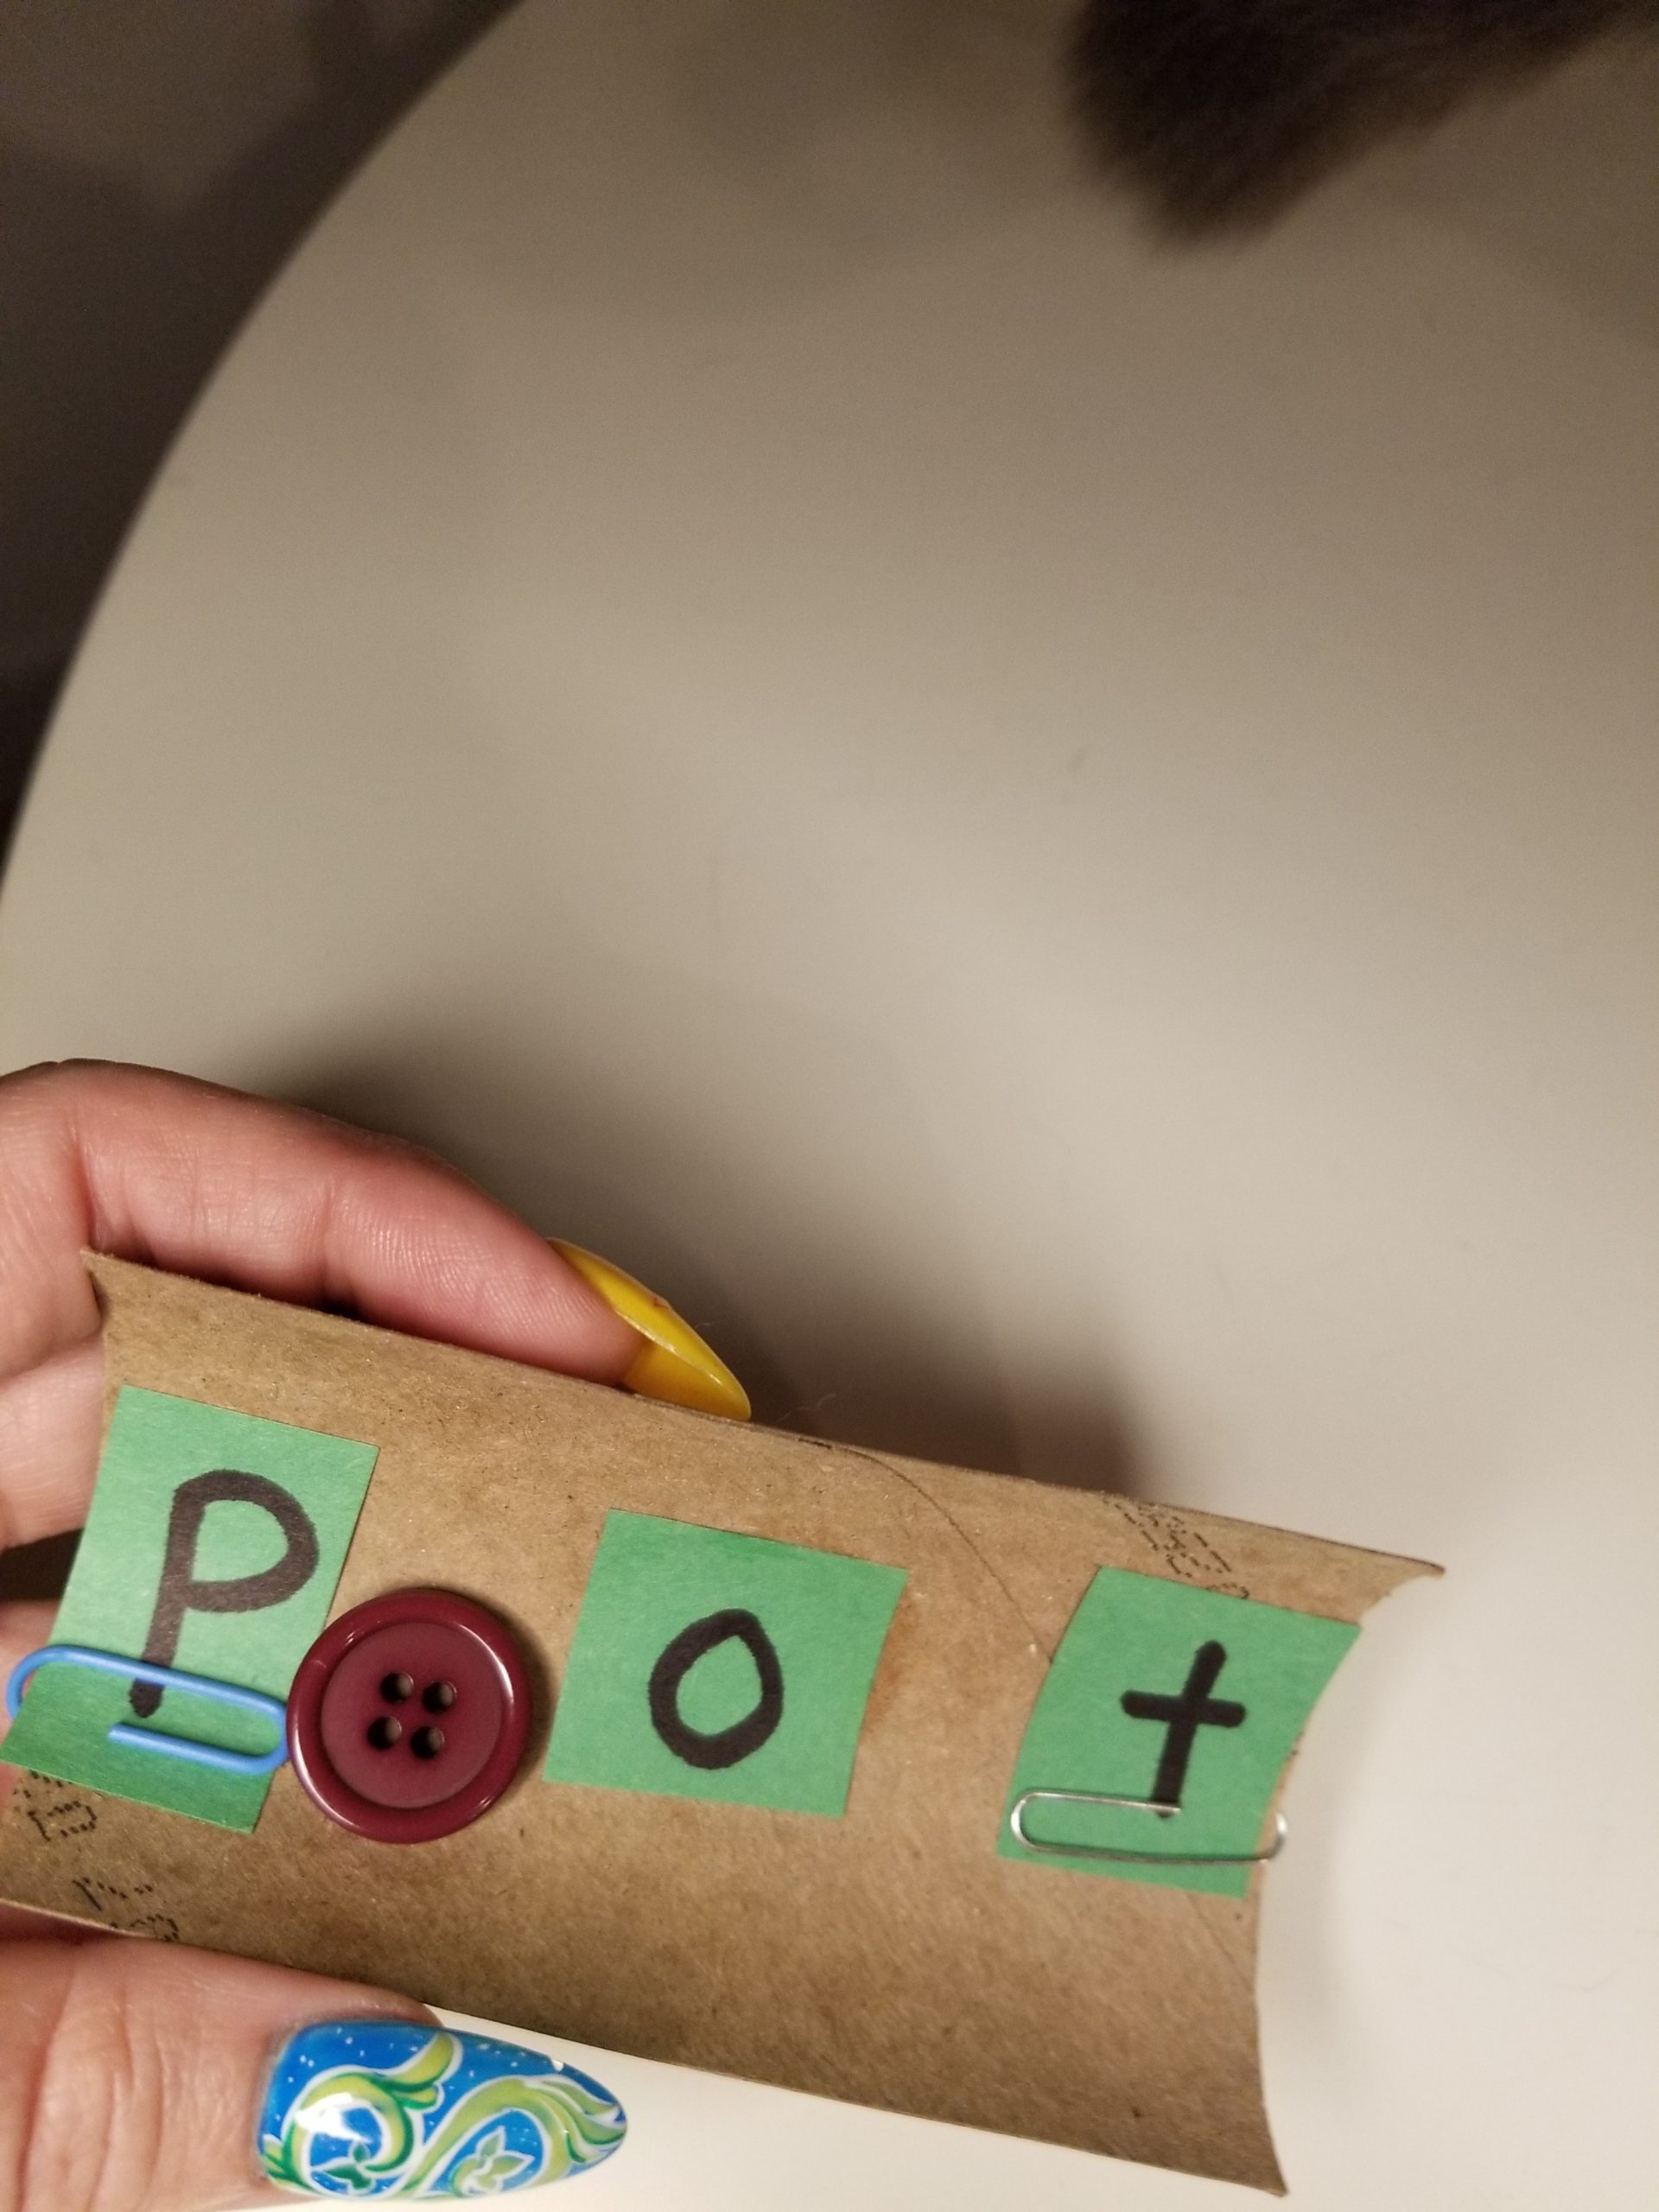
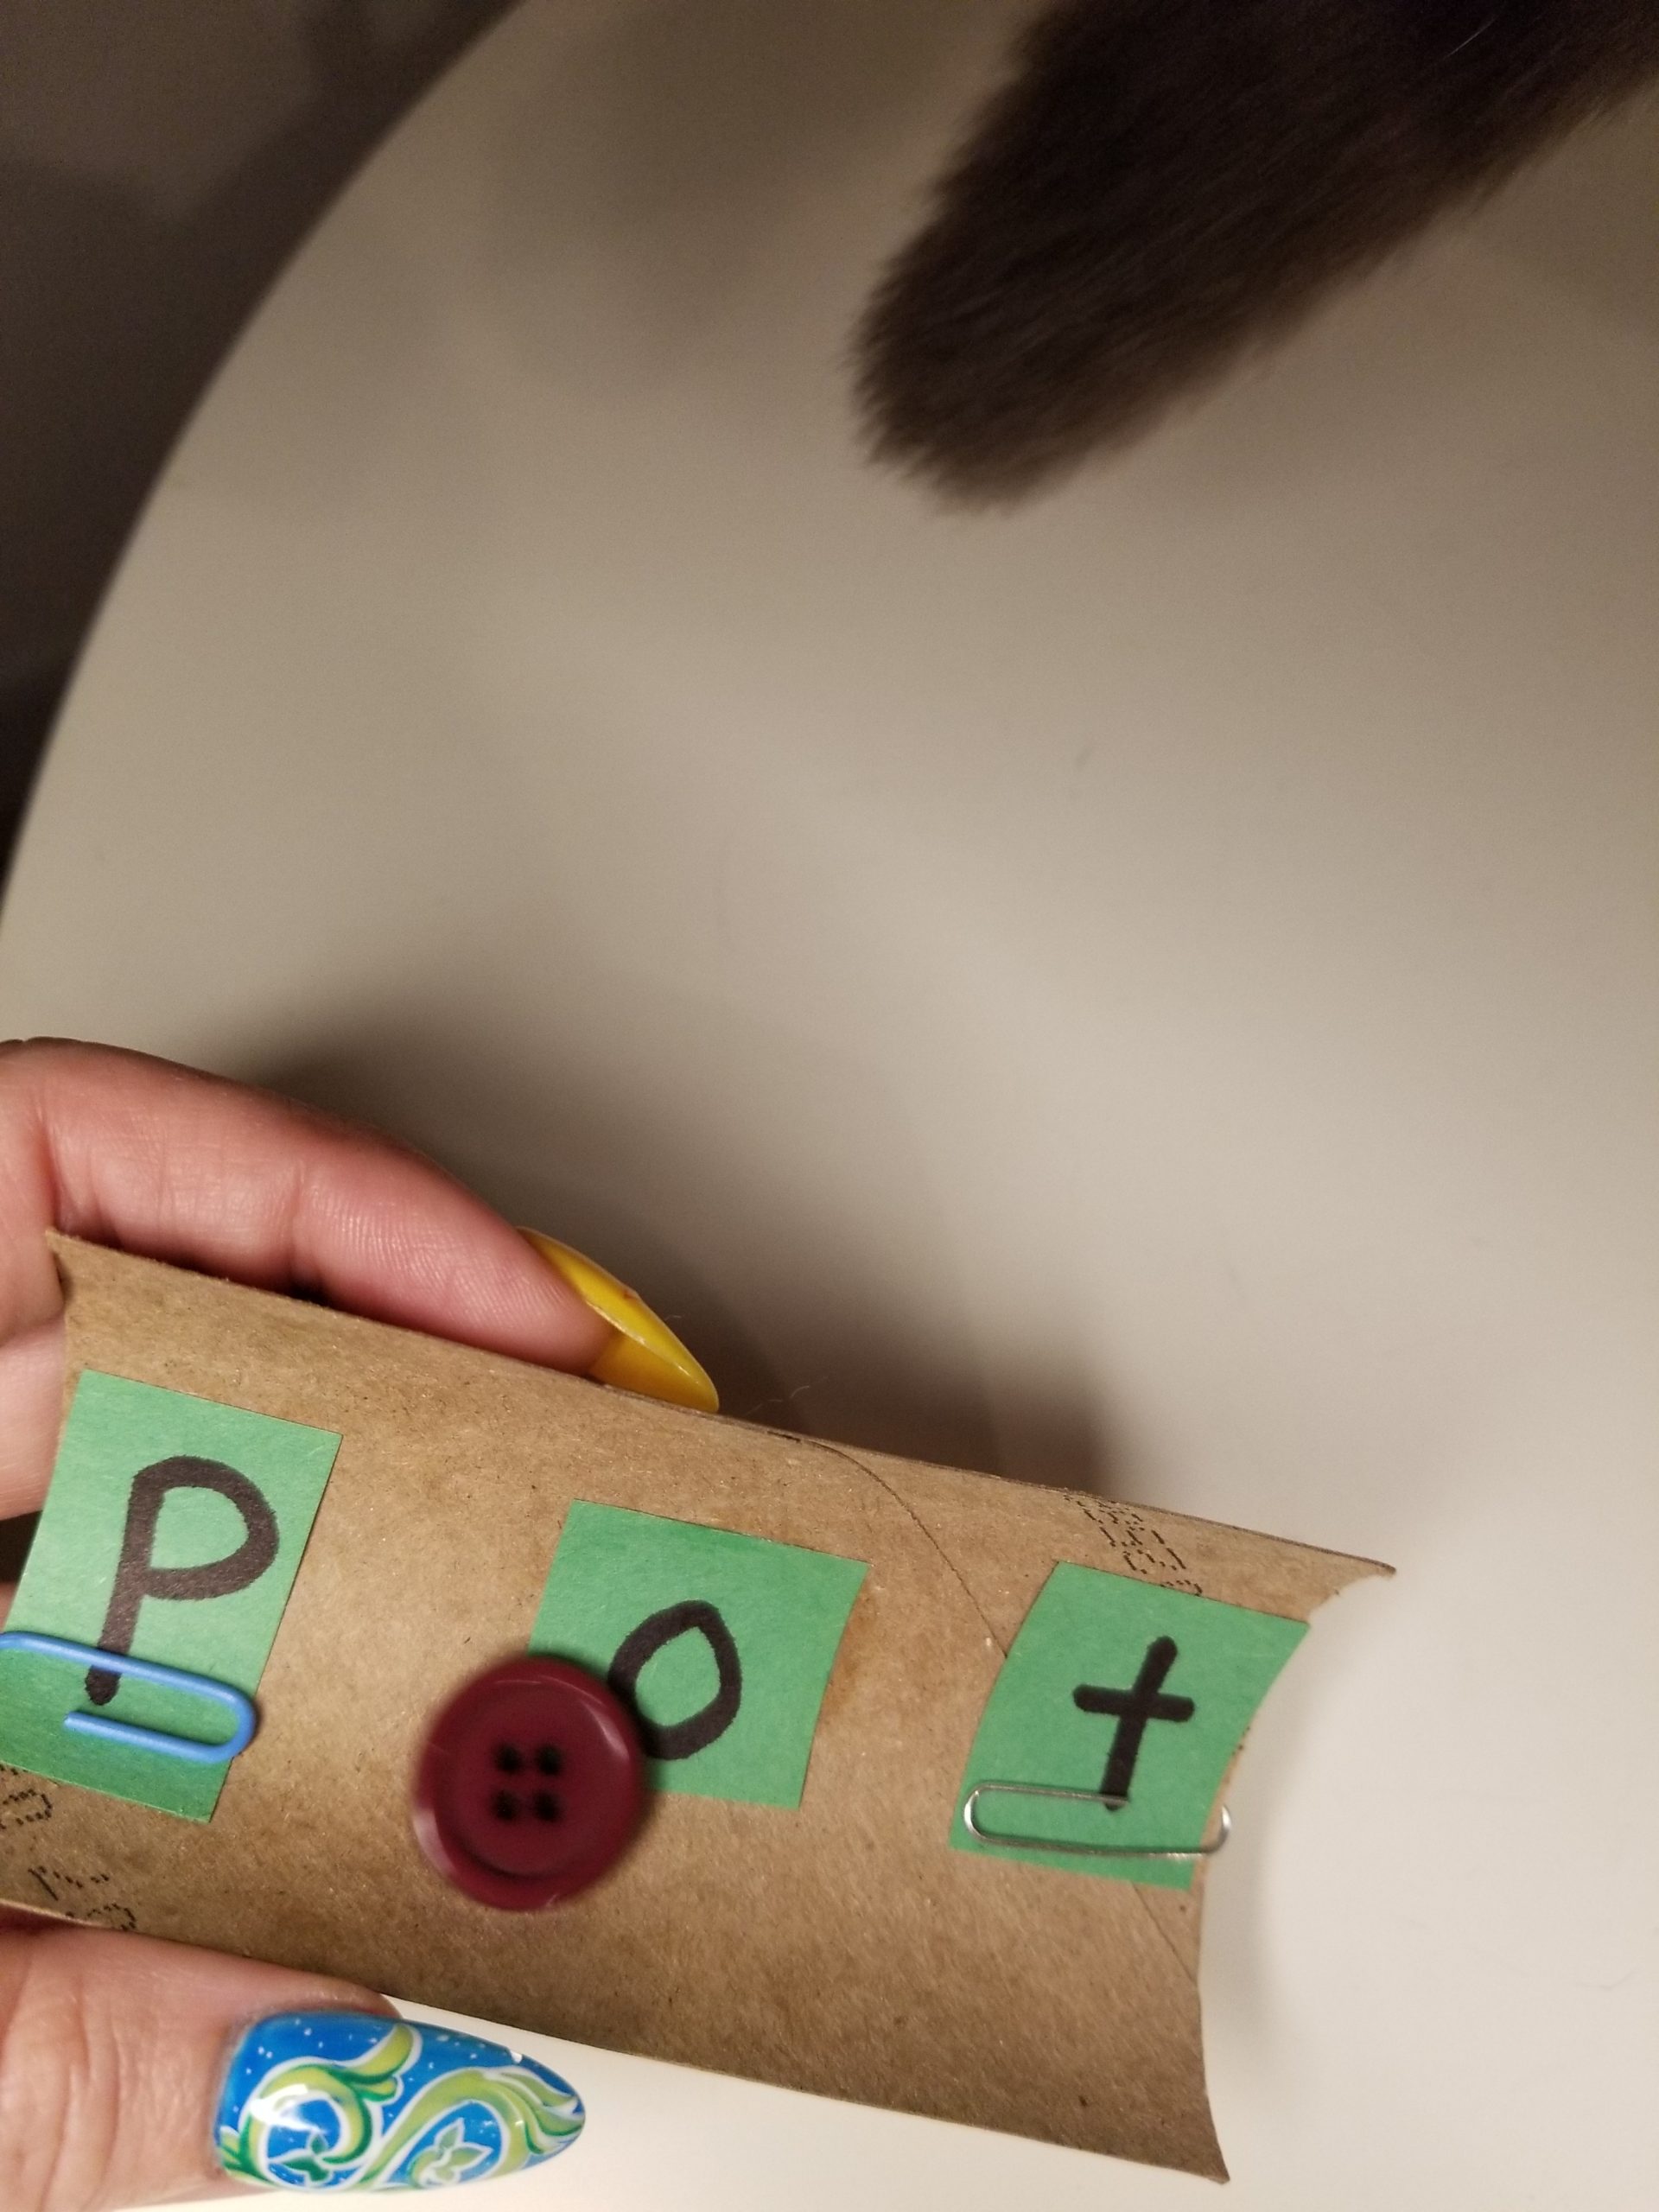
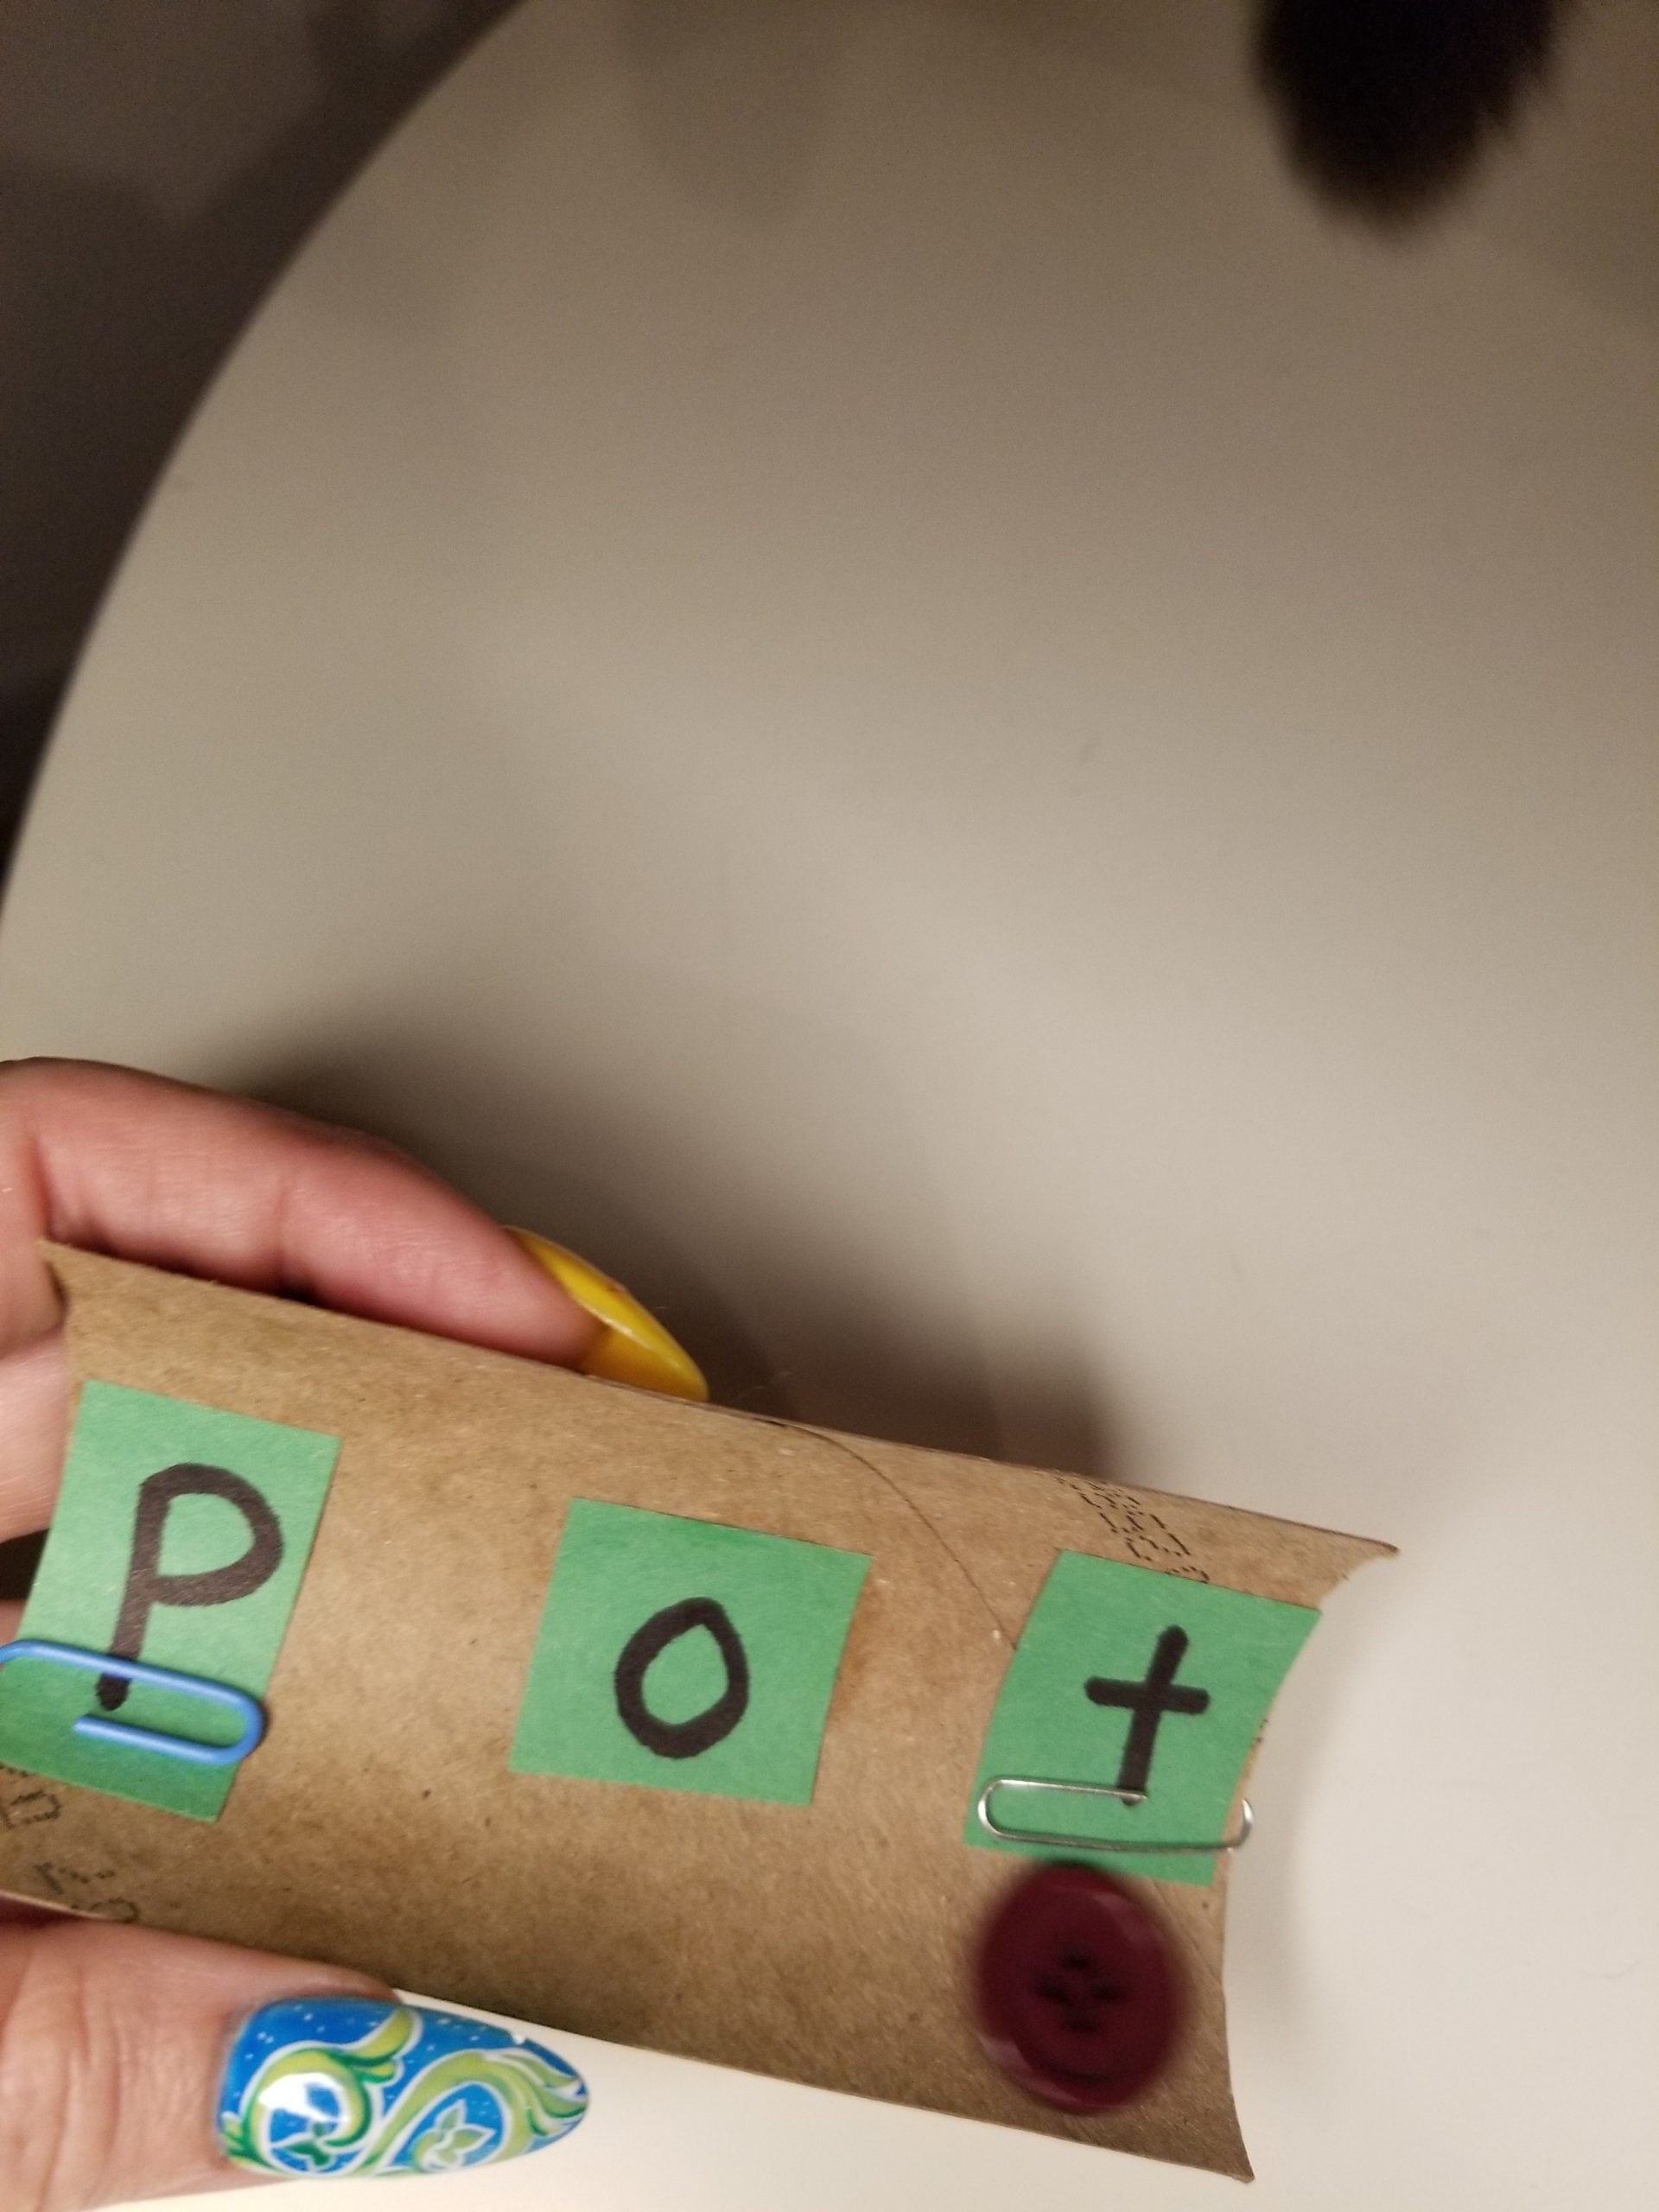
Now that you and your child have mastered using the slide, you can help them reproduce the skill when reading together. Ask questions like, “How would we say this on the slide?” or “Can we say and slide the sounds?” You could even keep the slides near your bookshelf as a tool for when your child needs more help.
Have fun sliding into reading!
Pin Me for Reference :
By Maya Payne Smart
Austin may be known for live music and technology show stoppers ACL and SXSW, but the quieter, gentler TBF stole my heart when I landed in Texas. Within weeks of moving to town, I signed up to volunteer with the Texas Book Festival’s Reading Rock Stars program, which brings authors to Title I schools and gives each child a book, sometimes the very first they’ve ever owned. And within a few months I joined the festival’s board and served for four years.
This year the Texas Book Festival celebrated its 25th anniversary in grand fashion, with two weeks of stellar virtual programming amid a pandemic. And while the warmth and energy of in-person book events doesn’t translate via Zoom, I can attest—based on my experience hosting conversations with Pulitzer Prize-winner Natasha Tretheway and PEN/Hemingway award-winner Yaa Gyasi—that virtual conversations bring an intimacy and power all their own.
Here are four festival author reflections from 2020 that I won’t soon forget:
Natasha Tretheway, author of Memorial Drive, on Revisiting Subjects
“A lot of great writers have told us, like Faulkner, the past isn’t dead, it isn’t even past. Or, Baldwin, people are trapped in history and history is trapped in them. I think that that’s absolutely true. In many ways we are in our traces, in the loop of this history . . . at the same time that we’re trying to advance forward, we keep circling back to some difficult moments. I think we’ve seen that in recent years, with the rise of vocal, visible, and more virulent forms of white supremacy that have been given a platform. If people thought that that was behind us, I think that what we are seeing is how much we’ve circled back to it and that the reckoning with it is still yet to be done . . .
“There are innumerable ways to approach these subjects. That’s why we continue to have books about the Civil War. It’s seemingly inexhaustible in terms of what it can tell us, not only about the past, but where we’re headed. Each new lens gives us a new way of understanding ourselves as Americans.
“As I was sitting down to work on this book, Memorial Drive, there would be moments that I would have to stop writing prose and turn the page over, because something was coming out as a poem instead. . . . The newer poems in my last book, Monument, which was my first retrospective, grew out of writing about my mother and our history in prose, but needing to stop because some of it came out as poems. And the things that come out as poems approach the subject from various and different angles.
“And to go the other way, from my very first book of poetry, Domestic Work, I was writing about this place, my mother’s extended family, things that happened to me as a child in Mississippi that come back as scenes in this book, but I have the opportunity to delve deeper into them in the prose and to look at the same situation in a very different way . . .
“It feels like palliative care, because the wounds can’t be reopened because they’ve not closed, they’ve not healed. The metaphor of palliative care works because that is what you do to a wound that can’t heal. You can keep it clean, you can do things to mitigate the pain, and you can keep it exposed to light. That’s what I do. And I think that returning to investigate, to write out of those particular wounds, is a form of palliative care. And I go back to the words of the poet Rumi, the wound is the place where the light enters you. And so it is a place that is, though painful, both defining and necessary. I think it gives me a particular kind of vision.”
Brit Bennett, Author of The Vanishing Half, on Empathy in Characterization
“I’m interested in representing a fictional world that’s as diverse as our actual world. And also, I’m interested in representing it in a way in which that diversity is not a conflict. That’s not to say that characters are not facing conflicts based on who they are. Obviously, that’s a big part of the book.
“But one of the things I wrote down going into this was that I didn’t want these characters’ identities to be problems that the story has to solve. To me that’s a different thing than characters facing the problem, for example, of racism or misogyny or transphobia. That is a problem, but being transgender is not a problem, being a black person or being a woman is not a problem. So to me, that was the distinction that I wanted to write toward.
“I think that’s more interesting. I think that there can be these really easy and simplistic ways that we have of thinking about identity, where if you’ve introduced a character who’s like this, then this conflict needs to arise from that. To me, it’s just boring. That was less interesting to me than, okay, now you have these two people, how are they going to work out their issues that are not about ‘this person has this type of body or this person has that type of body,’ but their issues about other things that you just struggle with as a person. So to me, those were some of the things that I’ve thought about . . .
“I think empathy also is just more interesting than bigotry. I think empathy is always more interesting than bigotry. Part of it was again of how I want to see the world and how I want to create a fictional world, but the other part of it is, yeah, it’s more interesting to write a character who has empathy than a character who is a bigot. I just think bigotry is very boring. So those were some of the things that I was thinking about in crafting the world, but I just wanted the world to look, to feel as diverse as our world is.”
Mychal Denzel Smith, author of Stakes is High, on Finding and Sustaining Hope
“The abolitionist organizer Mariame Kaba would say, hope is a discipline. It’s something that you cultivate every single day and it’s done by engaging in the work. Because it’s easy to look out and to be cast into despair because it’s like, What? We’re not winning.
“But when you are looking and you are in community with people who are committed to the work at the same level you’re committed to the work, and you’re getting little victories here and there, the hope is ingrained in you, because you understand that maybe you’re not winning the whole thing today. Maybe you’re not even winning the whole thing in your lifetime, but you’re doing something that’s setting the groundwork. You are becoming a good ancestor. You are giving future generations this ability to, when they look back at the history, to say, no, it’s not that—as we do now with every racist, every rapist—they were a person of their times.
“We don’t have to look back and say, Donald Trump was just a person of his times. We get to say there were other people who lived through that moment, and they fought and they fought back, and they were tenacious, and they did everything that they could in their power to ensure that the world that the Donald Trumps and everyone who follows him wants to come to pass, it doesn’t have to be. You do that and you engage in that and you find your people. You find the people that you are aligned with and grow that coalition and keep finding more people, and you build community, and you find these love connections with people to be able to sustain you.”
Yaa Gyasi, author of Transcendent Kingdom, on Writing about Addiction and Depression
“I think starting with the science really helped. Gifty [the protagonist] . . . the research that she does is modeled on the research that my friend does, and reward-seeking. Before I started researching this novel, I hadn’t really ever thought about things like addiction and depression as existing on this one spectrum. But through this work, one thing that came up for me was this idea that they both involve reward-seeking circuits of the brain. So with addiction, the animal continues to seek reward even when there’s great risk involved. And with depression, the animal cannot seek reward, even though there’s pleasure despite any risk. Once I kind of thought about these two things as existing on this spectrum, it helped me to enter into it.
“But the other piece of the research, beyond the science, was just talking to people, reading as much as I could from firsthand accounts of people who had struggled with this kind of major depressive episode. I think that was really moving and also really helpful. But it is something that’s difficult to write about.
“The other thing that helped is that I wasn’t writing it from the perspective of Gifty’s mother. That would have been another layer of difficulty to try to get into what she was feeling from that kind of lived experience. This way I’m seeing around it. I’m seeing it through the eyes of Gifty, who’s experiencing it as a caretaker, which I think is obviously a very different experience than experiencing it for oneself . . .
“I was thinking a lot about how culture and mental health are so intertwined. And how we witness or experience these illnesses has so much to do with the communities that we grew up in. Even that opening . . ., what you’re witnessing is Gifty’s shame and fear around seeing this man. But she describes the fact that nobody in the market seems afraid. Nobody in the market seems disgusted. Nobody’s parting the waters for this man to walk through. At some point, she says something like, his presence was weather, it wasn’t a thunderstorm, it was like a cloud on an otherwise sunny day.
“For me, that way of bringing in the way that other people experience or think about these different issues, the language and vocabulary of these communities for talking about things like depression and addiction, was just one way to see how culture and, specifically, mental health are deeply, deeply intertwined.”

By Chrysta Naron
Letters are keys for children to unlock the written world, and their futures. They’re also shapes—complicated ones. Teaching your child to see and form these important lines and curves will set them on the path to reading. Yet all those letters can look a whole lot alike to young kids. This crafty early literacy activity helps even the youngest kids, who can’t yet write with a pencil, distinguish and remember letters.
This easy project leverages the power of talking about letters and breaking them down to their parts. Discussing, describing, and dissecting each letter’s unique shape helps kids identify (and recreate) these all-important symbols. Pointing out how straight or curved lines come together in a particular letter draws kids’ attention to the details necessary to tell them apart. This easy at-home letter-learning activity is great for doing that in a fun, tactile way.
This activity is a twist on classic playdough letters, but with two important changes: We’ll write each letter in front of our children, giving them the chance to observe how we hold a pen and move it across the paper to form the letter. And we’ll use craft sticks to highlight the difference between the straight and curved lines that form our alphabet.
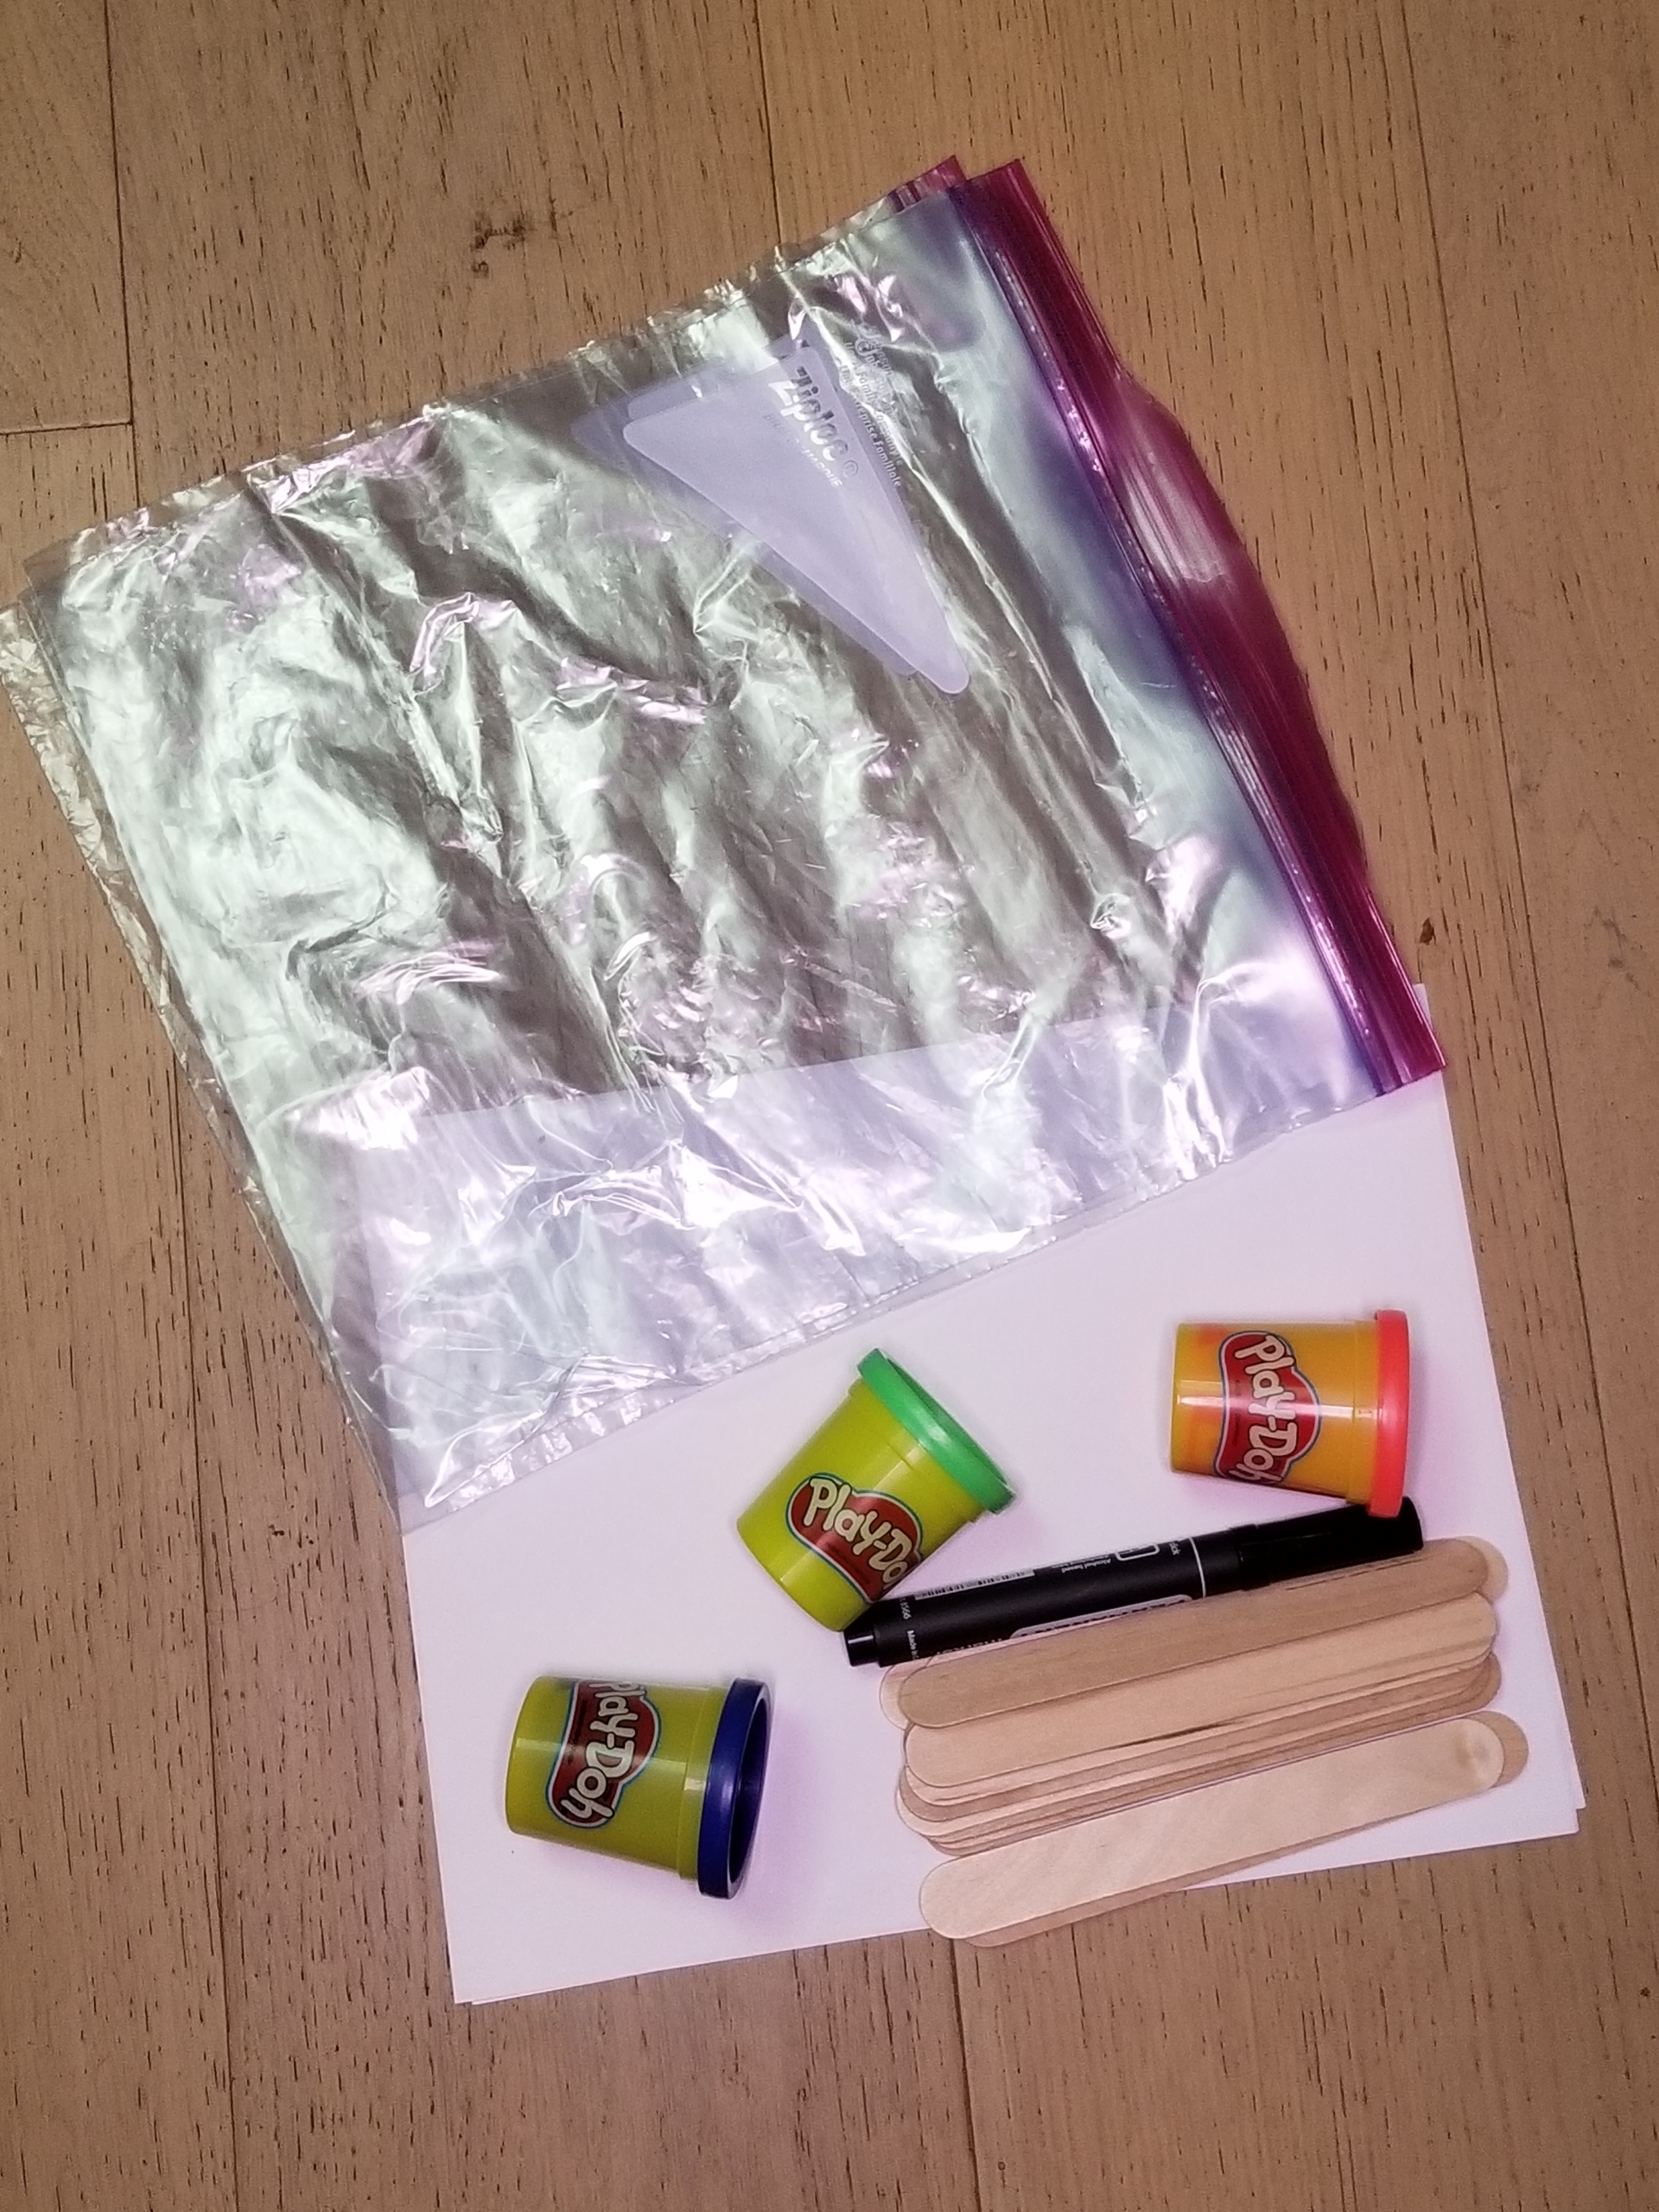
Materials Needed:
- Craft sticks
- Playdough
- Marker
- Paper
- Gallon sandwich bags
Cost: $6 for a bag of craft sticks, sandwich bags, and a container of playdough
Step 1: Write some uppercase letters on a piece of paper. Make them quite large, one letter per page. You will be laying craft sticks over the letters, so you can use the length of a stick for a guide as to size.
Tip: Starting with the letters in your child’s name will get extra buy-in, as children are drawn to their own name. Talk to your child as you create each letter: Say the name and describe its attributes. For example, if you write the letter A, you might say “This is the letter A. It has two lines that touch like a mountain and one line that goes across the middle, like a bridge.”
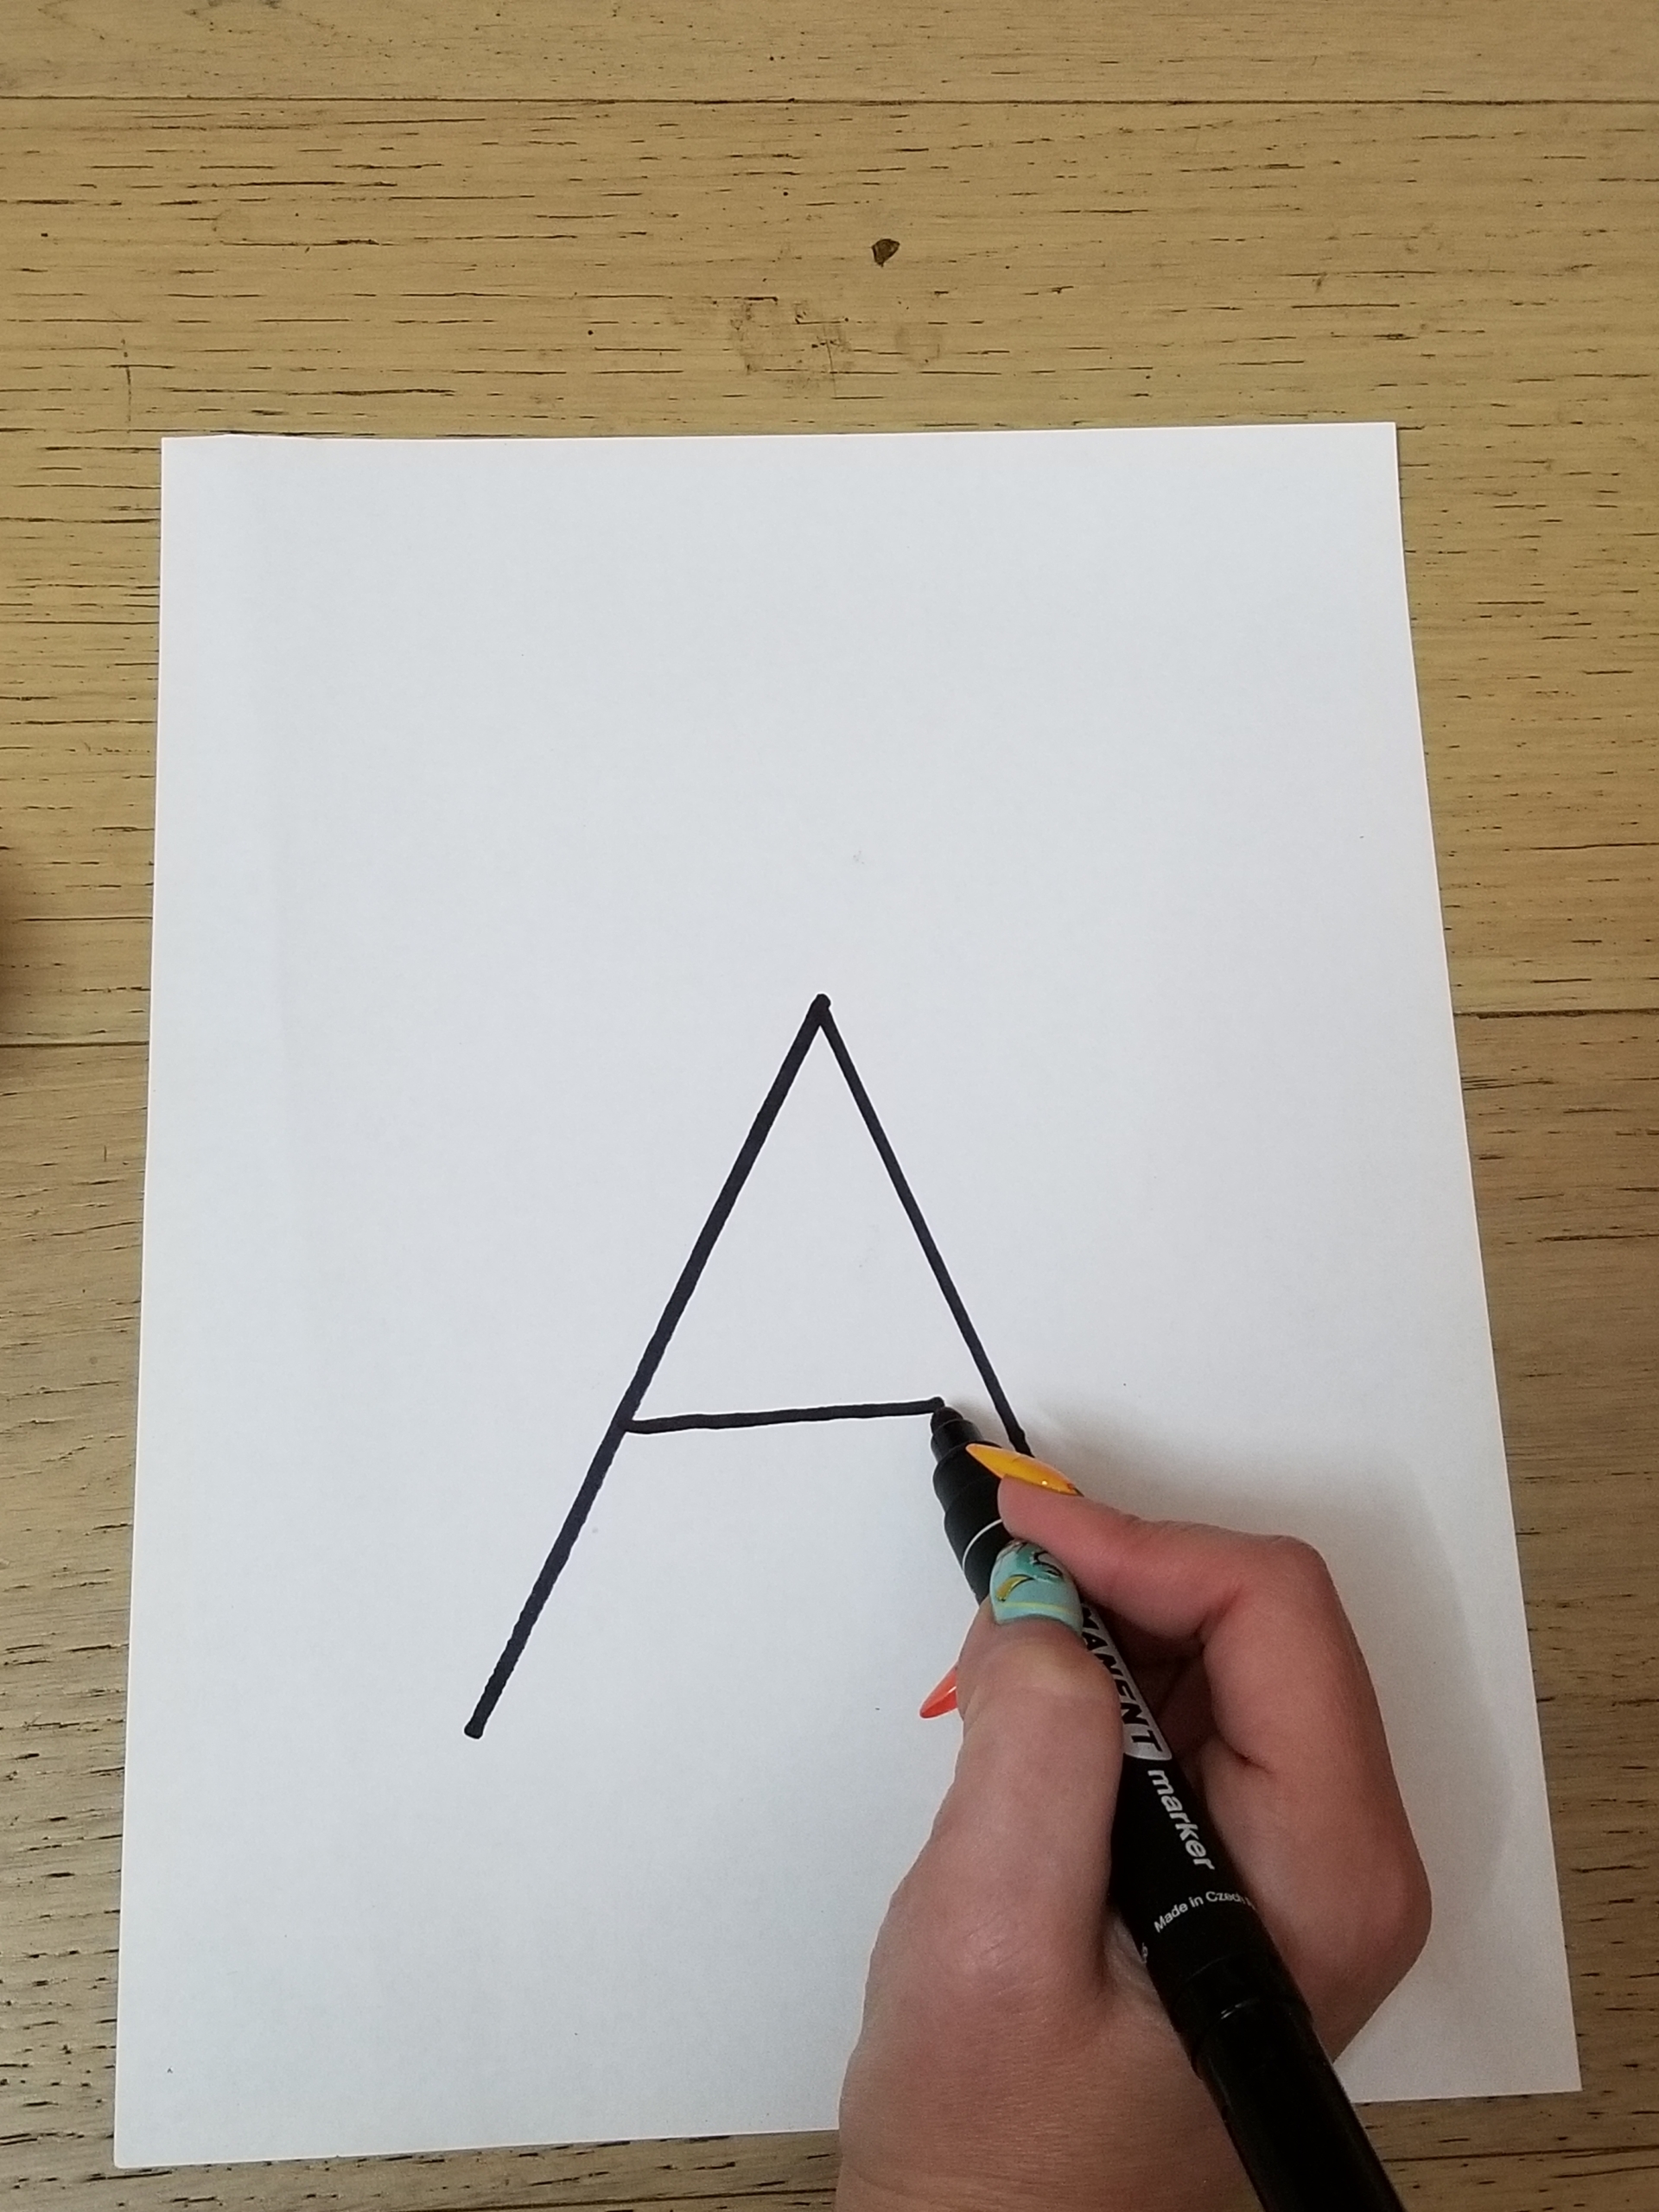
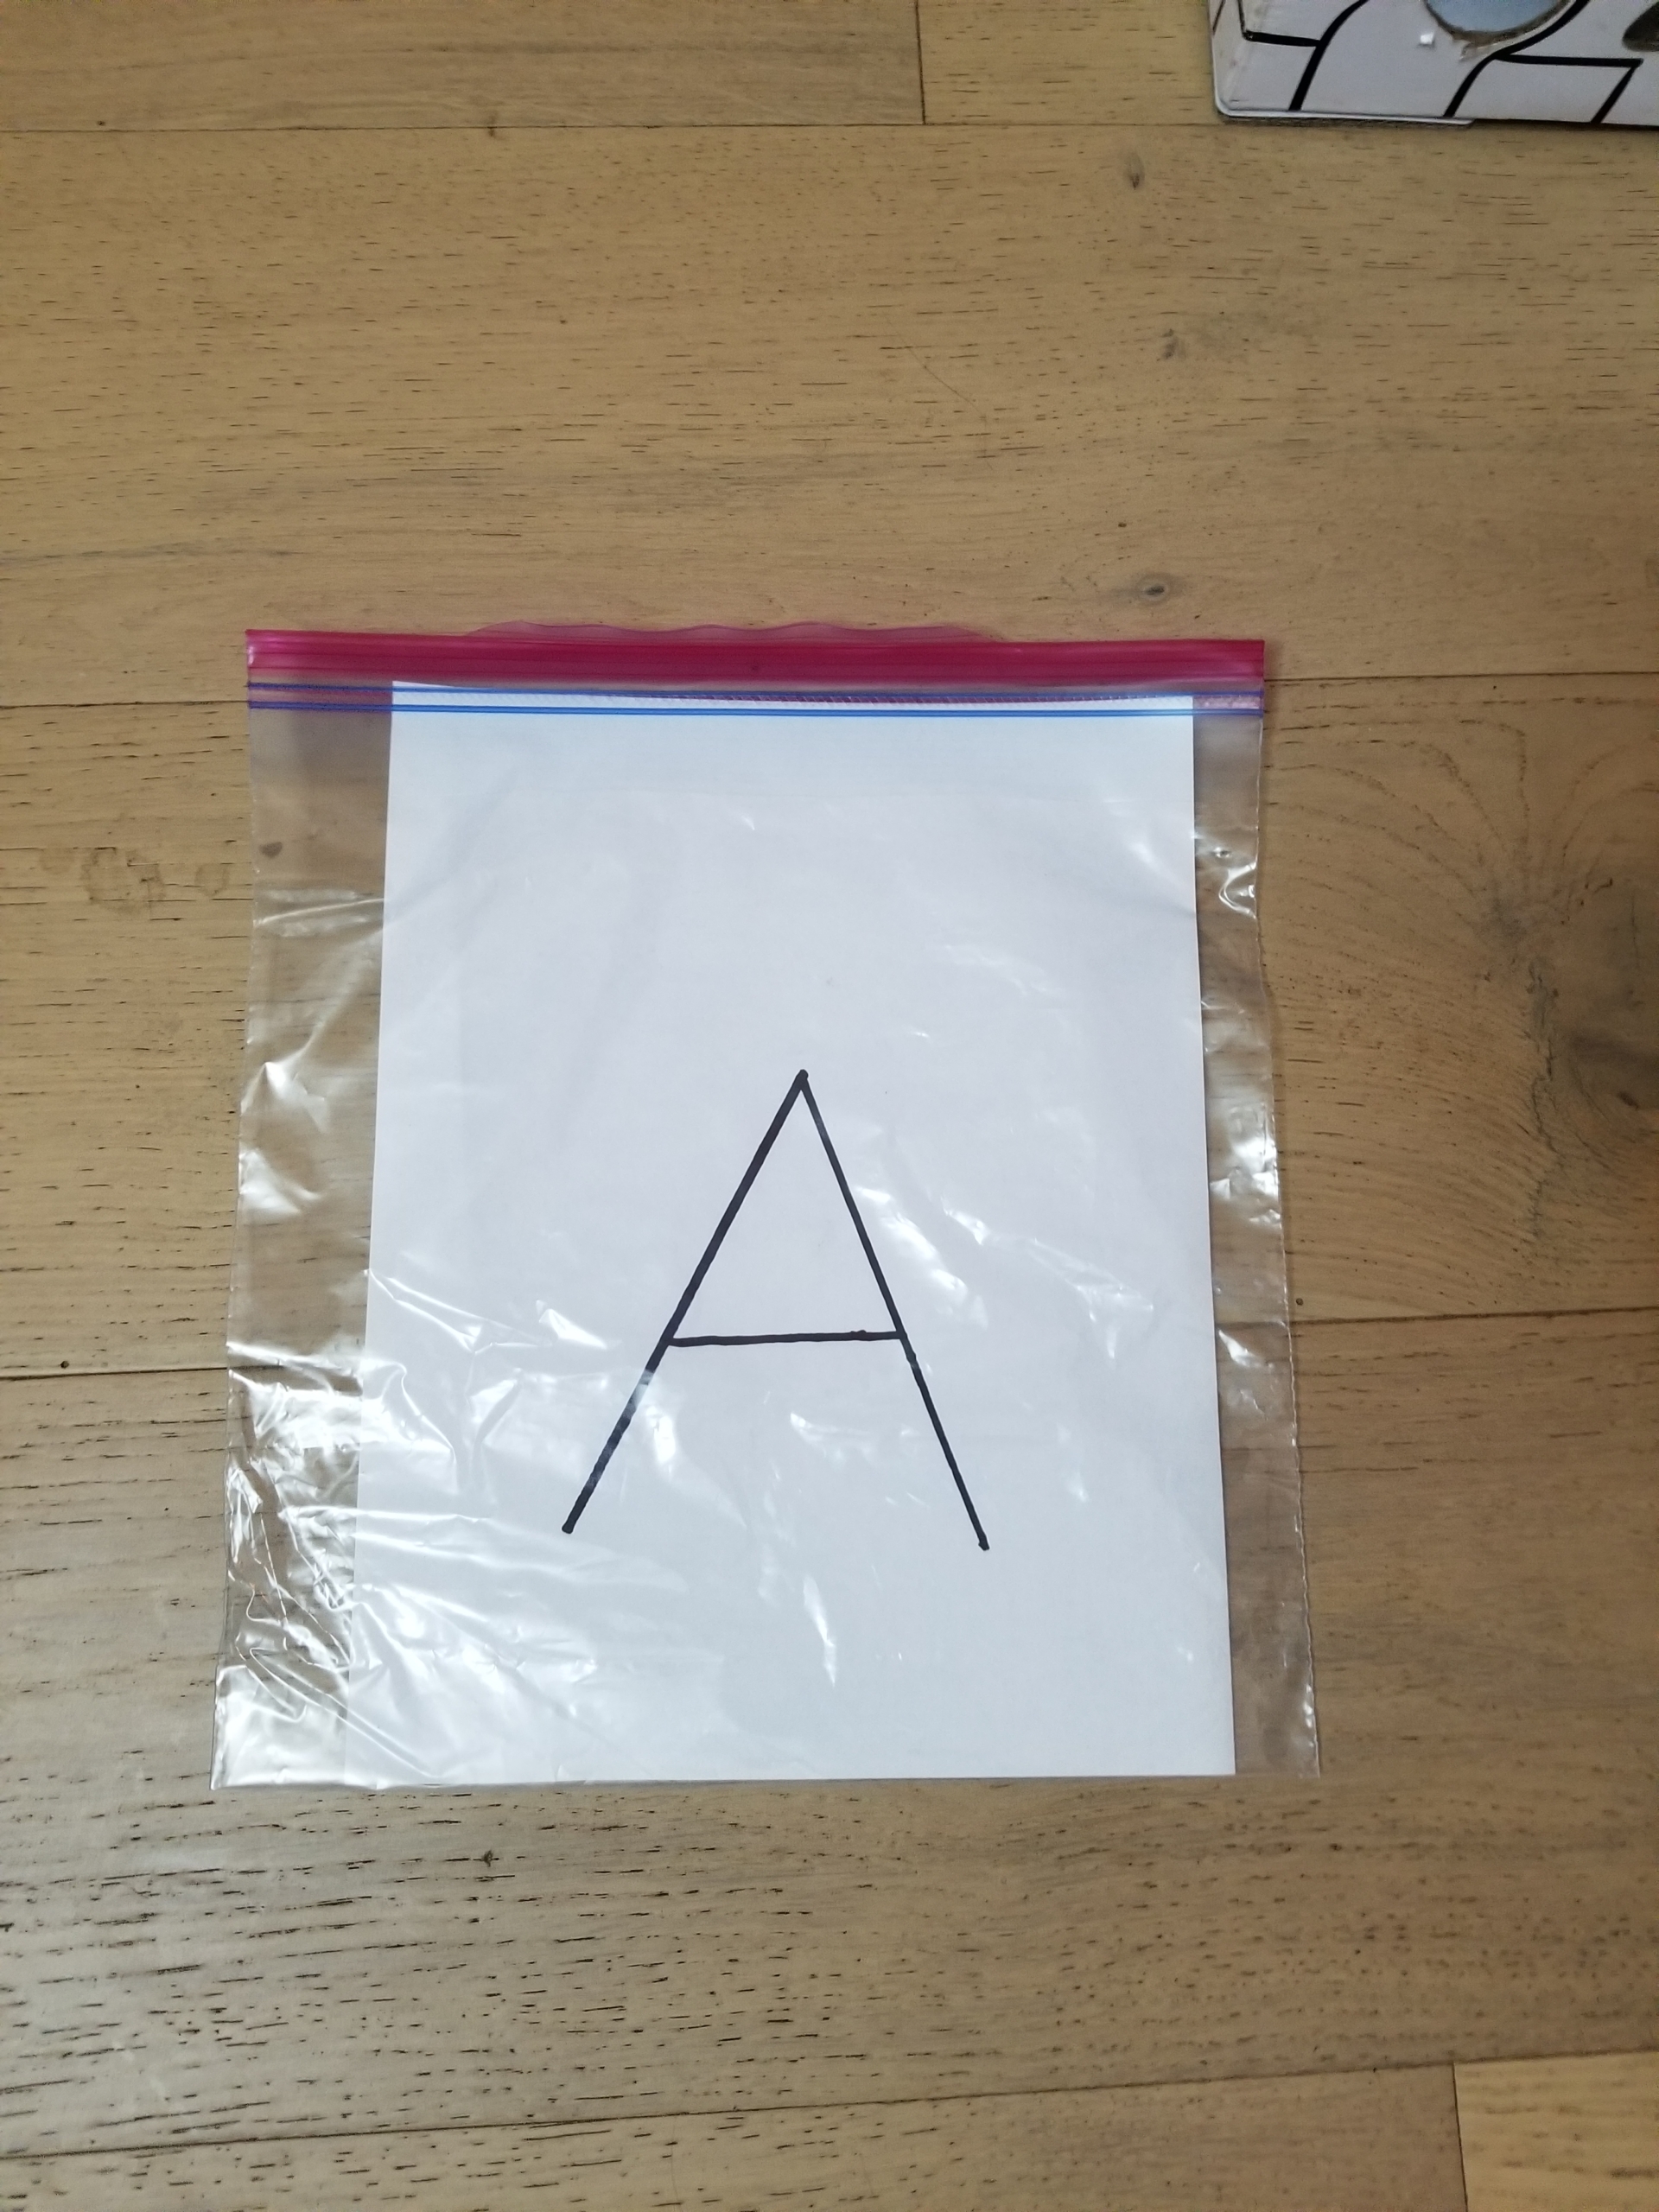
Step 2: Slide each letter into its own gallon sandwich bag. This allows you to roll playdough all over the letters without destroying the paper on each use.
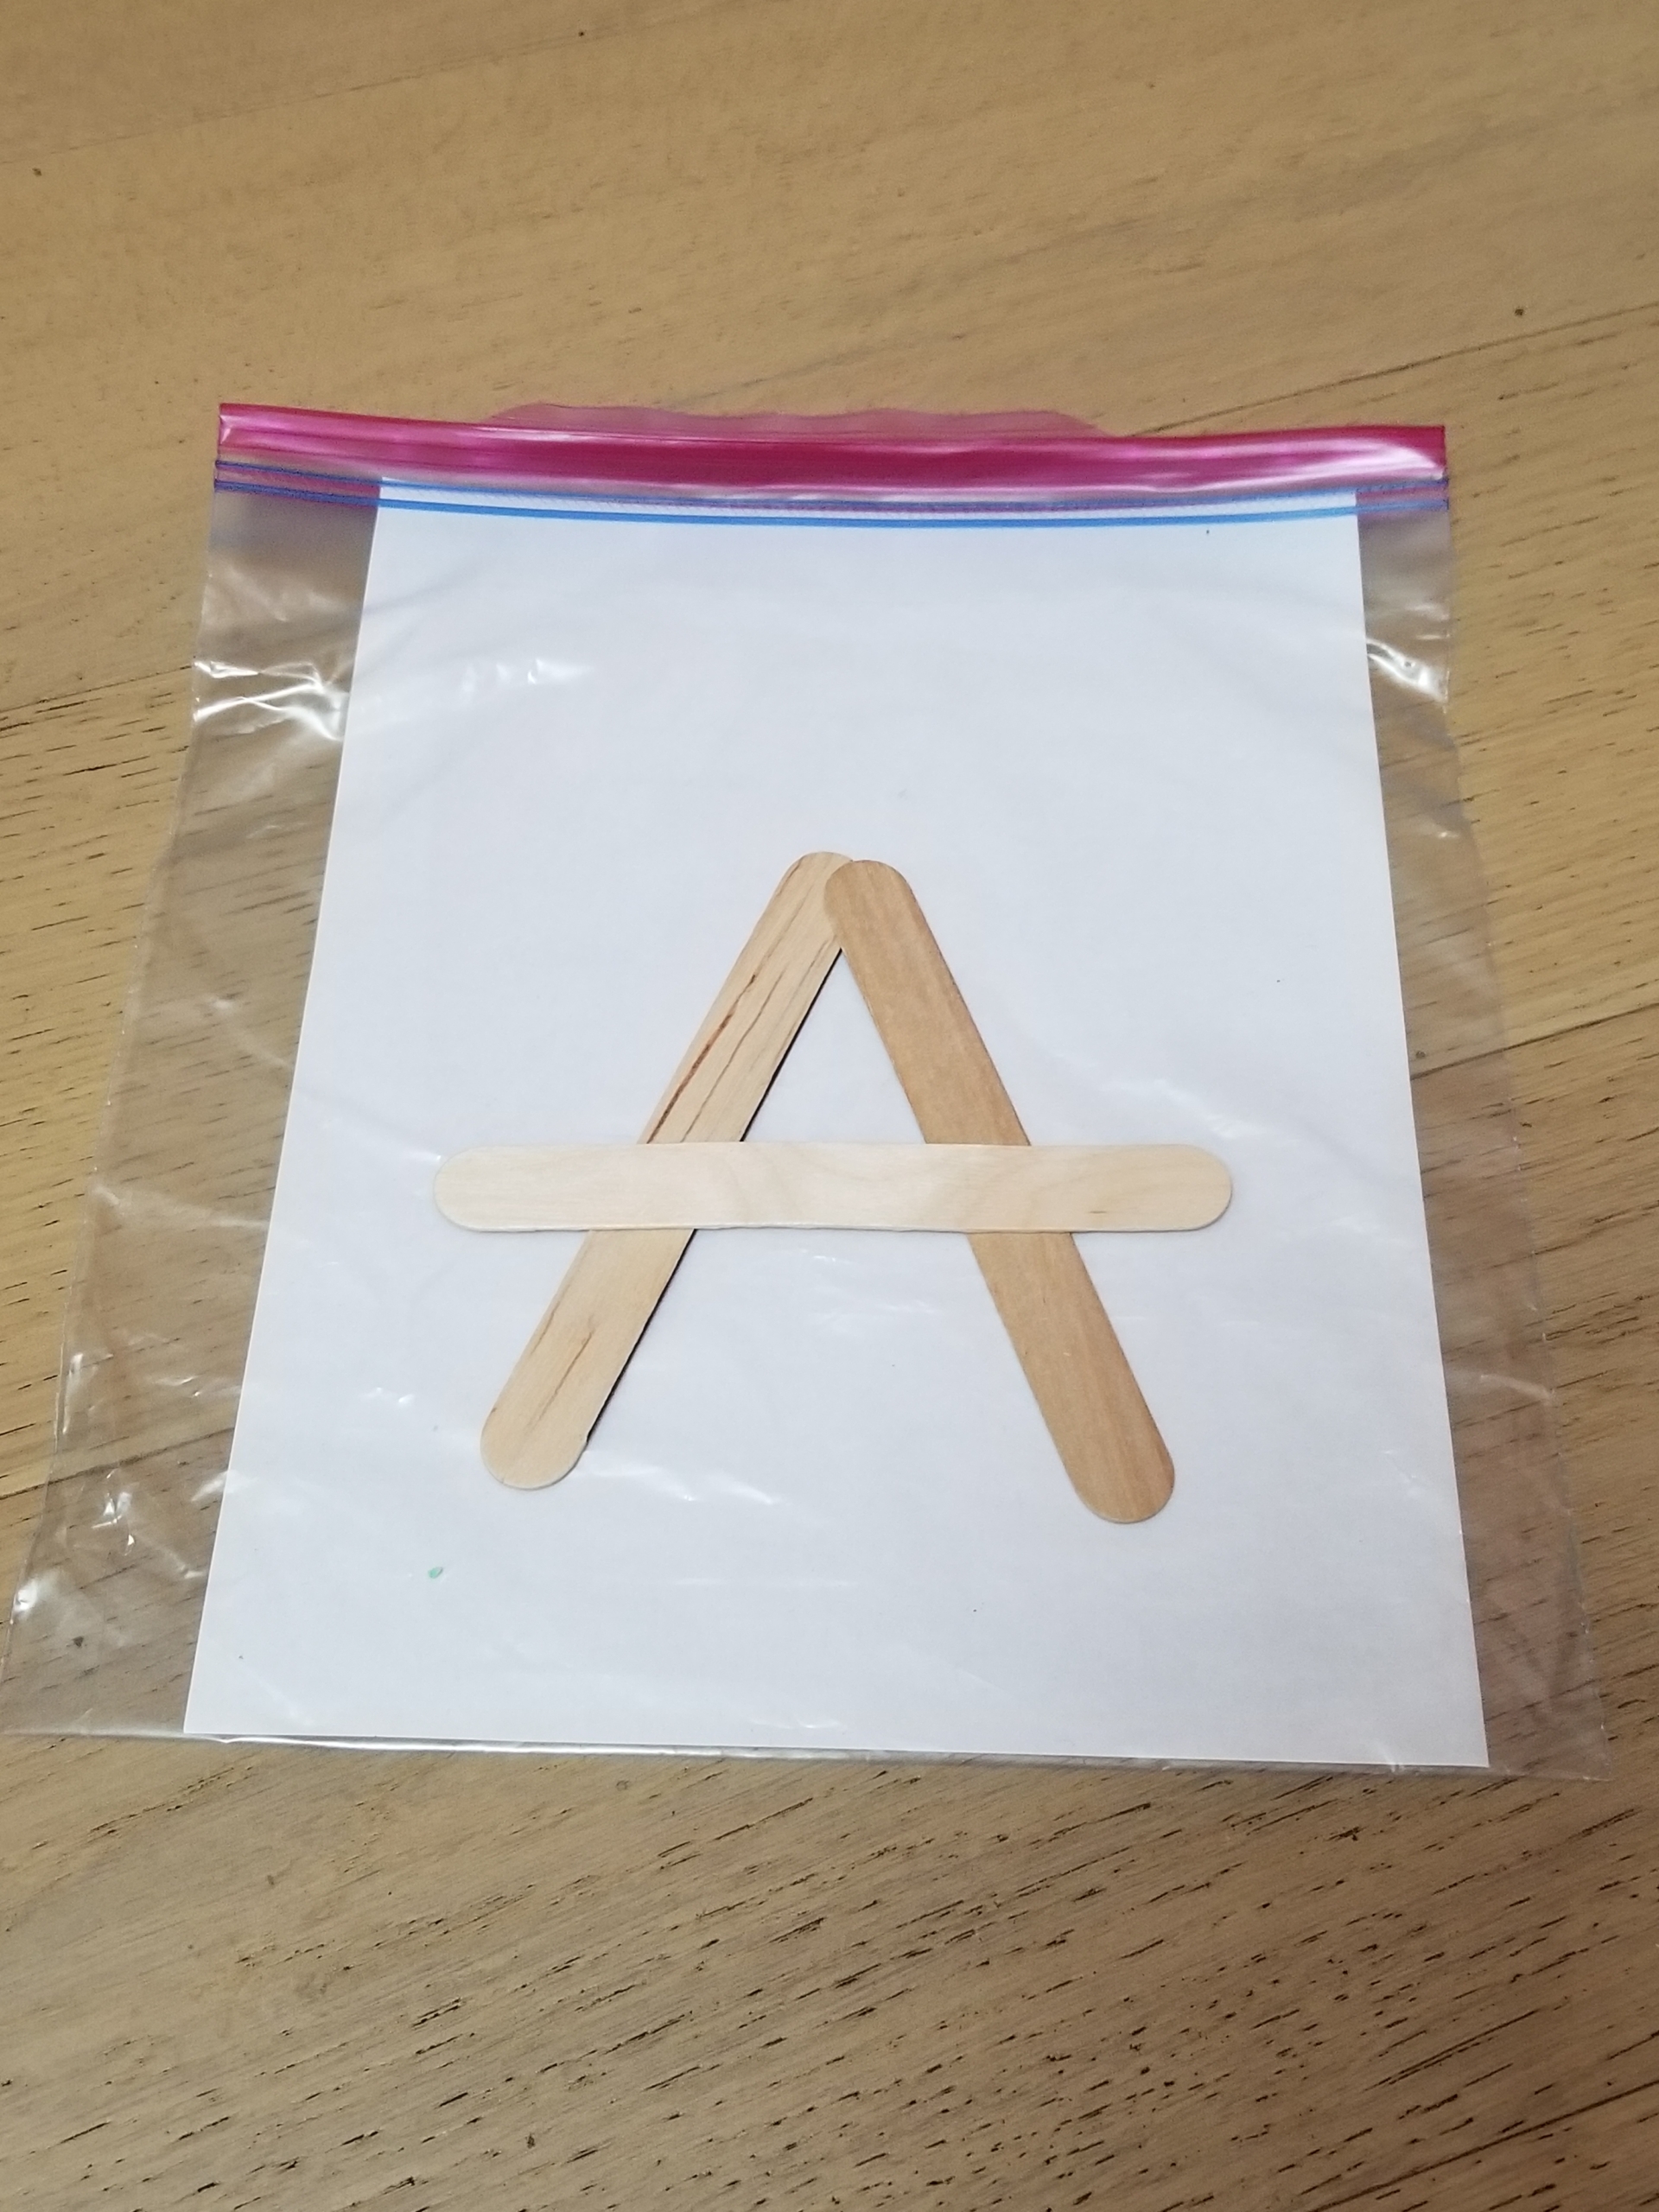
Step 3: Select a letter that is all straight lines, such as A, L, M, or X. Point to the lines and explain that some letters are tall and strong, so they need strong and tall lines, just like craft sticks. Demonstrate how to create the letter by laying craft sticks over the written letter. Invite your child to try.
Note: I noticed that when my students try to create letters with just dough, certain letters sag that should sit straight. Adding craft sticks allows them to create a better likeness for each letter, enhancing the learning.
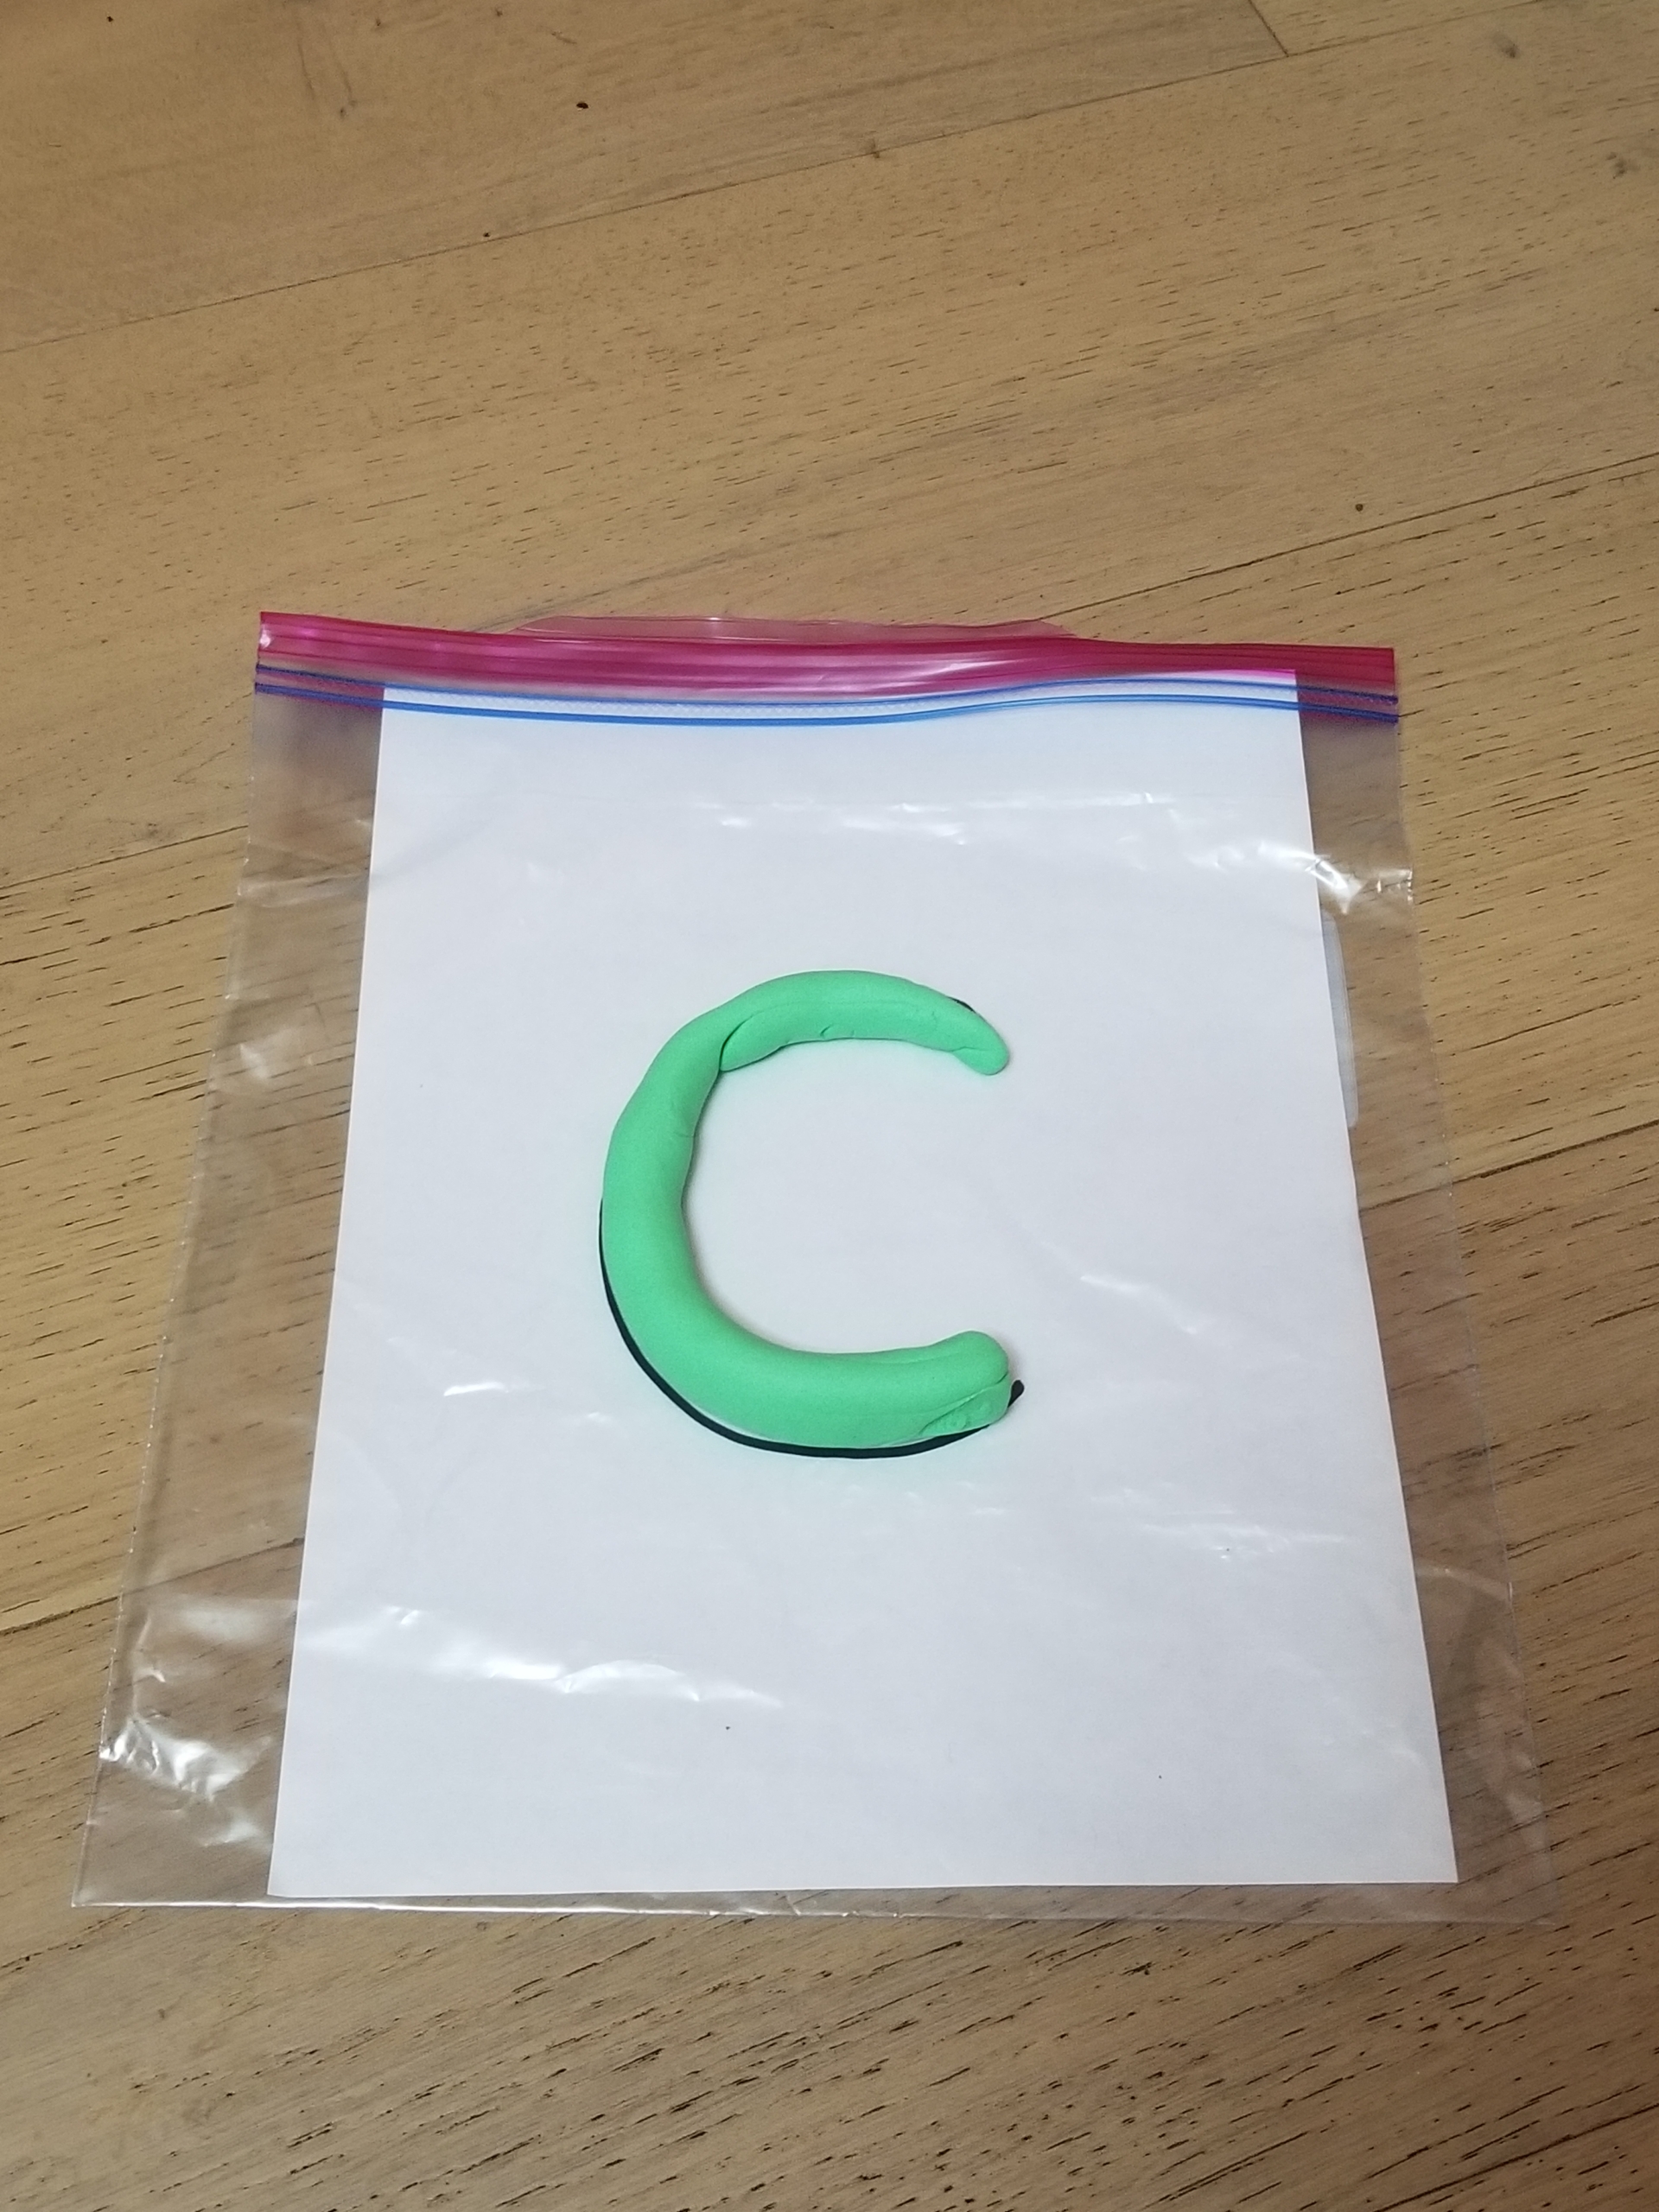
Step 4: Select a letter that is completely round, such as O, C, or U. Roll out a long snake-like piece of playdough. Explain that some letters are soft and round, so we’re making them with something soft and round (dough). Show your kiddo how to create the letter by shaping the playdough onto the letter. Invite your child to try this, too.
Tip: Depending on their level, you might have to make the playdough strips for them. But this is also a great chance to develop those fine motor skills!
Step 5: Choose a letter with straight and curved elements, like D, P, or B. Explain that some letters are both tall and round, so we need craft sticks and playdough. Use both materials to create the letter, letting your child show you where they think the sticks and dough should go.
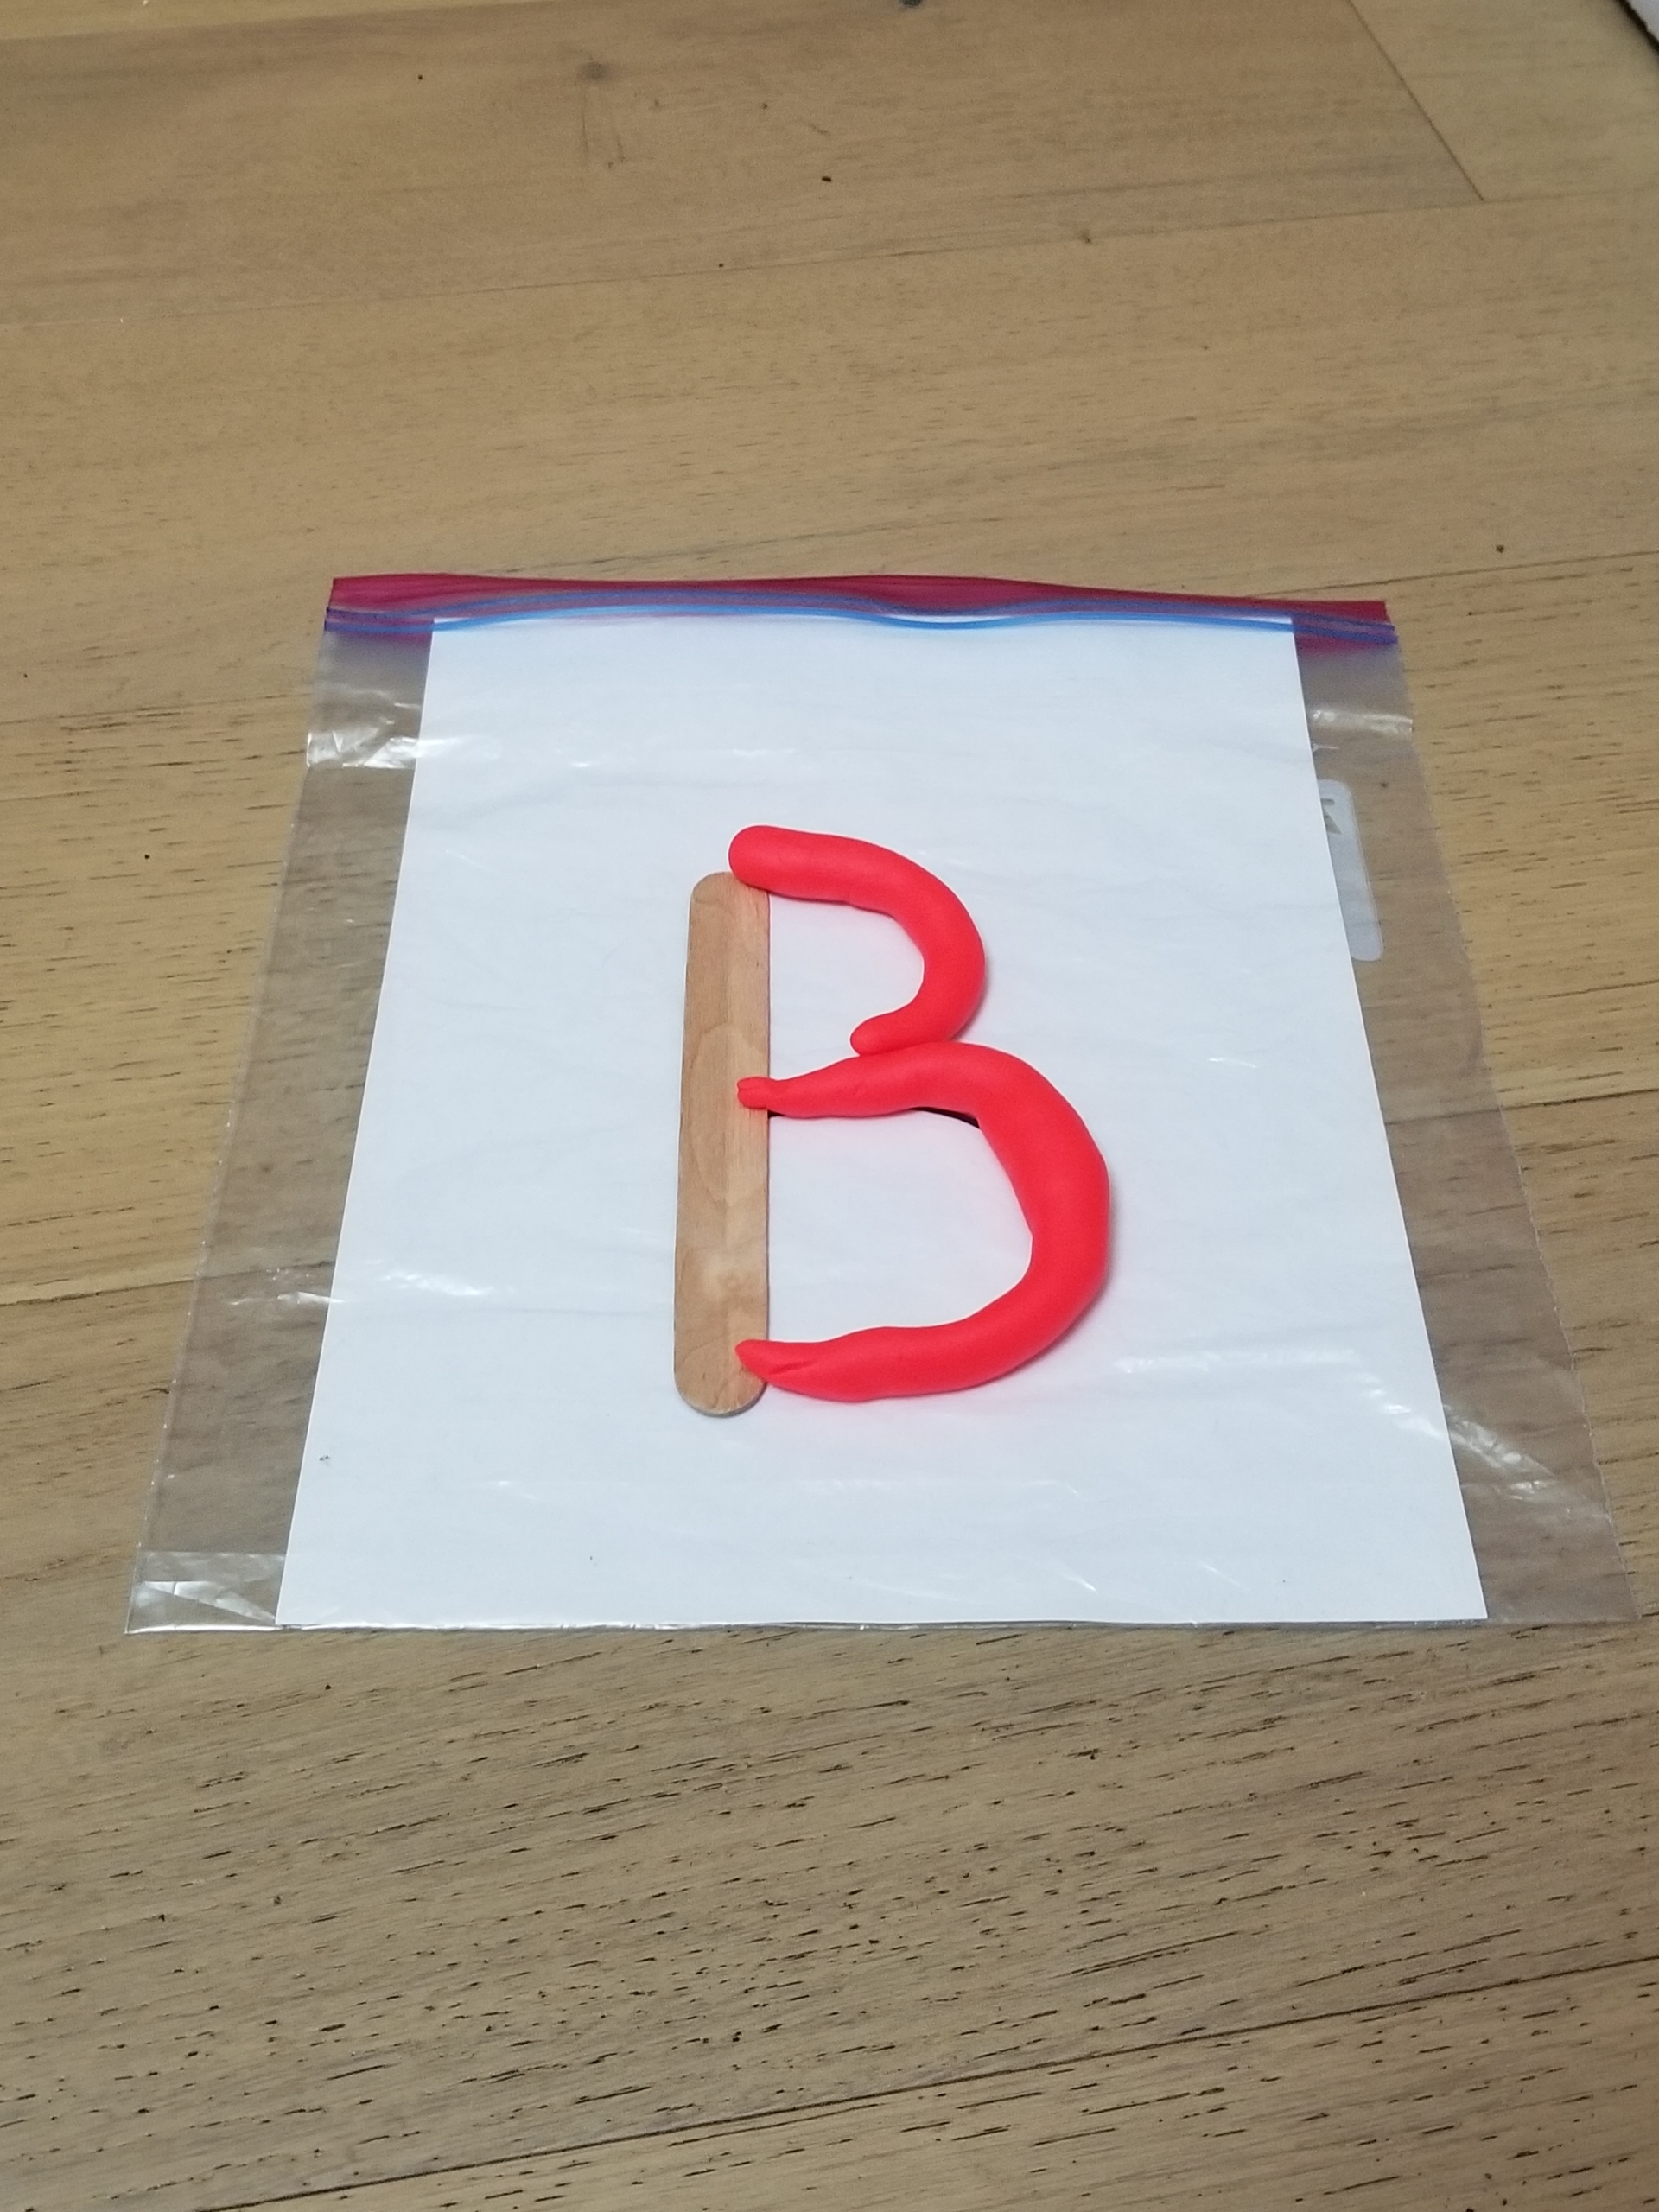
Step 6: Let your child take the lead! Get all the letters together and ask prompting questions while they create each letter. What’s the name of this letter? Do you know any words or names that start with this letter? How are you going to make it? Let them try to form the letters as independently as possible.
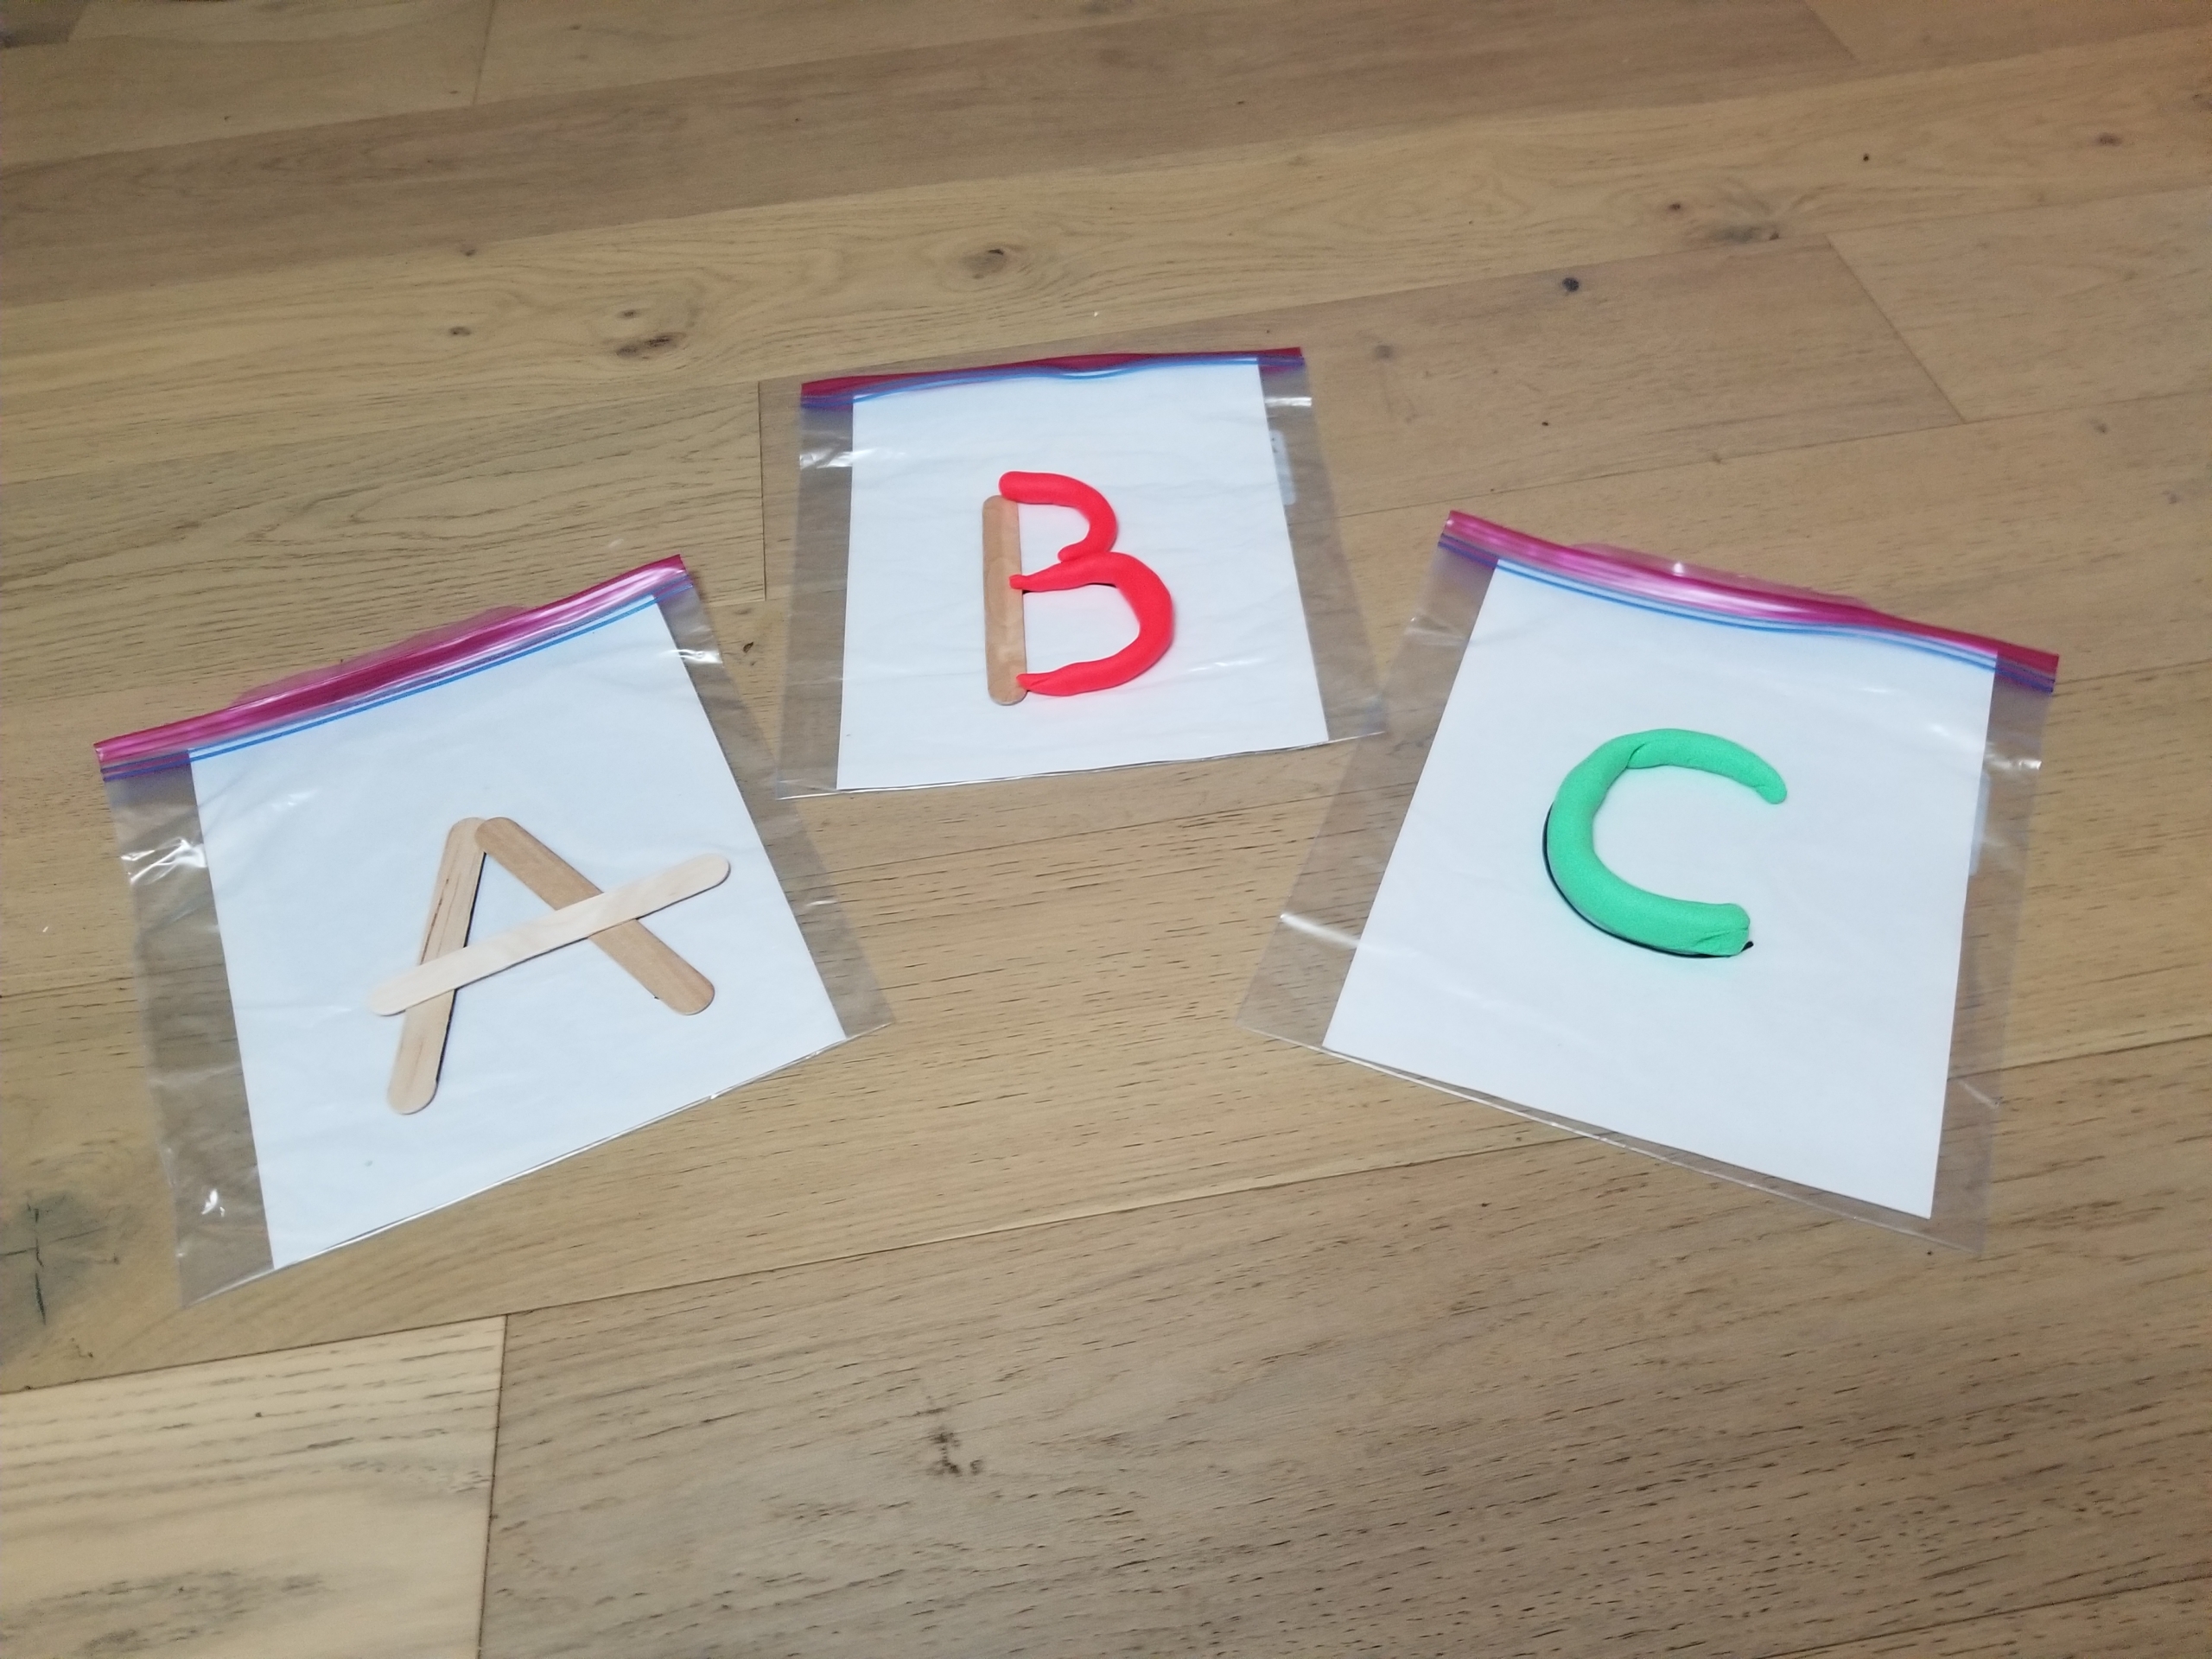
Our world is made up of letters, and one day your child’s letters might make up the world. So let’s get started—today!
Pin Me for Reference :
By Maya Payne Smart
More and more students enter school with no knowledge of classic nursery rhymes, primary school teachers report. Some traditional poems like Baa Baa Black Sheep passed from generation to generation for centuries, but they hold markedly less appeal for today’s parents. Indeed, many parents admit not recalling the nursery rhymes of their youth, let alone teaching them to their kids. And this has some educators, researchers, and early childhood experts worried.
Heightened scrutiny of the lyrics and origins of traditional songs plus competition from flashier child entertainment options contribute to the decline. Some of the classic tunes have undeniably racist roots, and conscious parents don’t want to pass their offensive themes and imagery on to a new generation. Other rhymes just feel dated and of uncertain value to younger parents. Going on about an old woman who lived in a shoe seems no more enriching than bopping along to Baby Shark.
But nursery rhyme defenders insist that the vast repertoire of traditional songs (offensive titles excluded) present unparalleled opportunities to foster sought-after early literacy skills, easily, enjoyably, and affordably. I’m inclined to agree. Here’s a rundown of the top reasons to add nursery rhymes—classic, remixed, or brand new—to your daily parenting routines.
Brain Development
Professor Usha Goswami, director of the University of Cambridge’s Centre for Neuroscience in Education, says four key caregiver behaviors help babies acquire language:
- making eye contact
- speaking in exaggerated, sing-song tones
- responsiveness to the infants’ actions, movements, and verbalizations
- taking turns in “conversation” (even before kids can truly talk).
Nursery rhymes incorporate all four behaviors and therefore play a vital role in children’s earliest development. When parents gaze at a baby, gently grasp her big toe, sing this little piggy went to market, then pause for a coo or babble in response, they are sending communicative, brain-building signals that even a newborn can recognize and learn from.
The regular cadence, plus the rhymes’ rise and fall, provide “the perfect rhythmic template for the developing brain,” Goswami says. When sung, the traditional tunes move air molecules and create waves of sound pressure at rates that align well with the way brain cells in the auditory cortex move, she told The Times Educational Supplement. The deliberate, rhythmically regular speech exaggerates the signal in ways that help the developing brain convert sound into neural signals and make sense of language.
Word Learning
Baby language proceeds from grunts to coos to babbles, often not arriving at anything resembling recognizable speech until a child is ten months or older. But evidence suggests infants understand their first word (often their own name) as young as four months old. The median vocabulary size at 16 months is 55 words and jumps to ten times that by 30 months. And the talking, singing, or reading of caregivers introduced each and every one.
Toddlers typically hear thousands of words a day, which includes any nursery rhymes their parents sing. If it weren’t for repeated recitations of Little Miss Muffett, I wouldn’t have learned the words tuffet, curds, and whey for years, if ever. But long before kindergarten, I picked up this unusual vocabulary and held a mental picture of a little girl seated on a stool eating something like cottage cheese.
Research confirms it wasn’t only the repetition that aided my word learning, but the power of the rhyme itself. Rhymes encourage kids to anticipate upcoming words and that active curiosity about what’s coming next makes new vocabulary more memorable, hypothesizes researcher Kirsten Read. The building anticipation and extra predictability of a rhyming word at the end of a stanza may heighten kids’ attention and thereby help the new words stick.
Phonological Awareness
As adults, it’s easy to look at a word like cat, see its three letters, and associate them with three distinct sounds. But that’s a learned perception. In speech, the /c/, /a/, and /t/ sounds in cat are all blurred together. Kids have to learn to discern where one sound ends and the next one begins.
Nursery rhymes support future reading by heightening kids’ sensitivity to the syllables and the separate beginning, middle and ending sounds within words. The stress patterns of classics like Jack and Jill went up the hill help children learn about rhymes, an important phonological dimension. And the alliteration in a rhyme like Peter Piper Picked a Peck of Pickled Peppers accentuates the /p/ sound and helps it stand out from surrounding sounds, a finer-grained level of sound sensitivity.
Fine Motor Skills
Kids need to develop the tiny muscles in their hands and fingers to hold a crayon, pen, or pencil and learn to write. Parents can take a cue from children’s librarians and preschool teachers and use “fingerplays”—songs and rhymes acted out with hands and fingers alone. From hand-clapping to the tune of Pat-A-Cake with a baby to the more delicate pinching movements and wrist turns of the Itsy Bitsy Spider crawling up the water spout, these classic interactive rhymes boost kids’ fine motor skills and eye-hand coordination.
See this great video demo from Ms. Melissa, a children’s librarian with the Austin Public Library.
Did you learn nursery rhymes as a kid? Will you carry on the tradition?
Pin Me for Reference :

Why buy a pencil case when you can make your own in a few simple steps? Duct tape comes in so many fun patterns that you can use to create a super-cute DIY pencil case. You can even punch three holes along the bottom of your case and it will fit perfectly in a binder.
Once you get the hang of cutting the duct tape, this DIY pencil case craft will not take long at all. Kids might need a little help aligning the tape, but they can easily join in and create their own special, personalized bag for their school binder or backpack. It will make it so much more exciting for them to pull out a pencil for homework or to work on literacy activities at home! This could also be a great accessory to our to-go activity kit for kids.
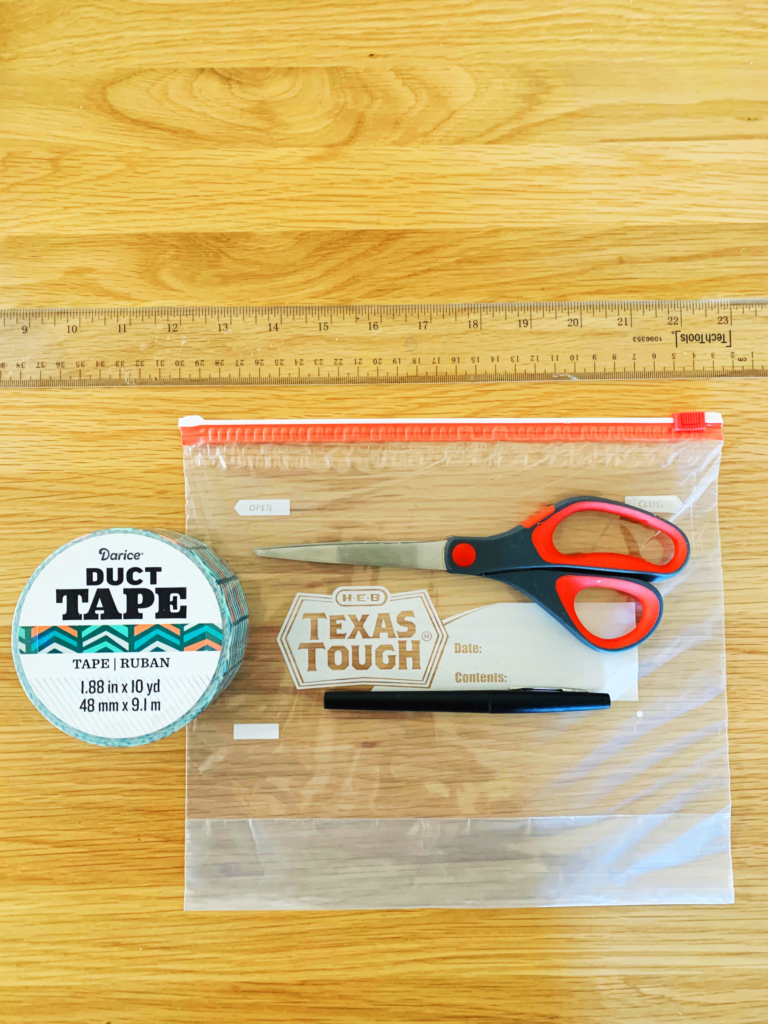
Materials:
- One gallon-sized ziplock plastic bag
- Duct tape in a fun print or color (or multiple styles to create your own pattern)
- Ruler
- Marker
- Scissors
Optional:
- Three-hole punch or single-hole punch
- Plastic cutting mat if you have one (this makes cutting the duct tape easier, but is definitely not necessary!)
Cost: Nothing, if you have these simple supplies on hand. Otherwise, duct tape should be available from a local craft store (or there are many options on Amazon!) for a few dollars.
Step 1: Take your ruler and draw a line across the ziplock bag three inches up from the bottom. With your scissors, cut that part off.
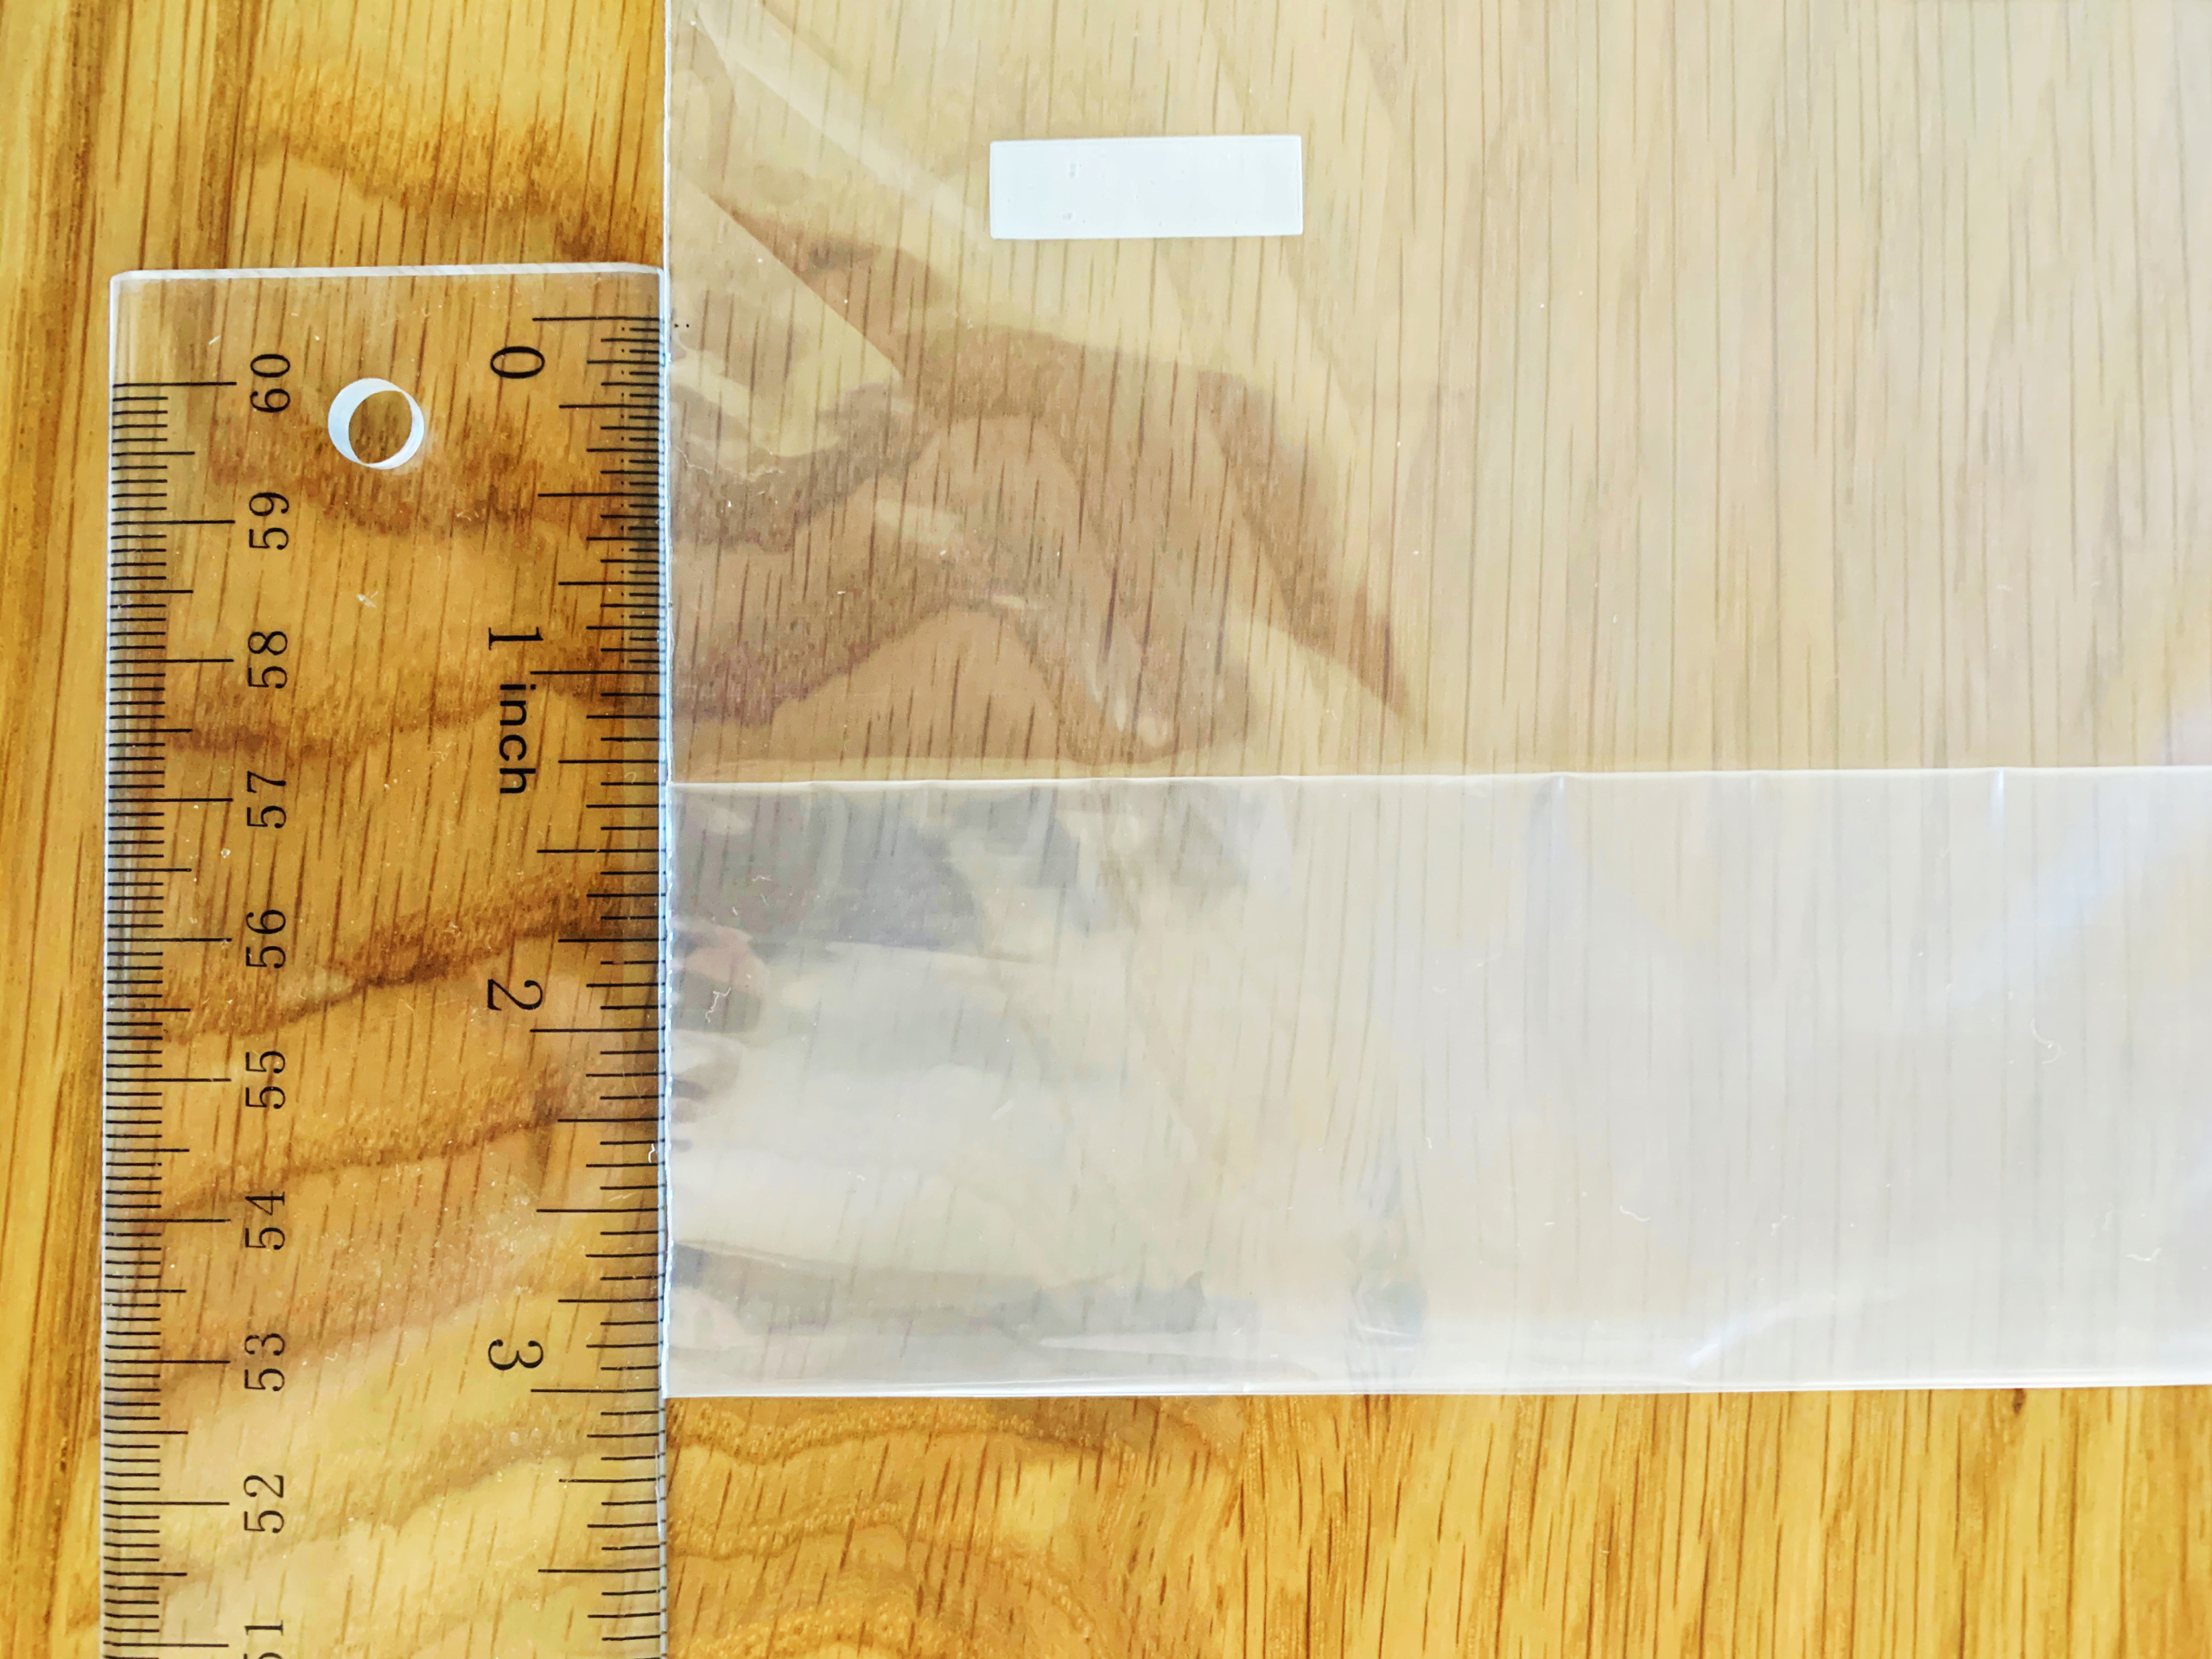
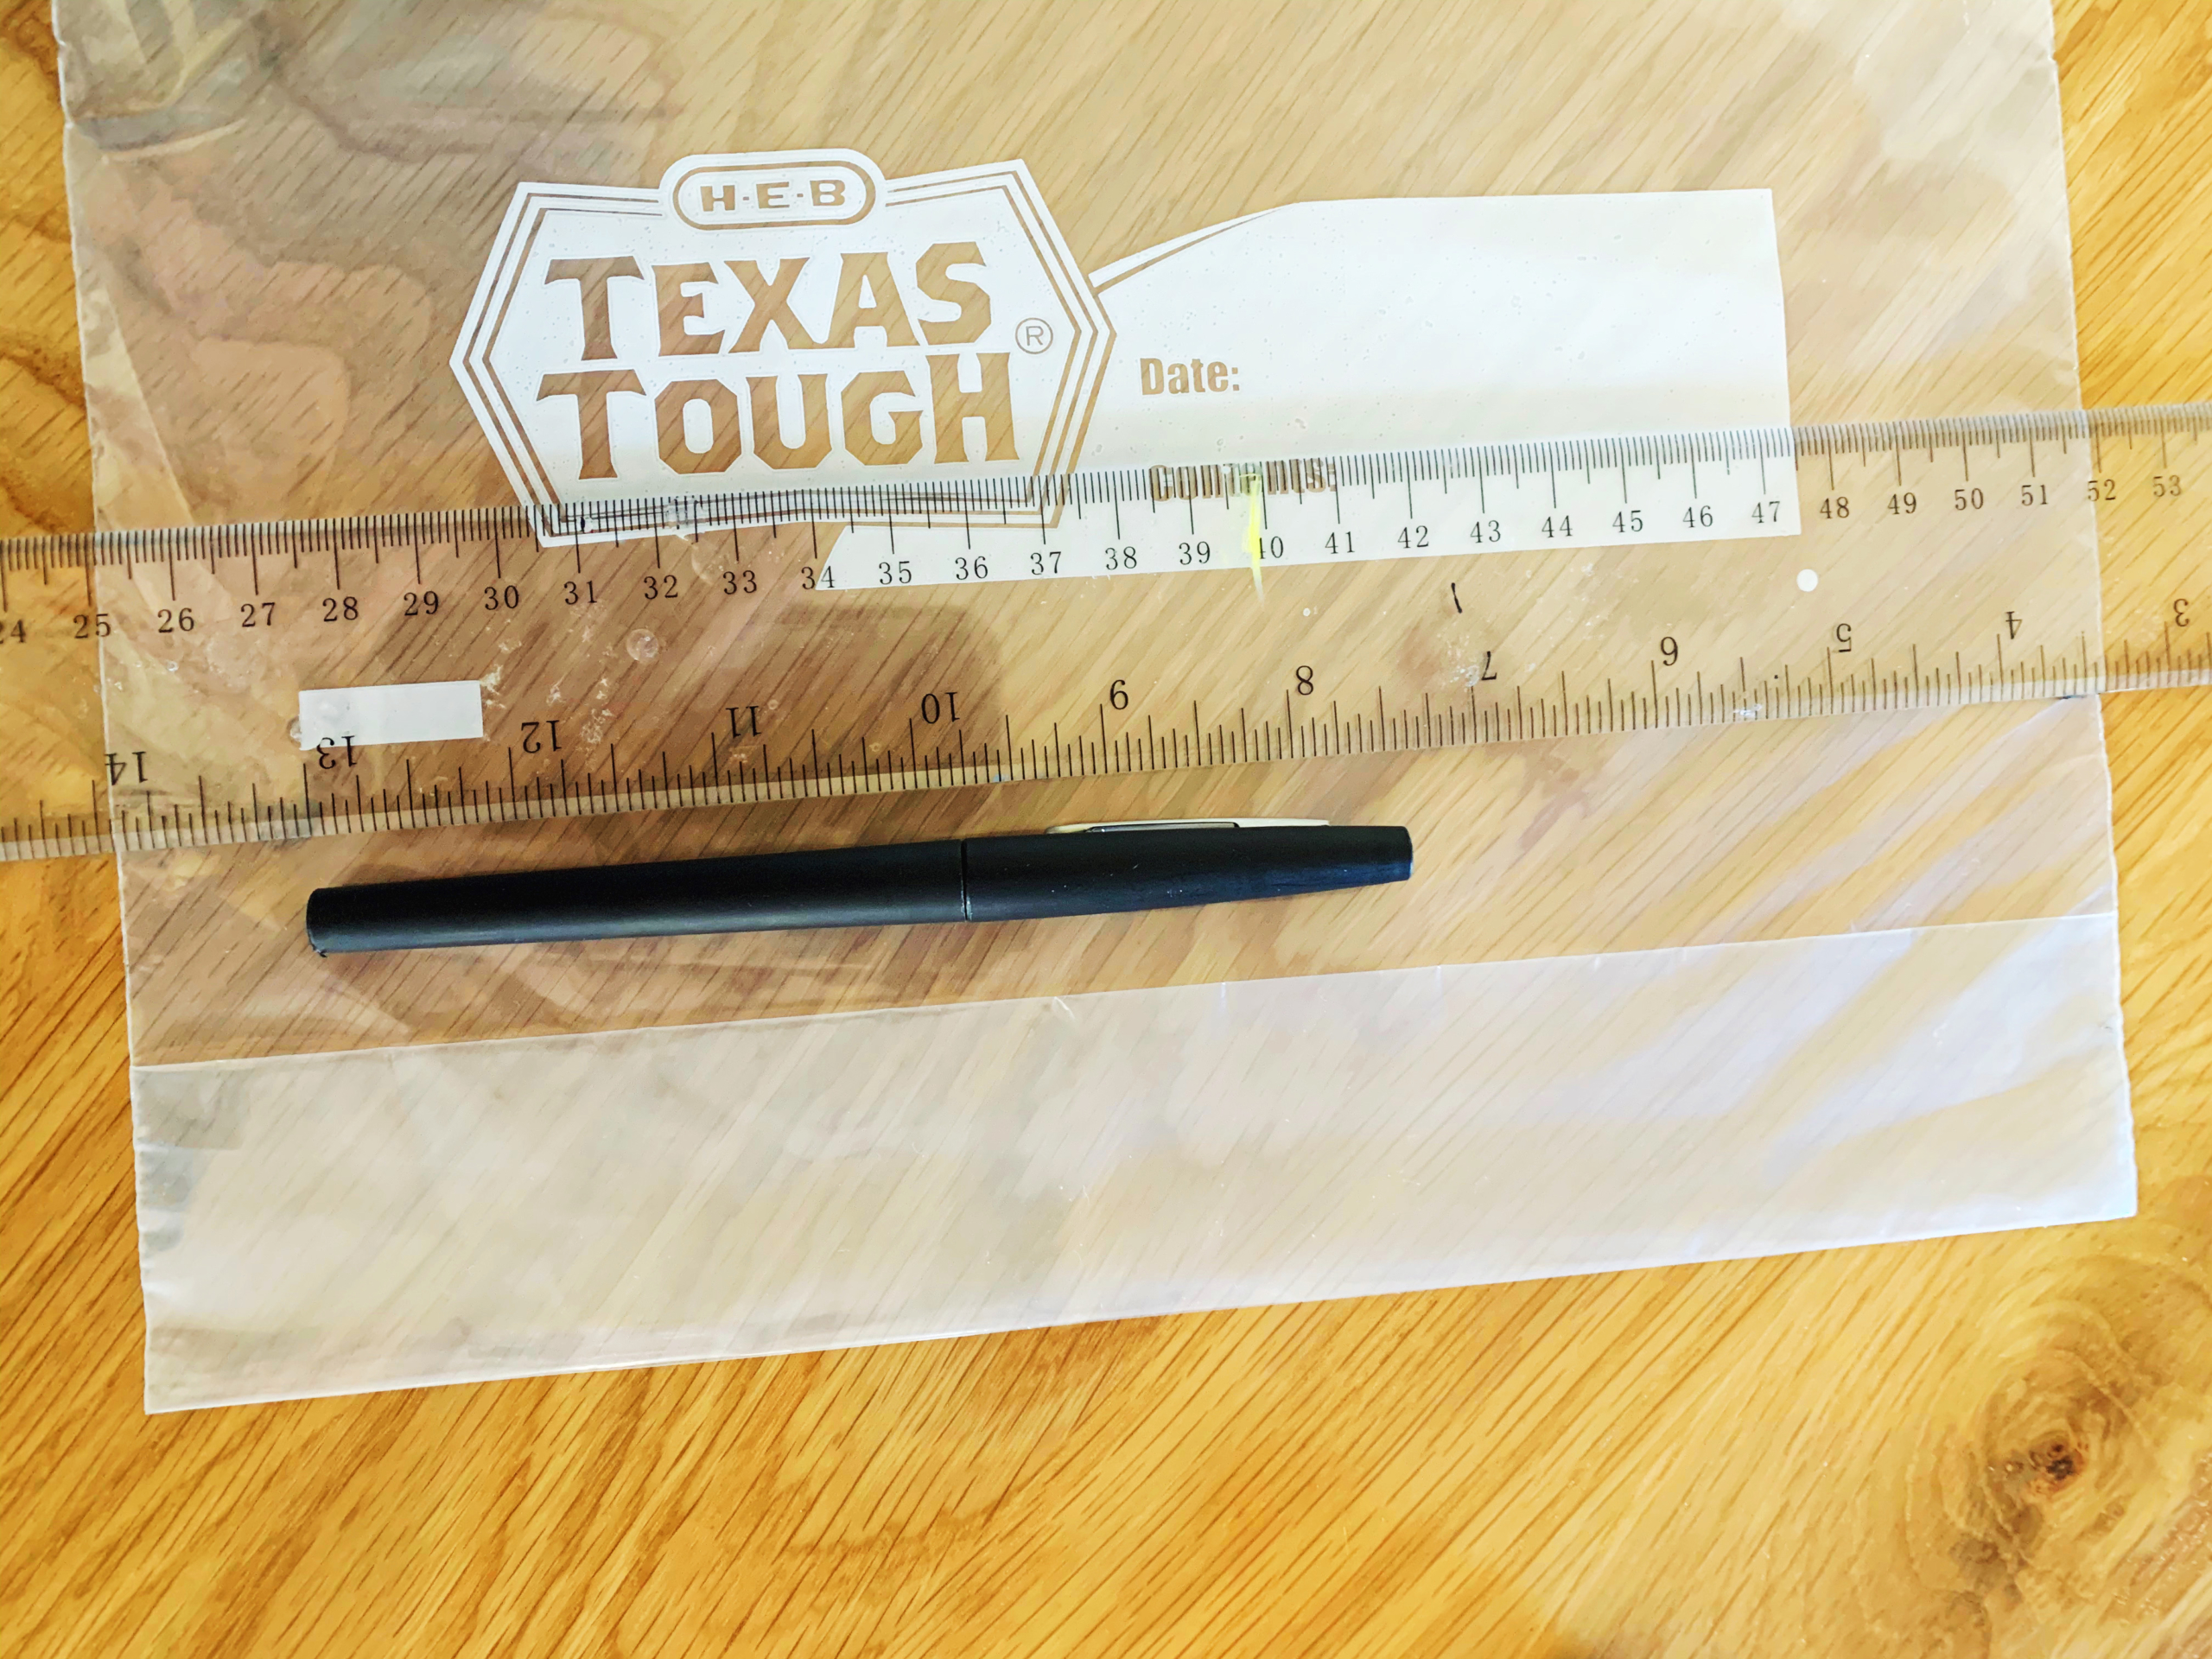
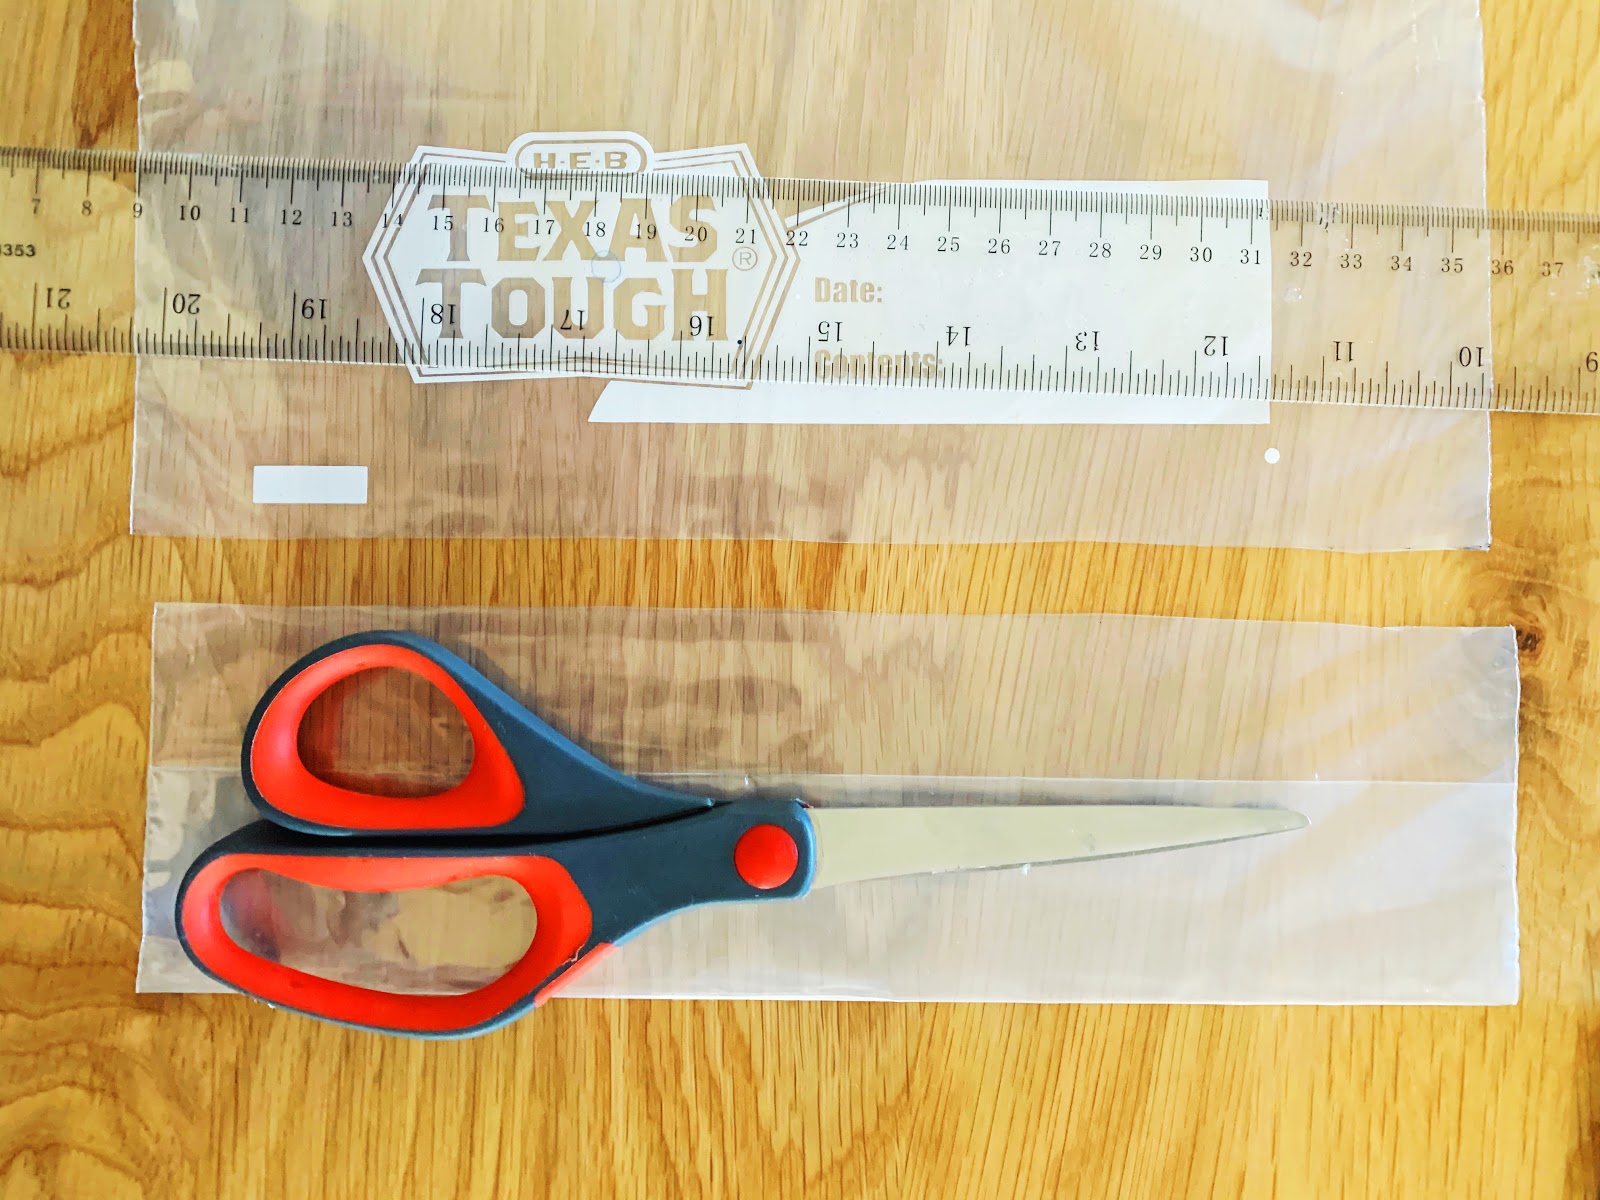
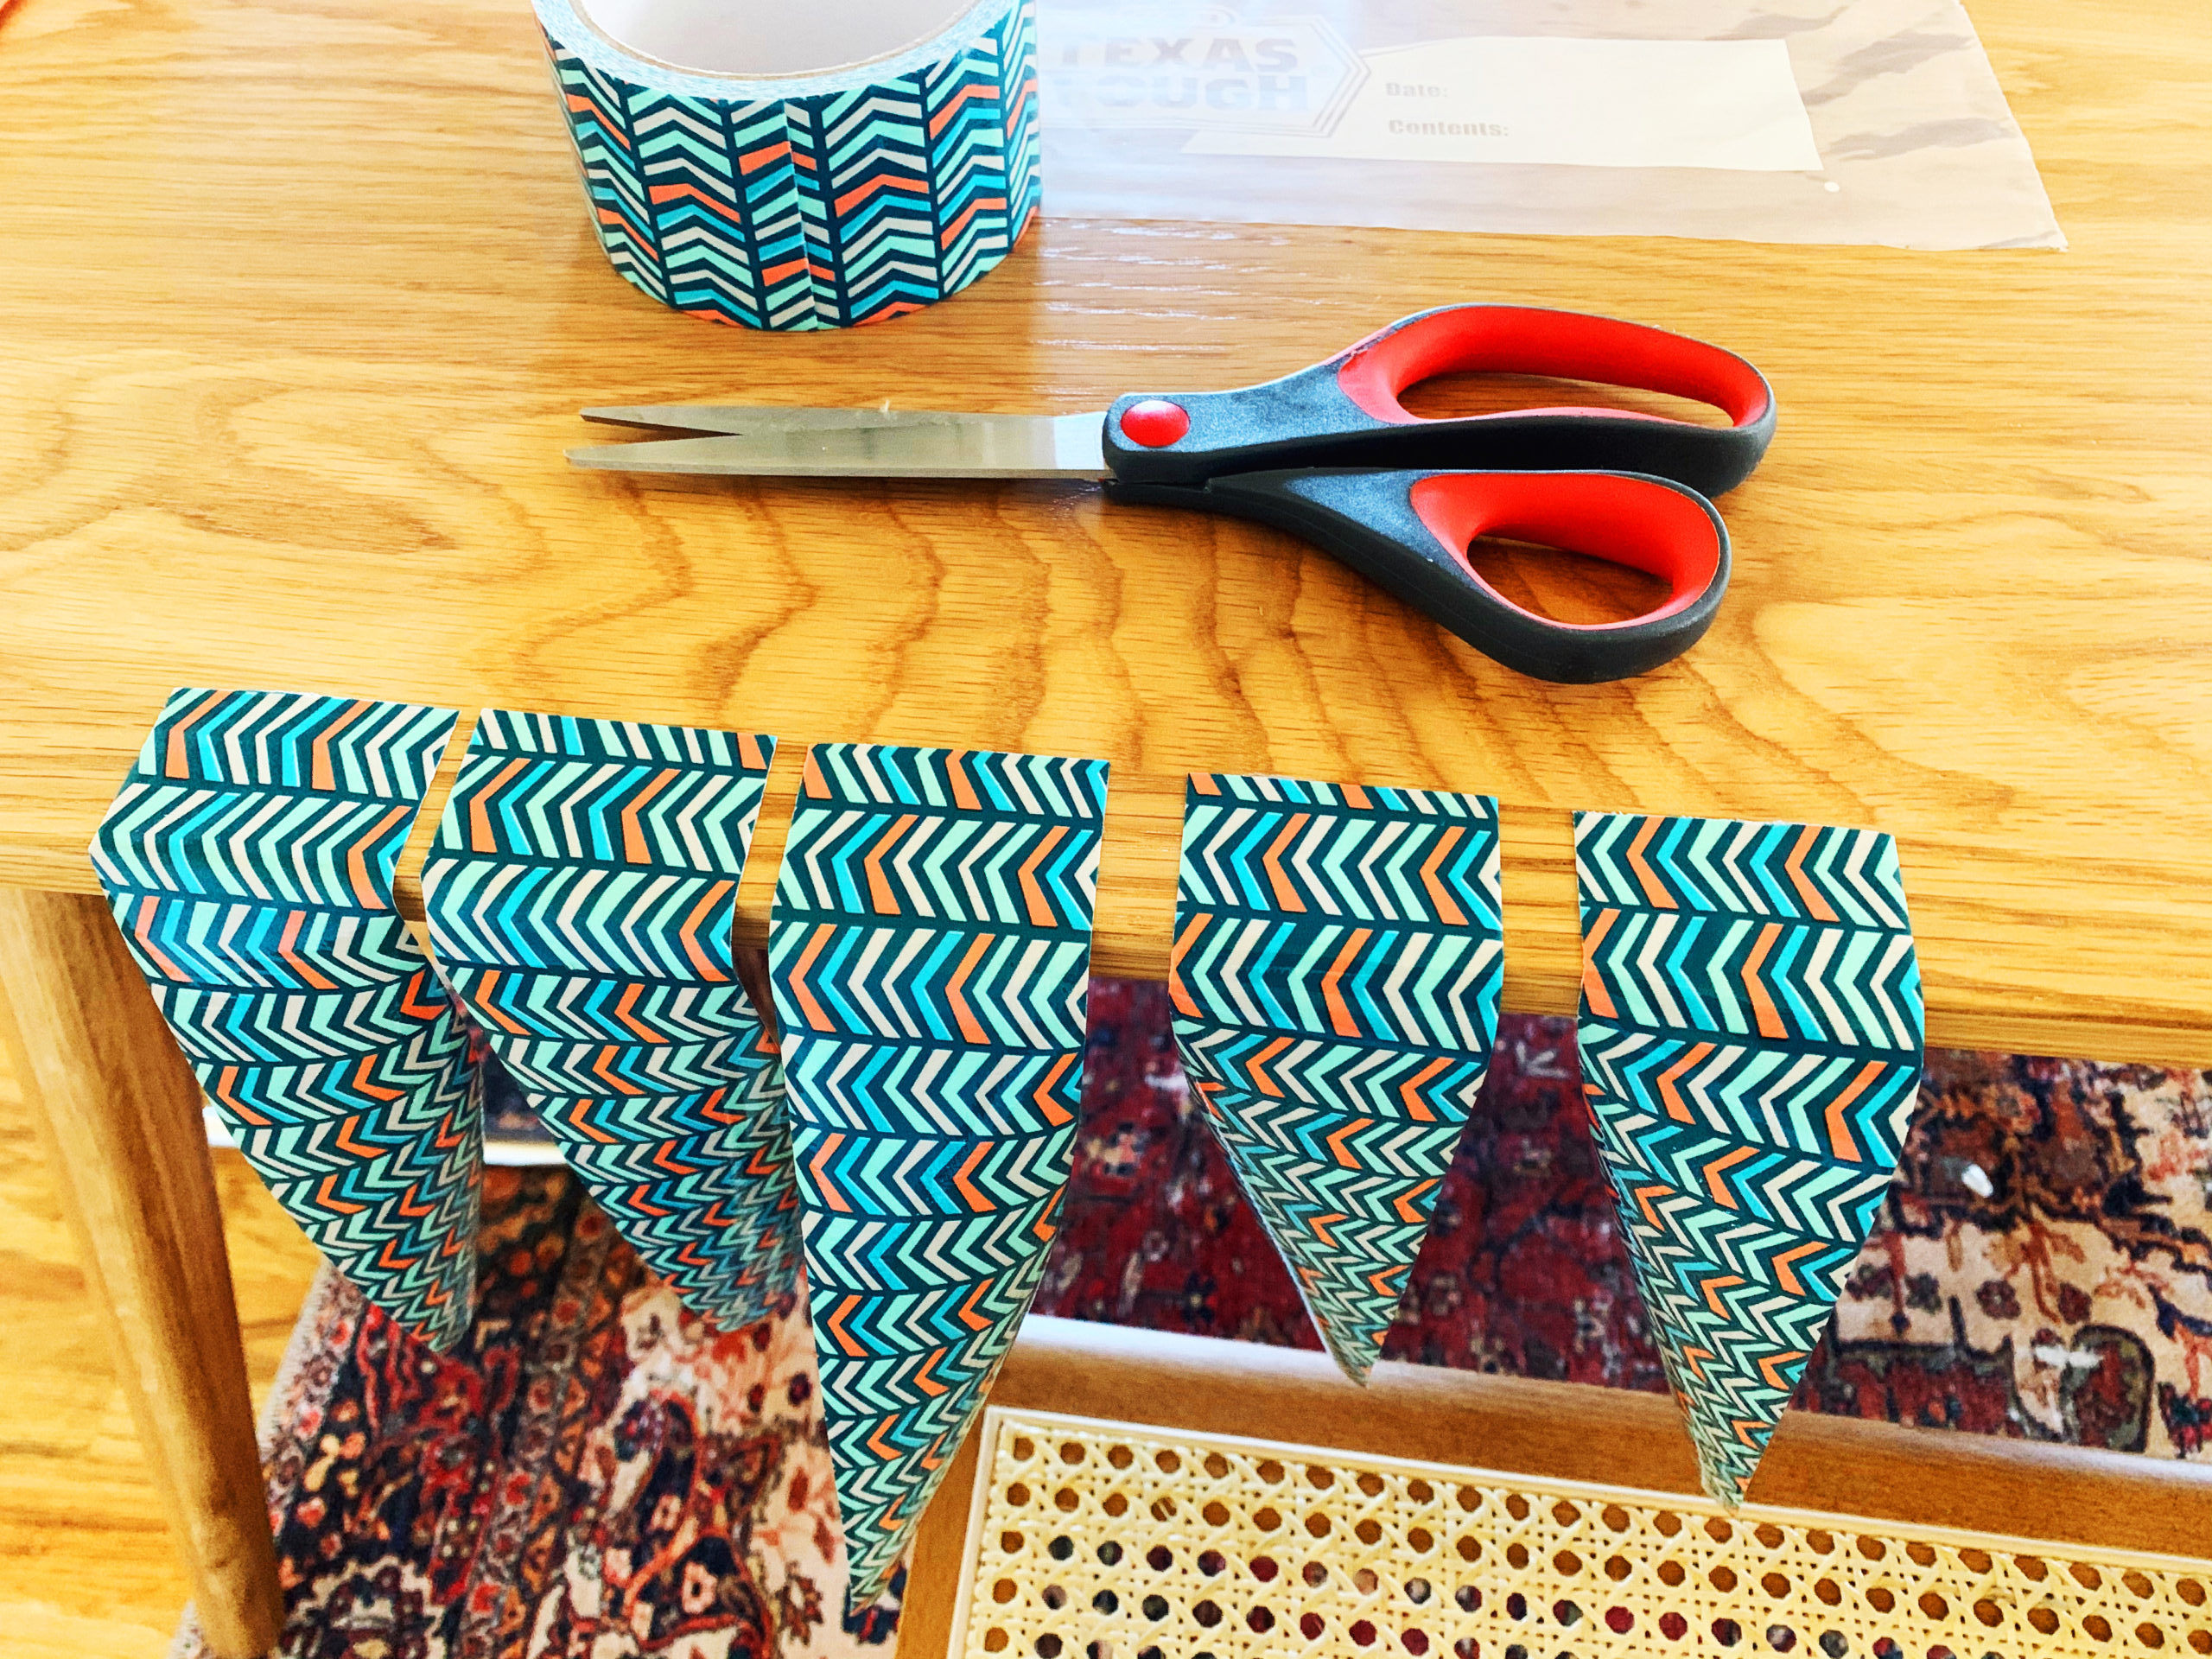
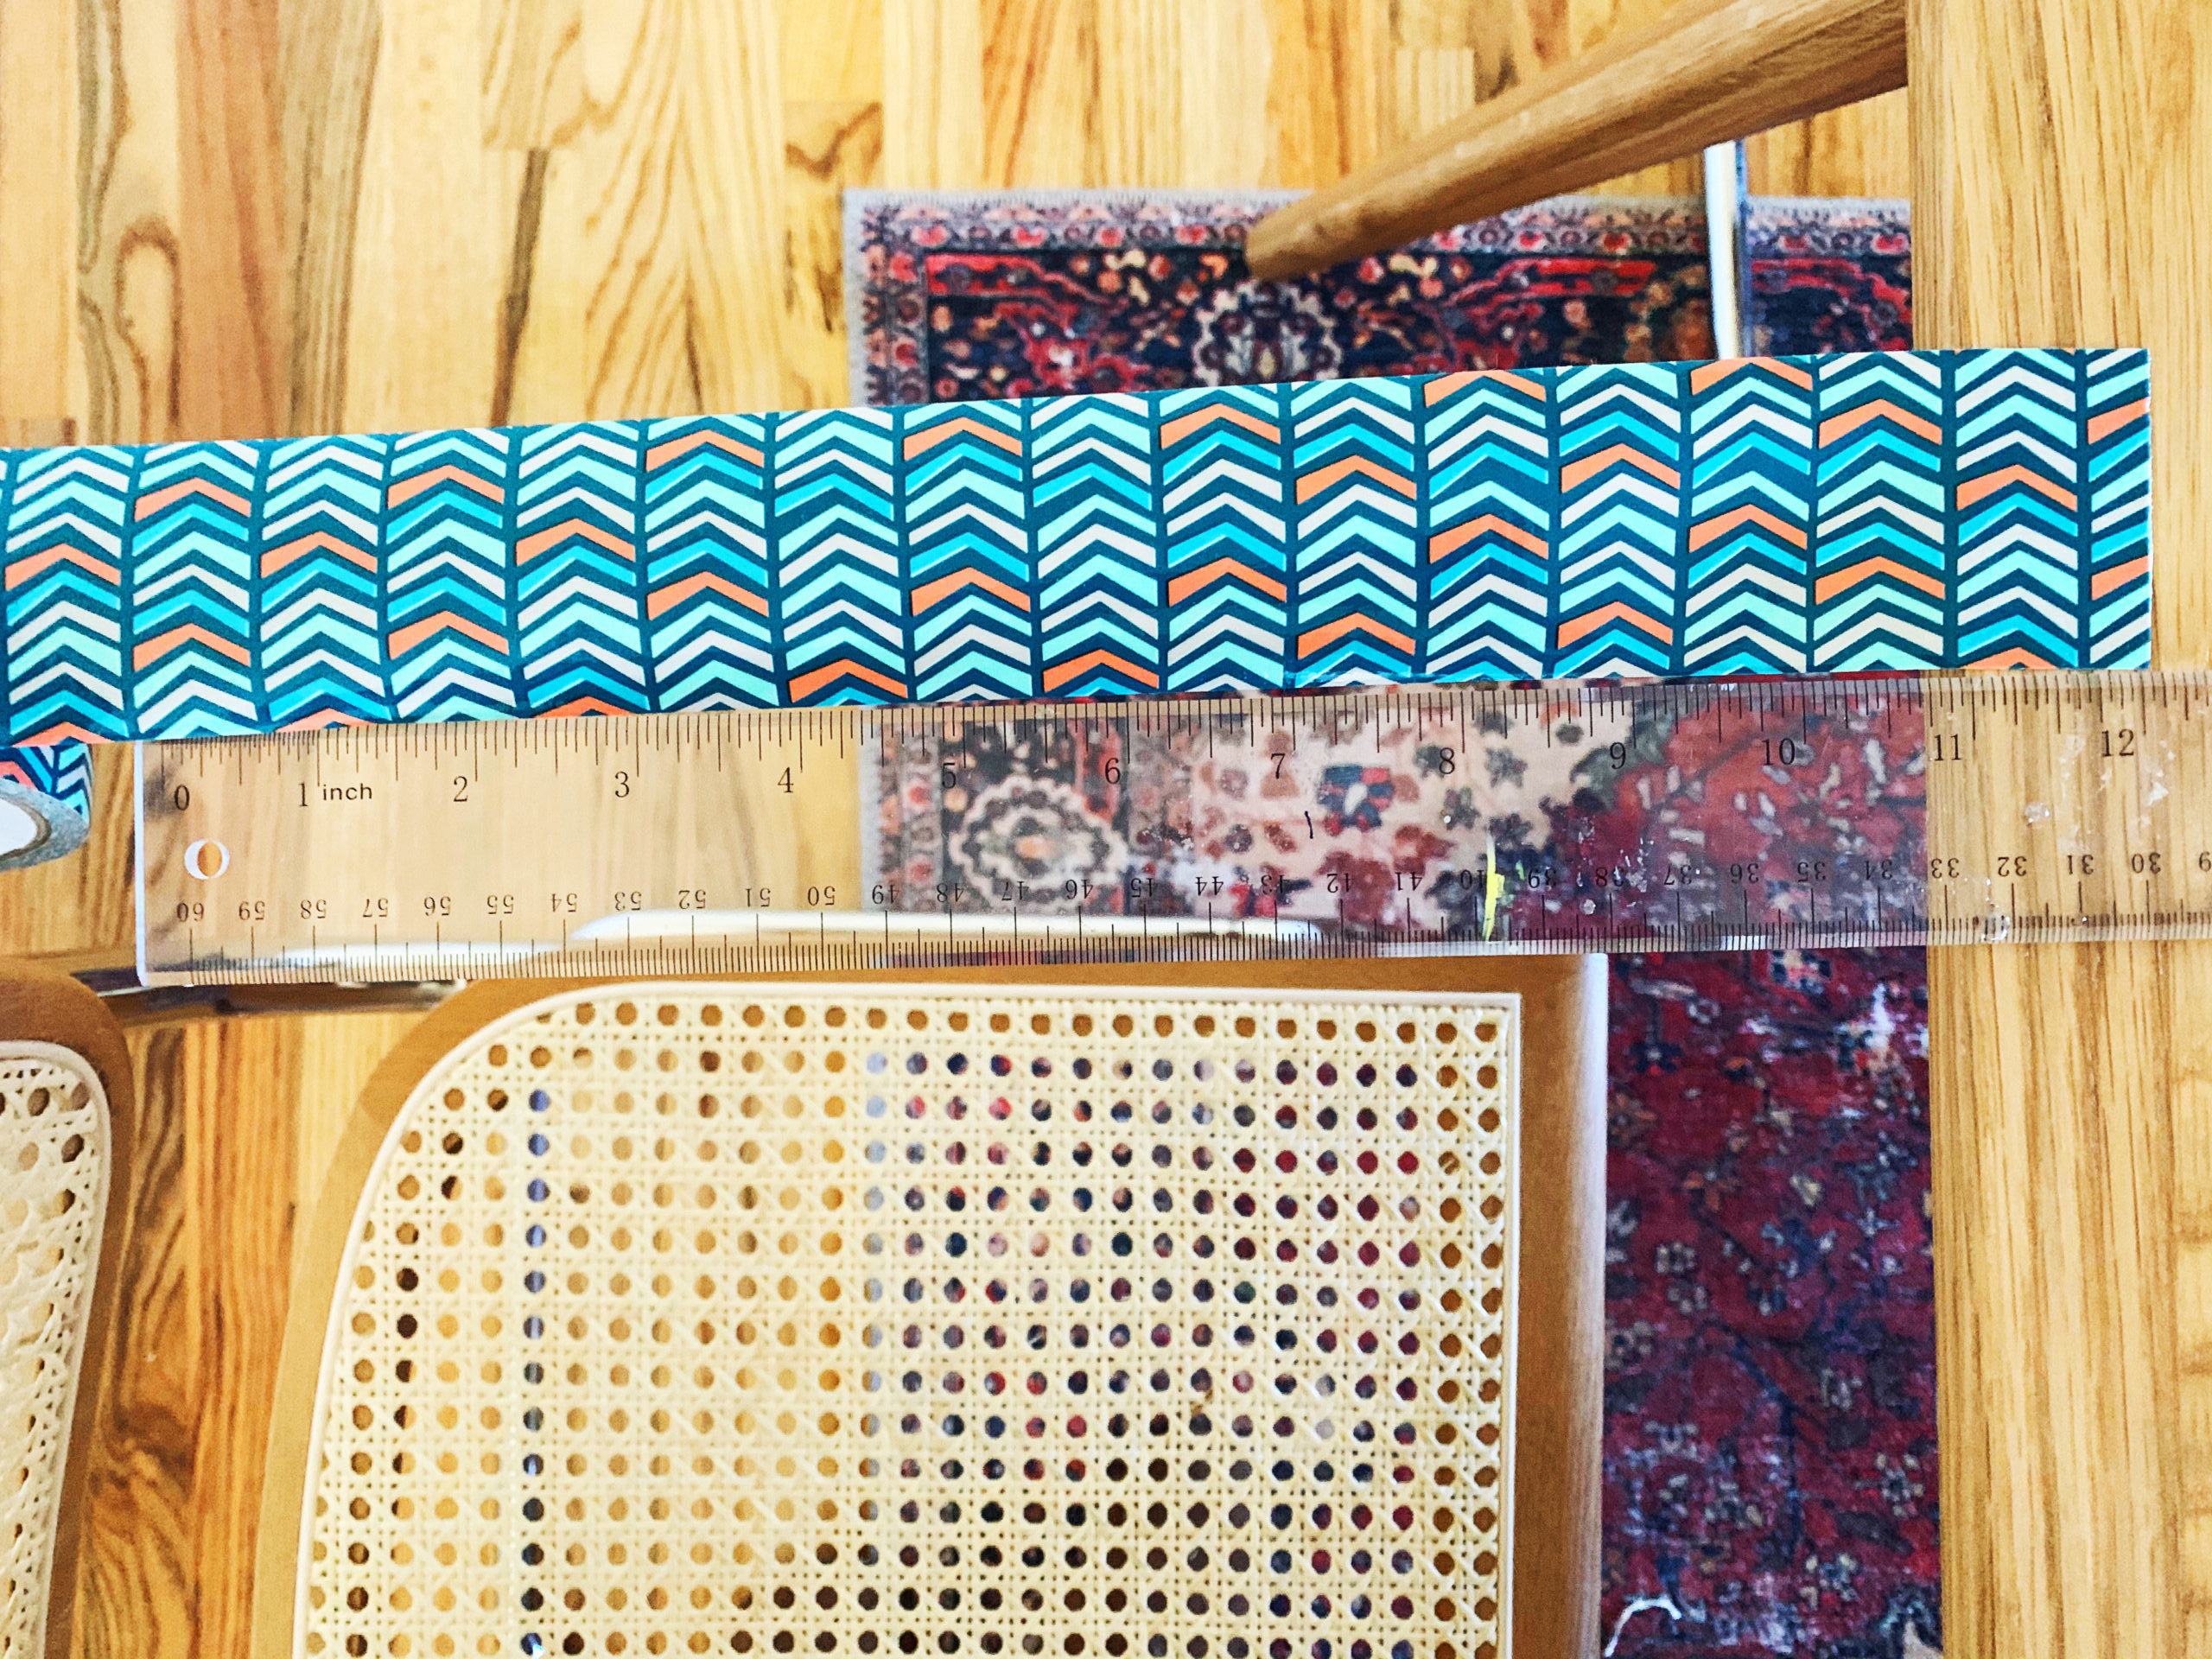
Step 2: Next, measure and cut five pieces of duct tape, 10 ½” each. Cut them all from one roll, or cut a variety of colors/patterns to mix and match! Tip: If you have a plastic cutting mat, you can lay the tape flat on the mat, and then peel it off once you have cut your piece. I did not have a mat, so I just attached the tape to the edge of my table, measured, and cut, and I had no problem.
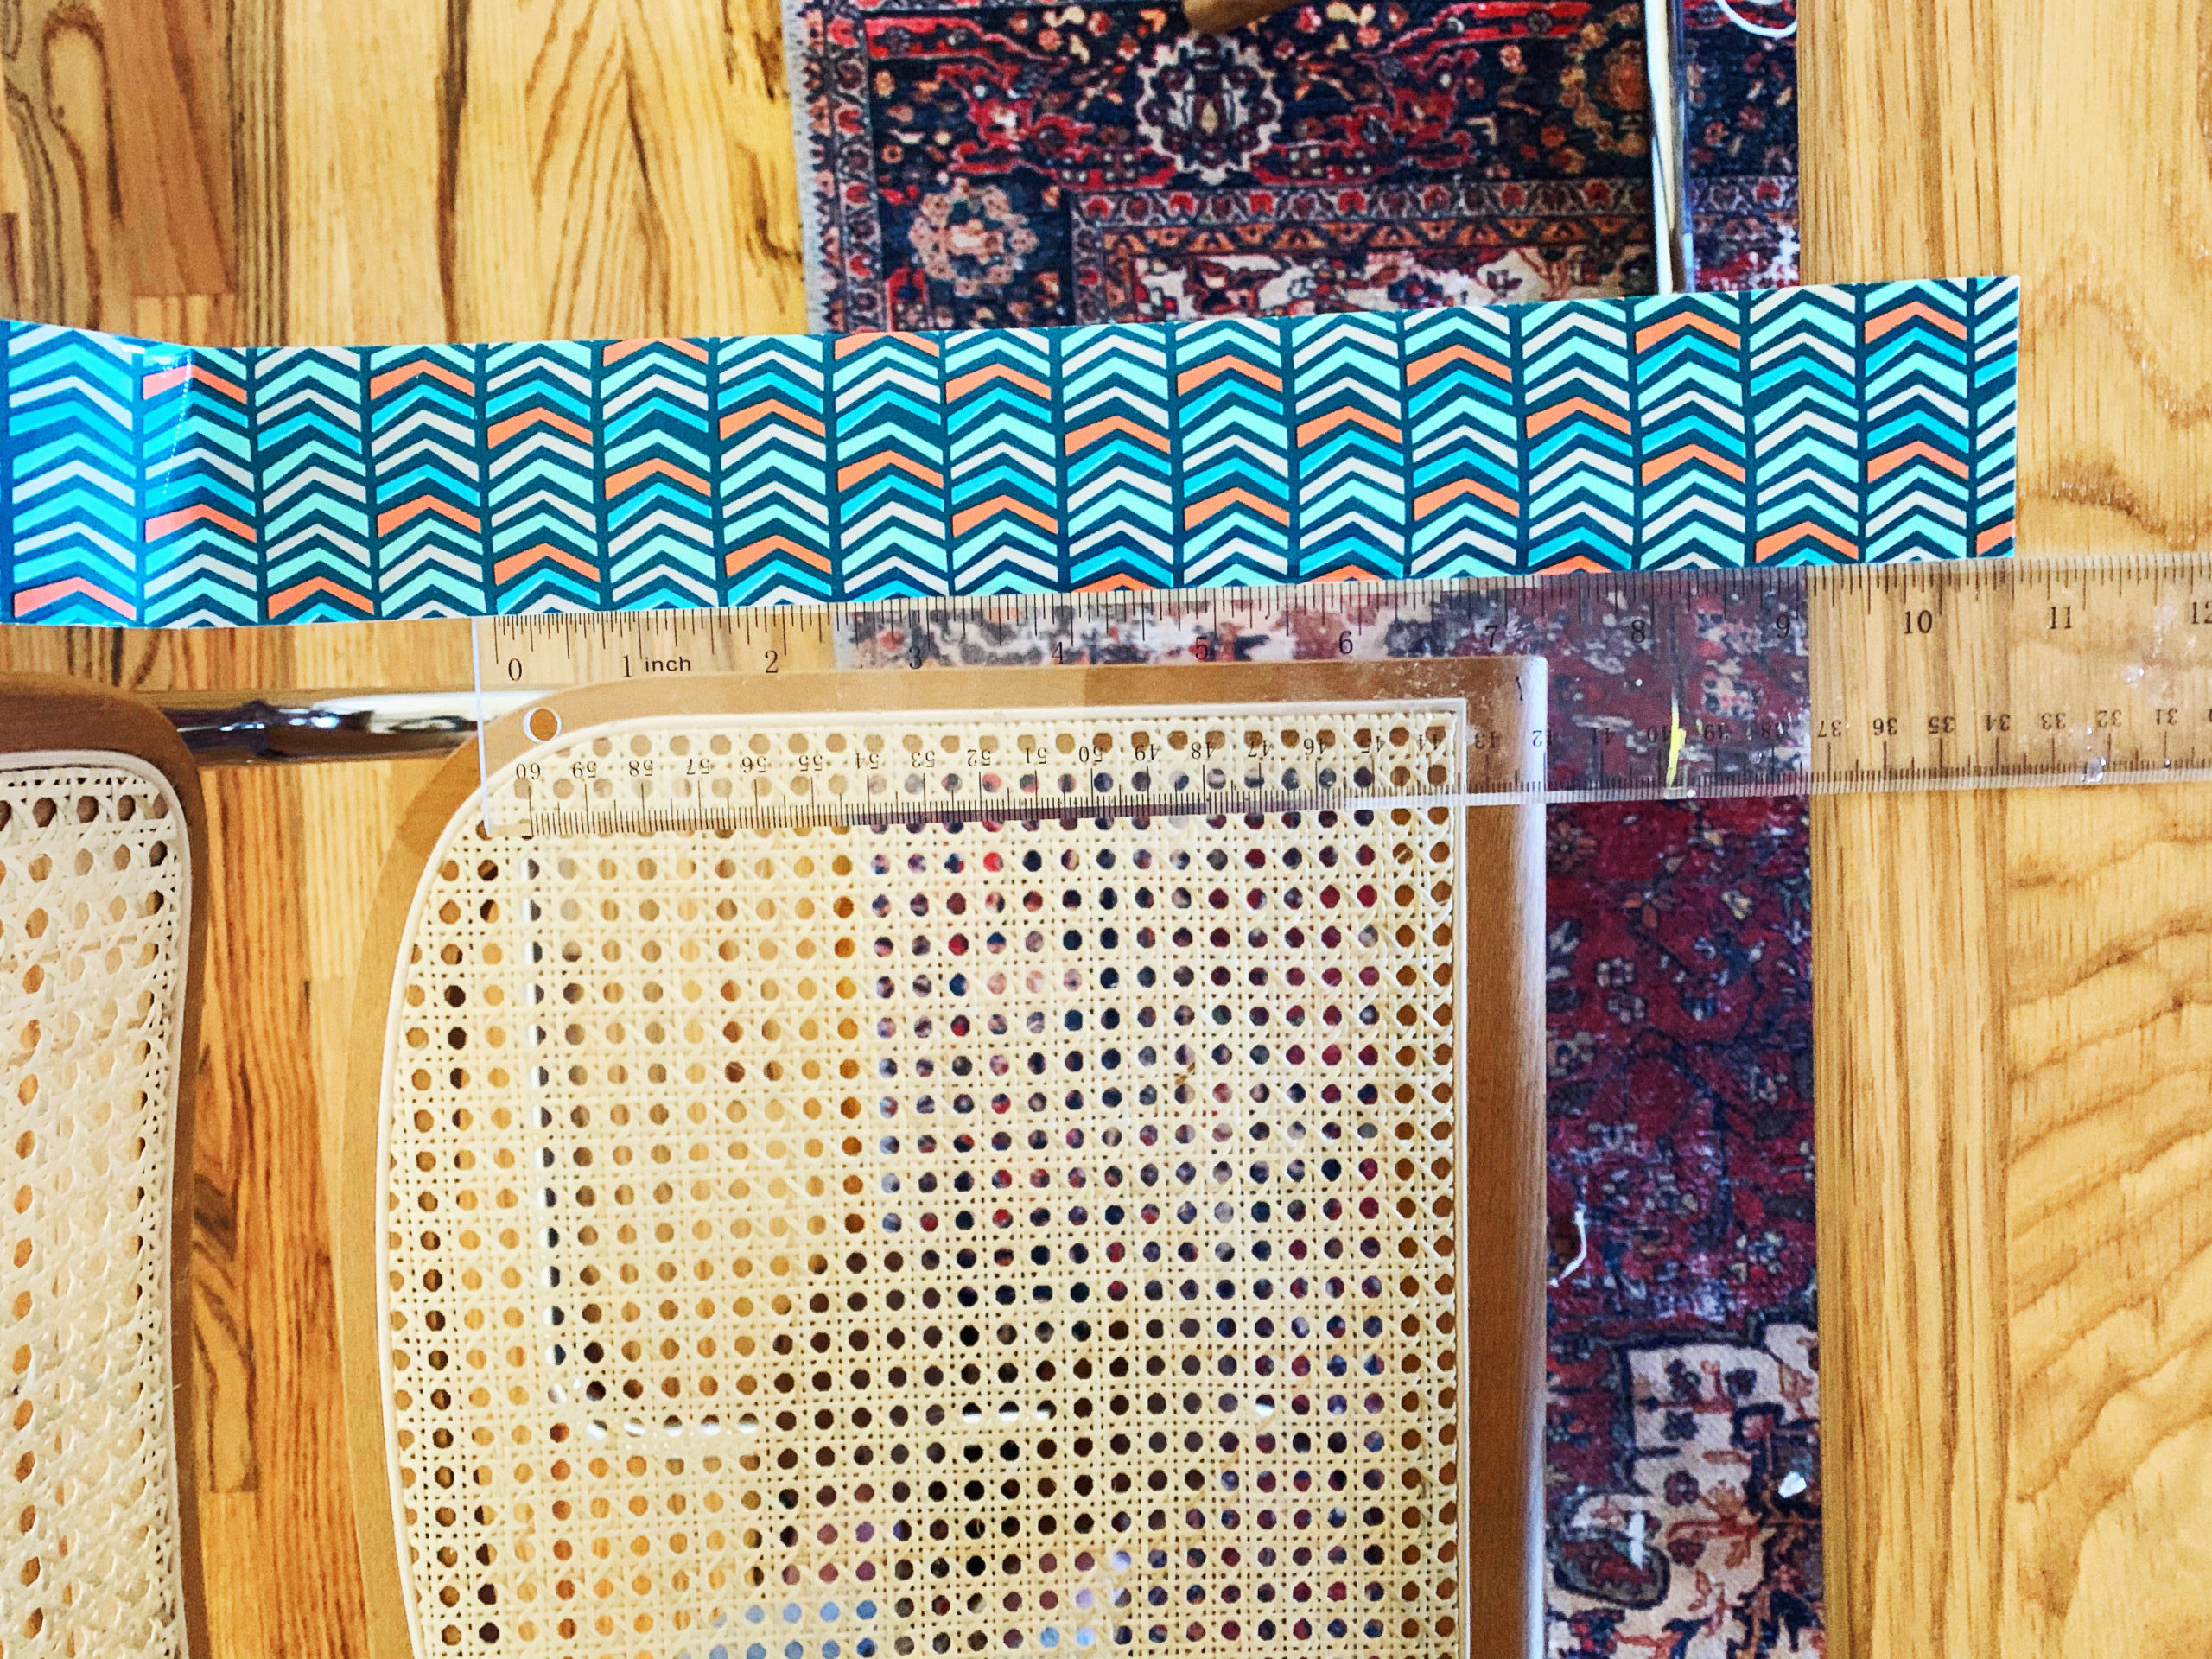
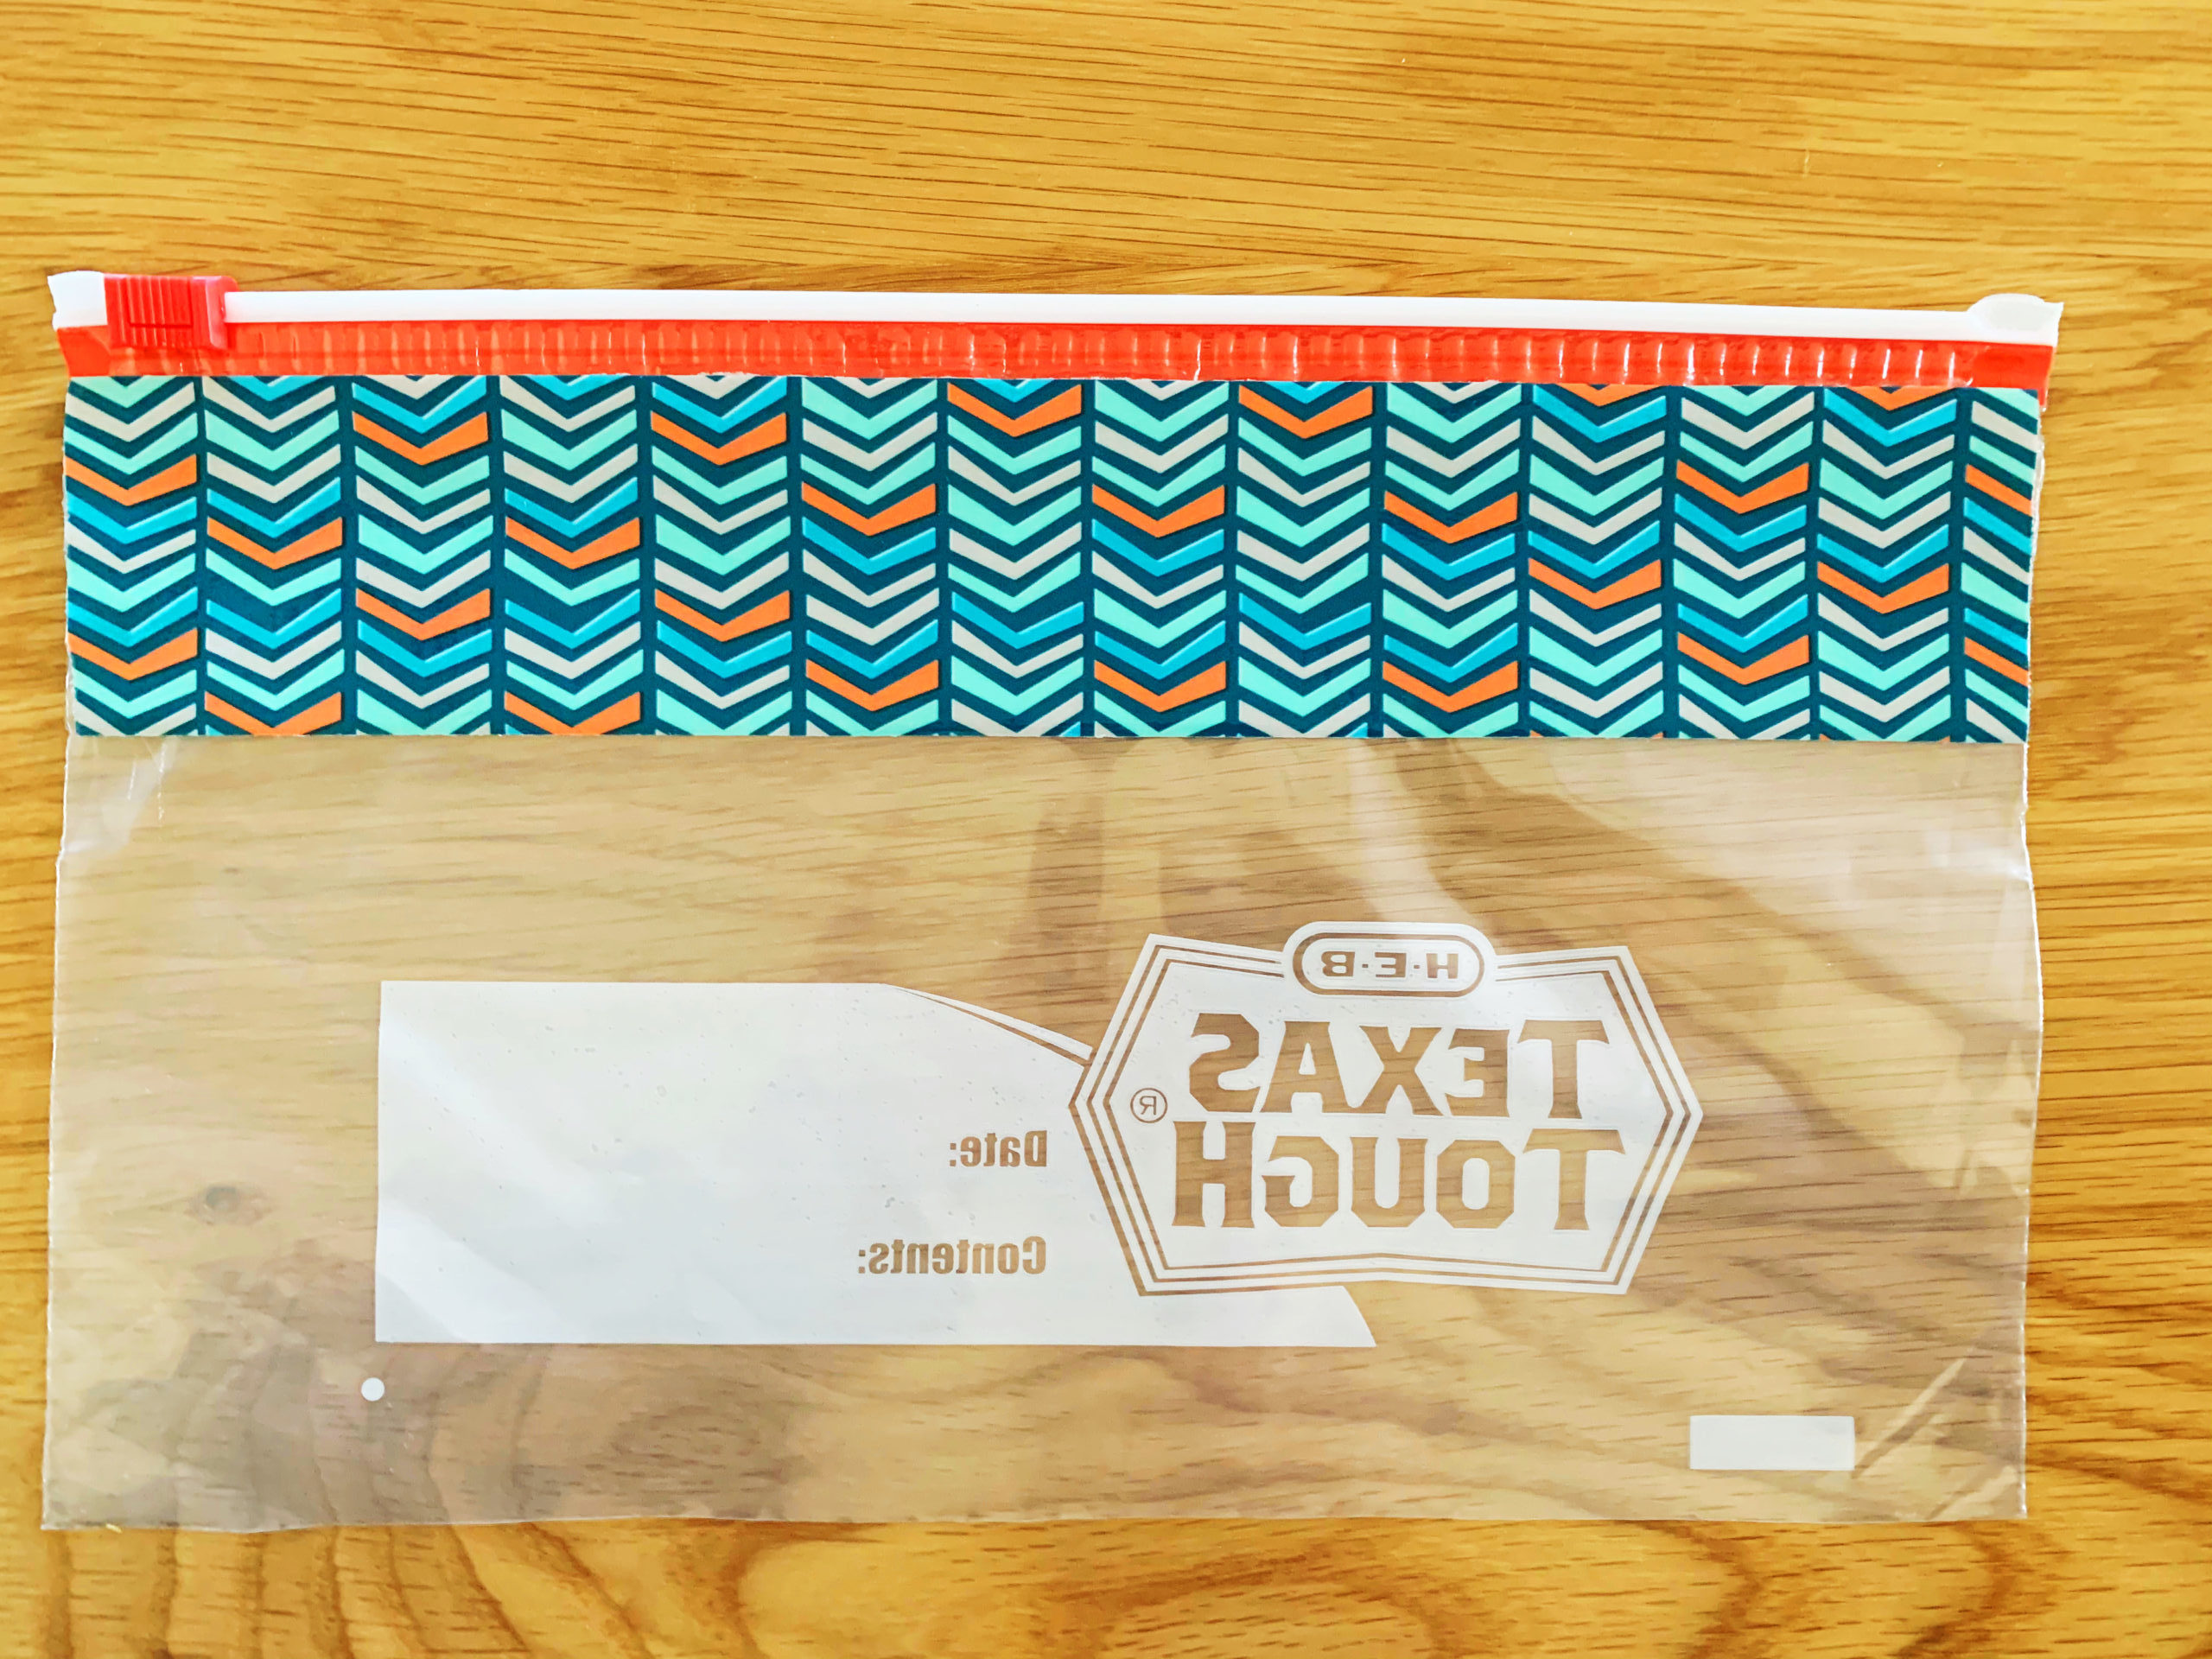
Step 3: Starting at the top edge of the ziplock bag, carefully attach your first piece of duct tape over the plastic of the bag and all the way across to the other side. Try to make the piece as flat as possible! Simply repeat with three more pieces of duct tape, working your way down the bag. You will want to slightly overlap the pieces of tape where the edges meet, to ensure you fully cover the bag. The last piece should hang over the bottom of the bag just a bit, so fold that part over to the other side of the bag. One side down!
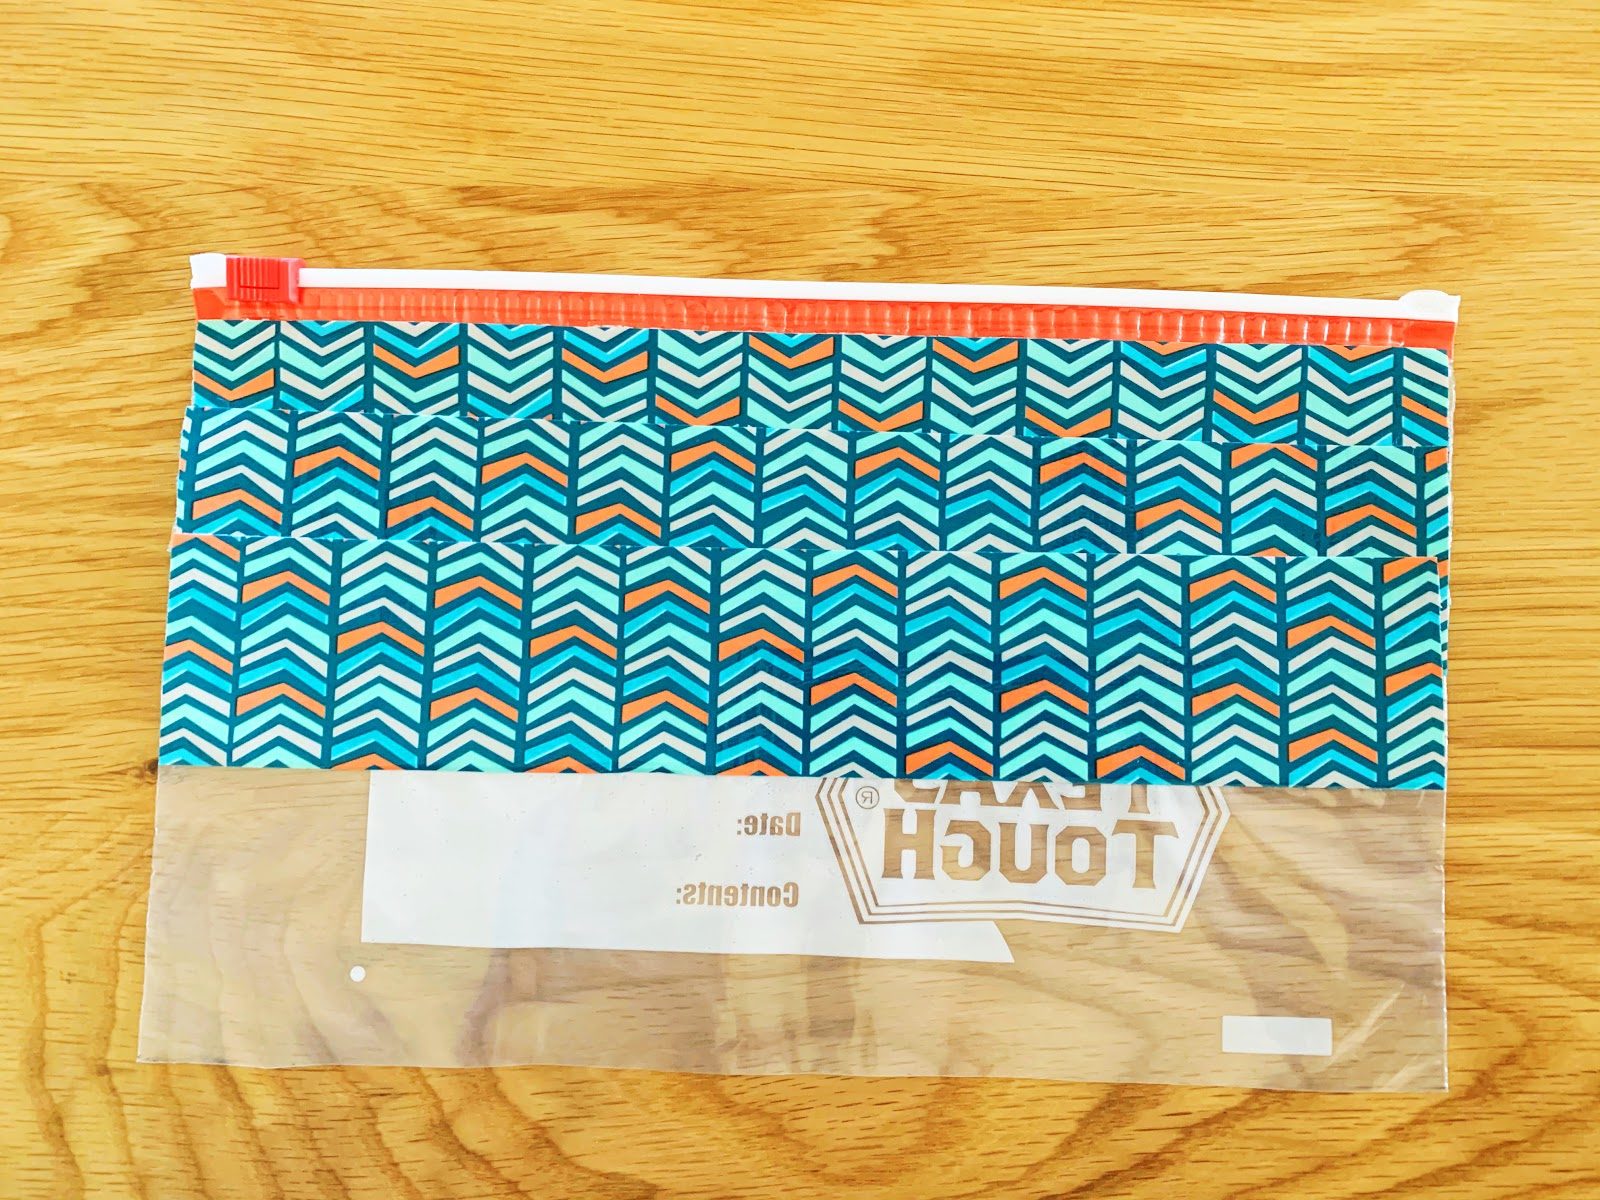
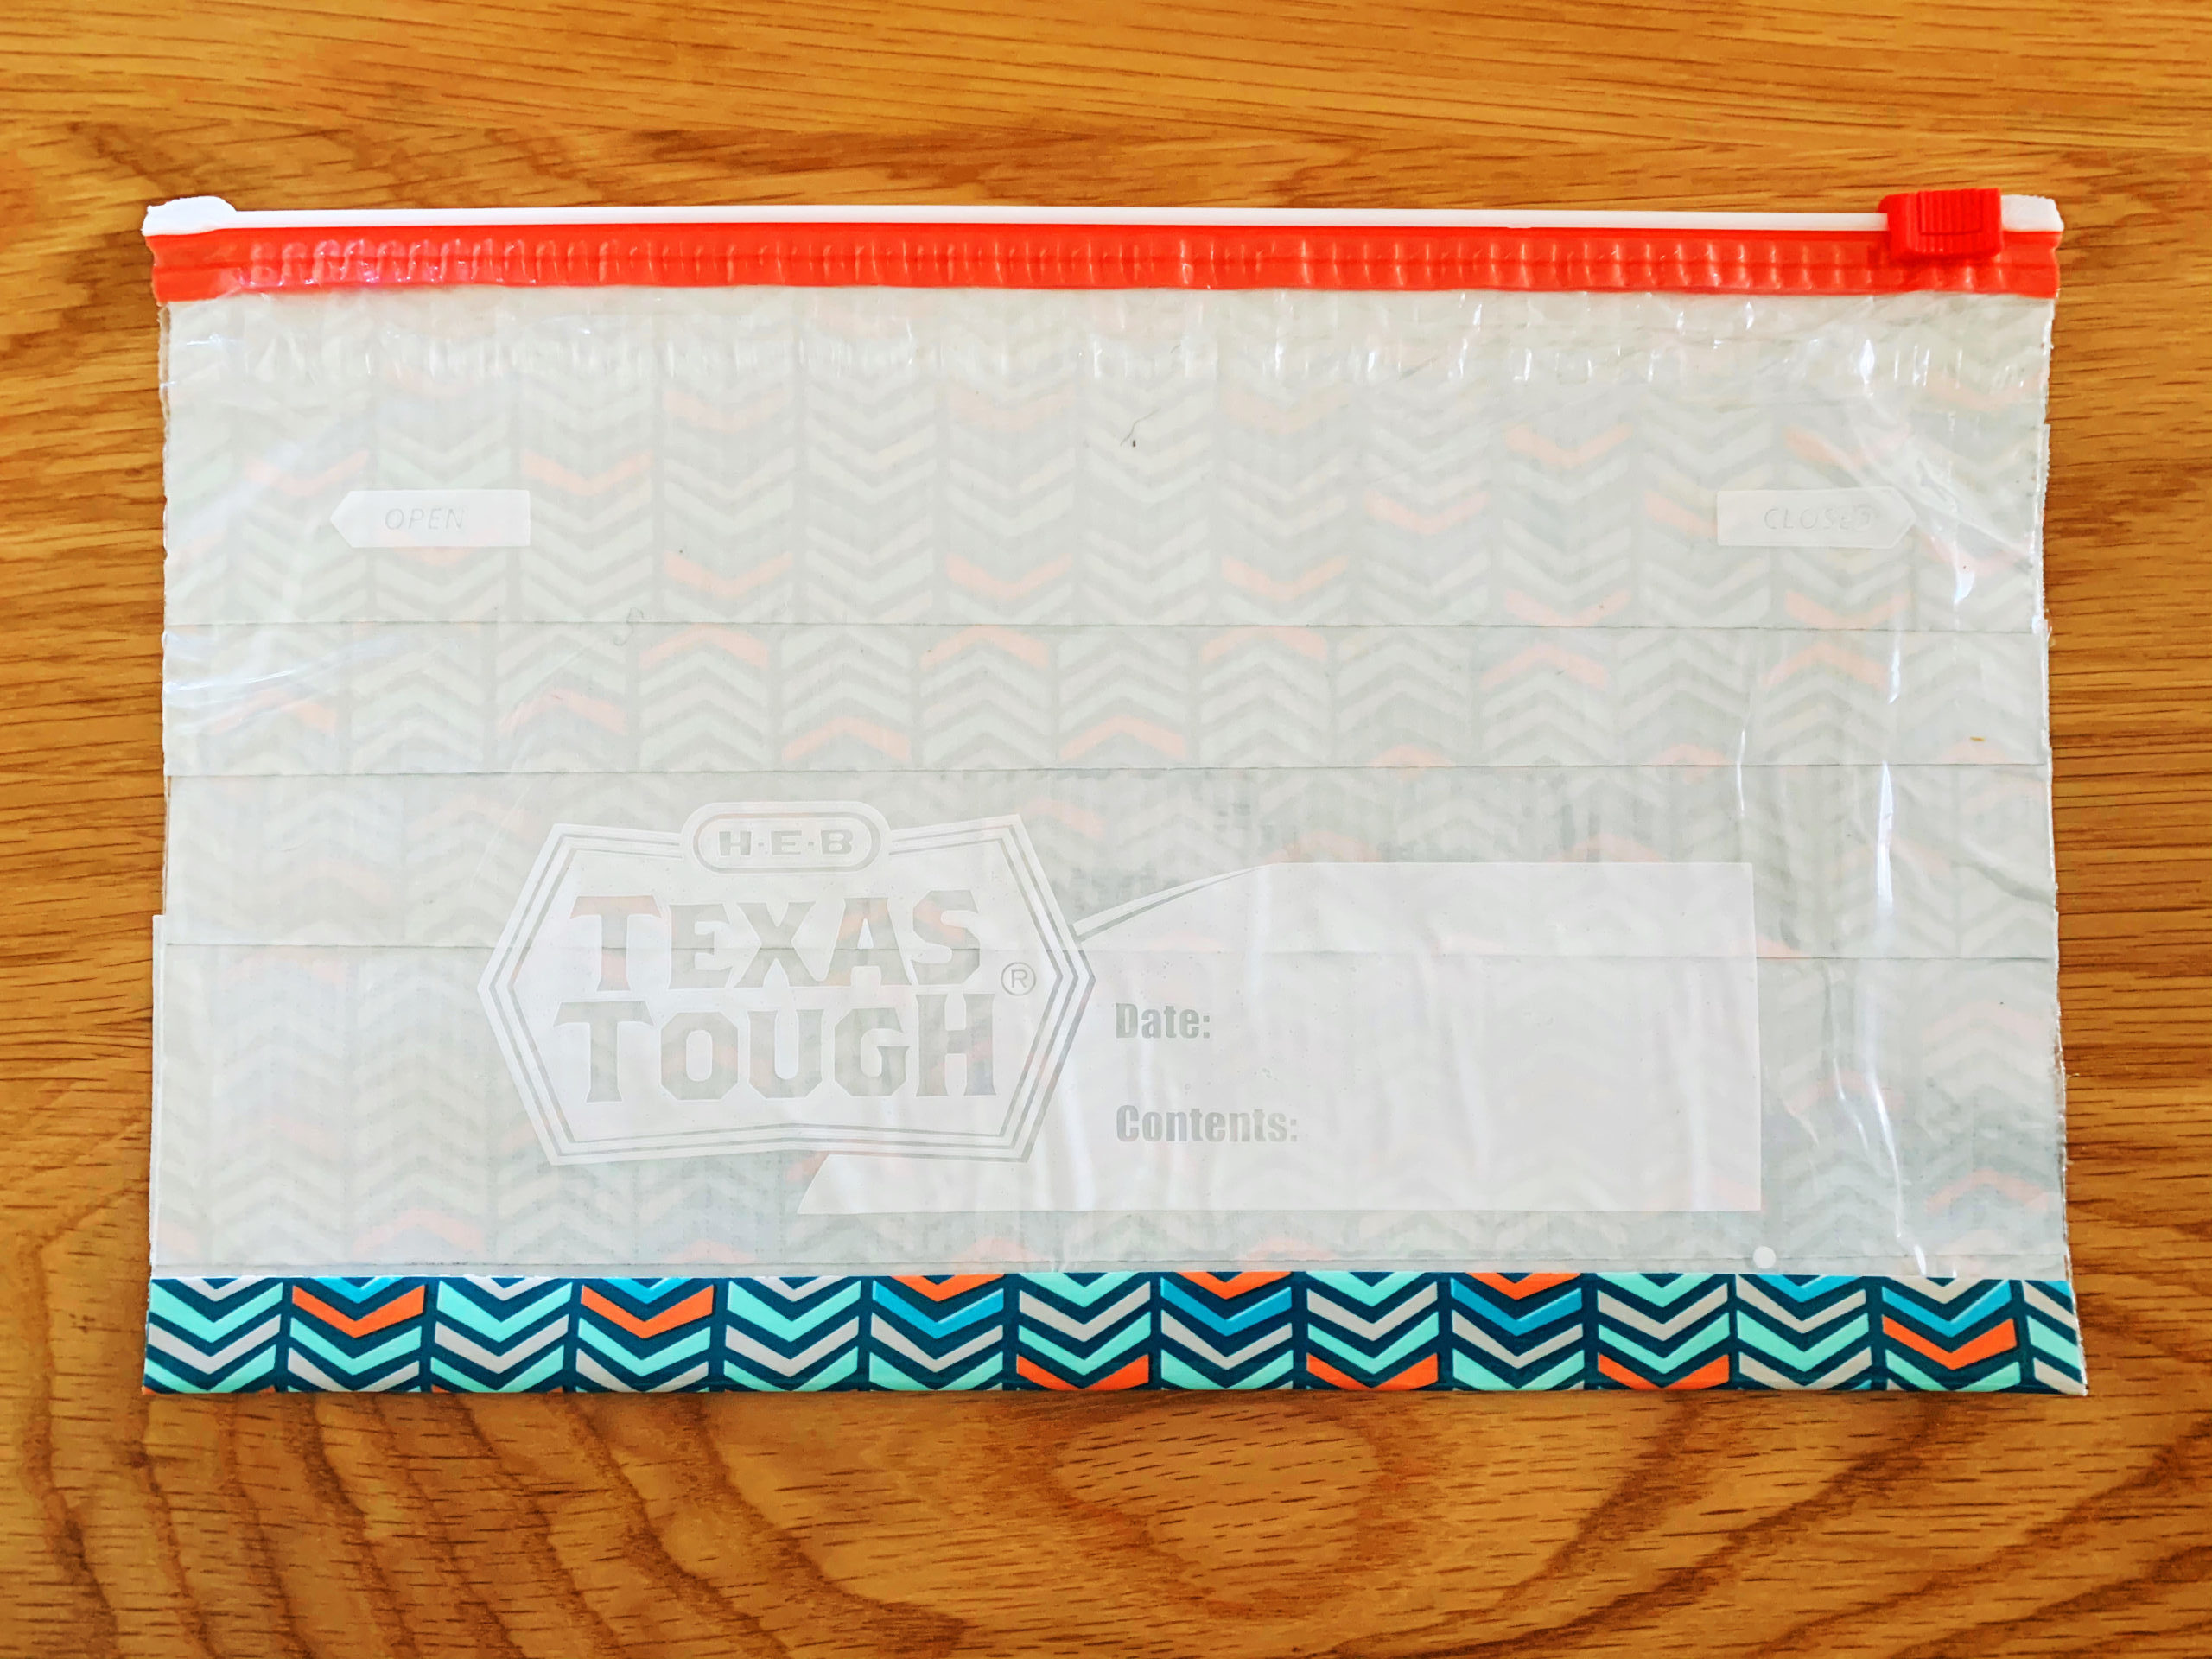
Step 4: Now it’s time to cover the other side of the bag. Cut four more pieces of duct tape, this time to 12” each. Repeat the same process as the other side, again starting at the top of the bag again, but this time leave about ½” extra tape on each side and fold that over to the other side. Continue to work your way down the bag just as you did before.
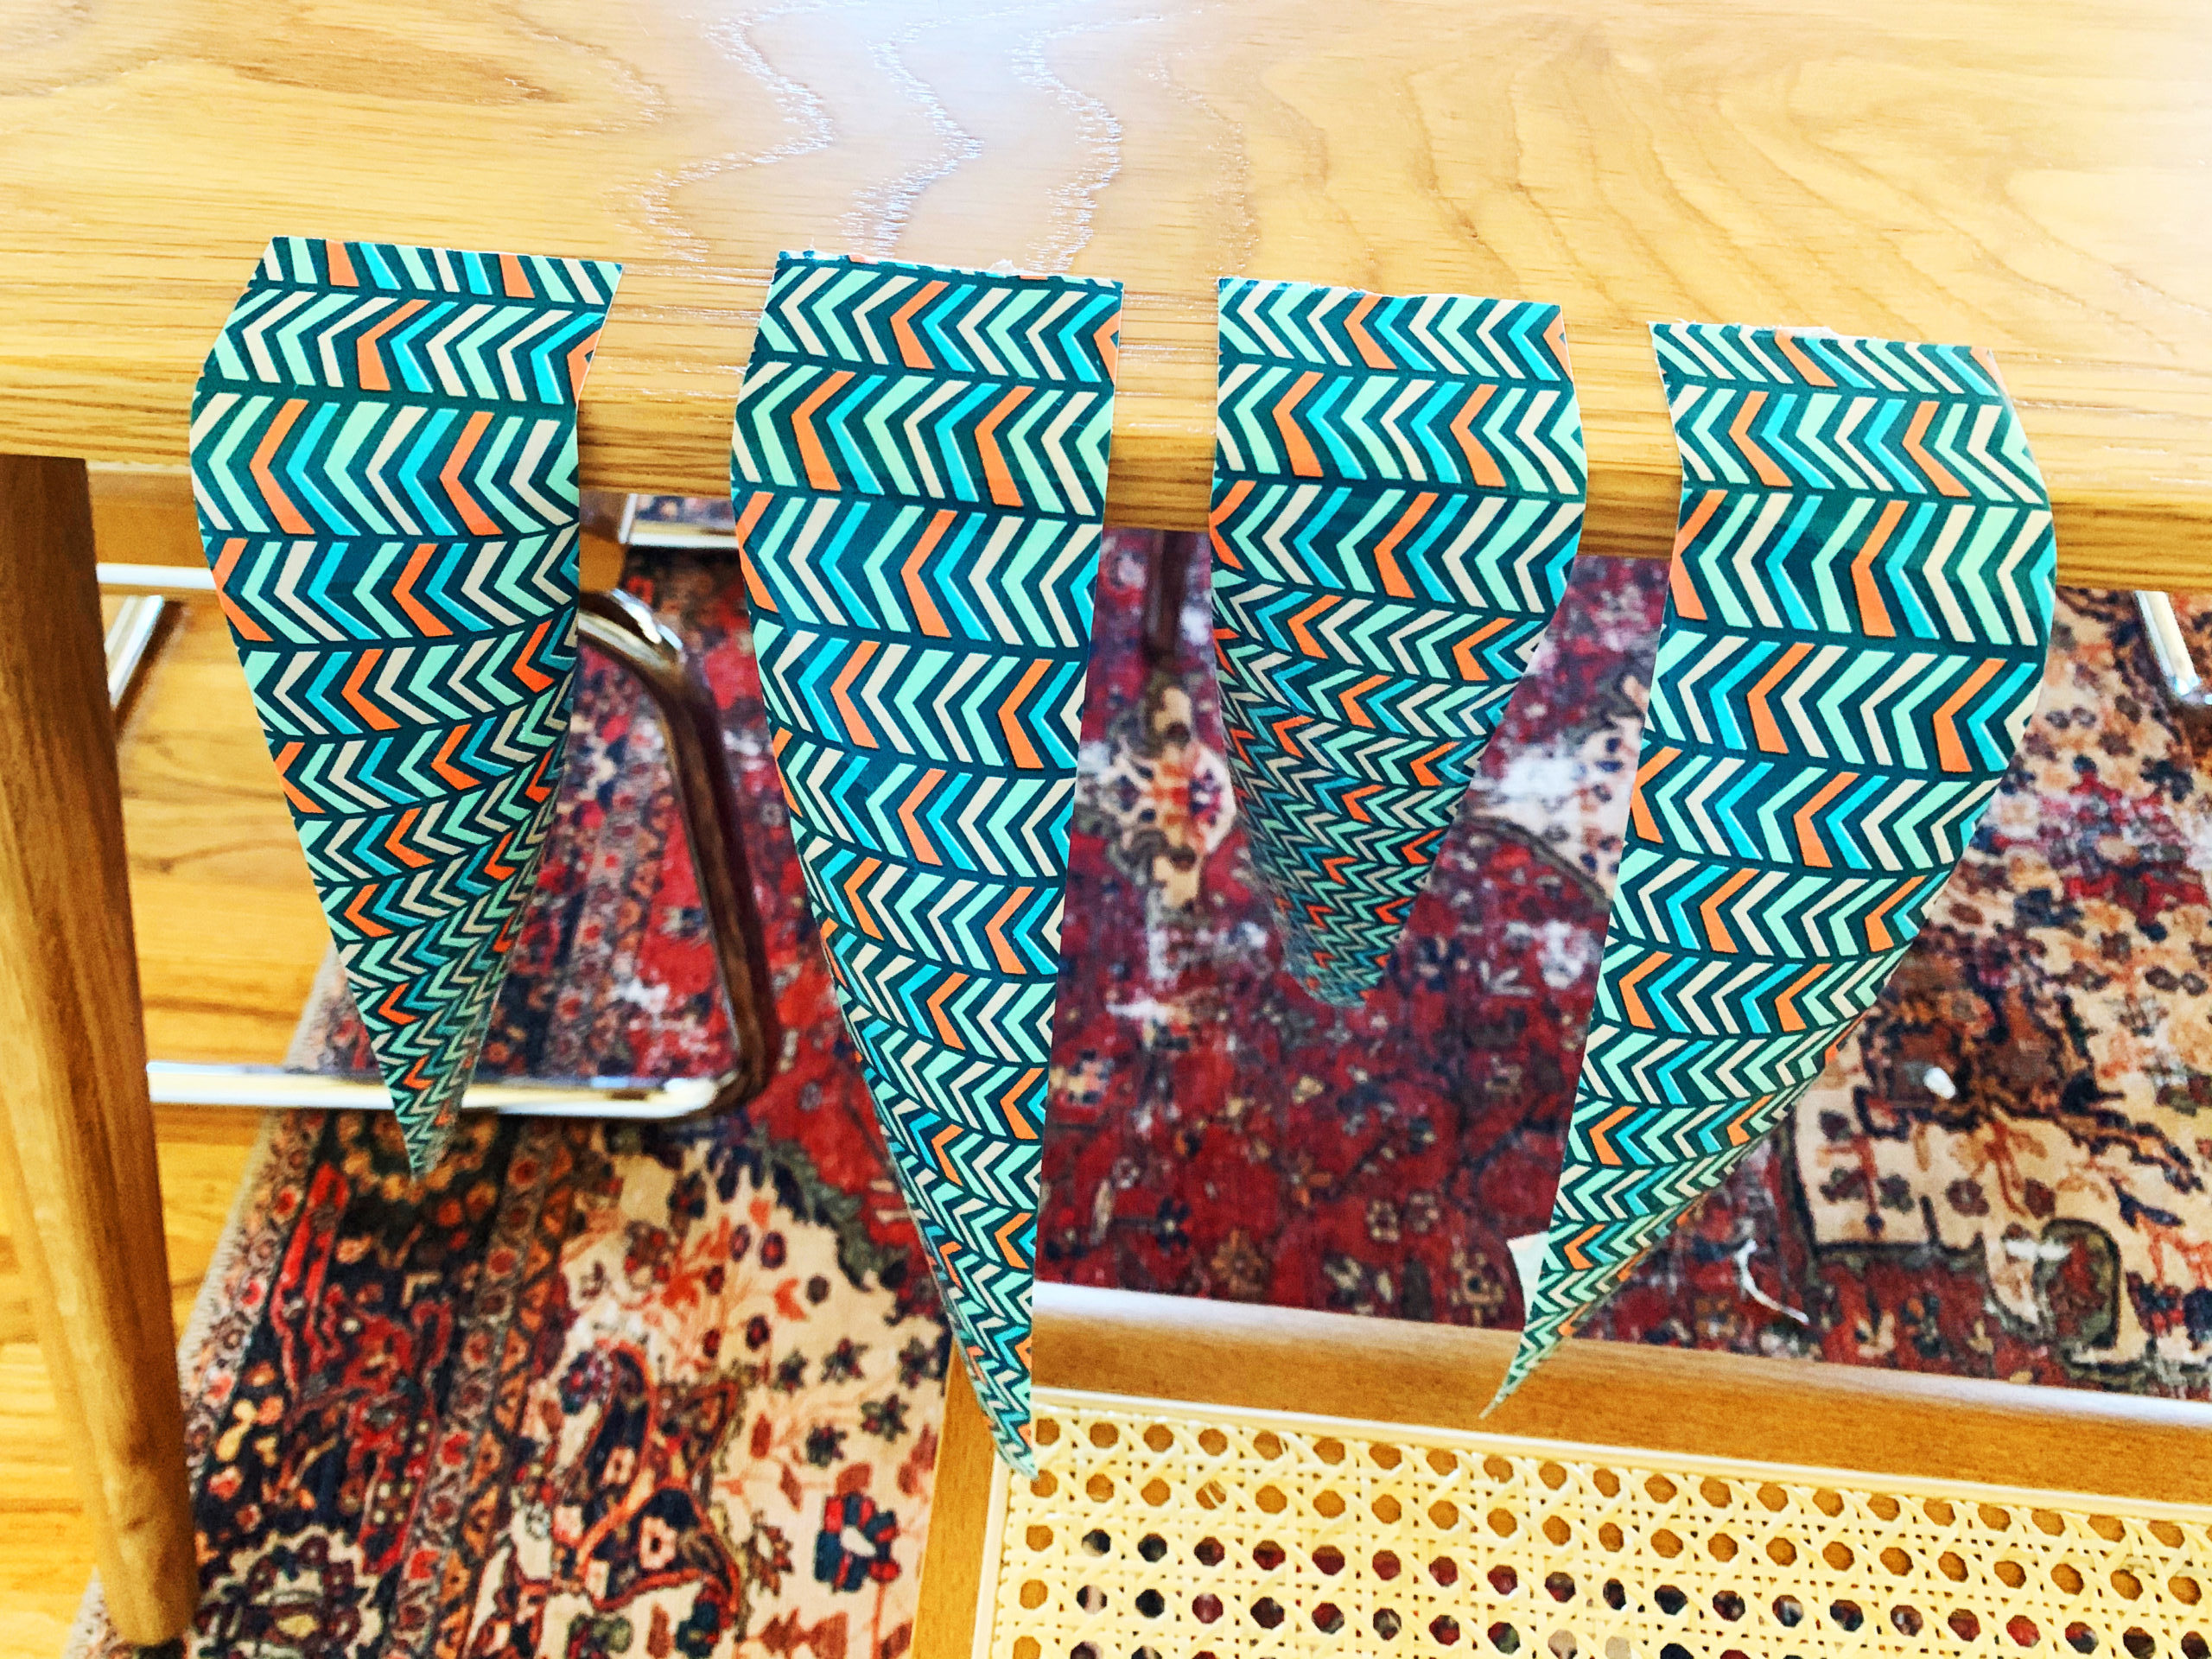
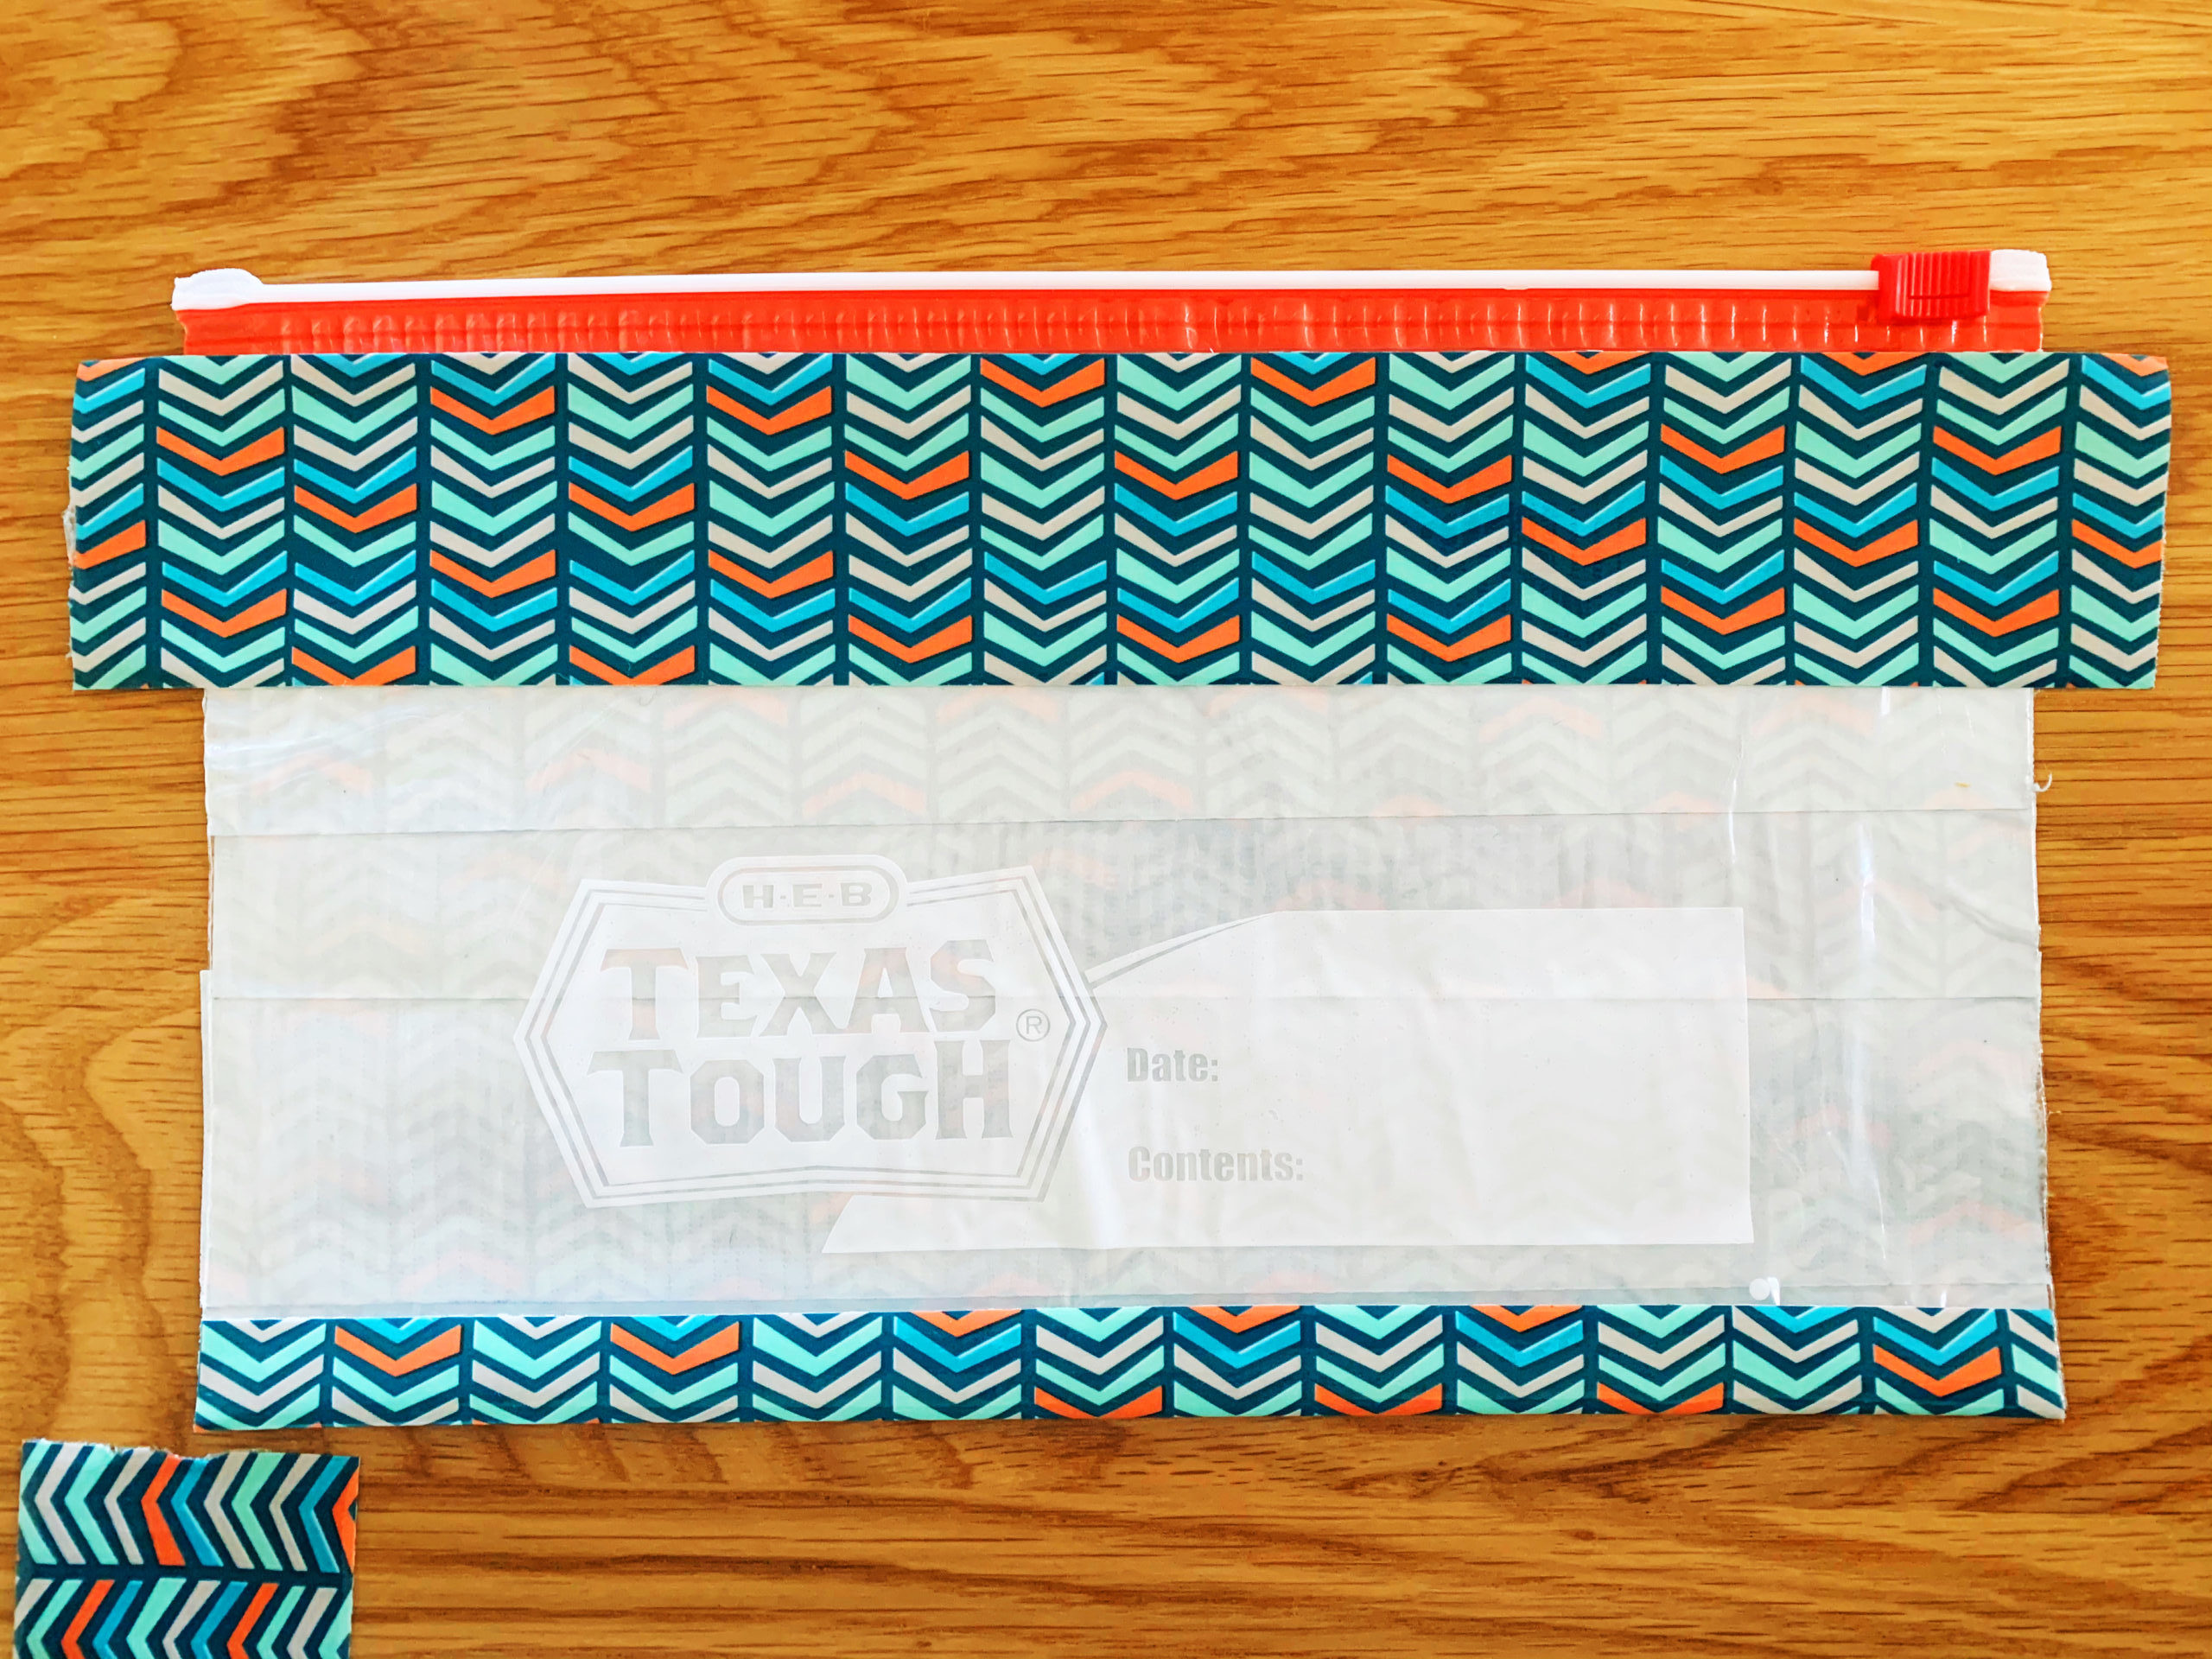
Step 5: Lastly, you will want to reinforce the sides and the bottom edge of the bag with another layer of duct tape. For this, you will need two pieces that are 7 ¾” long (for the sides) and one piece that is 10 ½” long (for the bottom edge). Press and smooth the duct tape around the side and bottom edges, so it’s secure on both sides of the bag.
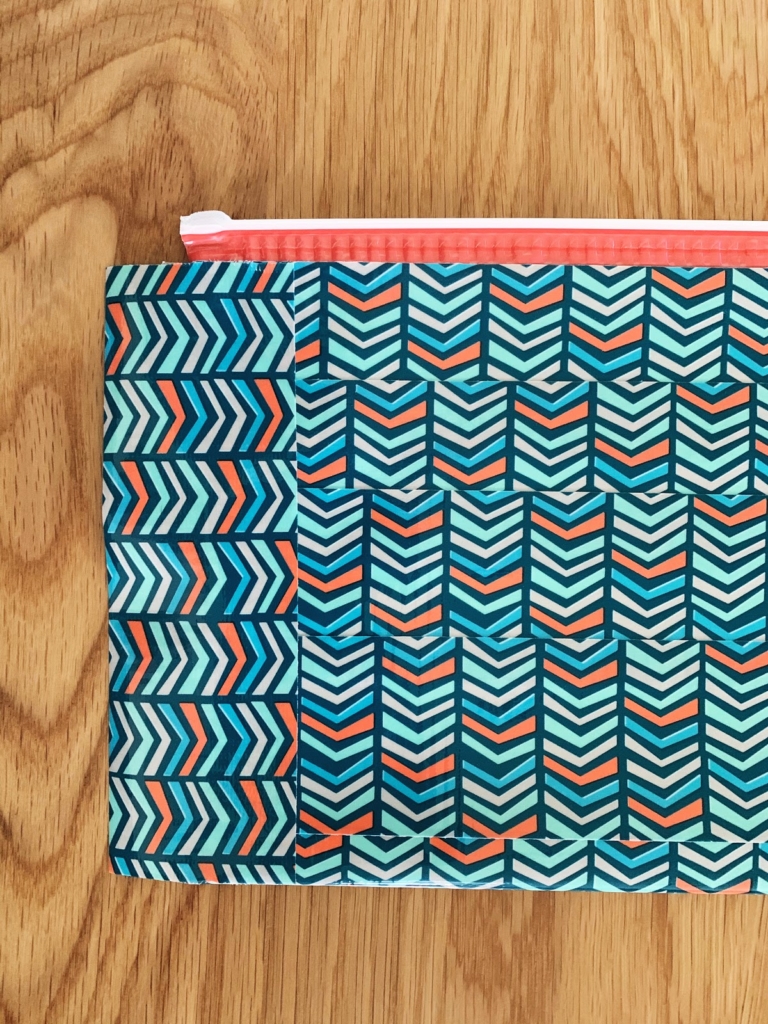
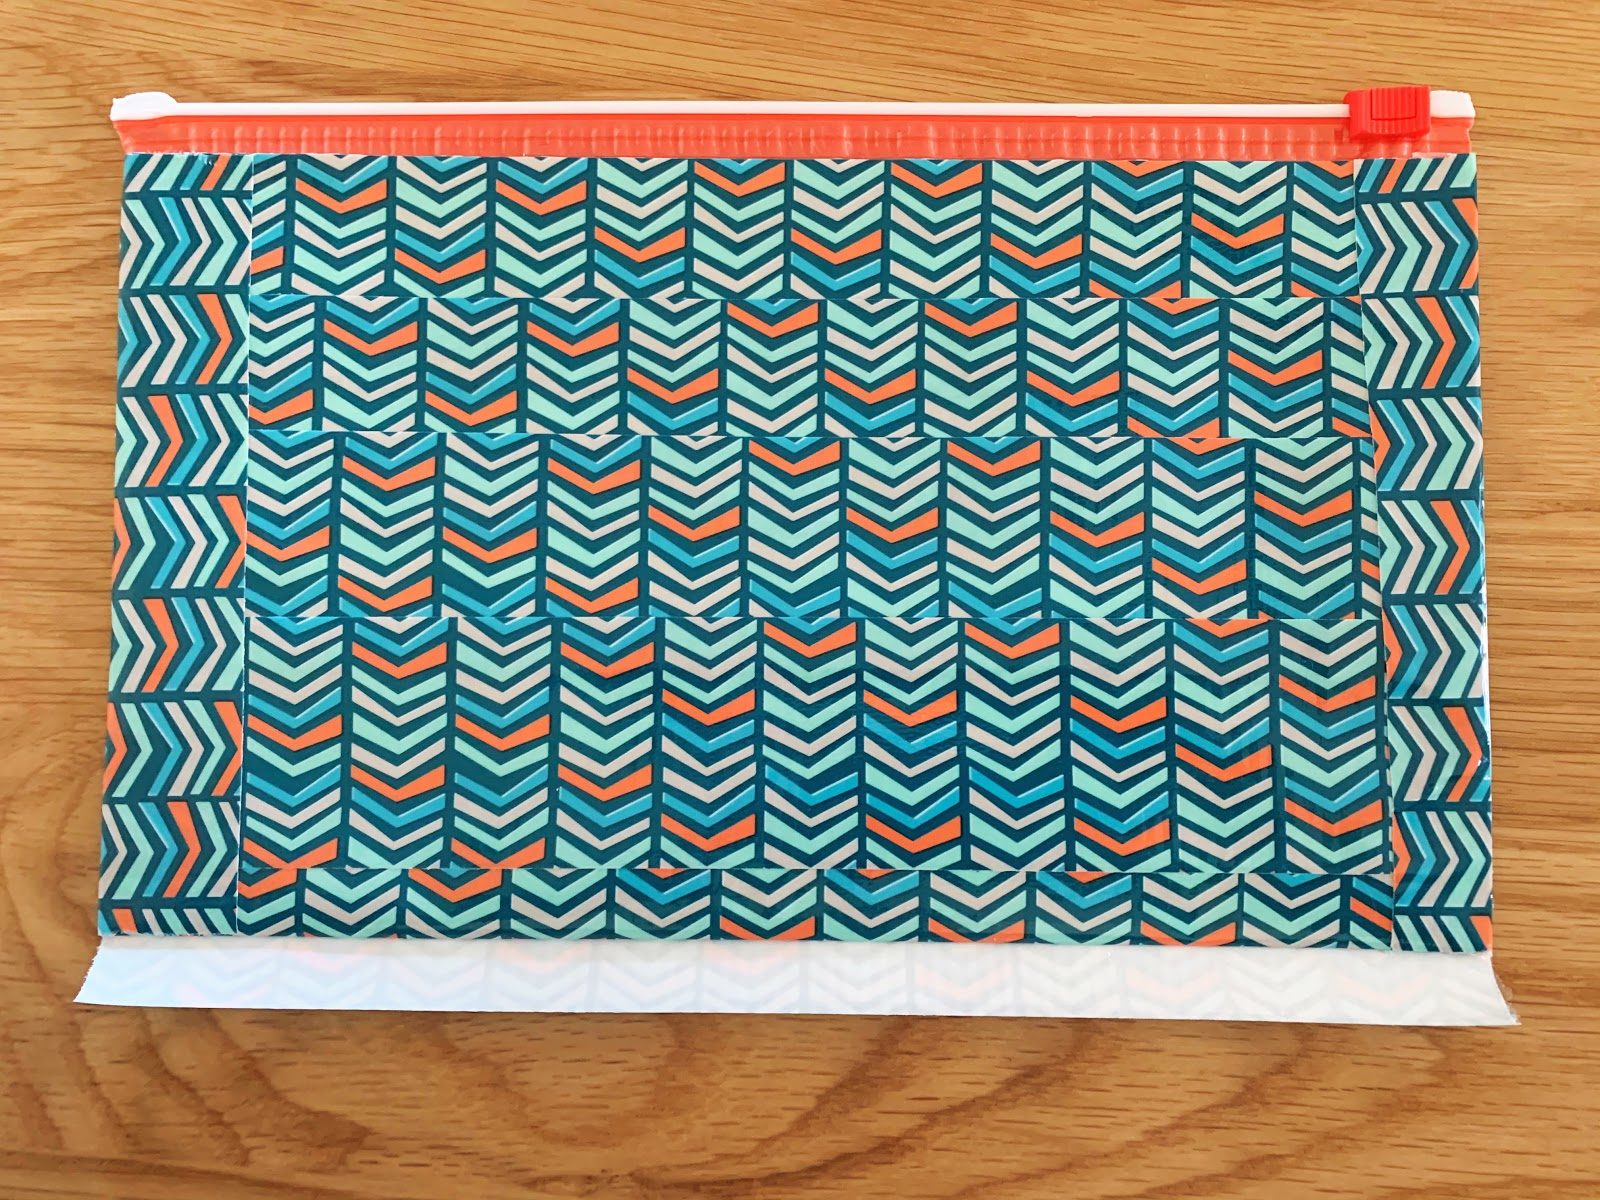
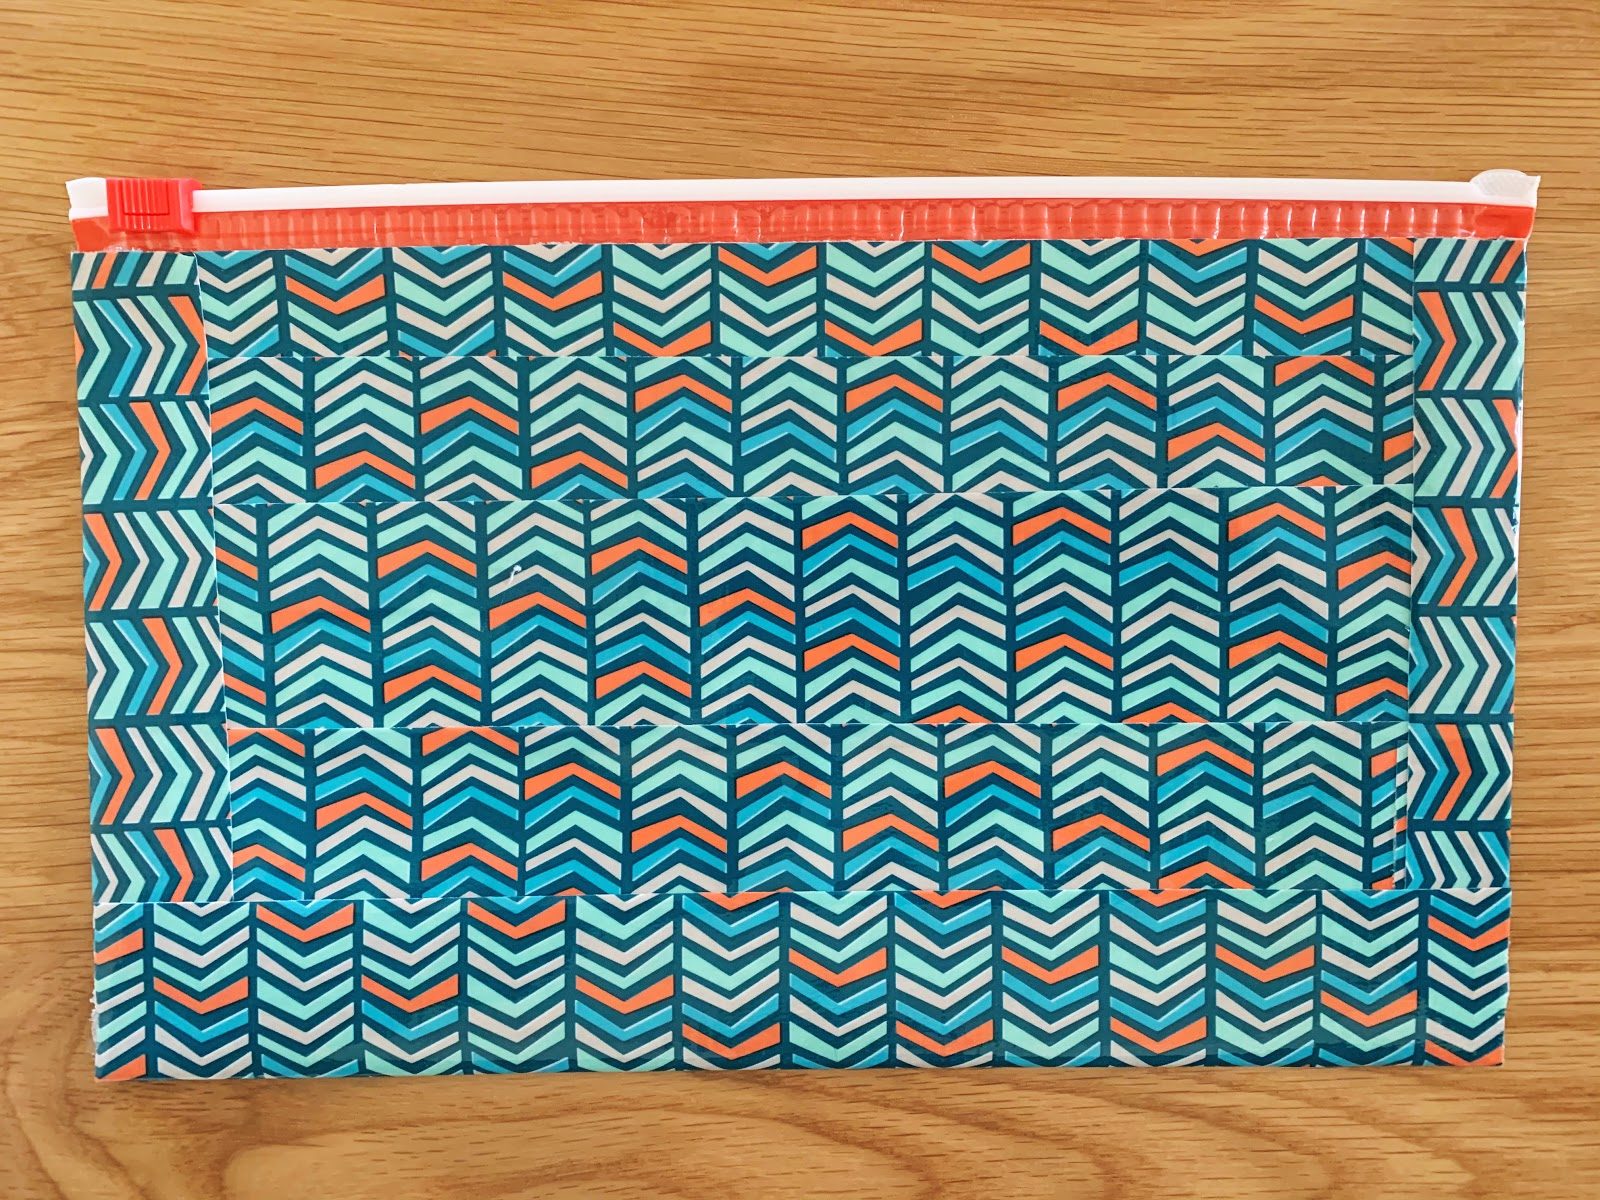
Optional: Step 6: The very last step (if you want!) is to punch holes in the bag so that you can insert your new pencil pouch in a loose-leaf binder. If you don’t use a binder and love your pencil pouch as-is, you can completely skip this step. For those that would like to, though, simply use a three-hole punch along the bottom edge of the bag. (If you don’t have a three-hole punch, you can trace the holes from a piece of binder paper and then punch them with a regular hole punch.)
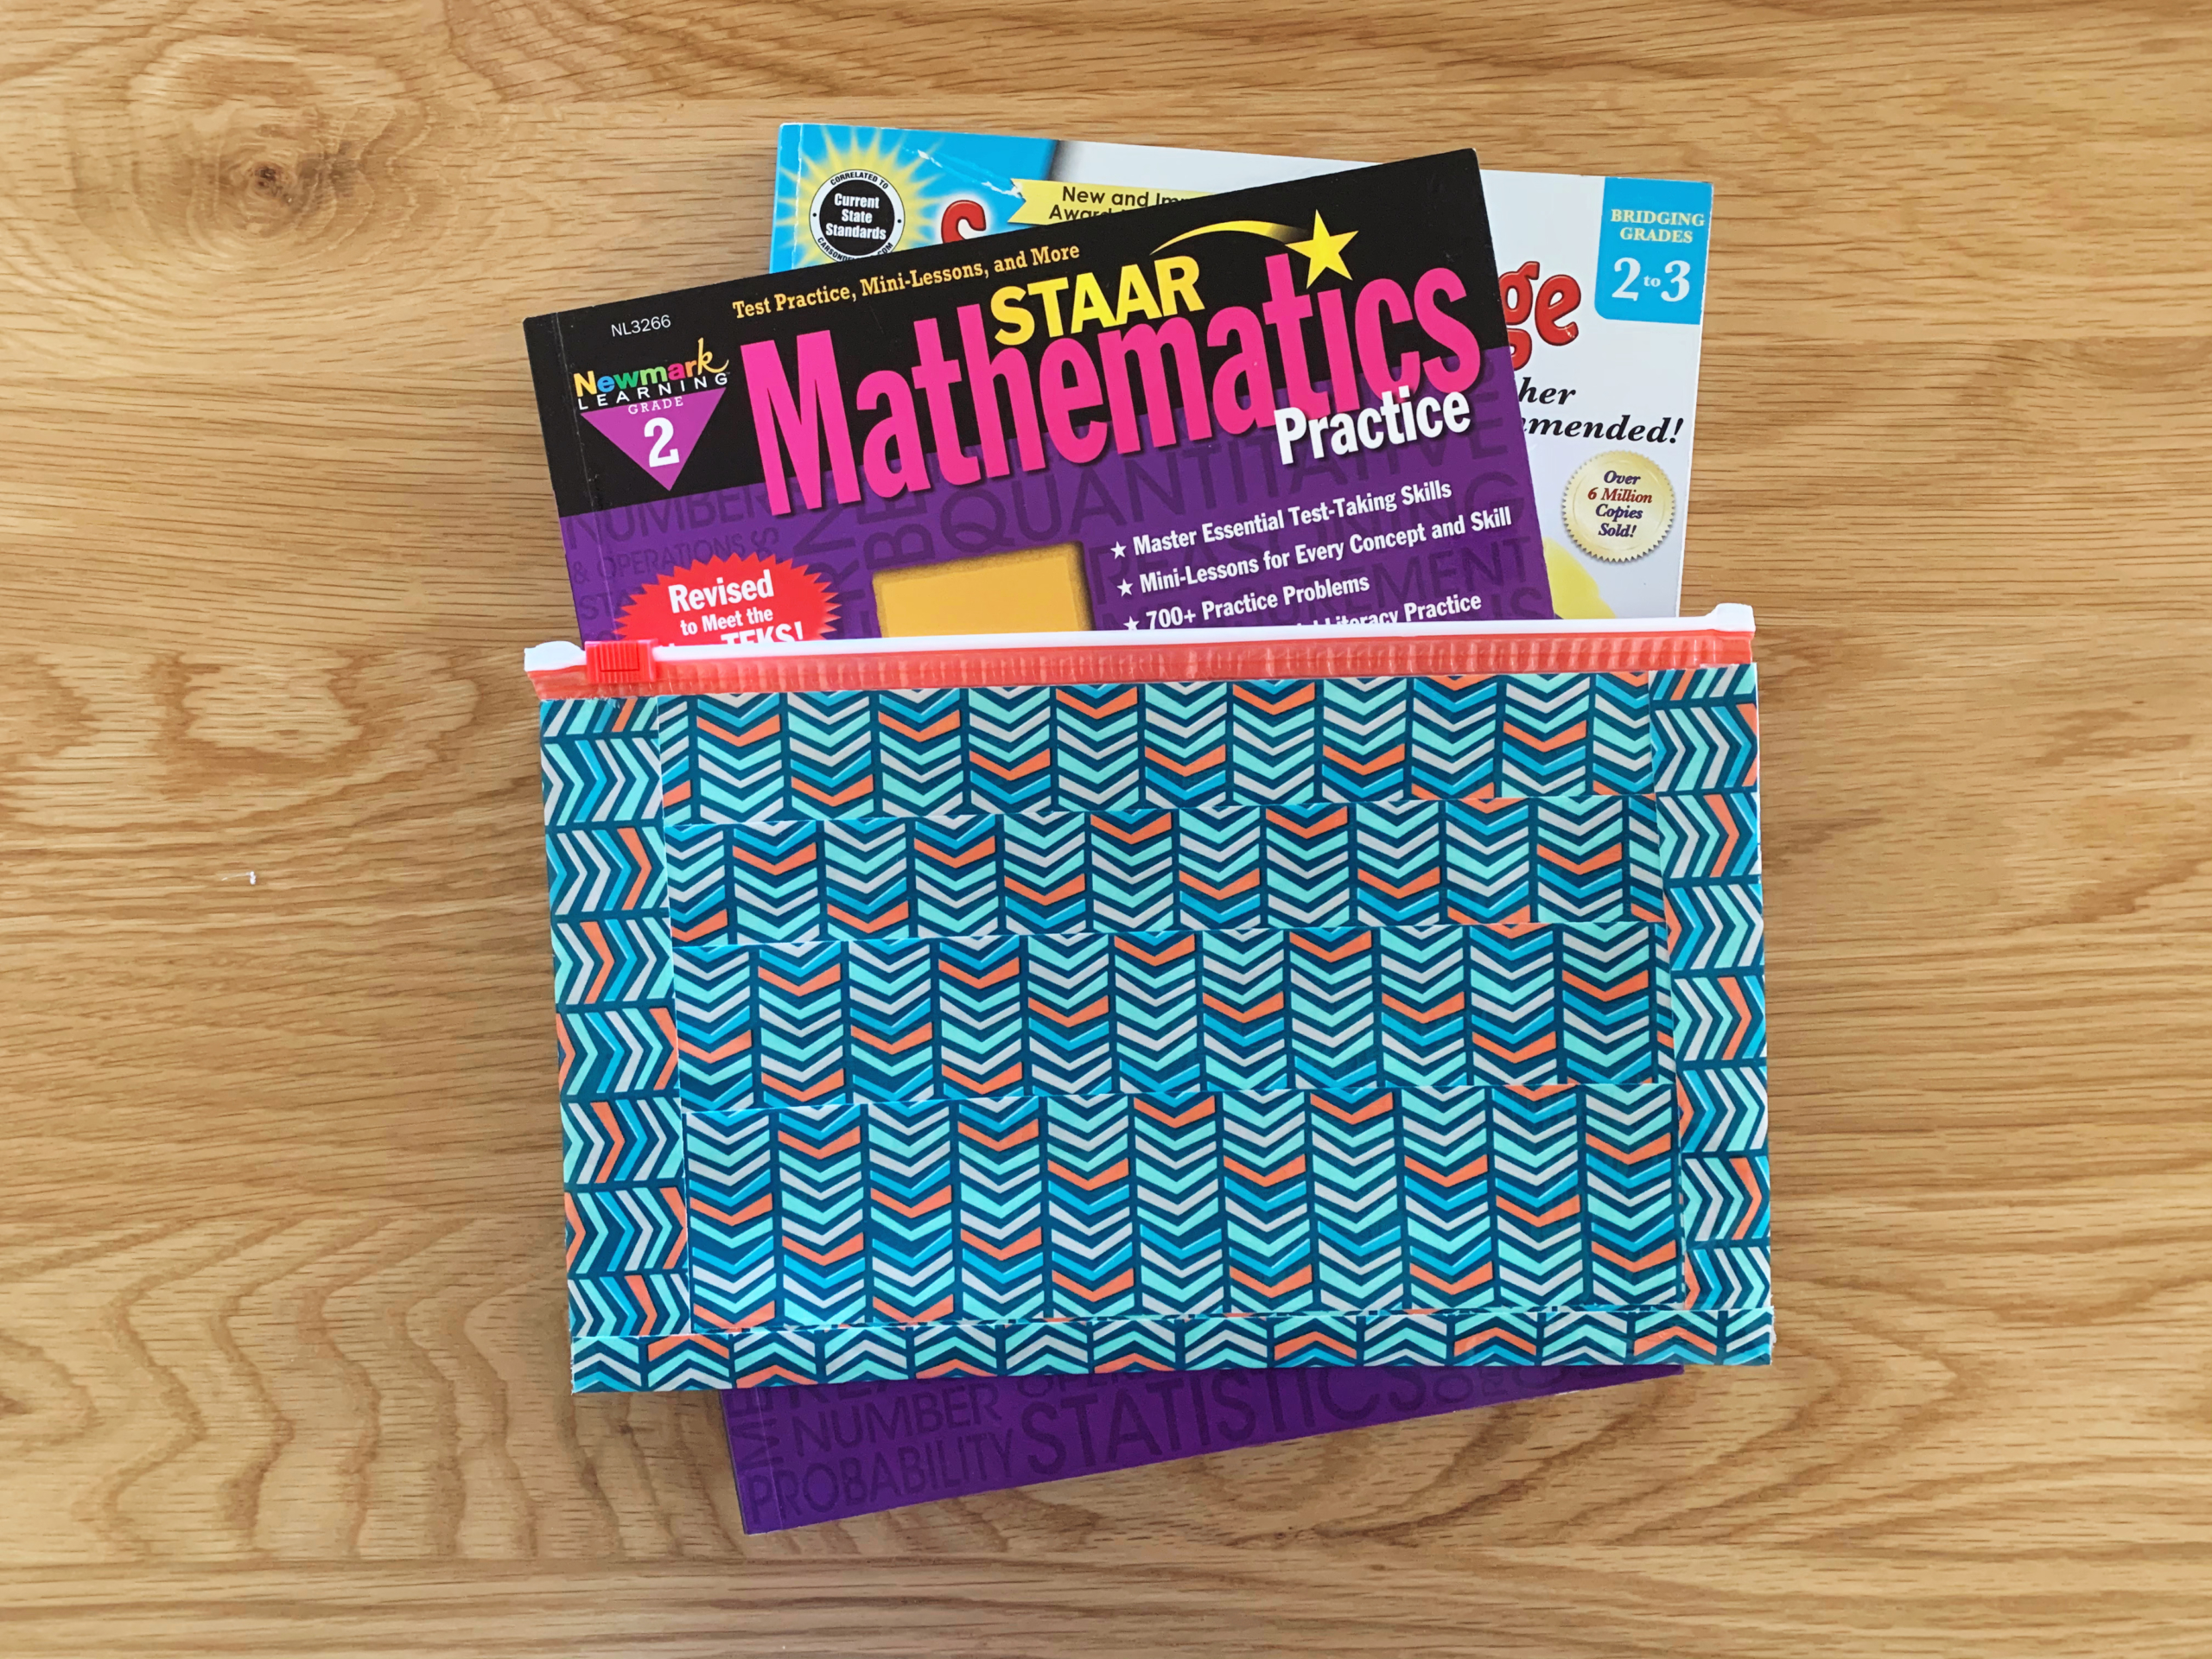
Enjoy! We can’t wait to see what fun duct tape patterns you find—there are so many colorful options to choose from.
Pin Me for Reference :
